Pipeline Interrupt Flow
Jenkins can automatically pause or terminate a build based on SonarQube’s quality gate result. The SonarQube Jenkins plugin exposes a webhook endpoint so SonarQube can notify Jenkins when analysis is complete.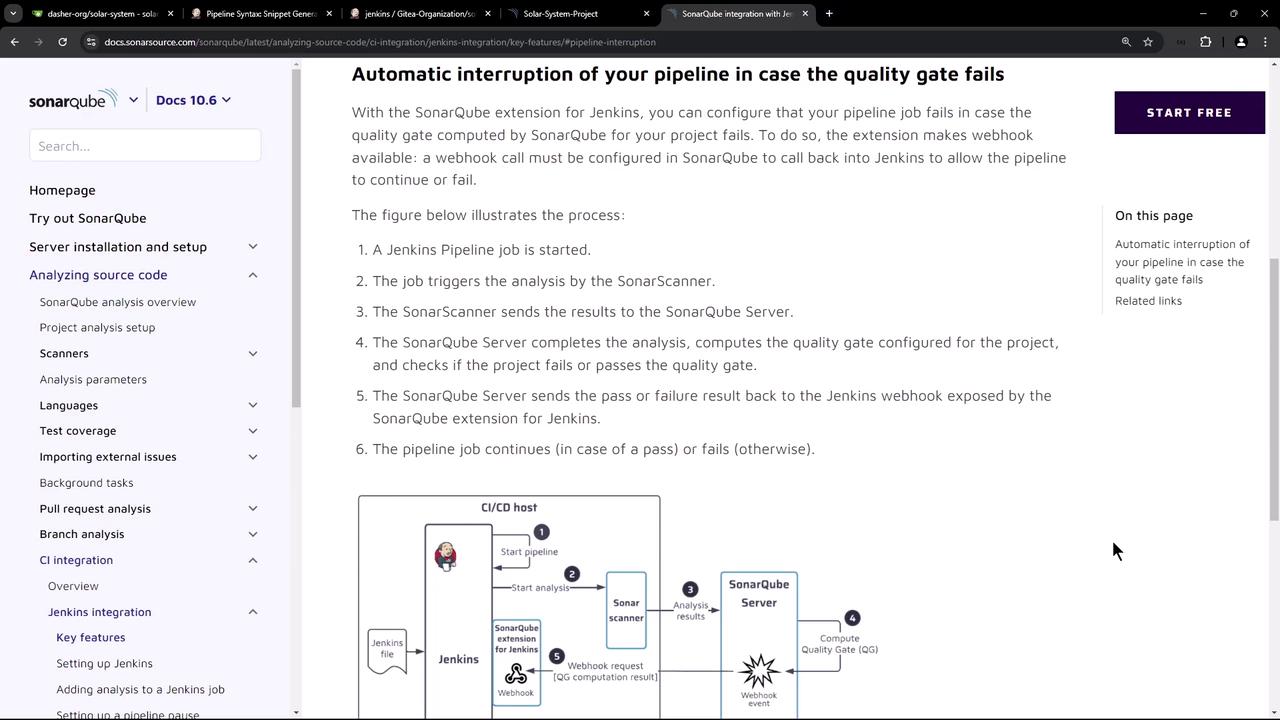
- Jenkins starts the pipeline.
- A SAST stage invokes SonarScanner.
- SonarScanner submits analysis to the SonarQube server.
- SonarQube evaluates the quality gate.
- SonarQube calls back Jenkins via webhook.
- Jenkins continues or aborts the pipeline based on the gate status.
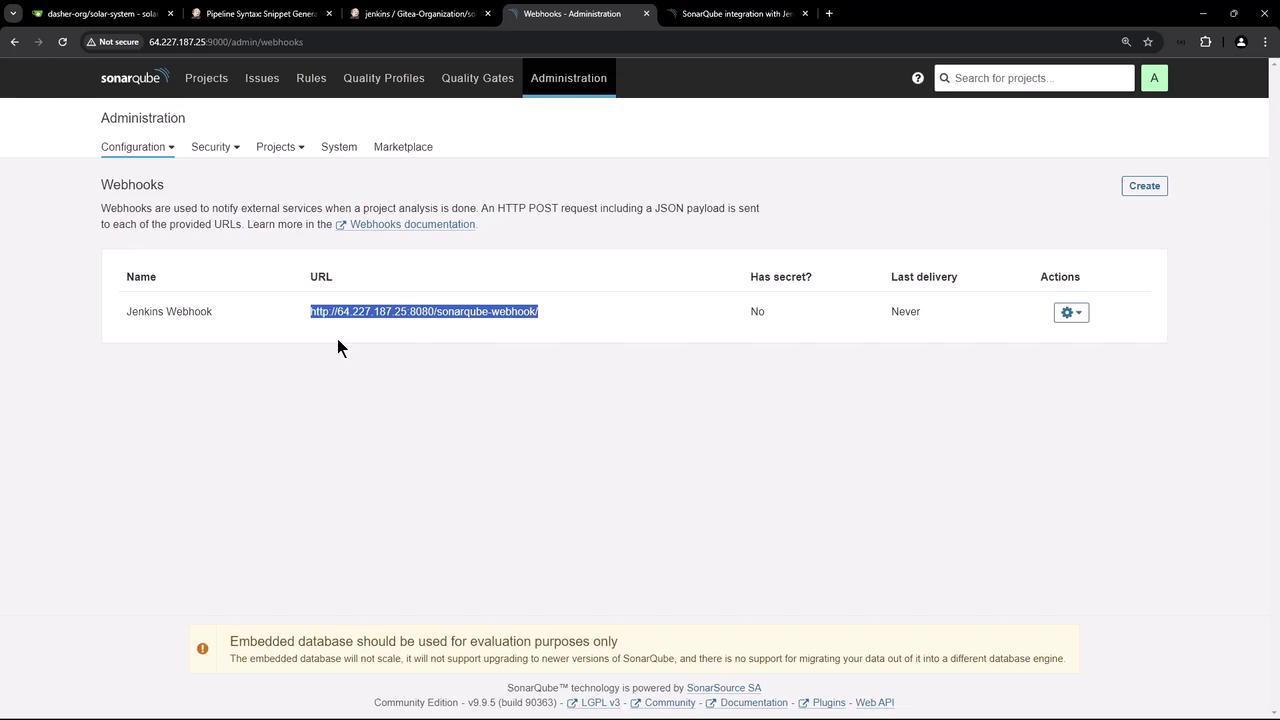
Configuring the SonarQube Webhook
First, retrieve your Jenkins webhook URL:- Navigate to Administration > Configuration > Webhooks.
- Click Create.
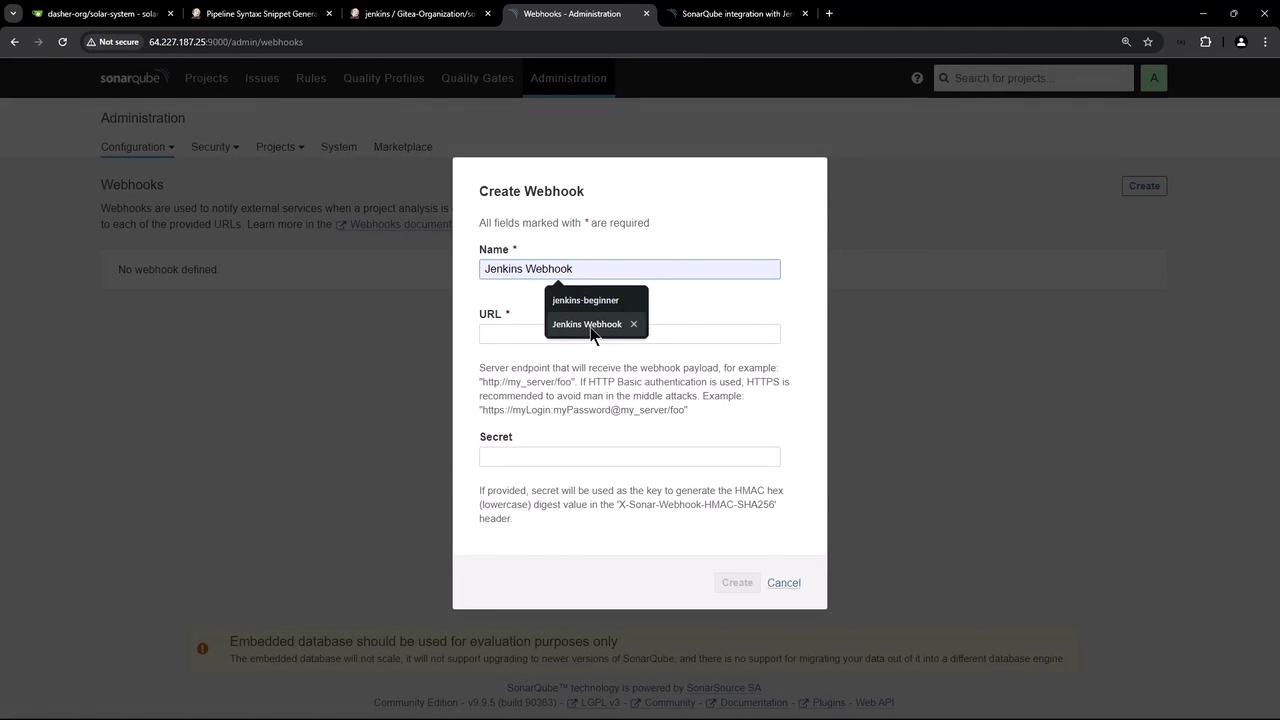
- Enter a name (e.g.,
Jenkins Webhook), paste the Jenkins URL, leave the secret blank, and save.
Refactoring the Jenkinsfile
Original SAST Stage
Below is an example of a Jenkins pipeline stage that hard-codes the Sonar token and URL:Never expose authentication tokens or URLs in your
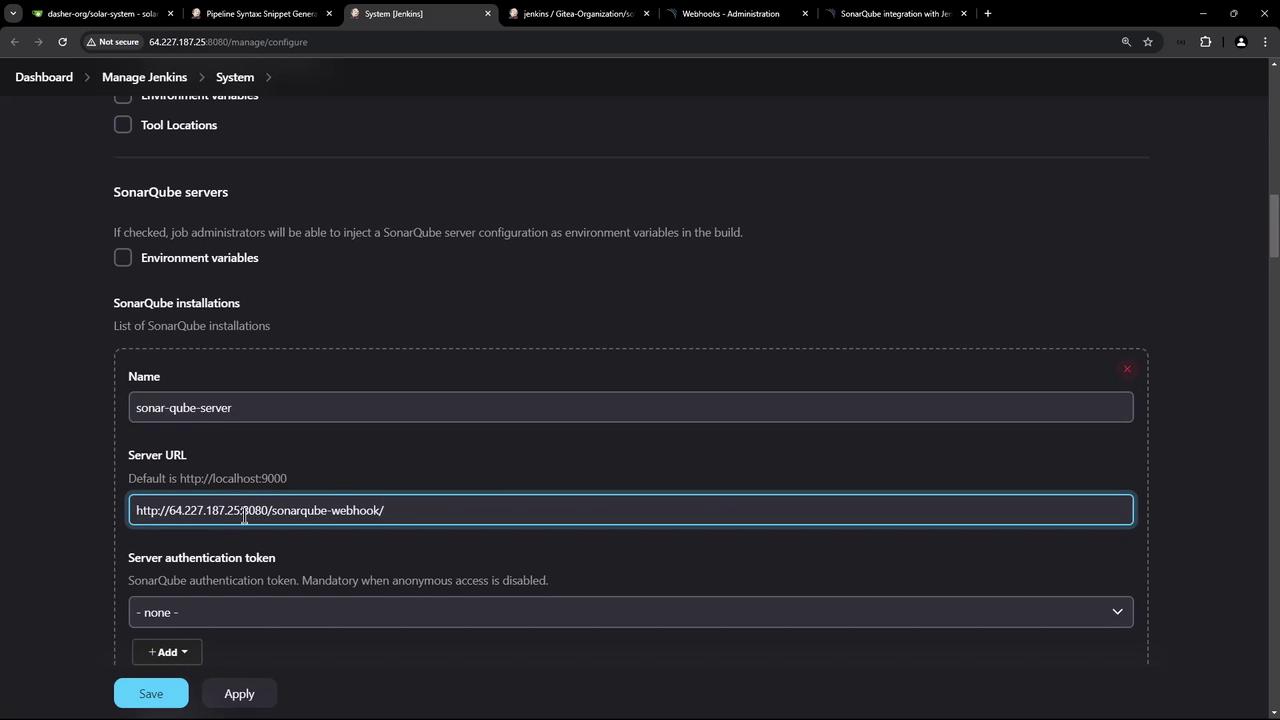
Jenkinsfile. Hard-coding credentials can lead to security breaches.Defining the SonarQube Server in Jenkins
- Go to Manage Jenkins > Configure System.
- Under SonarQube servers, click Add SonarQube.
- Enter:
- Name:
sonar-qube-server - Server URL:
http://64.227.187.25:9000
- Name:
- Save the configuration.
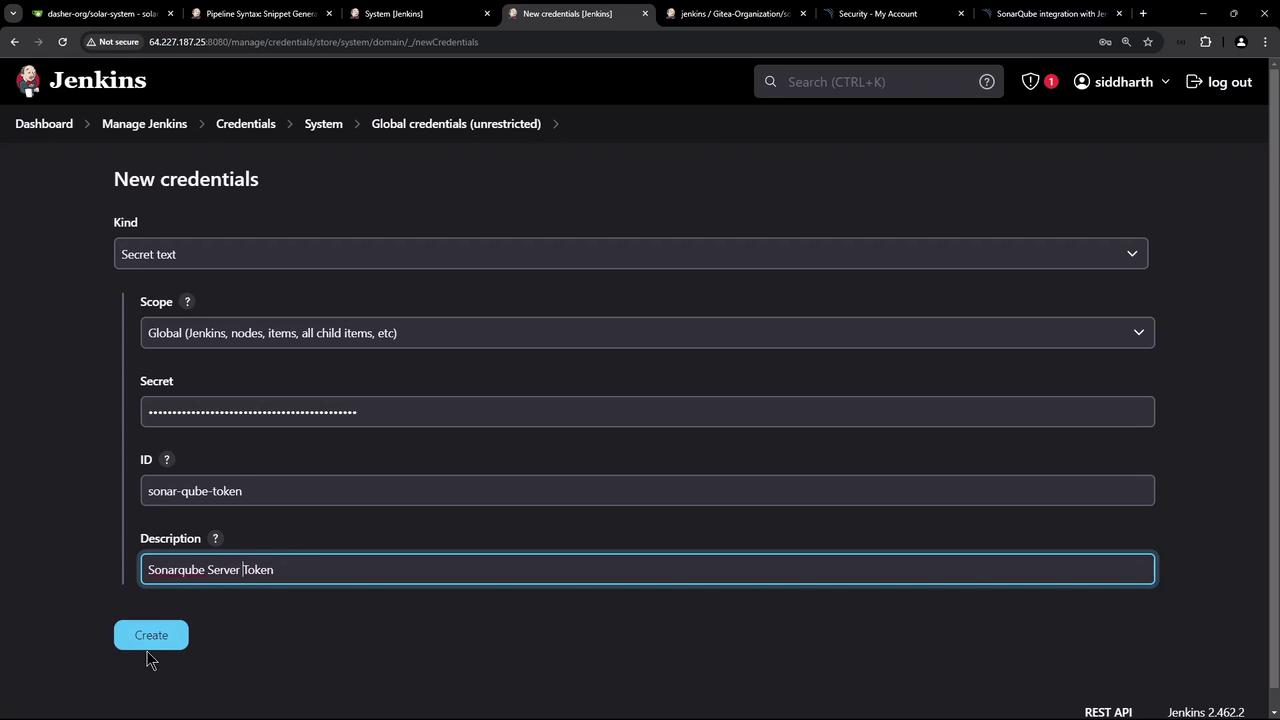
Storing the SonarQube Token Securely
- In Jenkins, navigate to Credentials > System > Global credentials.
- Click Add Credentials > Secret text.
- Paste your SonarQube token, set an ID (e.g.,
sonar-qube-token), and save.
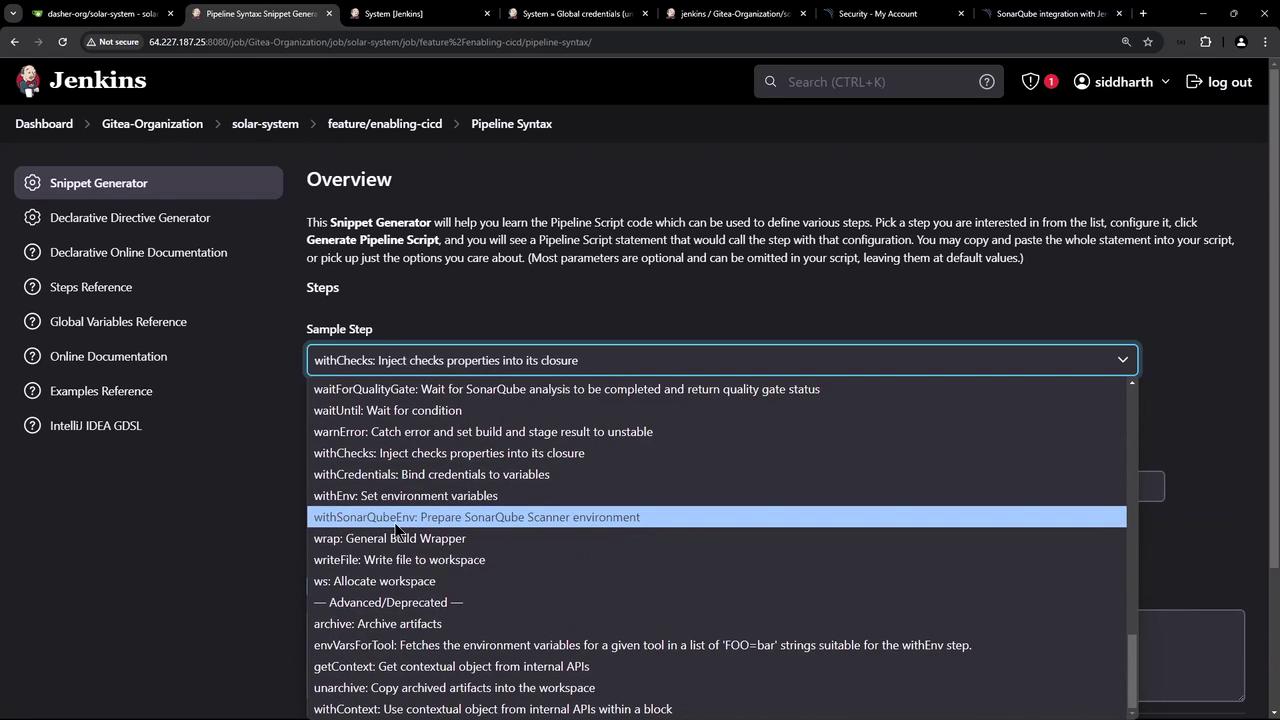
Using withSonarQubeEnv
LeveragewithSonarQubeEnv to inject the server URL and token as environment variables:
Waiting for the Quality Gate
To pause the pipeline until SonarQube returns the quality gate status, usewaitForQualityGate inside a timeout block:
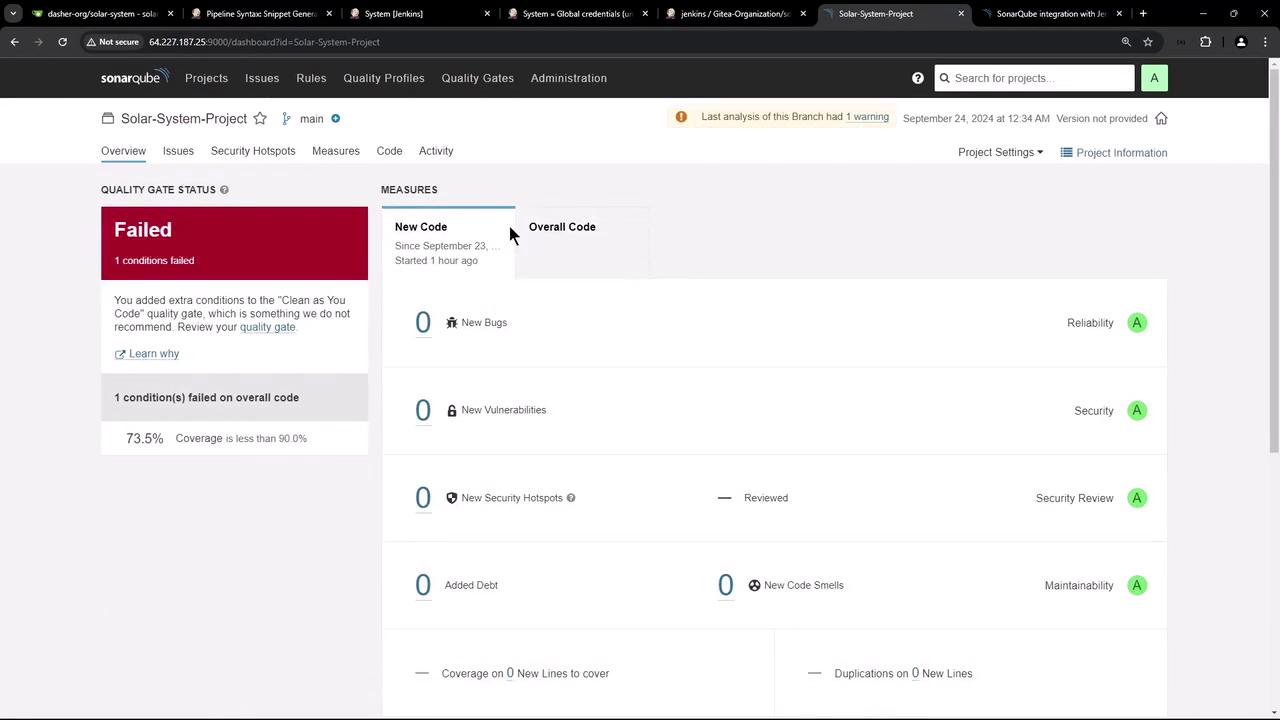
Observing a Failed Build
When code coverage or other metrics fall below thresholds, Jenkins will mark the SAST stage as failed:
Webhook Payload Example
When SonarQube calls Jenkins, it sends a JSON payload like this:Passing the Quality Gate
After raising test coverage (or adjusting thresholds), rerun the SAST stage. A successful webhook payload will look like:Conclusion
By integrating SonarQube’s quality gates into Jenkins and refactoring yourJenkinsfile:
- You enforce static code analysis in CI/CD.
- You secure credentials and avoid hard-coding secrets.
- You automate build interruption on policy violations.