Certified Jenkins Engineer

Jenkins Administration and Monitoring Part 1

Demo Job Configuration History Plugin

In this guide, you’ll learn how to install, configure, and use the Jenkins Job Configuration History plugin. This powerful plugin:

  • Automatically archives every job and system configuration change
  • Provides side-by-side diff views for quick comparison
  • Restores older versions and recovers deleted jobs

The image shows a webpage for the "Job Configuration History" plugin on the Jenkins website, detailing its features, version information, and links for further resources.

Plugin Features

FeatureDescriptionExample Use Case
Automatic BackupsSaves config on every changeTrack every build-job tweak
Diff ViewerSide-by-side comparison of configurationsIdentify exactly what changed between builds
Restore & RollbackRevert to any prior version or recover deleted jobsRoll back failed changes
System Config TrackingMonitors global Jenkins settingsAudit security or plugin updates

1. Installing the Plugin

  1. Navigate to Manage Jenkins > Manage Plugins.
  2. Under the Available tab, search for Job Configuration History.
  3. Select the plugin, click Install without restart, then restart Jenkins:
    • Via Manage Jenkins > Restart
    • Or manually restart the Jenkins service

Warning

Keeping every configuration change can consume significant disk space over time. Monitor the storage and adjust limits in the plugin settings section.

The image shows a webpage from the Jenkins plugin site, displaying a "Job Config History Revision Overview" with a table of job configuration changes and a "Job Diff Side-By-Side View" section.

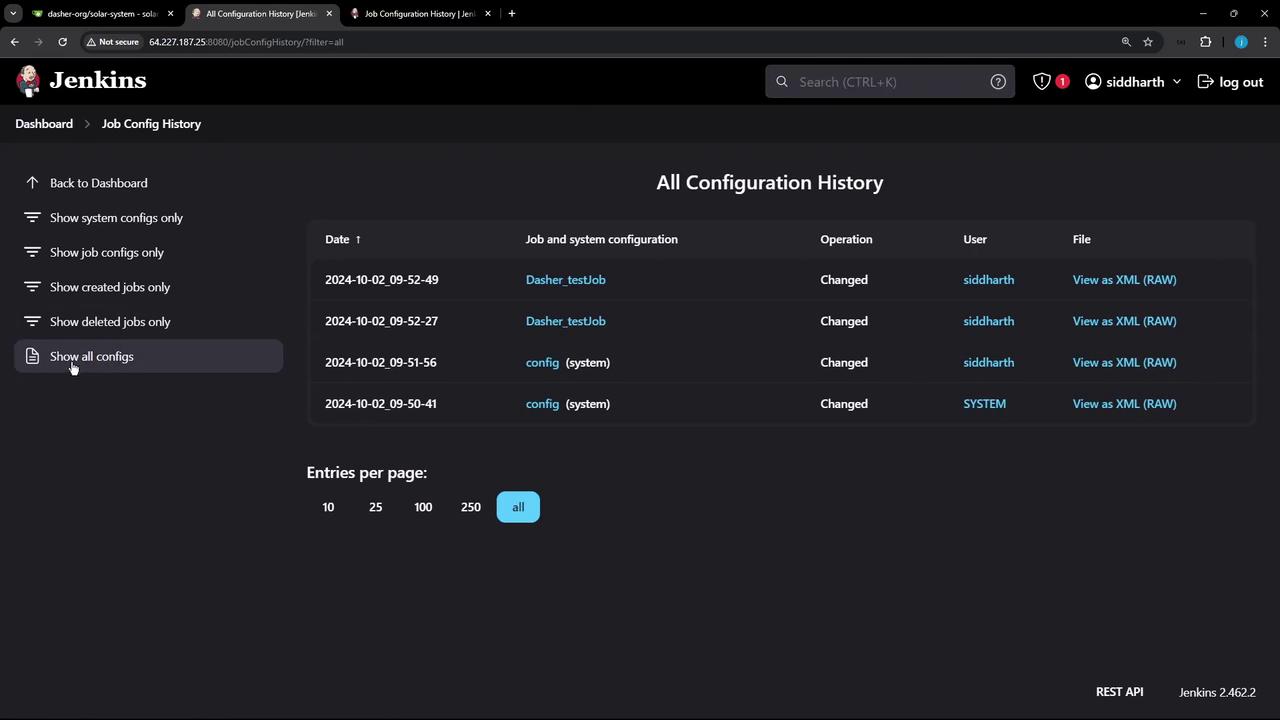
2. Navigating Configuration History

Once Jenkins restarts, a new Job Config History link appears in the dashboard sidebar. Click it to:

  • View All Configuration History
  • Filter by Job Changes, System Changes, Created Jobs, or Deleted Jobs
  • Inspect individual revisions and metadata

The image shows a Jenkins dashboard displaying the "All Configuration History" page, listing recent configuration changes with details like date, job configuration, operation, user, and file view options.

3. Tracking Job Configuration Changes

Follow these steps to see how changes are recorded:

  1. Open Dasher_testJob from the Jenkins dashboard.
  2. Click Configure, disable any restriction rules, then Save.
  3. In Build, add an Execute Shell step:
    echo "Hello Testing a new Plugin"
    
  4. Save and select Build Now.
  5. Re-enter Configure, add:
    sleep 5
    
  6. Save and Build Now again.

Return to Job Config History, click Show All Configs, and compare revisions:

<!-- First revision -->
<command>echo Hello Testing a new Plugin</command>

<!-- Second revision -->
<command>echo Hello Testing a new Plugin</command>
<command>sleep 5</command>

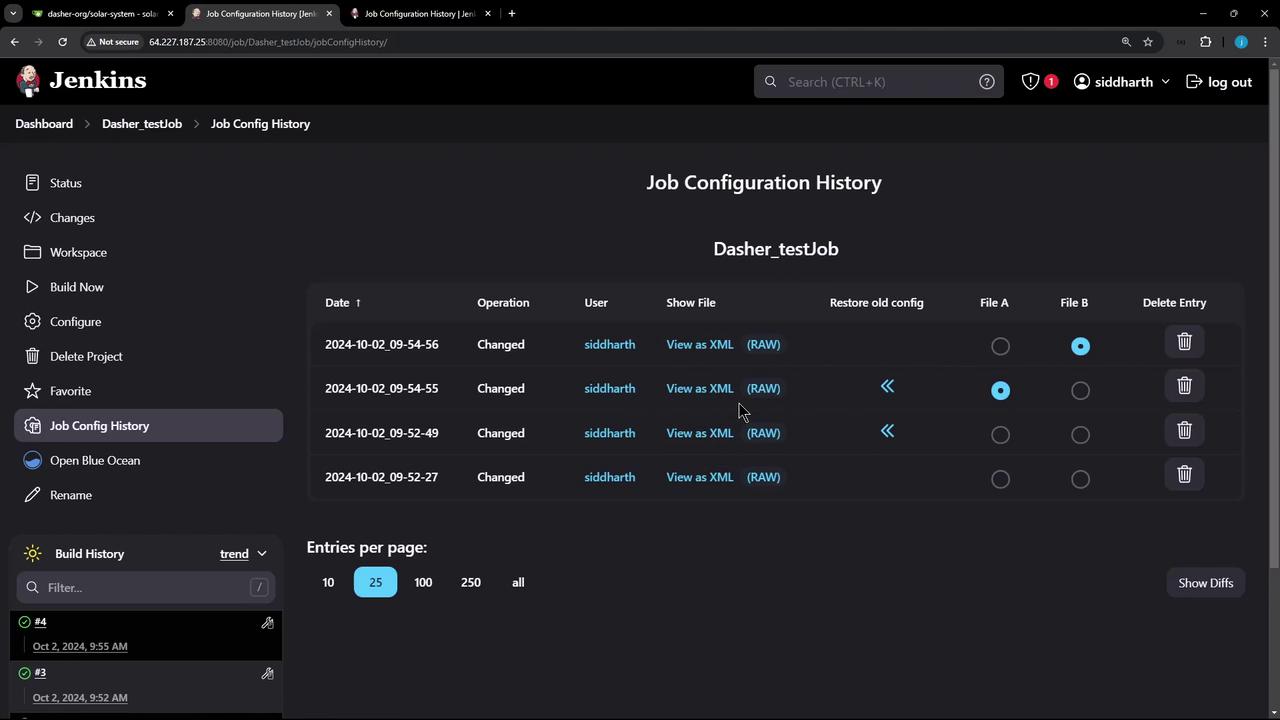
3.1 Per-Job History and Diff View

To inspect a single job’s history:

  • Open Dasher_testJob > Job Config History
  • You’ll see a list of revisions with user, timestamp, and operation
  • Click Show Difference for a side-by-side XML diff

The image shows a Jenkins interface displaying the "Job Configuration History" for a job named "Dasher_testJob," listing changes made by a user named Siddharth. The interface includes options to view configurations as XML, restore old configurations, and delete entries.

<!-- Older configuration -->
<command>echo Hello Testing a new Plugin</command>

<!-- Newer configuration -->
<command>echo Hello Testing a new Plugin</command>
<configuredLocalRules/>
<hudson.tasks.Shell/>
<command>sleep 5</command>
<configuredLocalRules/>

To revert to a previous version, click Restore next to the desired entry and confirm. Jenkins will apply the older config.xml and reflect only the restored build steps:

echo "Hello Testing a new Plugin"

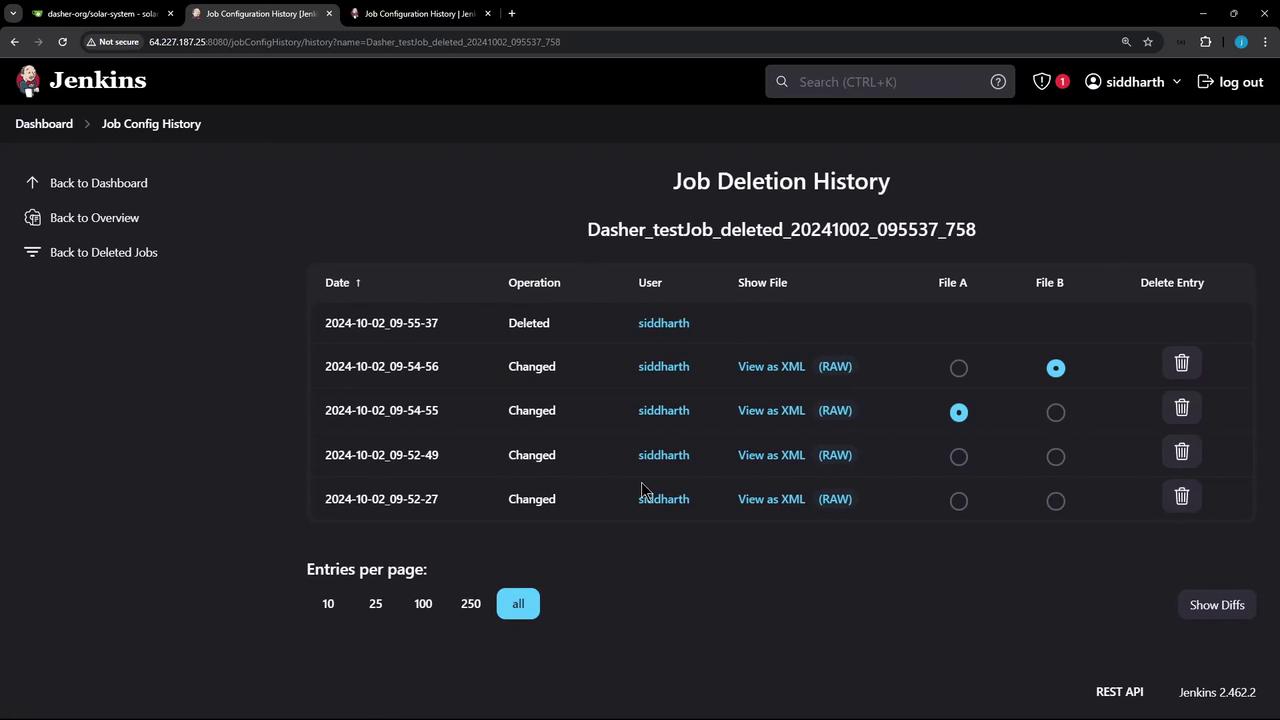
4. Restoring Deleted Jobs

The plugin logs deletions, allowing you to recover lost jobs:

  1. Delete Dasher_testJob from the dashboard.
  2. Go to Job Config History and filter by Deleted Jobs.
  3. Find the delete event and click Restore to recover the job.

The image shows a Jenkins interface displaying a "Job Deletion History" page, listing operations performed on a job, including deletions and changes, with options to view files and delete entries.

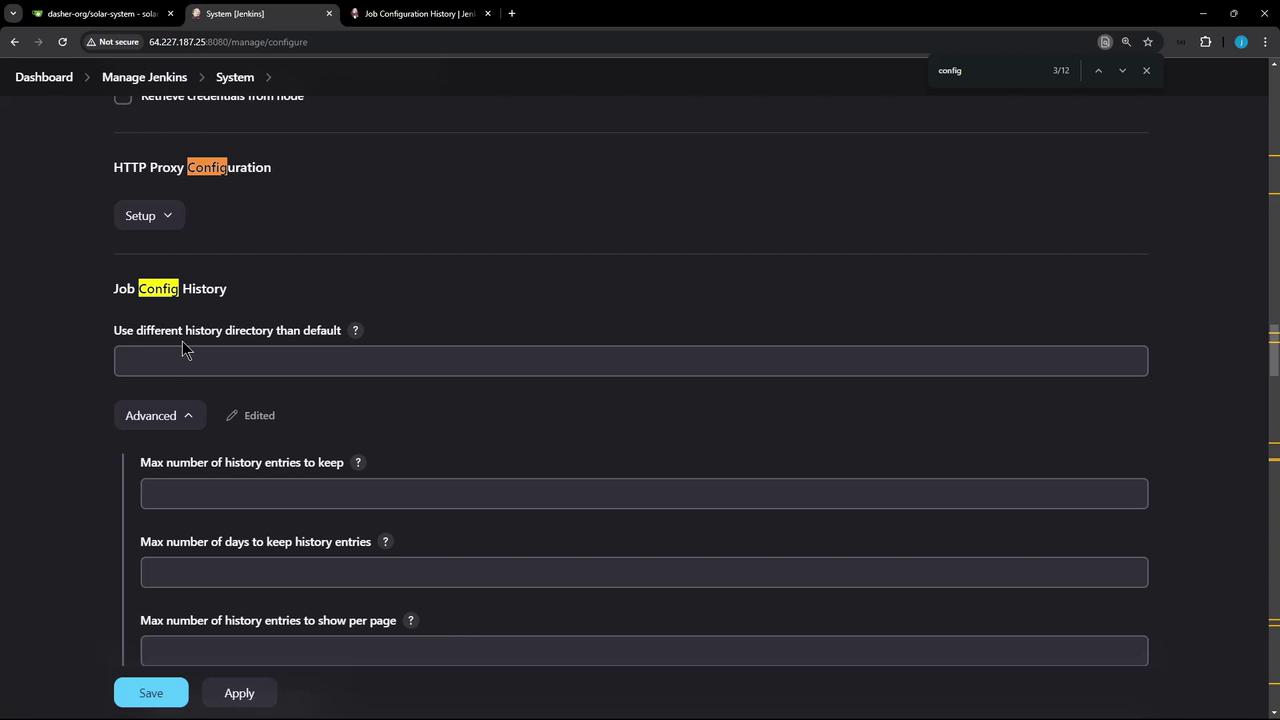
5. Plugin Settings and Storage Location

Configure history storage and limits:

  1. Navigate to Manage Jenkins > Configure System.
  2. Scroll to Job Config History settings:
    • History Root Directory (default: /var/lib/jenkins/config-history)
    • Max entries per config
    • Max age of entries

The image shows a Jenkins system configuration page, specifically focusing on the "Job Config History" settings, with options for history directory and entry limits.

On the controller:

cd /var/lib/jenkins
ls -l
cd config-history/jobs/Dasher_testJob
ls -l
# drwxr-xr-x  8 jenkins jenkins 4096 Oct 2 09:55 .

Each timestamped folder includes config.xml and history.xml:

<?xml version='1.1' encoding='UTF-8'?>
<hudson.plugins.jobConfigHistory.HistoryDescr plugin='[email protected]_911'>
  <user>siddharth</user>
  <userId>siddharth</userId>
  <operation>Changed</operation>
  <timestamp>2024-10-02_09-52-27</timestamp>
</hudson.plugins.jobConfigHistory.HistoryDescr>

With this setup, you’re equipped to track, compare, restore, and audit Jenkins configurations effortlessly.

References

Watch Video

Watch video content

Previous
Demo Job Restrictions