Certified Jenkins Engineer

Jenkins Pipelines

Demo Create Pipeline with Parameters

In this tutorial, you’ll learn how to build a single, parameterized Jenkins pipeline that can switch between branches, customize ports, and adjust timeouts—all without duplicating your Jenkinsfile. Parameterized pipelines make your CI/CD workflows more flexible and maintainable.

What Is a Parameterized Pipeline?

A parameterized build in Jenkins lets you define input variables that users can set at build time. This approach helps you:

  • Reuse the same pipeline for multiple branches or environments
  • Pass dynamic values such as branch names, ports, or timeouts
  • Reduce Jenkinsfile duplication and improve maintainability
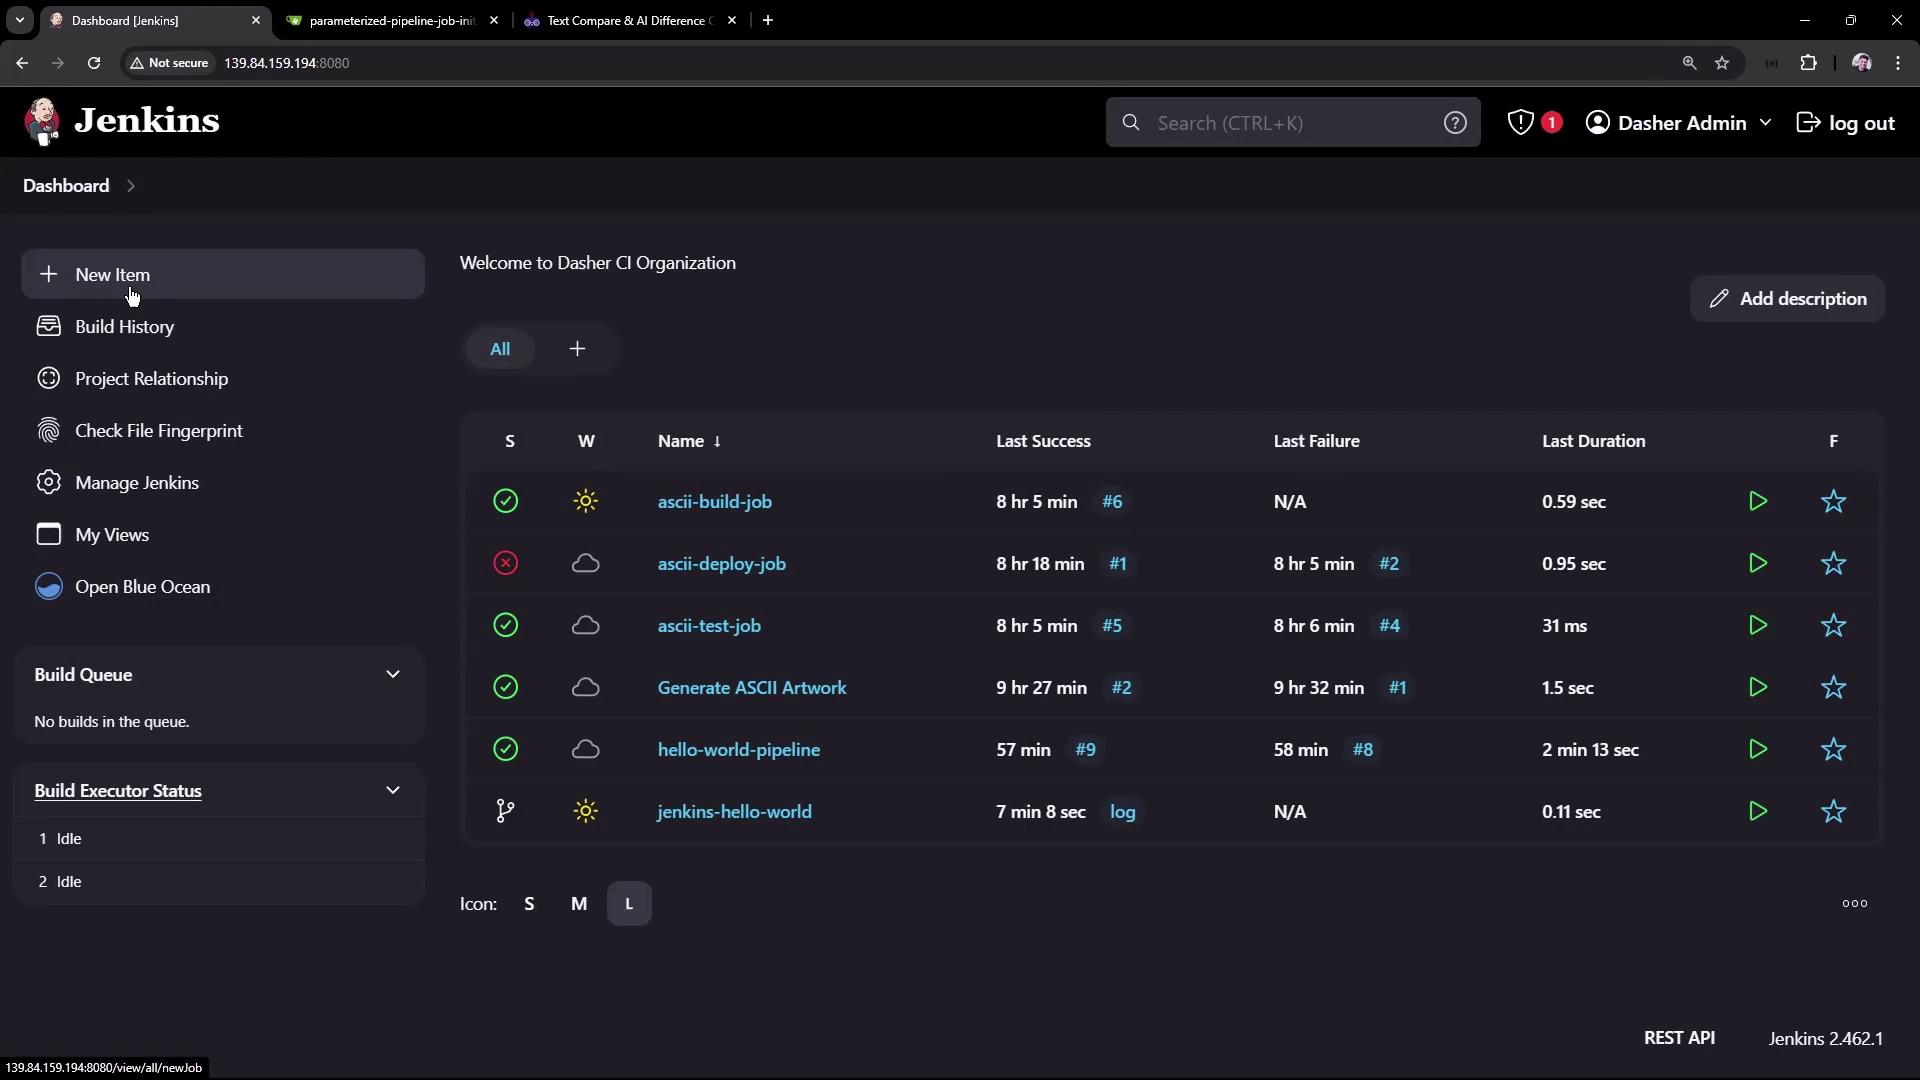
Example Repository

We’ll use the parameterized-pipeline-job-init GitHub repository, which contains a simple Spring Boot “Hello World” application. There are two branches:

  • main: Production pipeline with containerization and Kubernetes deployment
  • test: Basic pipeline that builds, tests, and deploys locally

The image shows a Git repository interface with a list of commits and branches, and a section for a Springboot Hello World App used for a Jenkins training demo.

Pipeline Definition: test Branch

pipeline {
    agent any
    tools { maven 'M398' }
    stages {
        stage('Maven Version') {
            steps {
                sh 'echo Print Maven Version'
                sh 'mvn -version'
            }
        }
        stage('Build') {
            steps {
                sh 'mvn clean package -DskipTests=true'
                archiveArtifacts 'target/hello-demo-*.jar'
            }
        }
        stage('Test') {
            steps {
                sh 'mvn test'
                junit(testResults: 'target/surefire-reports/TEST-*.xml',
                      keepProperties: true,
                      keepTestNames: true)
            }
        }
        stage('Local Deployment') {
            steps {
                sh 'java -jar target/hello-demo-*.jar > /dev/null &'
            }
        }
        stage('Integration Testing') {
            steps {
                sh 'sleep 10s'
                sh 'echo Testing using cURL commands......'
            }
        }
    }
}

Pipeline Definition: main Branch

pipeline {
    agent any
    tools { maven 'M398' }
    stages {
        stage('Build') {
            steps {
                sh 'mvn clean package -DskipTests=true'
                archiveArtifacts 'target/hello-demo-*.jar'
            }
        }
        stage('Test') {
            steps {
                sh 'mvn test'
                junit(testResults: 'target/surefire-reports/TEST-*.xml',
                      keepProperties: true,
                      keepTestNames: true)
            }
        }
        stage('Containerization') {
            steps {
                sh 'echo Docker Build Image..'
                sh 'echo Docker Tag Image....'
                sh 'echo Docker Push Image......'
            }
        }
        stage('Kubernetes Deployment') {
            steps {
                sh 'echo Deploy to Kubernetes using ArgoCD'
            }
        }
        stage('Integration Testing') {
            steps {
                sh 'sleep 10s'
                sh 'echo Testing using cURL commands......'
            }
        }
    }
}

Goal: One Job for Both Branches

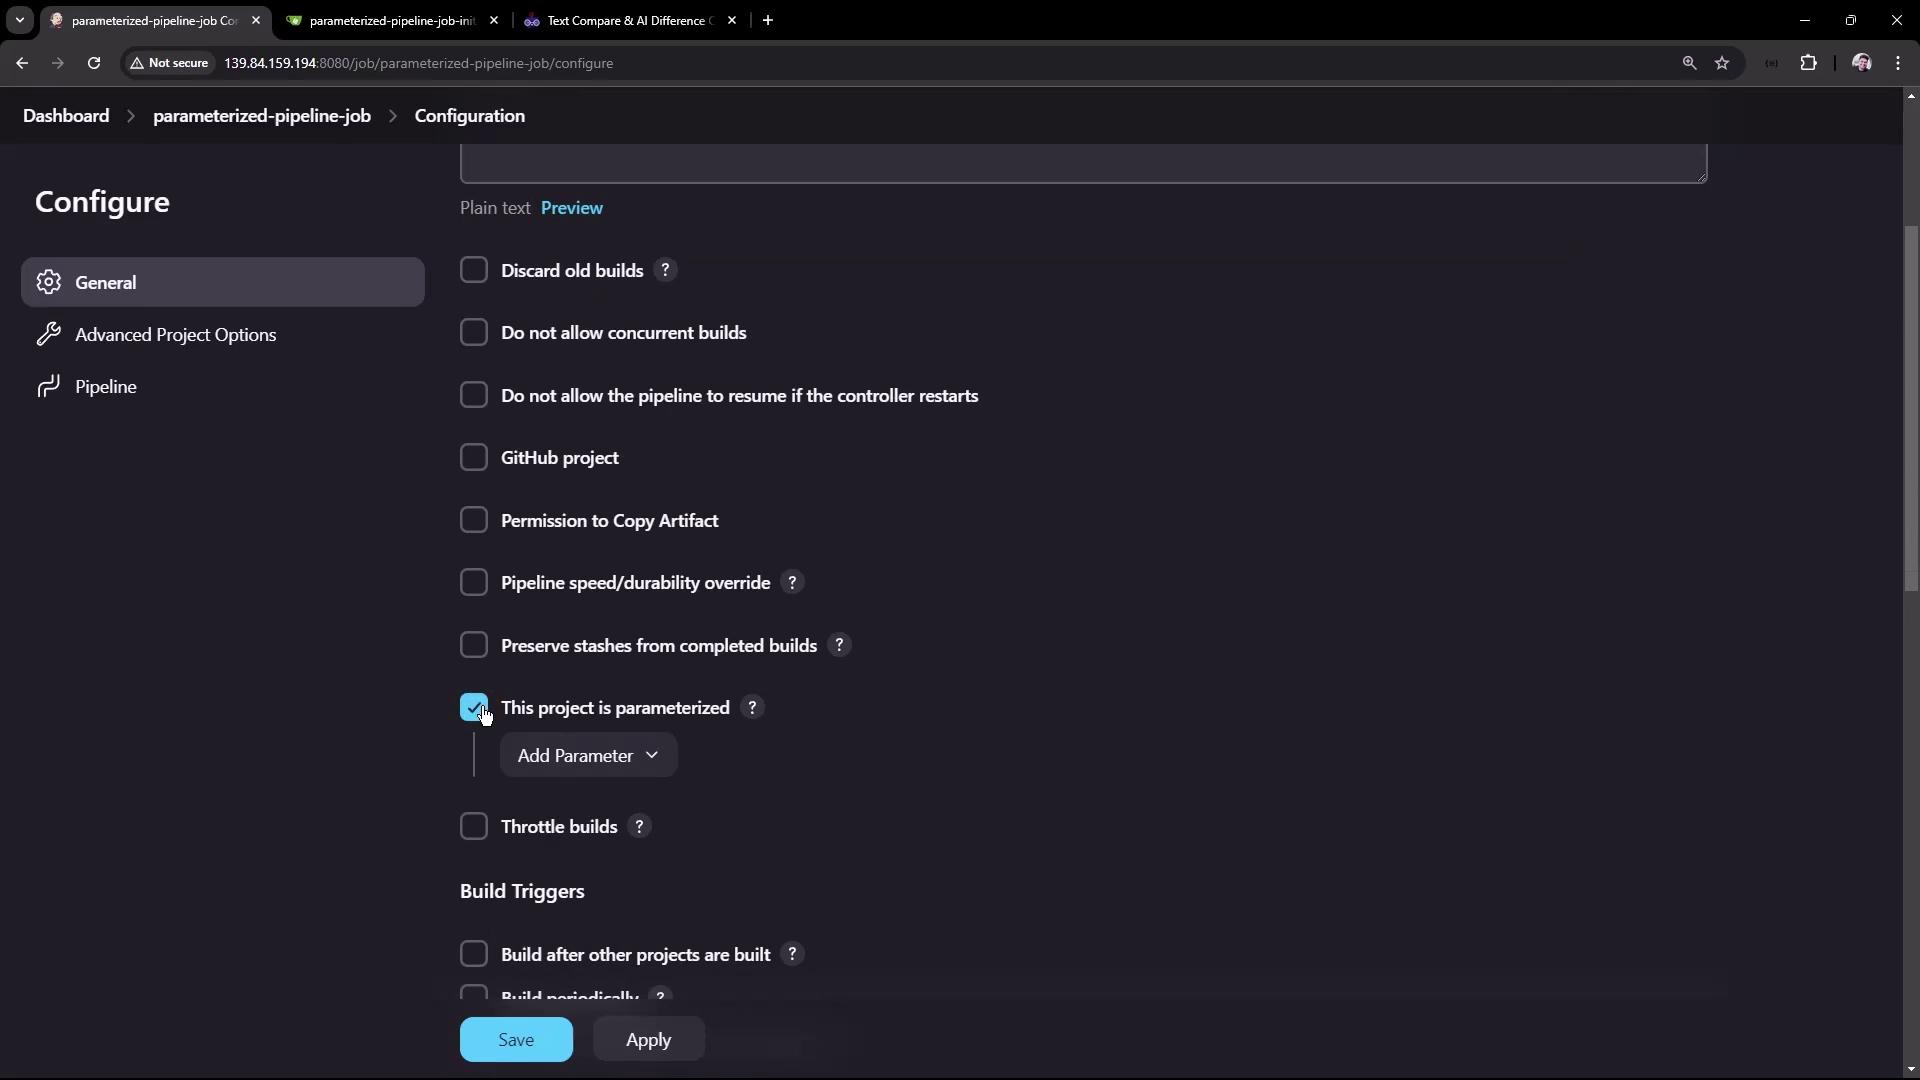
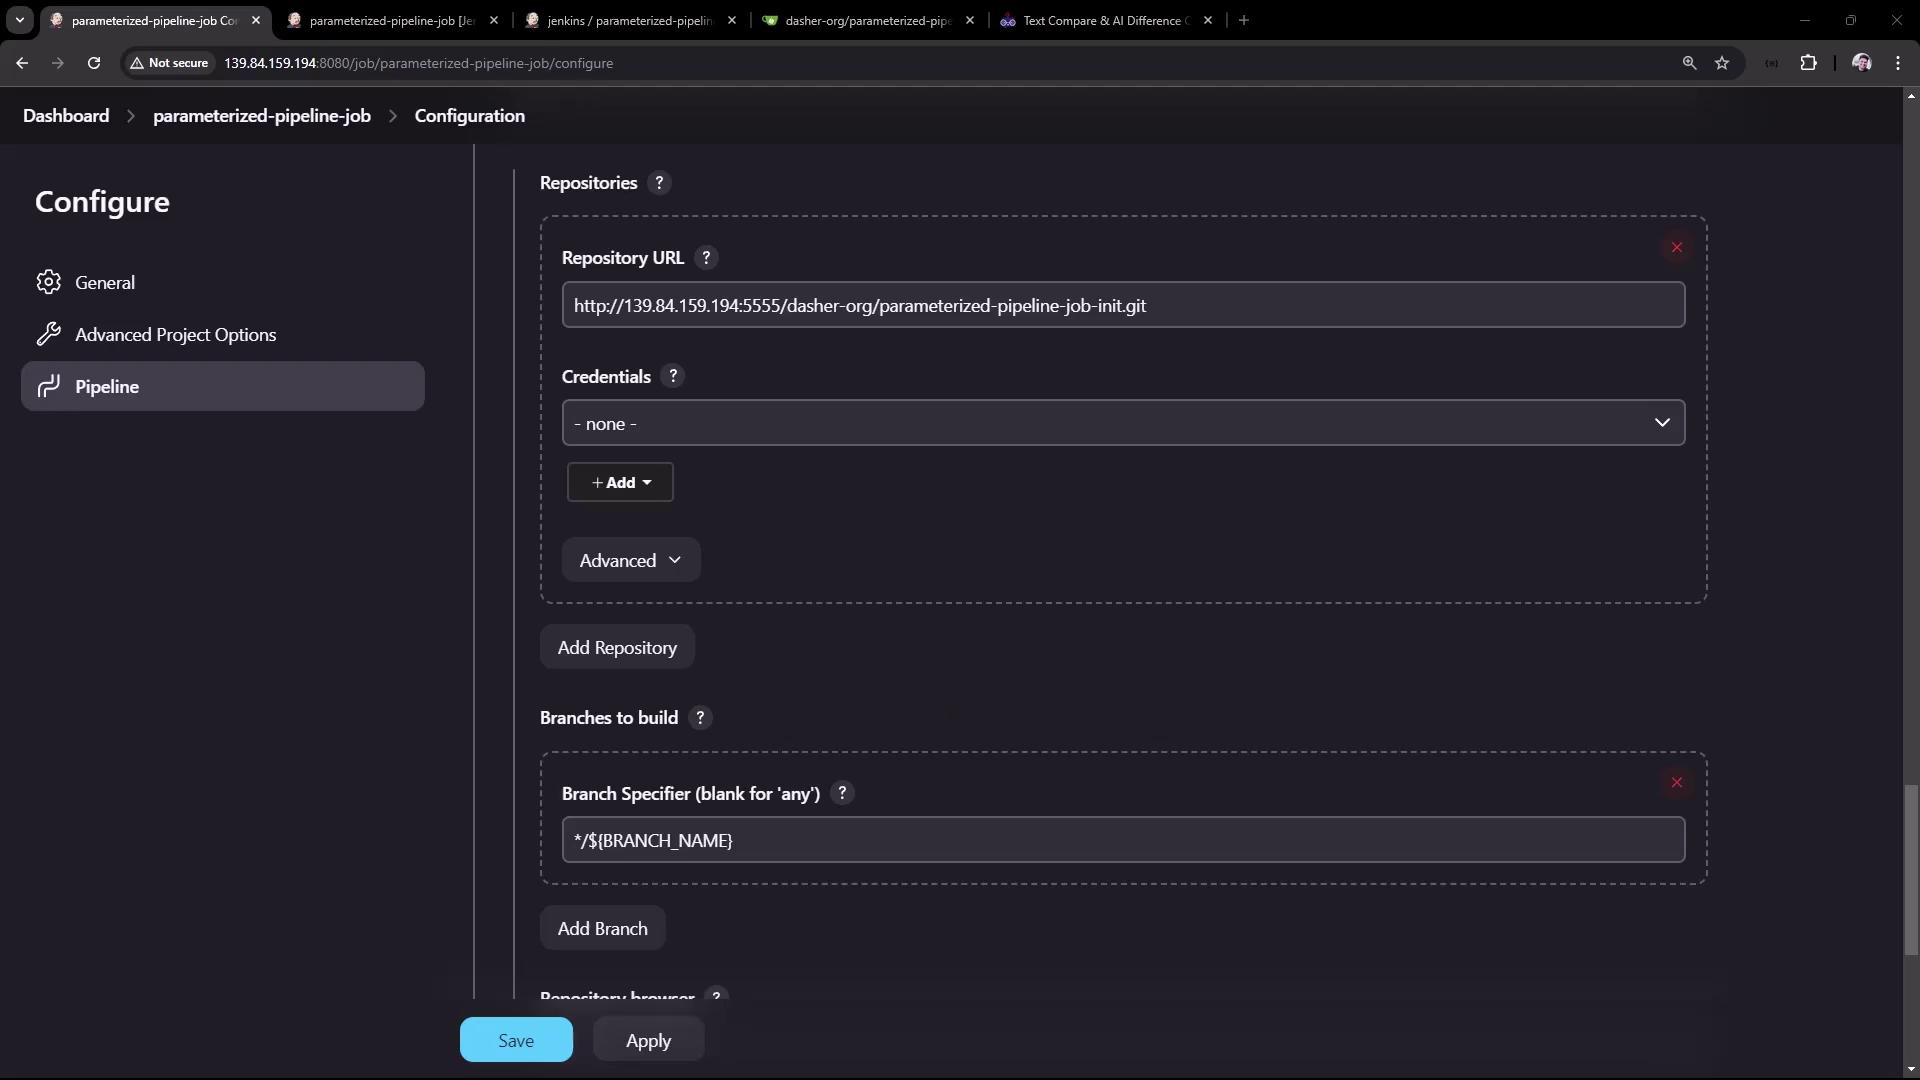
Instead of creating separate Jenkins jobs, we’ll parameterize a single pipeline so it can target either branch at build time.

1. Create the Parameterized Job

  1. In Jenkins Classic UI, click New Item.
  2. Enter Parameterized Pipeline Job, select Pipeline, then click OK.
  3. Under Pipeline, choose Pipeline script from SCM.
  4. Point SCM to your Git repo and set Branch Specifier to test for now.
  5. Keep Script Path as Jenkinsfile.

The image shows a Jenkins dashboard with a list of jobs, their statuses, last success and failure times, and durations. The interface includes options for managing Jenkins, viewing build history, and creating new items.

The image shows a configuration screen for a parameterized pipeline job, with various options and settings available for selection, such as build triggers and project parameters.

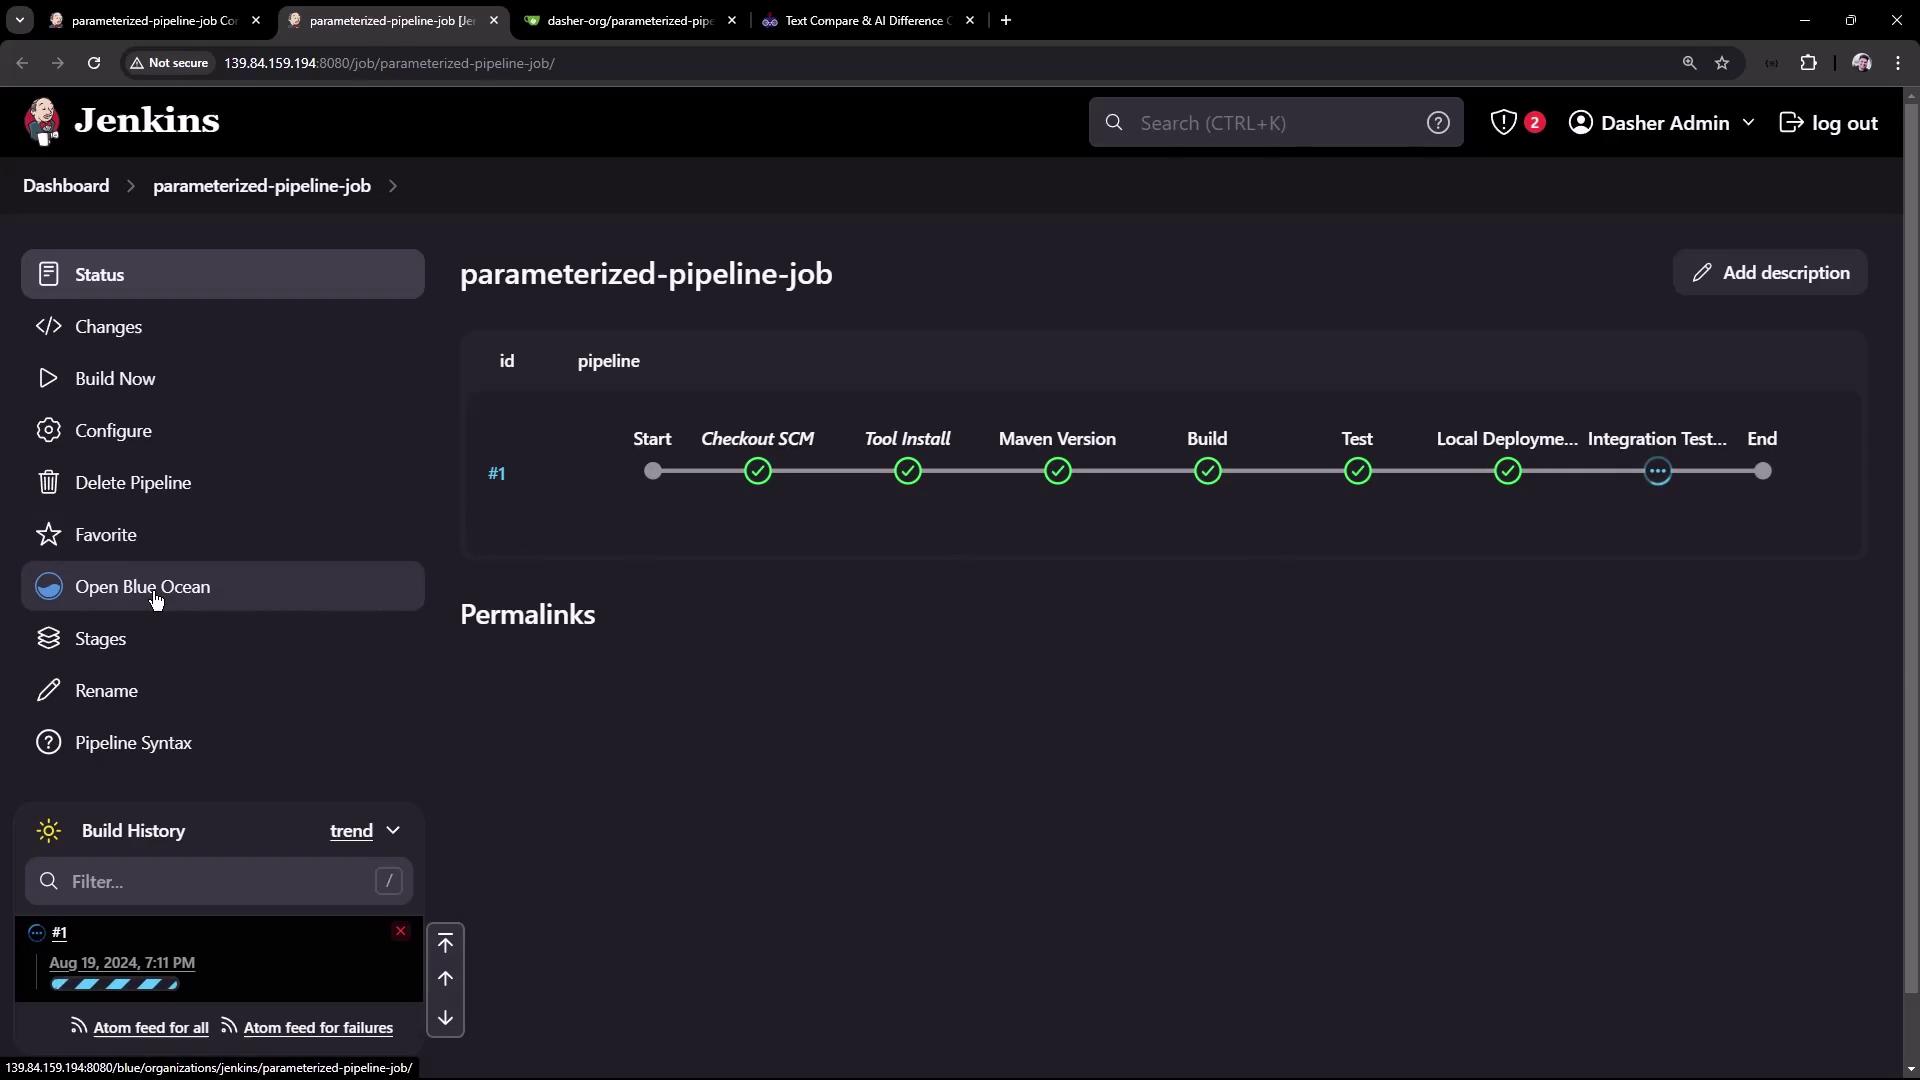
2. Verify the test Branch

Run the job once to ensure the test pipeline works as expected. In Blue Ocean, you should see all stages complete successfully:

The image shows a Jenkins dashboard displaying the progress of a parameterized pipeline job with various stages like "Checkout SCM," "Tool Install," and "Build," all marked as completed.

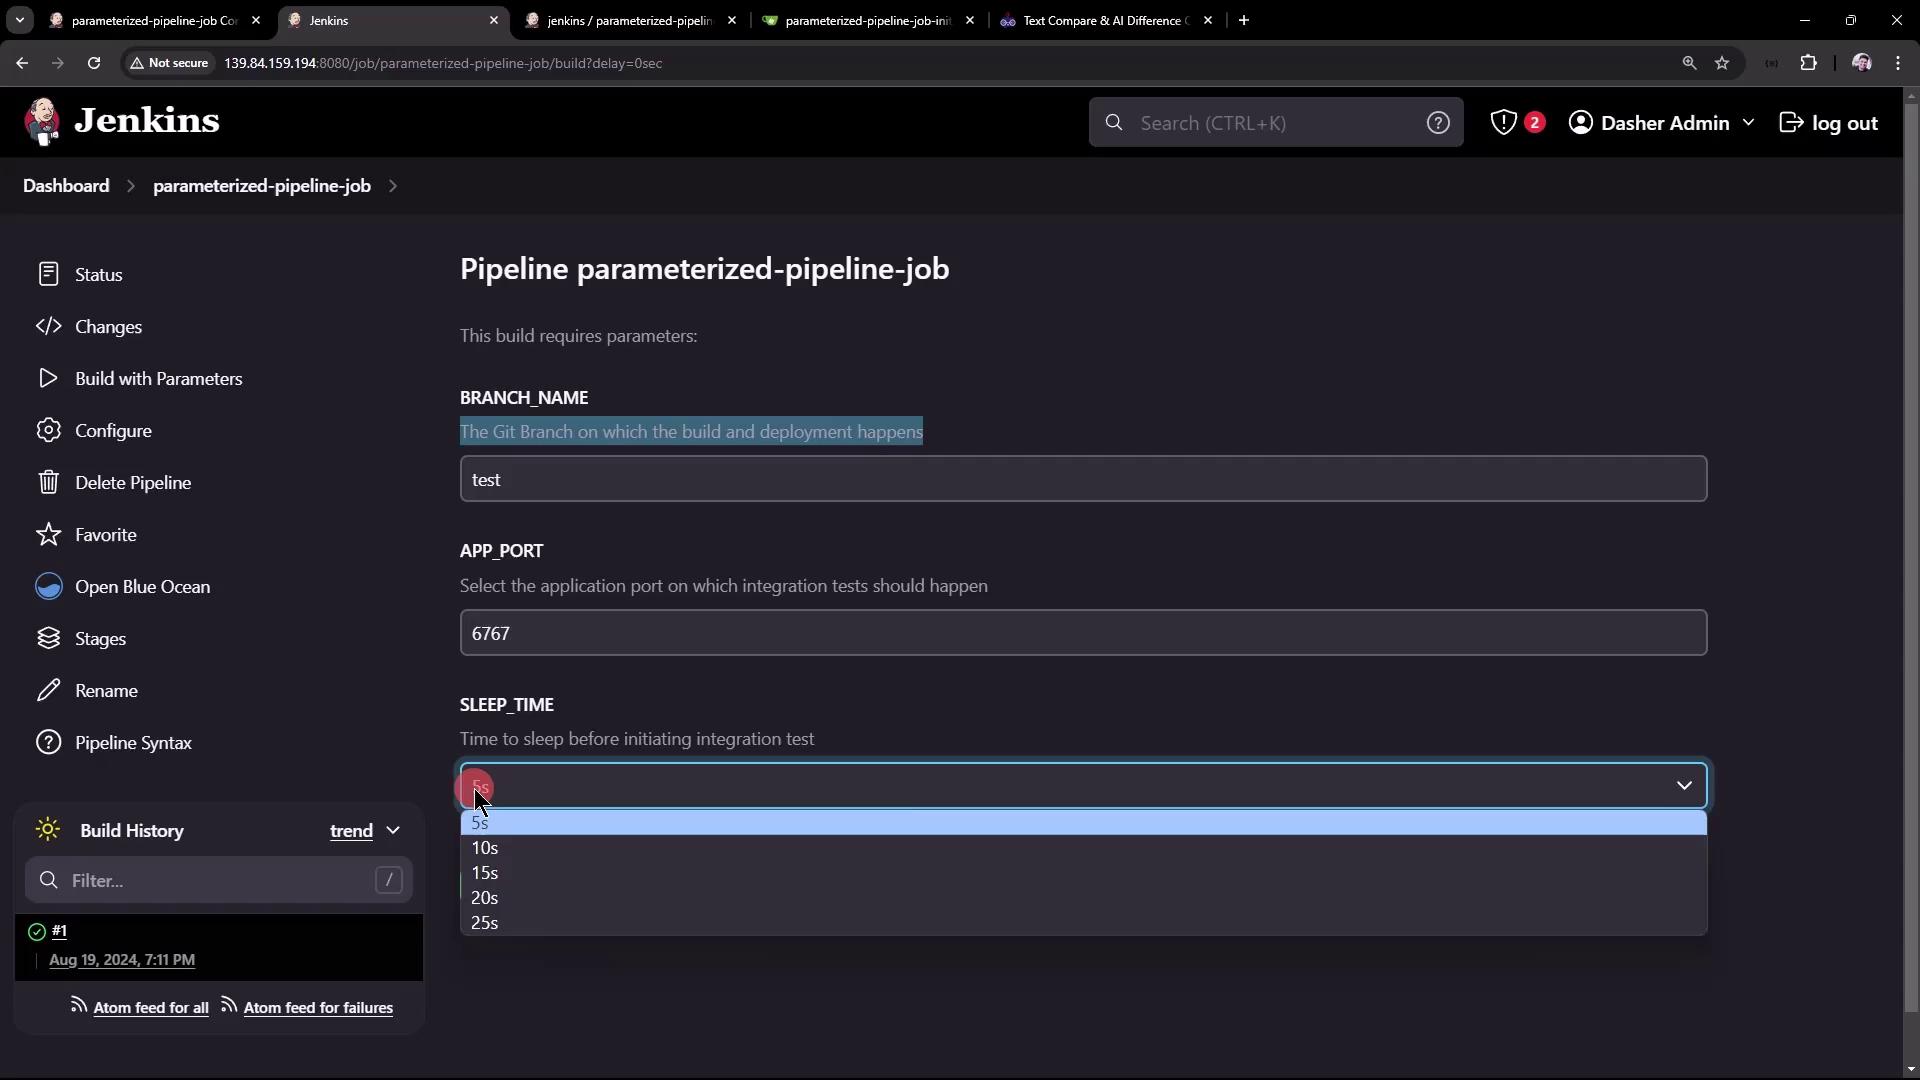
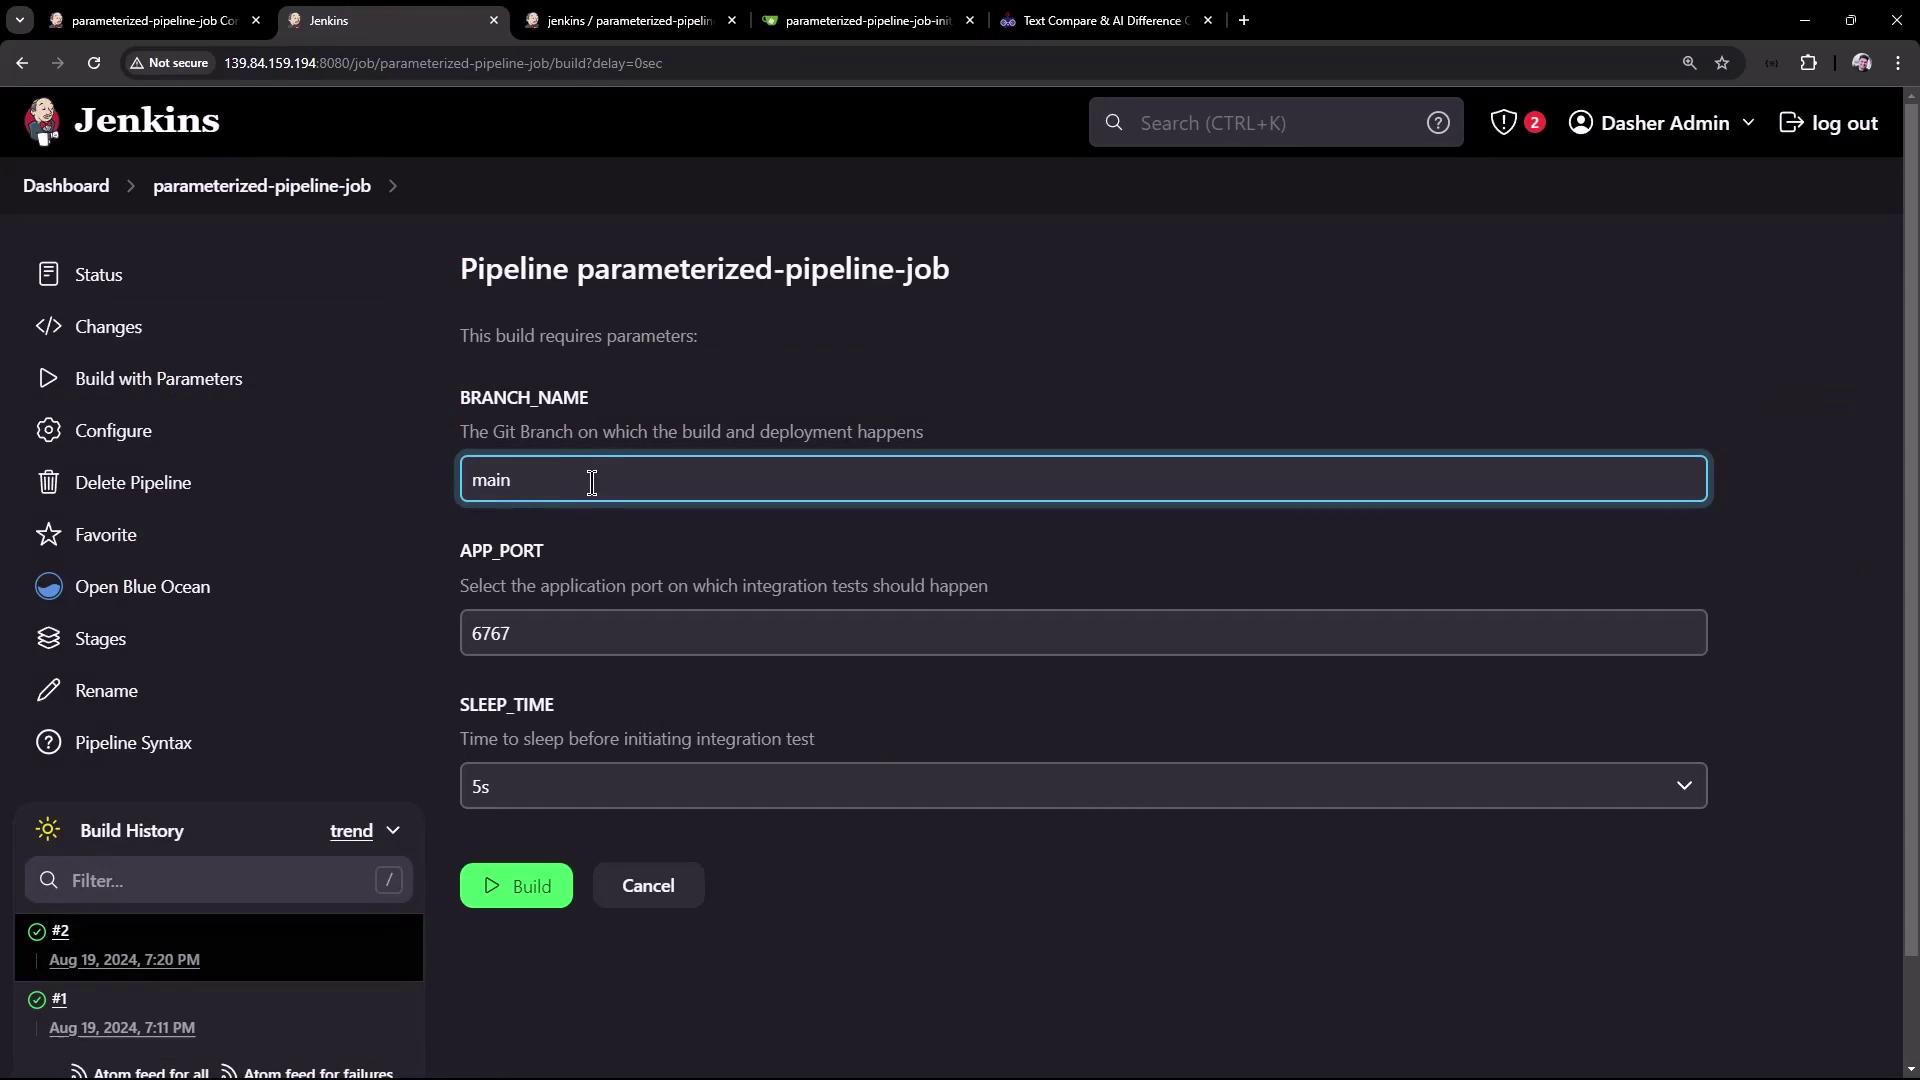
3. Define Build Parameters

Go back to Configure and enable This project is parameterized. Add the following parameters:

ParameterTypeDefaultDescription
BRANCH_NAMEStringmainGit branch to build
APP_PORTString6767Port for local or integration test
SLEEP_TIMEChoice10sDelay before running tests

Note

You can add more parameters (e.g., TIMEOUT, ENVIRONMENT) to adapt this pipeline for different use cases.

The image shows a configuration screen for a parameterized pipeline job, with options to set a string parameter for a Git branch name, default value, and description.

The image shows a configuration screen for a parameterized pipeline job, with settings for a string parameter named "APP_PORT" and a default value of "6767".

The image shows a configuration screen for a parameterized pipeline job, where a choice parameter named "SLEEP_TIME" is being set with options ranging from 5s to 25s. There is a warning indicating that choices are required.

Next, update Branch Specifier under Source Code Management to:

*/${BRANCH_NAME}

The image shows a Jenkins configuration screen for a parameterized pipeline job, including fields for repository URL, credentials, and branch specifier.

Warning

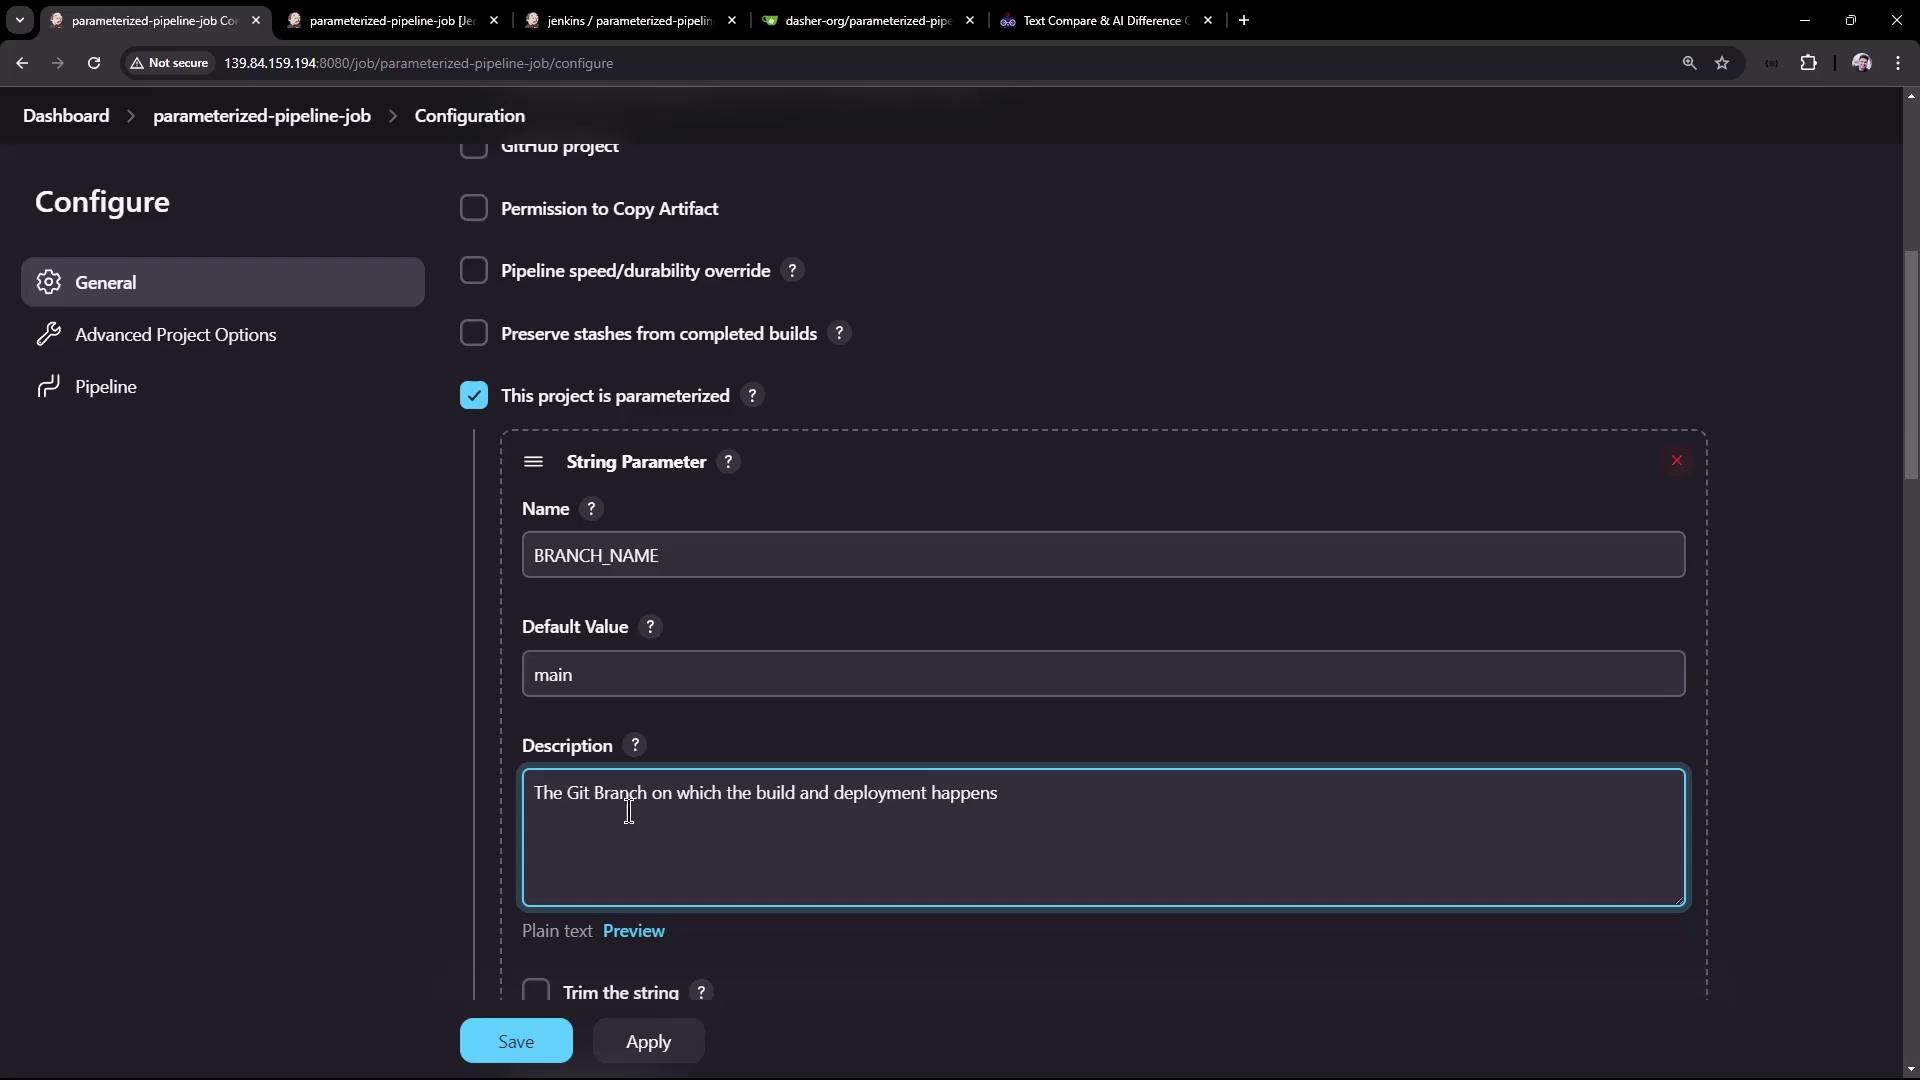
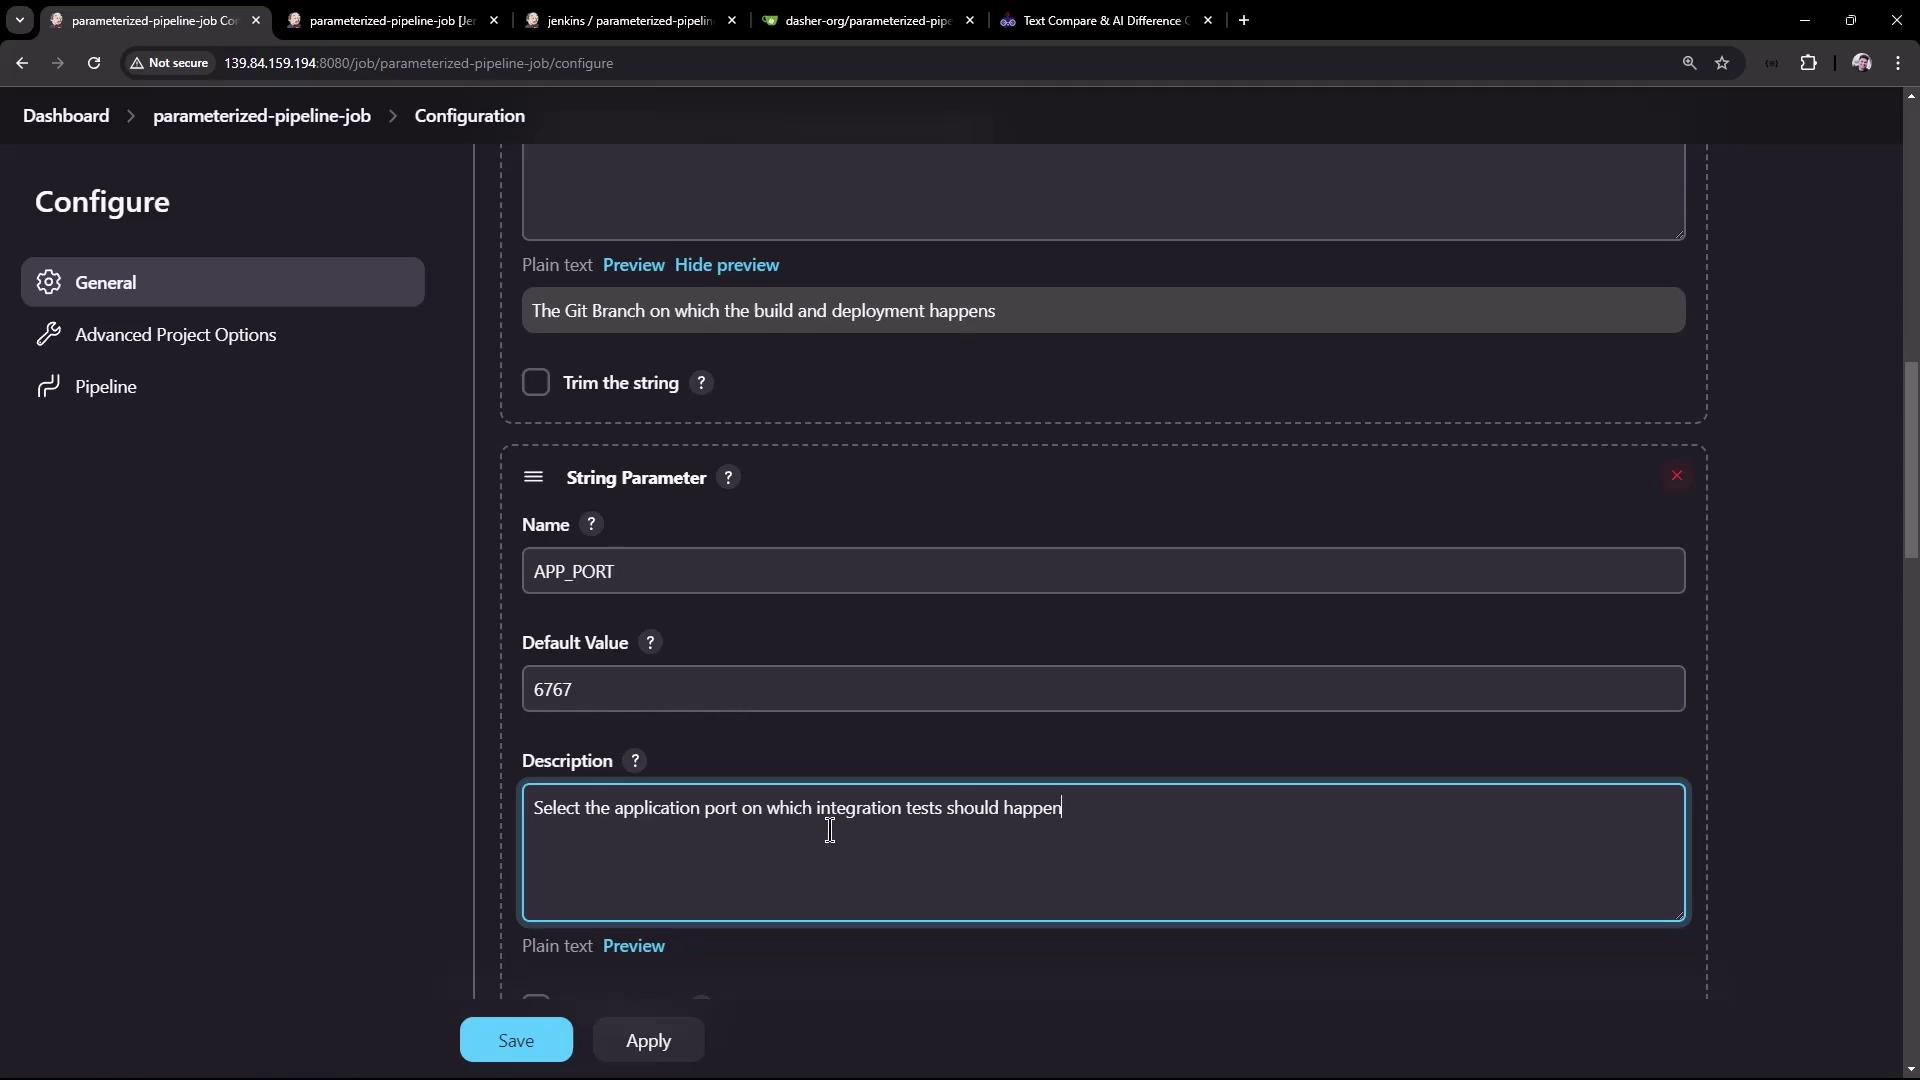
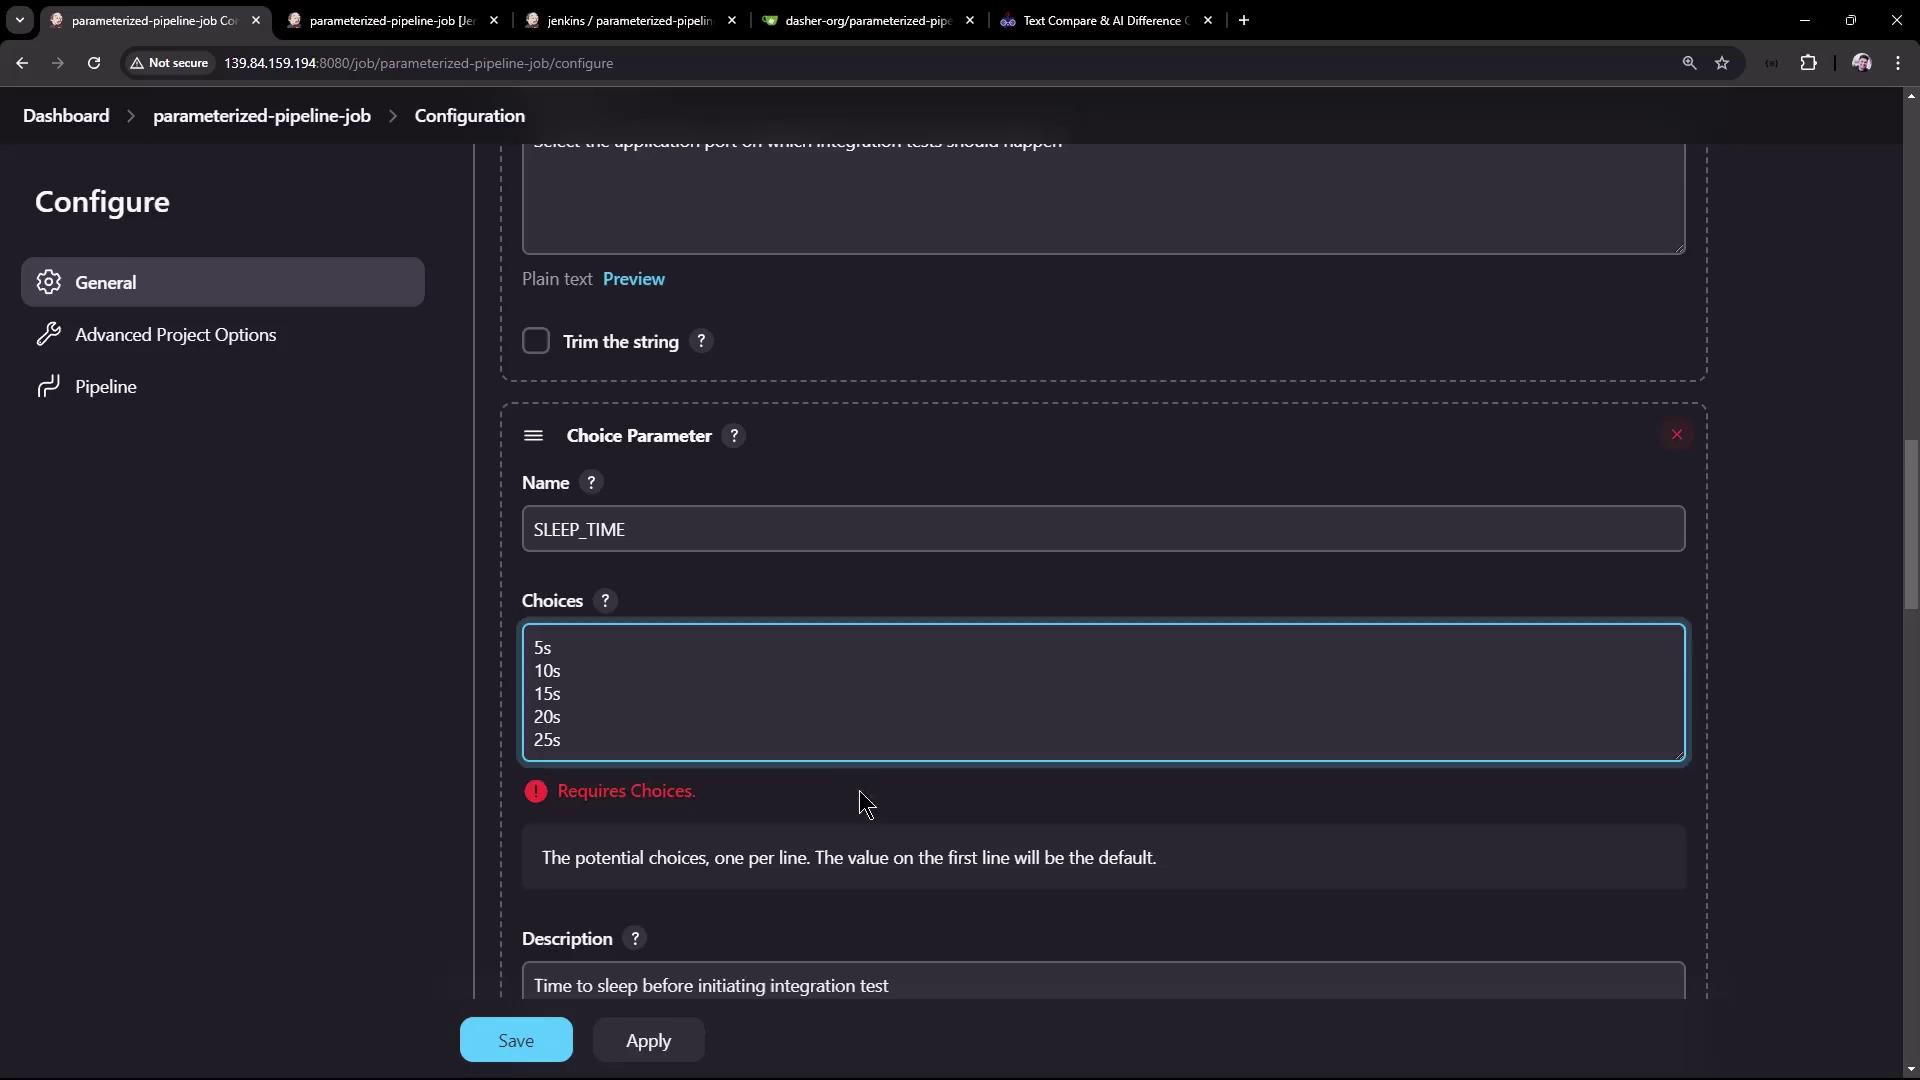
Make sure to commit these parameterized Jenkinsfile changes to each branch; otherwise, ${params.*} will not be available.

4. Update the test Branch Jenkinsfile

Switch to the test branch and edit Jenkinsfile to leverage the new parameters:

pipeline {
    agent any
    stages {
        stage('Maven Version') {
            steps {
                sh "echo Print Maven Version"
                sh "mvn -version"
                sh "echo Sleep-Time - ${params.SLEEP_TIME}, Port - ${params.APP_PORT}, Branch - ${params.BRANCH_NAME}"
            }
        }
        stage('Build') {
            steps {
                sh 'mvn clean package -DskipTests=true'
                archiveArtifacts 'target/hello-demo-*.jar'
            }
        }
        stage('Test') {
            steps {
                sh 'mvn test'
                junit(testResults: 'target/surefire-reports/TEST-*.xml',
                      keepProperties: true,
                      keepTestNames: true)
            }
        }
        stage('Local Deployment') {
            steps {
                sh "java -jar target/hello-demo-*.jar > /dev/null &"
            }
        }
        stage('Integration Testing') {
            steps {
                sh "sleep ${params.SLEEP_TIME}"
                sh "curl -s http://localhost:${params.APP_PORT}/hello"
            }
        }
    }
}

Commit and push these updates. Then in Jenkins, select Build with Parameters, choose:

  • BRANCH_NAME: test
  • APP_PORT: 6767
  • SLEEP_TIME: 5s

The image shows a Jenkins interface for a parameterized pipeline job, where users can set parameters like branch name, app port, and sleep time before initiating an integration test.

In the logs, you’ll see the parameter values substituted correctly:

echo Sleep-Time - 5s, Port - 6767, Branch - test
Sleep-Time - 5s, Port - 6767, Branch - test

+ sleep 5s
+ curl -s http://localhost:6767/hello
Hello, KodeKloud community!

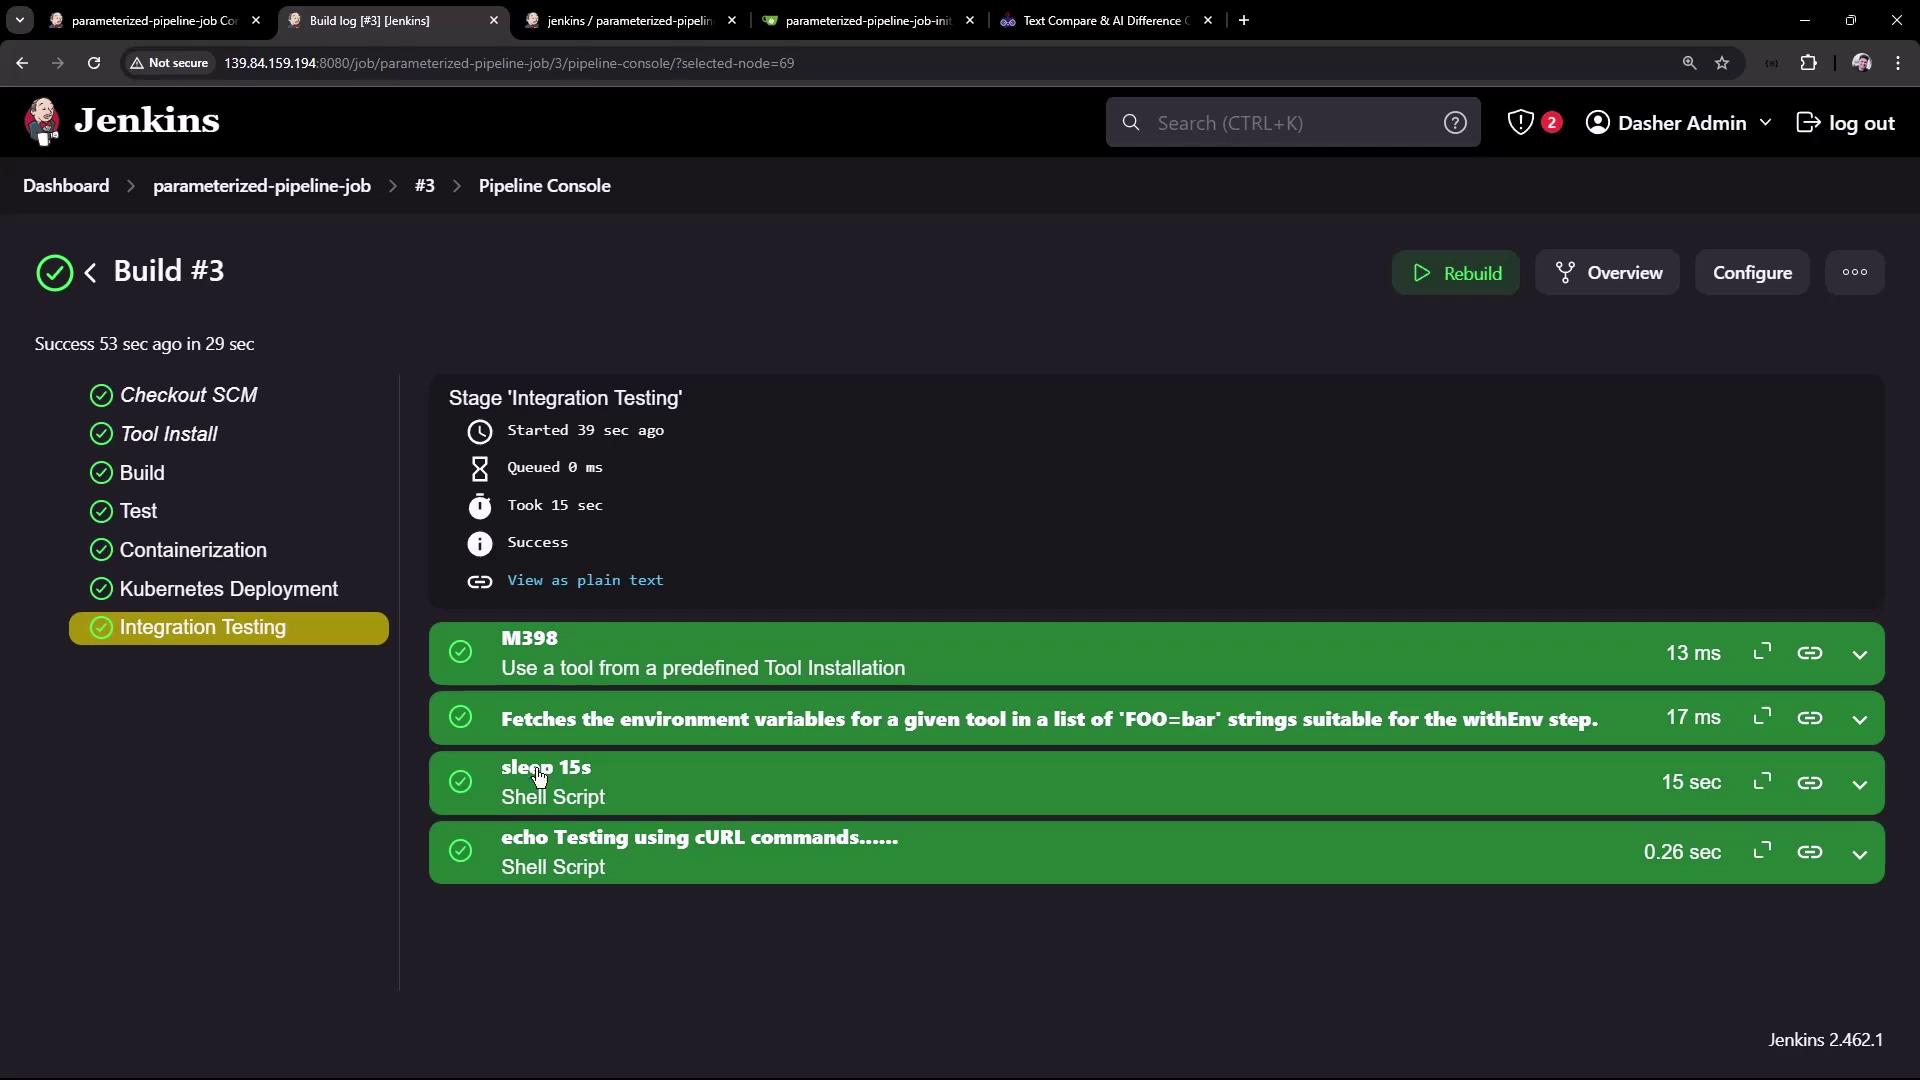
5. Update the main Branch Jenkinsfile

Repeat a similar update in the main branch to reference ${params.SLEEP_TIME}:

pipeline {
    agent any
    stages {
        stage('Build') {
            steps {
                sh 'mvn clean package -DskipTests=true'
                archiveArtifacts 'target/hello-demo-*.jar'
            }
        }
        stage('Test') {
            steps {
                sh 'mvn test'
                junit(testResults: 'target/surefire-reports/TEST-*.xml',
                      keepProperties: true,
                      keepTestNames: true)
            }
        }
        stage('Containerization') {
            steps {
                sh 'echo Docker Build Image..'
                sh 'echo Docker Tag Image....'
                sh 'echo Docker Push Image......'
            }
        }
        stage('Kubernetes Deployment') {
            steps {
                sh 'echo Deploy to Kubernetes using ArgoCD'
            }
        }
        stage('Integration Testing') {
            steps {
                sh "sleep ${params.SLEEP_TIME}"
                sh 'echo Testing using cURL commands......'
            }
        }
    }
}

Commit, push, then run Build with Parameters:

  • BRANCH_NAME: main
  • SLEEP_TIME: 15s

The image shows a Jenkins interface for a parameterized pipeline job, where users can input parameters like branch name, app port, and sleep time before building.

You should see the main branch pipeline honor the parameters:

The image shows a Jenkins pipeline console with a successful build process, highlighting the "Integration Testing" stage and its steps, all marked as successful.

Conclusion

By defining job-level parameters and referencing them in your Jenkinsfile, you can maintain a single pipeline that adapts to multiple branches and environments. This strategy:

  • Reduces duplication across branches
  • Simplifies CI/CD maintenance
  • Enables dynamic, user-driven builds

For more on Jenkins pipelines and job parameters, check out:

Happy building!

Watch Video

Watch video content

Practice Lab

Practice lab

Previous
Demo Create Pipeline using Blue Ocean Graphical Editor