Certified Jenkins Engineer
Jenkins Setup and Interface
Demo Running the Jenkins WAR as a standalone application
In this guide, we’ll move beyond the default apt installation and launch Jenkins directly from its WAR file. This approach gives you full control over JVM options, ports, and context paths—ideal for testing or side-by-side instances.
1. Inspecting the Apt-Installed Jenkins Service
Start by confirming the existing Jenkins process managed via apt:
ps aux | grep -i jenkins
jenkins   27173  8.4  8.2 10874592 134834 ?      Ssl  17:51   0.58 /usr/bin/java -Xms1G -Xmx1G -jar /usr/share/java/jenkins.war \
    --webroot=/var/cache/jenkins/war --httpPort=8080
root      29978  0.0  0.0  4088  2080 pts/6    S+   18:03   0.00 grep --color=auto -i jenkins
Here you can see:
- A 1 GB heap (
-Xms1G -Xmx1G) - The WAR file at
/usr/share/java/jenkins.war - Webroot under
/var/cache/jenkins/war - HTTP bound to port 8080
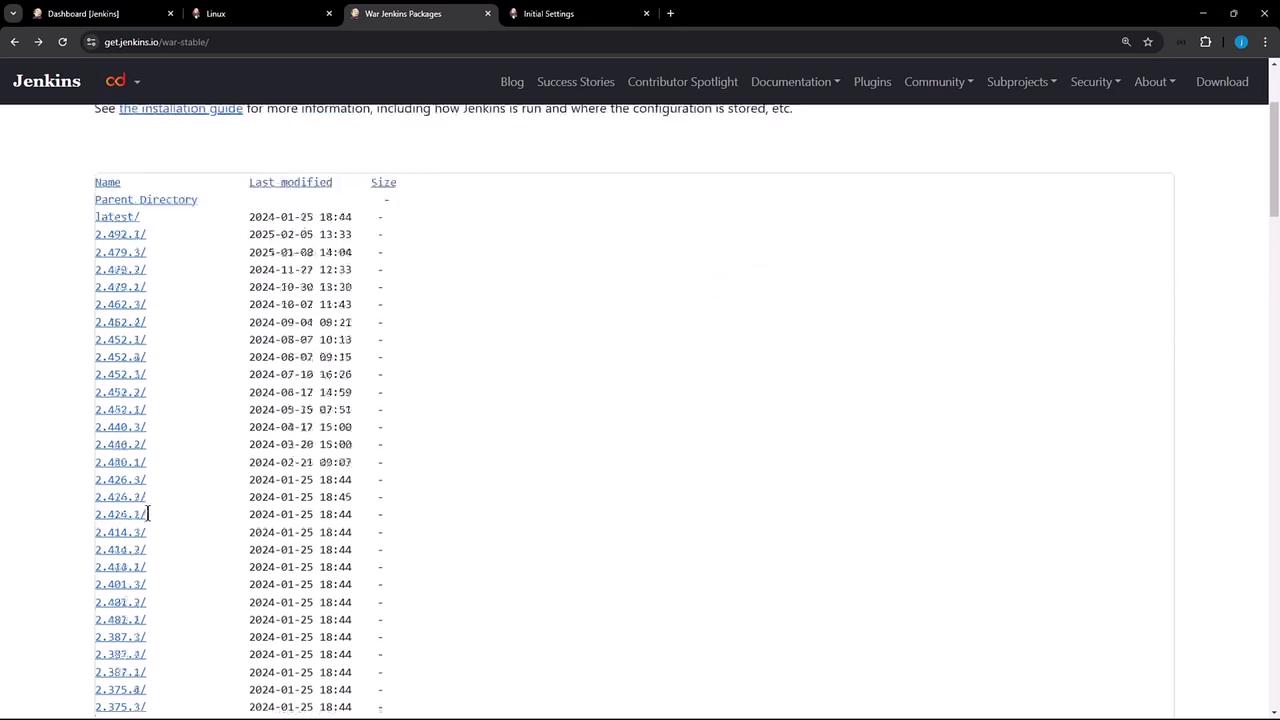
2. Downloading a Specific Jenkins WAR Version
To try a newer release, browse the Jenkins WAR directory and choose 2.479.3 (released Jan 1, 2025):
Once you’ve picked the version, verify the file and checksum:
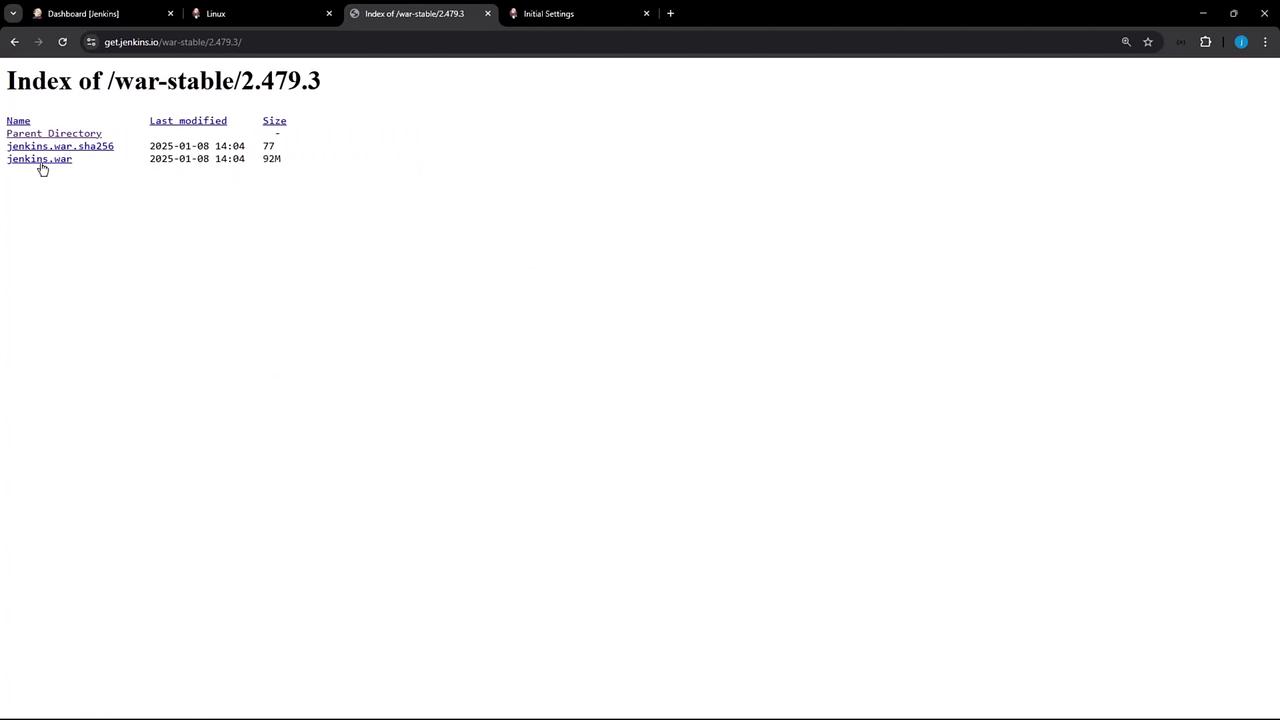
On your Ubuntu server:
mkdir -p ~/jenkins-war
cd ~/jenkins-war
wget https://get.jenkins.io/war-stable/2.479.3/jenkins.war

# Confirm the download
ls -lh jenkins.war
# -rw-r--r-- 1 root root 92M Jan  8 16:34 jenkins.war
3. Launching Jenkins with Custom Parameters
By default, java -jar jenkins.war binds to port 8080—which conflicts with the apt-installed service. Override this with:
java -jar jenkins.war --httpPort=7777 --prefix=/dasher-technologies
After a few seconds, you’ll see Jetty start up and the initial setup wizard prompt:
2025-02-05 18:09:12.026+0000 [id=1]  INFO  org.eclipse.jetty.server.Server#doStart: Started Server@19c65cdc{STARTING}[12.0.16,sto=0] @1525ms
...
***********************************************************************
Jenkins initial setup is required. An admin user has been created and a password generated.
Please use the following password to proceed to installation:
456e352c1ea424f9bfc923315957c2
This may also be found at: /root/.jenkins/secrets/initialAdminPassword
***********************************************************************
Note
Save the generated password. You can always retrieve it later from /root/.jenkins/secrets/initialAdminPassword.
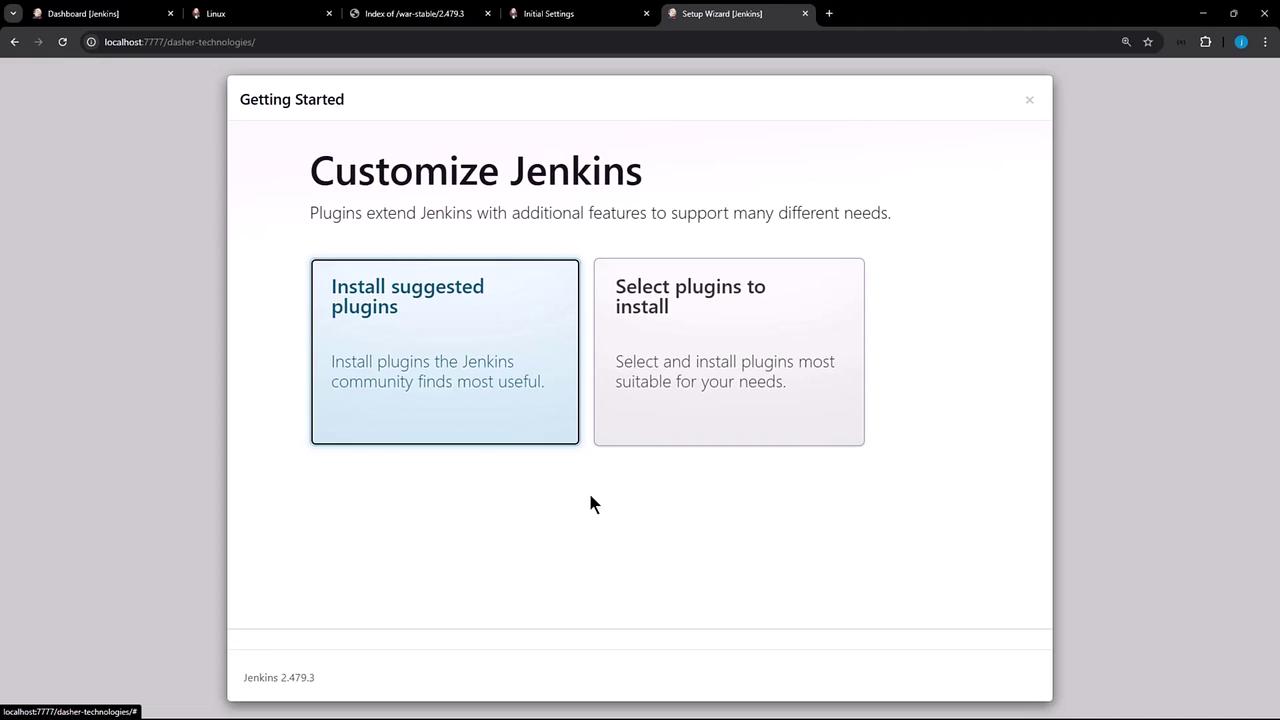
4. Unlocking Jenkins and Installing Plugins
Open your browser at:
http://localhost:7777/dasher-technologies
Enter the admin password when prompted. The setup wizard will then let you:
- Install Suggested Plugins
- Select Plugins to customize your install
5. Common Startup Options
Jenkins supports various JVM and server flags. Below are frequently used HTTP/HTTPS settings:
| Option | Description | Example |
|---|---|---|
--httpPort=<port> | Bind HTTP server to this port | --httpPort=7777 |
--httpListenAddress=<addr> | Set HTTP bind address | --httpListenAddress=0.0.0.0 |
--httpsPort=<port> | Enable HTTPS on this port (use -1 to disable) | --httpsPort=8443 |
--httpsListenAddress=<addr> | Set HTTPS bind address | --httpsListenAddress=0.0.0.0 |
--prefix=<context-path> | Specify the URL prefix (context path) | --prefix=/custom-path |
--sessionTimeout=<minutes> | Define session timeout in minutes | --sessionTimeout=30 |
--httpsKeyStore=<path> | Path to your Java keystore for HTTPS | /path/to/keystore |
--httpsKeyStorePassword= | Password for the HTTPS keystore | YourPassword |
For the complete list of server options, see Jenkins HTTP Server Options.
6. Verifying Multiple Jenkins Instances
In another terminal, confirm both the apt-installed and standalone WAR instances are running:
ps aux | grep -i jenkins
jenkins   27173  5.4  8.8 10874592 1435160 ?     Ssl  17:52   1.02 /usr/bin/java -Xms1G -Xmx1G -jar /usr/share/java/jenkins.war --webroot=/var/cache/jenkins/war --httpPort=8080
root      31980 19.6  5.6 13983116  912304 pts/6 Sl+  18:09   0.21 java -jar jenkins.war --httpPort=7777 --prefix=/dasher-technologies
root      32769  0.0  0.0   4088   1960 pts/8 S+   18:11   0.00 grep --color=auto -i jenkins
You now have two independent Jenkins servers running:
- Port 8080 via
apt - Port 7777 with custom context
/dasher-technologies
Thank you for following this demo!
Links and References
Watch Video
Watch video content