Certified Jenkins Engineer

Pipeline Structure and Scripted vs Declarative

Demo Scripted Pipeline Static Agent

In this tutorial, you’ll learn how to run every stage of a Jenkins scripted pipeline on a dedicated static agent instead of the controller node. By specifying the agent label at the node level, you ensure consistent build environments for your projects.

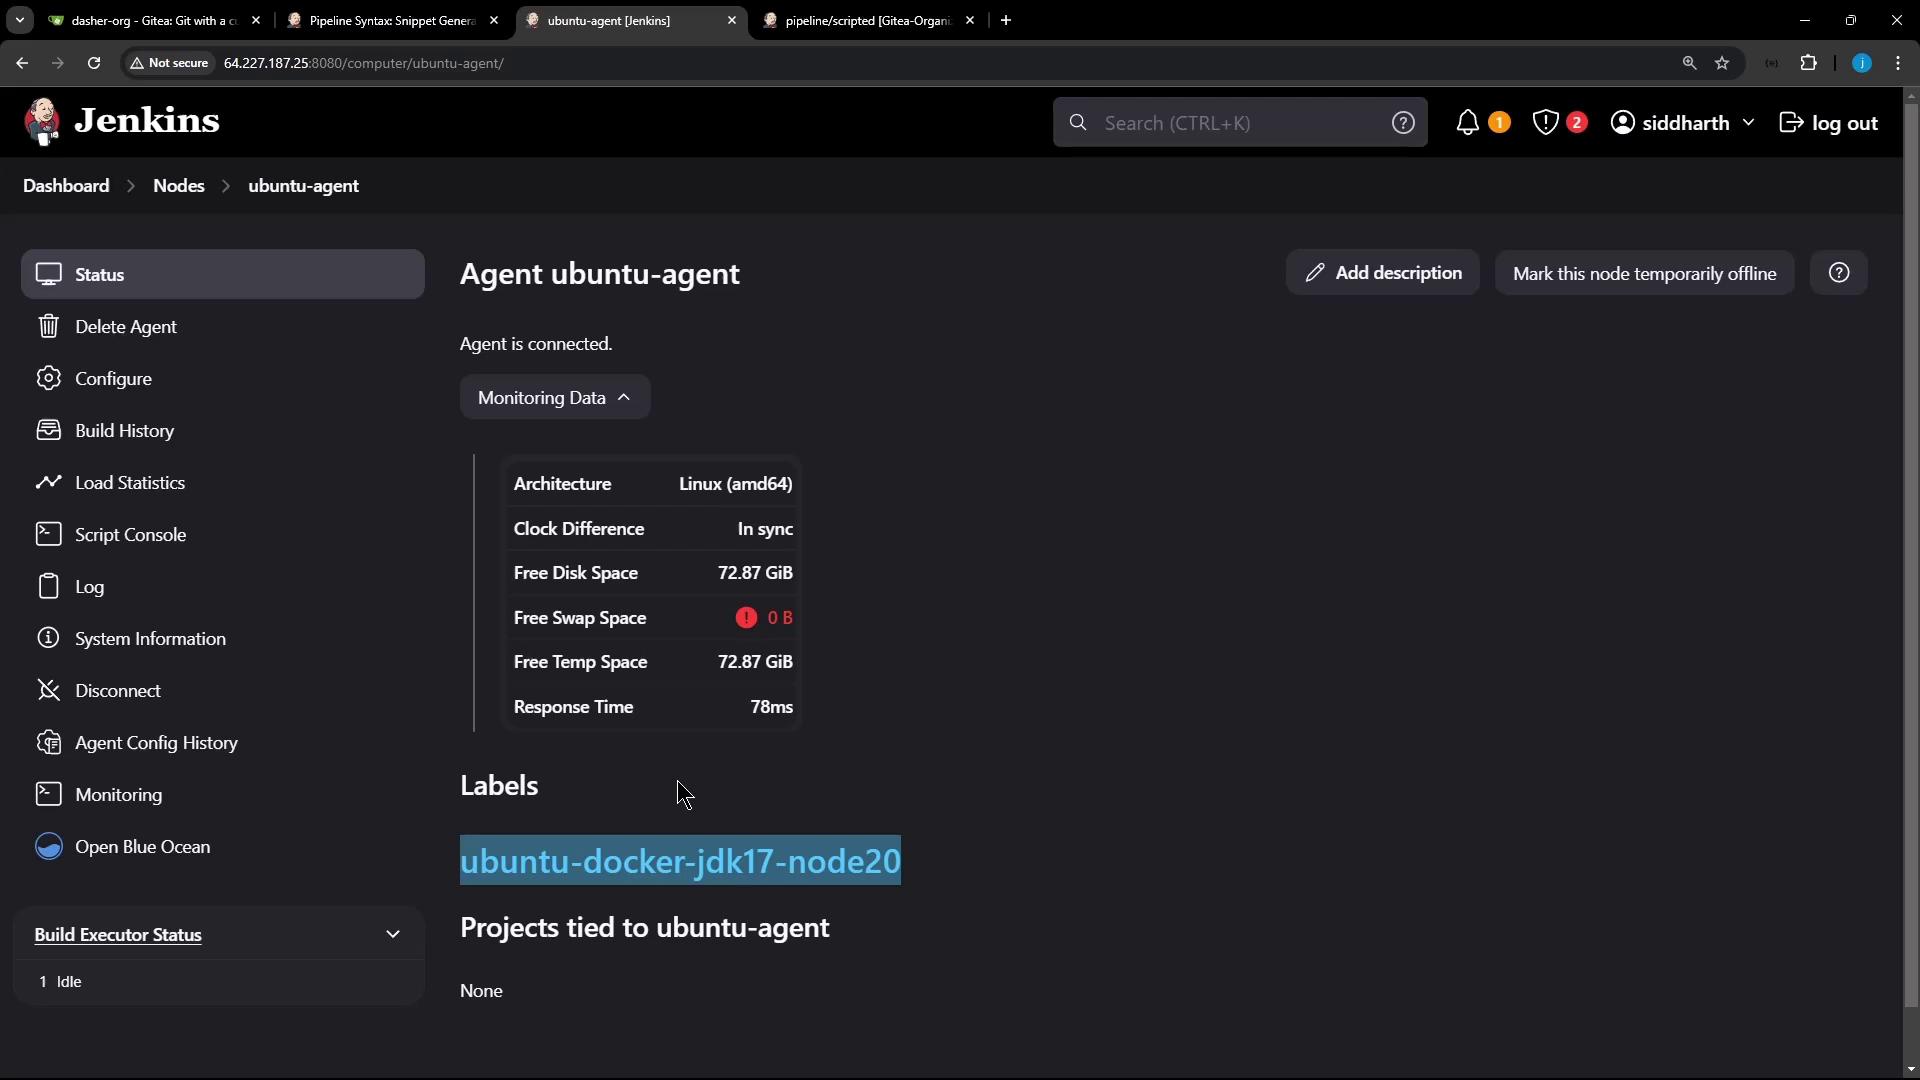
1. Confirm Your Static Agent

We’ve provisioned a static agent labeled Ubuntu-Docker-JDK-17-node20. Verify its status in the Jenkins dashboard:

The image shows a Jenkins dashboard for an agent named "ubuntu-agent," displaying its status, monitoring data, and available disk space.

2. Wrap All Stages in a node Block

Open your Jenkinsfile and nest every stage inside a node block that targets the static agent:

node('Ubuntu-Docker-JDK-17-node20') {
  stage('Checkout') {
    git url: 'http://<your-git-repo-url>.git', branch: 'pipeline/scripted'
  }

  stage('Installing Dependencies') {
    sh 'npm install --no-audit'
  }

  stage('Unit Testing') {
    // Define the MongoDB URI
    env.MONGO_URI = 'mongodb+srv://supercluster.d83j'

    // Inject MongoDB credentials securely
    withCredentials([usernamePassword(
        credentialsId: 'mongo-db-creds',
        usernameVariable: 'MONGO_USERNAME',
        passwordVariable: 'MONGO_PASSWORD'
    )]) {
      sh 'node -v'
      sh 'npm test'
    }
  }
}

Note

Scripted pipelines don’t support declarative environment blocks. Use withCredentials to inject secrets at runtime without exposing them in your repository.

3. Generate the withCredentials Snippet

To obtain the exact snippet for your setup, use the Jenkins Pipeline Syntax generator:

  1. Navigate to Dashboard → Pipeline Syntax
  2. Select withCredentials: Username and password (separated)
  3. Choose the mongo-db-creds credential
  4. Set Username Variable to MONGO_USERNAME and Password Variable to MONGO_PASSWORD
  5. Click Generate Pipeline Script

The image shows a Jenkins Pipeline Syntax configuration screen where a user is setting up username and password variables for MongoDB credentials. The interface includes fields for entering the username and password variables, and a dropdown to select credentials.

4. Stage Overview

StagePurposeCommands / Steps
CheckoutClone the Git repositorygit url: ..., branch: ...
Installing DependenciesInstall project dependenciesnpm install --no-audit
Unit TestingRun tests with MongoDB credentialswithCredentials + npm test

5. Commit and Push

Once your Jenkinsfile is updated:

git add Jenkinsfile
git commit -m "Use static agent and add unit tests with MongoDB credentials"
git push origin pipeline/scripted

This push triggers a build on the pipeline/scripted branch.

6. Monitor the Build

Open Blue Ocean or the Classic UI to watch your pipeline execute all stages on the static agent:

The image shows a Jenkins pipeline interface with multiple build stages, including "Checkout," "Installing Dependencies," and "Unit Testing," all marked as successful. The sidebar contains options like "Build Now" and "View Configuration."

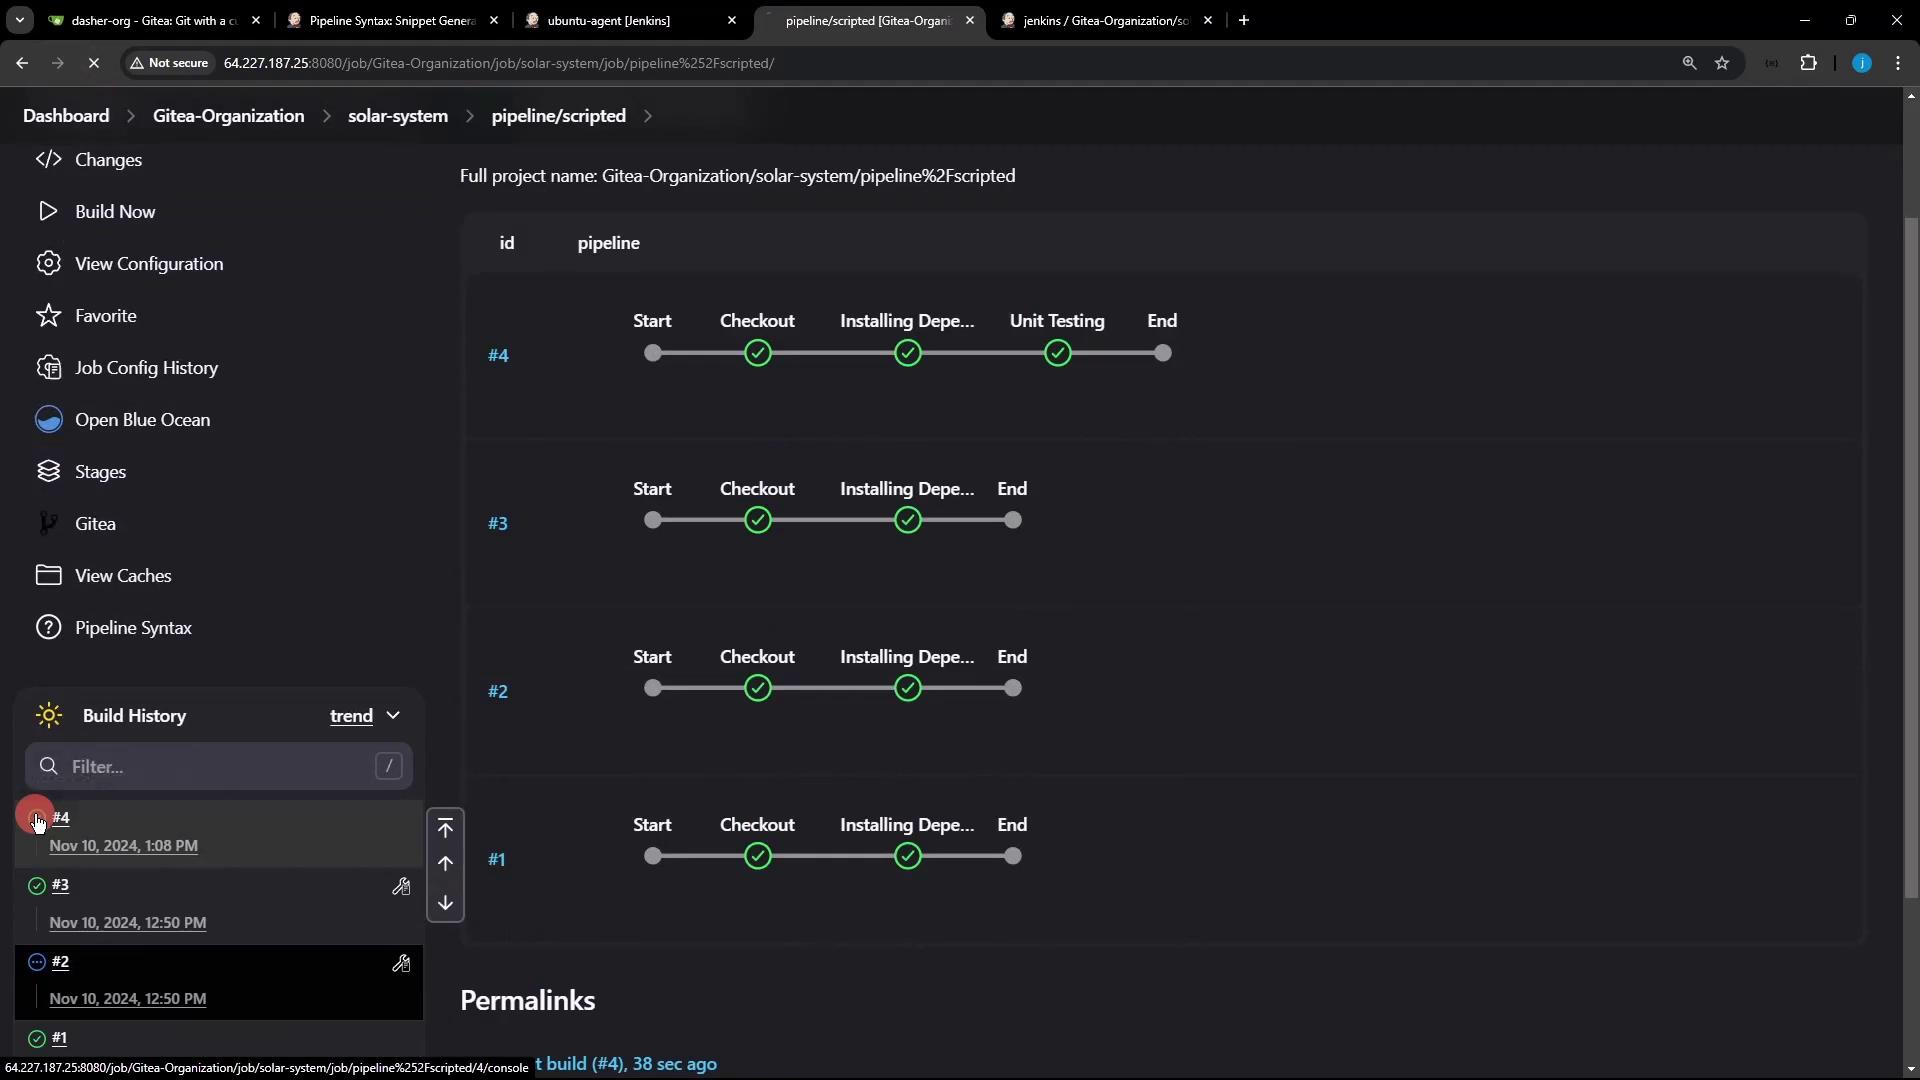
Sample Console Output

> git init /home/jenkins-agent/workspace/n_solar-system_pipeline_scripted
> git remote add origin http://64.227.187.25:8080/dasher-org/solar-system.git
+ node -v
v22.6.0
+ npm test

> Solar [email protected] test
> mocha app-test.js --timeout 10000 --reporter mocha-junit-reporter --exit

Server successfully running on port - 3000

You should see all stages executed on Ubuntu-Docker-JDK-17-node20, with MONGO_URI, MONGO_USERNAME, and MONGO_PASSWORD injected for your tests.


Watch Video

Watch video content

Previous
Demo Scripted Pipeline Initialize