Certified Jenkins Engineer
Setting up CI Pipeline
Demo InstallSetup NodeJS Build Tool
In this tutorial, you will learn how to integrate Node.js into your Jenkins pipelines by using both the host installation and Jenkins-managed Node.js tool. By the end, you'll be able to run Node.js commands in freestyle jobs across controllers and agents.
Prerequisites
- A running Jenkins controller (version 2.x or later).
- Shell access to the Jenkins host machine.
- Administrative privileges to install plugins.
1. Verify Node.js on the Jenkins Host
SSH into the Jenkins server and confirm that Node.js and npm are installed:
node -v
npm -v
systemctl status jenkins
# ● jenkins.service - Jenkins Continuous Integration Server
#    Active: active (running)
If Node.js is available on the controller, freestyle jobs can execute node and npm directly. Agents without Node.js will fail unless you provide a managed installation.
2. Test Node.js in a Freestyle Project
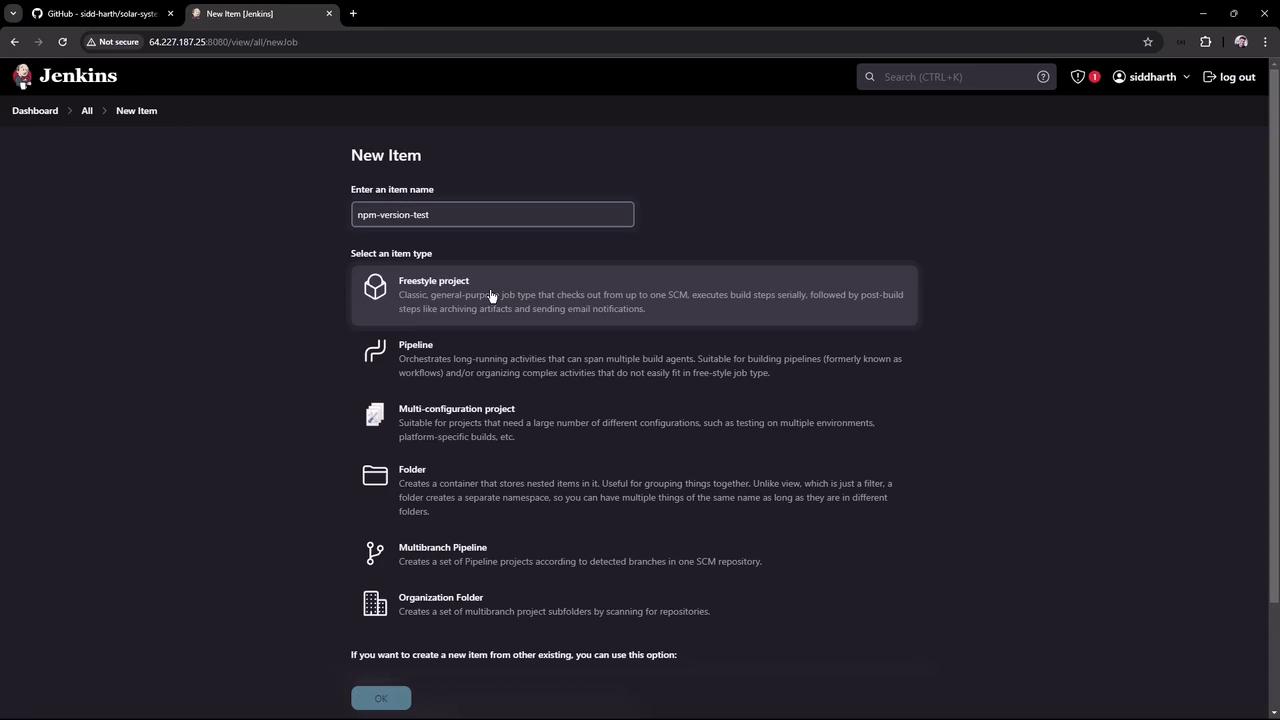
In Jenkins, click New Item, enter
npm-version-test, choose Freestyle project, then OK.Under Build → Execute shell, add:
node -v
npm -v
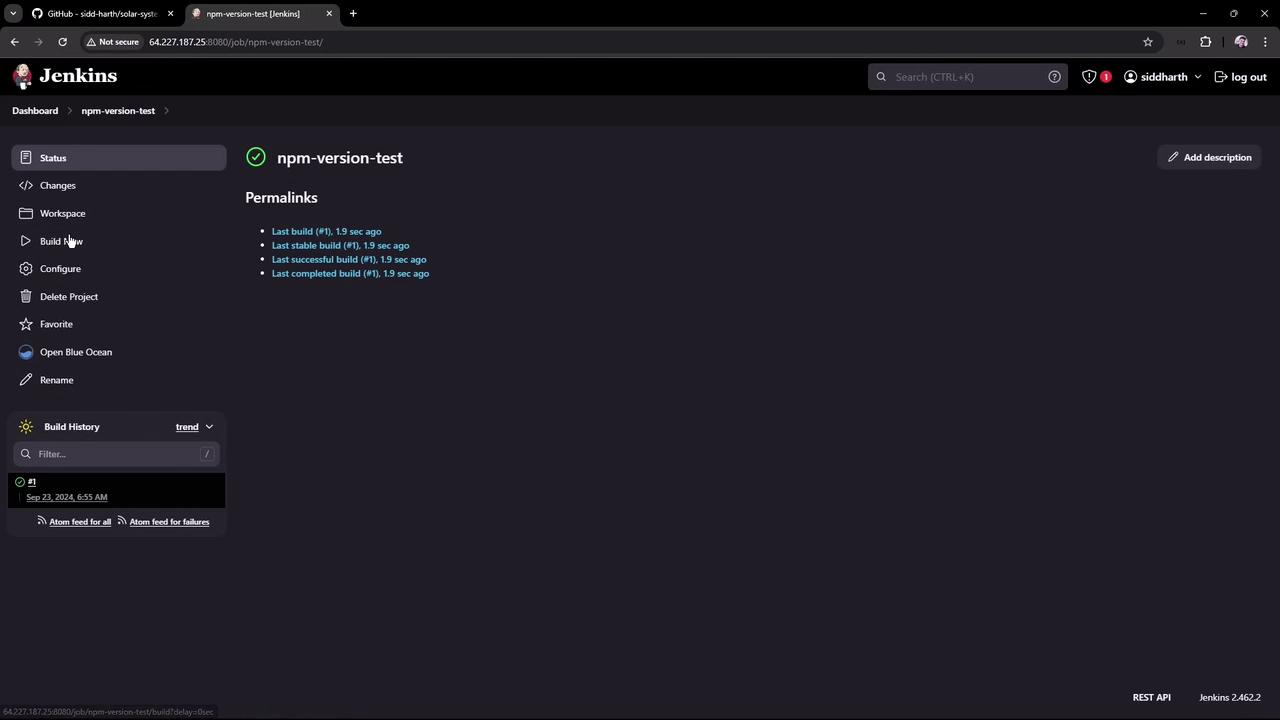
Save and run the job. You should see:
Started by user example
Building in workspace /var/lib/jenkins/workspace/npm-version-test
[npm-version-test] $ /bin/sh -xe /tmp/jenkins.sh
+ node -v
v20.16.0
+ npm -v
10.8.1
Finished: SUCCESS
Agent Considerations
If your builds run on agents without Node.js, this job will fail. To ensure consistency, use Jenkins-managed tools.
3. Install the NodeJS Plugin
Add Node.js as a managed tool in Jenkins:
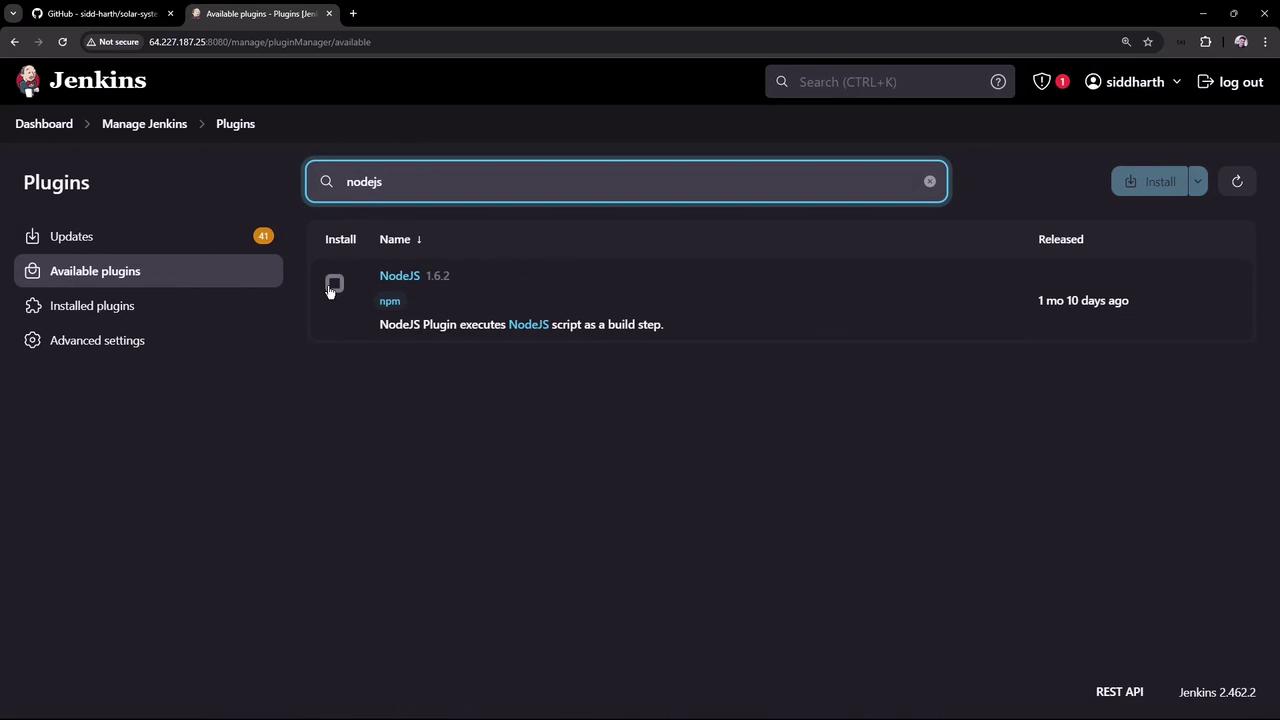
- Go to Manage Jenkins → Manage Plugins → Available.
- Search for NodeJS, select NodeJS plugin (v1.6.2), then Install without restart.
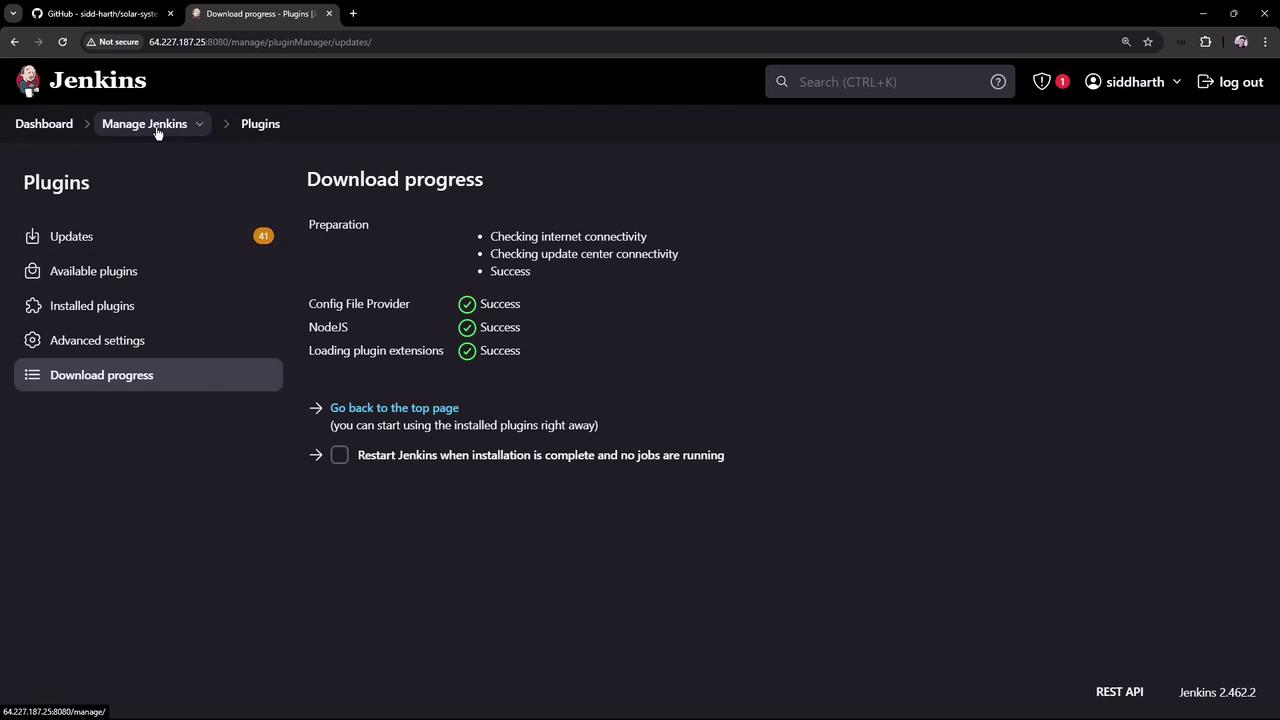
Wait for the installation to complete:
4. Configure Node.js as a Global Tool
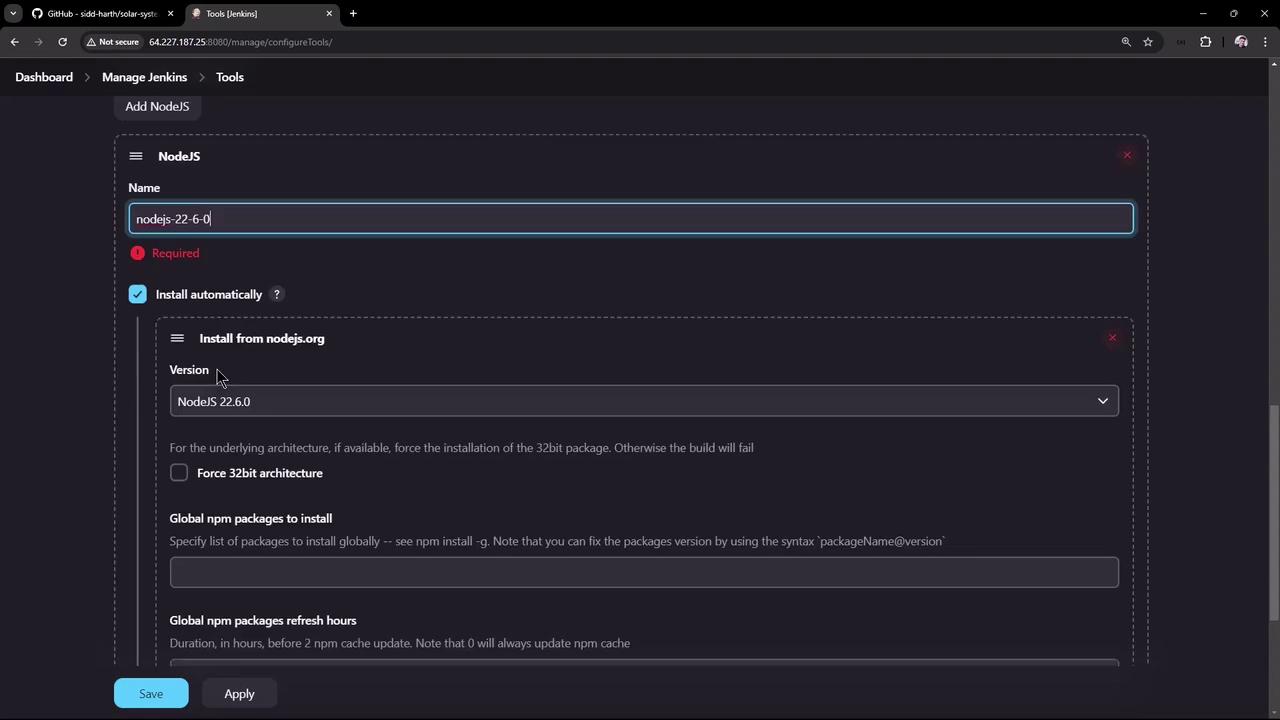
Navigate to Manage Jenkins → Global Tool Configuration.
Under NodeJS installations, click Add NodeJS, then fill in:
- Name:
Node.js 22.6.0 - Install automatically: checked
- Version:
22.6.0
- Name:
Click Save.
5. Use the Managed Node.js in a Freestyle Job
- Open the npm-version-test job and click Configure.
- In Build Environment, enable Provide Node & npm bin/ folder to PATH, then select Node.js 22.6.0.
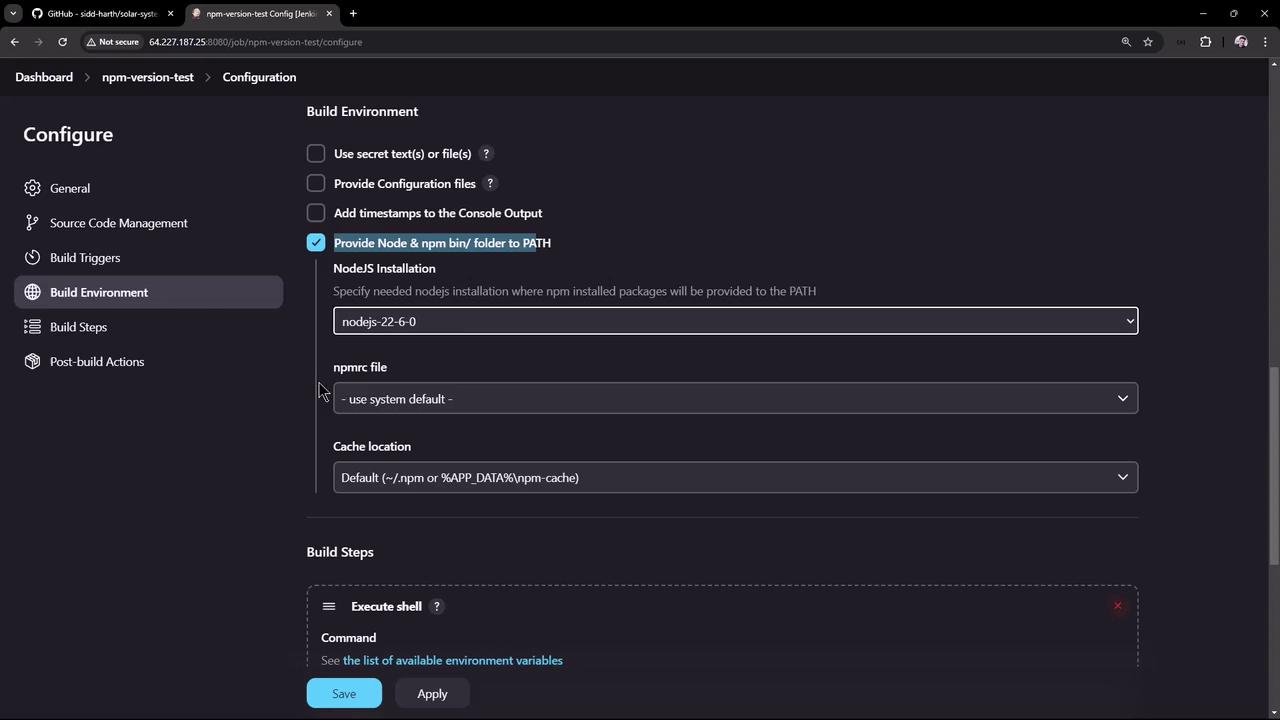
Save and trigger the build. The first run installs Node.js on the controller:
Started by user example
Building in workspace /var/lib/jenkins/workspace/npm-version-test
Unpacking https://nodejs.org/dist/v22.6.0/node-v22.6.0-linux-x64.tar.gz to /var/lib/jenkins/tools/.../nodejs-22-6-0
[npm-version-test] $ /bin/sh -xe /tmp/jenkins.sh
+ node -v
v22.6.0
+ npm -v
10.8.2
Finished: SUCCESS
Subsequent builds reuse the cached installation, ensuring consistent Node.js versions across all agents.
Summary
| Step | Description |
|---|---|
| Verify Host Installation | Check node -v and npm -v on the Jenkins controller. |
| Freestyle Project Test | Run a basic freestyle job using host-installed Node.js. |
| Install NodeJS Plugin | Add NodeJS plugin via Manage Plugins. |
| Global Tool Configuration | Define Node.js under Global Tool Configuration. |
| Use Managed Node.js | Enable Node.js in Build Environment of a freestyle job. |
Links and References
Watch Video
Watch video content