DevSecOps - Kubernetes DevOps & Security

DevSecOps Pipeline

Demo Mutation Tests PIT

In this tutorial, you’ll learn how to integrate PIT Mutation Testing into a Spring Boot project, execute mutation tests, and publish the HTML report in Jenkins. We’ll walk through:

  1. Configuring the Maven POM
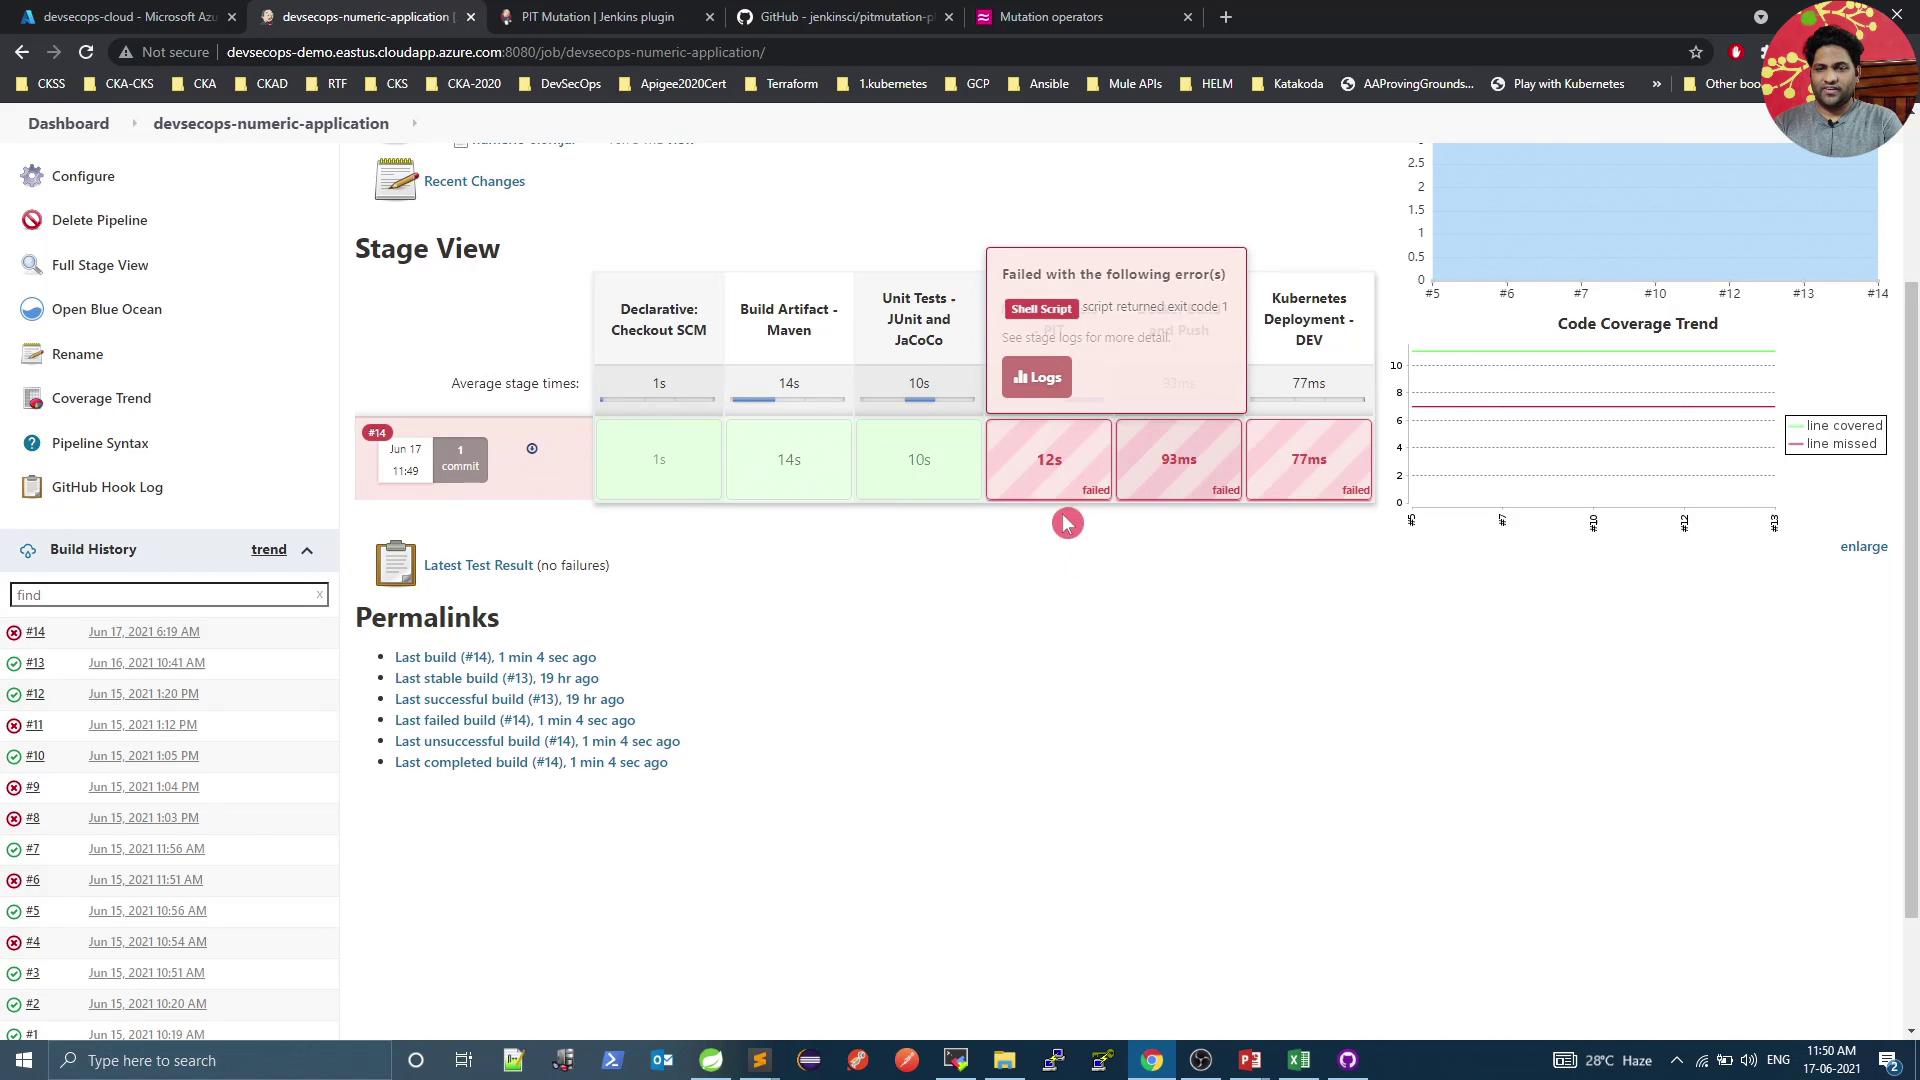
  2. Updating the Jenkinsfile
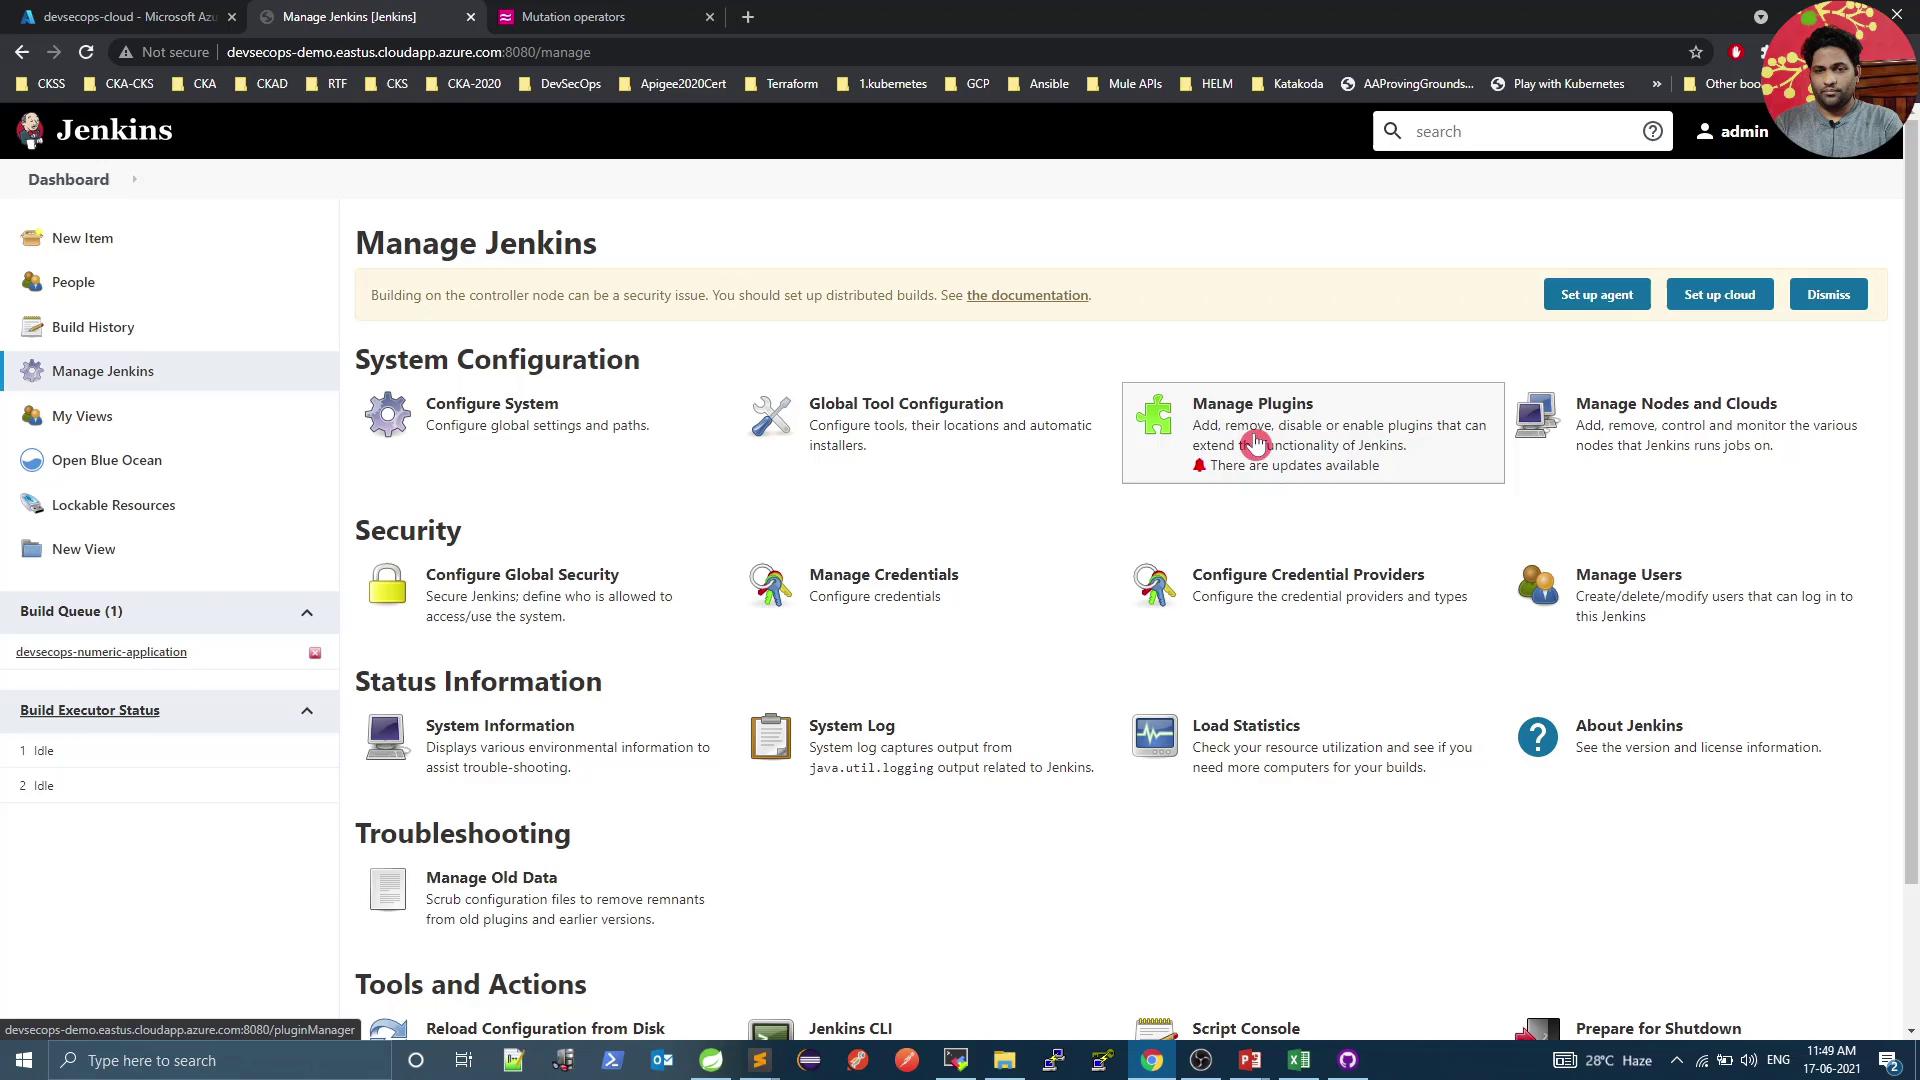
  3. Installing and configuring the PIT plugin in Jenkins
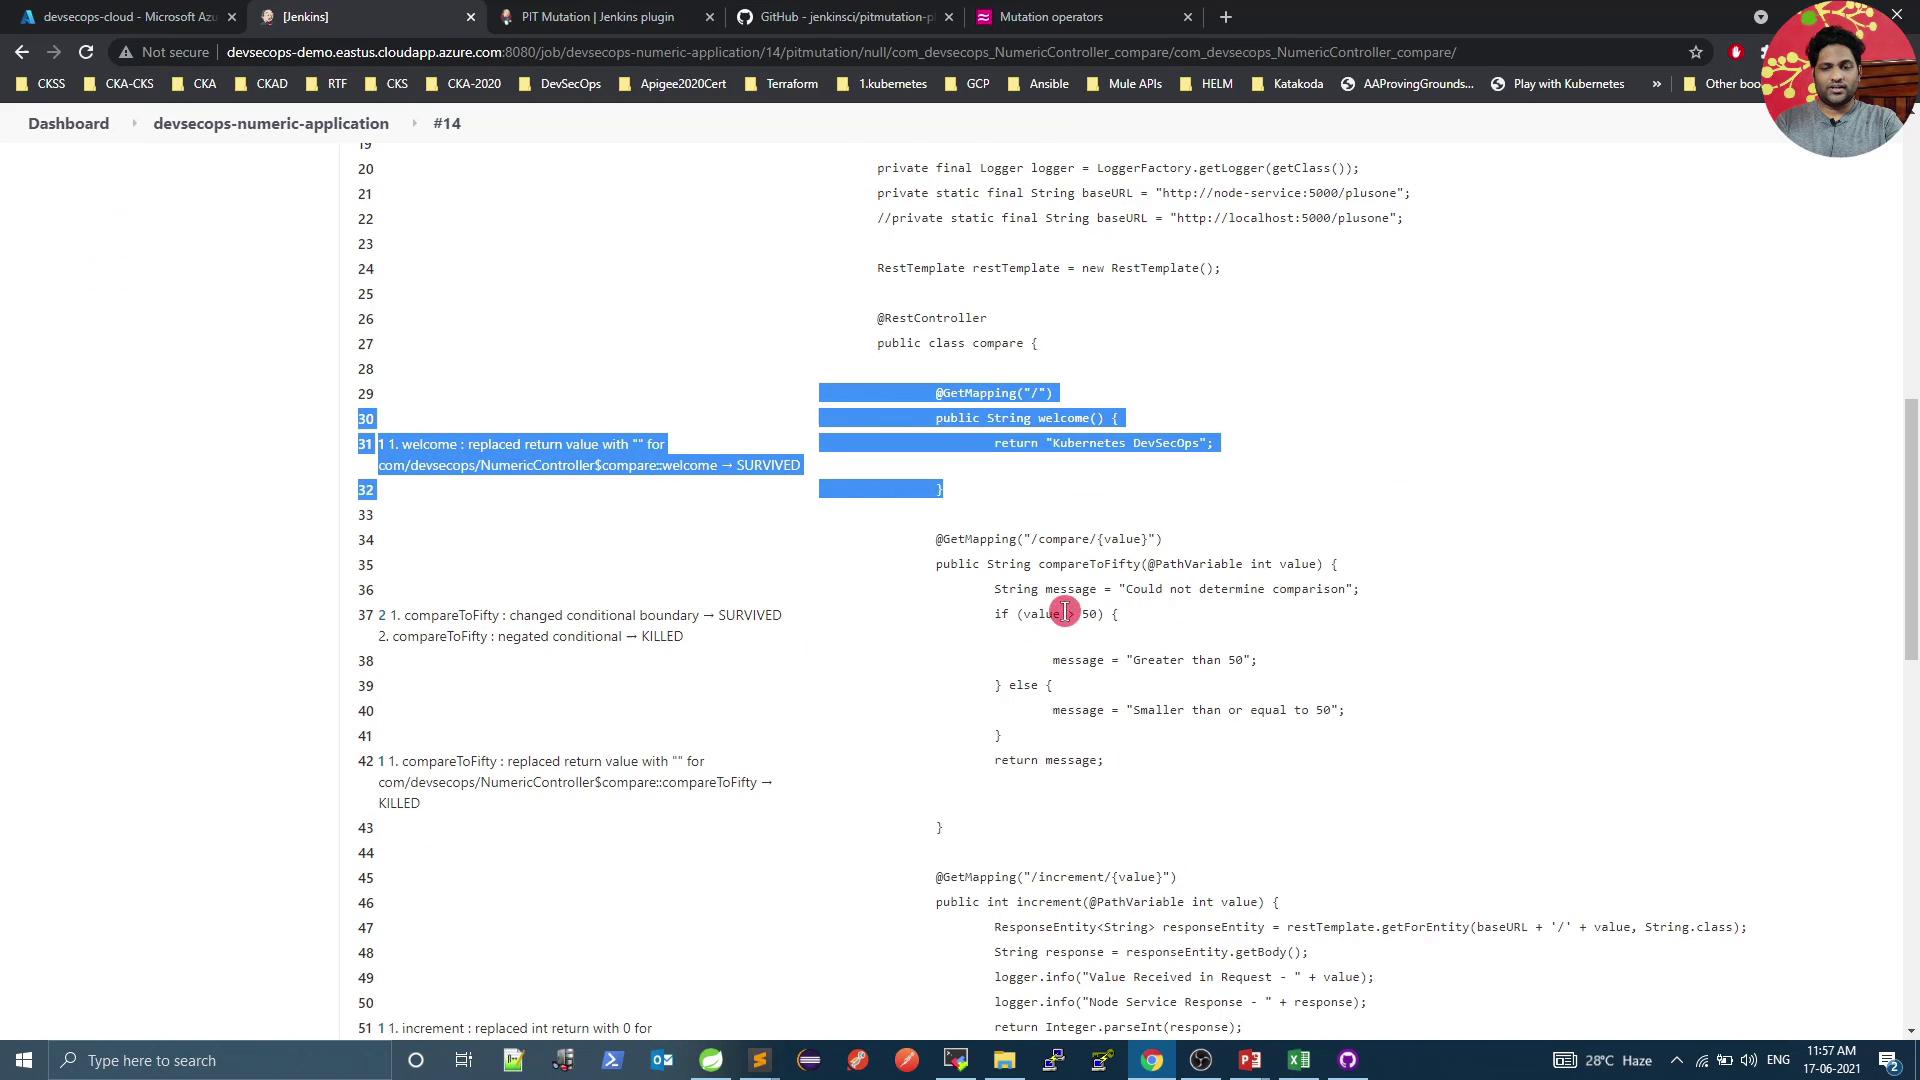
  4. Running the pipeline and diagnosing failures
  5. Inspecting coverage and mutation results
  6. Strengthening unit tests to kill mutations
  7. Re-running tests and accessing reports

Table of Contents

  1. Configure Maven POM
  2. Update Jenkinsfile for Mutation Tests
  3. Install PIT Plugin in Jenkins
  4. Run Pipeline & Analyze Failures
  5. Inspect Coverage & Mutation Reports
  6. Understanding PIT Mutators
  7. Improve Tests to Kill Mutations
  8. Re-Run Mutation Tests
  9. Access Reports on Jenkins Agent

1. Configure Maven POM

Open your pom.xml and ensure you have Spring Boot and JaCoCo configured. Then add the PIT plugin:

<build>
  <plugins>
    <!-- 1. Spring Boot Maven Plugin -->
    <plugin>
      <groupId>org.springframework.boot</groupId>
      <artifactId>spring-boot-maven-plugin</artifactId>
    </plugin>

    <!-- 2. JaCoCo for Code Coverage -->
    <plugin>
      <groupId>org.jacoco</groupId>
      <artifactId>jacoco-maven-plugin</artifactId>
      <version>0.8.5</version>
      <goals>
        <goal>prepare-agent</goal>
      </goals>
      <executions>
        <execution>
          <id>report</id>
          <phase>test</phase>
          <goals>
            <goal>report</goal>
          </goals>
        </execution>
      </executions>
    </plugin>

    <!-- 3. PIT Mutation Testing Plugin -->
    <plugin>
      <groupId>org.pitest</groupId>
      <artifactId>pitest-maven</artifactId>
      <version>1.5.0</version>
      <dependencies>
        <dependency>
          <groupId>org.pitest</groupId>
          <artifactId>pitest-junit5-plugin</artifactId>
          <version>0.12</version>
        </dependency>
      </dependencies>
      <configuration>
        <mutationThreshold>70</mutationThreshold>
        <outputFormats>
          <outputFormat>XML</outputFormat>
          <outputFormat>HTML</outputFormat>
        </outputFormats>
      </configuration>
    </plugin>
  </plugins>
</build>

Note

The <mutationThreshold> of 70% fails the build if the mutation score is below 70%. Reports are generated under target/pit-reports.


2. Update Jenkinsfile for Mutation Tests

Add a dedicated stage for PIT after unit tests. Use this example pipeline:

pipeline {
  agent any
  stages {
    stage('Unit Tests - JUnit & JaCoCo') {
      steps {
        sh 'mvn clean package -DskipTests=true'
        archive 'target/*.jar'
      }
    }
    stage('Mutation Tests - PIT') {
      steps {
        sh 'mvn org.pitest:pitest-maven:mutationCoverage'
      }
      post {
        always {
          pitmutation mutationStatsFile: '**/target/pit-reports/**/mutations.xml'
        }
      }
    }
    stage('Docker Build & Push') {
      steps {
        withDockerRegistry([credentialsId: 'docker-hub', url: '']) {
          sh 'docker build -t myorg/app:"$GIT_COMMIT" .'
          sh 'docker push myorg/app:"$GIT_COMMIT"'
        }
      }
    }
    stage('Kubernetes Deployment - DEV') {
      steps {
        // Deployment steps
      }
    }
  }
}
StageDescriptionCommand
Unit Tests - JUnit & JaCoCoCompile and generate coverage datamvn clean package -DskipTests=true
Mutation Tests - PITRun mutation testingmvn org.pitest:pitest-maven:mutationCoverage
Docker Build & PushBuild and push Docker imagedocker build / docker push
Kubernetes Deployment - DEVDeploy to development clusterCustom kubectl or Helm commands

3. Install PIT Plugin in Jenkins

  1. Go to Manage Jenkins → Manage Plugins
  2. Search for PIT Mutation Plugin and install
  3. Configure the report path:
    target/pit-reports/**/mutations.xml
    

The image shows the "Manage Jenkins" dashboard, displaying various configuration and management options for Jenkins, a popular automation server.


4. Run Pipeline & Analyze Failures

Trigger the Jenkins pipeline. If the mutation score is below threshold, the stage will fail:

The image shows a Jenkins pipeline dashboard with a stage view, indicating a failed build due to a shell script error. It includes build history, average stage times, and a code coverage trend graph.

>>> Mutators
Generated 2 Killed 1 (50%)
KILLED 1 SURVIVED 1
[ERROR] Mutation score of 40 is below threshold of 70

Warning

A low mutation score indicates untested code paths. Strengthen your tests to catch mutated behavior.


5. Inspect Coverage & Mutation Reports

Even on failure, Jenkins archives test reports. View the JaCoCo summary:

The image shows a Jenkins build page for "Build #14" with details such as build artifacts, changes, and a Jacoco coverage summary. The coverage summary includes metrics like instruction, branch, complexity, line, method, and class coverage.

Click PIT Mutation Report for detailed mutation stats:

The image shows a Jenkins dashboard with details of a mutation testing report, including active mutators and tests examined. It also displays a list of mutators like BOOLEAN_FALSE_RETURN and CONDITIONALS_BOUNDARY_MUTATOR.


6. Understanding PIT Mutators

PIT applies mutators that change your code to test the effectiveness of your tests.

Example: Conditional boundary mutator

// Original
if (a < b) { … }

// Mutated
if (a <= b) { … }

Example: Return values mutator

// Original
public Object foo() {
  return new Object();
}

// Mutated
public Object foo() {
  new Object();
  return null;
}

Surviving mutations imply missing assertions in your tests.


7. Improve Tests to Kill Mutations

Consider this REST controller:

The image shows a screenshot of a code editor with Java code, including REST controller methods and mutation testing results. There is also a browser window with multiple tabs open at the top.

@RestController
public class NumericController {
  @GetMapping("/")
  public String welcome() {
    return "Kubernetes DevSecOps";
  }

  @GetMapping("/compare/{value}")
  public String compareToFifty(@PathVariable int value) {
    if (value > 50) {
      return "Greater than 50";
    } else {
      return "Smaller than or equal to 50";
    }
  }
}

Existing tests only checked status codes, allowing some mutations to survive.

Update your tests to assert response content:

@RunWith(SpringRunner.class)
@SpringBootTest
@AutoConfigureMockMvc
public class NumericApplicationTests {

  @Autowired
  private MockMvc mockMvc;

  @Test
  public void smallerThanOrEqualToFiftyMessage() throws Exception {
    mockMvc.perform(get("/compare/50"))
      .andExpect(status().isOk())
      .andExpect(content().string("Smaller than or equal to 50"));
  }

  @Test
  public void greaterThanFiftyMessage() throws Exception {
    mockMvc.perform(get("/compare/51"))
      .andExpect(status().isOk())
      .andExpect(content().string("Greater than 50"));
  }

  @Test
  public void welcomeMessage() throws Exception {
    mockMvc.perform(get("/"))
      .andExpect(status().isOk())
      .andExpect(content().string("Kubernetes DevSecOps"));
  }
}

8. Re-Run Mutation Tests

Re-trigger the pipeline. A successful mutation stage should look like:

> Generated 5 mutations Killed 4 (80%)
> Ran 4 tests (2.0 tests per mutation)
[INFO] BUILD SUCCESSFUL

You’ll see an 80% mutation score and full HTML reports.


9. Access Reports on Jenkins Agent

On your Jenkins server:

sudo -i
cd /var/lib/jenkins/workspace/devsecops-numeric-application/target/pit-reports
ls
# index.html  mutations.xml

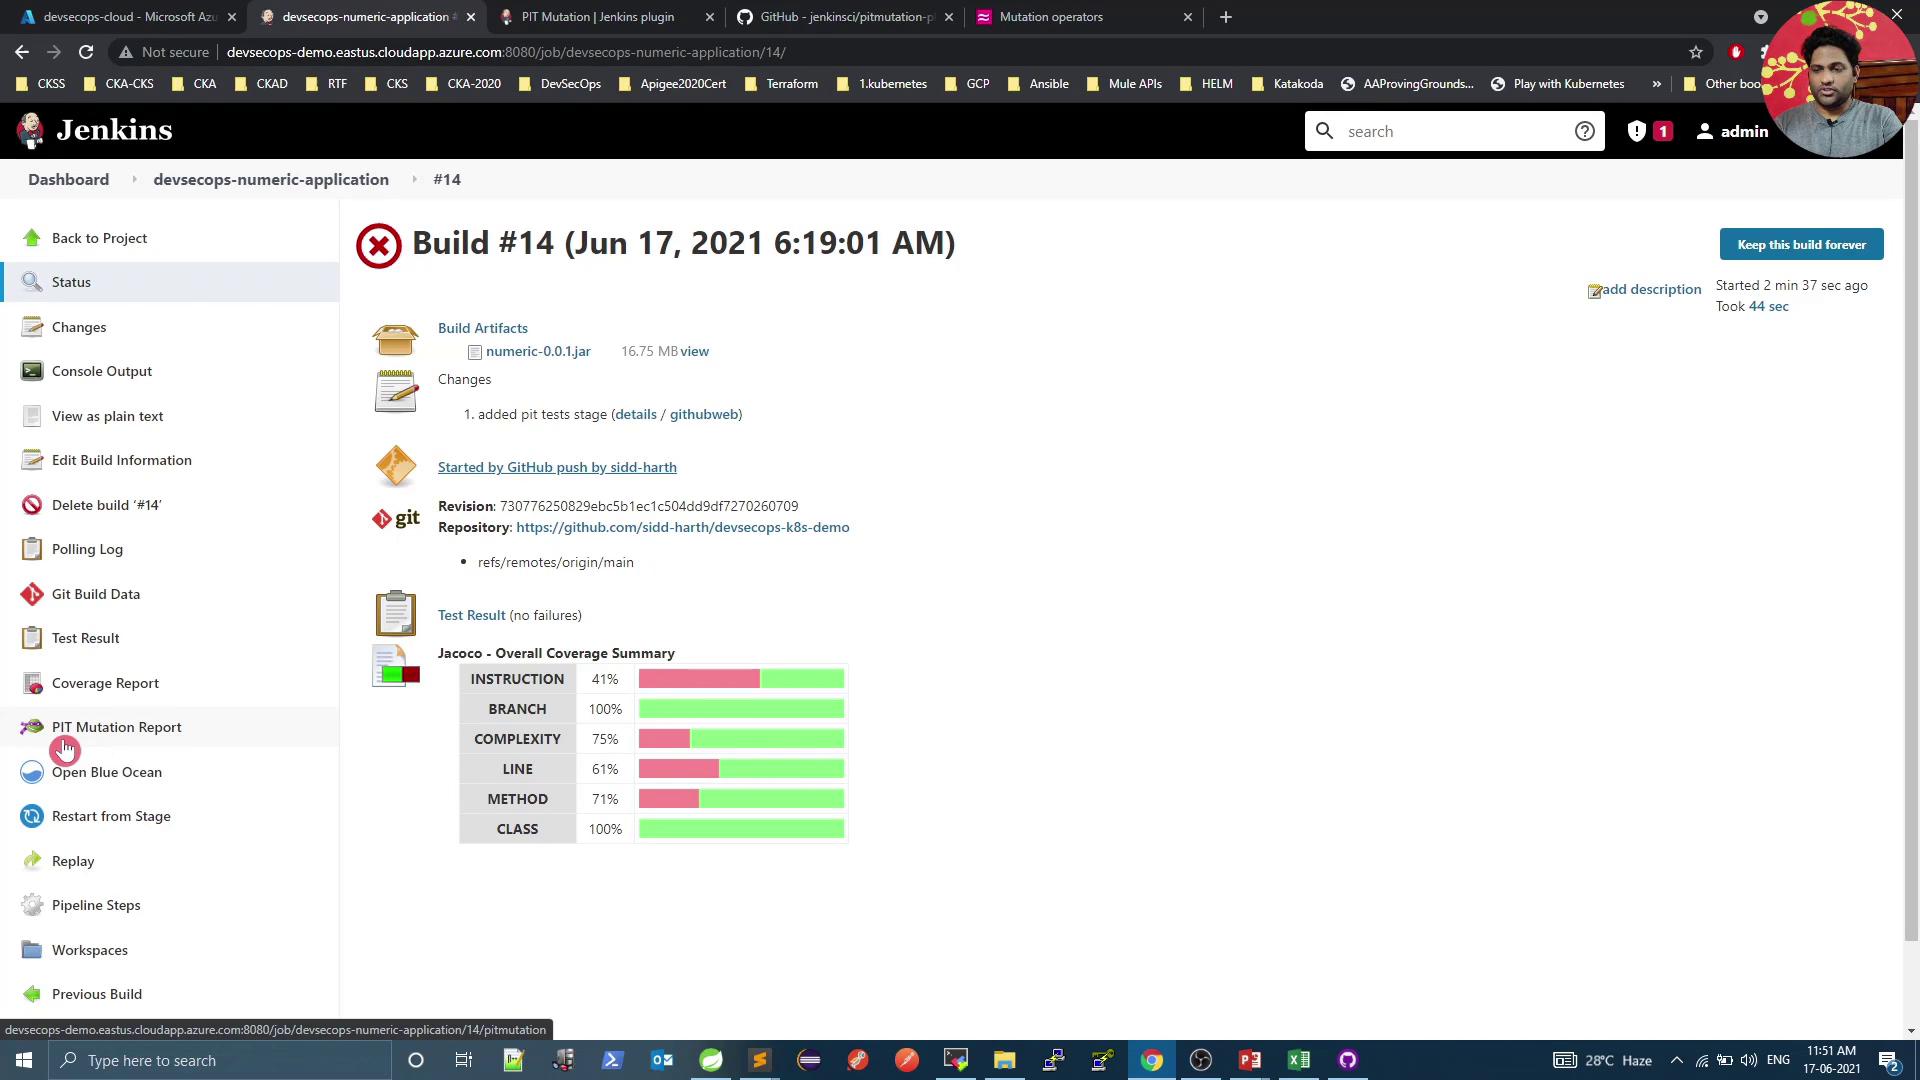
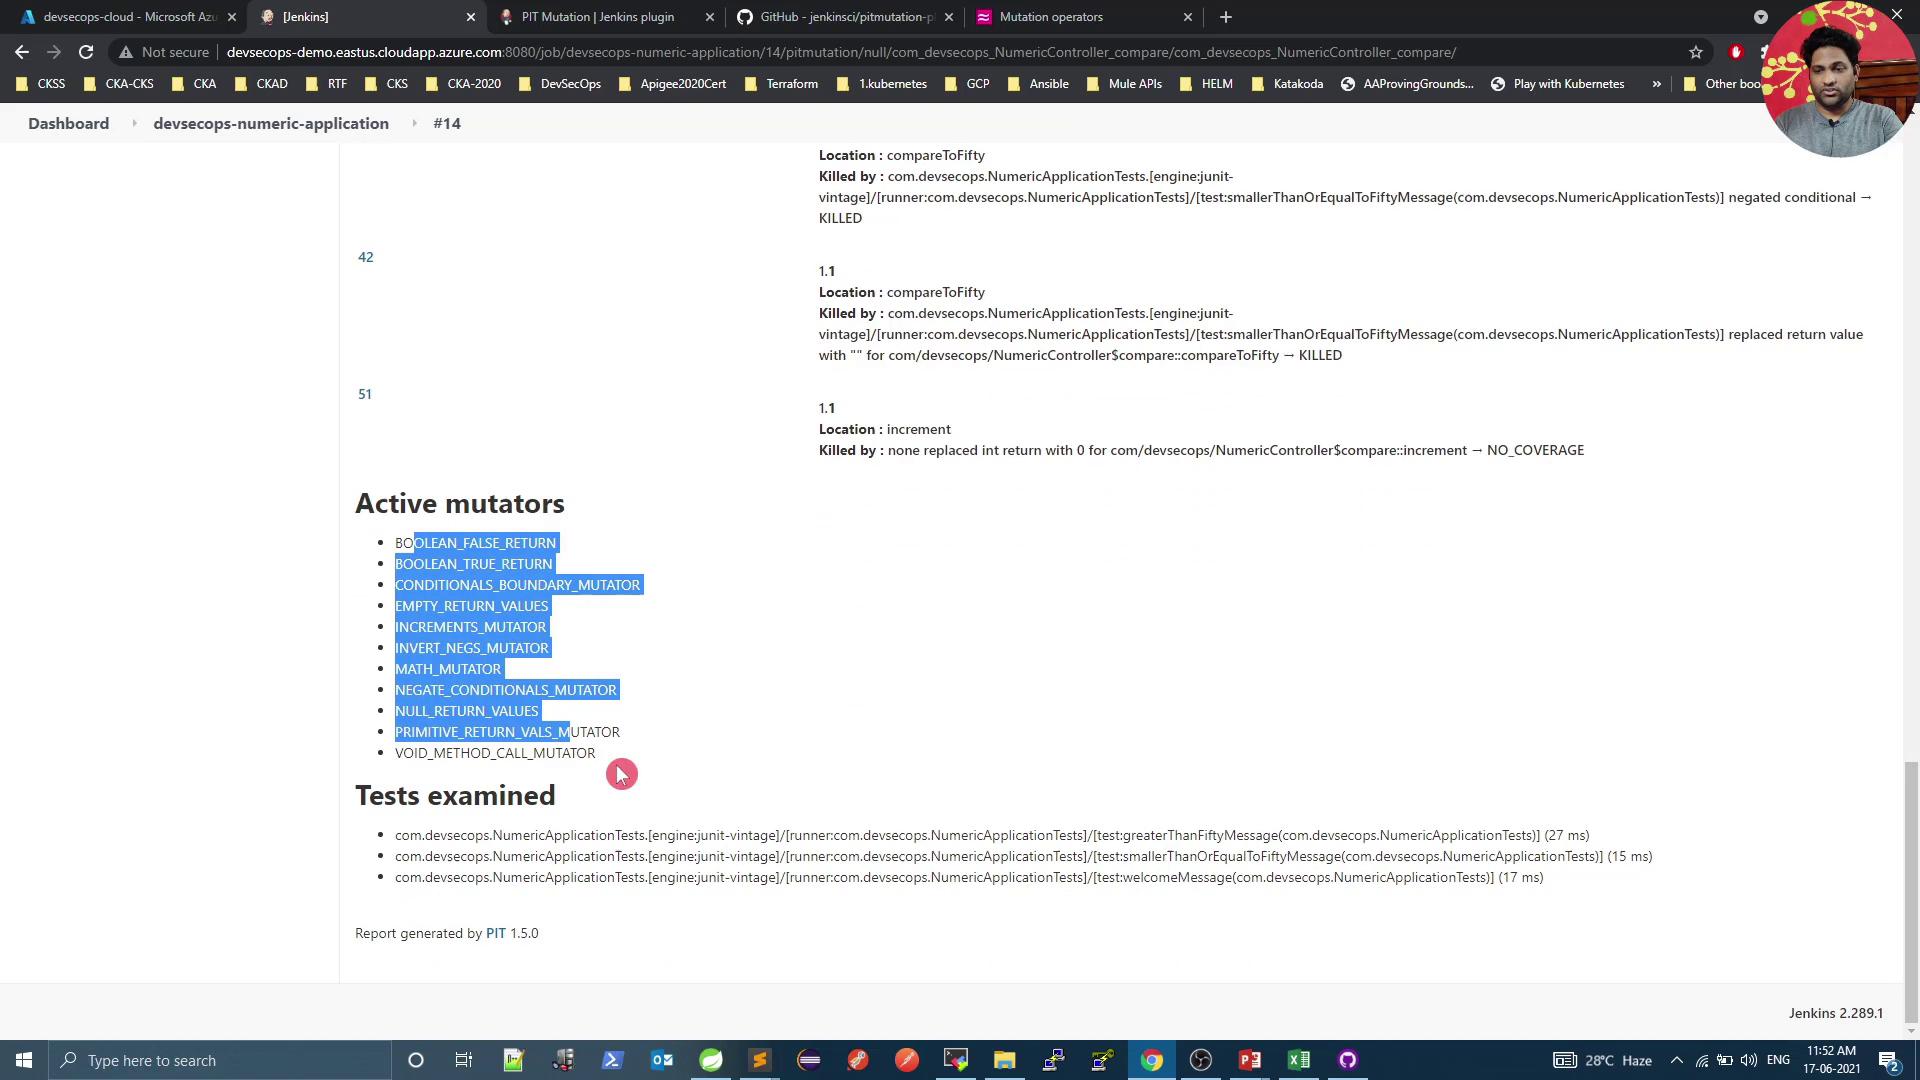
Open index.html in a browser to explore the complete mutation report.


Congratulations! You’ve successfully integrated PIT mutation testing, configured Jenkins for automated reporting, identified weak spots, and enhanced your tests for robust coverage.


Watch Video

Watch video content

Practice Lab

Practice lab

Previous
Mutation Tests PIT Basics