What Is Mutation Testing?
Mutation testing introduces small, deliberate changes—mutations—into your application code to validate the effectiveness of your tests. After each mutation, the code is recompiled and your existing tests are run against these altered versions. Two outcomes are possible:- Mutation killed: A test fails, indicating it caught the mutation.
- Mutation survived: All tests pass, highlighting a potential blind spot.
Mutation testing doesn’t replace unit testing—it complements it. Use mutation score alongside line coverage for a fuller picture of test quality.
Why Use Mutation Testing Over Line Coverage?
Traditional tools report which lines were executed during tests, but they can’t tell if tests actually validate the logic. Mutation testing fills that gap by ensuring that tests fail when the code is faulty.- Line coverage checks execution.
- Mutation testing checks verification.
Getting Started with PIT
PIT (Pitest) is a leading mutation testing tool for Java. To integrate PIT into your Maven-based Spring Boot project:- Add the PIT plugin to your
pom.xml: - Run PIT:
- Inspect the HTML report in
target/pit-reports/YYYYMMDDHHMM/index.html.
Common Mutation Operators
| Operator | Description | Example |
|---|---|---|
| Arithmetic Replacement | Replaces +, -, *, / with alternatives | a + b → a - b |
| Conditional Boundary | Flips relational operators | if (x > y) → if (x <= y) |
| Return Value | Changes method return values | return true; → return false; |
| Negate Conditional | Inverts boolean conditions | if (flag) → if (!flag) |
Reviewing the PIT HTML Report
After running mutation testing, open the generated HTML report: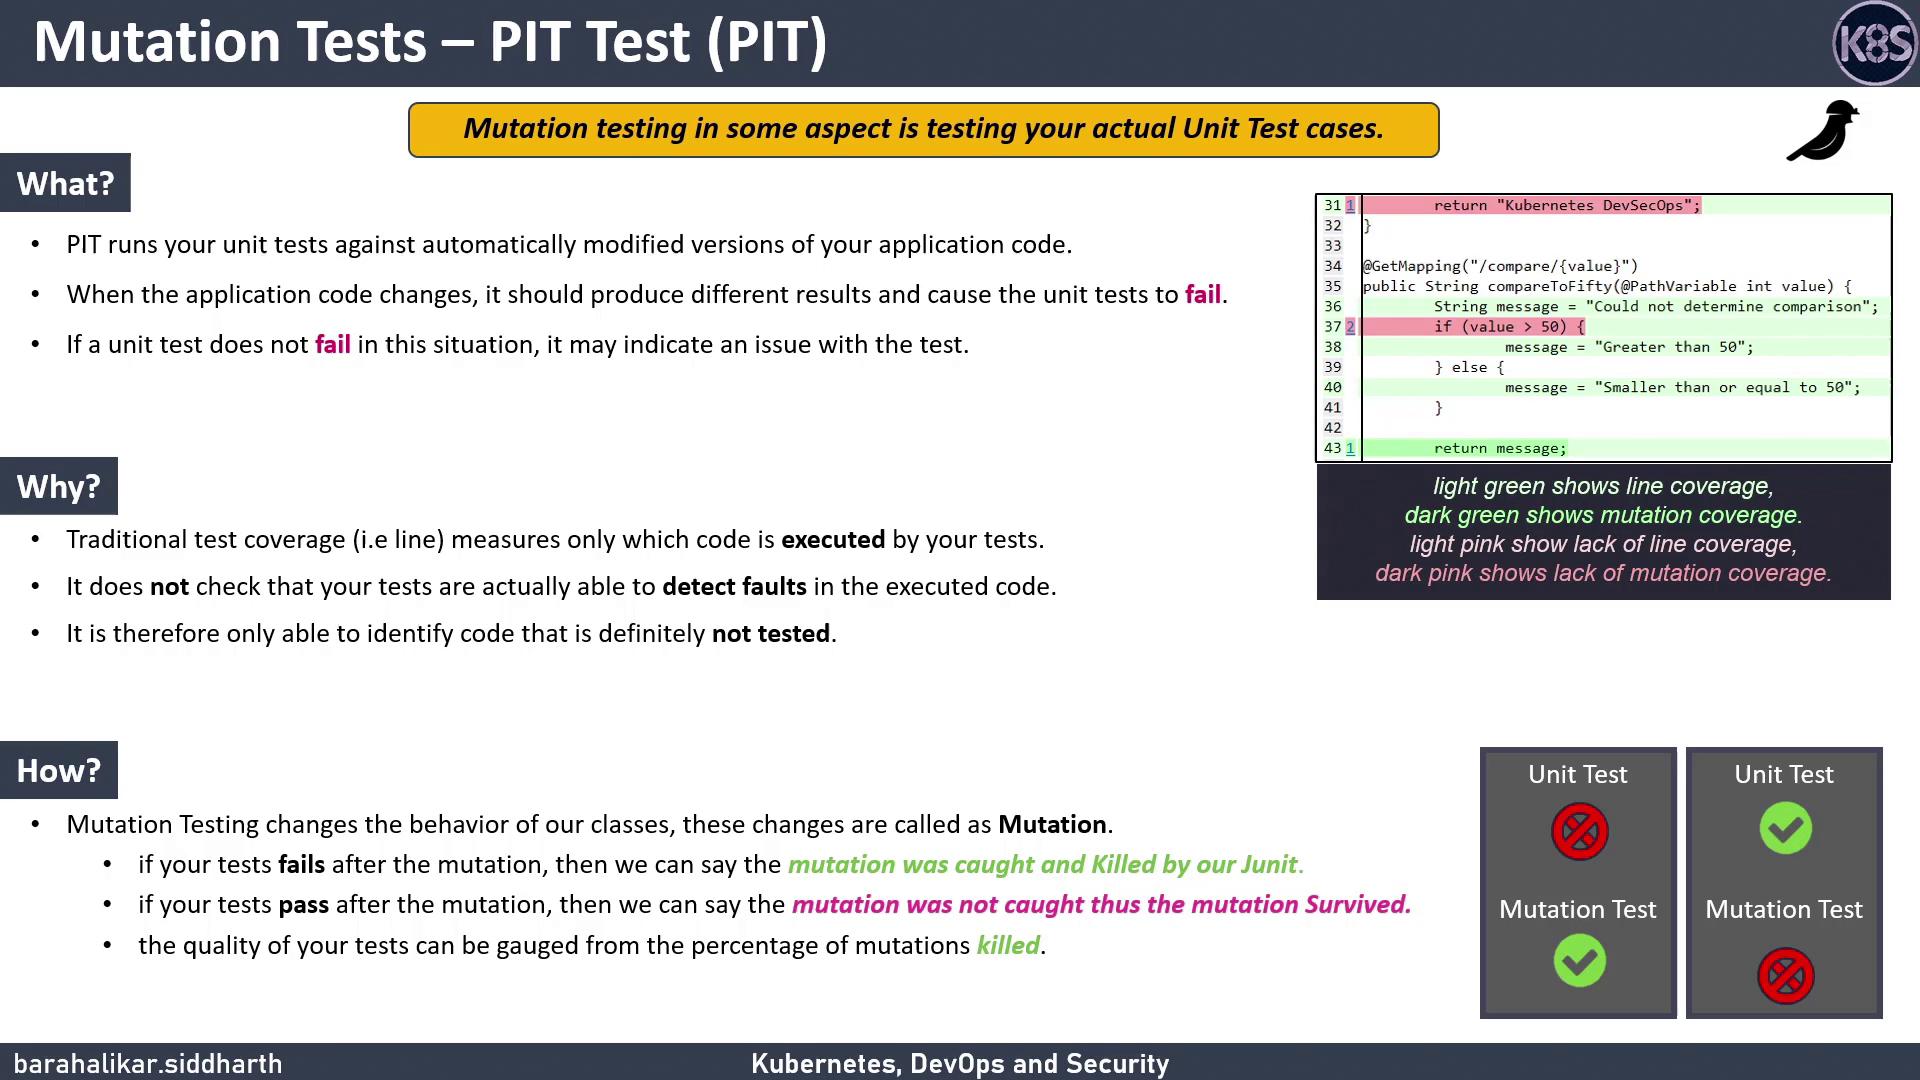
- Overview: Killed vs. survived mutations and overall score.
- Source view: Mutated code highlighted inline.
- Test results: Failing tests for each surviving mutant.
Mutation testing can significantly increase build time. For large codebases, run PIT in incremental mode or focus on key modules first.
Next Steps
In the upcoming demo, we’ll:- Integrate PIT into a live Spring Boot application.
- Execute mutation tests via Maven.
- Analyze surviving mutations to improve test cases.