DevSecOps - Kubernetes DevOps & Security

DevSecOps Pipeline

Demo SonarQube Quality Gate

In this tutorial, we’ll show you how to integrate SonarQube quality gates into a Jenkins pipeline so that builds automatically pass or fail based on code quality metrics. We’ll use the SonarQube Scanner for Jenkins plugin to pause the pipeline for code analysis and enforce the gate status before proceeding.

Key Benefits

  • Enforces coding standards automatically
  • Fails builds on critical issues
  • Provides real-time feedback on code smells, bugs, and vulnerabilities

Prerequisites

RequirementDetails
SonarQube Scanner for Jenkins (v2.13.1+)Installed via Manage Plugins
SonarQube instanceAccessible URL (Community, Developer, or Enterprise edition)
Jenkins webhookConfigured in SonarQube Administration → Webhooks
Jenkins credentialsSonarQube auth token added as a Secret Text credential

Note

Ensure you have administrative access in both Jenkins and SonarQube to configure plugins, credentials, and webhooks.


1. Verify SonarQube Scanner Plugin

In Jenkins, navigate to Manage Jenkins → Manage Plugins, then open the Installed tab to confirm:

The image shows the Jenkins Plugin Manager interface with the "Installed" tab open, displaying a list of installed plugins including "Credentials Plugin," "Plain Credentials Plugin," and "SonarQube Scanner for Jenkins." A person is visible in a small video call window at the top right corner.

If it’s missing, install SonarQube Scanner for Jenkins from the Available tab and restart Jenkins.


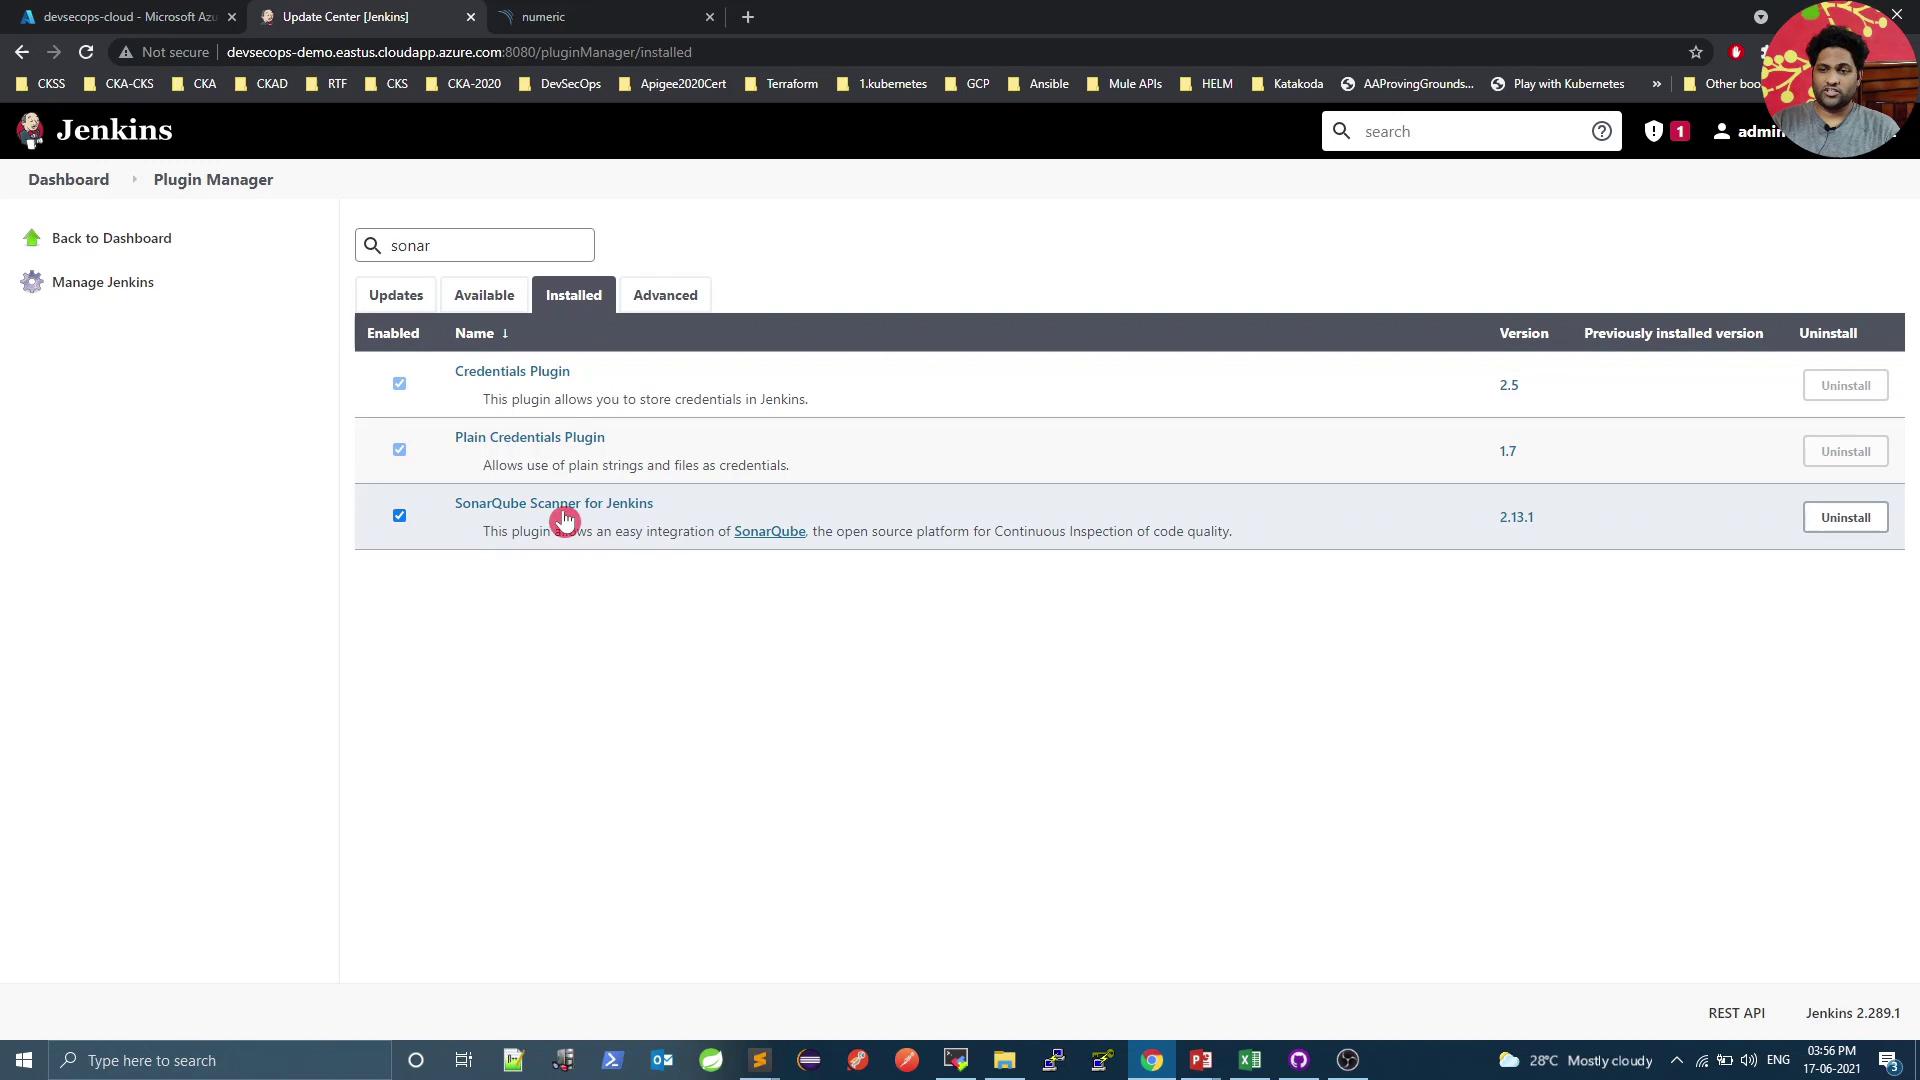
2. Configure SonarQube Server in Jenkins

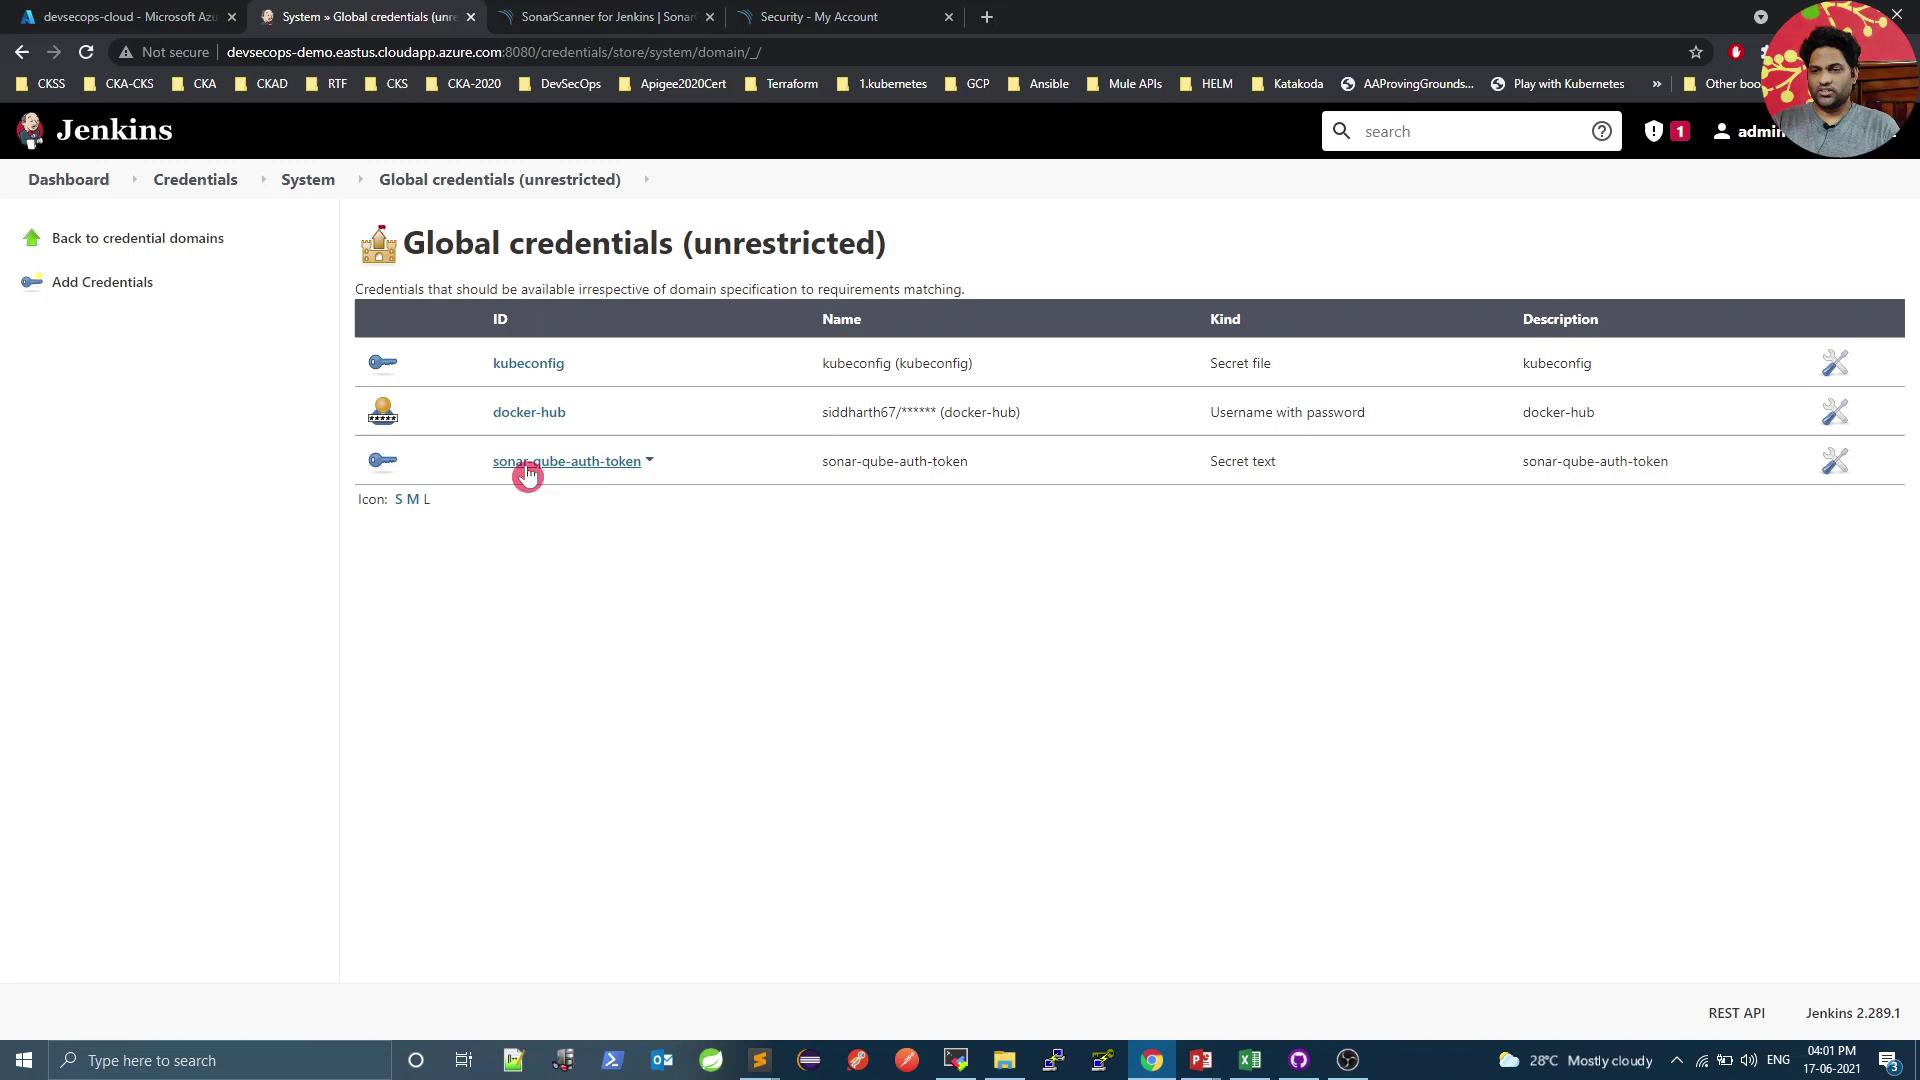
  1. In your SonarQube user profile, generate an authentication token.
  2. In Jenkins, go to Credentials → System → Global credentials and add a new Secret Text credential with your token:

The image shows a Jenkins interface displaying a list of global credentials, including kubeconfig, docker-hub, and sonar-qube-auth-token, with their respective types and descriptions.

  1. Still under Manage Jenkins → Configure System, scroll to SonarQube servers and add:

    • Name: SonarQube
    • Server URL: https://<your-sonarqube-host>
    • Server authentication token: Select your Secret Text credential

You can now review existing project gates in SonarQube. Here’s an example of a failed gate due to excessive code smells:

The image shows a SonarQube dashboard with a "Failed" quality gate status due to 14 code smells, exceeding the threshold of 12. The measures indicate no new bugs, vulnerabilities, or security hotspots, and a duplication rate of 0.0%.


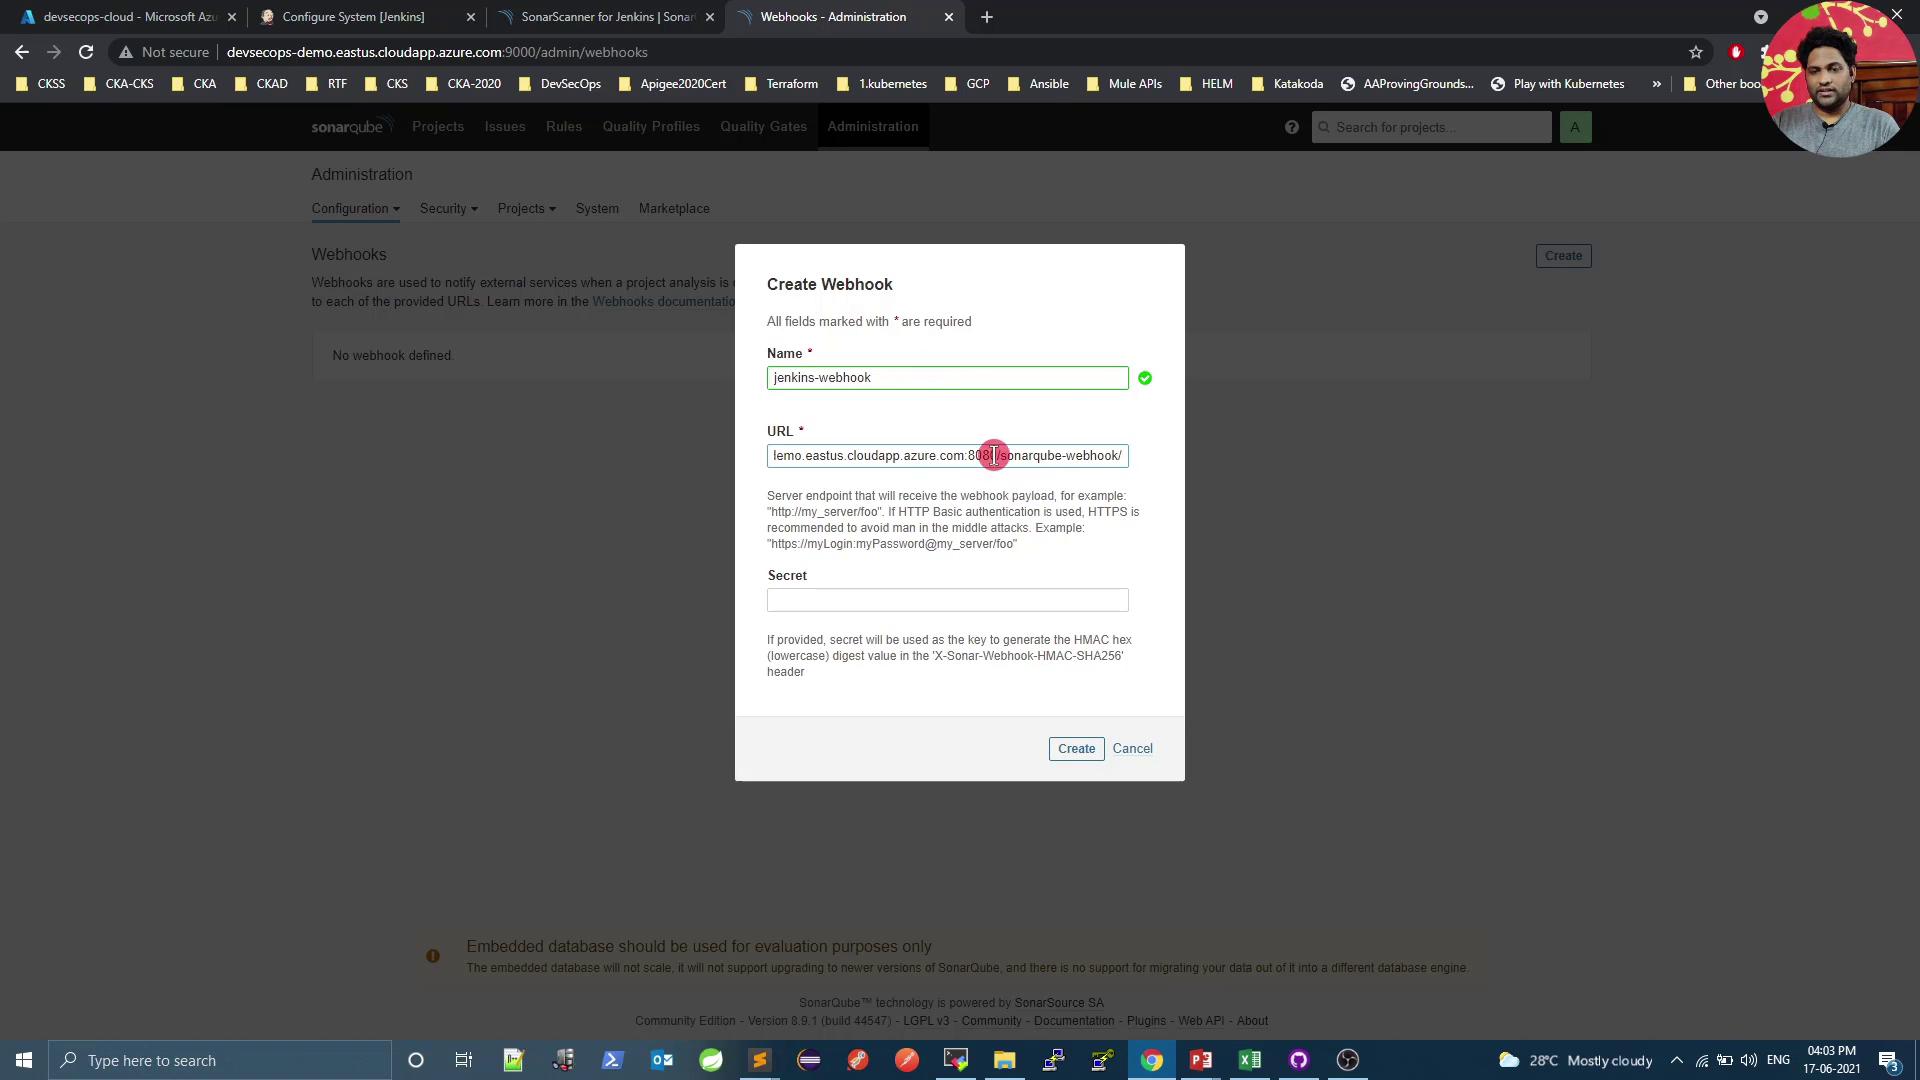
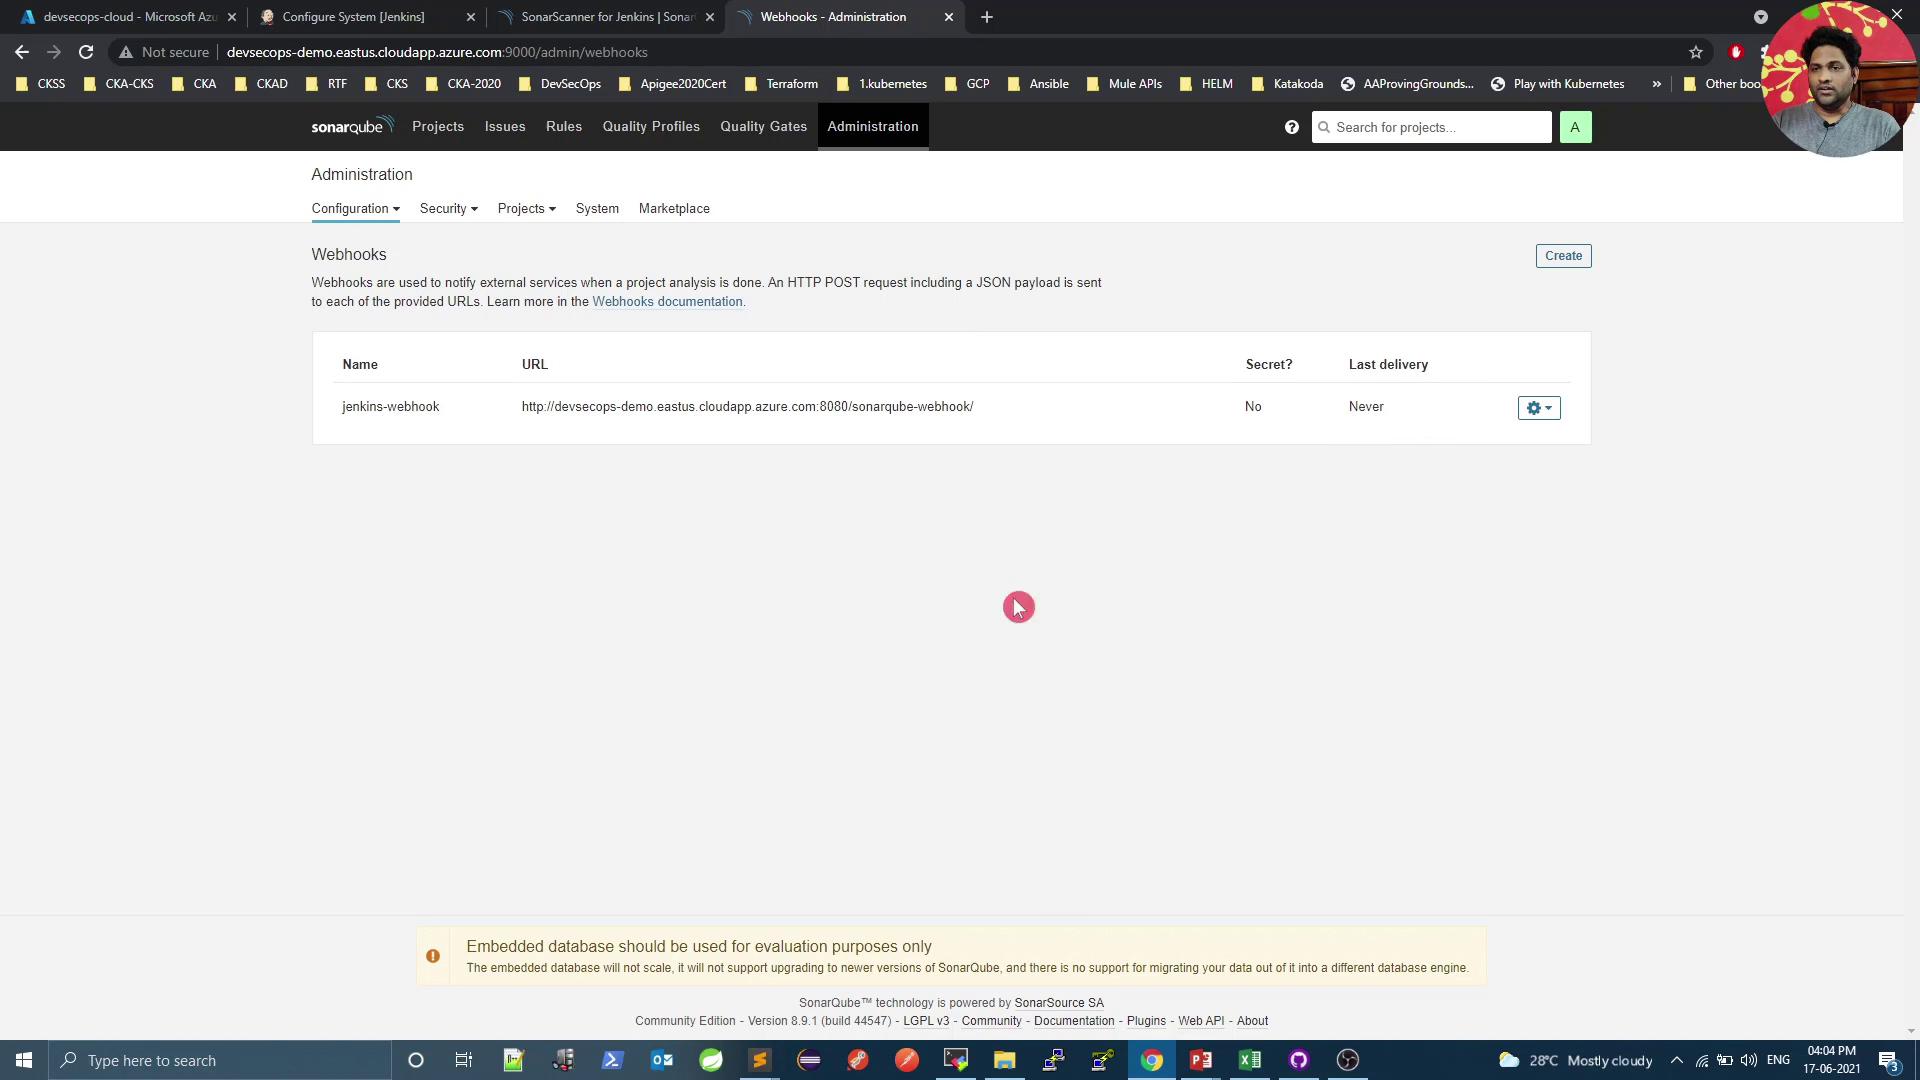
3. Add SonarQube Webhook

In SonarQube, go to Administration → Configuration → Webhooks:

  1. Name: Jenkins webhook
  2. URL: https://<your-jenkins-host>/sonarqube-webhook/
  3. (Optional) Secret if you want to secure payloads

The image shows a web interface for creating a webhook in SonarQube, with fields for the name, URL, and secret. The browser tabs and taskbar are visible, indicating a Windows operating system.

Save and verify it appears in the list:

The image shows a SonarQube administration page displaying webhook configurations, with one webhook named "jenkins-webhook" listed. The page is accessed through a browser with multiple tabs open.


4. Create Declarative Jenkins Pipeline

Place the following Jenkinsfile at the root of your repository. It:

  1. Checks out source code
  2. Runs Maven build & SonarQube analysis
  3. Waits for the quality gate result (abortPipeline: true stops the build on failure)
  4. Builds and pushes a Docker image
pipeline {
  agent any

  stages {
    stage('Checkout SCM') {
      steps {
        git url: 'https://github.com/foo/bar.git'
      }
    }

    stage('Build & Analyze') {
      steps {
        withSonarQubeEnv('SonarQube') {
          withMaven(maven: 'Maven 3.5') {
            sh 'mvn clean package sonar:sonar'
          }
        }
      }
    }

    stage('Quality Gate') {
      steps {
        timeout(time: 1, unit: 'HOURS') {
          waitForQualityGate abortPipeline: true
        }
      }
    }

    stage('Docker Build & Push') {
      steps {
        withDockerRegistry([credentialsId: 'docker-hub', url: '']) {
          sh 'docker build -t sidharth67/numeric-app:${GIT_COMMIT} .'
          sh 'docker push sidharth67/numeric-app:${GIT_COMMIT}'
        }
      }
    }
  }
}

Commit and push this file to your Git repo to trigger a new build.

The image shows a Jenkins pipeline dashboard with a stage view of various build processes, including stages like "Checkout SCM," "Build Artifact," and "Unit Tests." Some stages are marked as failed, indicated by red highlights, while others are successful, shown in green.

Warning

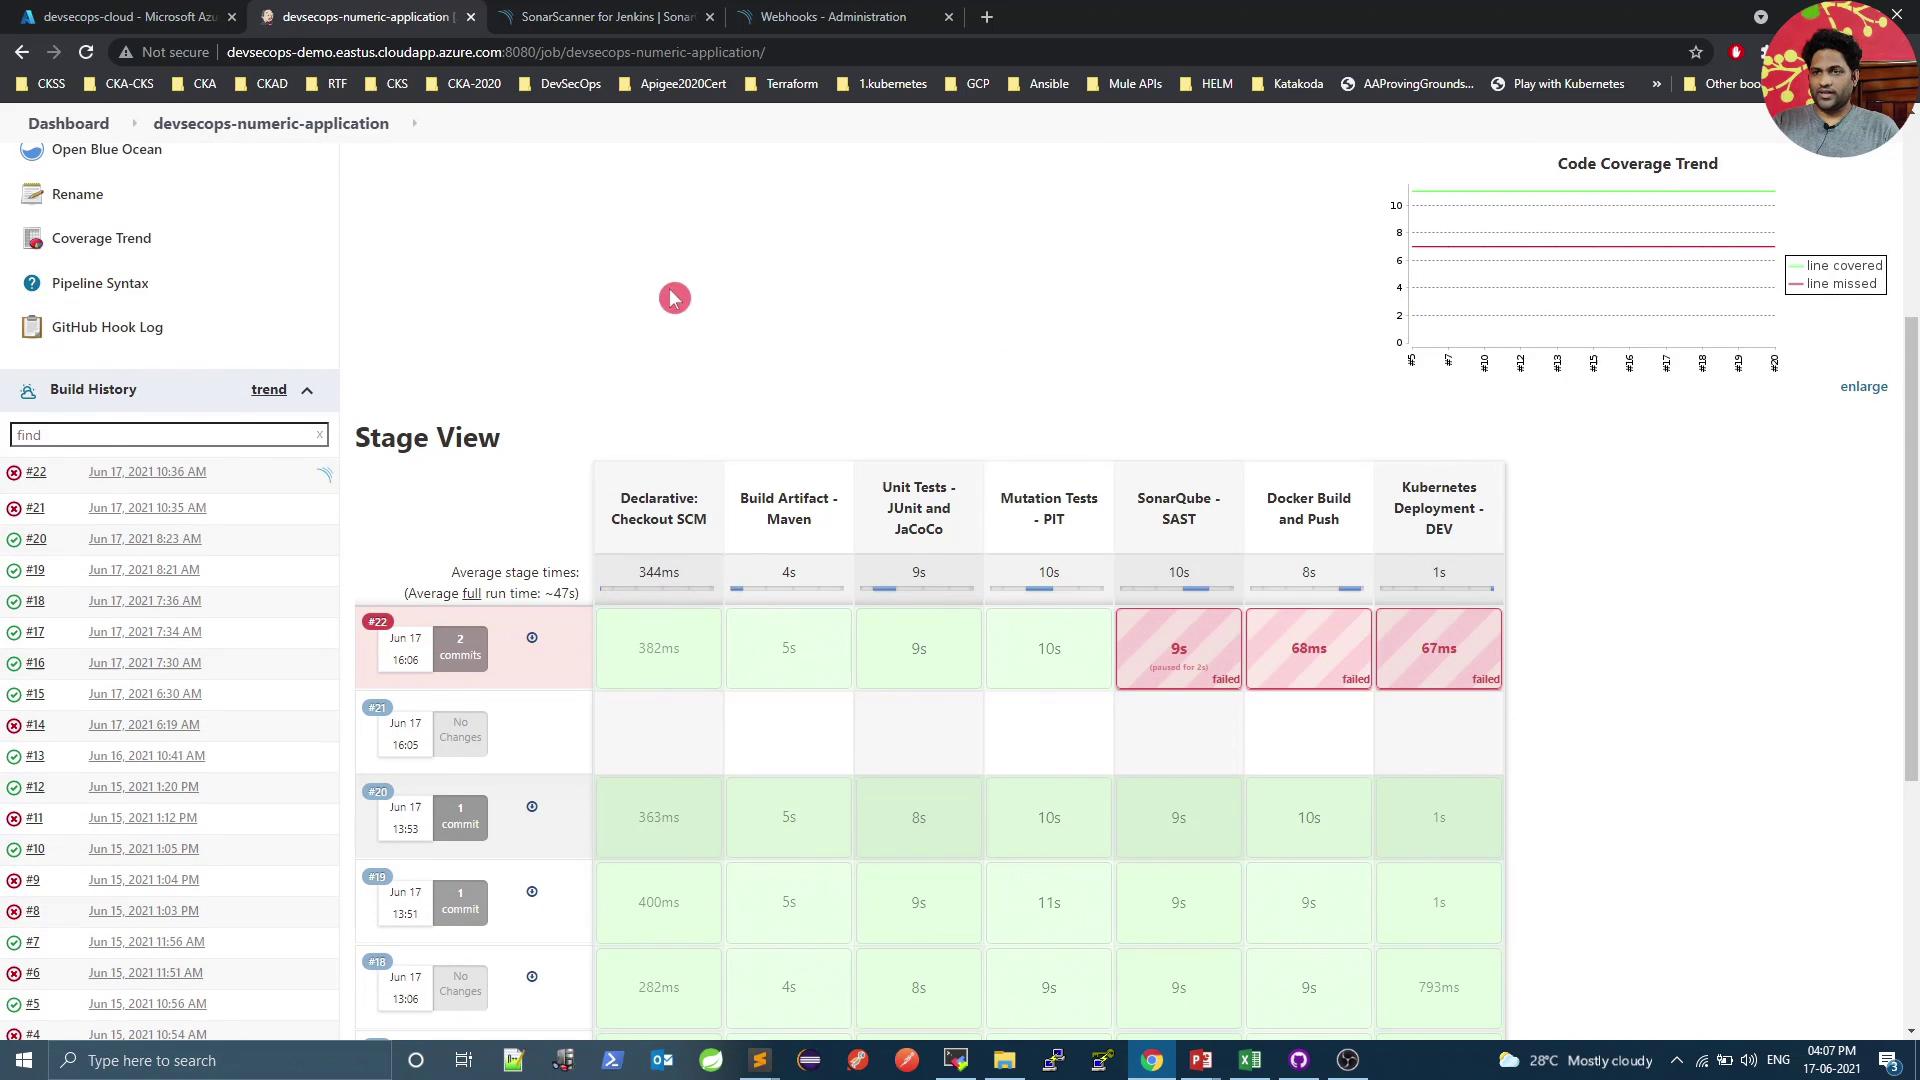
If the quality gate fails, the pipeline will abort at the Quality Gate stage. Inspect and resolve all reported issues before retrying.


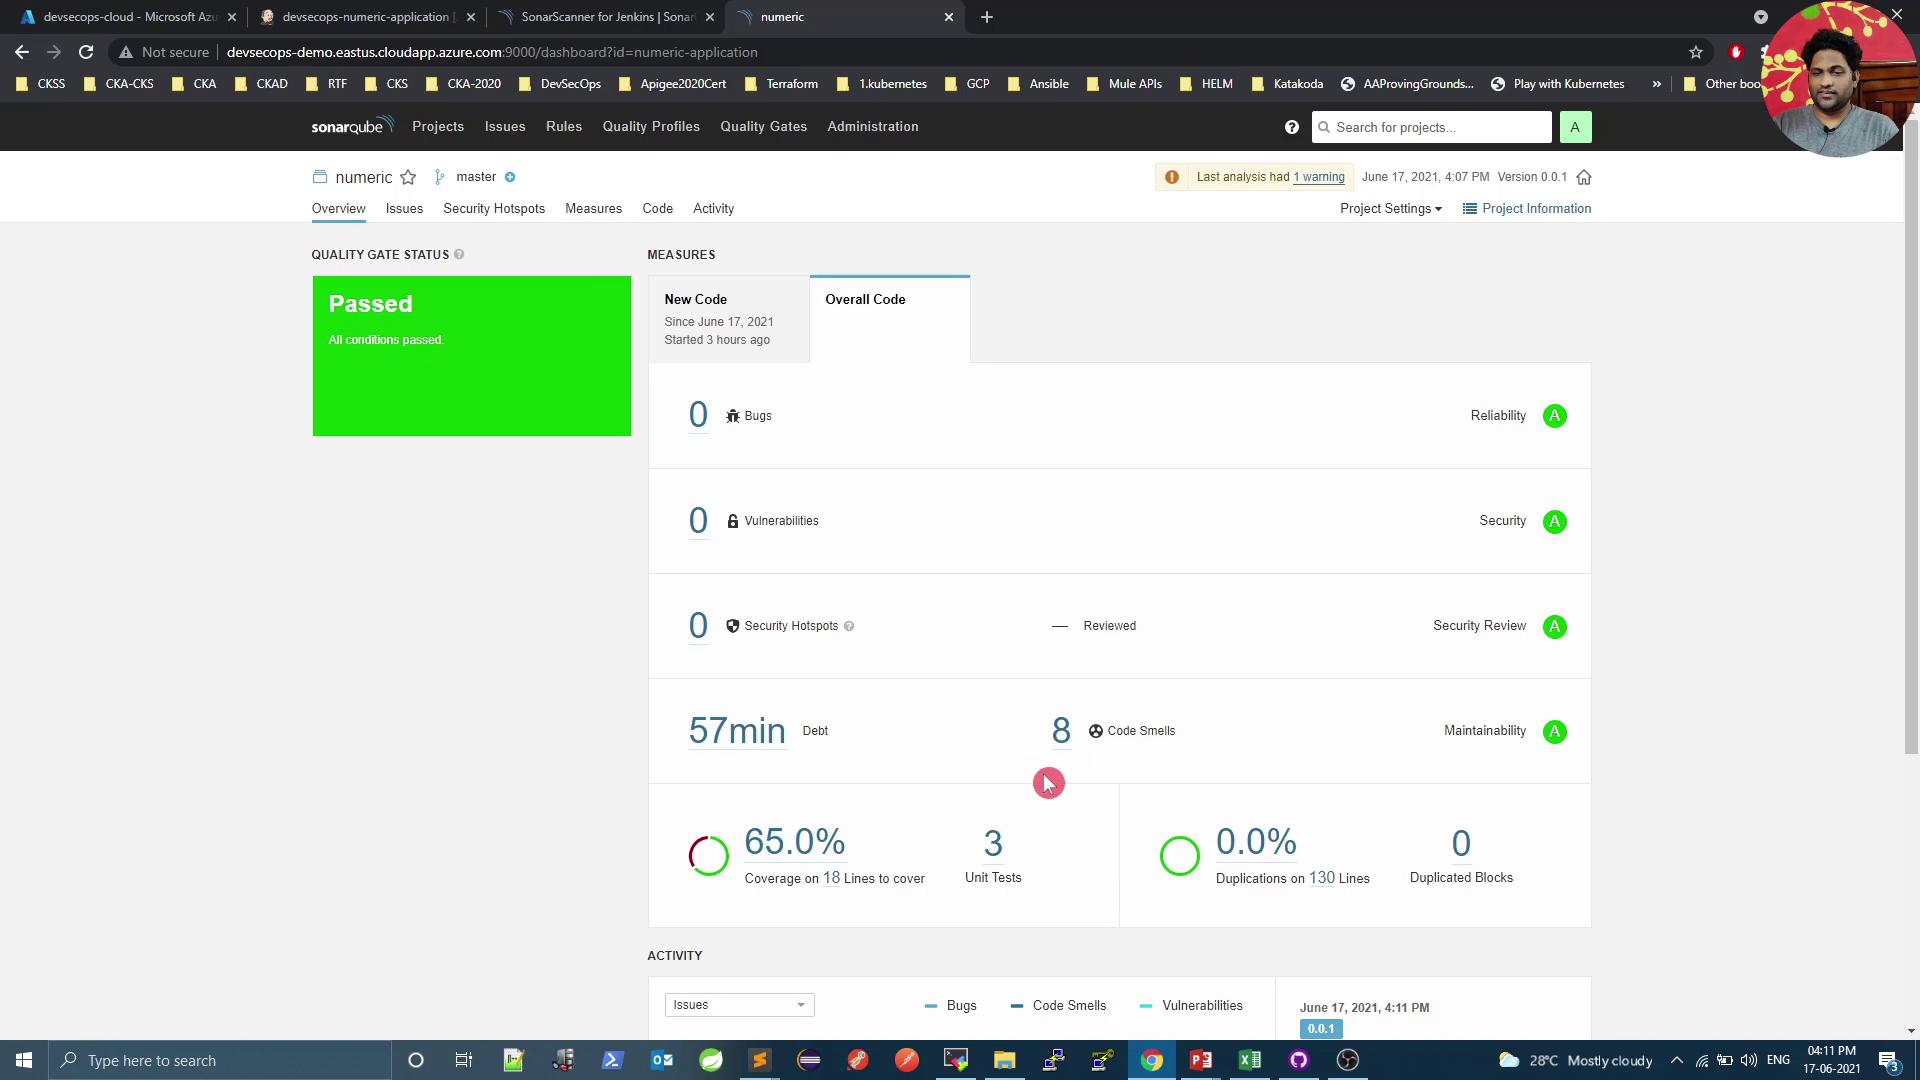
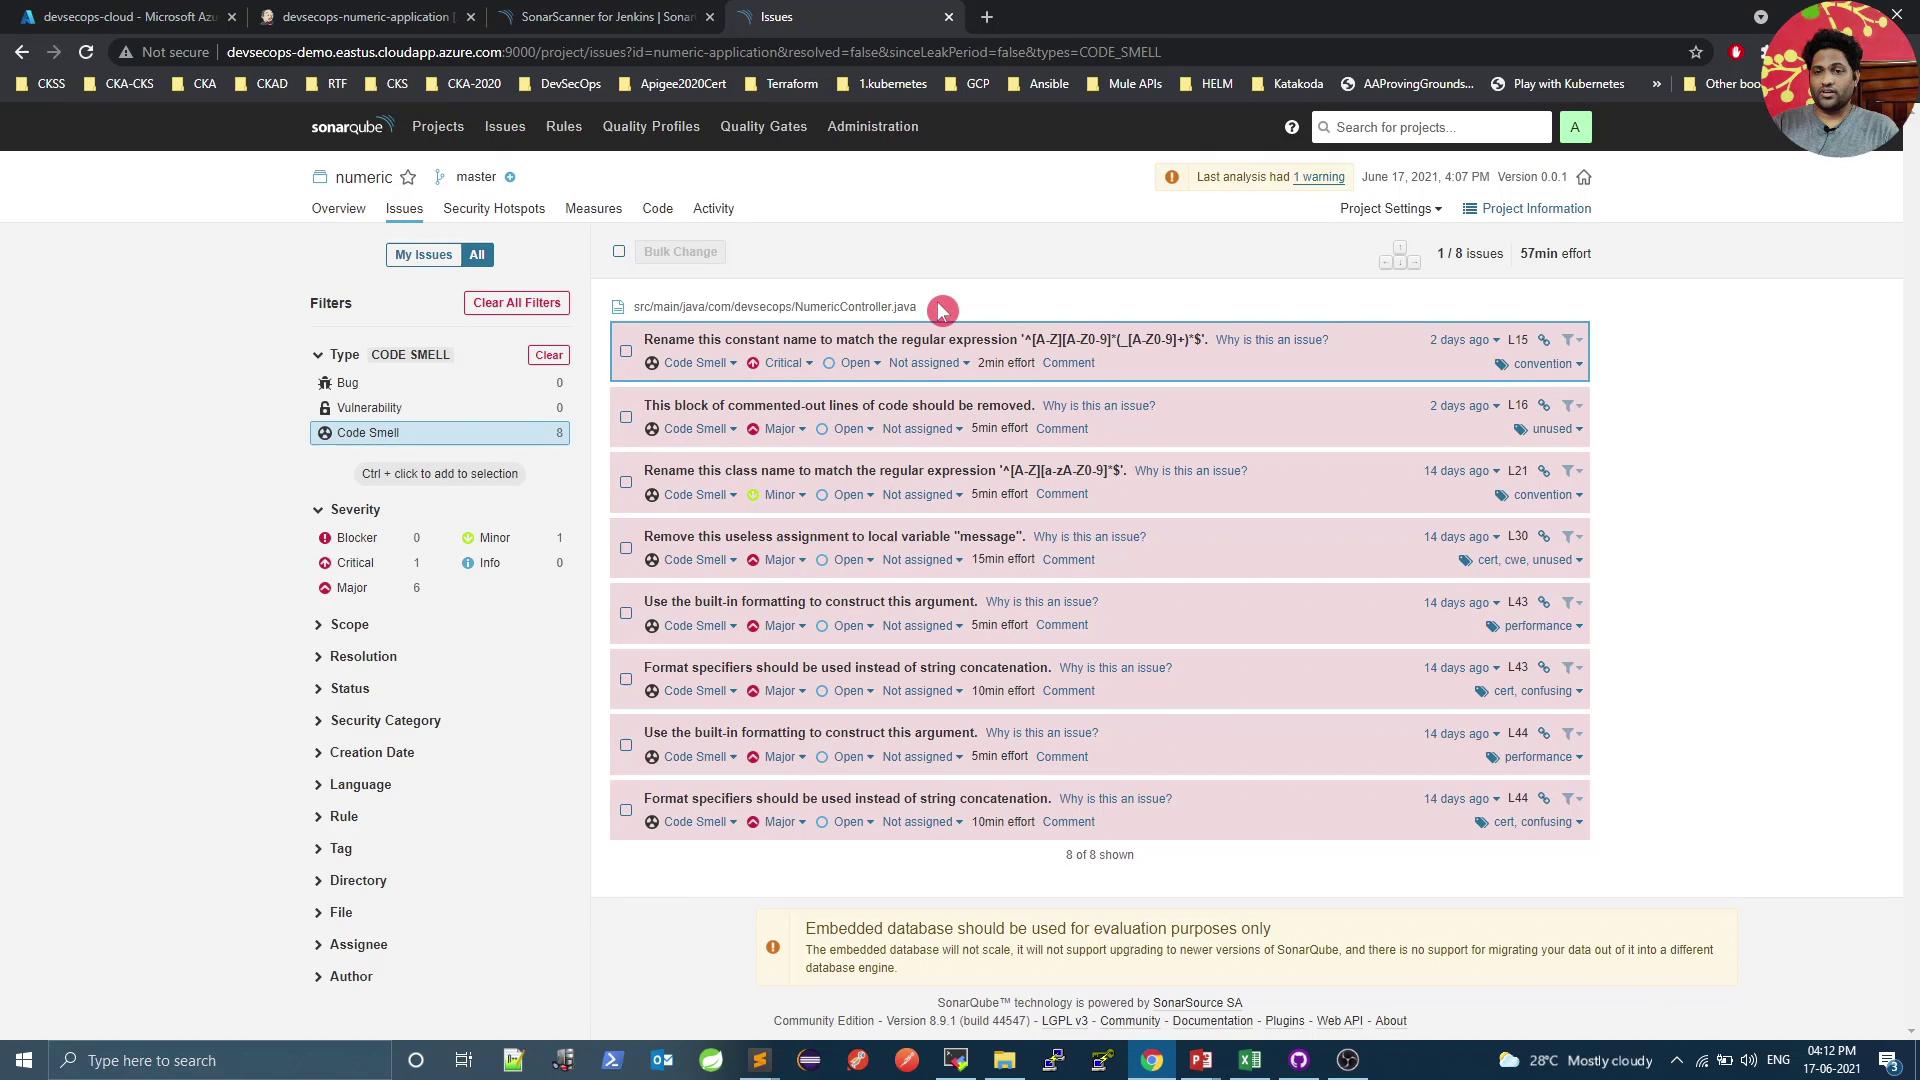
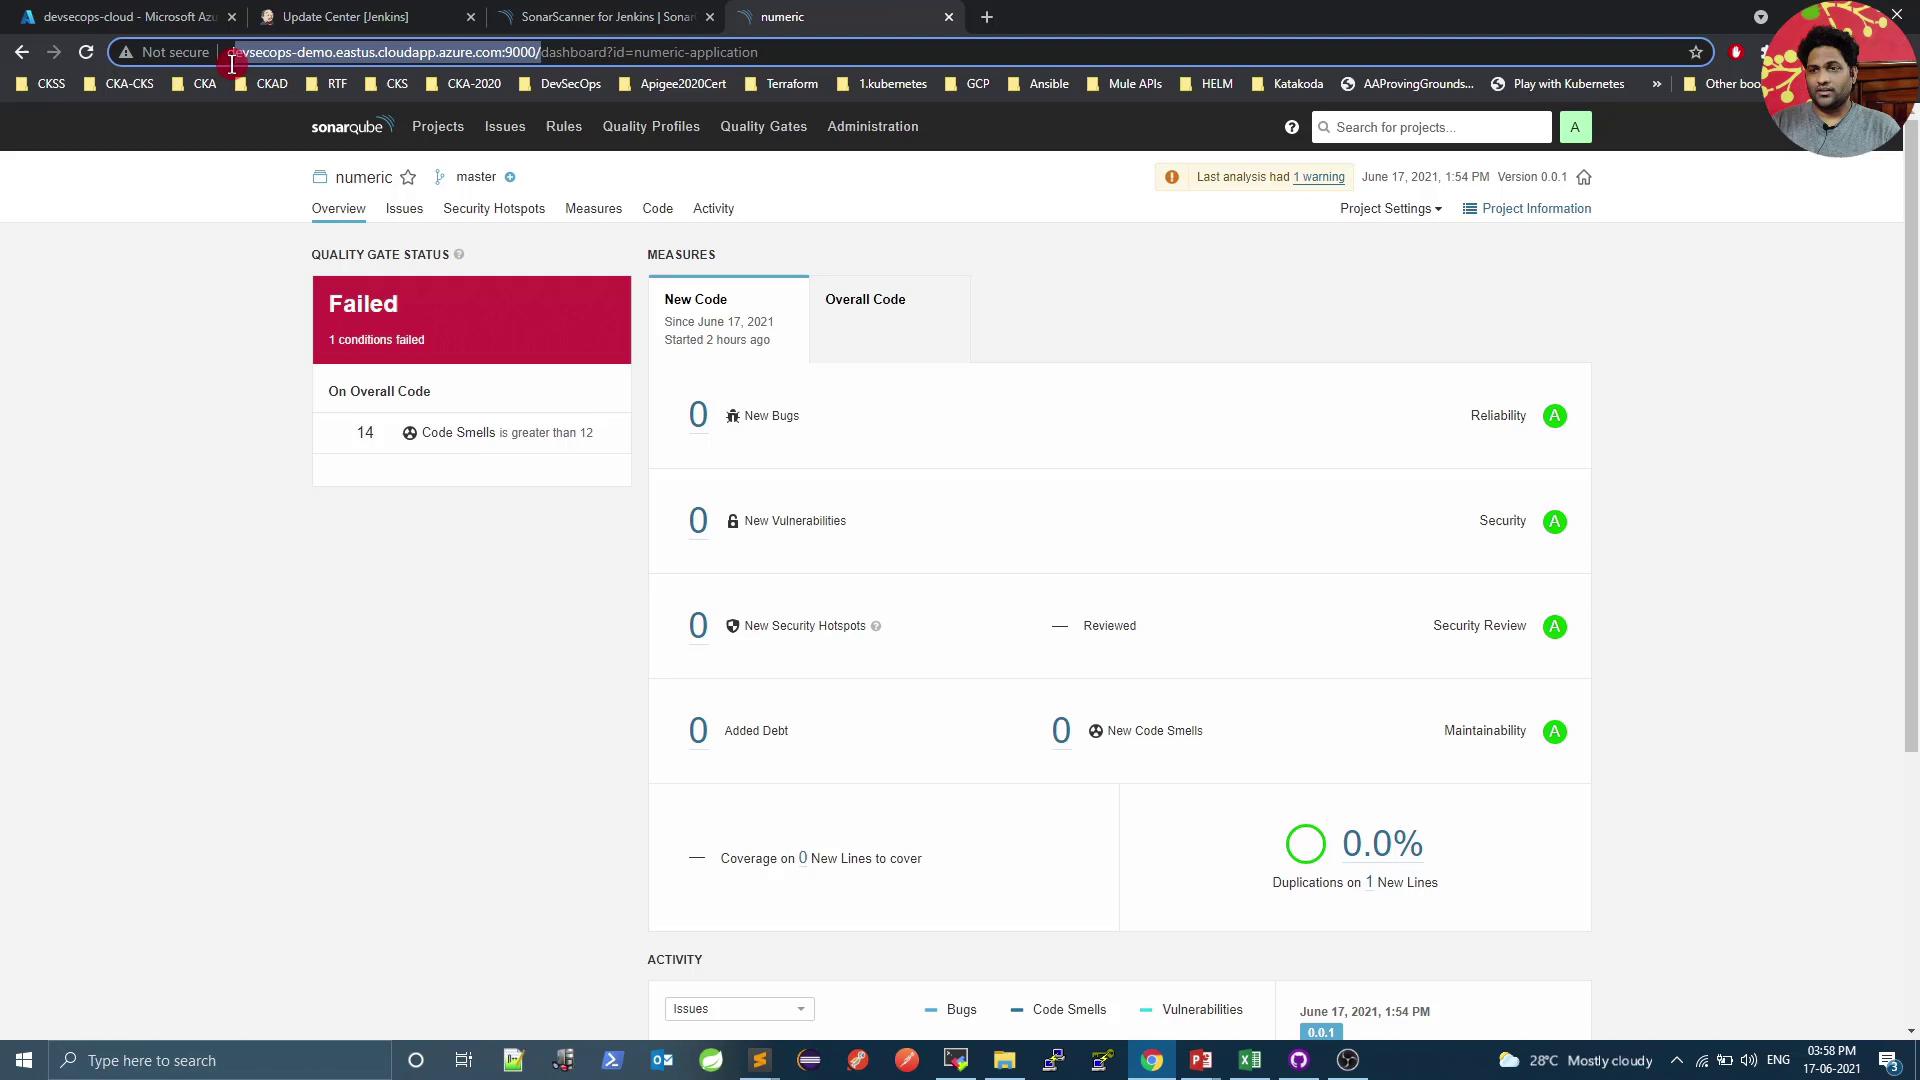
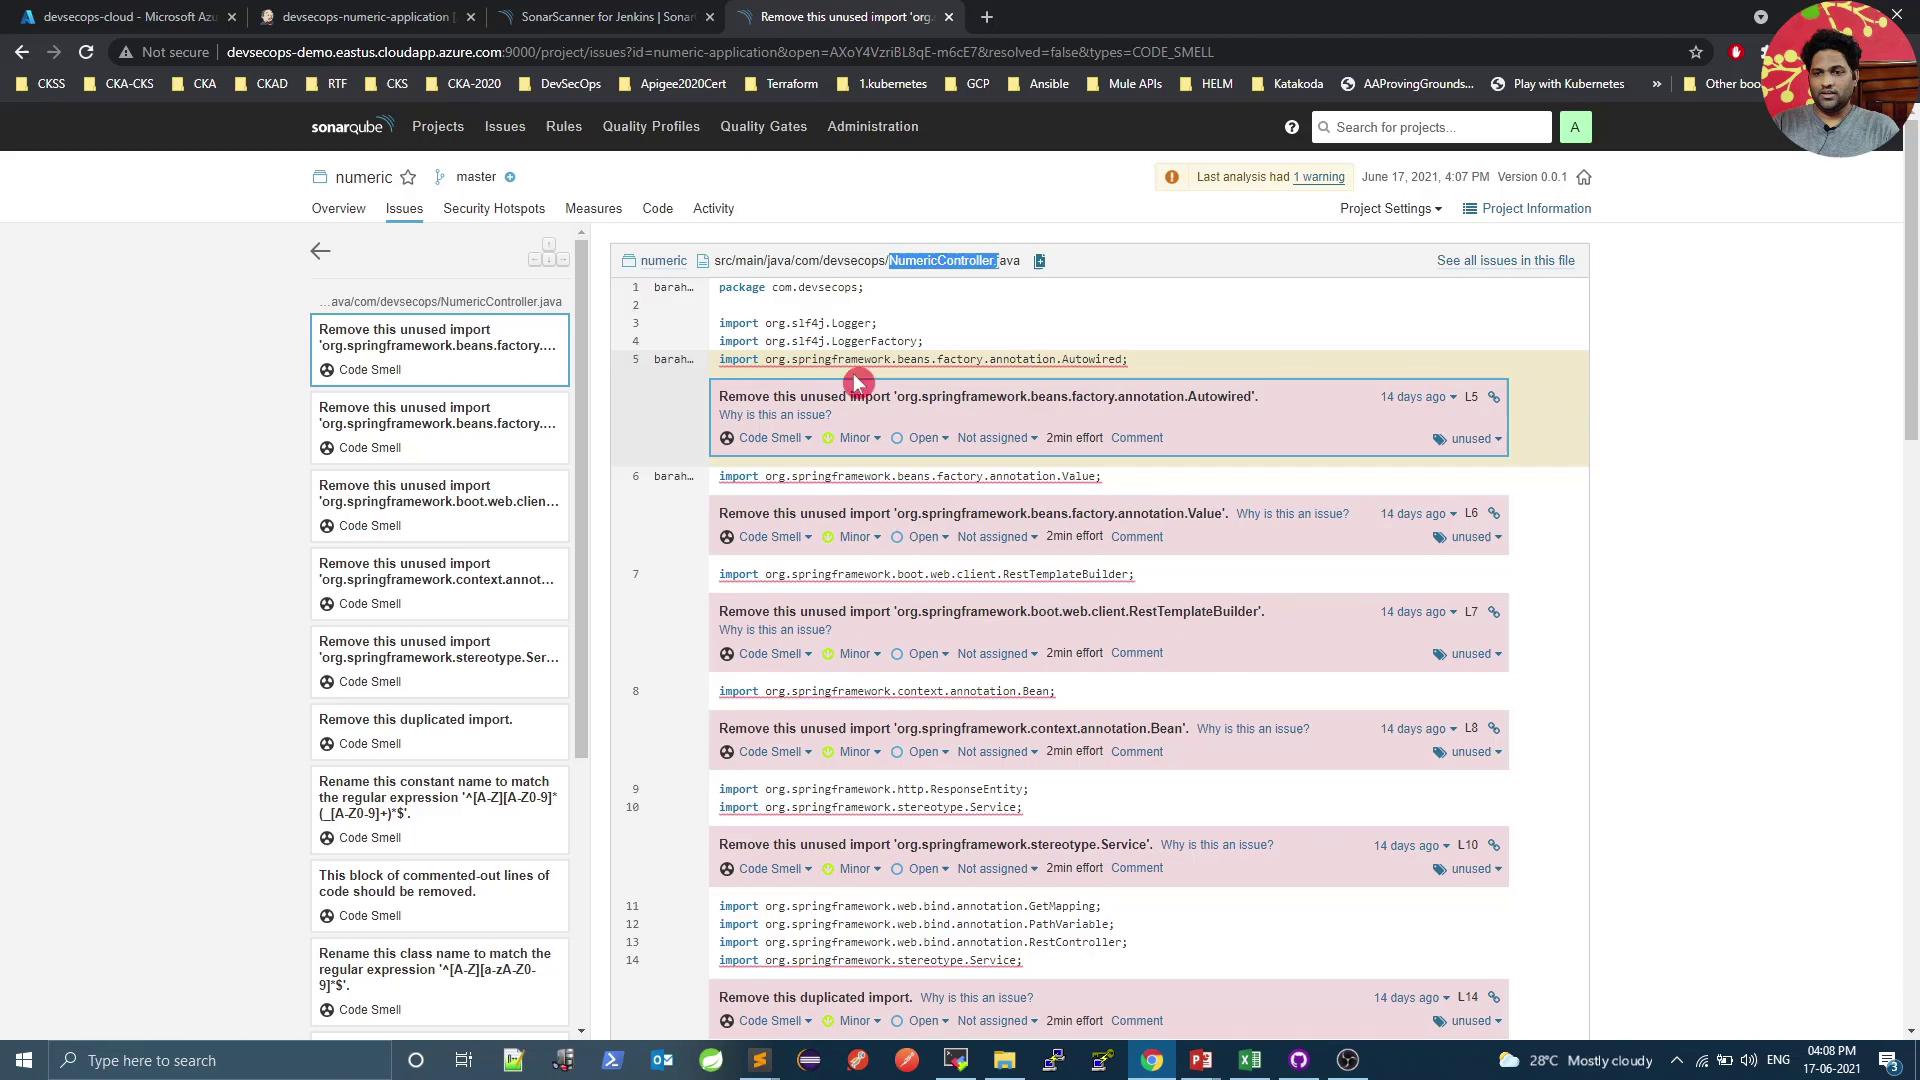
5. Diagnose Quality Gate Failures

When the pipeline fails at the gate, open SonarQube to see detailed issues:

The image shows a SonarQube dashboard with a "Failed" quality gate status due to 14 code smells, and metrics indicating no bugs, vulnerabilities, or security hotspots.

Common findings include unused imports and code smells:

The image shows a SonarQube interface displaying code issues related to unused imports in a Java file. The issues are categorized as "Code Smell" and are listed with details such as file path and line numbers.

Refactor or remove the offending lines, then commit and push again.


6. Confirm Quality Gate Pass

After addressing issues, trigger a new build. A successful SonarQube analysis will pass the gate:

The image shows a SonarQube dashboard with a "Passed" quality gate status, indicating no bugs, vulnerabilities, or security hotspots, and displaying metrics like code coverage and code smells.

You can review any remaining non-blocking issues here:

The image shows a SonarQube dashboard displaying code issues, specifically "code smells," with details such as severity, type, and suggested actions. The interface includes filters and a list of issues with descriptions and timestamps.


References

Watch Video

Watch video content

Previous
Demo SonarQube