DevSecOps - Kubernetes DevOps & Security

Kubernetes Operations and Security

Demo Falco UI HELM

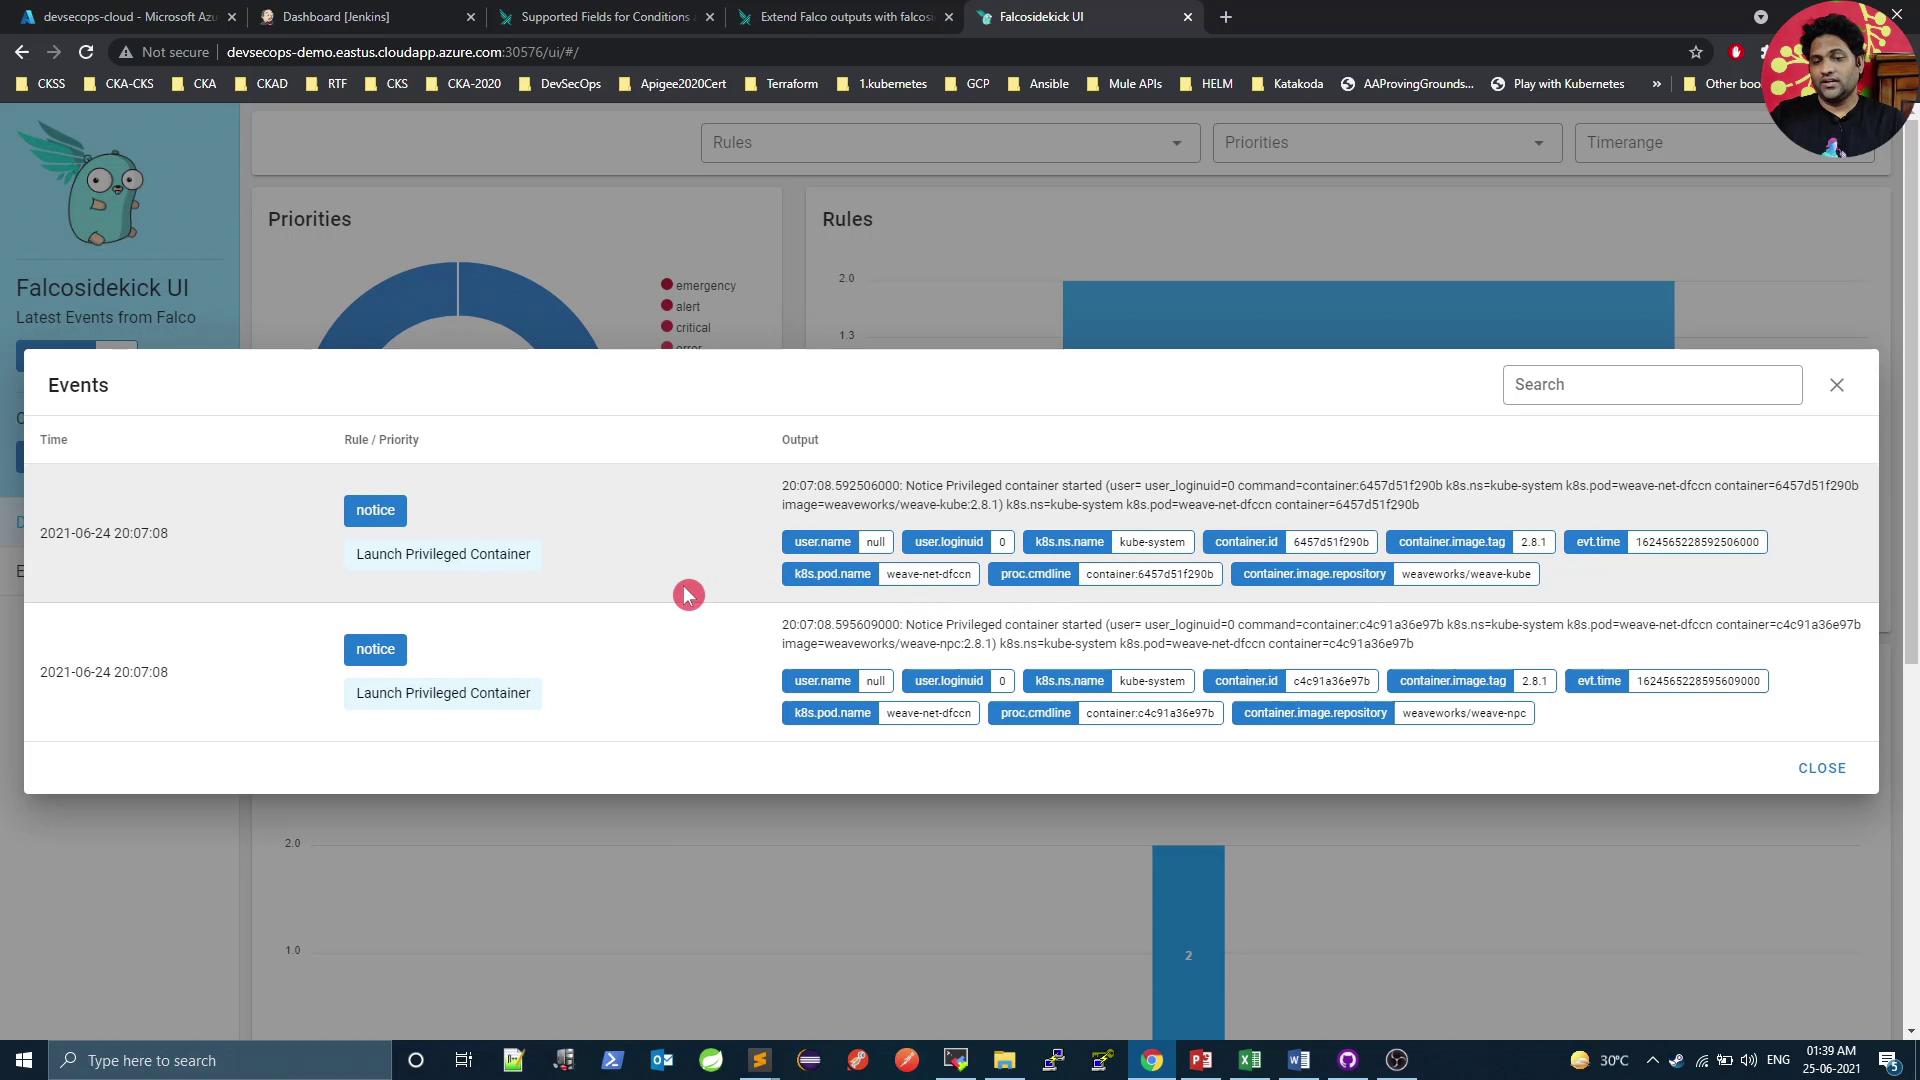
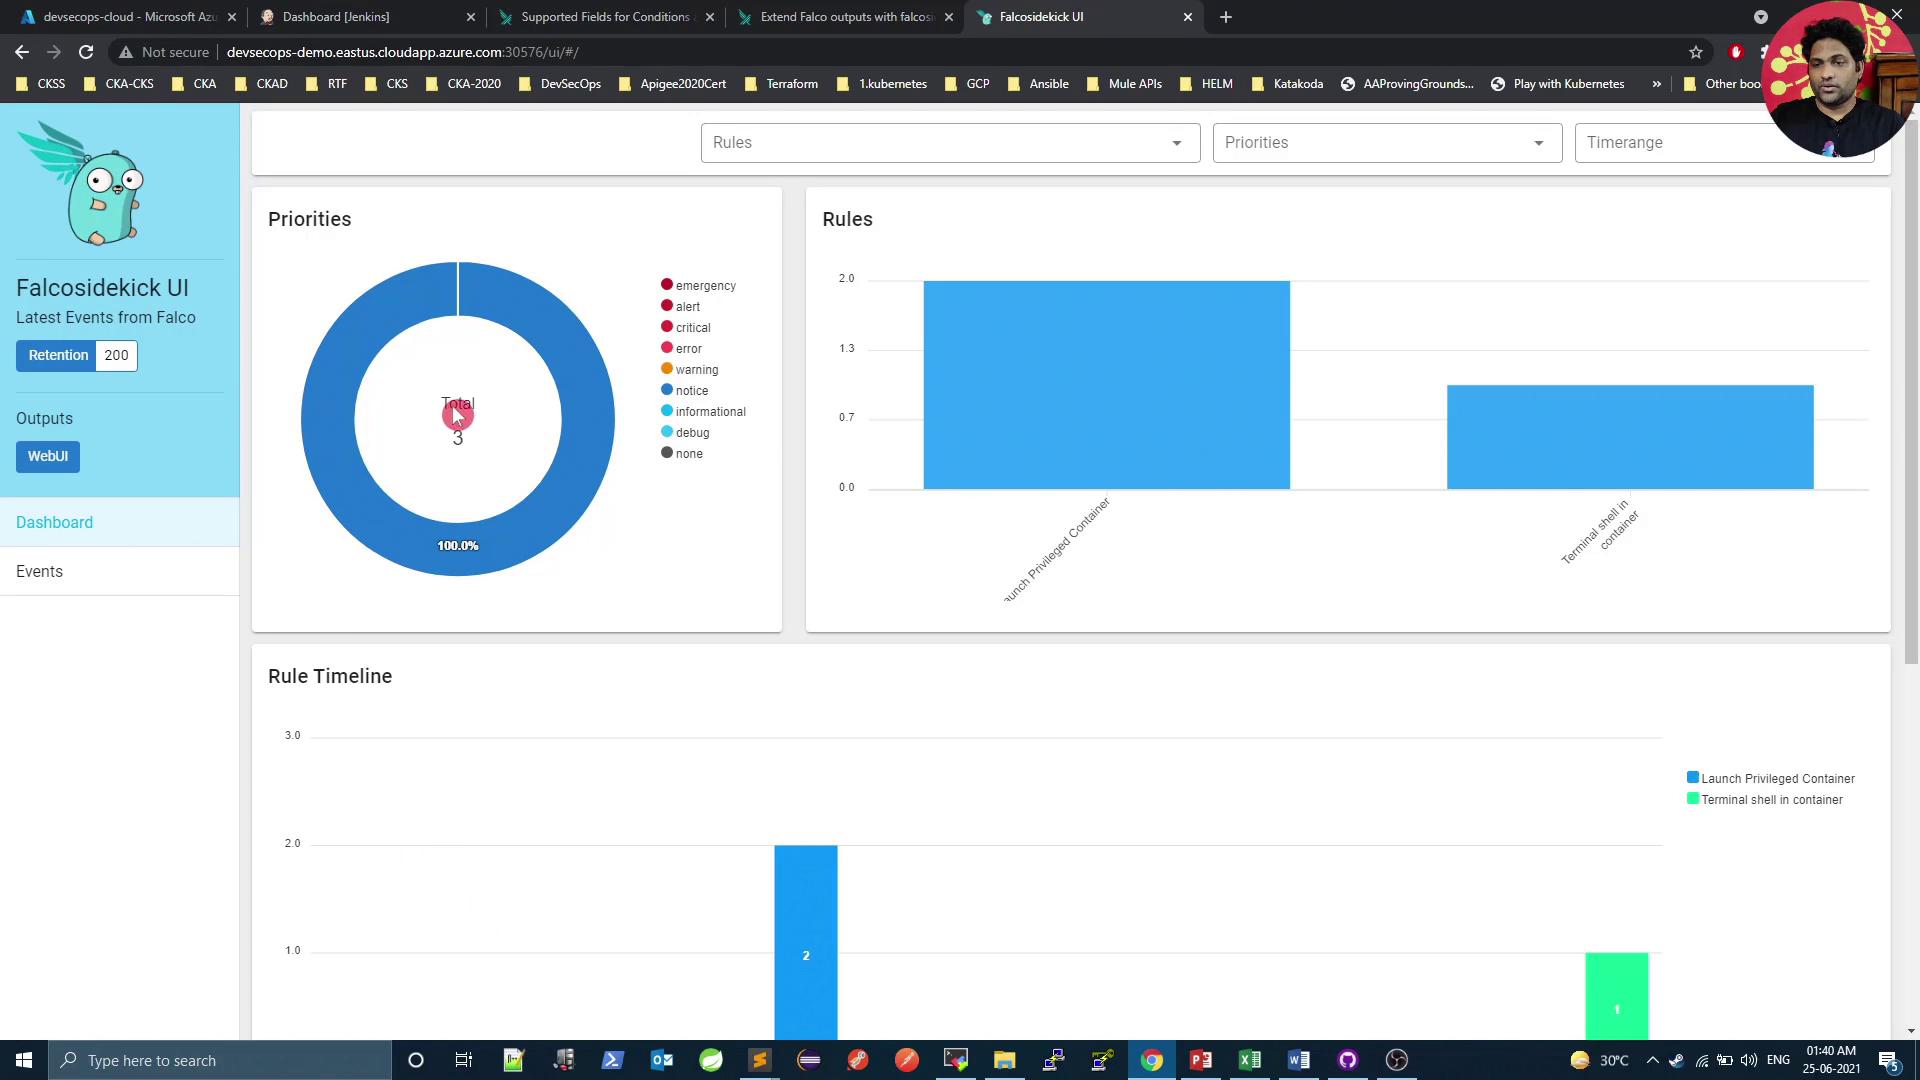
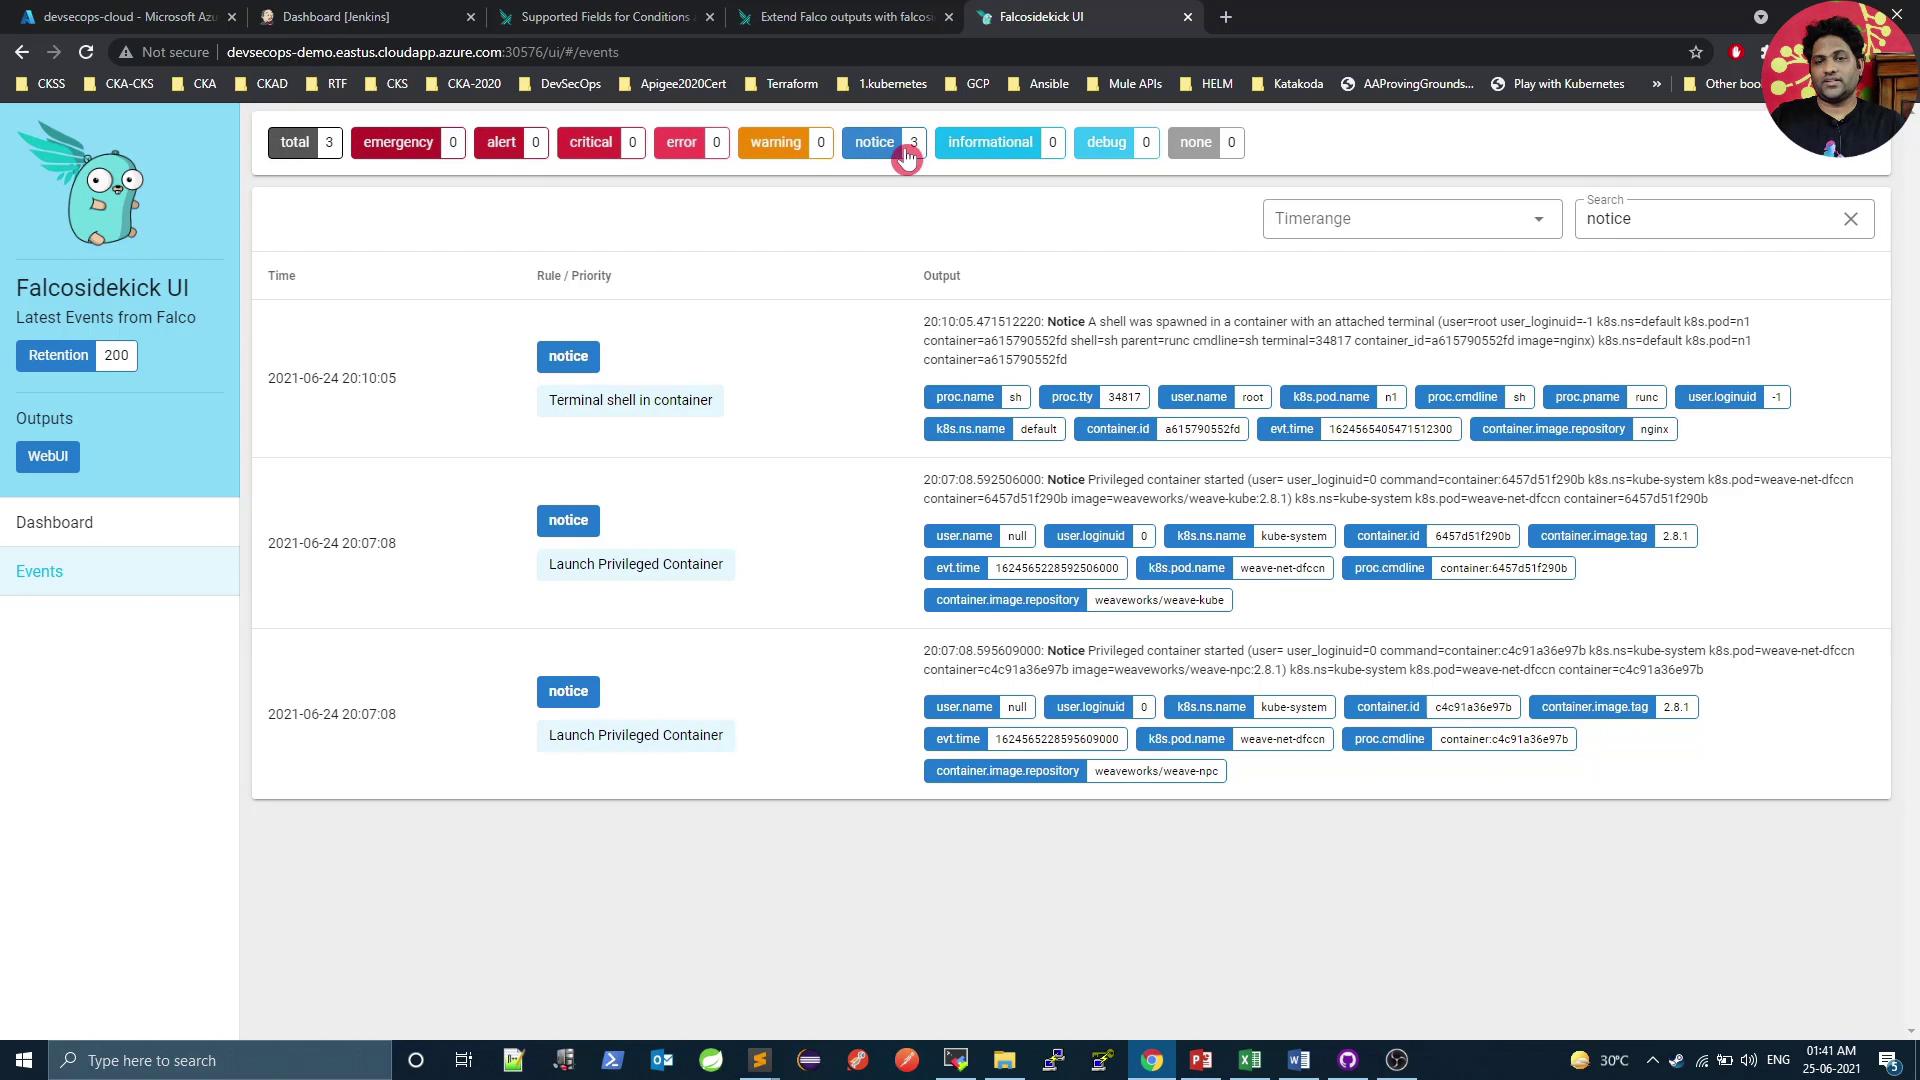
In this guide, you’ll learn how to extend Falco alerts using Falco Sidekick and visualize them with a Web UI. We’ll cover installing Falco Sidekick via Helm on a Kubernetes cluster and configuring notifications (e.g., Slack, Teams, Datadog).

Falco Sidekick is a companion project that delivers Falco events to multiple endpoints—stdout, files, gRPC, shell commands, HTTP, and UIs. Enabling its Web UI lets you explore alerts in real time.


Table of Contents

  1. Prerequisites
  2. Falco Sidekick Overview
  3. Installing Helm 3
  4. Deploying Falco with Sidekick
  5. Verifying the Installation
  6. Accessing the Falco Sidekick UI
  7. Triggering an Alert
  8. Next Steps
  9. Links and References

Prerequisites

Note

  • A running Kubernetes cluster
  • kubectl configured for your cluster
  • helm CLI installed locally

Falco Sidekick Overview

Falco Sidekick extends Falco’s native alerting by routing events to various destinations:

DestinationProtocolConfiguration Key
Web UIHTTPfalcosidekick.webui.enabled
SlackHTTP POSTfalcosidekick.config.slack.webhookurl
Microsoft TeamsHTTP POSTfalcosidekick.config.teams.webhookurl
DatadogHTTP POSTfalcosidekick.config.datadog.apiKey
gRPCgRPCfalcosidekick.config.grpc.*
Shell CommandShellfalcosidekick.config.shell.command
FileFilefalcosidekick.config.file.filename

Installing Helm 3

Helm is the Kubernetes package manager. To install Helm 3:

export VERIFY_CHECKSUM=false
curl https://raw.githubusercontent.com/helm/helm/master/scripts/get-helm-3 | bash
helm version

Expected output:

version.BuildInfo{Version:"v3.x.x", GitCommit:"...", GitTreeState:"clean", GoVersion:"go1.x.x"}

Deploying Falco with Sidekick

  1. Create the falco namespace:

    kubectl create namespace falco
    
  2. Add the Falco Security Helm repo:

    helm repo add falcosecurity https://falcosecurity.github.io/charts
    helm repo update
    
  3. Install Falco with Sidekick and the Web UI:

    Warning

    Replace the placeholder webhook URL with your actual Slack (or Teams/Datadog) endpoint.

    helm install falco falcosecurity/falco \
      --namespace falco \
      --set falcosidekick.enabled=true \
      --set falcosidekick.webui.enabled=true \
      --set falcosidekick.config.slack.webhookurl="https://hooks.slack.com/services/XXXX/YYYY/ZZZZ"
    

Verifying the Installation

Check Helm releases and Kubernetes resources:

helm ls -n falco
kubectl -n falco get all

Sample output:

NAME    NAMESPACE REVISION UPDATED                 STATUS   CHART     APP VERSION
falco   falco     1        2021-07-01 12:34:56 UTC deployed falco-1.XX.0 0.29.0

NAME                                    TYPE        CLUSTER-IP      PORT(S)     AGE
service/falco-falcosidekick             ClusterIP   10.0.0.123      2801/TCP    1m
service/falco-falcosidekick-ui          ClusterIP   10.0.0.124      2802/TCP    1m

NAME                                                 READY   STATUS    AGE
daemonset.apps/falco                                 1/1     Running   1m
deployment.apps/falco-falcosidekick                  2/2     Running   1m
deployment.apps/falco-falcosidekick-ui               1/1     Running   1m

By default, the UI service is ClusterIP. To expose it:

kubectl -n falco edit service falco-falcosidekick-ui
# Change `type: ClusterIP` to `type: NodePort` and save.
kubectl -n falco get service falco-falcosidekick-ui

Accessing the Falco Sidekick UI

Open your browser at:

http://<node-ip>:<node-port>/ui

The UI launches with default alerts for privileged container launches.

The image shows a Falcosidekick UI displaying events related to the launch of privileged containers, with detailed information about each event. The interface includes a search bar and various data fields such as user name, container ID, and event time.

The dashboard provides charts for event priorities and rule counts:

The image shows a dashboard from the Falcosidekick UI, displaying a pie chart of event priorities and a bar chart of rules related to container security events.

On the Events tab, you can filter by severity and drill into individual alerts:

The image shows a dashboard interface of the Falcosidekick UI displaying event logs with notices about container activities. It includes details like time, priority, and specific container information.


Triggering an Alert

Generate a new Falco event by executing a shell in any pod:

kubectl exec -it n1 -n istio-system -- sh
# Run a command, then exit
exit

Refresh the UI to see the new alert.


Next Steps

In the next article, we’ll configure Sidekick to send alerts to a Slack channel. Reinstall Falco with your Slack webhook:

kubectl delete release falco -n falco
helm install falco falcosecurity/falco \
  --namespace falco \
  --set falcosidekick.enabled=true \
  --set falcosidekick.webui.enabled=true \
  --set falcosidekick.config.slack.webhookurl="https://hooks.slack.com/services/XXXX/YYYY/ZZZZ"

Watch Video

Watch video content

Previous
Demo Falco Installation View in Terminal