Docker Certified Associate Exam Course
Docker Engine Enterprise
Docker EE UCP Client Bundle
In this guide, you'll configure the Universal Control Plane (UCP) client bundle on your local machine to interact with a UCP cluster through the Docker CLI.
1. Exploring the UCP Documentation
Start by reviewing the official Docker Engine Enterprise (EE) and UCP docs:
- Visit the Docker Engine Enterprise documentation.1
- Under Product Manuals, select Docker Enterprise.
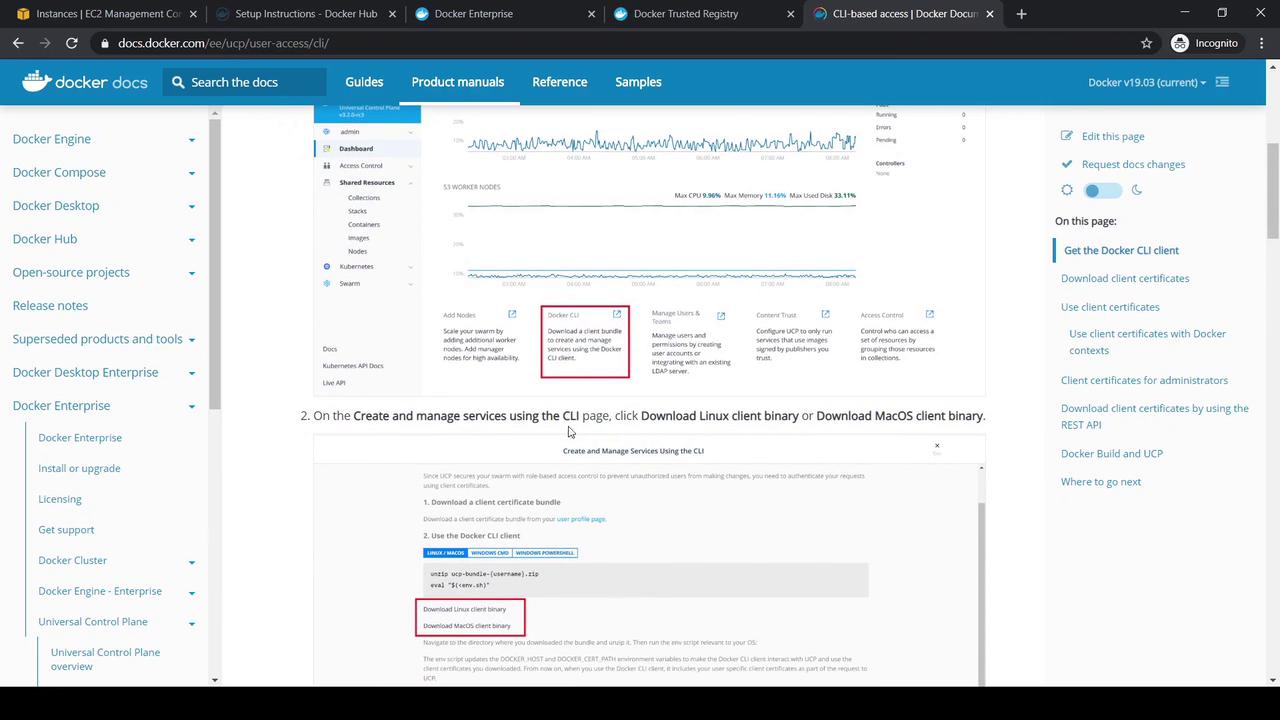
- Click Universal Control Plane → Access UCP.
- Follow the CLI-Based Access instructions to obtain the UCP client bundle.
With UCP, you continue using the Docker CLI by downloading a bundle that contains the necessary certificates and environment scripts.
2. Downloading the UCP Client Bundle
- In your UCP console dashboard, locate the Docker CLI section and click Download.
- Choose the Linux or macOS binary.
- Under My Profile (your admin user), download the client certificates ZIP.

unzip ucp-bundle-{username}.zip
eval "$(env.sh)"
Note
Keep your client certificates secure. Do not commit them into version control.
Back in the UCP dashboard, click New Client Bundle to generate and download your personalized bundle. You should now have:
dockerCLI binaryucp-bundle-{username}.zip
3. Setting Up a Remote Client
For this example, we provisioned a CentOS host on AWS named Yogesh Client Bundle Test. Transfer both the Docker CLI binary and the UCP client bundle (e.g., via WinSCP), then:
# On the remote host
mkdir -p ~/client-bundle
unzip ucp-bundle-{username}.zip -d ~/client-bundle
cd ~/client-bundle
Here's an example public key from the bundle:
-----BEGIN PUBLIC KEY-----
MIGeMA0GCSqGSIb3DQEBAQUAA4GNADCB
9M7C1cfPReZIrCrypItIh4V127f1UARf78B8iWa/2HZfSmKx24QDyCFRDoA=
-----END PUBLIC KEY-----
Warning
Your private keys and certificates grant full access to your UCP cluster. Handle them with care.
4. Configuring Environment Variables
Execute the provided environment script to set Docker CLI variables:
cd ~/client-bundle
eval "$(env.sh)"
Verify your environment settings:
| Variable | Description | Example |
|---|---|---|
| DOCKER_HOST | UCP manager endpoint | tcp://172.31.32.217:443 |
| DOCKER_CERT_PATH | Path to client certificates and keys | /home/user/client-bundle |
echo $DOCKER_HOST
# If needed, switch to the private IP
export DOCKER_HOST=tcp://172.31.32.217:443
echo $DOCKER_HOST
echo $DOCKER_CERT_PATH
# /home/user/client-bundle
5. Verifying Connectivity
Ensure your CLI can communicate with UCP:
docker node ls
# ID                          HOSTNAME     STATUS  AVAILABILITY  MANAGER STATUS  ENGINE VERSION
# vpns18n5tj7c59rcx4t26oz06   dtrnode      Ready   Active        Active          19.03.5
# g2gzfa9lrijoyg7atl2avveu6r   * ucpmanager Ready   Active        Leader          19.03.5
docker service ls
If both commands succeed, your Docker CLI is correctly configured to manage UCP.
6. Deploying a Test Application
Create a simple HTTP service on port 83:
docker service create \
  --name kodekloudtest \
  --publish 83:80 \
  httpd:alpine
Check the task status:
docker service ps kodekloudtest
# ID            NAME               IMAGE          NODE       DESIRED STATE  CURRENT STATE
# 1yatpy8tm6gi  kodekloudtest.1    httpd:alpine   ucpworker  Running        Running 2 minutes ago
Visit http://<UCP_WORKER_IP>:83 in your browser. You should see the default Apache welcome page. The service also appears under Swarm in the UCP console.
7. Cleaning Up
Remove the test service:
docker service rm kodekloudtest
Refresh the UCP console; the kodekloudtest service will be gone.
References
Watch Video
Watch video content