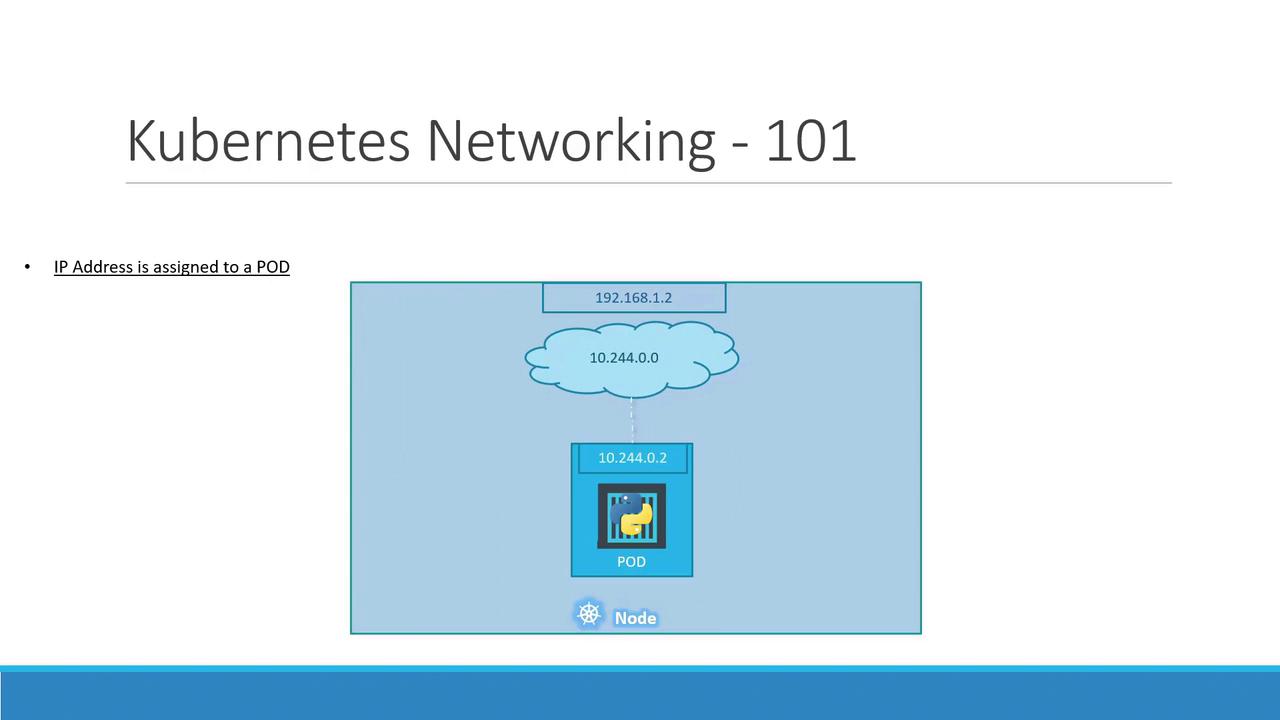
Single-Node Cluster Networking
On a single-node cluster, the Kubernetes node itself has an IP address (e.g.,192.168.1.2). You use this address to SSH into the host or connect to the API server. However, each Pod you create is allocated its own IP from a private Pod network—by default, something like 10.244.0.0/16.
10.244.0.2, which all containers in that Pod share.
10.244.0.0/16 range. They can communicate directly using these IPs:
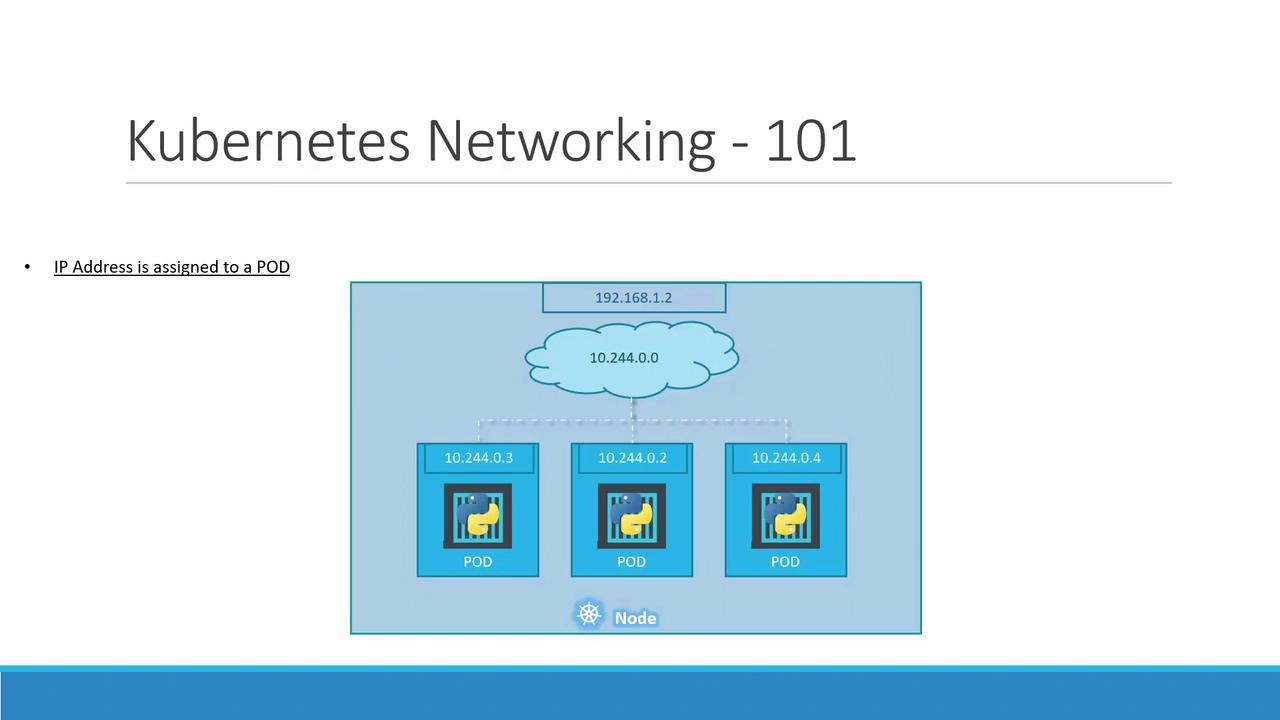
Pod IP addresses are ephemeral. When a Pod is deleted and recreated, it may receive a different IP.
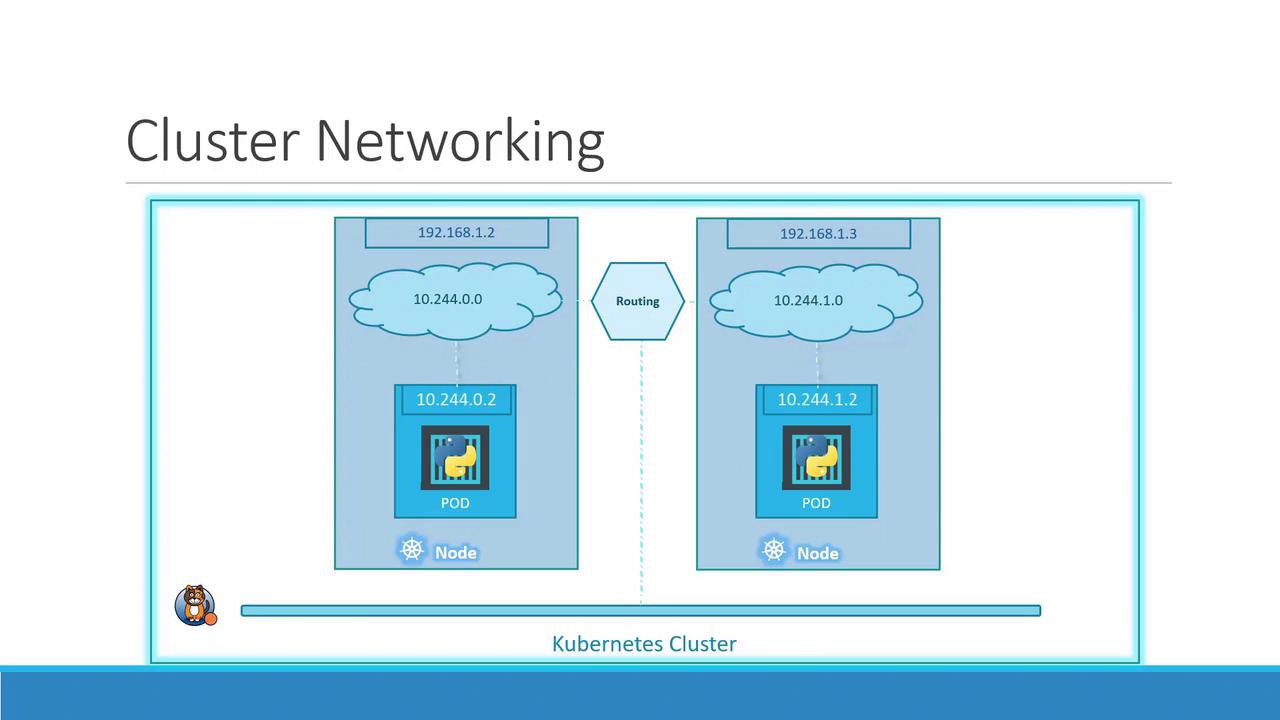
Multi-Node Cluster Networking
As your cluster scales to multiple nodes, each host must carve out a non-overlapping slice of the Pod network to avoid IP conflicts. Consider two nodes:- Host IP:
192.168.1.2→ Pod subnet10.244.0.0/24 - Host IP:
192.168.1.3→ Pod subnet10.244.1.0/24
| Requirement | Description |
|---|---|
| Pod-to-Pod | All Pods communicate directly across nodes without NAT |
| Node-to-Pod | Nodes can reach any Pod IP without SNAT |
| Pod-to-Node | Pods can reach any node IP address |
| Non-overlap | Each node gets a unique Pod subnet to prevent IP conflicts |
If you skip installing a proper CNI, Pods on different nodes may end up with overlapping IPs, causing connectivity failures.
Popular CNI Plugins
| Plugin | Type | Description | Link |
|---|---|---|---|
| Calico | Layer 3 | Advanced network policy, IP-in-IP or VXLAN overlay | https://docs.projectcalico.org/ |
| Flannel | VXLAN/Host-gw | Simple overlay networking, ideal for labs and small clusters | https://github.com/flannel-io/flannel |
| Cilium | eBPF | High-performance networking, built-in security policies | https://cilium.io/ |
| Weave Net | VXLAN | Automatic mesh networking, easy to deploy | https://www.weave.works/docs/net/latest/kubernetes/kube-addon/ |
| Cisco ACI | SDN | Enterprise-grade, integrates with Cisco data center fabrics | https://developer.cisco.com/docs/aci/ |
| VMware NSX-T | SDN | Micro-segmentation, multi-cloud networking | https://docs.vmware.com/en/VMware-NSX-T/index.html |
flanneld or calico-node) allocates a unique /24 Pod subnet and programs the host routes. The result is a seamless overlay network: