production environment in your GitHub repository settings, enforce deployment protection rules, restrict deployments to the main branch, and add the necessary secrets and variables. By the end, your production workflow will be locked down and ready for automated deployments.
Prerequisites
- A GitHub repository with Actions enabled
- Admin permissions on the repository
- (Optional) Familiarity with GitHub Environments
Step 1: Create the Production Environment
- Go to your repository, then click Settings > Environments.
- Hit New environment and enter
productionas the name.
Step 2: Configure Deployment Protection Rules
Under Deployment protection rules, set up the controls that gate your production deployments: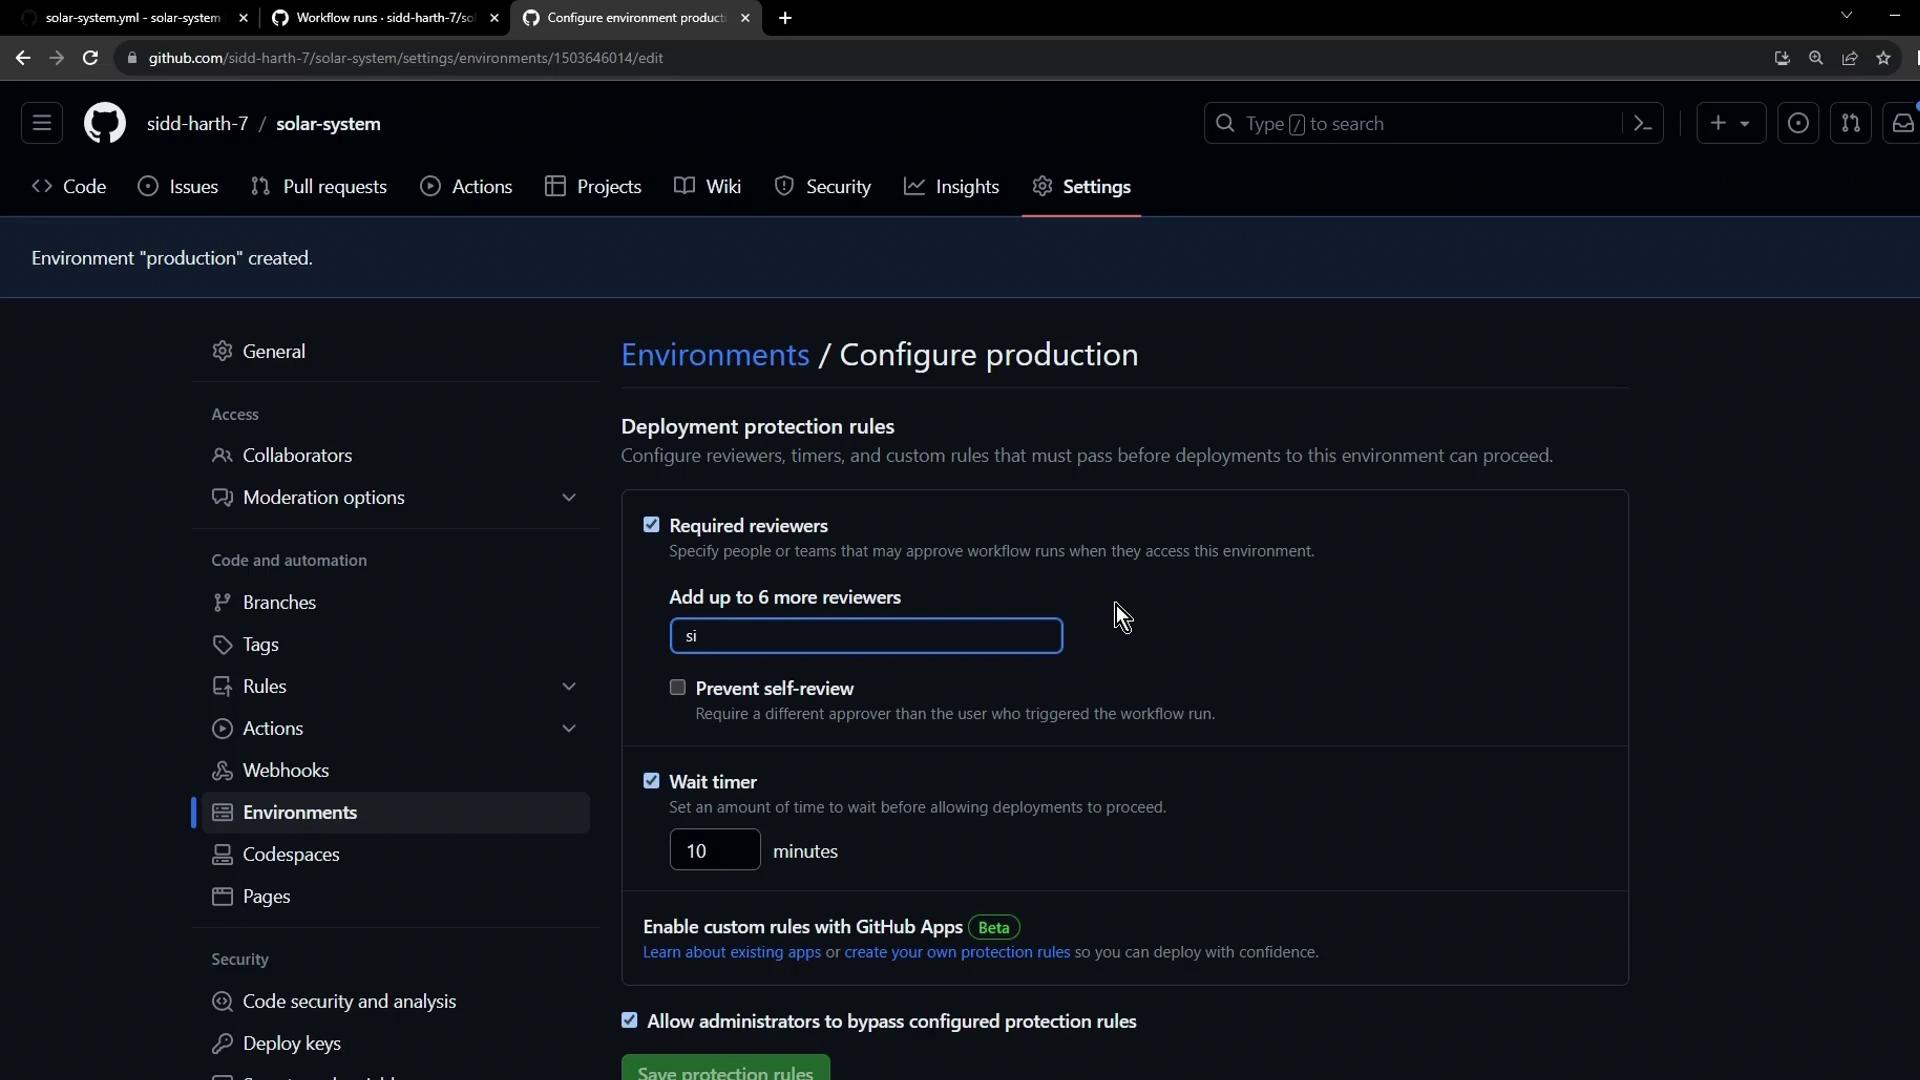
- Wait timer: e.g.,
1 minute– enforces a delay before a workflow can proceed. - Required reviewers: add up to six team members; at least one approval is mandatory.
- Allow self-review: toggle off to prevent the person who triggered the workflow from approving their own deployment.
Disabling self-review is critical for maintaining an audit trail and ensuring someone else verifies each production deployment.
Step 3: Restrict Deployments to Your Main Branch
In the same production environment settings:- Find Restrict deployments.
- Select Only allow deployments from specific branches.
- Choose
mainfrom the dropdown.
main can trigger the production workflow.
Step 4: Add Secrets and Variables
Scroll down to Secrets and variables to store environment-specific data: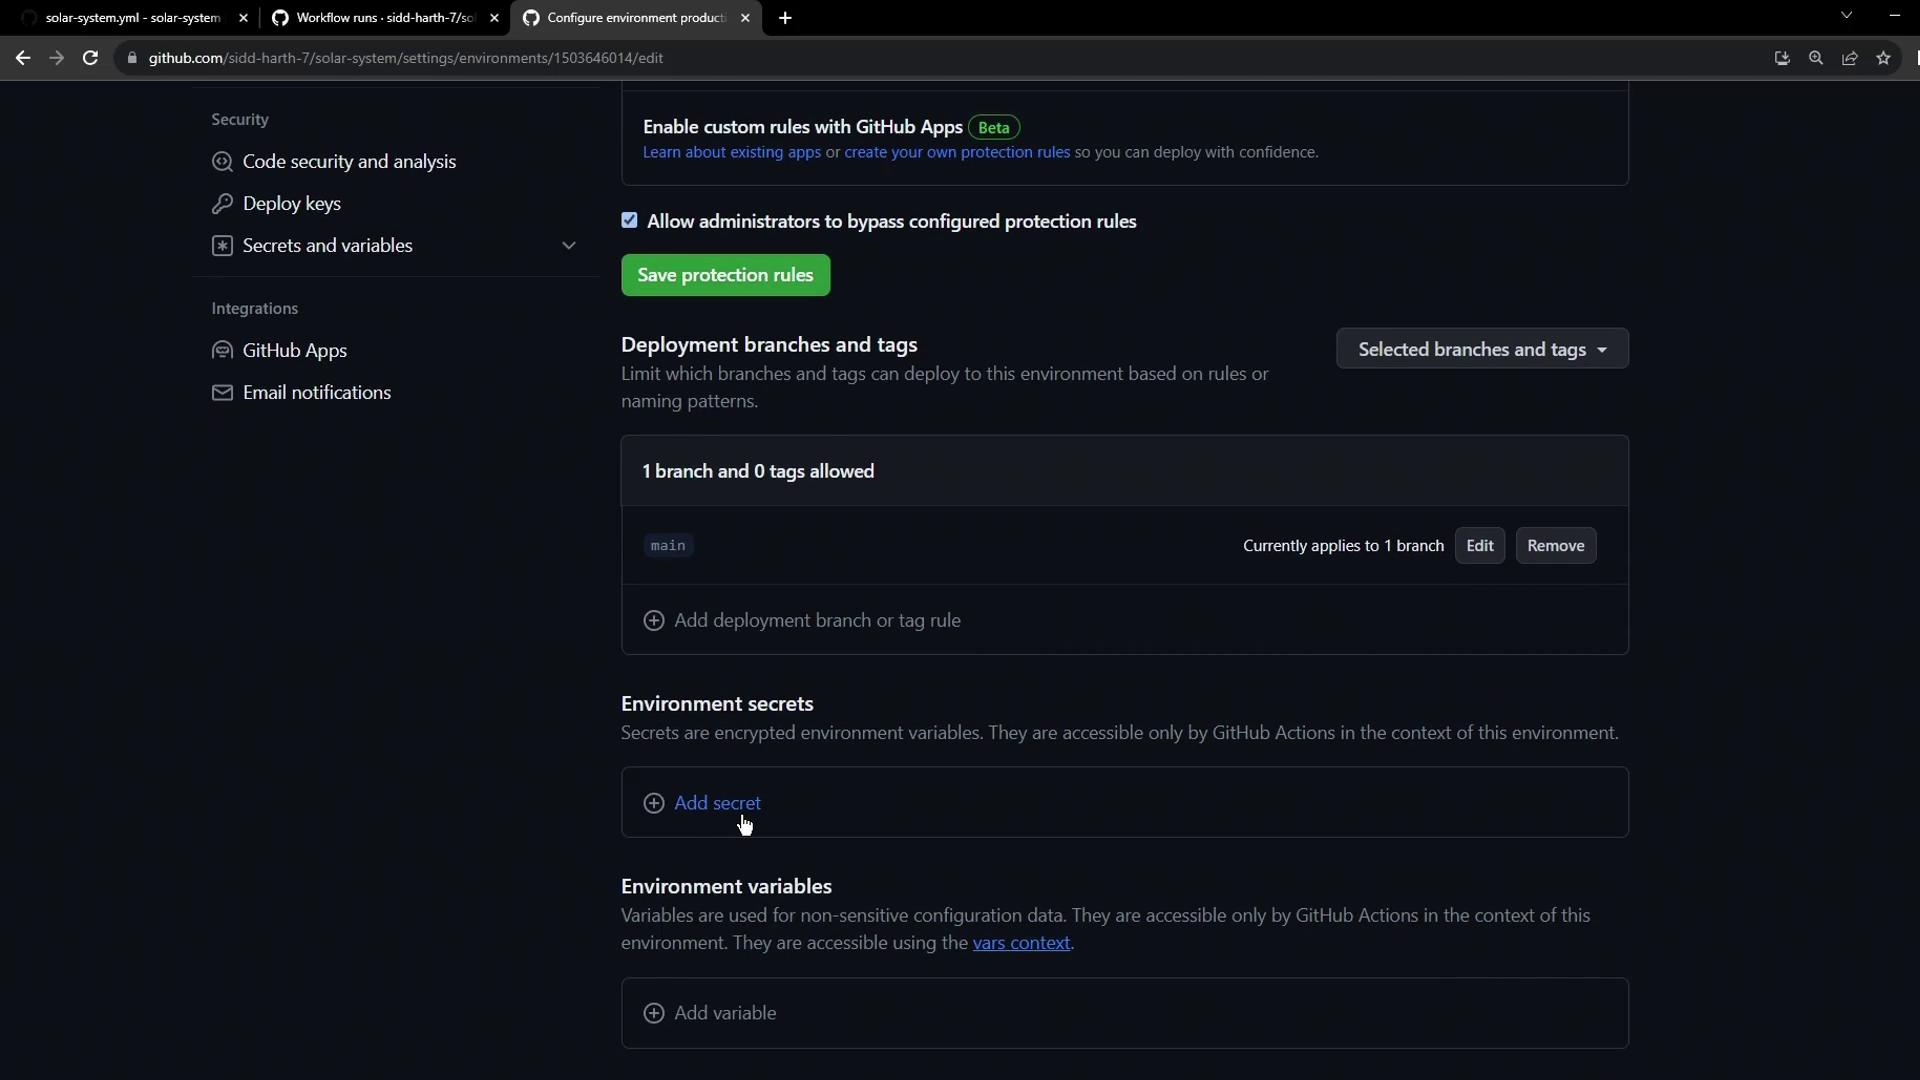
| Type | Name | Value |
|---|---|---|
| Secret | KUBECONFIG | Your Kubernetes config content |
| Variable | namespace | locus-production |
| Variable | replicas | 5 |
- Under Secrets, click New secret, enter
KUBECONFIG, paste your kubeconfig, and save. - Under Variables, add
namespaceandreplicasone at a time, then click Save.
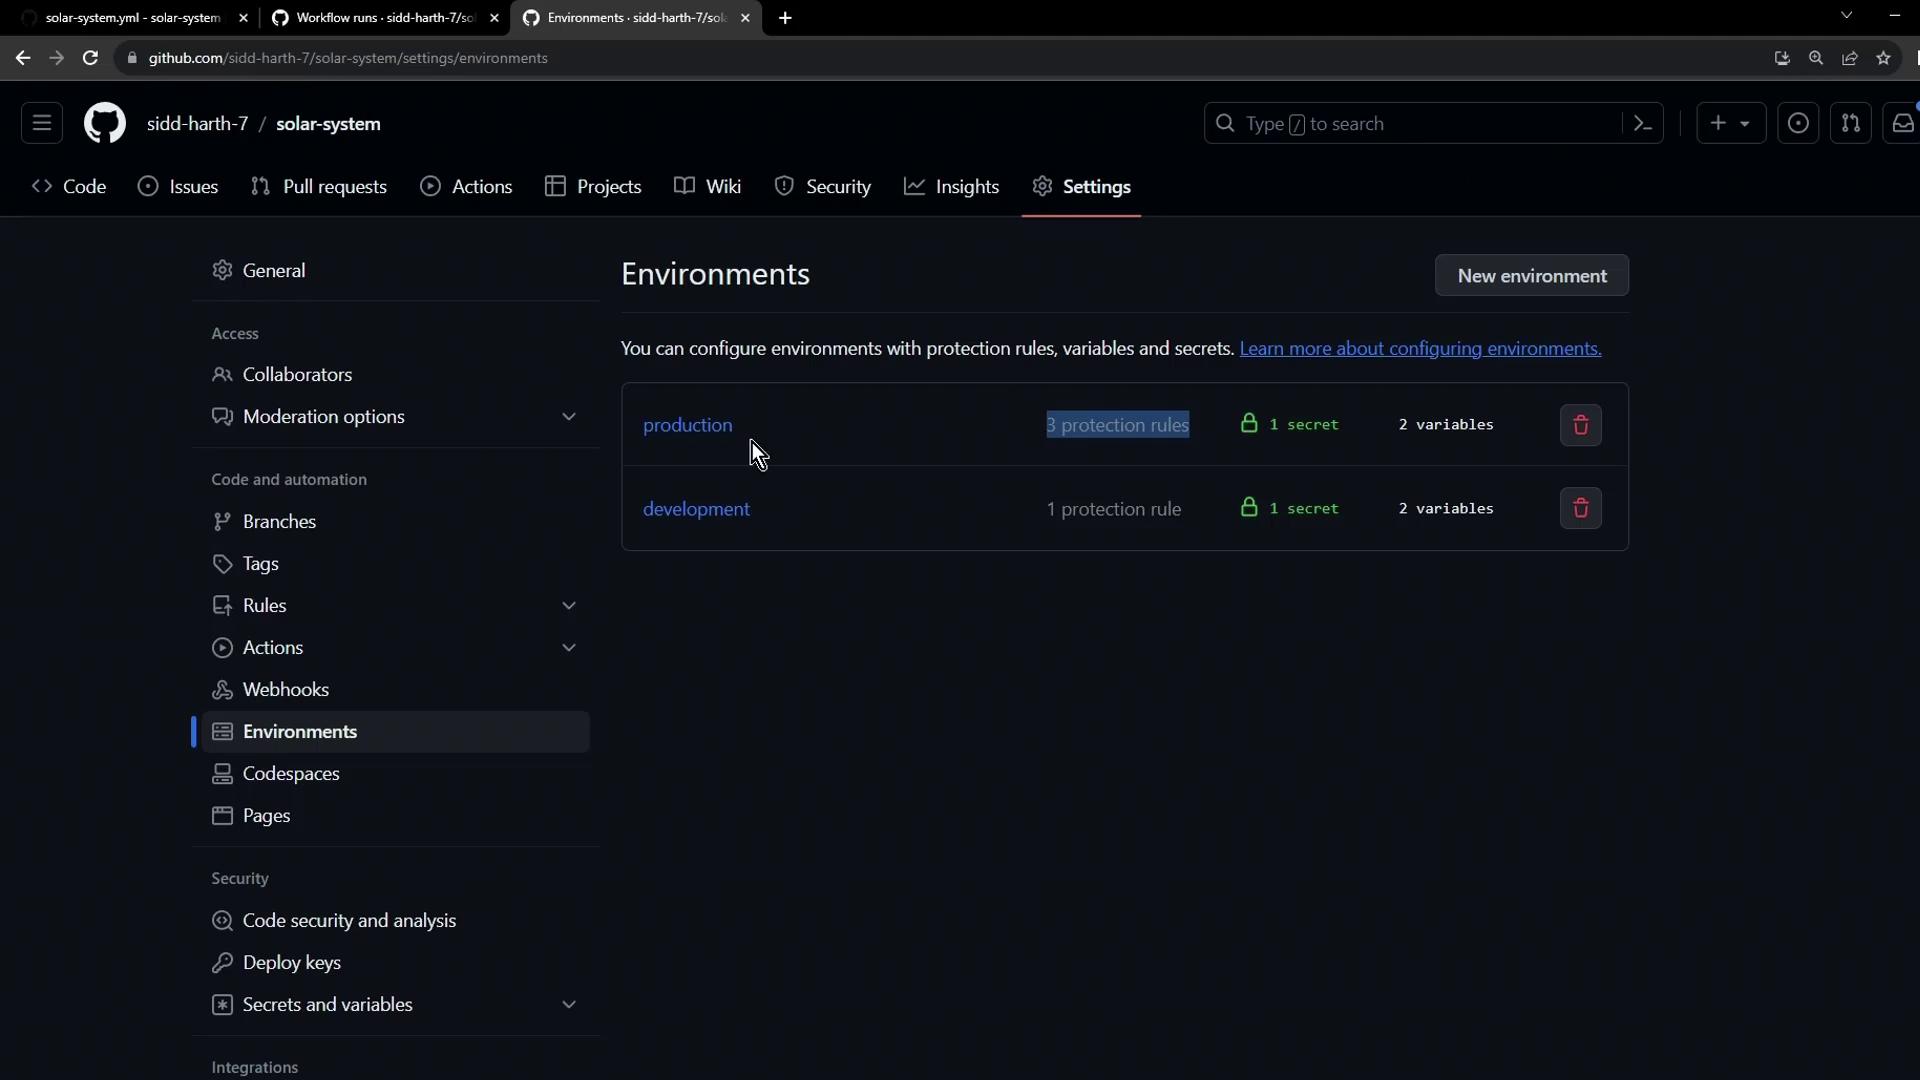
Step 5: Verify Your Environment Configuration
After saving, your Environments page should list bothdevelopment and production, displaying their protection rules, secrets, and variables:
Summary
- Production environment created under Settings > Environments
- Protection rules: wait timer + required reviewers + no self-approval
- Branch restriction: only
maincan deploy - Secrets:
KUBECONFIG - Variables:
namespace,replicas