Step 1: Sign Up for GitHub
Begin at GitHub and click Sign up. Provide your email, choose a secure password, and pick a unique username. You can opt out of email announcements if you prefer.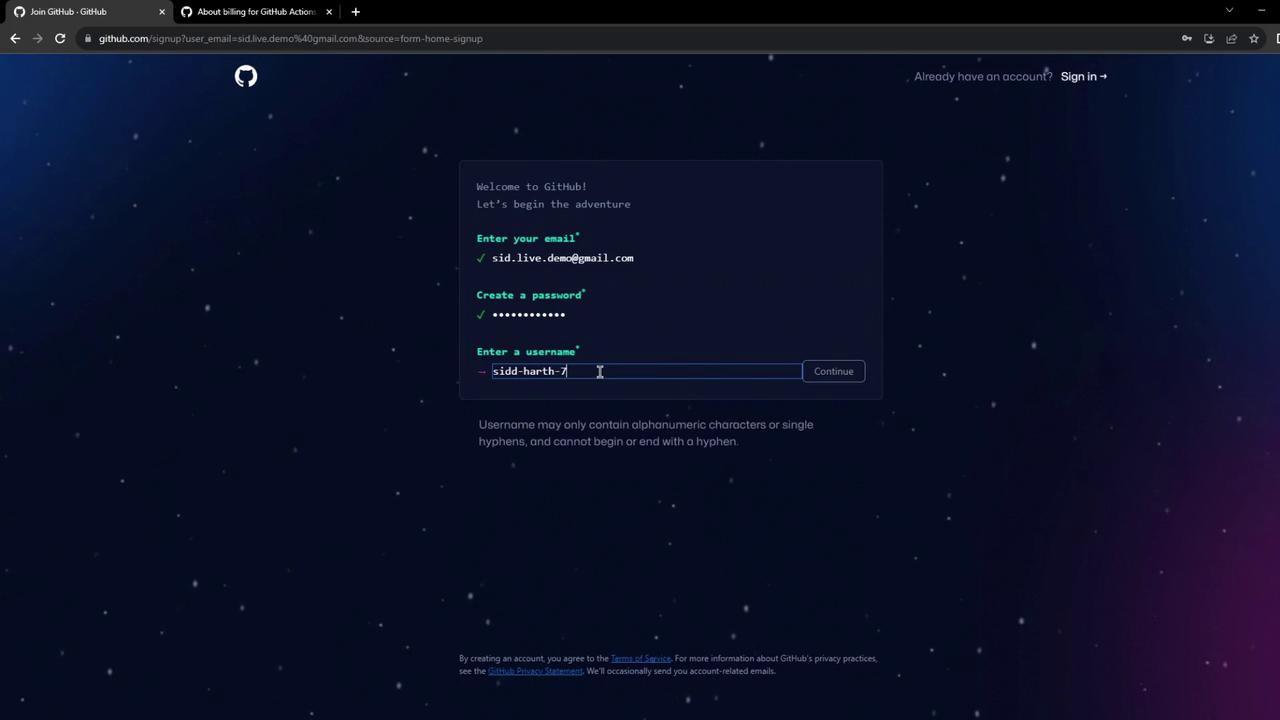
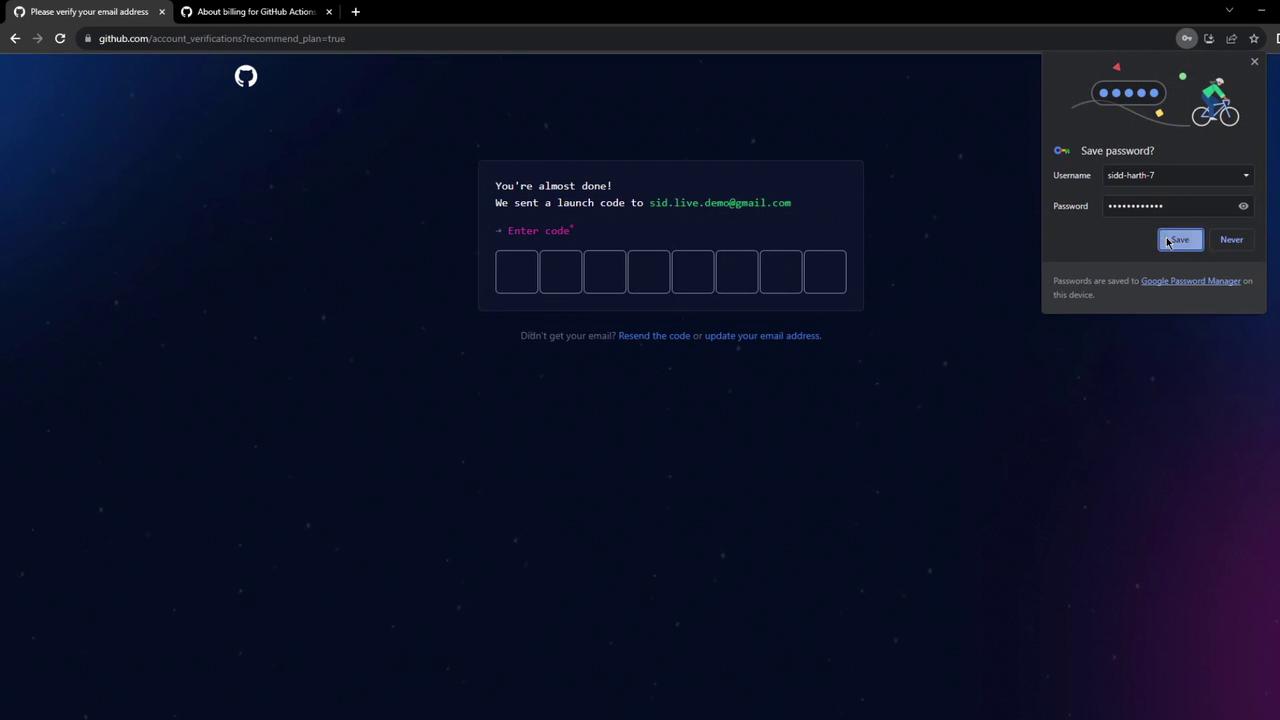
Step 2: Verify Your Email
Shortly after registering, GitHub emails a verification code. Enter this code on the verification page to activate your account.If you don’t see the verification email, check your spam folder.
Step 3: Explore Your Dashboard
You can skip the optional personalization steps. Once complete, your dashboard displays options to create repositories, view recent activity, and explore open-source projects.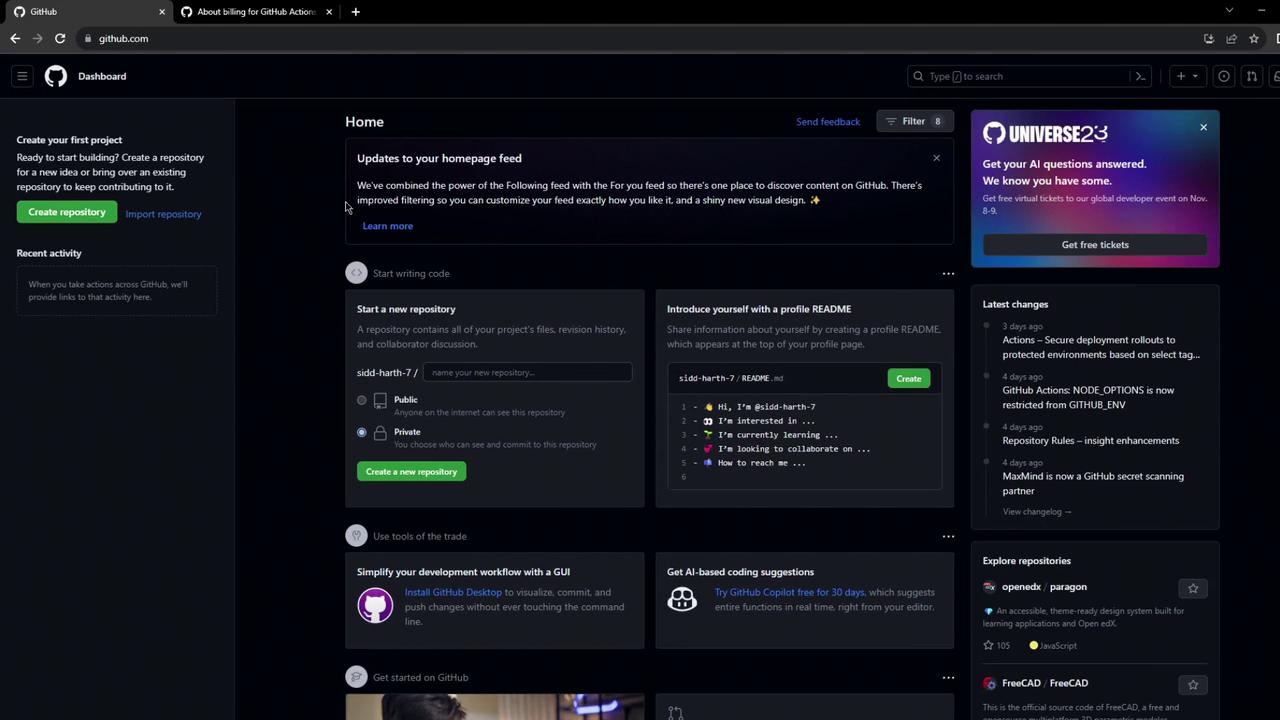
Step 4: Check Billing & Usage Limits
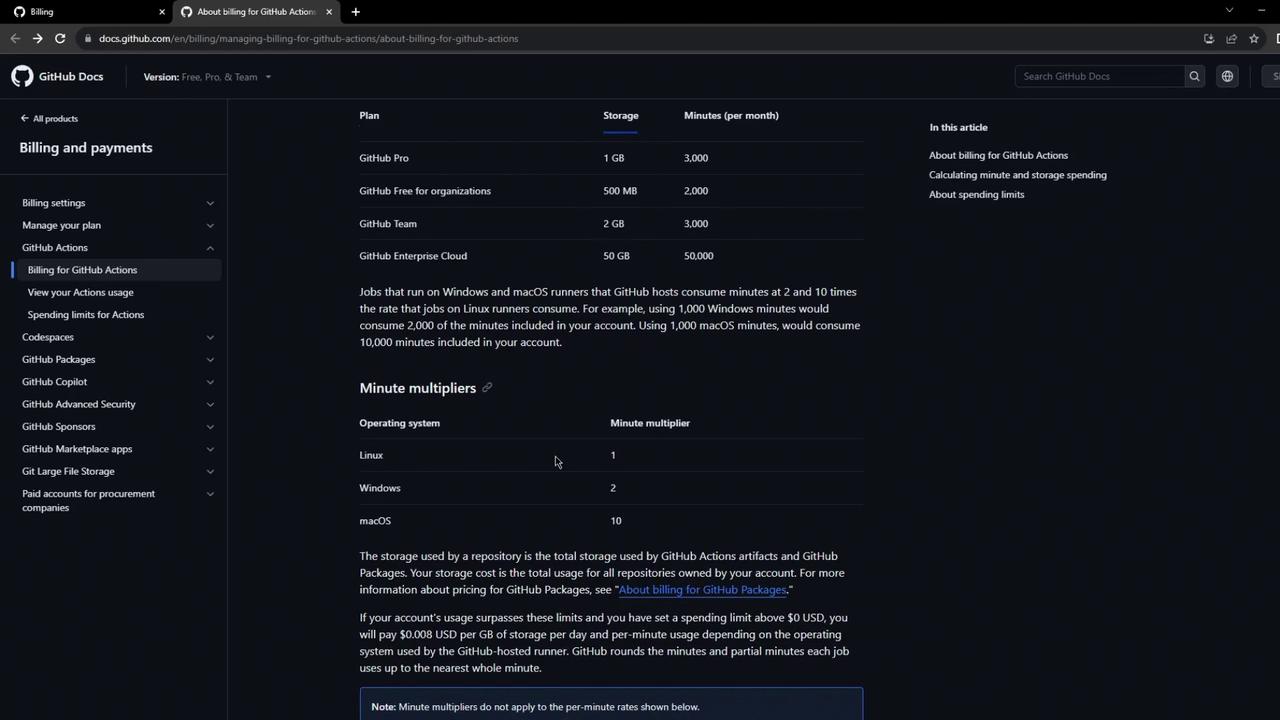
Navigate to Settings > Billing & plans to review your plan details:
| Resource | Free Plan Allocation |
|---|---|
| GitHub Actions minutes | 2,000 minutes / month |
| Package storage | 500 MB |
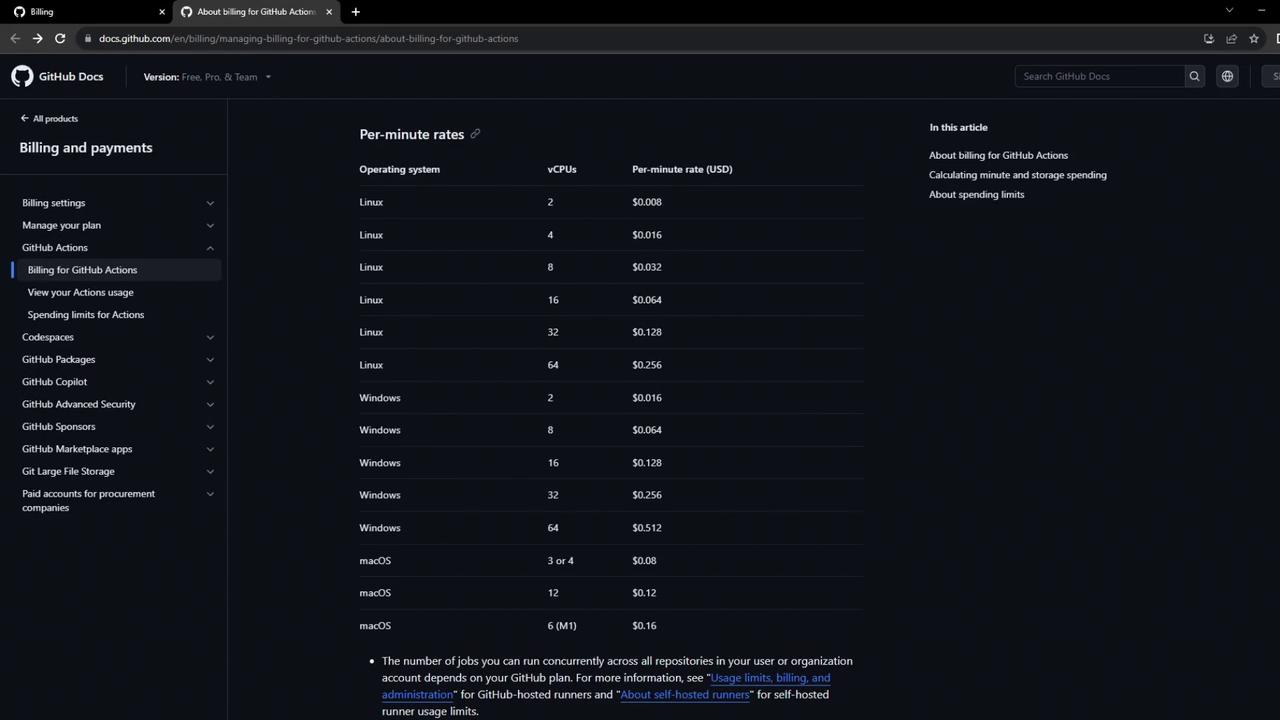
Exceeding these free limits will incur charges based on per-minute runner rates.
| Runner OS | Rate per minute |
|---|---|
| Ubuntu | $0.008 |
| Windows | 2× Ubuntu rate |
| macOS | 10× Ubuntu rate |