GitHub Copilot Certification

Advanced Features

GitHub Copilot Agents

In this guide, we explore GitHub Copilot Agents and demonstrate how to control context in your prompts for more precise AI assistance.

What Are Copilot Agents?

GitHub Copilot Agents are domain-specific assistants you can summon in the chat interface by typing @ followed by their names. Each agent is optimized to access relevant contexts—such as your workspace files, terminal history, or editor settings—to deliver tailored suggestions and code snippets. These agents use advanced natural language processing (NLP) to understand your requests and generate contextually accurate responses.

The image explains how Copilot agents operate, detailing their functionality and features, including triggering by "@" mentions, specialized knowledge, information analysis, and natural language processing. It also shows a list of commands in a chat interface.

Note

Each agent has unique training data and access scopes—choose the right one for your task to get the best results.

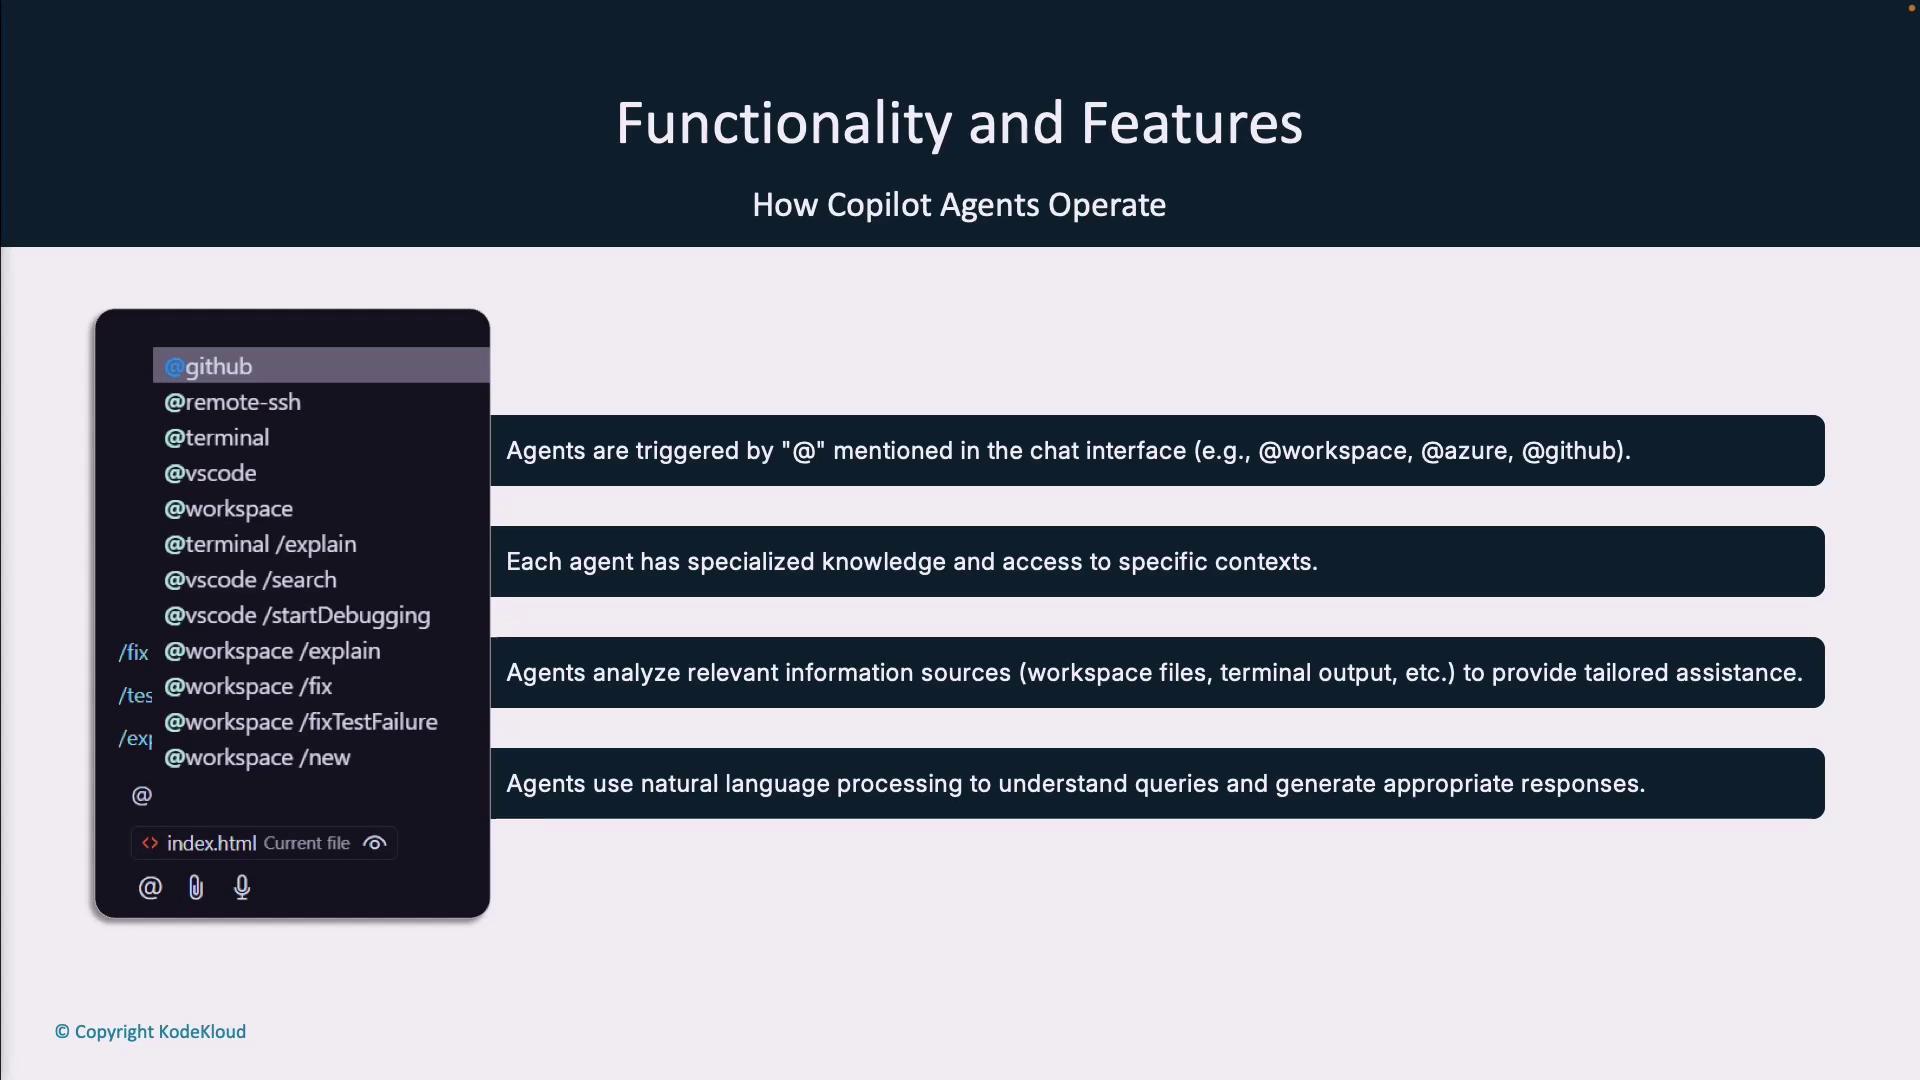
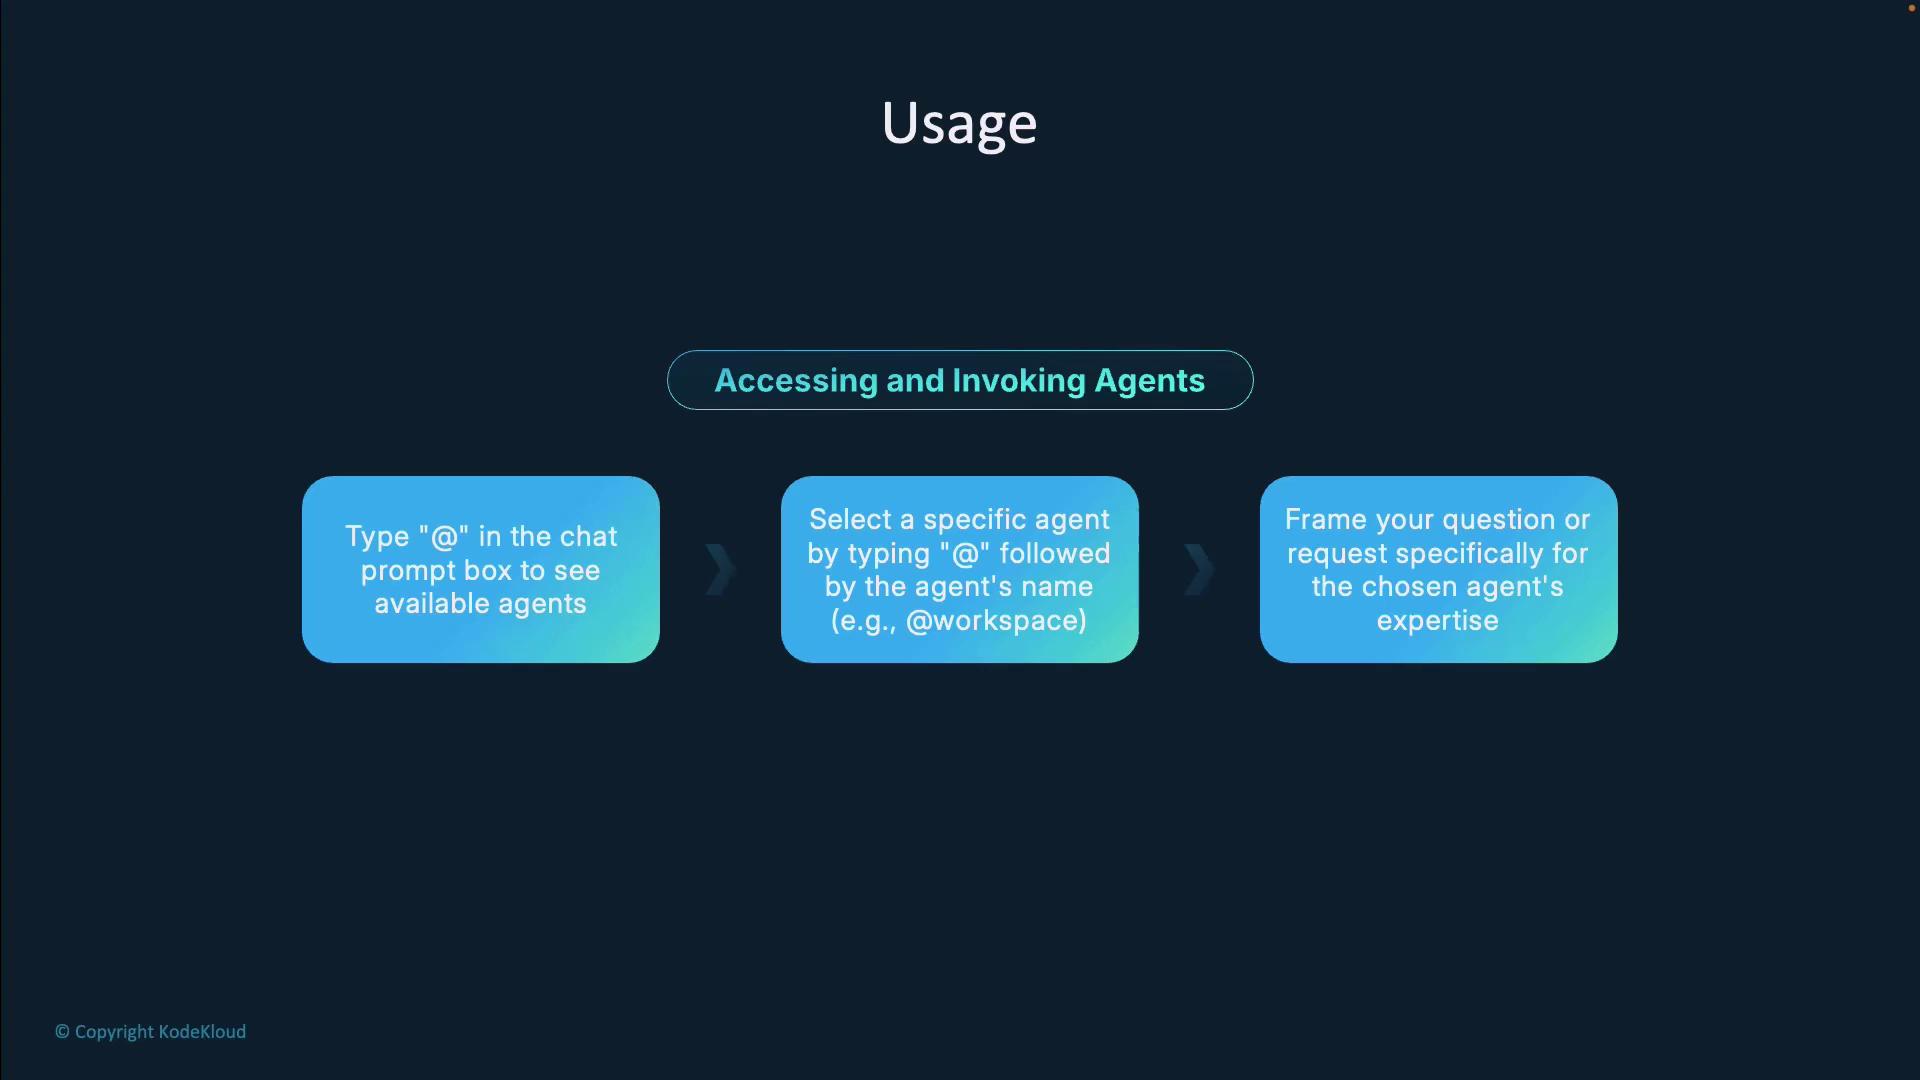
Accessing and Invoking Agents

To view all available agents, type @ in the Copilot chat prompt. A dropdown menu will list every agent you can interact with. Simply select an agent by typing @agent-name. For example:

@workspace

For optimal responses, frame your query according to the agent’s expertise.

The image is a guide on accessing and invoking agents, detailing steps to type "@" in the chat prompt, select an agent, and frame a question for the agent's expertise.

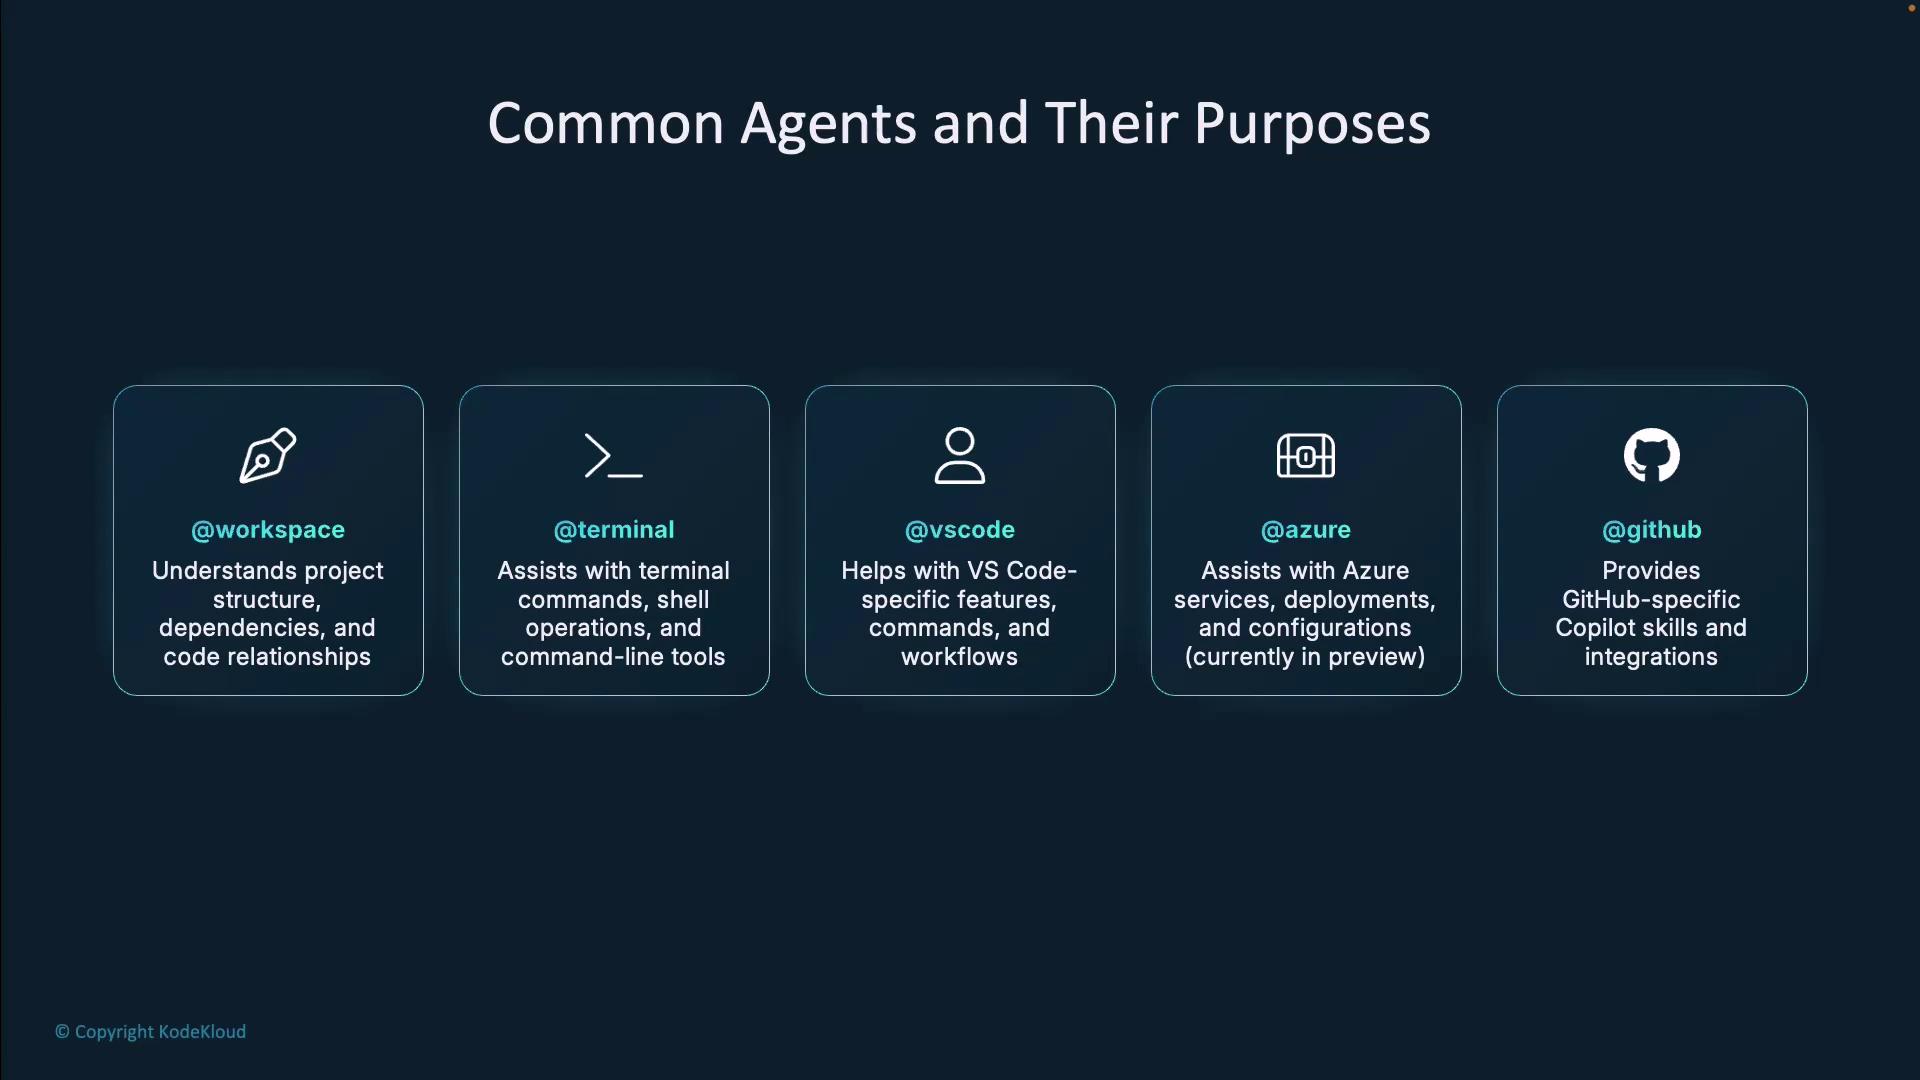
Common Agents and Their Domains

AgentDomainExample Use Case
@workspaceProject structure, dependencies, code relationshipsExplain function calls across multiple modules
@terminalShell commands, environment setup, CLI toolingInstall dependencies or troubleshoot command errors
@vscodeVS Code settings, extensions, editor featuresEnable Copilot Chat experimental features
@azure (preview)Azure services, deployments, cloud configurationsScaffold Azure Functions or ARM templates
@githubGitHub workflows, actions, repository integrationsCreate CI/CD pipelines or manage pull request templates

The image lists common agents and their purposes, including @workspace, @terminal, @vscode, @azure, and @github, each with a brief description of their functions.

Agents in Action: Mention-Based Workflow

Below is a step-by-step example of how to use mention-based agents in Visual Studio Code:

  1. Open Copilot Chat (Ctrl+Shift+P → Copilot: Open Chat)

  2. Type @workspace and ask a question:

    @workspace Explain how this traffic simulation application works.
    

    The agent will scan your entire project and highlight relevant functions. For instance:

    def draw_traffic_light(surface, direction, state):
        """
        Draws a circular traffic light for a given direction at a fixed offset
        from the intersection.
        """
        positions = {
            'north': (CENTER_X, STOP_LINE['north'] - LIGHT_OFFSET),
            'south': (CENTER_X, STOP_LINE['south'] + LIGHT_OFFSET),
            'east':  (STOP_LINE['east'] - LIGHT_OFFSET, CENTER_Y),
            'west':  (STOP_LINE['west'] + LIGHT_OFFSET, CENTER_Y)
        }
        pos = positions.get(direction)
        color = LIGHT_COLORS[state]
        pygame.draw.circle(surface, color, pos, LIGHT_RADIUS)
    
  3. Switch to the Terminal agent to install and run the app:

    pip3 install pygame
    python3 -m venv testenv
    source testenv/bin/activate
    pip install pygame
    python main2.py
    

    If you encounter an indentation error:

    (venv) jeremy@MACSTUDIO code % python main2.py
    Traceback (most recent call last):
      File "main2.py", line 220, in <module>
        main()
      File "main2.py", line 216, in main
        run_simulation()
    IndentationError: unindent does not match any outer indentation level
    

    Correct the indentation and rerun to launch the Pygame traffic light simulator.

  4. For editor-specific queries, use the VS Code agent:

    @vscode How do I enable Copilot Chat experimental features?
    

    It will direct you to Settings > Editor > Copilot.

  5. Generate tests across your codebase with Workspace:

    @workspace fix tests
    

    This produces comprehensive unit tests rather than file-scoped ones.

Experimental Agent Mode

GitHub Copilot’s experimental Agent Mode lets Copilot autonomously suggest code, edit files, and run terminal commands. This mode can significantly accelerate repetitive tasks.

The image shows a GitHub Copilot interface in a code editor, with options for chatting about code and editing with Copilot in experimental agent mode.

To enable Agent Mode:

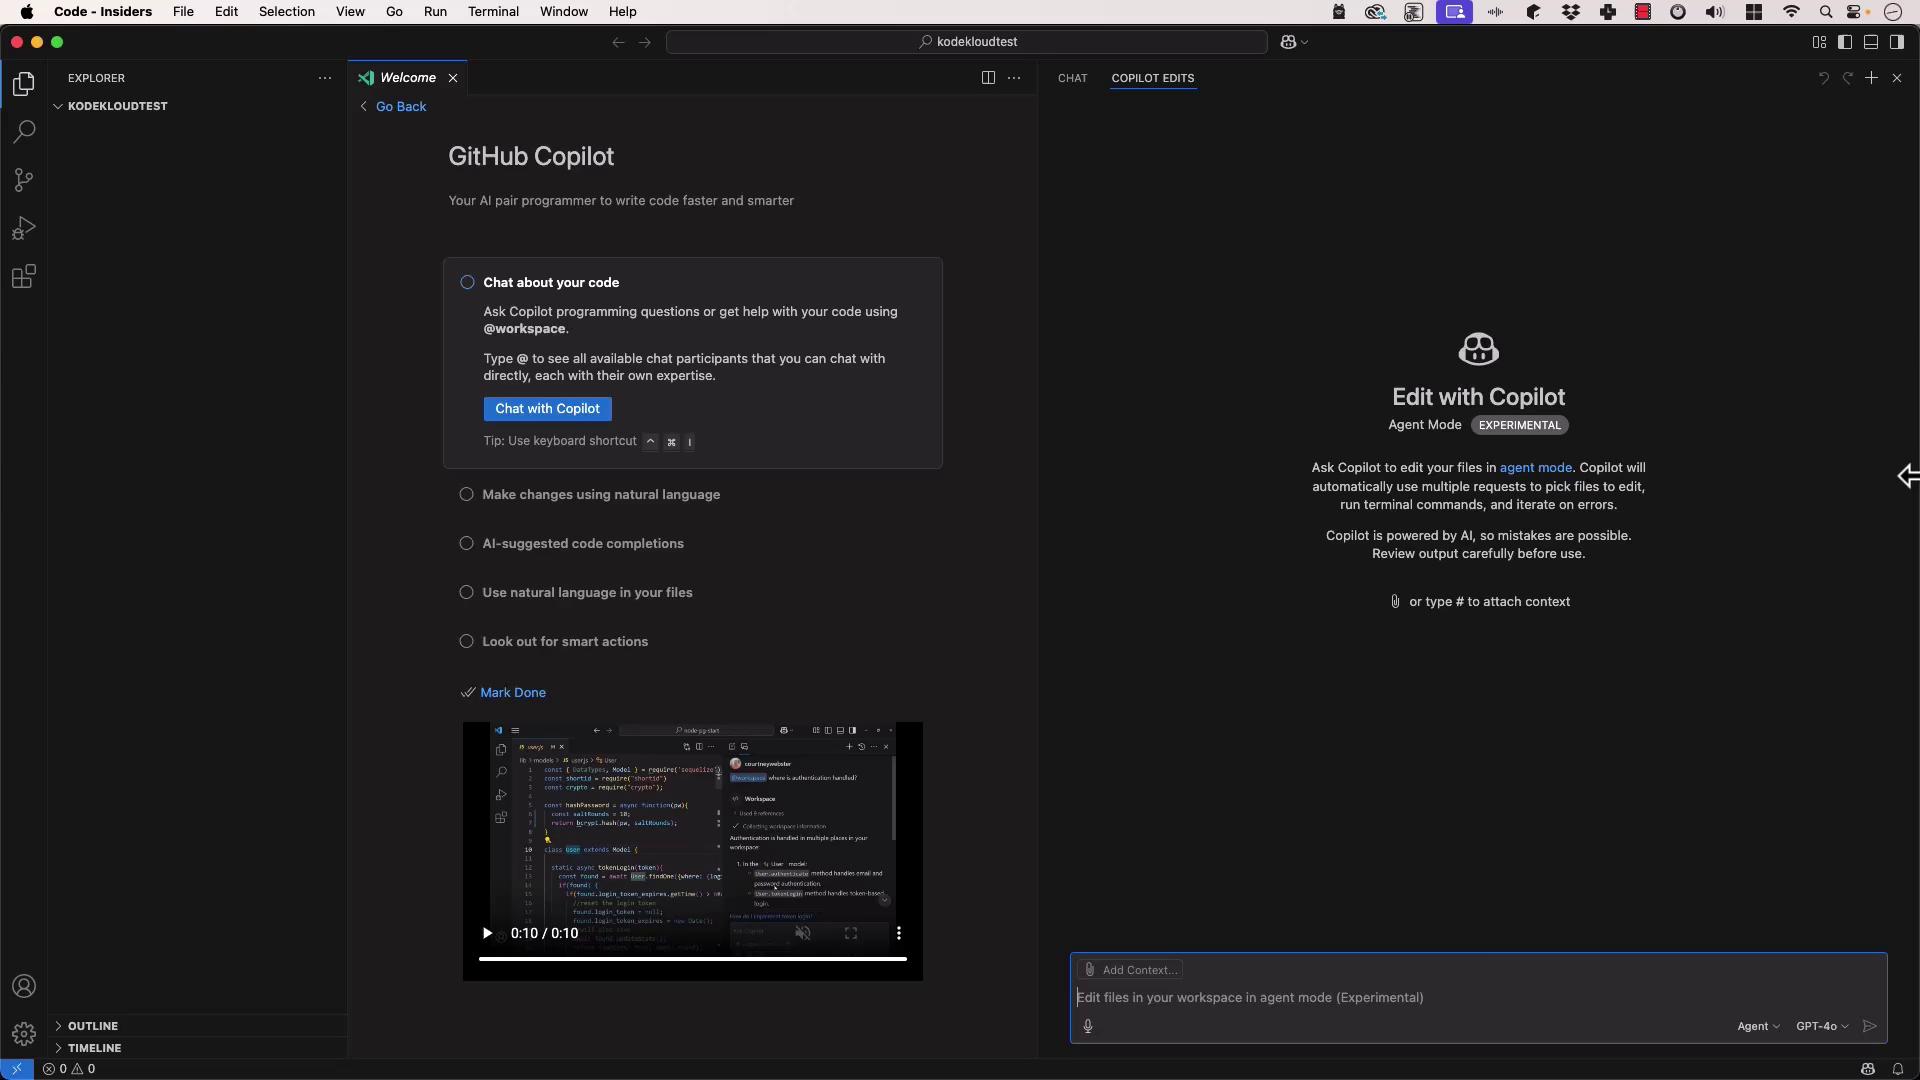
  1. Click the Agent Mode toggle in the lower-right corner of VS Code.

  2. Request a new project scaffold:

    Create a Python API application.
    

    The agent will generate a virtual environment, install Flask, and produce app.py:

    from flask import Flask
    
    app = Flask(__name__)
    
    @app.route('/')
    def hello_world():
        return 'Hello, World!'
    
    if __name__ == '__main__':
        app.run(debug=True)
    

    And run:

    python3 -m venv venv
    source venv/bin/activate && pip install Flask
    source venv/bin/activate && python app.py
    
    * Running on http://127.0.0.1:5000/ (Press CTRL+C to quit)
    * Restarting with stat
    * Debugger is active!
    * Debugger PIN: 371-990-415
    127.0.0.1 - - [06/Mar/2025 14:45:21] "GET /" 200 -
    

Warning

Agent Mode is experimental. Review all changes before committing to avoid unintended edits.

From here, you can ask the agent to add a database layer:

Add an in-memory database with fields ID, name, and email.

The agent will update your Flask app and execute the necessary commands automatically.

Summary

  • Mention-based Copilot Agents (@workspace, @terminal, @vscode, etc.) scan specific contexts to deliver targeted assistance.
  • Experimental Agent Mode enables Copilot to autonomously generate code, run commands, and modify files.

Leverage GitHub Copilot Agents to streamline your development workflow and boost productivity.

Watch Video

Watch video content

Previous
Slash Commands in Depth