- File-Based Configuration
- Testing in
main.py - Using the Completions Panel
- Keyboard Shortcuts
- Switching AI Models
- Managing Context Windows
1. File-Based Configuration
Store custom instructions at the repository root to steer Copilot’s code generation.copilot-instructions.md will shape Copilot’s output. For example, to enforce PEP 8 in Python:
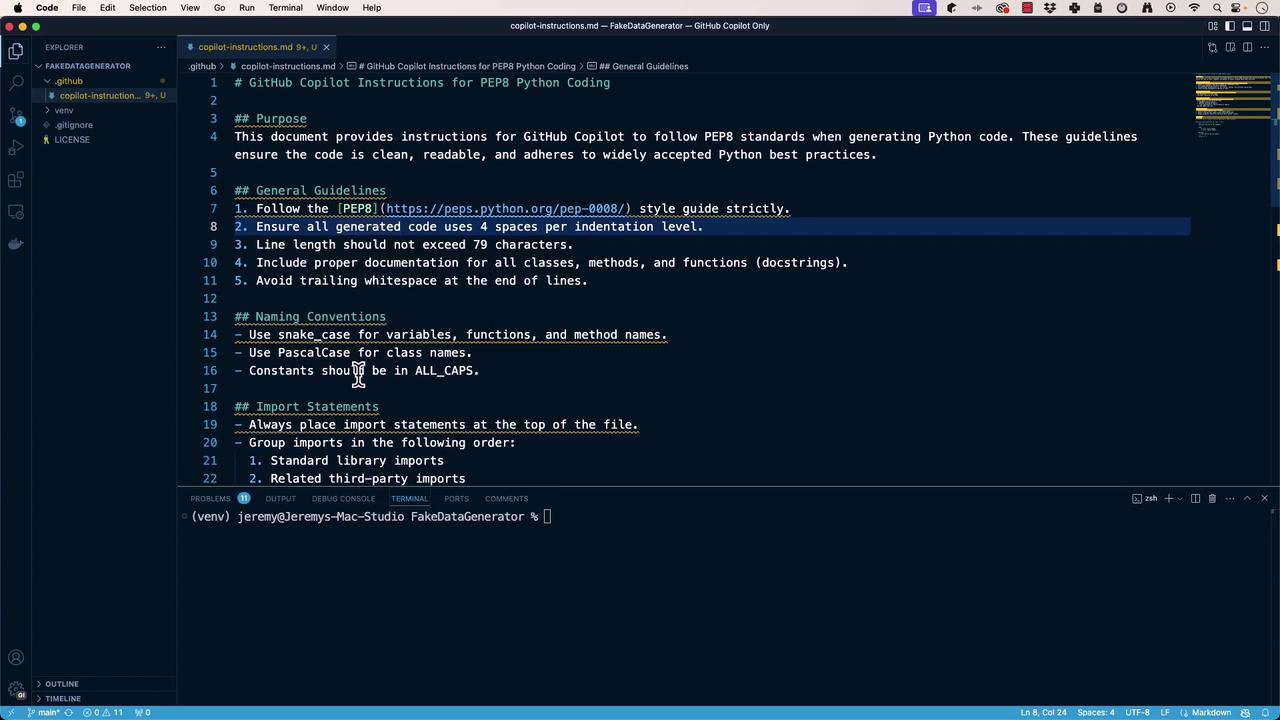
Well-defined instructions ensure consistent, high-quality suggestions across your team.
2. Testing in main.py
Validate that Copilot respects your file-based configuration:
If the generated code doesn’t match your standards, retry or use Copilot Chat for better fidelity.
3. Using the Completions Panel
The Completions Panel lets you review multiple suggestions side-by-side:- Open with the Copilot icon or run GitHub Copilot: Open Completions Panel.
- Enter your prompt, e.g.:
- Compare suggestions and pick the one that aligns with your style.
4. Keyboard Shortcuts
Master these keybindings to speed up your workflow: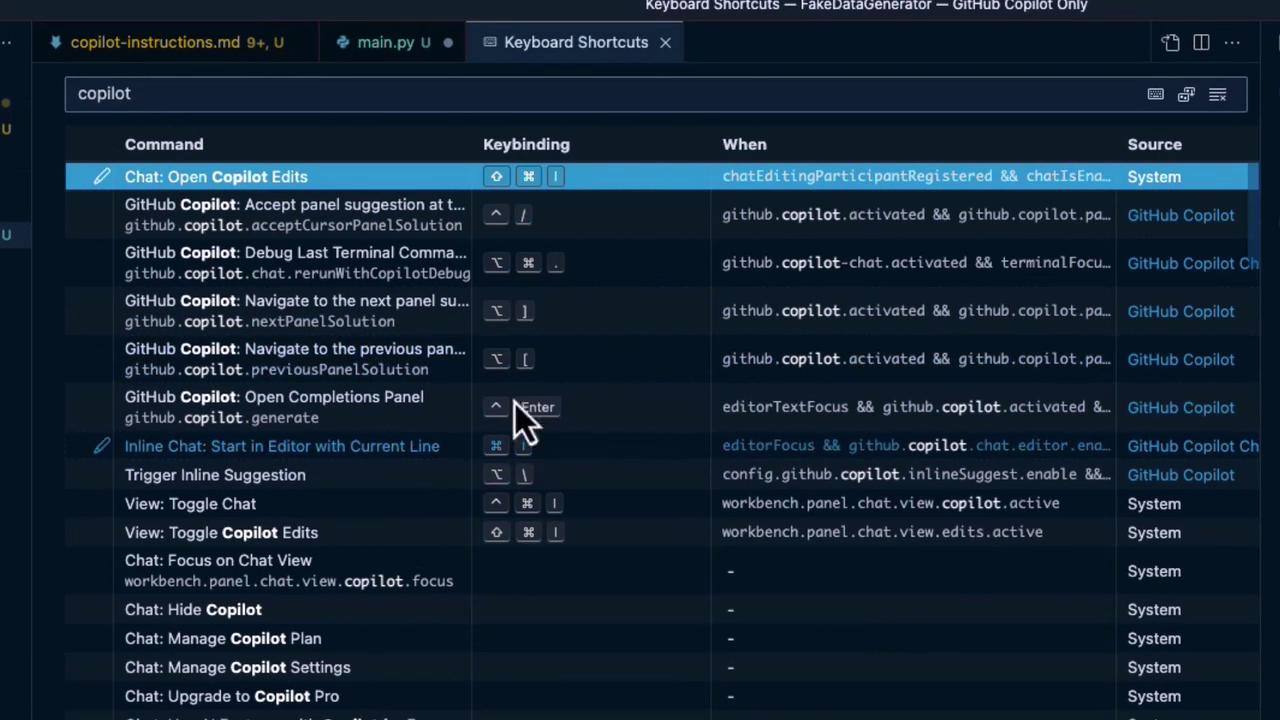
| Command | Keybinding | Condition |
|---|---|---|
| Chat: Open Copilot Edits | — | chatEditingParticipantRegistered && chatIsEnabled |
| Accept panel suggestion | ⌥\ | github.copilot.acceptCursorPanelSolution |
| Next panel suggestion | ⌥\ | github.copilot.nextPanelSolution |
| Previous panel suggestion | ⌥[ | github.copilot.previousPanelSolution |
| Open Completions Panel | — | github.copilot.generate |
| Start Inline Chat in Editor | Enter | editorTextFocus && github.copilot.chat.editor.enabled |
| Trigger Inline Suggestion | ⌥\ | editorFocus && github.copilot.chat.editor.enabled |
5. Switching AI Models
Different Copilot models excel at different tasks. Click the model selector in the lower-right corner to choose:| Model | Strength | Ideal Use Case |
|---|---|---|
| Claude 3.5 | Deep contextual reasoning | Summaries, refactoring |
| Sonnet | Fast, lightweight completions | Short snippets, boilerplate code |
| GPT-4 | Broad language understanding | Complex logic, detailed explanations |
| O1 Preview | Optimized for multi-step workflows | Step-by-step guides, automation flows |
6. Managing Context Windows
Copilot’s suggestions depend on the active context. Keep only your current files open to maintain focused and relevant completions.Closing inactive tabs prevents context dilution and improves suggestion accuracy.
In this lesson, we covered:
- Defining file-based instructions
- Verifying behavior in
main.py - Leveraging the Completions Panel
- Memorizing keyboard shortcuts
- Selecting the optimal AI model
- Managing editor context