GitLab CI/CD: Architecting, Deploying, and Optimizing Pipelines

Introduction

Create GitLab Account

In this lesson, you’ll learn how to set up and navigate your GitLab SaaS account—no self-hosted installation required. We’ll cover sign-in methods, namespaces, projects, CI/CD usage quotas, and how compute usage is calculated.

1. Sign In to GitLab

Begin by visiting the GitLab login page. You can authenticate with your email and password or leverage single sign-on providers:
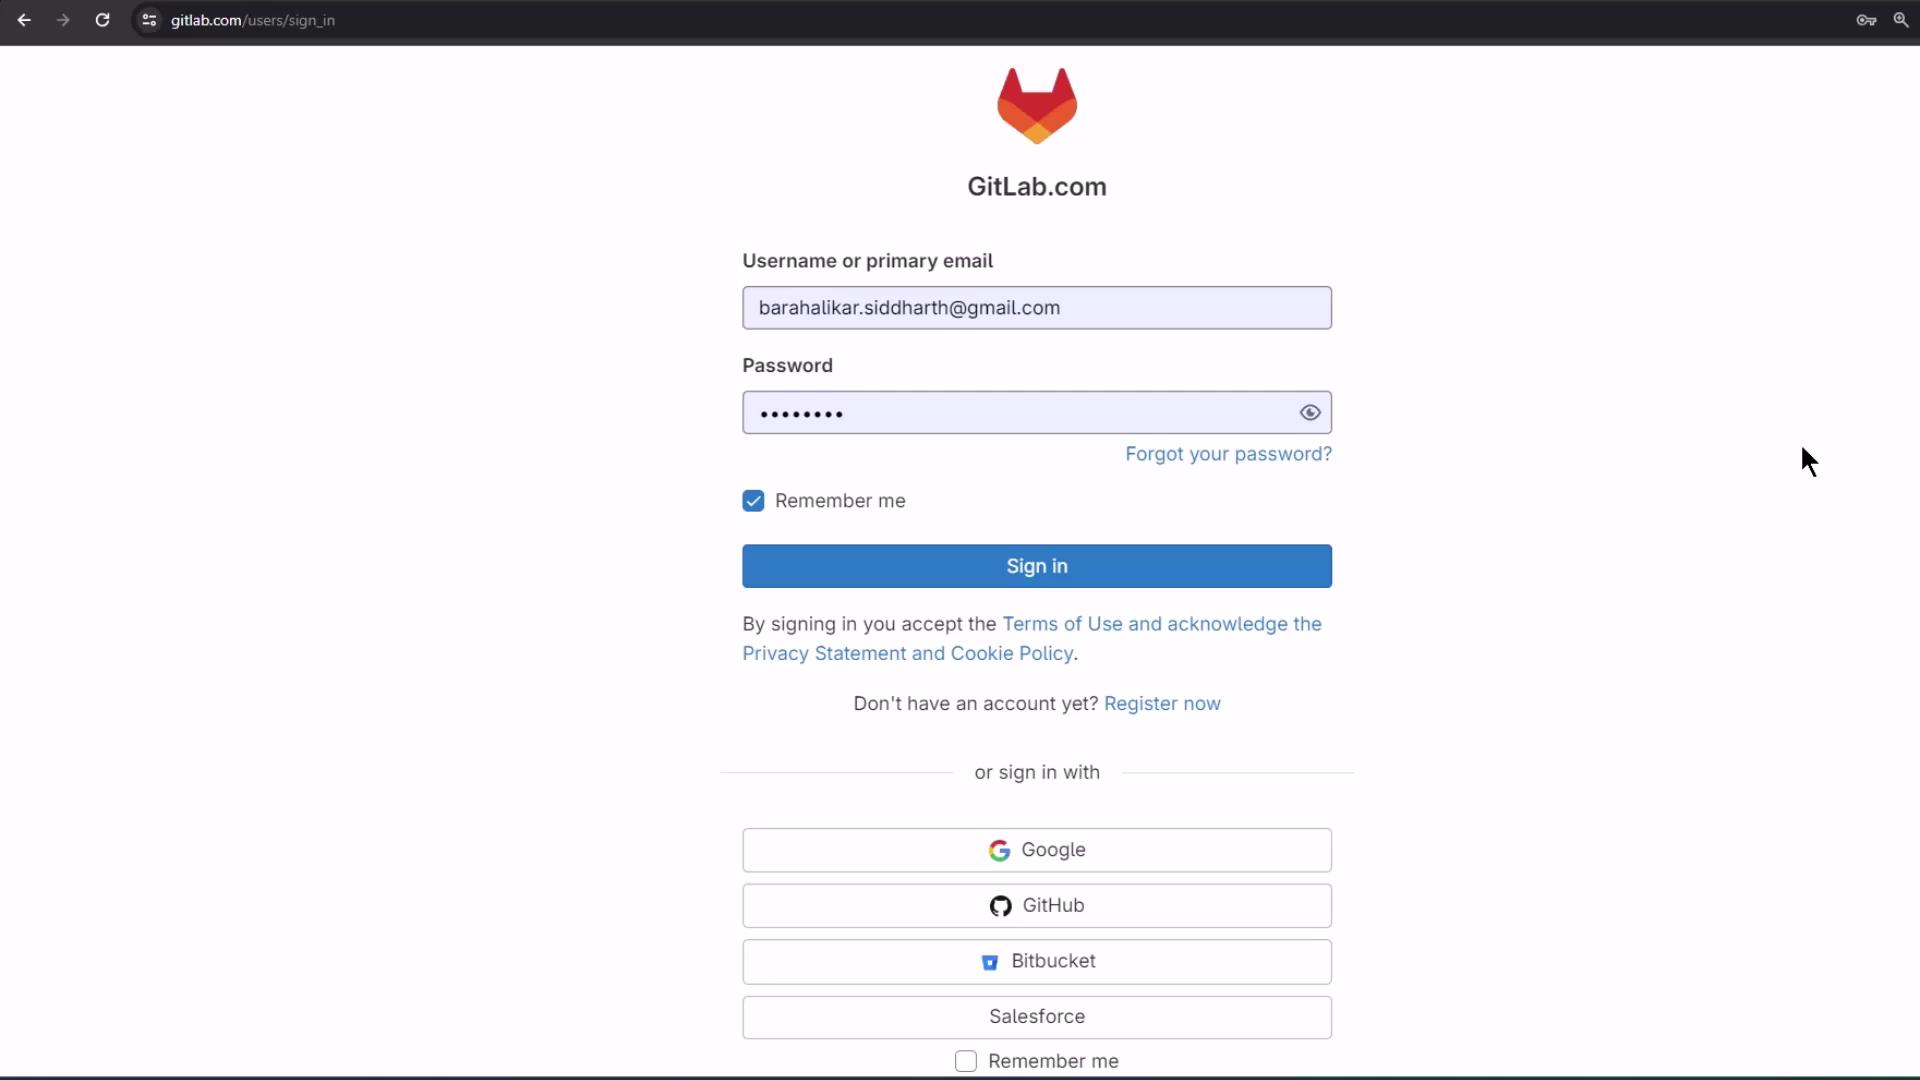
The image shows a GitLab login page where a user can sign in with a username or email and password, or use alternative sign-in options like Google, GitHub, Bitbucket, or Salesforce.

Available sign-in options include:

  • Email and password
  • Google
  • GitHub
  • Bitbucket
  • Salesforce

In this tutorial, we’ll continue with an existing trial account.

2. Your Dashboard and Namespaces

After logging in, GitLab displays all your projects grouped by namespace:
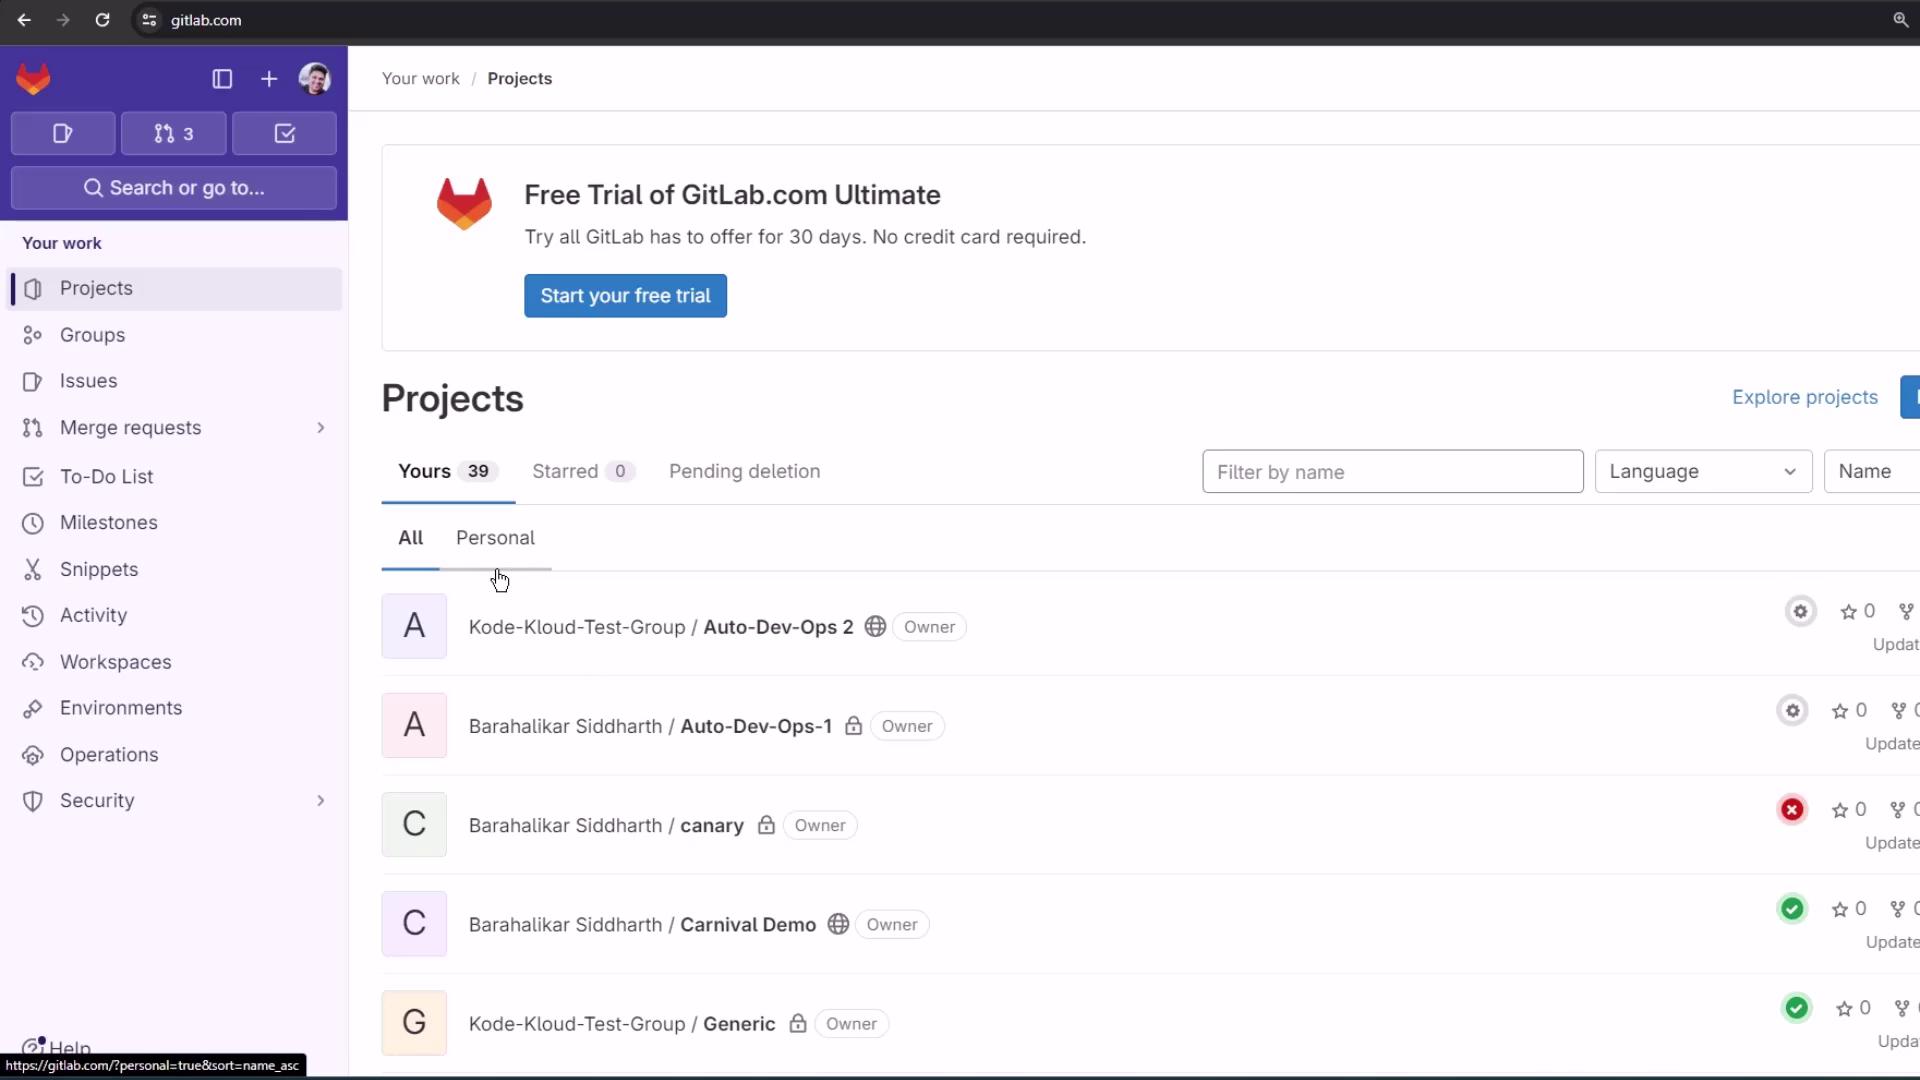
The image shows a GitLab dashboard with a list of personal projects and an option to start a free trial of GitLab.com Ultimate.

By default, GitLab creates two namespace types:

Namespace TypeDescription
Personal namespaceNamed after your username and contains only projects you own
Group namespaceA folder for related projects that share permissions, settings, and members

3. Understanding GitLab Projects

A project in GitLab is equivalent to a repository on other platforms. Within each project, you can:

  • Host your code and assets
  • Track issues, boards, and merge requests
  • Collaborate on code reviews
  • Build, test, and deploy with integrated CI/CD pipelines

Note

Projects in GitLab combine repository management, issue tracking, and CI/CD in one place—no extra setup required.

This guide will later show you how to configure CI/CD pipelines, review environment dashboards, and explore security insights.

4. Viewing Usage Quotas

To monitor your CI/CD consumption, go to Edit Profile > Usage Quotas:

The image shows a GitLab user interface displaying "Usage Quotas" for pipelines, with a graph of compute usage and options for filtering charts by year.

GitLab trial accounts include 400 compute units per month. Compute units measure the time your jobs run on GitLab’s shared runners.

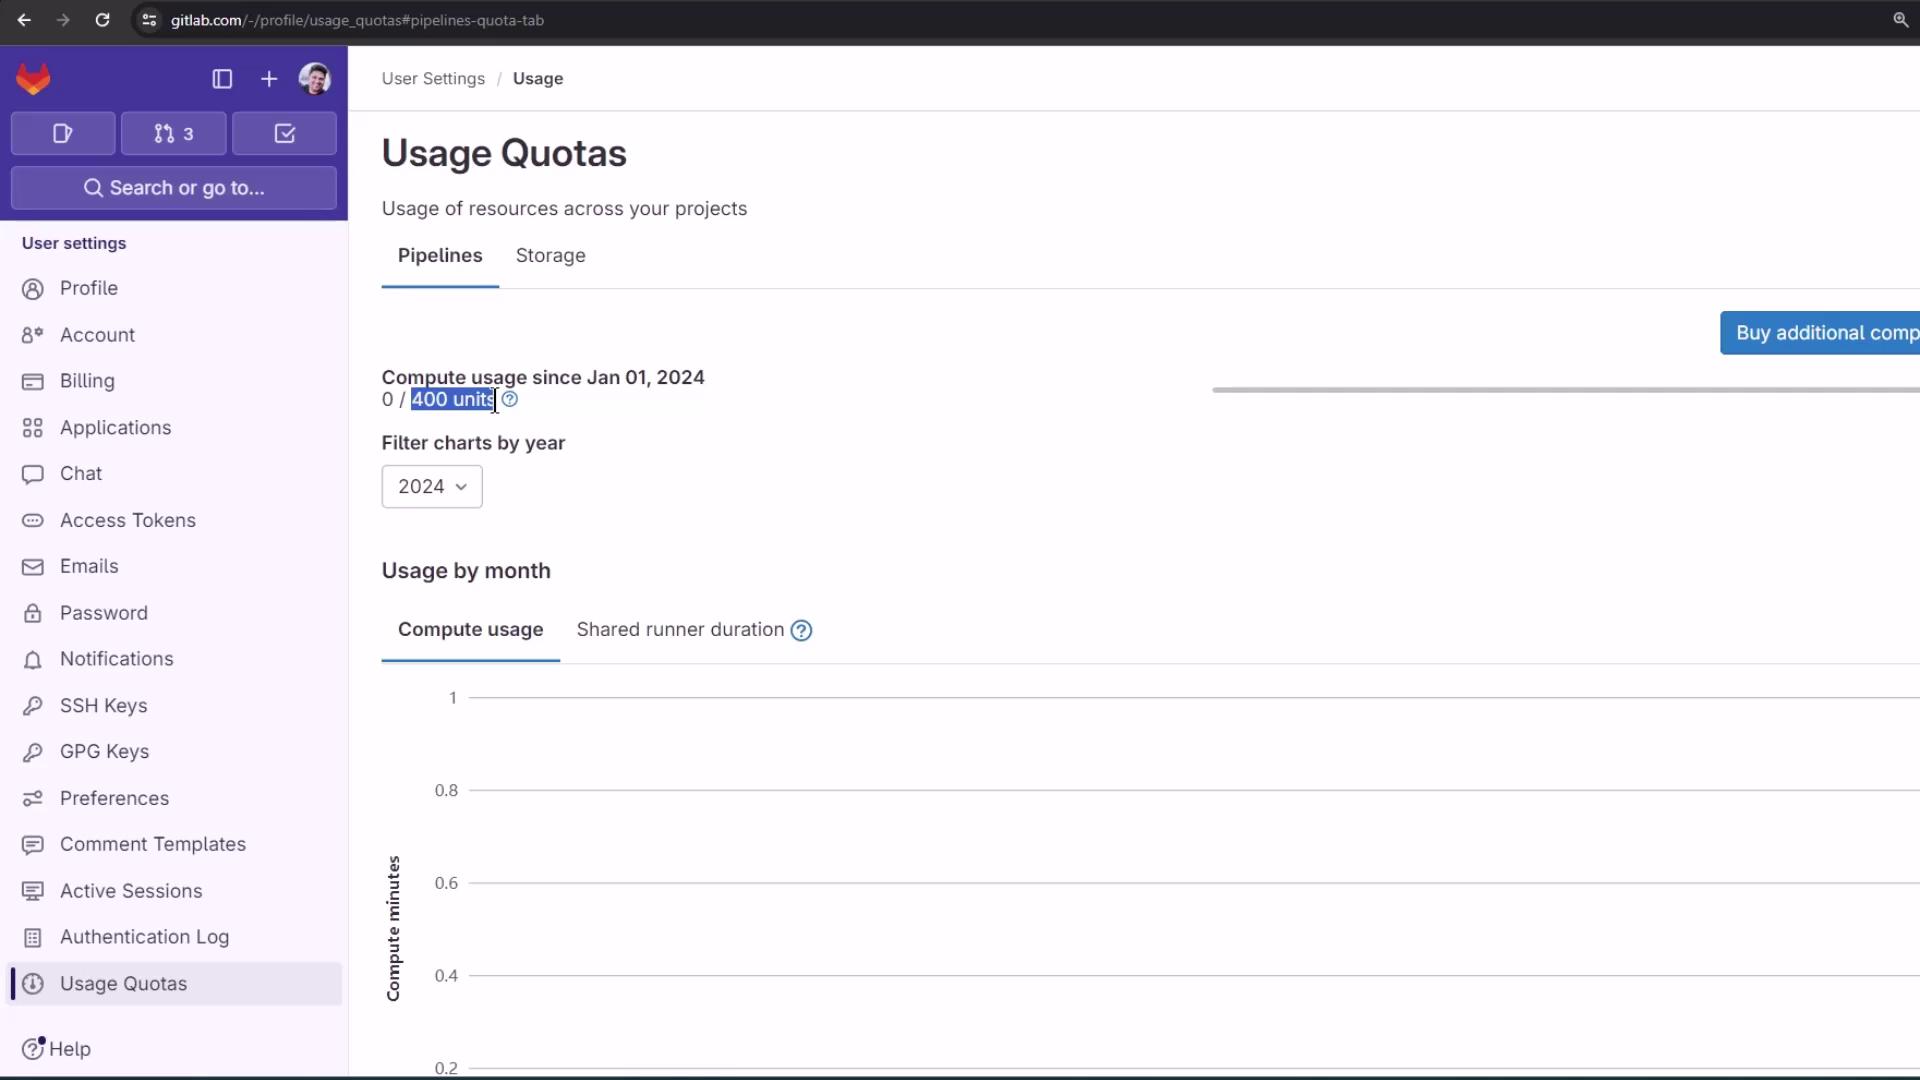
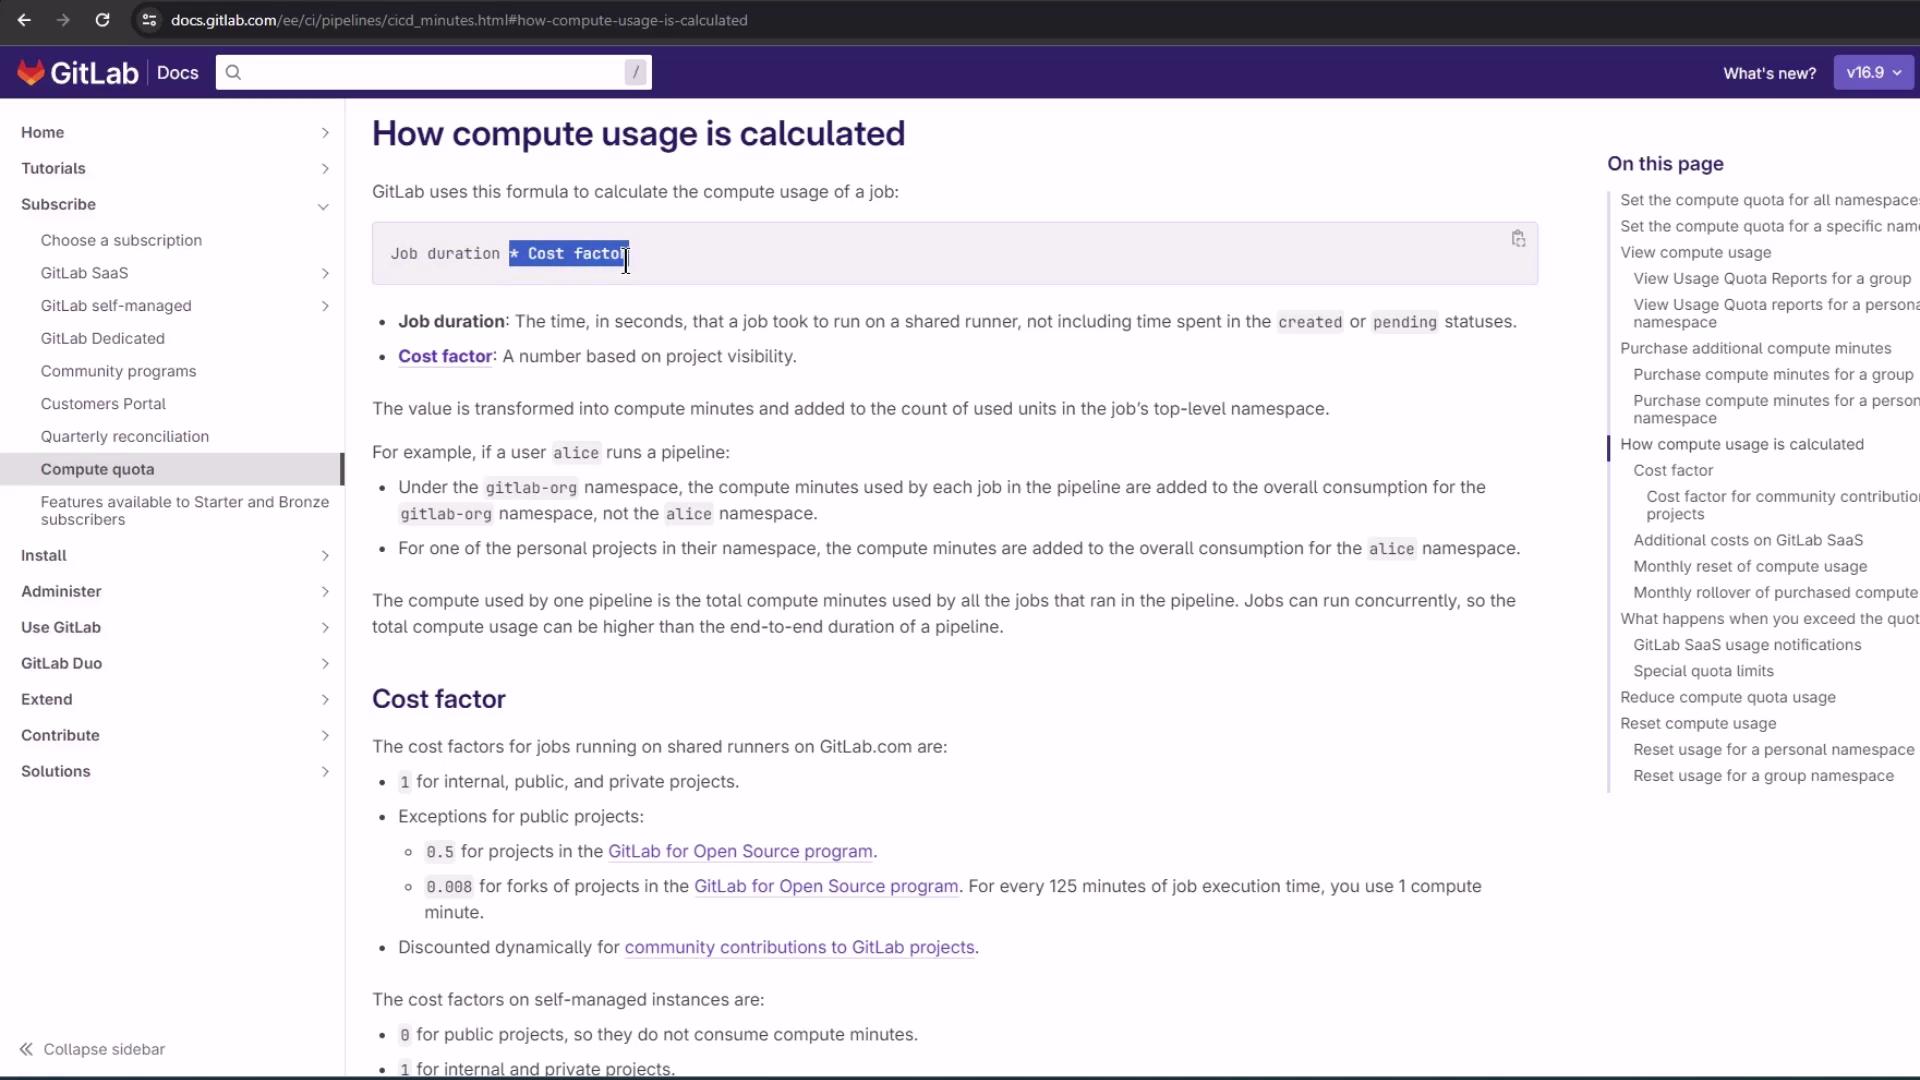
Compute usage = job duration × cost factor

For full details on compute quotas and billing, see the official documentation:

The image shows a GitLab documentation page about "Compute quota," detailing how administrators can manage the time projects use for running jobs. It includes navigation links on the left and a table of contents on the right.

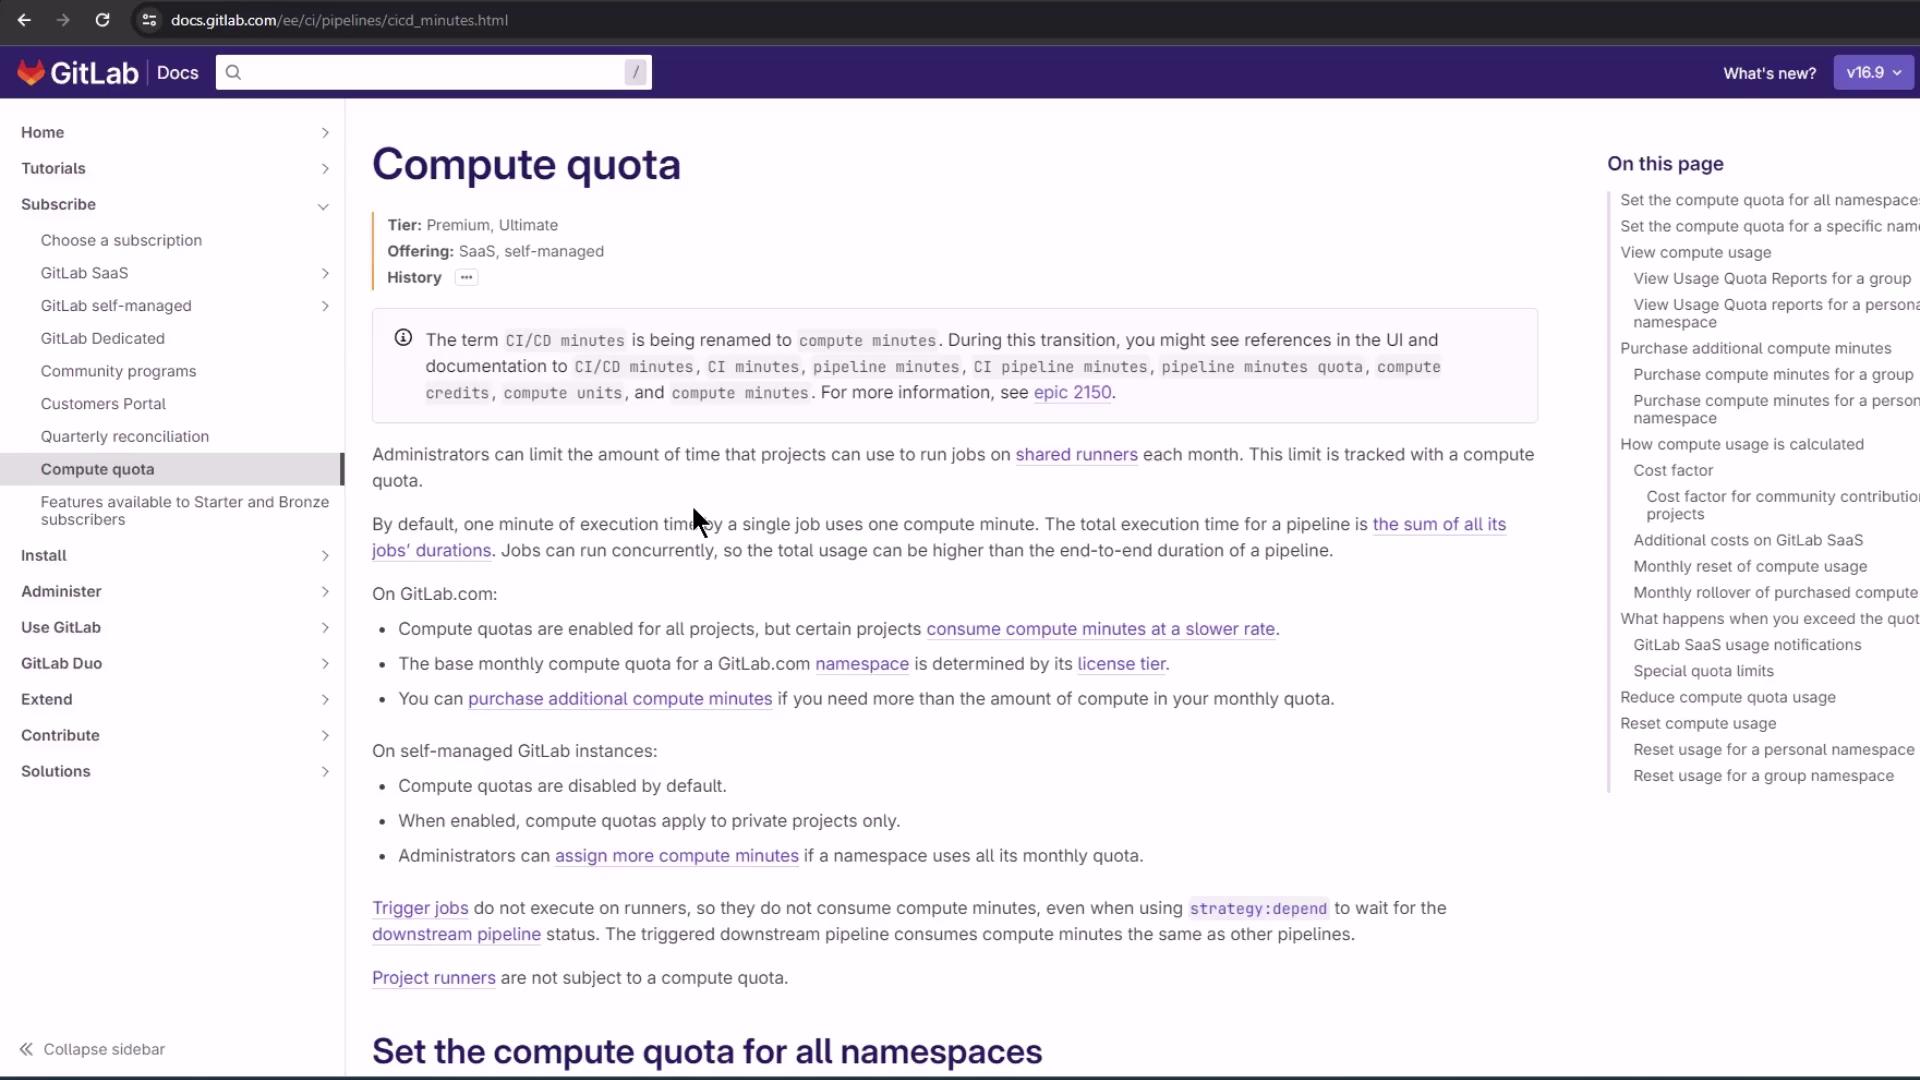
5. How Compute Usage Is Calculated

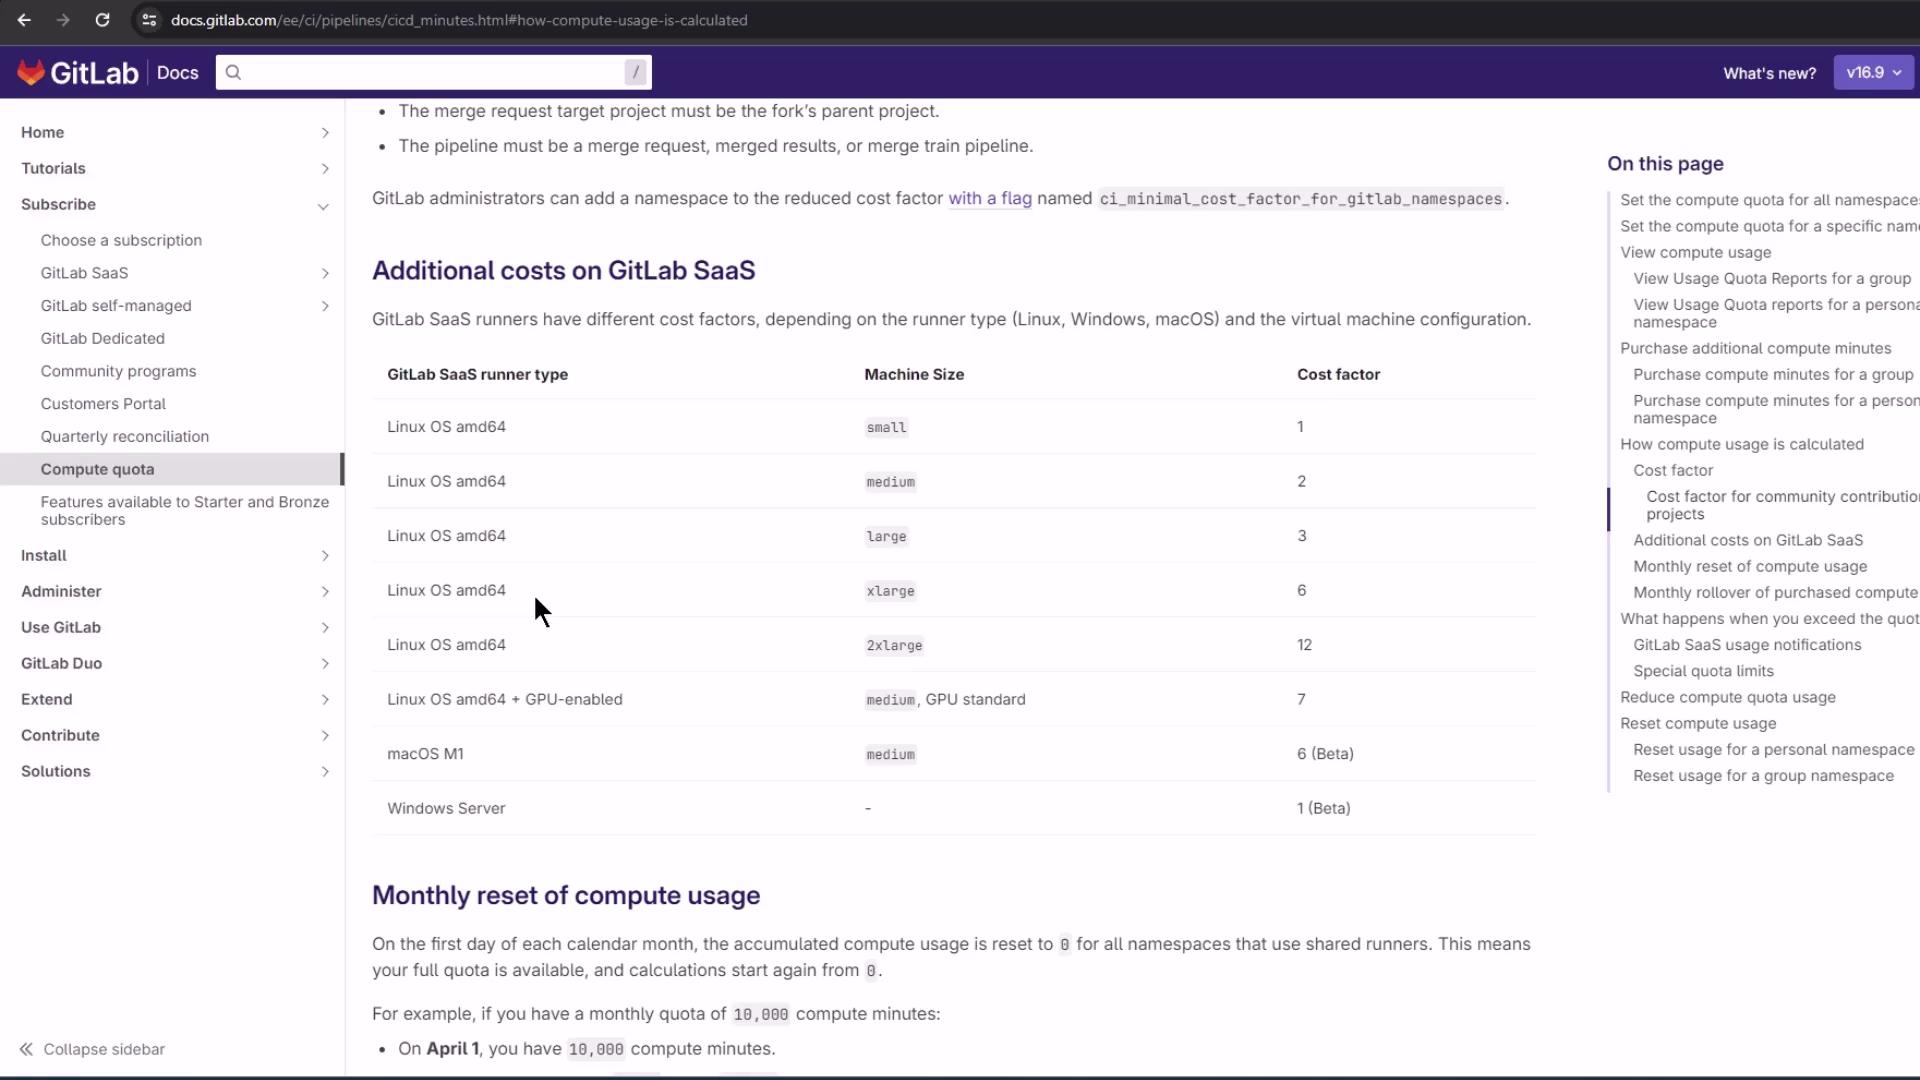
GitLab multiplies each job’s runtime by a cost factor that depends on:

  • Project visibility (public, internal, private, open source)
  • Runner type and size (Linux, Windows, macOS, GPU-enabled, etc.)

The image shows a GitLab documentation page explaining how compute usage is calculated, including details on job duration and cost factors. The page includes a sidebar with navigation links related to compute quota and usage.

Different VM types incur varying cost factors. Review the example table in GitLab’s docs:

The image shows a GitLab documentation page detailing additional costs for GitLab SaaS, with a table listing different Linux OS runner types, machine sizes, and their associated cost factors.

Warning

Exceeding your monthly compute quota may incur additional charges. Monitor usage regularly and consider adding more runners or optimizing job durations.

6. Next Steps

You’re all set to explore deeper GitLab CI/CD features:

  • Configure custom runners and tags
  • Define advanced pipeline stages and triggers
  • Use environment and operations dashboards
  • Integrate security and compliance scans

Watch Video

Watch video content

Previous
Introducing GitLab CICD