1. Homepage Overview
Open your browser and go to https://openai.com. The homepage highlights key resources:| Section | Description | Examples |
|---|---|---|
| Research | Browse model releases, papers, and demos | DALL·E, GPT-4 |
| Safety | Standards for ethical AI, copyright, deepfakes | “Safety at every step” guidelines |
| Company | OpenAI’s mission, team, and corporate values | About Us, Careers |
| Developer | API reference, tutorials, SDKs | API docs, code samples |
| Stories | Use cases, news, and blog articles | Customer spotlights, announcements |

2. Exploring the Menu
Research
Under Research, you’ll find model releases and research insights:- DALL·E: Generate high-quality images from textual prompts.
- GPT-4: State-of-the-art LLM for advanced text generation.
OpenAI is developing experimental video-generation models—imagine a woolly mammoth running in the snow!
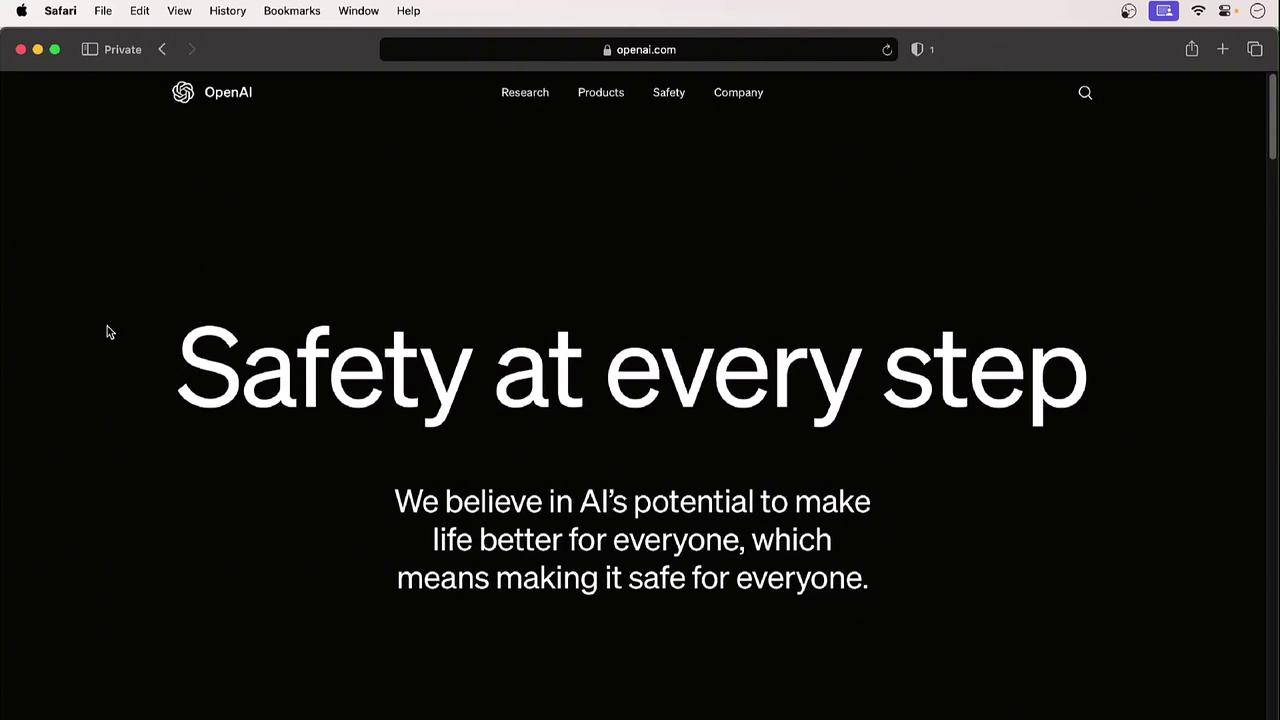
Safety
The Safety section covers:- Ethics and responsible AI
- Copyright guidance
- Misinformation and deepfake prevention
Company
Visit Company → About Us to learn OpenAI’s mission, values, and organizational structure.3. Accessing the API
- Go to Products → API in the top menu.
- Click Login (or Sign Up if you don’t have an account yet).
- Explore the left sidebar for:
- API reference
- Quickstart guides
- Sample code
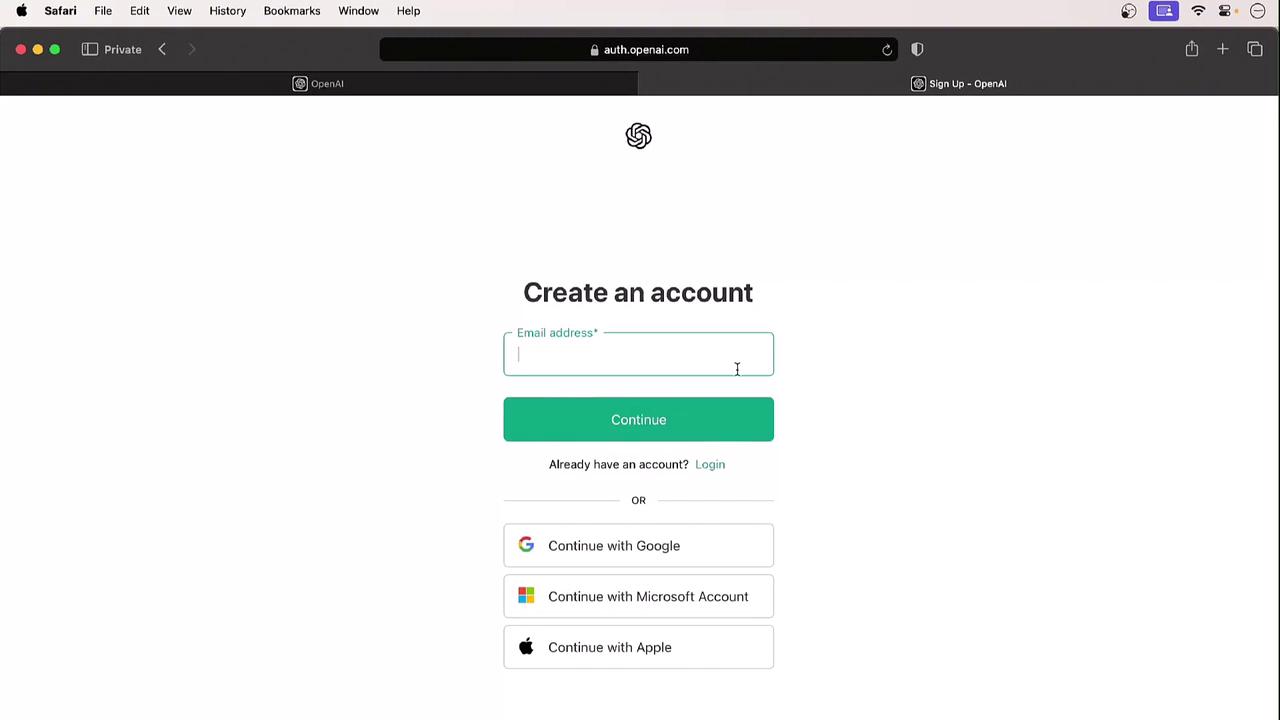
4. Creating Your Account
Follow these steps to set up your OpenAI account:- Click Sign Up on the API page.
- Enter your email address and create a password.
- Verify your email via the confirmation link.
- Complete your profile:
- Full name
- Organization (optional)
- Birth date
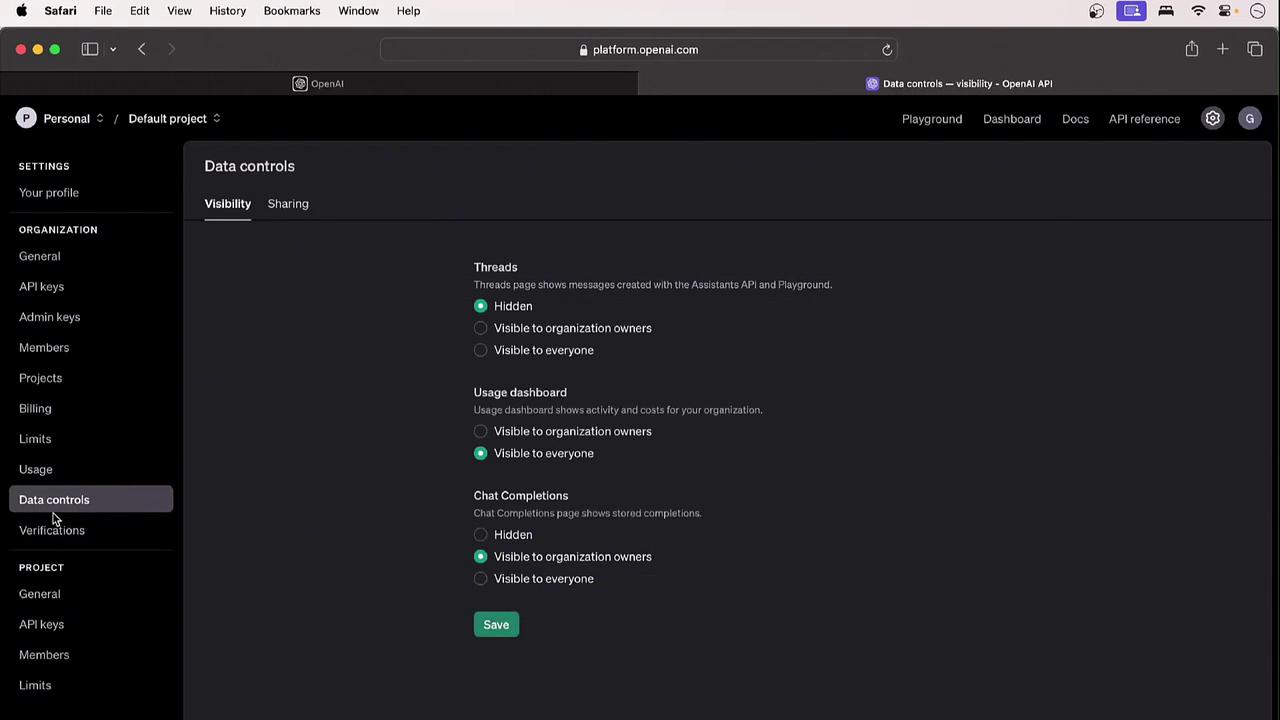
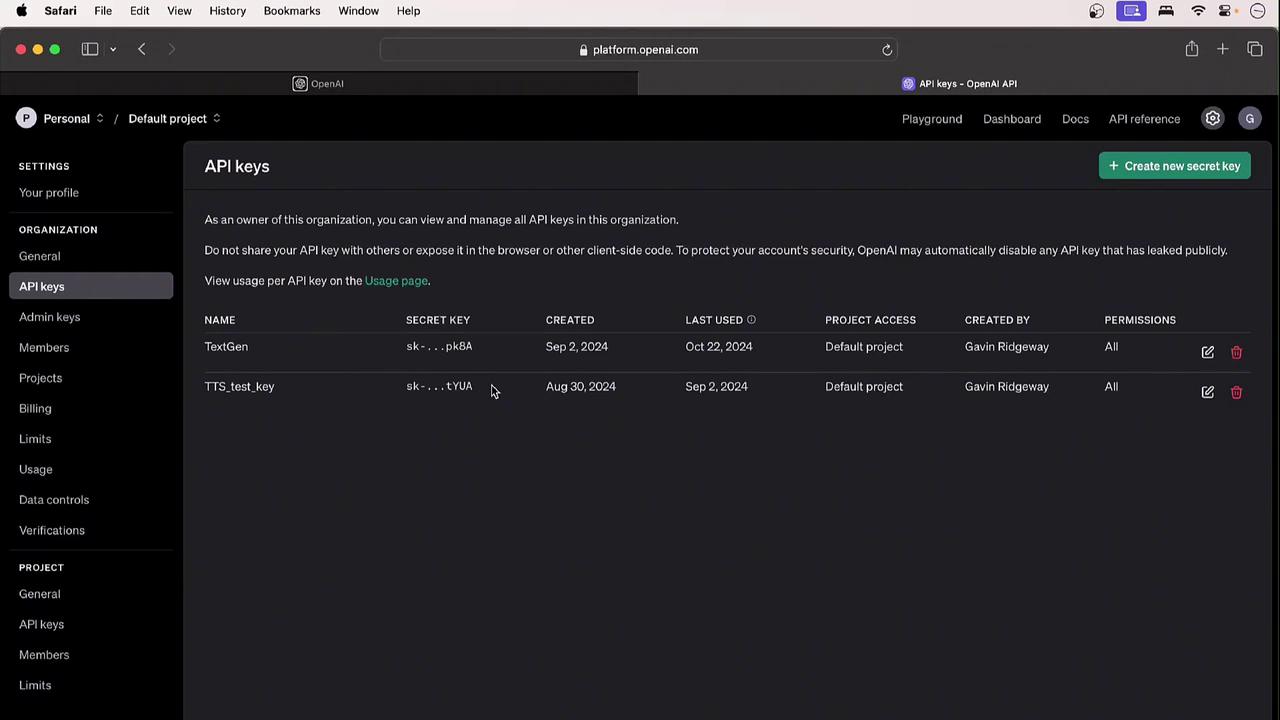
5. Your Profile and API Keys
Once logged in, click your initials in the top-right corner to open Profile & Keys. Here you can:- Update organization name and billing details
- Adjust interface settings and preferences
- Create, view, or revoke API keys
- Admin vs. user permissions
- Project-based access controls
- Billing and usage dashboards
- Rate limits and quotas
- Data control settings