Learn to obtain a Jenkins pipeline script from a Source Control Management system like GitHub for better version control and maintainability.
In this lesson, you’ll learn how to obtain a Jenkins pipeline script directly from a Source Control Management (SCM) system like GitHub. Traditionally, the pipeline script was defined directly in the Jenkins UI. For example, a typical script defined in the Jenkins UI looked like this:
Copy
pipeline { agent any tools { // Install the Maven version configured as "M398" and add it to the path. maven "M398" } stages { stage('Echo Version') { steps { sh 'echo Print Maven Version' sh 'mvn -version' } } stage('Build') { steps { // Get some code from a Git repo git 'http://139.84.159.194:5555/dasher-org/jenkins-hello-world.git' // Run Maven Package CMD sh 'mvn clean package -DskipTests=true' } } stage('Unit Test') { steps { sh 'mvn test' } } }}
Defining your pipeline script in SCM allows you to maintain version control over your build configuration, making it easier to track changes over time.
Instead of embedding the pipeline script in Jenkins, you can add it to your GitHub (or Git repository) to keep it version-controlled. In your repository, create a new file (typically named Jenkinsfile) at the root level and paste the pipeline script. Note that Jenkins automatically looks for a file named “Jenkinsfile” unless you specify a different script path.Below is an updated example of a Jenkinsfile saved in the repository. Notice that the Maven tool is now referenced as “M3”:
Copy
pipeline { agent any tools { // Install the Maven version configured as "M3" and add it to the path. maven "M3" } stages { stage('Echo Version') { steps { sh 'echo Print Maven Version' sh 'mvn -version' } } stage('Build') { steps { // Get some code from a Gitea repository git 'http://139.84.159.194:5555/dasher-org/jenkins-hello-world.git' // Run Maven Package CMD sh "mvn clean package -DskipTests=true" } } stage('Unit Test') { steps { sh 'mvn test' } } }}
When you configure your Jenkins pipeline job with the Pipeline Script from SCM option, Jenkins automatically checks out your repository. This means you can remove or comment out explicit Git commands in your pipeline. For example, the modified Jenkinsfile using SCM looks like this:
Copy
pipeline { agent any tools { // Install the Maven version configured as "M398" and add it to the path. maven "M398" } stages { stage('Echo Version') { steps { sh "echo Print Maven Version" sh "mvn -version" } } stage('Build') { steps { // No explicit Git checkout required since SCM performs the checkout automatically sh "mvn clean package -DskipTests=true" } } }}
To set up your pipeline to retrieve the script from SCM:
Select the SCM Option: Choose “Pipeline Script from SCM” as the definition.
Choose Your SCM: Select Git as the SCM provider.
Provide Details: Enter the repository URL, specify the branch (e.g., ‘main’), and if needed, set the script path if your Jenkinsfile resides in a subdirectory.
An example configuration using a GitLab repository might include the following script:
Copy
pipeline { agent any tools { // Install the Maven version configured as "M3" and add it to the path. maven "M3" } stages { stage('Echo Version') { steps { sh 'echo Print Maven Version' sh 'mvn -version' } } stage('Build') { steps { // Get some code from a GitLab repository git branch: 'main', url: 'http://139.84.159.194:5555/dasher-org/jenkins-hello-world.git' } } }}
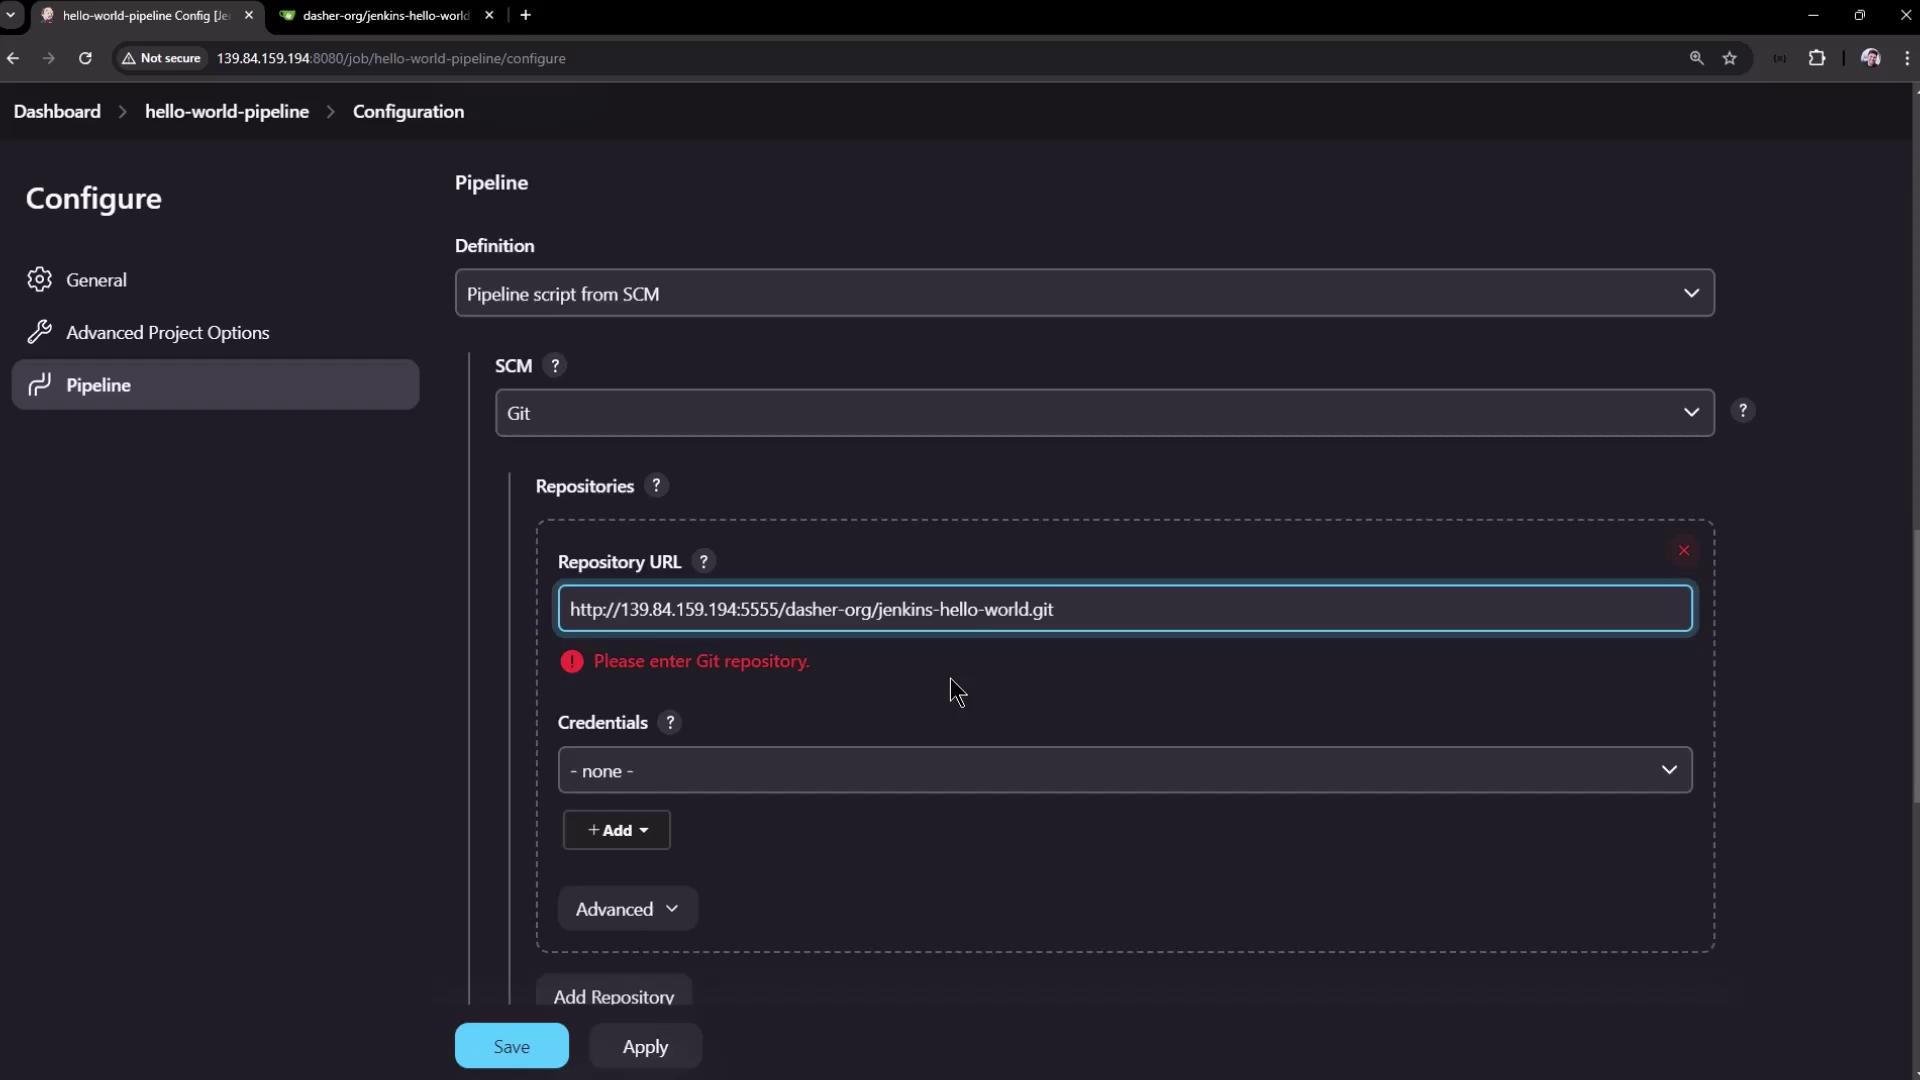
If you receive an error message indicating that the repository URL is not valid, double-check that the URL is correct and that no credentials are needed for a public repository.
During configuration, you might encounter an error message similar to the one shown below:
Since the repository is public, credentials are not required. In the advanced settings, ensure the correct branch name (such as ‘main’) is specified. Jenkins will search for the Jenkinsfile in the repository root by default unless a different path is defined.
After the configuration is complete, Jenkins checks out your repository and executes the defined stages. The build log will include details like fetching the repository, commit messages, and more. An excerpt from a typical build log might look like this:
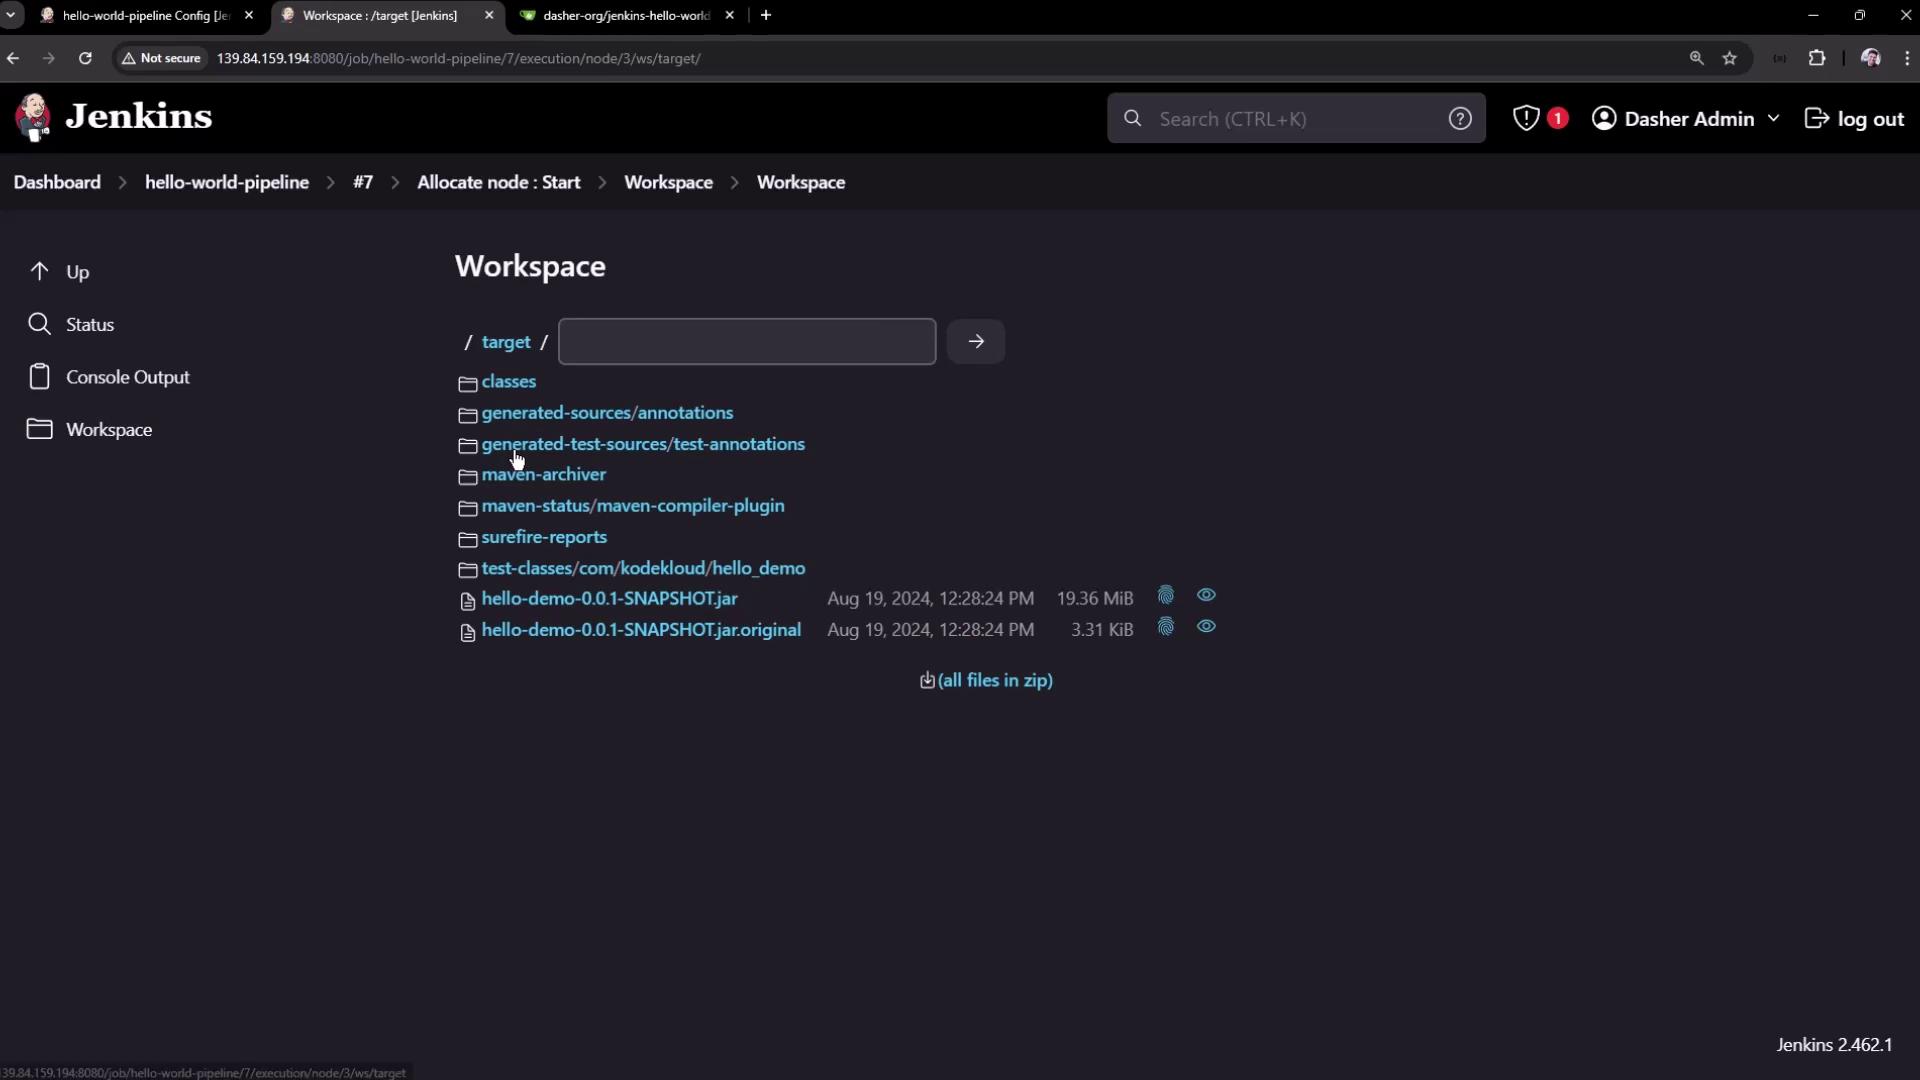
After a successful build, you can review the workspace files via the Jenkins UI. The workspace includes both the repository files and the build outputs (such as the generated Maven target folder, test reports, and packaged application files).For example, here is an interface displaying the workspace files for the project:
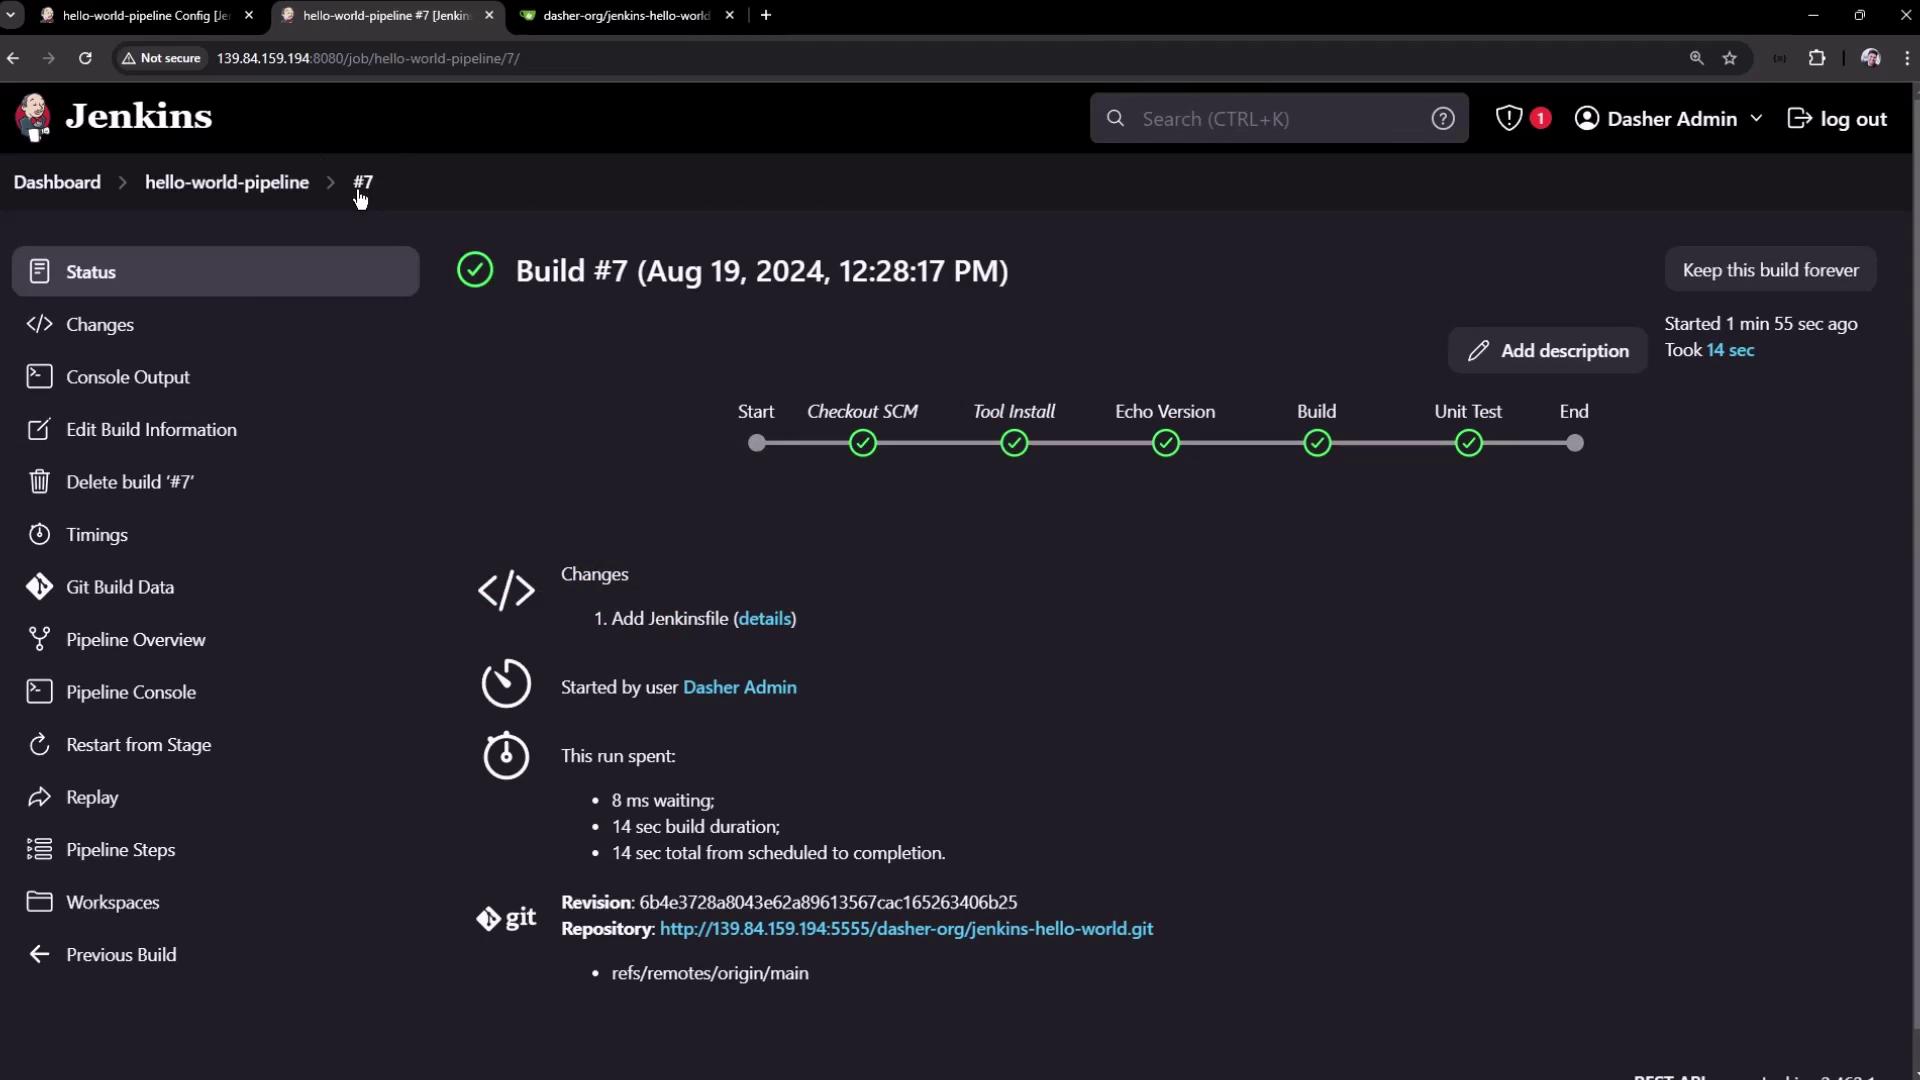
You can also inspect detailed build stages in the pipeline interface:
By following this lesson, you now understand how to retrieve a pipeline script from SCM, version control your build configurations, and streamline the pipeline setup in Jenkins. This approach offers better maintainability and traceability for your continuous integration workflows.Thank you for exploring how to integrate SCM with Jenkins pipeline scripts. Happy building!