Jenkins For Beginners

Jenkins Setup and Interface

Chained Freestyle Projects

This article demonstrates how to break a multi-stage process into separate jobs by chaining Freestyle Projects in Jenkins. Previously, we executed a job that generated ASCII artwork by performing build, test, and deploy stages. Now, we will separate these stages into individual projects and chain them so that the test job runs after the build job, and the deploy job runs only after both the build and test jobs complete.

Below is an example of the complete process originally executed in one job:

# Build a message by invoking the ADVICESLIP API
curl -s https://api.adviceslip.com/advice > advice.json

# Test to ensure the advice message has more than 5 words
cat advice.json | jq -r .slip.advice > advice.message
[ $(wc -w < advice.message) -gt 5 ] && echo "Advice has more than 5 words" || echo "Advice - $(cat advice.message) has 5 words"

# Deploy by installing cowsay and displaying the advice in ASCII art
sudo apt-get install cowsay -y
echo $PATH
export PATH="$PATH:/usr/games:/usr/local/games"
cat advice.message | cowsay -f $(ls /usr/share/cowsay/cows | shuf -n 1)

We will now refactor these steps into separate Freestyle Projects.


ASCII Build Job

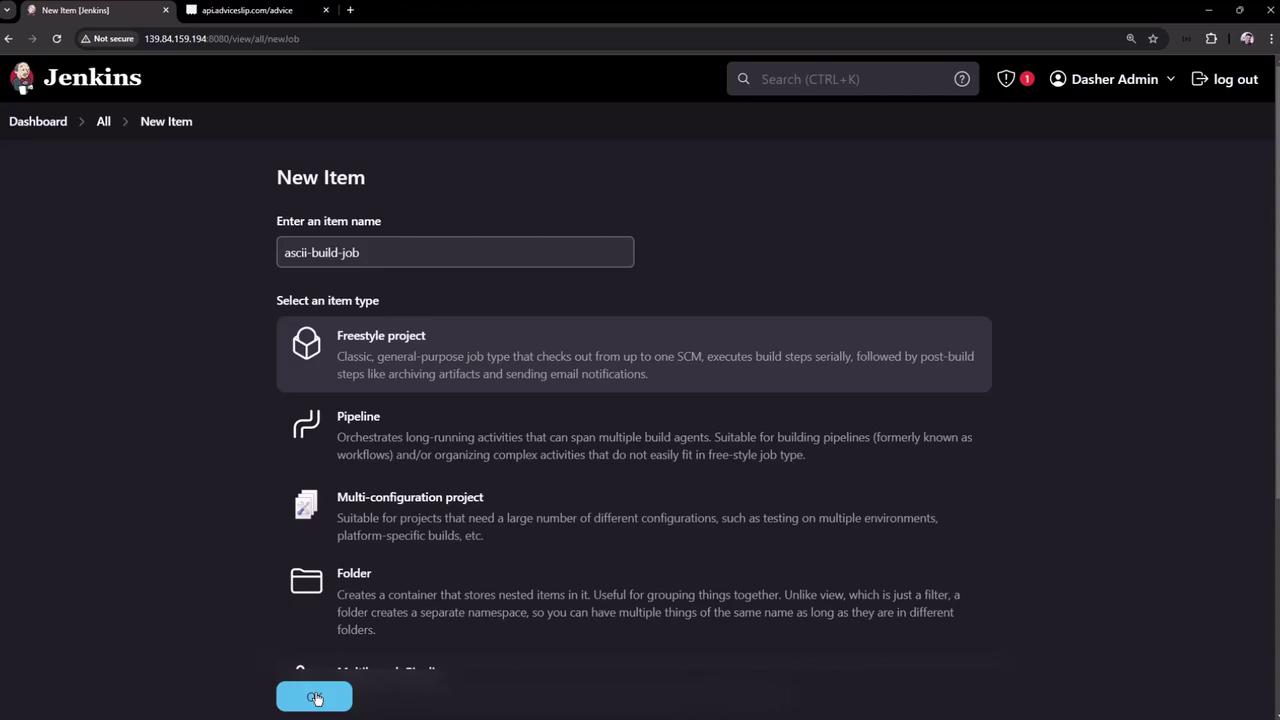
Begin by setting up the build phase as a new Freestyle Project.

  1. Open the Jenkins dashboard and create a new item. Name the project ASCII Build Job and select the Freestyle Project type. Then click OK.

    The image shows a Jenkins interface for creating a new item, with options to select different project types such as Freestyle project, Pipeline, Multi-configuration project, and Folder. The item name "ascii-build-job" is entered in the input field.

  2. In the project configuration, scroll down to the Build section and add an Execute shell build step. Enter the following commands:

    # Build: Fetch advice from the API and save to file
    curl -s https://api.adviceslip.com/advice > advice.json
    cat advice.json
    
  3. Save the configuration.

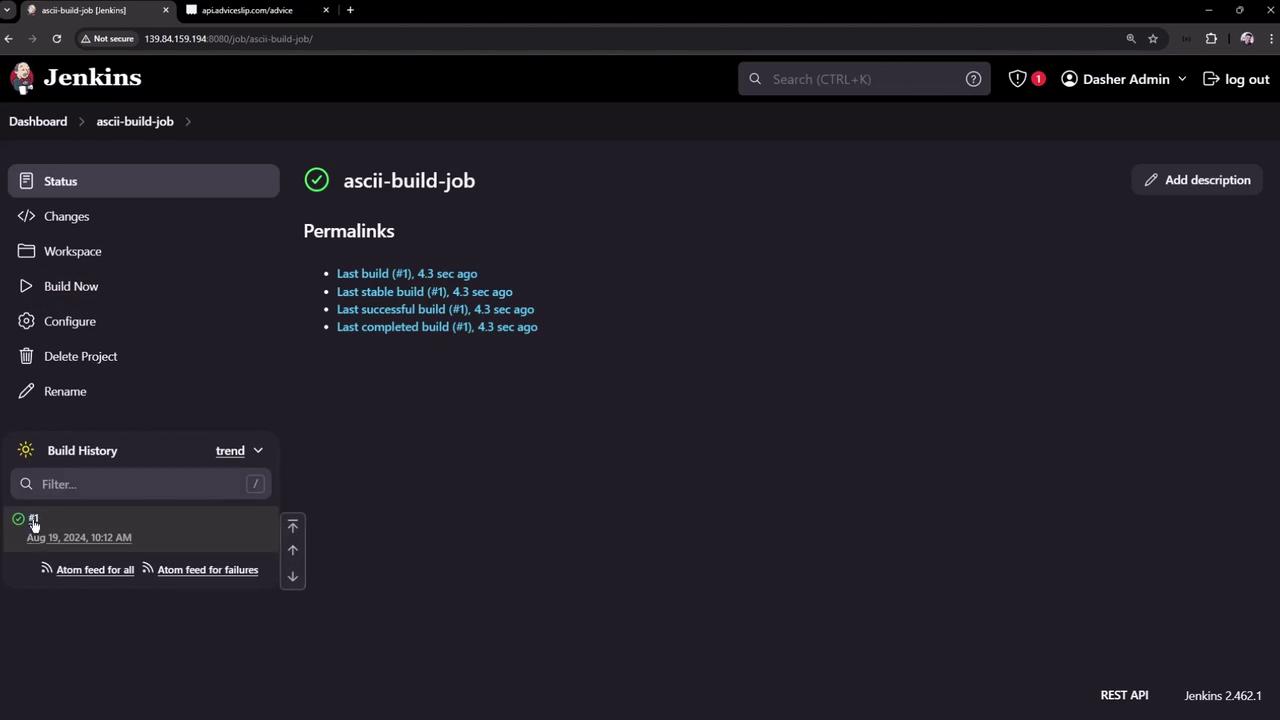
  4. Run a build manually to verify that it completes successfully. After a successful build, a new file named advice.json will be generated in the workspace. For example, the file might appear as:

    {
      "slip": {
        "id": 59,
        "advice": "Don't be afraid of silly ideas."
      }
    }
    
  5. You can review the build history and details on the Jenkins dashboard:

    The image shows a Jenkins dashboard for a job named "ascii-build-job," displaying build status and history. It includes details about the last build, stable build, successful build, and completed build, all occurring 4.3 seconds ago.


ASCII Test Job

Next, create a test job to verify the output generated by the build job.

  1. From the Jenkins dashboard, create a new job named ASCII Test Job. Select the Freestyle Project option and click OK.

  2. In the job configuration, add an Execute shell build step. Insert the following script, which performs the necessary tests:

    # Test: Verify that the advice message has more than 5 words
    ls advice.json
    cat advice.json | jq -r '.slip.advice' > advice.message
    if [ $(wc -w < advice.message) -gt 5 ]; then
        echo "Advice has more than 5 words: $(cat advice.message)"
    else
        echo "Advice message has 5 words or less: $(cat advice.message)"
    fi
    

    This script checks for the presence of advice.json, extracts the advice text into a file called advice.message, and then confirms that it contains more than five words.

  3. Save the configuration. You don’t need to trigger this job manually since it will be set up to run automatically after the build job completes.

  4. Note that initially the workspace for this job will not include advice.json because that file is created in the build job’s workspace. In a later section, we will address artifact sharing between jobs.

  5. To see Jenkins managing multiple jobs, refer to the following image:

    The image shows a Jenkins dashboard with a list of build jobs, including their status, last success, last failure, and duration. The interface includes options for creating new items, viewing build history, and managing Jenkins.


Chaining the Projects

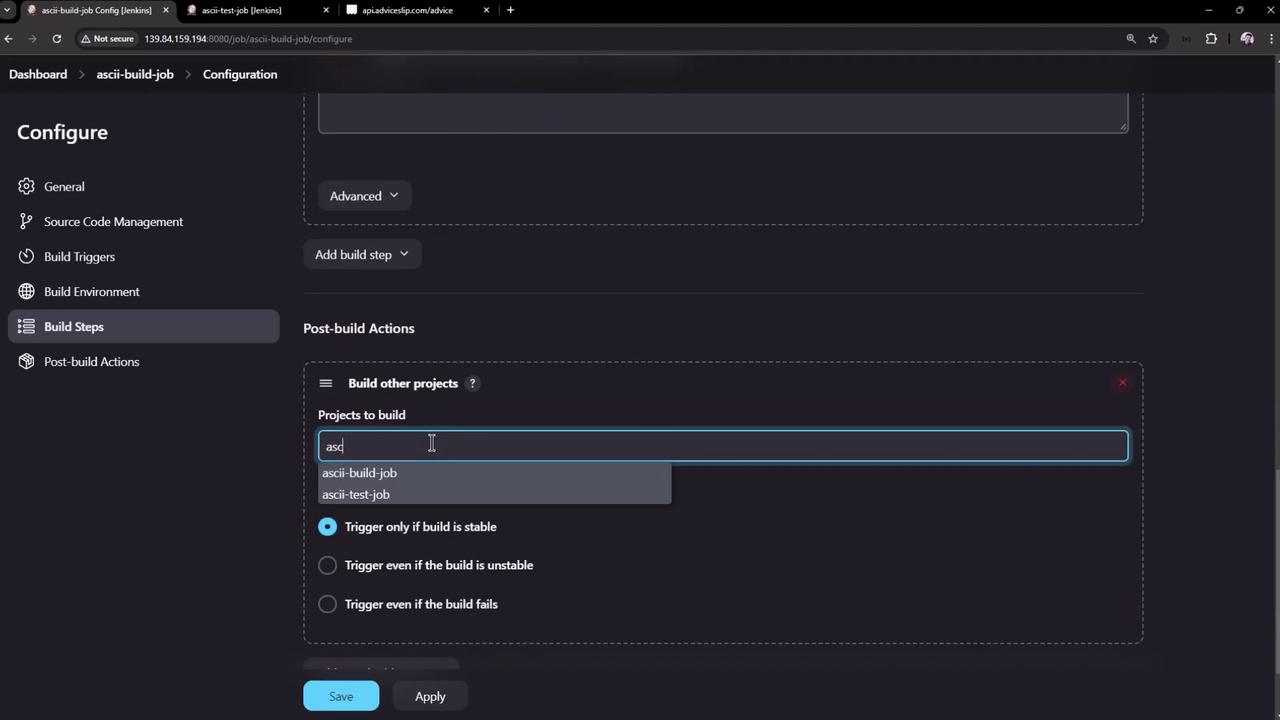
To automate the process, configure the build job to trigger the test job once it completes successfully:

  1. Open the configuration for ASCII Build Job.
  2. Scroll to the Post-build Actions section and click Add post-build action. Then, select Build other projects.
  3. Enter ASCII Test Job in the provided field. (Multiple projects can be listed by separating them with commas.)
  4. Make sure the downstream job is configured to trigger only upon a successful build. Save your settings.

After these adjustments, when the ASCII Build Job completes successfully, it will automatically trigger the ASCII Test Job.

The image shows a Jenkins configuration screen for setting up post-build actions, specifically selecting projects to build and setting trigger conditions.

Important

If the build job successfully runs but the test job fails to find advice.json, it is due to isolated workspaces. This will be resolved in the next section using the Copy Artifact Plugin.

After applying the settings and running the build, you might see an error in the test job’s console log resembling:

Started by upstream project "ascii-build-job" build number 2
originally caused by:
  Started by user Dasher Admin
Running as SYSTEM
Building in workspace /var/lib/jenkins/workspace/ascii-test-job
[ascii-test-job] $ /bin/sh -xe /tmp/jenkins45174349567217279430.sh
+ ls advice.json
ls: cannot access 'advice.json': No such file or directory
Build step 'Execute shell' marked build as failure
Finished: FAILURE

This error indicates that the advice.json file is not present in the test job’s workspace.


Workspace Considerations

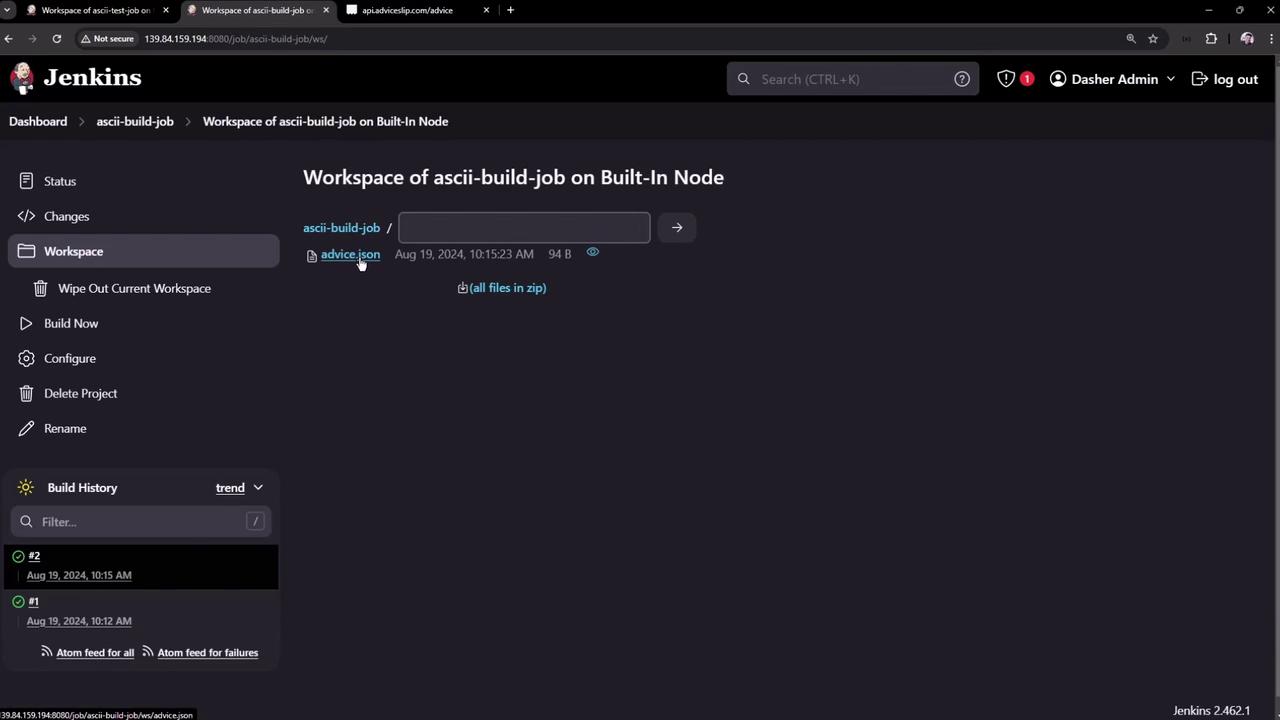
In the ASCII Build Job, the workspace includes the generated advice.json file:

The image shows a Jenkins workspace interface for a job named "ascii-build-job" on a built-in node, displaying a file named "advice.json" with its details.

Since each Jenkins job has its own workspace, files are not automatically shared between jobs. To resolve this, use the Copy Artifact Plugin to transfer necessary files like advice.json from the build job’s workspace to the test job’s workspace.

Workspace Isolation

Directly accessing files from another job's workspace will result in errors. Ensure you properly configure artifact sharing using plugins like the Copy Artifact Plugin.


That concludes the guide on chaining Freestyle Projects in Jenkins. In a future article, we will explore how to copy artifacts between jobs to overcome workspace isolation issues. For more details on Jenkins automation and best practices, please refer to the Jenkins Documentation.

Watch Video

Watch video content

Previous
Working with Freestyle Job