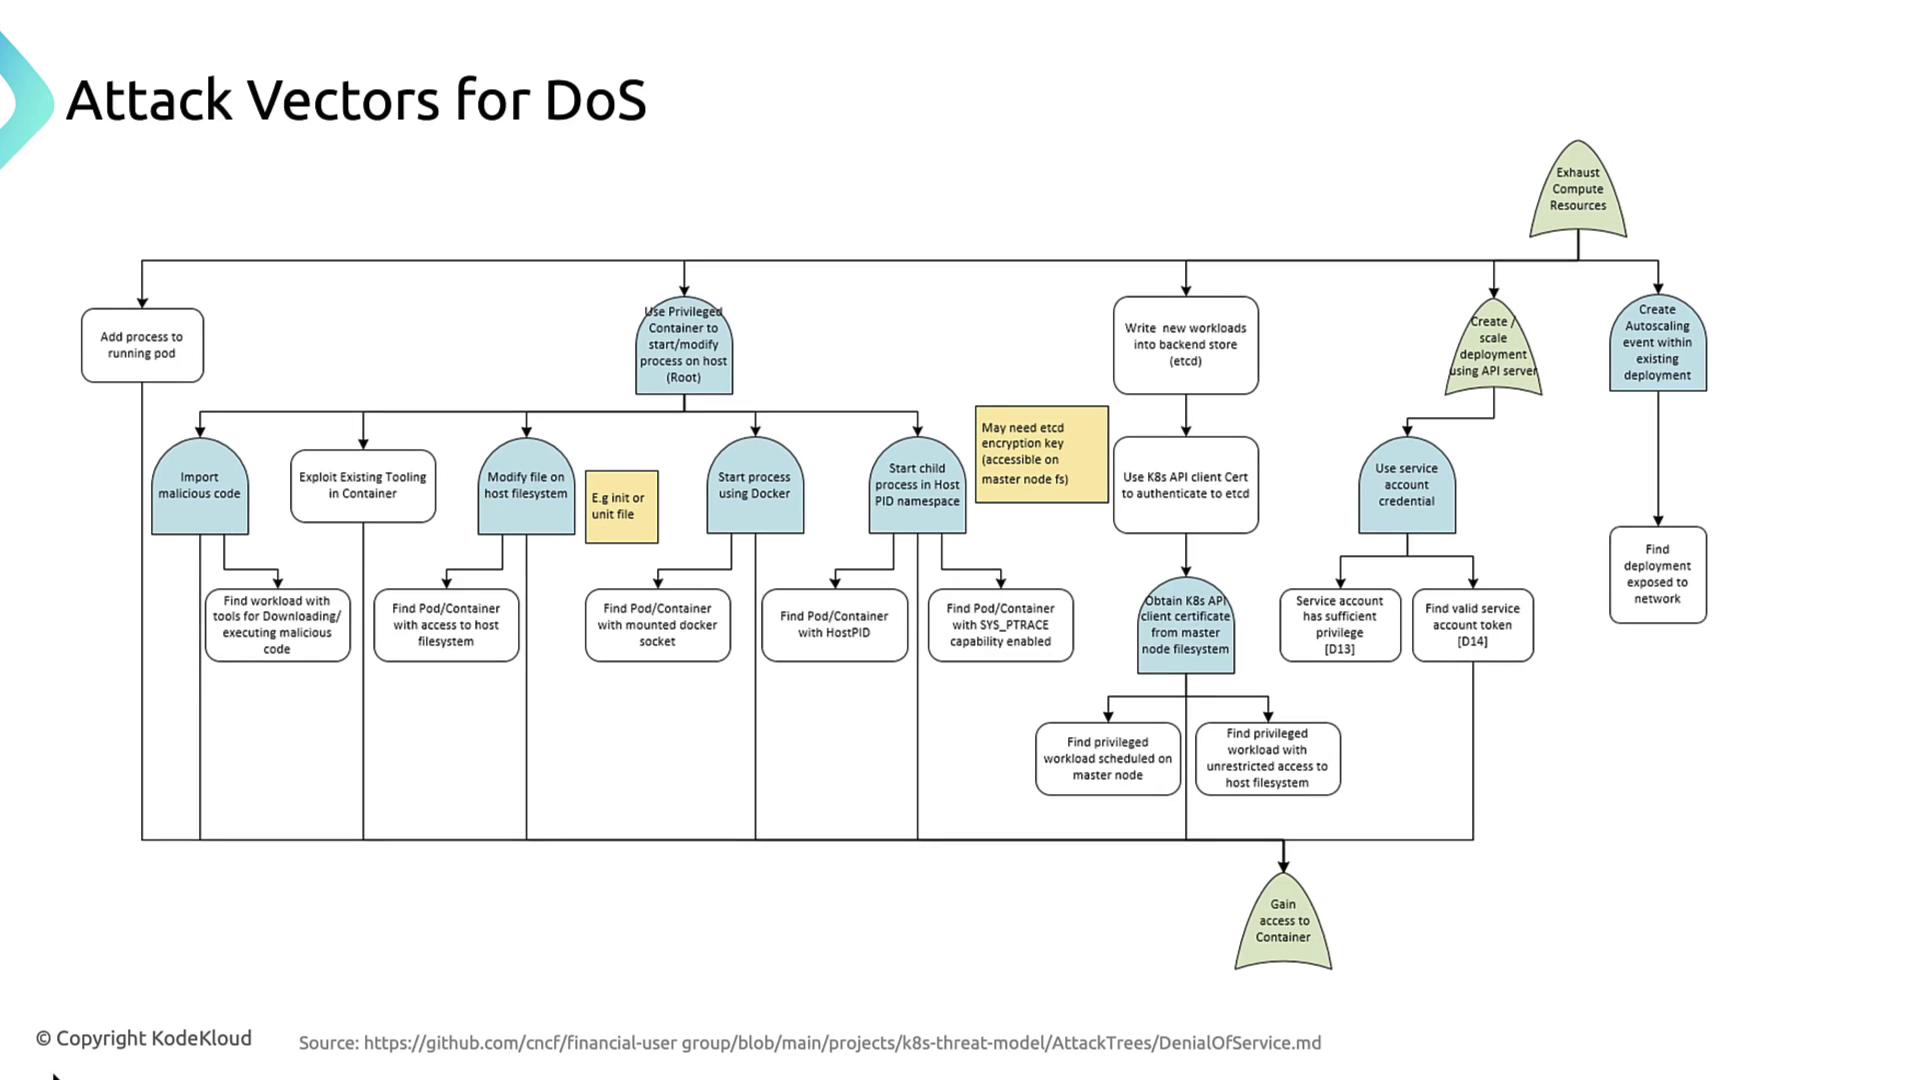
CNCF-Defined DoS Attack Vectors
| Attack Vector | Description |
|---|---|
| Adding processes to a running pod | Spawn new processes inside a compromised container to consume CPU and memory. |
| Privileged container modifications | Use --privileged to alter host processes, mount the filesystem, abuse Docker socket, or join host PID ns. |
Direct etcd writes | Inject or inflate workload definitions by writing straight to etcd with stolen certificates or tokens. |
| API-server scaling abuse | Create or scale deployments via the API server to force excessive pod creation. |
1. Adding Processes to a Running Pod
If an attacker can exec into a pod, they may launch additional CPU- or memory-intensive processes:2. Privileged Container Exploits
Running a container in privileged mode grants full host access:- Mount the host filesystem (
/) to modify critical files (e.g., systemd units). - Execute
dockercommands via/var/run/docker.sock. - Enter the host PID namespace to kill or spawn host processes.
- Download and run malicious binaries with tools like
curlor package managers.
Privileged containers bypass nearly all Kubernetes isolation. Use
securityContext.privileged: true only when absolutely necessary and audit those pods.Deep Dive: Privileged Container Attack Steps
- Deploy malicious binaries via existing host tools (
curl,wget). - Modify host unit or cron files for persistence.
- Abuse the Docker daemon to spawn new containers on the node.
- Interact with host processes directly using the host PID namespace.
3. Direct etcd Key-Value Manipulation
With stolen client certificates or service account tokens, an attacker can write new workload specs directly to etcd, bypassing API-server RBAC and admission controls. This forces the scheduler to spin up arbitrarily many pods.
4. API-Server Abuse for Deployment Scaling
An attacker with API-server credentials can:- Create fresh deployments or jobs.
- Increase replica counts on existing Deployments.
- Trigger HorizontalPodAutoscalers by simulating load, causing endless pod creation.
Network-Based DoS Tactics
| Tactic | Impact |
|---|---|
| Resource Exhaustion | Flood kubelets or kube-proxies to cause node-level failures. |
| Scheduling Disruption | Overwhelm the API server or scheduler with bogus requests. |
| Network Disruption | Poison DNS or tamper with CNI plugins to break pod-to-pod communication. |
Example: Compromised Service Account
An attacker uses a stolen token to mass-create pods:API Server Flooding
Lax network rules allow an HTTP flood against the control plane:Mitigation Strategies
1. Resource Quotas and Limits
Limit per-pod and per-namespace resource consumption:2. Least-Privilege Service Accounts
Define RBAC roles with minimal privileges:3. Network Policies & Firewalls
Restrict access to the API server and etcd:4. Monitoring and Alerts
Use Prometheus and Grafana to detect unusual resource spikes:Regularly review alerts and integrate with your incident-response workflow to minimize reaction time.
Summary
To defend against Kubernetes DoS attacks:- Enforce resource quotas and limits.
- Apply least-privilege RBAC for service accounts.
- Implement network policies and firewall rules.
- Continuously monitor and alert on anomalies.
Links and References
- Kubernetes Documentation
- Cloud Native Computing Foundation (CNCF)
- etcd Key-Value Store
- Prometheus Monitoring
- Grafana Dashboards