AWS Solutions Architect Associate Certification

Services Application Integration

Demo of using Eventbridge to respond to changes in your environment with AWS config

In this guide, we’ll show you how to leverage Amazon EventBridge to respond dynamically to changes in your AWS environment. You'll learn how to trigger events based on EC2 instance state changes and generate custom events from your application code. When an EC2 instance changes state—whether it’s stopped, started, or restarted—a corresponding event is fired to invoke a subscribed Lambda function. We also illustrate how to generate a custom event using a simple Node.js API.


Configuring an EventBridge Rule for EC2 Instance State Changes

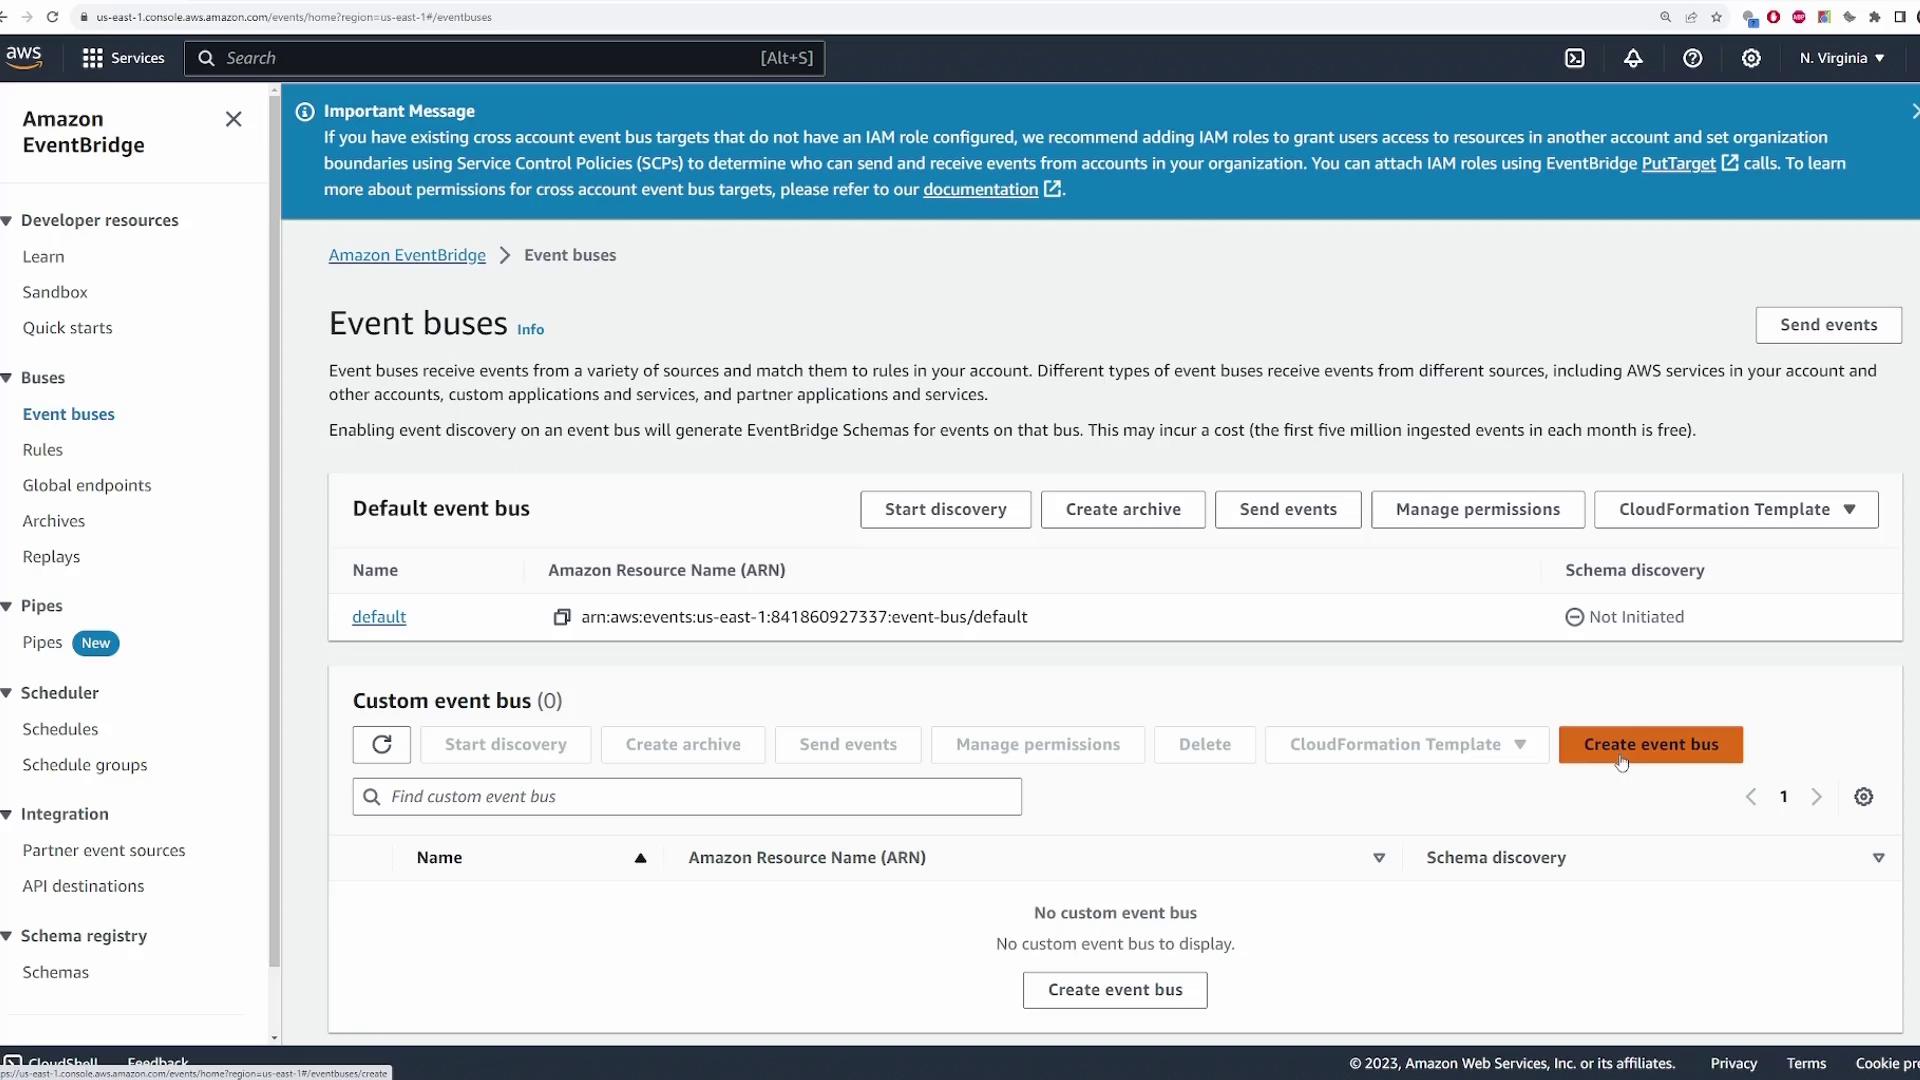
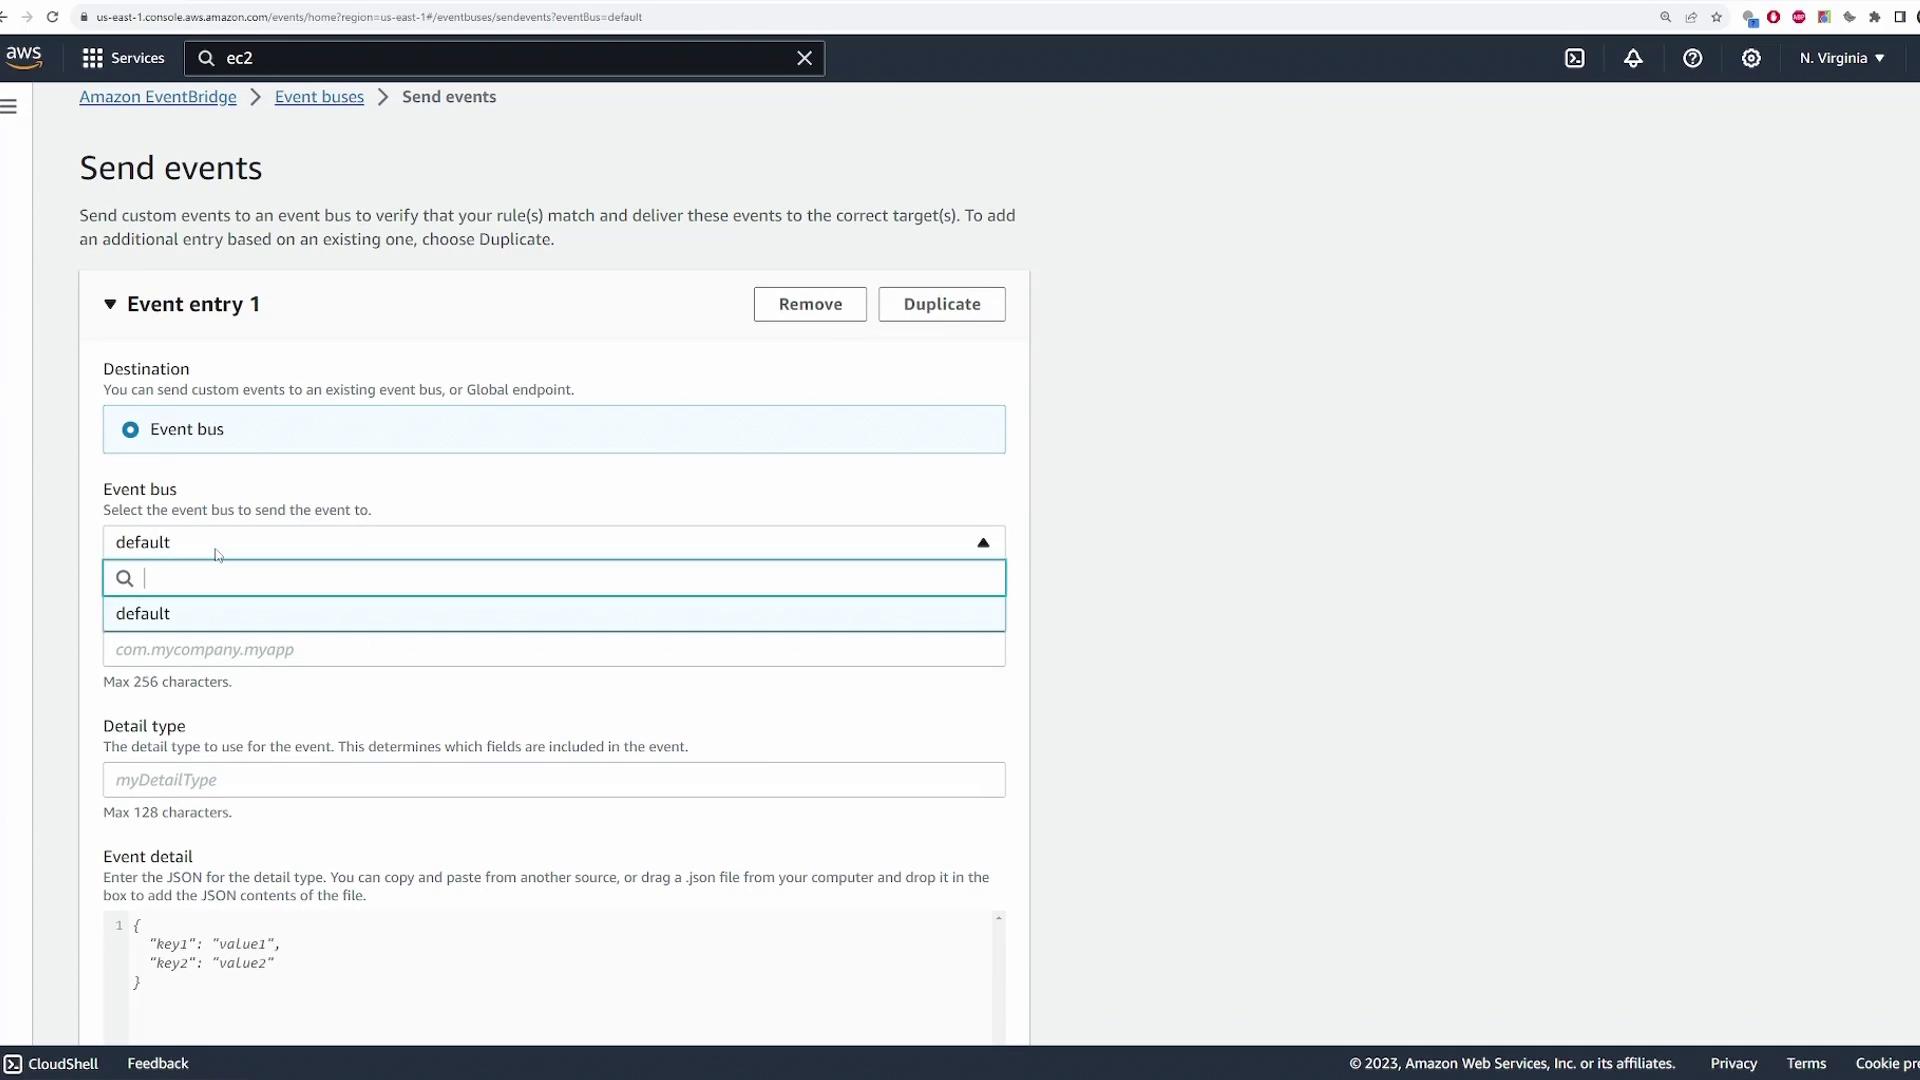
Begin by opening the Amazon EventBridge console and navigating to the Event buses section. Every AWS account has a default event bus. Although you can create custom event buses, this demo uses the default.

The image shows the Amazon EventBridge console, specifically the "Event buses" section, where users can manage default and custom event buses, with options to start discovery, create archives, and send events.

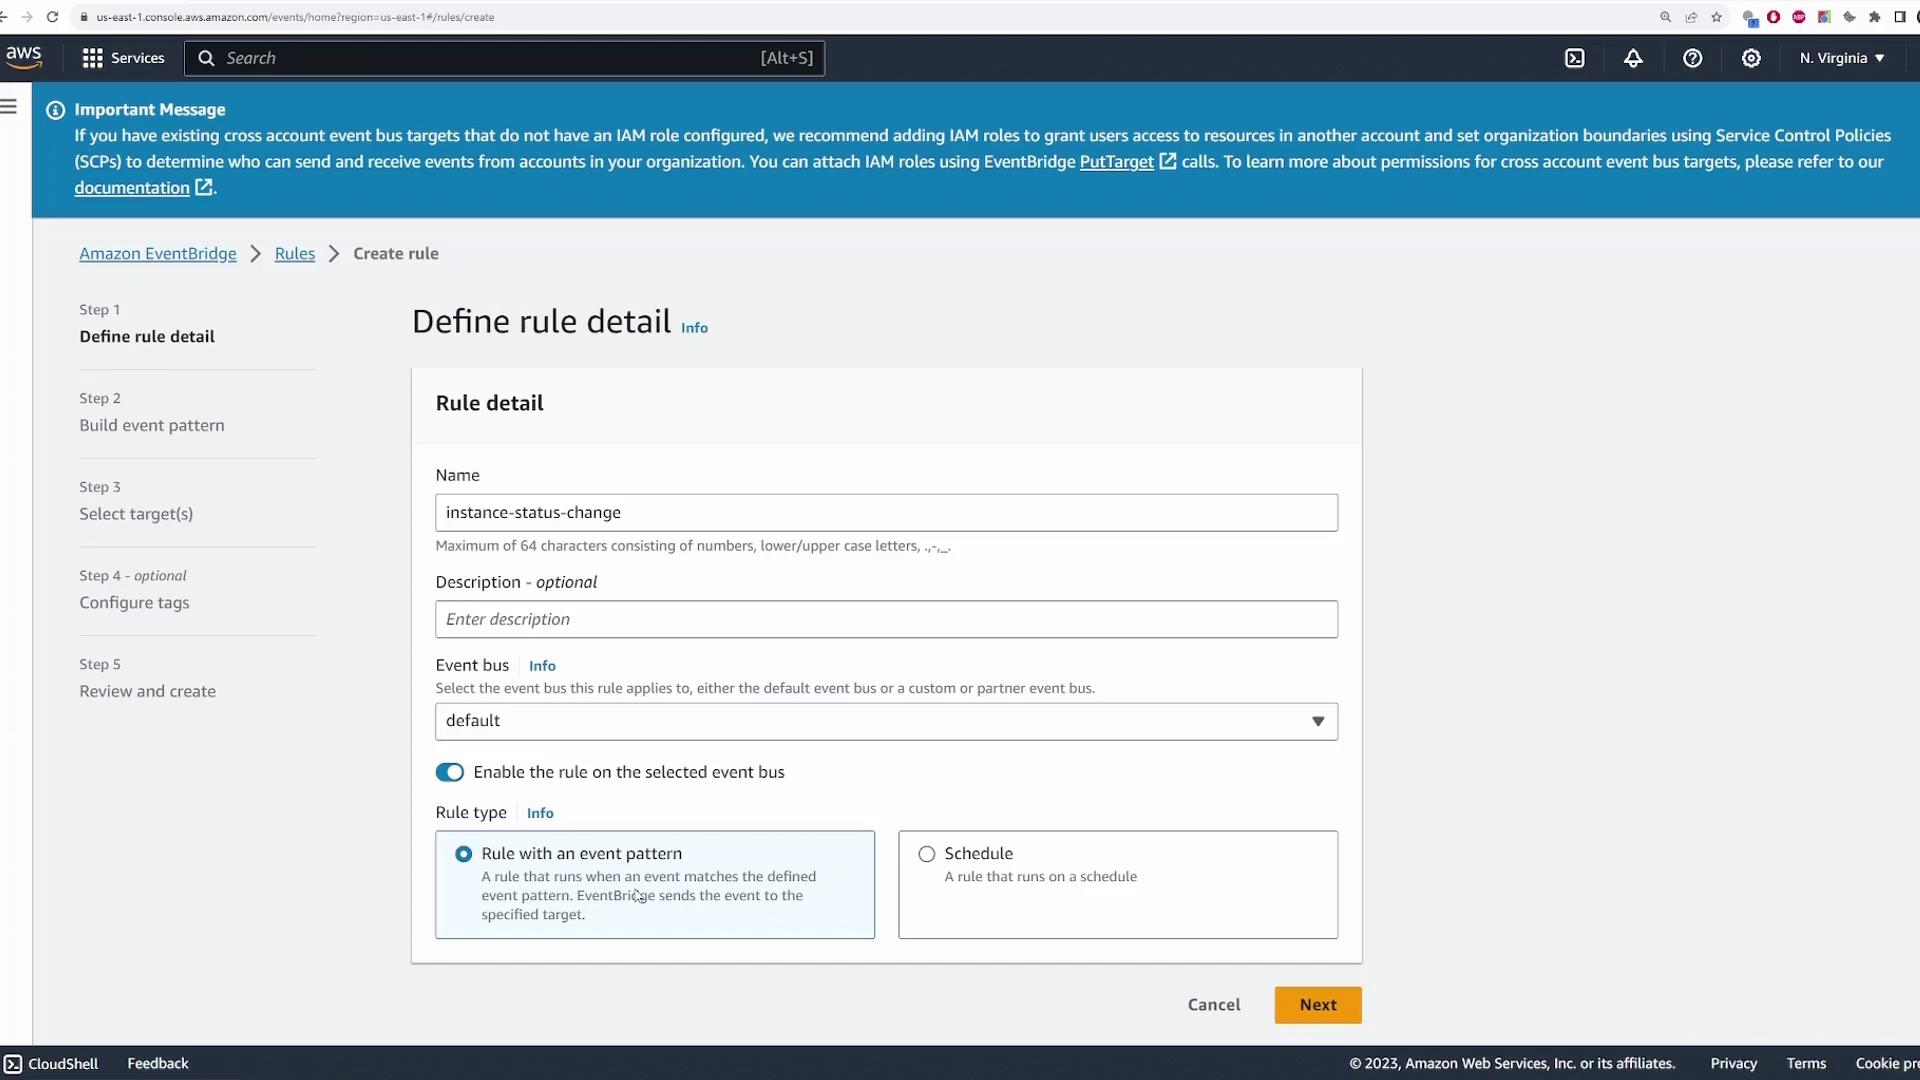
Next, go to the Rules section. Here, you define the events of interest and specify the actions to take when those events occur. Click Create rule, provide a suitable name (e.g., "InstanceStatusChange"), and optionally add a description. Ensure the rule is associated with the default event bus.

There are two types of rules available:

  1. Event Pattern: The rule triggers when an incoming event matches a defined pattern.
  2. Schedule: The rule executes based on a cron-like schedule.

For our scenario, select Event Pattern. Then specify the event source. In this demo, we focus on AWS service events for EC2.

The image shows an AWS EventBridge interface where a rule is being defined, with fields for rule name, description, and event bus selection. It includes options for enabling the rule and choosing between an event pattern or schedule.

Defining the Event Pattern

Select AWS services as the event source, choose EC2 as the service, and pick EC2 instance status, instance state change notification as the event type. By default, this pattern covers any state change:

{
  "source": ["aws.ec2"],
  "detail-type": ["EC2 Instance State-change Notification"]
}

If you need to target a specific state—such as when an instance is shutting down—you can refine the event pattern:

{
  "source": ["aws.ec2"],
  "detail-type": ["EC2 Instance State-change Notification"],
  "detail": {
    "state": ["shutting-down"]
  }
}

For our demo, we maintain the broader pattern that captures any state change.

Tip

Keep the event pattern broad during testing for ease of debugging. You can narrow it down once you’re confident the event rule works.

Specifying the Target

In the next step, define the target for the rule. For this demo, select a Lambda function (for example, one named "test one"). Use the sample Lambda function code provided below to log event data and inspect details via CloudWatch logs:

export const handler = async (event) => {
    // Log the event data for debugging purposes
    console.log(event);
    const response = {
        statusCode: 200,
        body: JSON.stringify('Hello from Lambda!'),
    };
    return response;
};

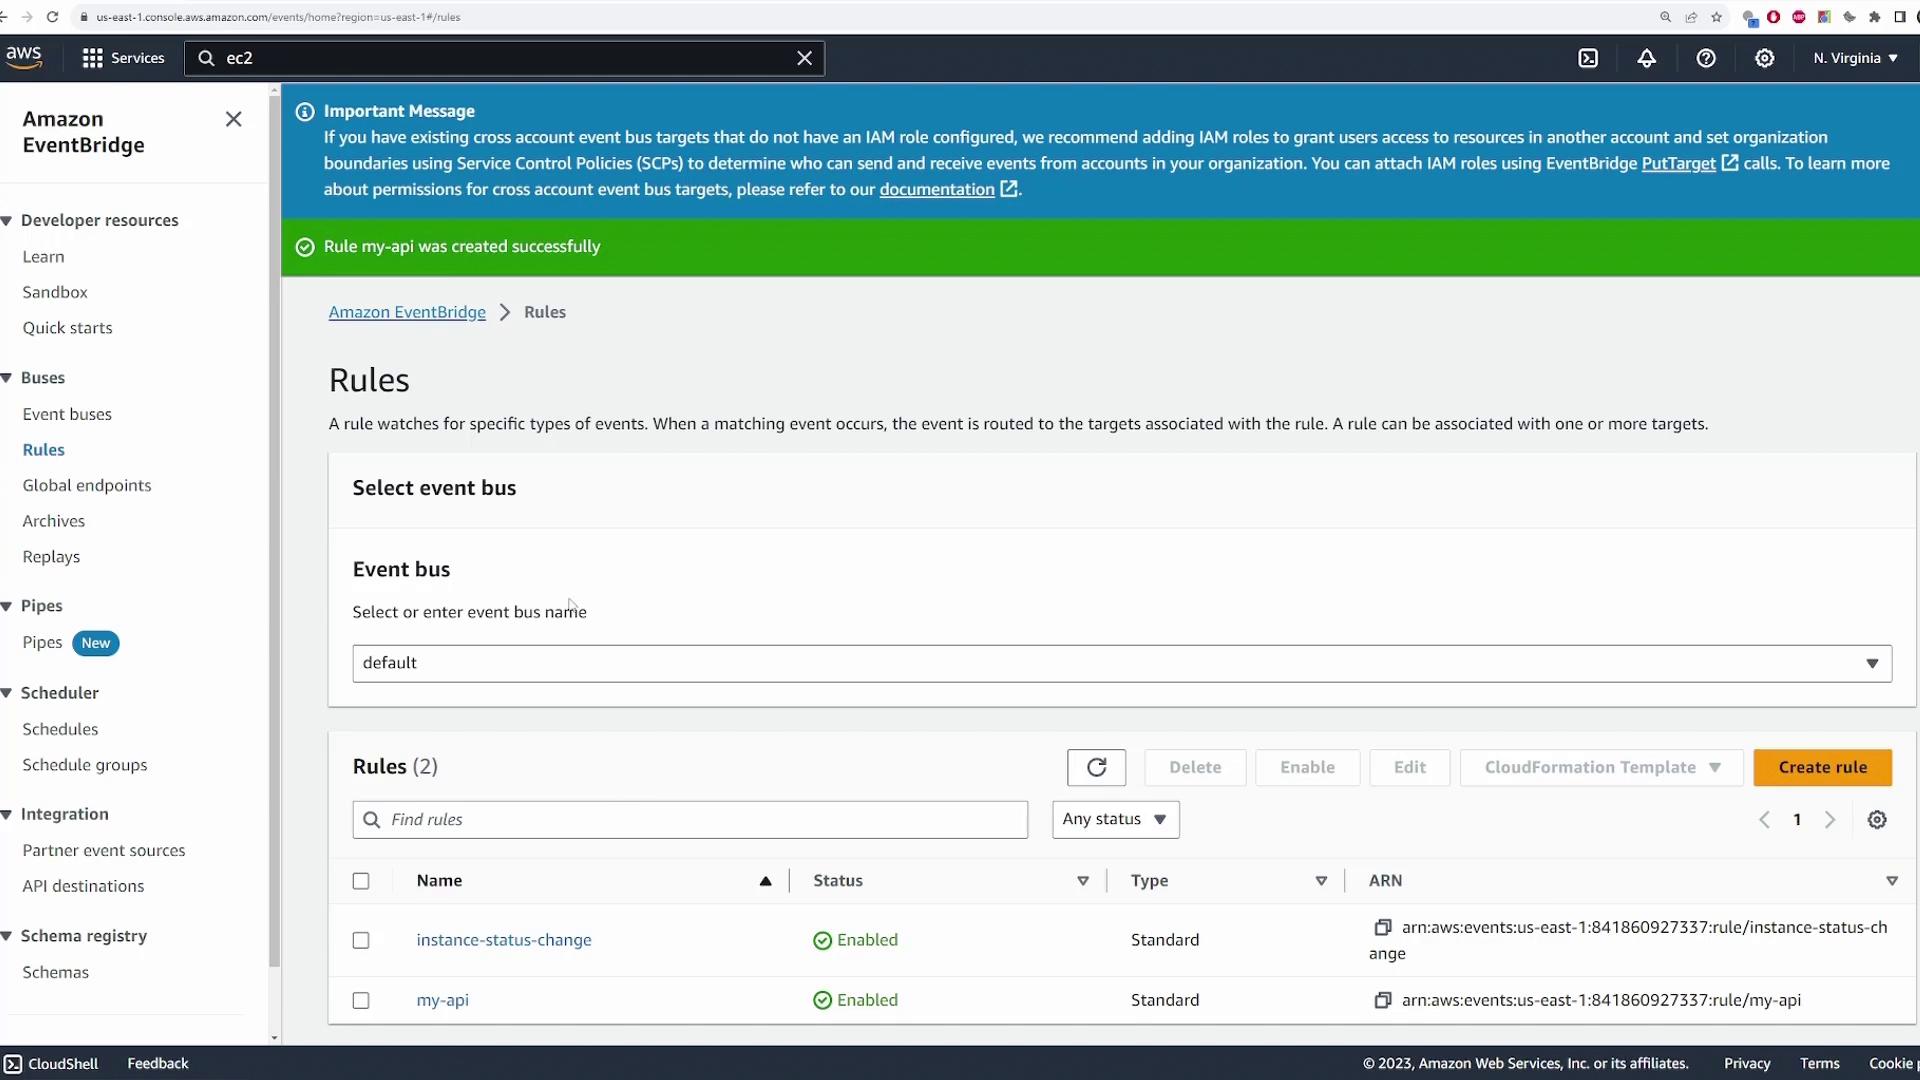
After reviewing your configuration and optionally adding tags, click Create rule. Your EventBridge rule is now active.


Testing the EC2 Instance State Change

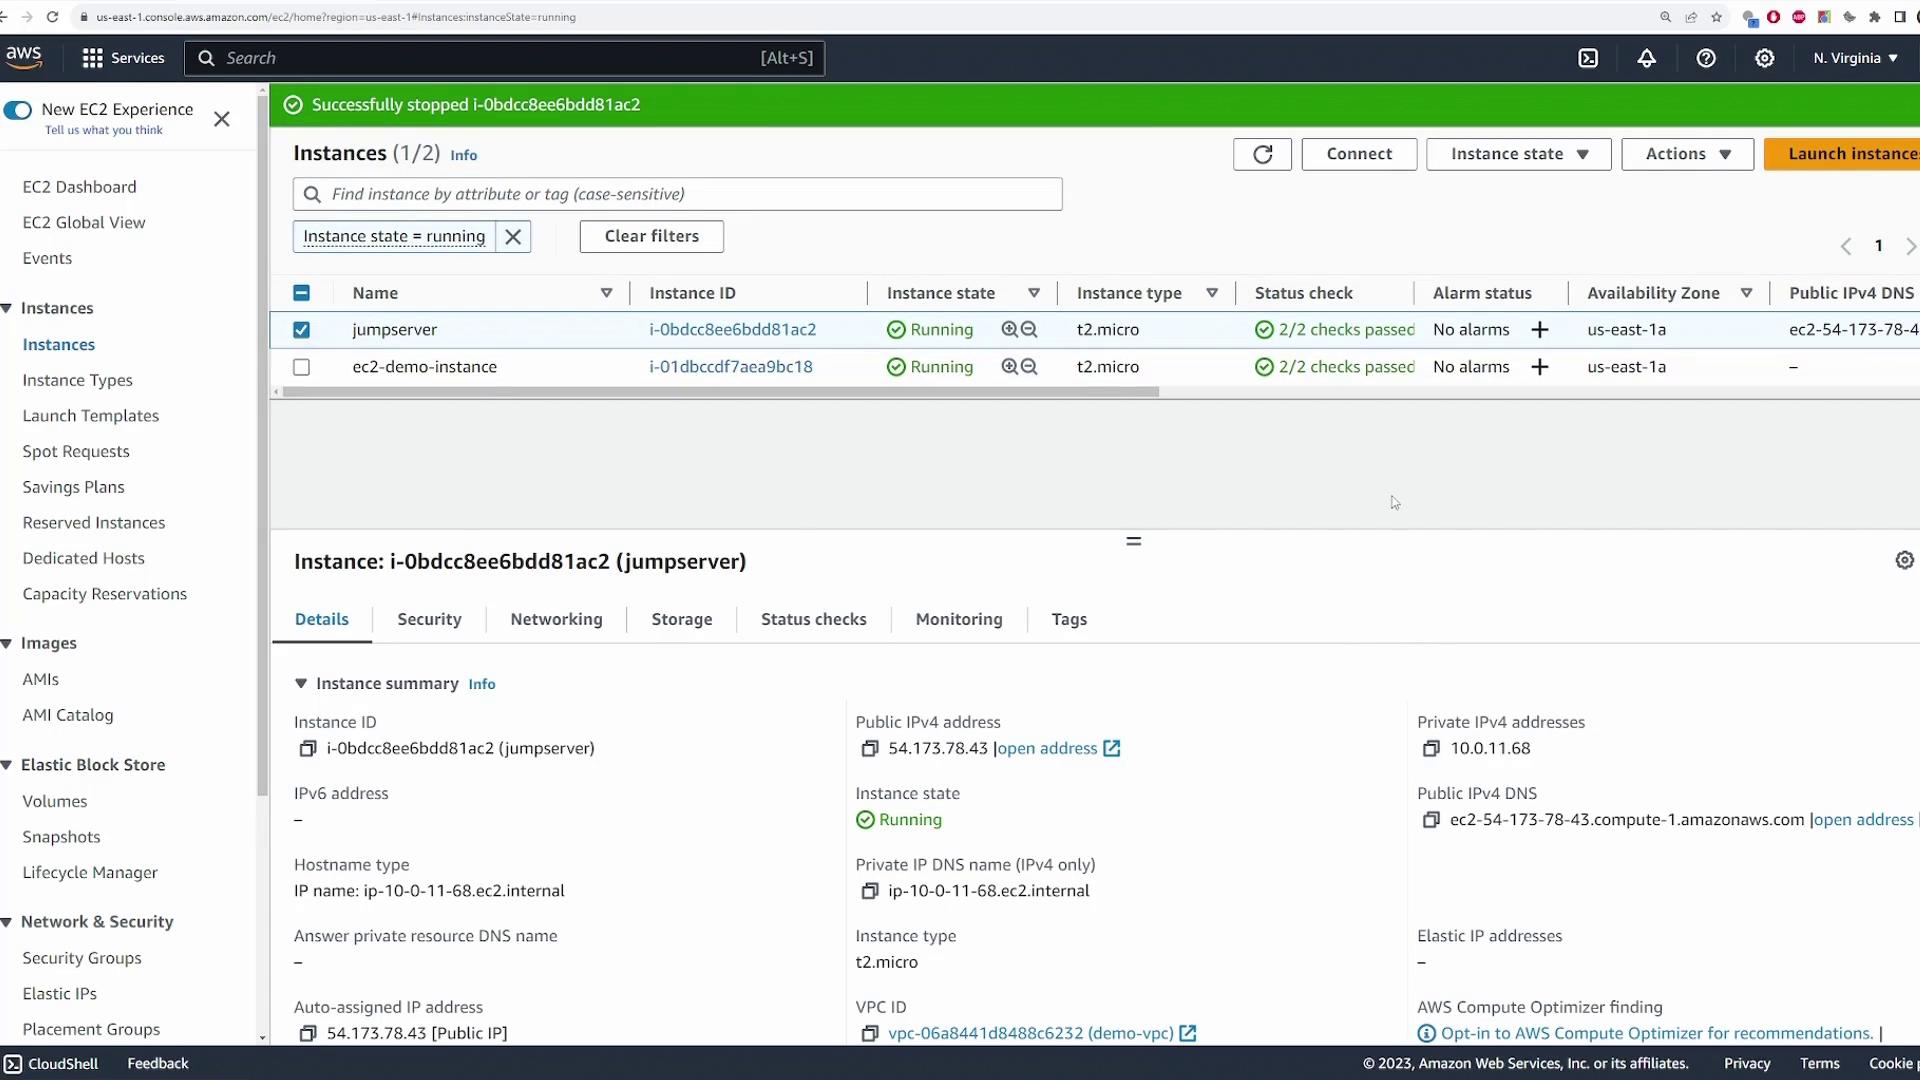
To verify your setup, open the EC2 console and change the state of a running instance. For instance, select the instance, then choose Instance state > Stop instance. Allow a few seconds for the instance state to update.

The image shows an AWS EC2 management console with two running instances, displaying details for a selected instance named "jumpserver."

After the state change, EventBridge generates an event that triggers your Lambda function. Go to the Lambda console, navigate to the Monitor tab, and click the link to view CloudWatch logs. Look for an output similar to the following:

2023-10-12T03:47:58.870Z	5fdcc7b3-520b-42ce-b221-3f059a01a69e	INFO	{
    version: '0',
    id: 'a9ae6bf8-cbe8-cb37-ef59-e34c069f7268',
    'detail-type': 'EC2 Instance State-change Notification',
    source: 'aws.ec2',
    account: '123456789012',
    time: '2021-11-17T00:00:00Z',
    region: 'ca-central-1',
    resources: ['arn:aws:ec2:region:account-id:instance/instance-id'],
    detail: { state: 'stopped', instanceId: 'i-0123456789abcdef0' }
}

This confirms that your event triggered properly and the Lambda function processed the event data.


Creating and Testing a Custom Event

Now, let’s demonstrate how to generate custom events from your application. We have set up a basic Node.js API using the AWS SDK to publish events to EventBridge. In this example, a POST request to the /signup endpoint triggers an event.

Node.js API Setup

Below is the code snippet for creating the API:

require("dotenv").config();
const express = require("express");
const { EventBridgeClient, PutEventsCommand } = require("@aws-sdk/client-eventbridge");

const app = express();
app.use(express.json());

const client = new EventBridgeClient();

app.post("/signup", async (req, res) => {
    const { username } = req.body;

    const event = {
        Source: "my-app",
        DetailType: "New User",
        Detail: JSON.stringify({ user: username }),
    };

    try {
        const response = await client.send(new PutEventsCommand({ Entries: [event] }));
        console.log(response);
        res.status(201).json({ status: "success" });
    } catch (error) {
        console.error(error);
        res.status(500).json({ status: "error" });
    }
});

app.listen(3000, () => {
    console.log("Server is running on port 3000");
});

When you send a POST request with a JSON body (for example, { "username": "user2", "password": "password123" }), the API sends an event to EventBridge with the source "my-app" and the detail type "New User", along with the user details.

Configuring the Custom Event Rule

  1. Open the EventBridge console and create a new rule (e.g., "MyAPIEvent").

  2. Use the following custom event pattern:

    {
        "source": ["my-app"],
        "detail-type": ["New User"]
    }
    
  3. Set the target for the rule to another Lambda function (for example, "test two").

  4. Review the configuration and click Create rule.

Manually Testing the Custom Event

To test the custom event directly via the EventBridge console:

  1. Navigate to Event Bus and click Send event.

  2. Select the default bus, set the Source to "my-app", and the Detail type to "New User".

  3. In the Detail section, provide a JSON object such as:

    {
      "username": "user1"
    }
    
  4. Click Send event.

After a few seconds, check the CloudWatch logs for the "test two" Lambda function. You should see log entries resembling:

{
  "version": "0",
  "id": "a9a06fb6-cb37-ef59-e34c069f7268",
  "detail-type": "New User",
  "source": "my-app",
  "account": "848169027373",
  "time": "2023-10-12T03:47:59Z",
  "region": "us-east-1",
  "resources": [],
  "detail": {
    "username": "user1"
  }
}

This confirms that your custom event was processed successfully by EventBridge.


Testing the API Integration

Finally, start your Node.js API and send a POST request to the /signup endpoint containing the new user's information. For example, using a REST client, submit the following JSON:

{
  "username": "user2",
  "password": "password123"
}

The API should respond with:

{
  "status": "success"
}

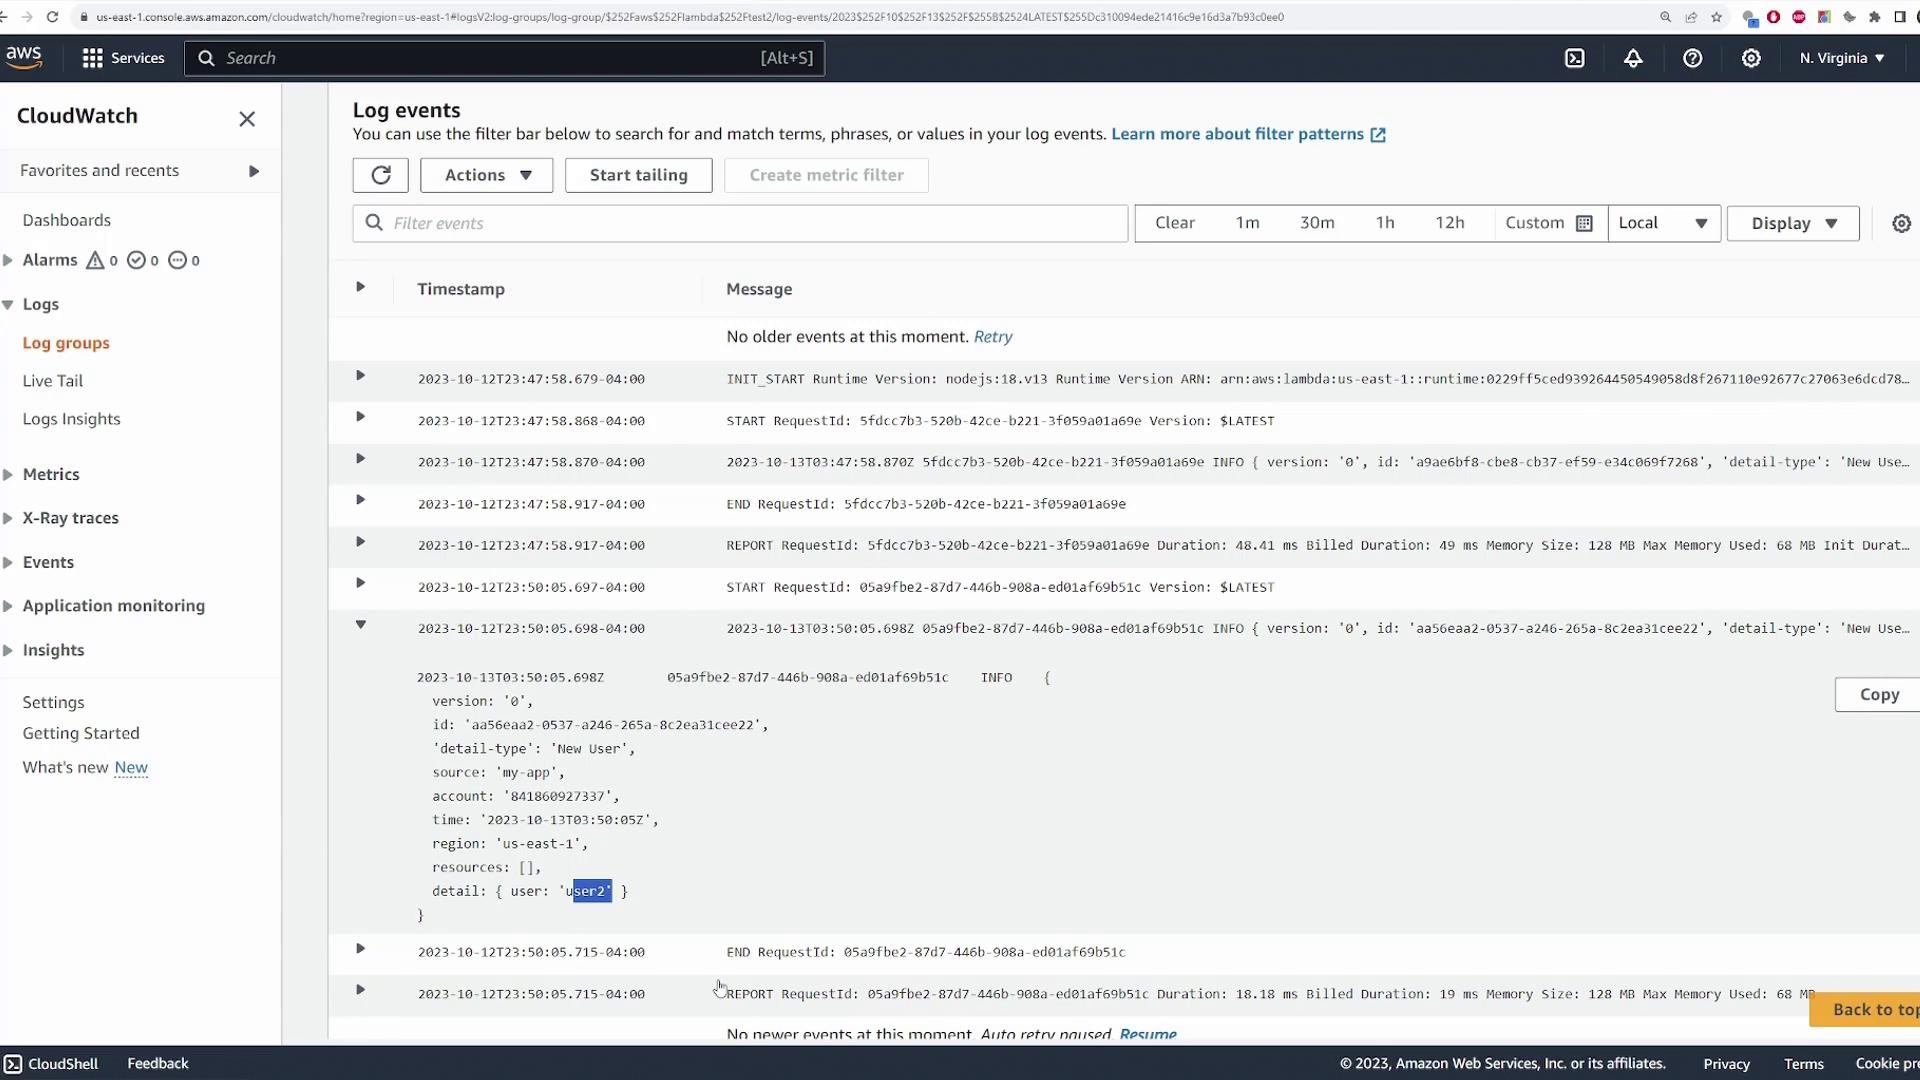
After a few seconds, verify the CloudWatch logs for the "test two" Lambda function to confirm that it received the event with "username": "user2".

The image shows the Amazon EventBridge interface with a notification about a rule being created successfully. It displays options for selecting an event bus and lists two enabled rules.

The image shows the "Send events" page in the Amazon EventBridge console, where users can configure and send custom events to an event bus. It includes fields for selecting the event bus, detail type, and entering event details in JSON format.

The image shows an AWS CloudWatch console displaying log events, including timestamps, request IDs, and messages related to Lambda function executions.

Final Check

Ensure that each step has been tested thoroughly to confirm that both AWS service events and custom application events are processed properly by your Lambda functions.


Conclusion

By following these steps, you’ve successfully configured Amazon EventBridge to handle both AWS service events and custom events from your application. This event-driven approach enables you to integrate various AWS services and custom workflows seamlessly. Enjoy building and expanding your event-driven architectures!

Happy coding!

Watch Video

Watch video content

Previous
Eventbridge