Learn to use AWS network interfaces for flexible management of EC2 instances, including creation, attachment, and configuration of network settings.
In this lesson, you’ll learn how to work with AWS network interfaces to improve the flexibility and management of your EC2 instances. Instead of configuring network settings directly on your EC2 instance, you can create a standalone network interface that encapsulates key network configurations—such as subnet placement, IP address, and security groups. This modular approach allows you to attach network interfaces to one or more EC2 instances as needed.
Follow these steps to create a network interface in AWS:
Open the EC2 page in the AWS Management Console.
Scroll down and select “Network Interfaces.”
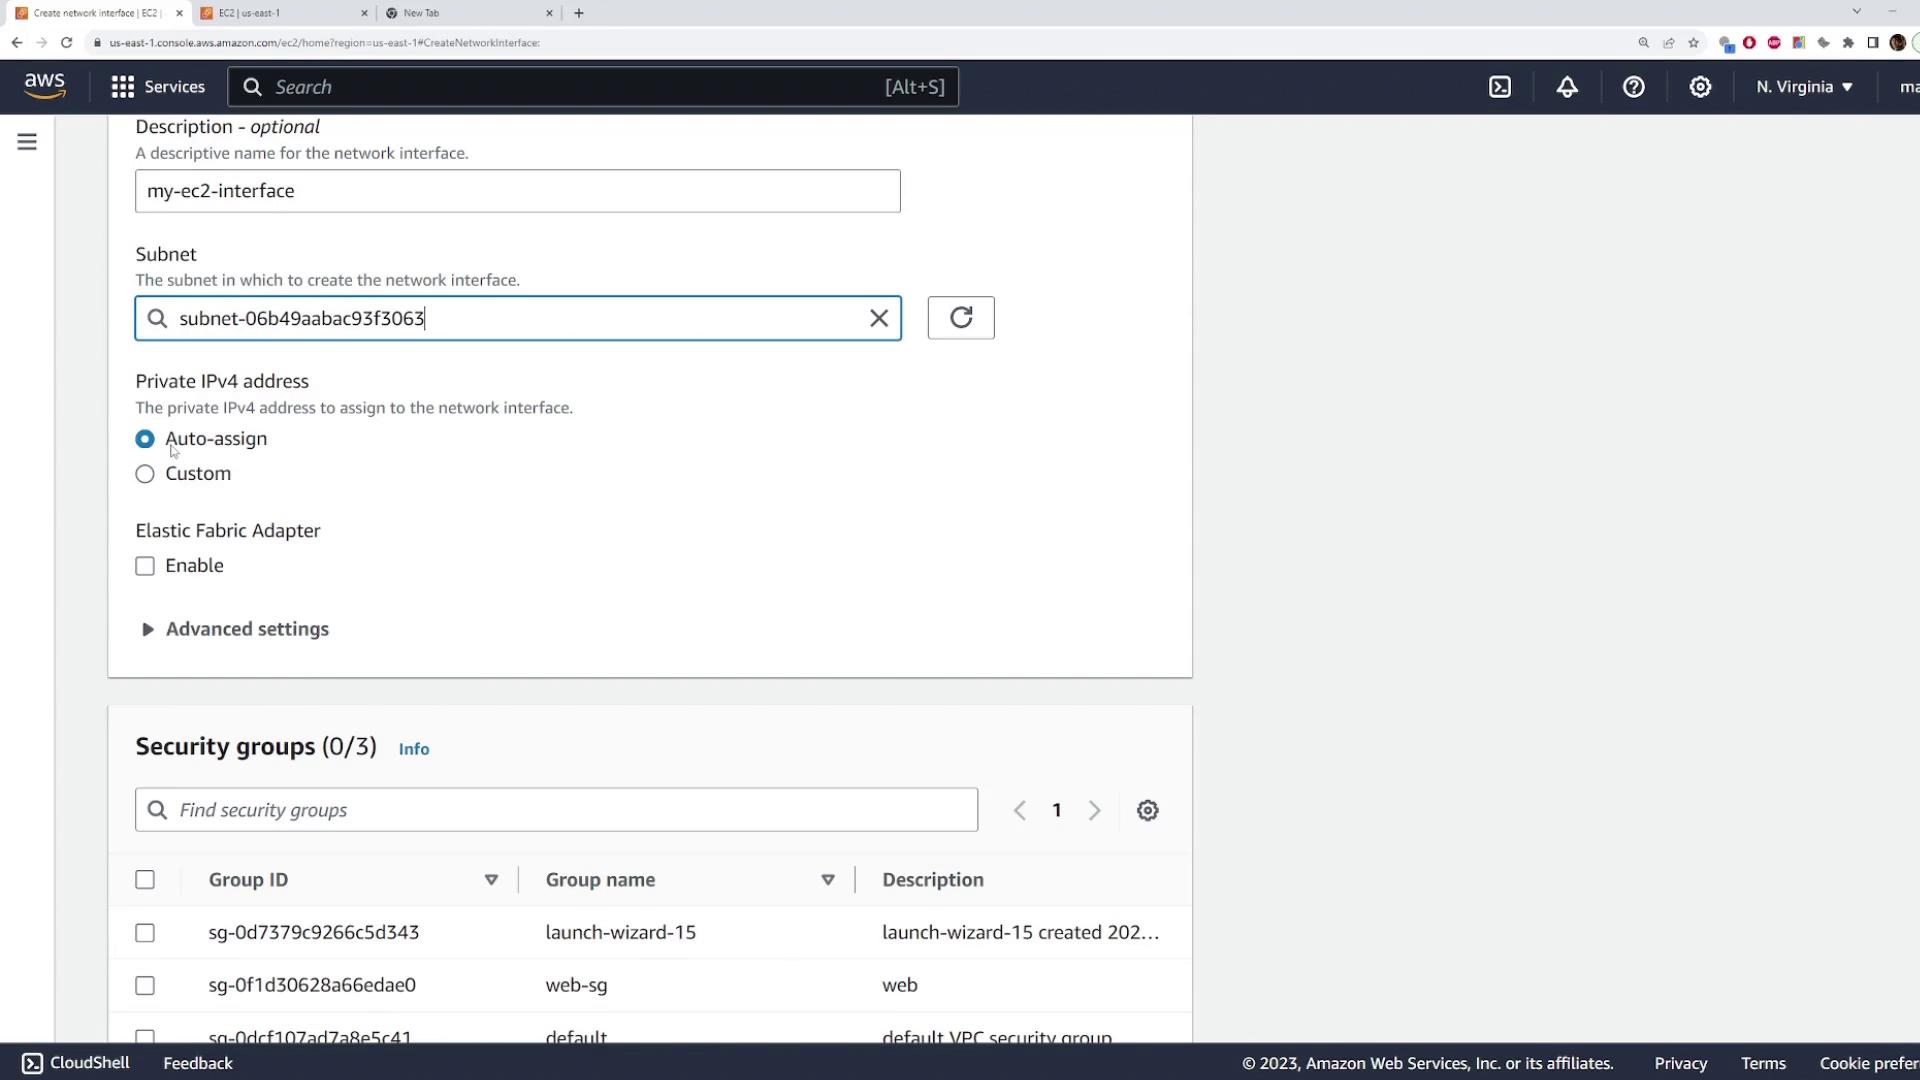
Click on the option to create a network interface.
Provide a clear description (for example, “my EC2 interface”).
Choose the appropriate subnet for the interface.
For the private IP address, decide whether to auto-assign it or specify a custom IP (in this example, auto-assign is used).
Select the desired security group, such as “Web SG.”
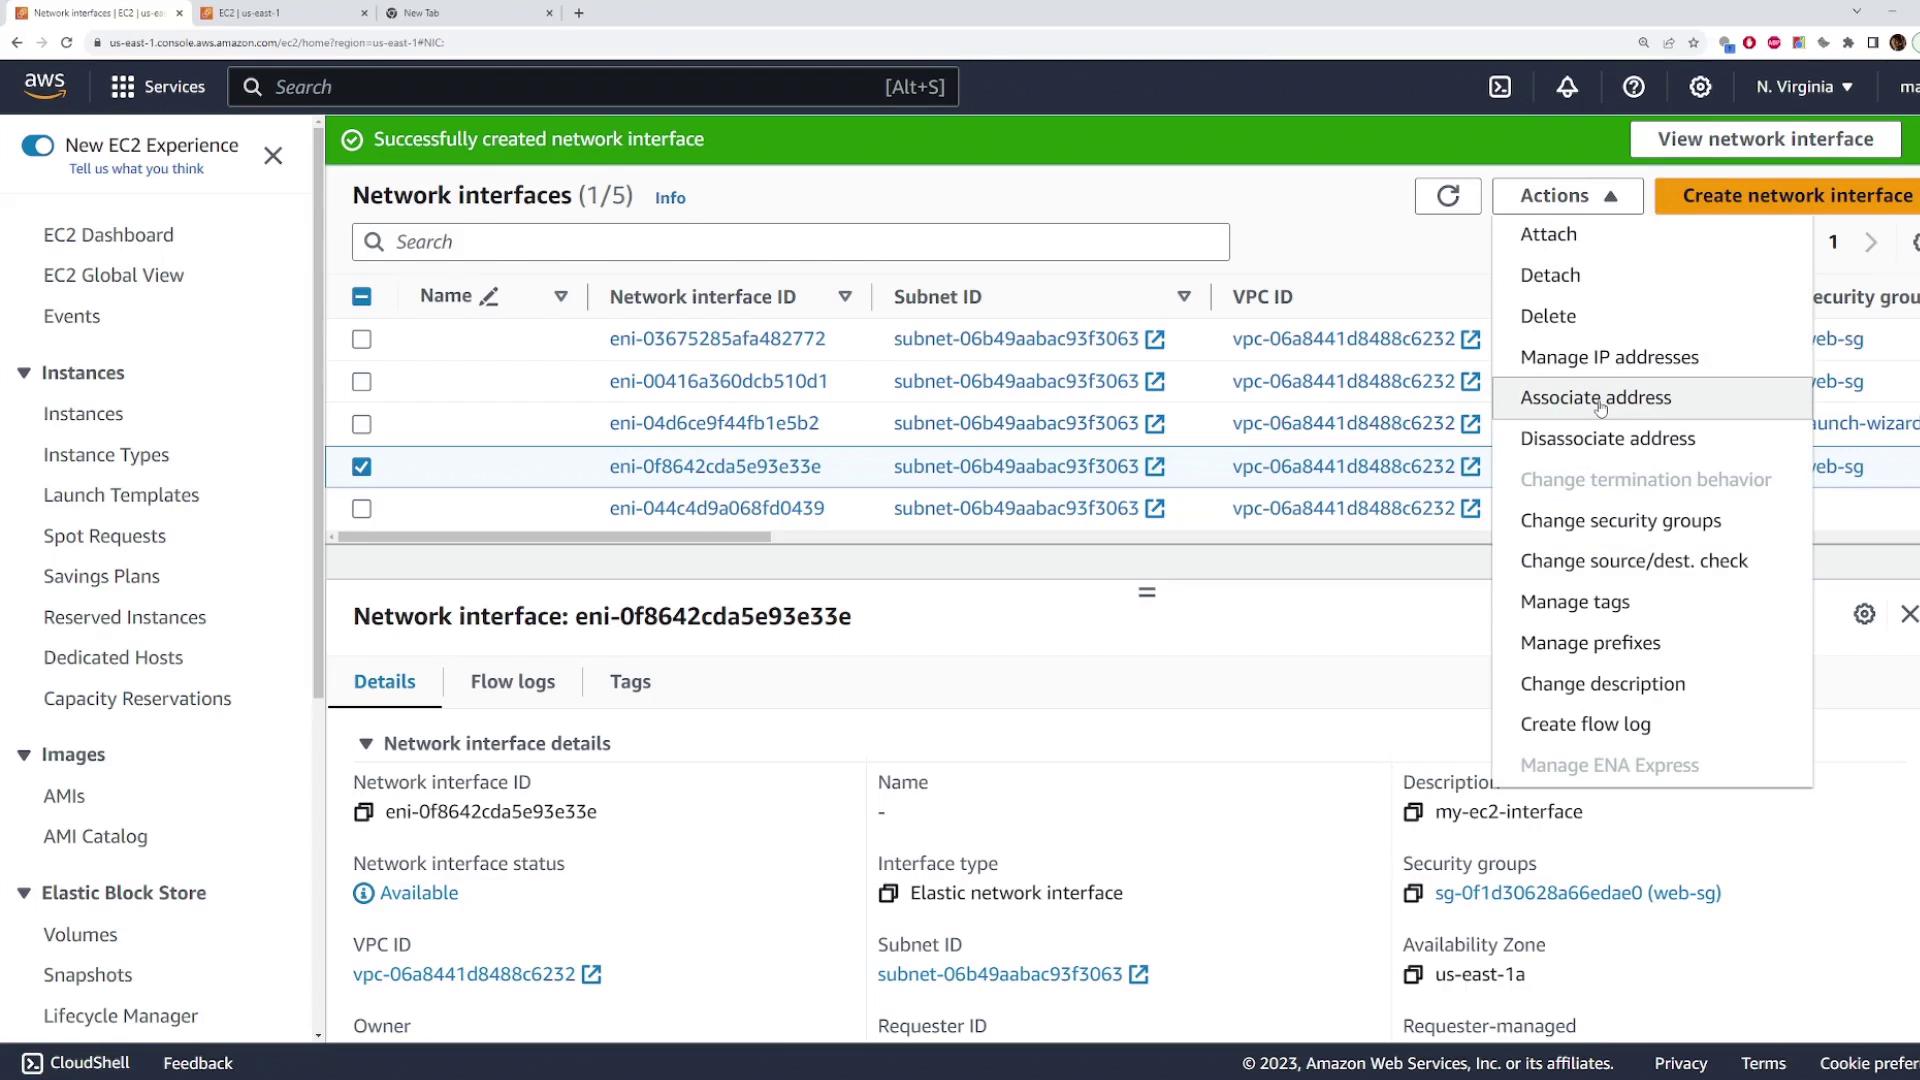
After configuring these details, create the network interface. You should see the new interface in your list (e.g., “my EC2 interface”).
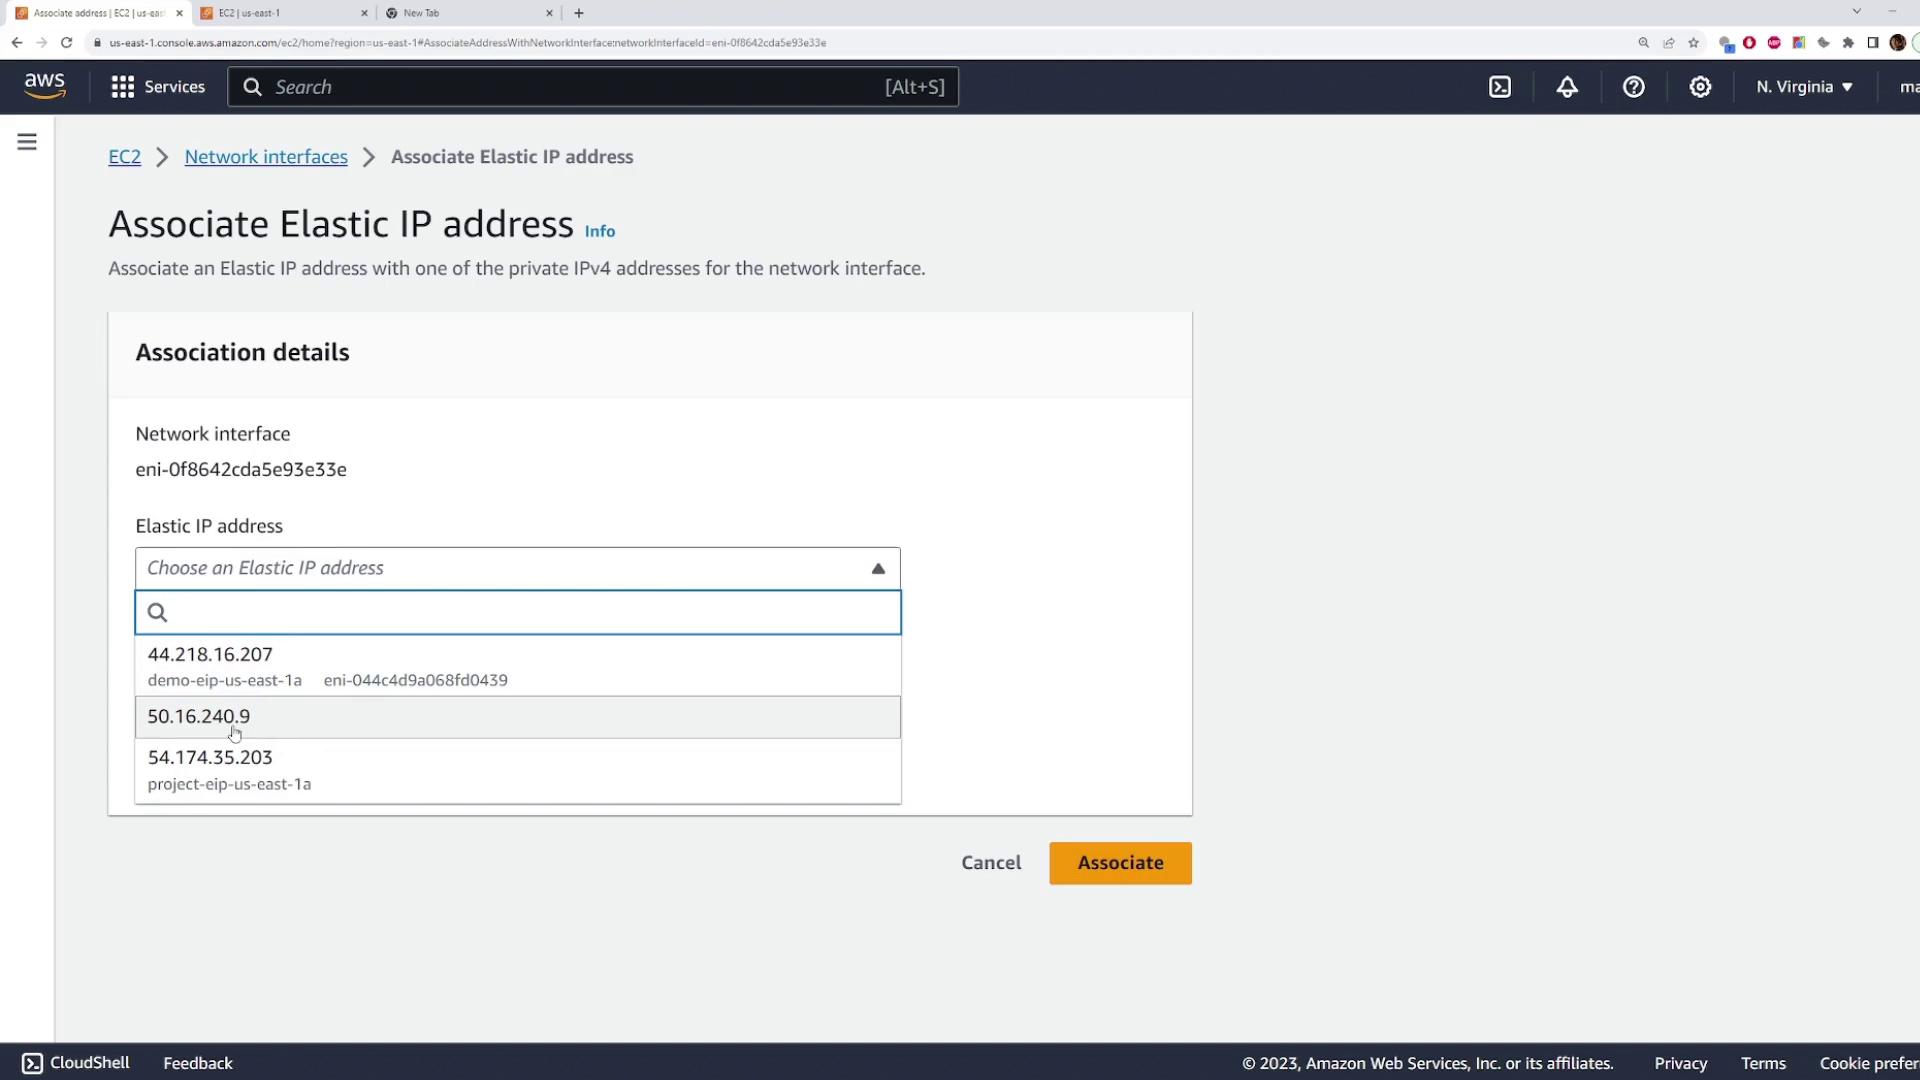
At this point, you have the option to attach the network interface to an existing EC2 instance or assign it during the launch of a new instance. AWS also allows you to associate an Elastic IP with the network interface so that a reserved public IP remains consistently linked to the interface.
When associating an Elastic IP, simply select the Elastic IP from the dropdown menu:
Launching an EC2 Instance with an Existing Network Interface
Next, you’ll learn how to launch an EC2 instance using an existing network interface:
Start by launching a new instance and assign a descriptive name (for example, “EC2 Interface Demo”).
Select the Amazon Linux AMI, choose the T2 micro instance type, and pick the appropriate key pair.
In the network settings section, select “Edit” to review the VPC, subnet, and security group configurations.
Open the “Advanced network configuration” section to view the default network interface (device index 0) that will be used.
Instead of keeping the default configuration, select the existing network interface you created earlier (look for an ID like “eni-3E3E…”). You might need to search for the specific interface ID.
Leave the other settings unchanged and launch the instance.
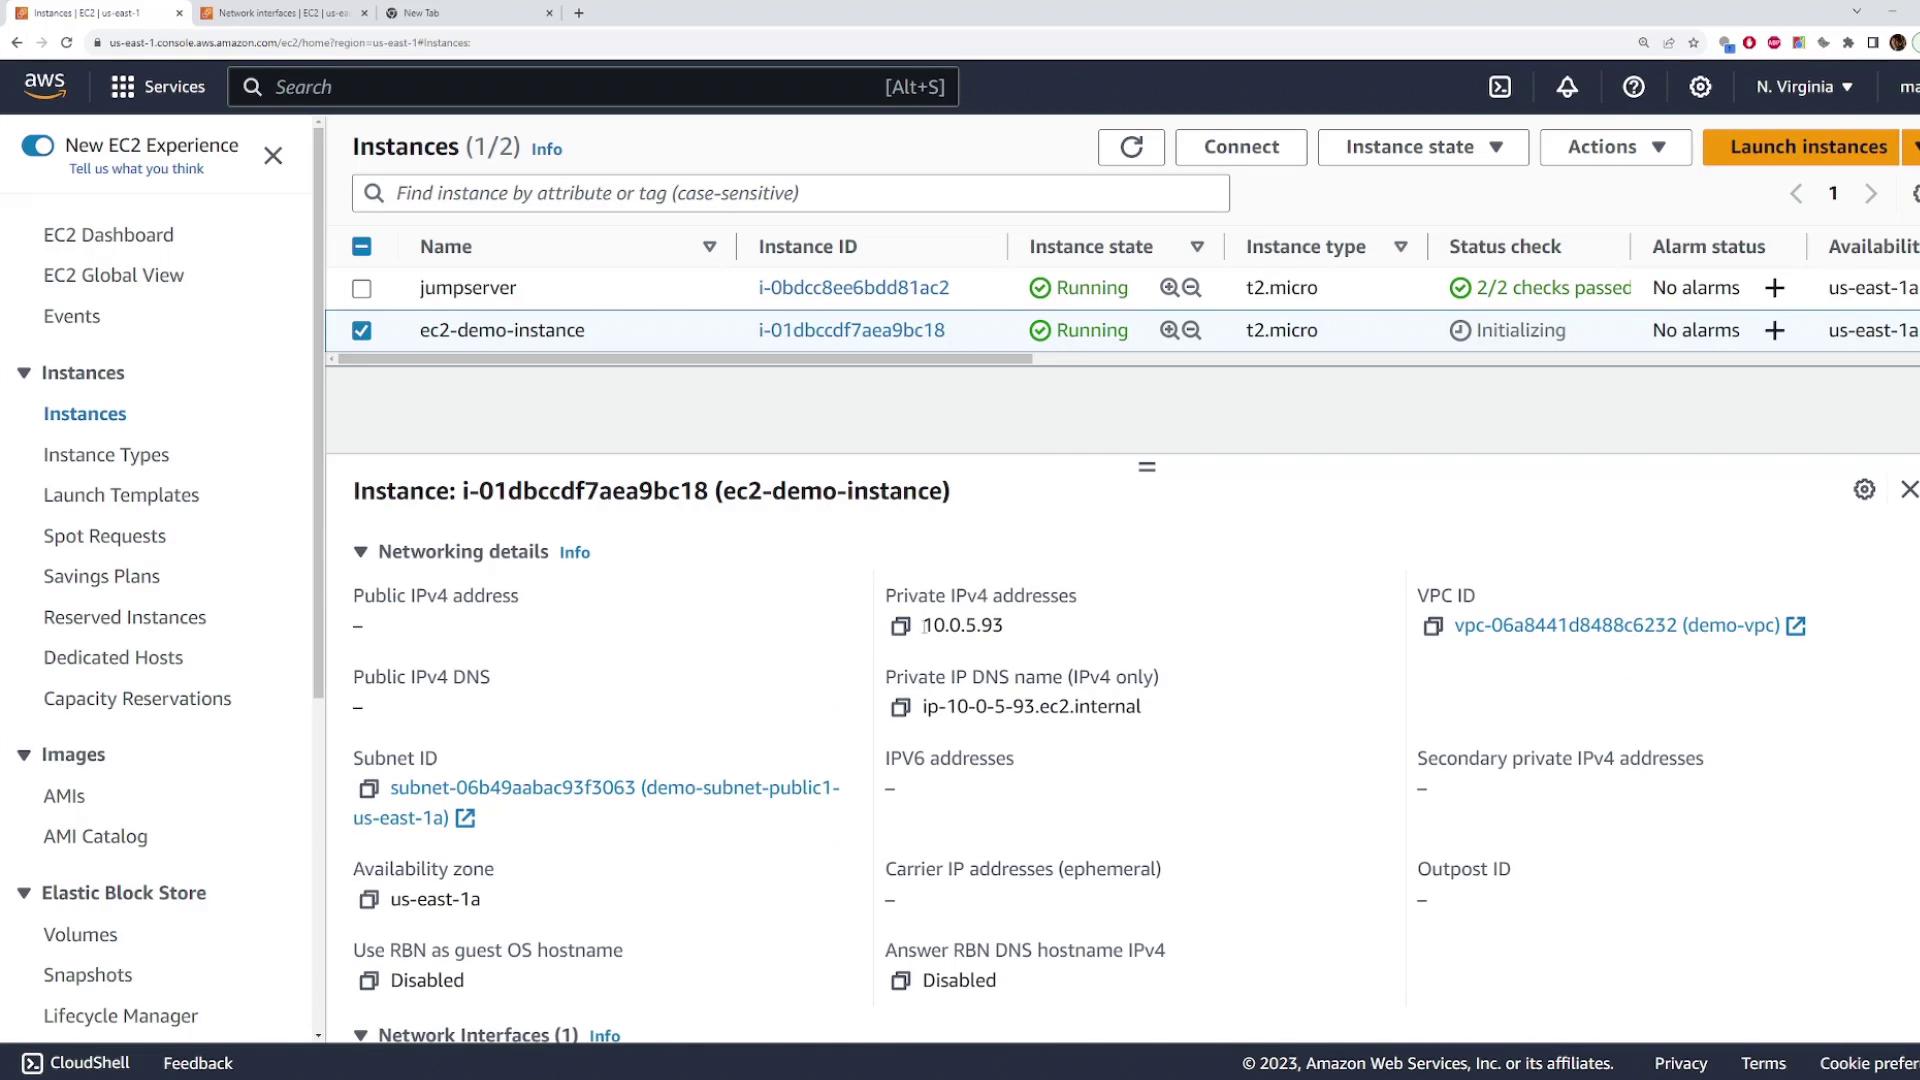
Once the instance is up and running, inspect its network configuration to verify the assigned private IP address. Even though no public IP is directly assigned to the instance, AWS maps a public Elastic IP to the instance via network address translation (NAT).
An EC2 instance can have multiple network interfaces. To attach an additional interface, proceed as follows:
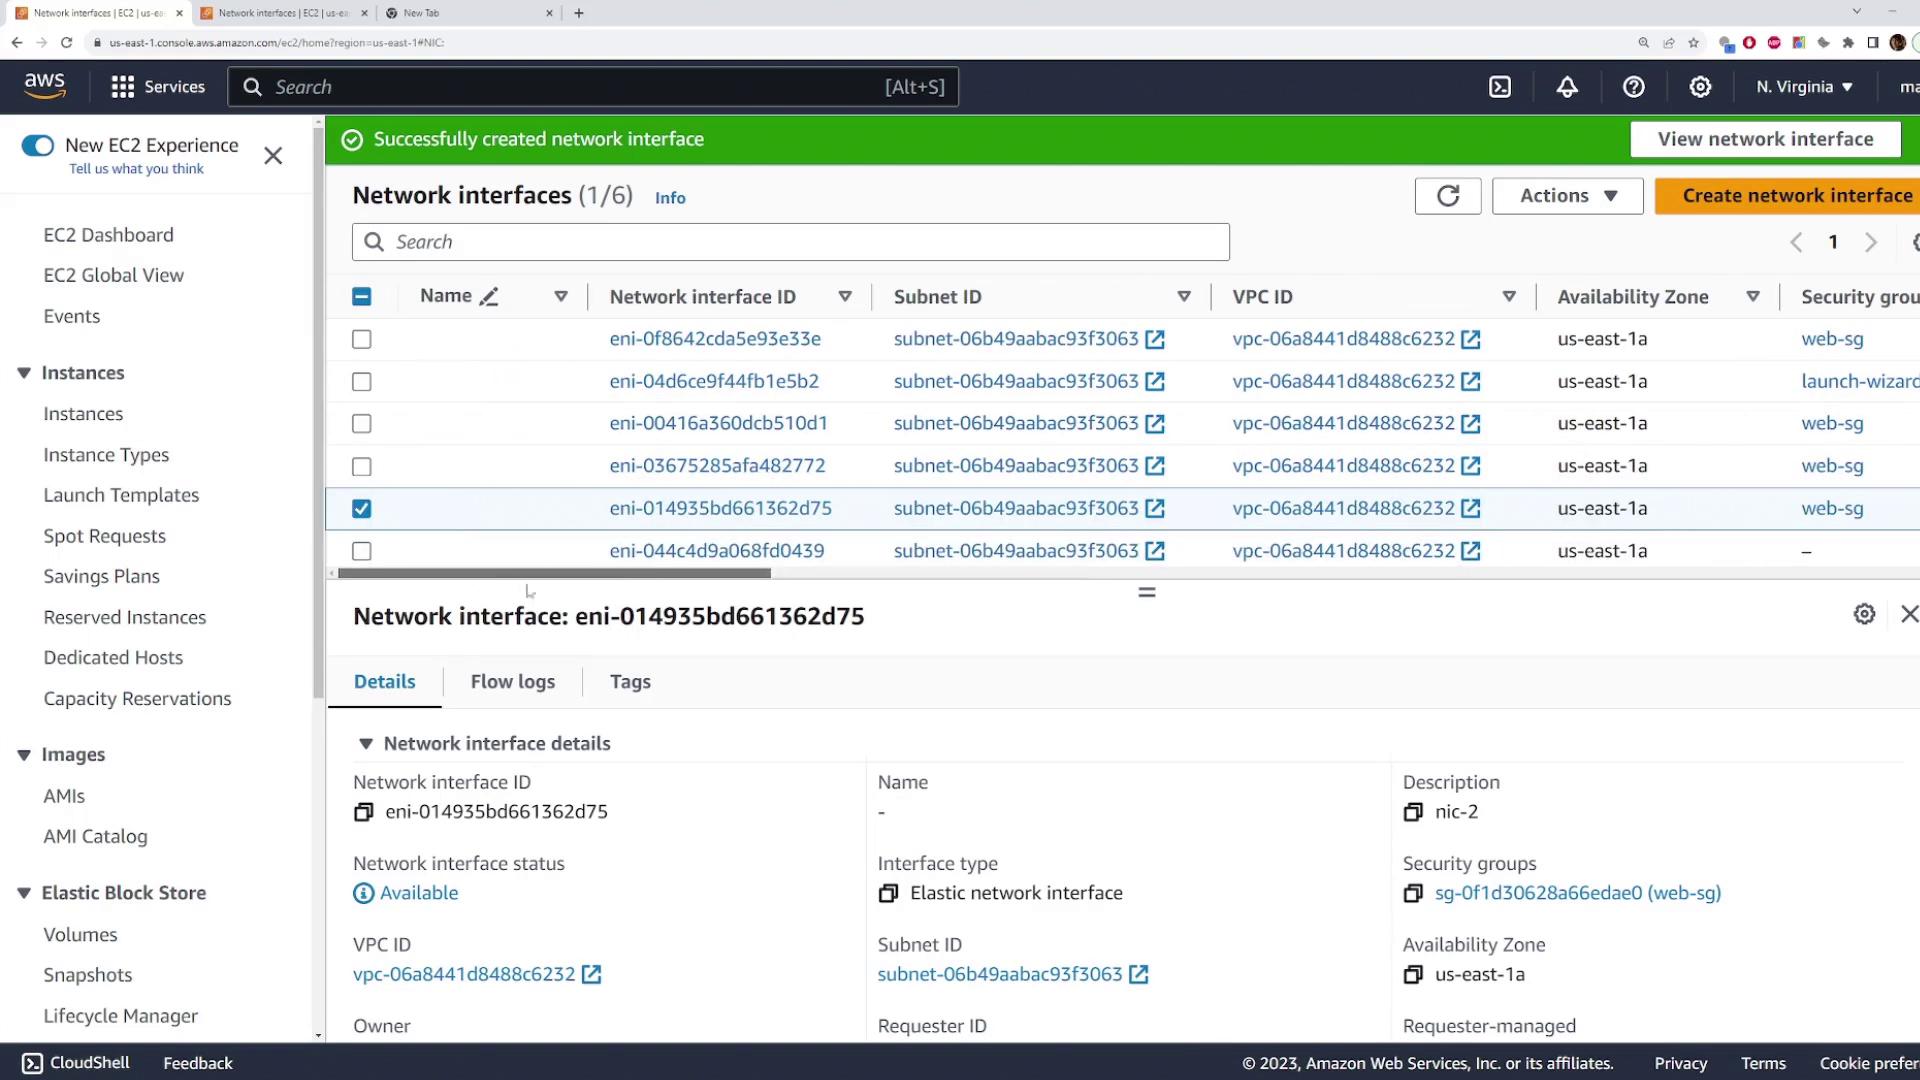
Create a new network interface (e.g., named “NIC 2”) in the same availability zone as your EC2 instance. This interface can reside in a different subnet, provided it’s within the same zone. You may use the same security group if desired.
Optionally, associate an Elastic IP with “NIC 2” by selecting one from your Elastic IP addresses.
Return to the EC2 instances page, select your demo instance, and choose the attach option for network interfaces.
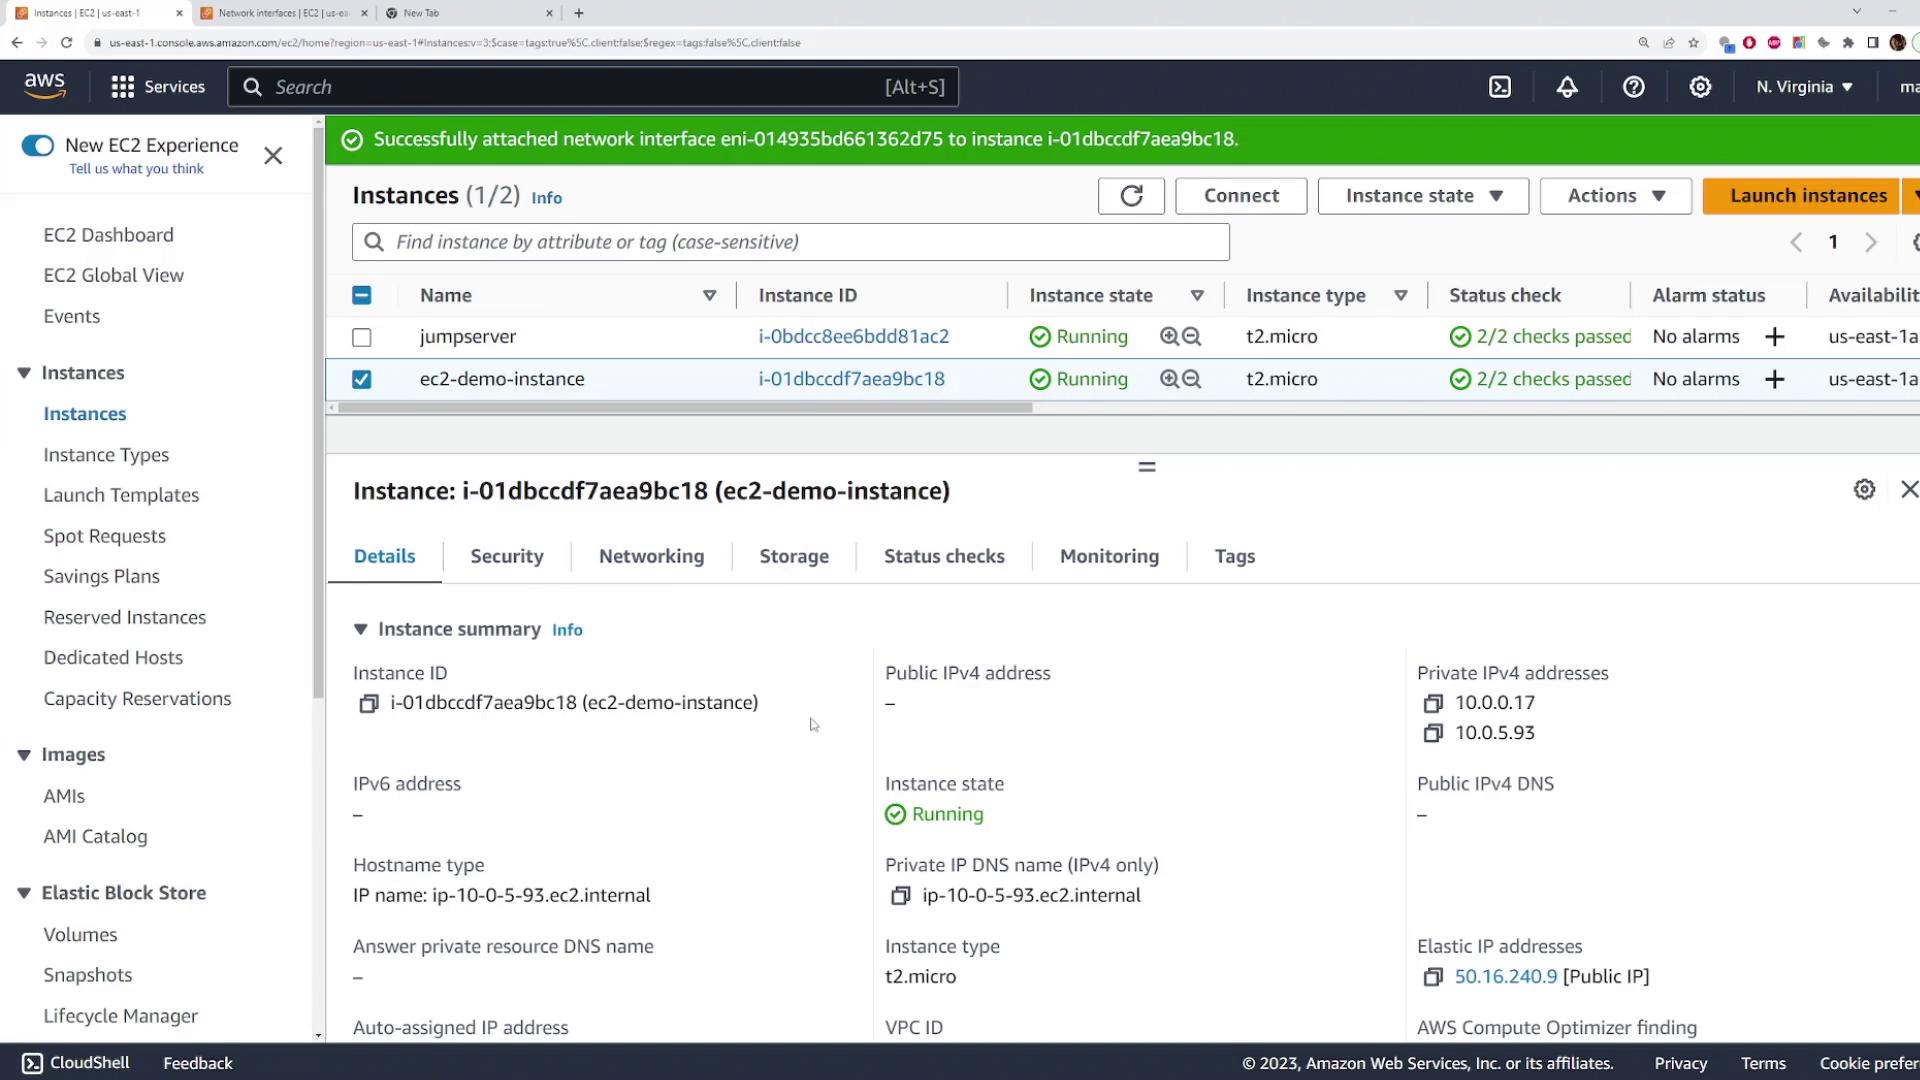
Select “NIC 2” from the list and attach it. This action can be performed while the instance is running.
After the attachment, your instance will have two network interfaces: the original one and “NIC 2” (with its associated Elastic IP if configured).
Using the public Elastic IP associated with “NIC 2,” you can SSH into the server without directly exposing the instance’s primary network configuration.
Here is an example of logging in via SSH from a Windows command prompt:
Copy
# Example SSH command from a Windows command promptC:\Users\sanje\Documents\scratch\aws-demo> ssh -i main.pem ec2-user@50.16.240.9 ,# ,_# |######## ~~~ ____ V~-> ~~~ /m/'Last login: Thu Oct 12 04:43:18 2023 from 173.73.184.248[ec2-user@ip-10-0-5-93 ~]$
Once logged in, view the network interfaces on your instance with the ip add command:
Copy
[ec2-user@ip-10-0-5-93 ~]$ ip add1: lo: <LOOPBACK,UP,LOWER_UP> mtu 65536 qdisc noqueue state UNKNOWN group default qlen 1000 link/loopback 00:00:00:00:00:00 brd 00:00:00:00:00:00 inet6 ::1/128 scope host noprefixroute valid_lft forever preferred_lft forever2: enX0: <BROADCAST,MULTICAST,UP,LOWER_UP> mtu 9001 qdisc fq_codel state UP group default qlen 1000 link/ether 0e:c1:c6:4e:41:39 brd ff:ff:ff:ff:ff:ff altname eni-0f8642cda59e33e altname device-number-0 inet 10.0.5.93/20 metric 512 brd 10.0.15.255 scope global dynamic enX0 valid_lft 3291sec preferred_lft 3291sec inet6 fe80::cc1:c6ff:fe4e:4139/64 scope link valid_lft forever preferred_lft forever3: enX1: <BROADCAST,MULTICAST,UP,LOWER_UP> mtu 9001 qdisc fq_codel state UP group default qlen 1000 link/ether 0e:c4:fc:6e:60:3c brd ff:ff:ff:ff:ff:ff altname eni-014935bd661362d75 altname device-number-1 inet 10.0.0.17/20 metric 522 brd 10.0.15.255 scope global dynamic enX1 valid_lft 3548sec preferred_lft 3548sec inet6 fe80::fcff:fe6e:603c/64 scope link valid_lft forever preferred_lft forever[ec2-user@ip-10-0-5-93 ~]$
The output lists the loopback interface and the two attached network interfaces. Notice that only private IP addresses are present because AWS uses network address translation (NAT) to map the public Elastic IPs—thus keeping the public IPs hidden from the instance itself.
Network interfaces can be detached from a running instance via the instance’s actions menu. Detached interfaces retain their IP addresses and security configurations, allowing you to attach them to another instance without reconfiguration. This is especially useful for maintenance and scaling.
This separation between EC2 instances and their network configurations offers a robust and scalable method for managing your AWS cloud networking resources.That concludes our demonstration. We hope this lesson on AWS network interfaces has been both informative and practical for managing your EC2 networking setup.