AWS Solutions Architect Associate Certification
Services Database
DynamoDB Demo
In this demonstration, we explore how to work with DynamoDB by creating a table to store customer orders for an e-commerce website. The tutorial covers table creation, configuration, adding items (orders), performing queries, editing and deleting items, using PartiQL, and monitoring. The sequence below matches the original demonstration while enhancing clarity, technical accuracy, and SEO.
Creating the Orders Table
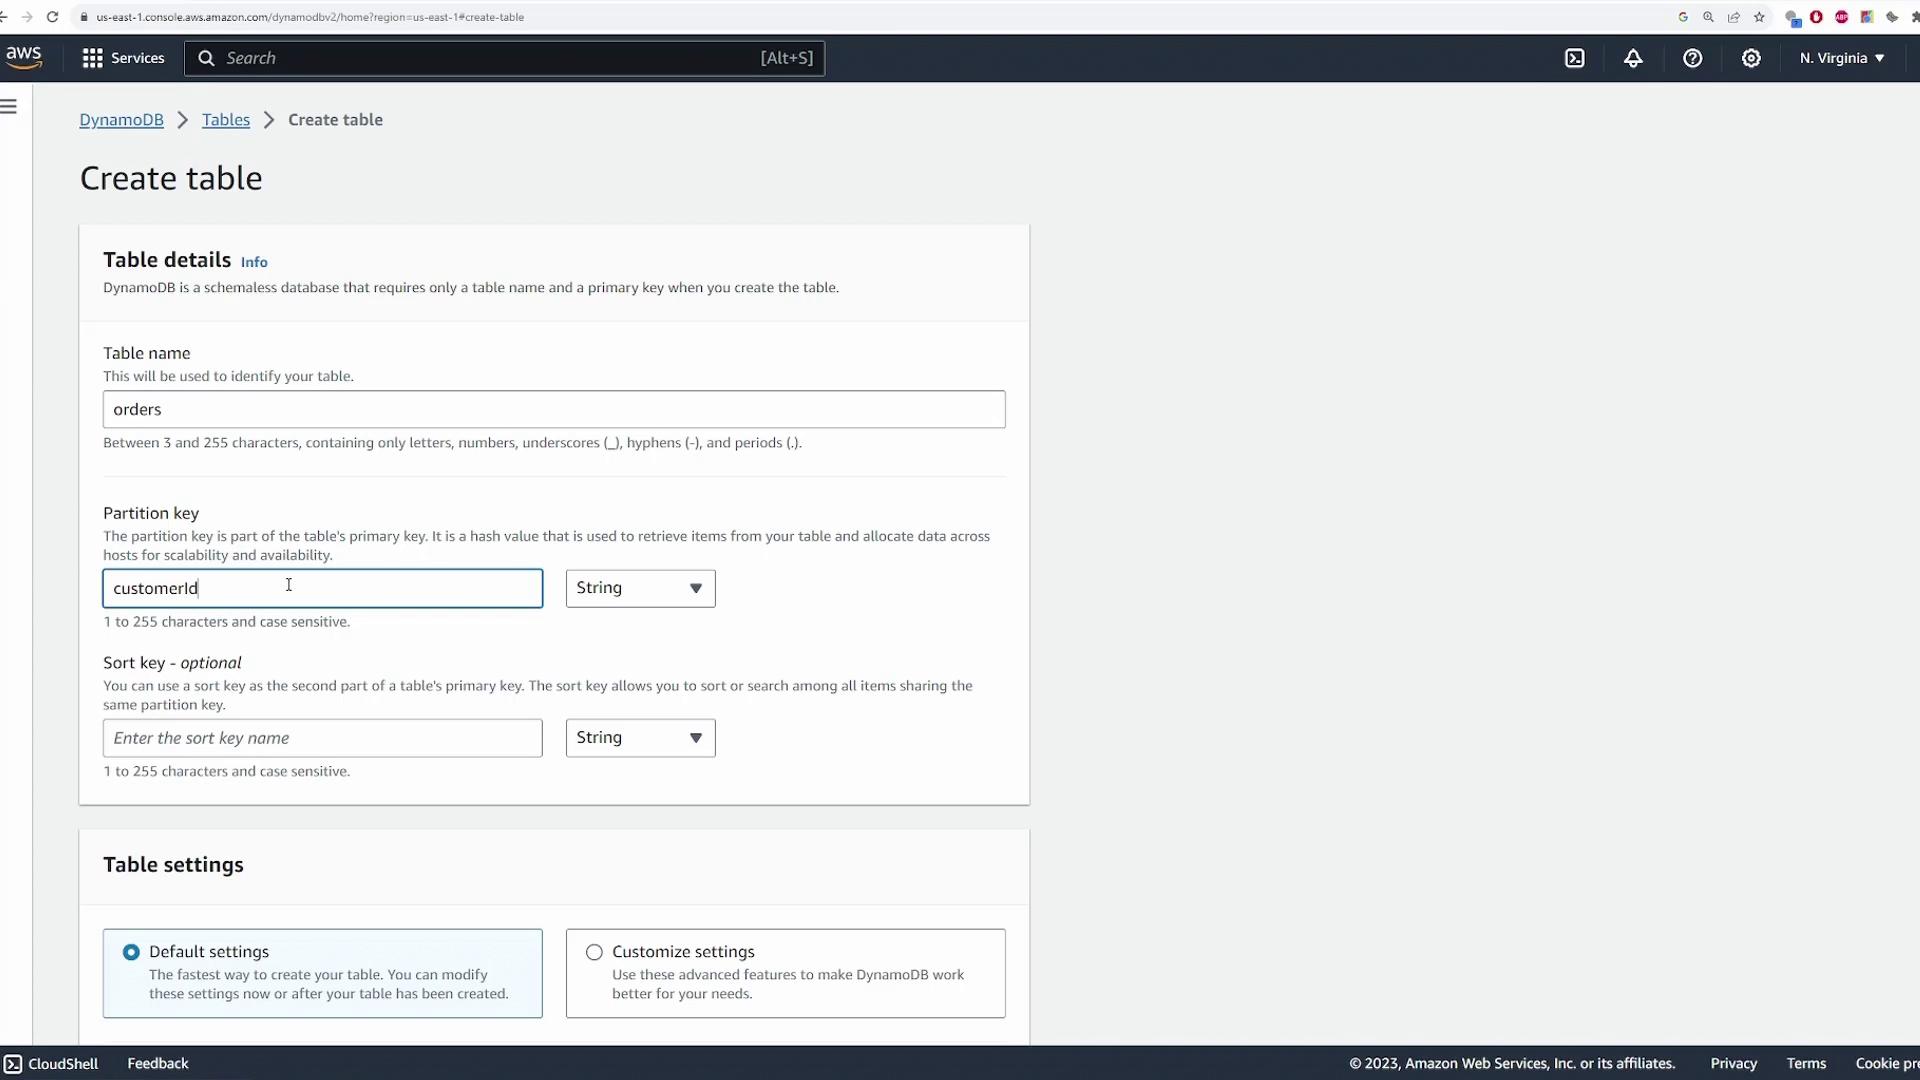
Begin by searching for the DynamoDB service within the AWS Console. Once you are in the DynamoDB interface, click Create table. For this demonstration, we will store orders placed by customers on an e-commerce site. You can name the table “orders” (or any name you prefer).
When creating the table, choose a partition key (and optionally a sort key) that best suits your data model:
- Partition key: customer ID (String) – enables efficient queries.
- Sort key: order ID (String) – distinguishes multiple orders for the same customer.
Below is a screenshot of the Orders table creation interface:
Configuring Table Settings
After specifying the keys, you can choose default settings or customize them:
Table Class:
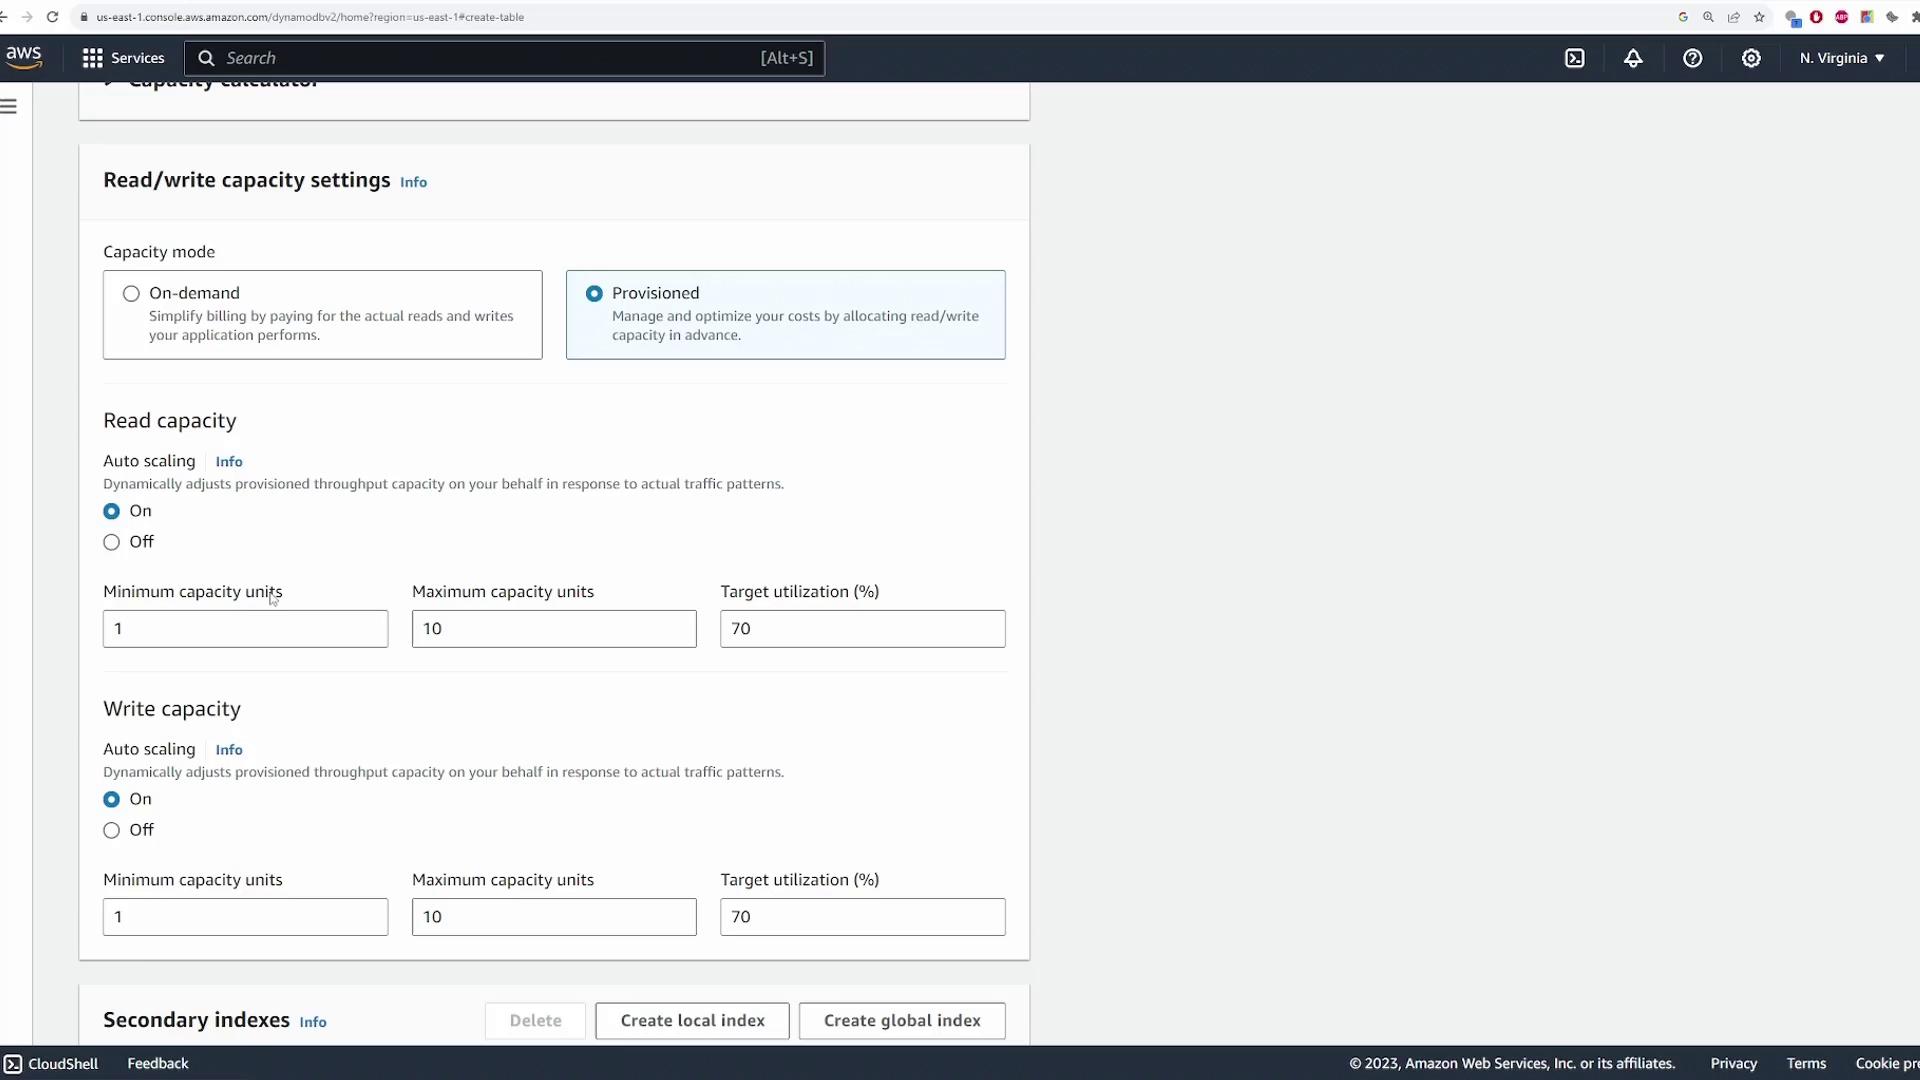
Typically, DynamoDB Standard is used for general purposes. If your data is infrequently accessed, consider using DynamoDB Standard-IA.Read/Write Capacity Settings:
- Set fixed capacity (e.g., five read and five write capacity units) or enable auto scaling.
- With auto scaling, define minimum and maximum capacity units and a target utilization percentage to automatically adjust throughput based on demand.
Review the screenshots below to understand the settings configuration:

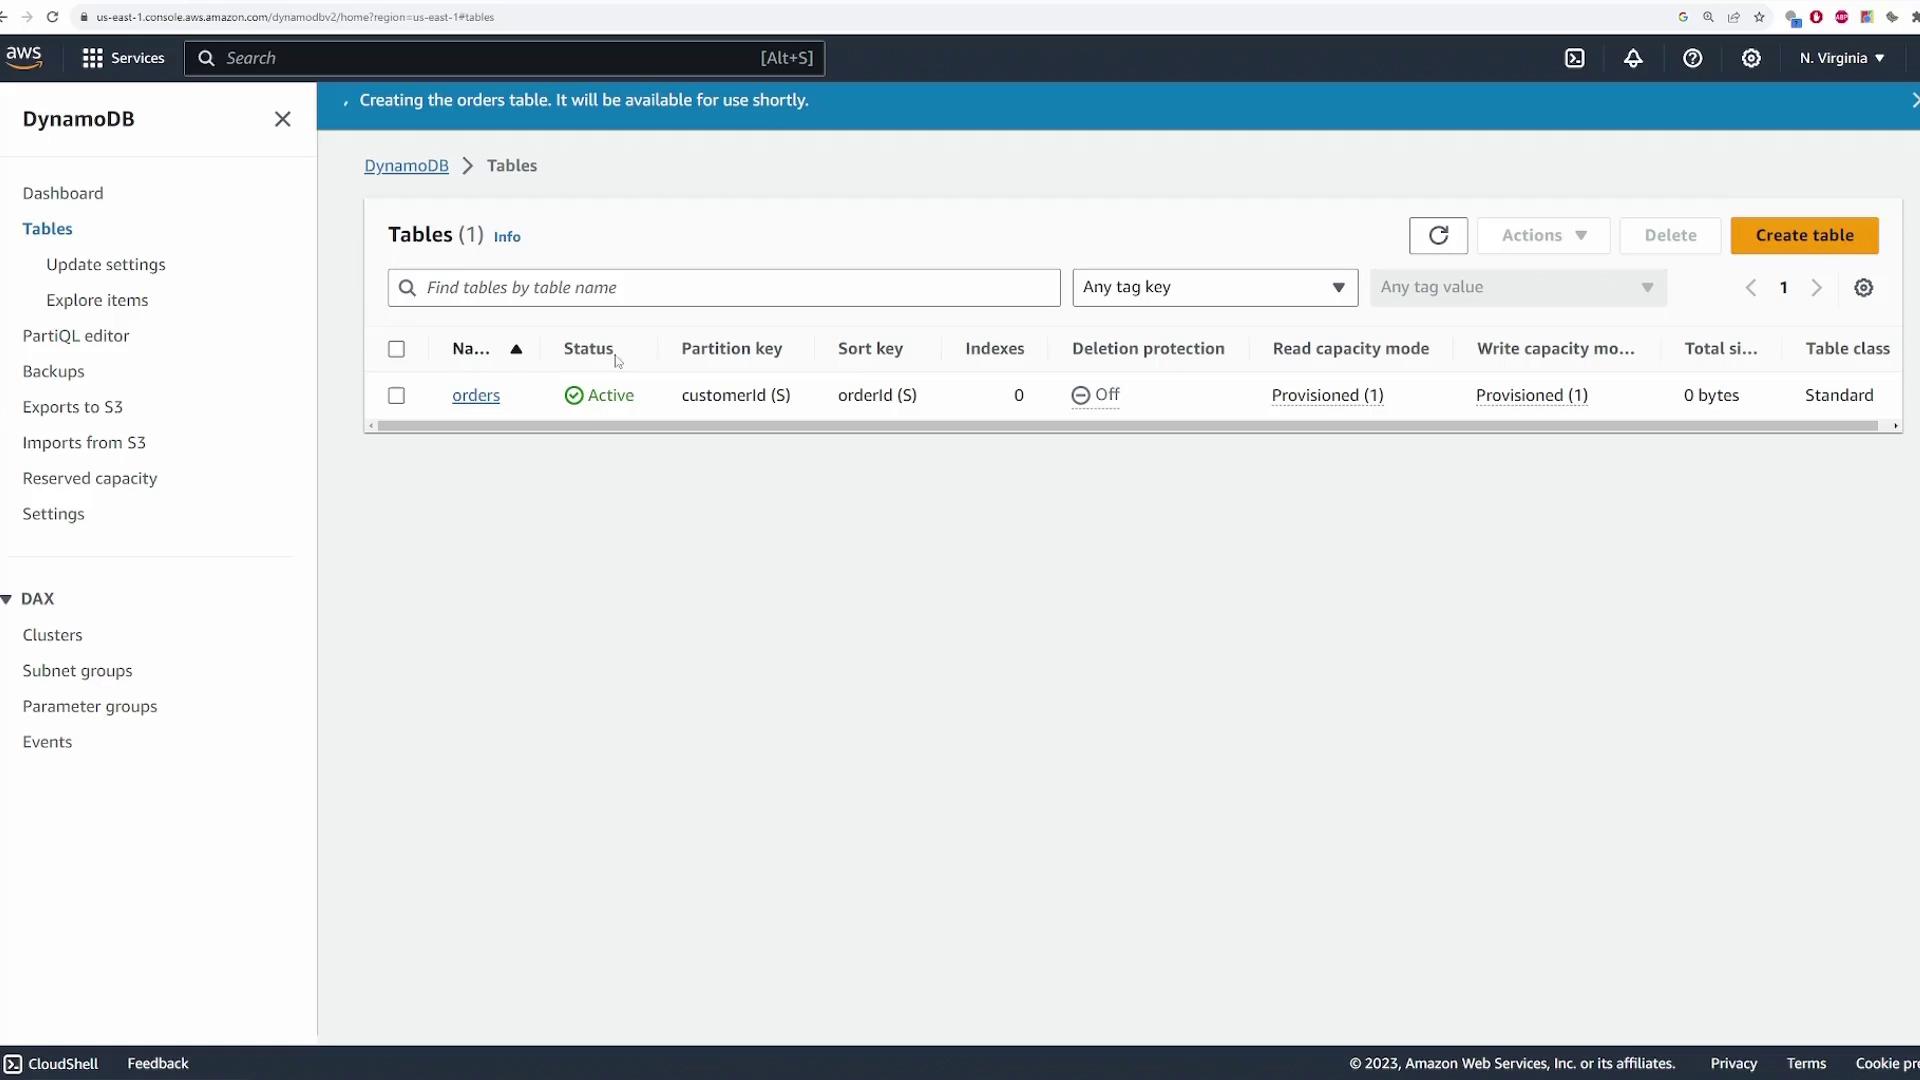
After setting the capacity and reviewing additional options like secondary indexes, encryption settings, and deletion protection, click the button to create the table. The creation process should take a few seconds until the table's status becomes “active.”
Below is an image showing the active table:
Exploring the Table Overview
After creation, select your orders table from the console to view an overview of its configurations:
- Key Information: Displays the partition key (customerId) and sort key (orderId), along with the chosen capacity mode.
- Metrics: Initially, the table contains zero items. The overview provides details like table size, average item size, and capacity metrics.
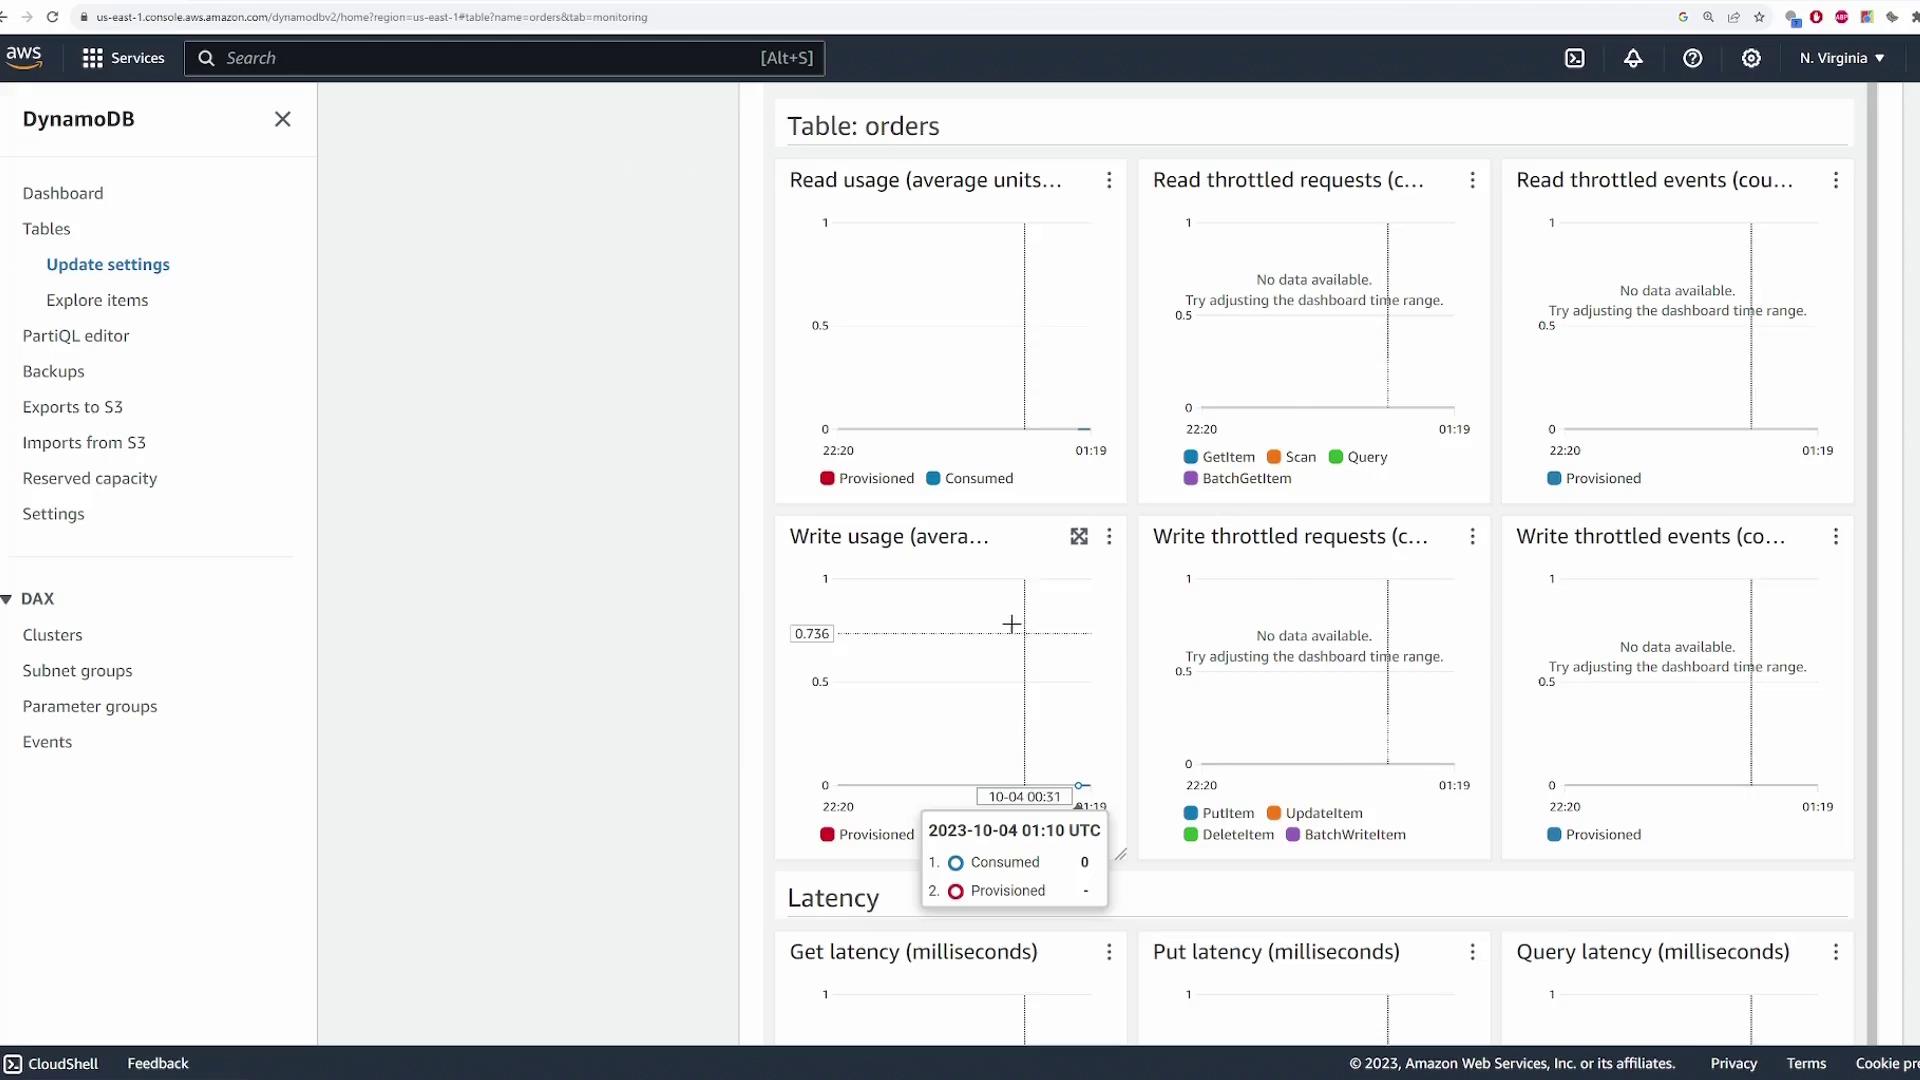
- Indexes and Monitoring: Explore secondary indexes in the “Indexes” section and review CloudWatch metrics in the “Monitor” section, including read/write usage, latency, and alarms for performance tracking.
Refer to the images below for an overview and monitoring dashboard:

Adding Items to the Table
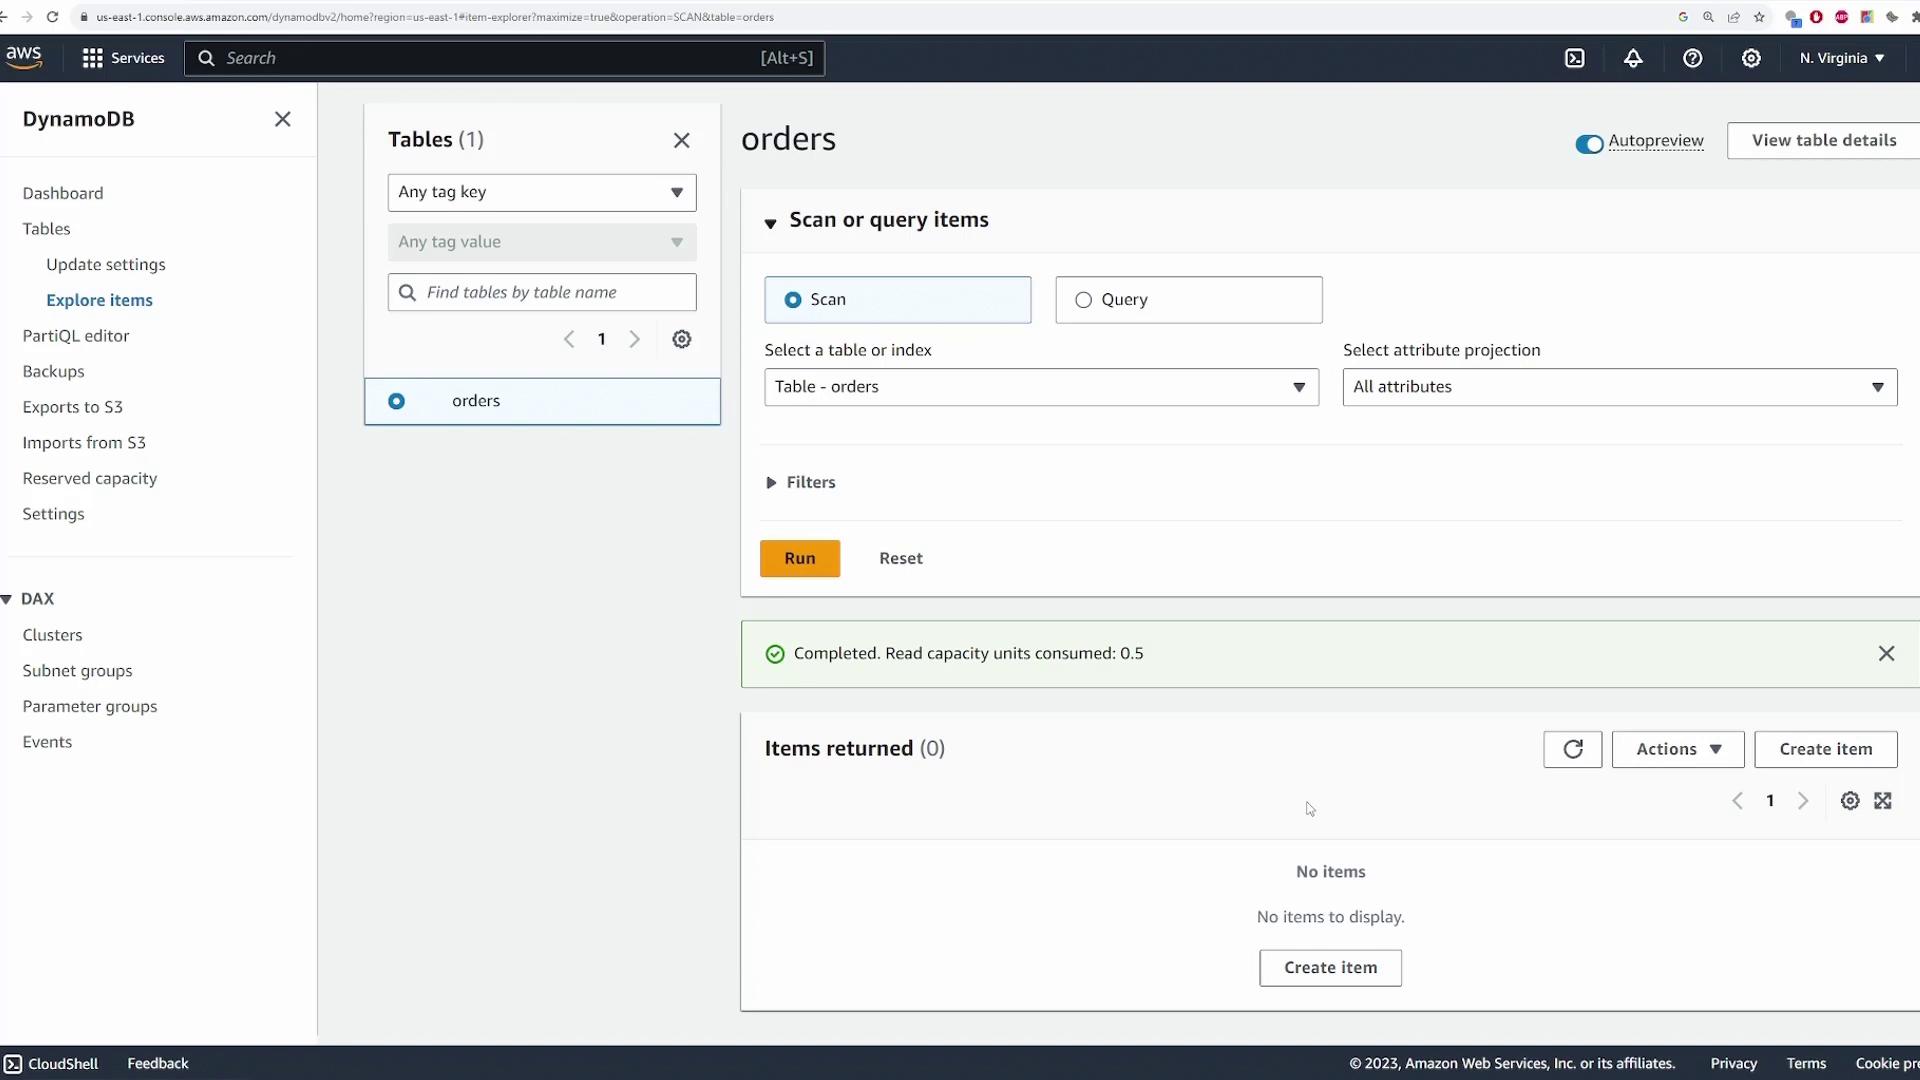
To populate your table with data, navigate to Explore Table Items. Since the table is initially empty, you will see a message indicating no items and minimal read capacity usage:
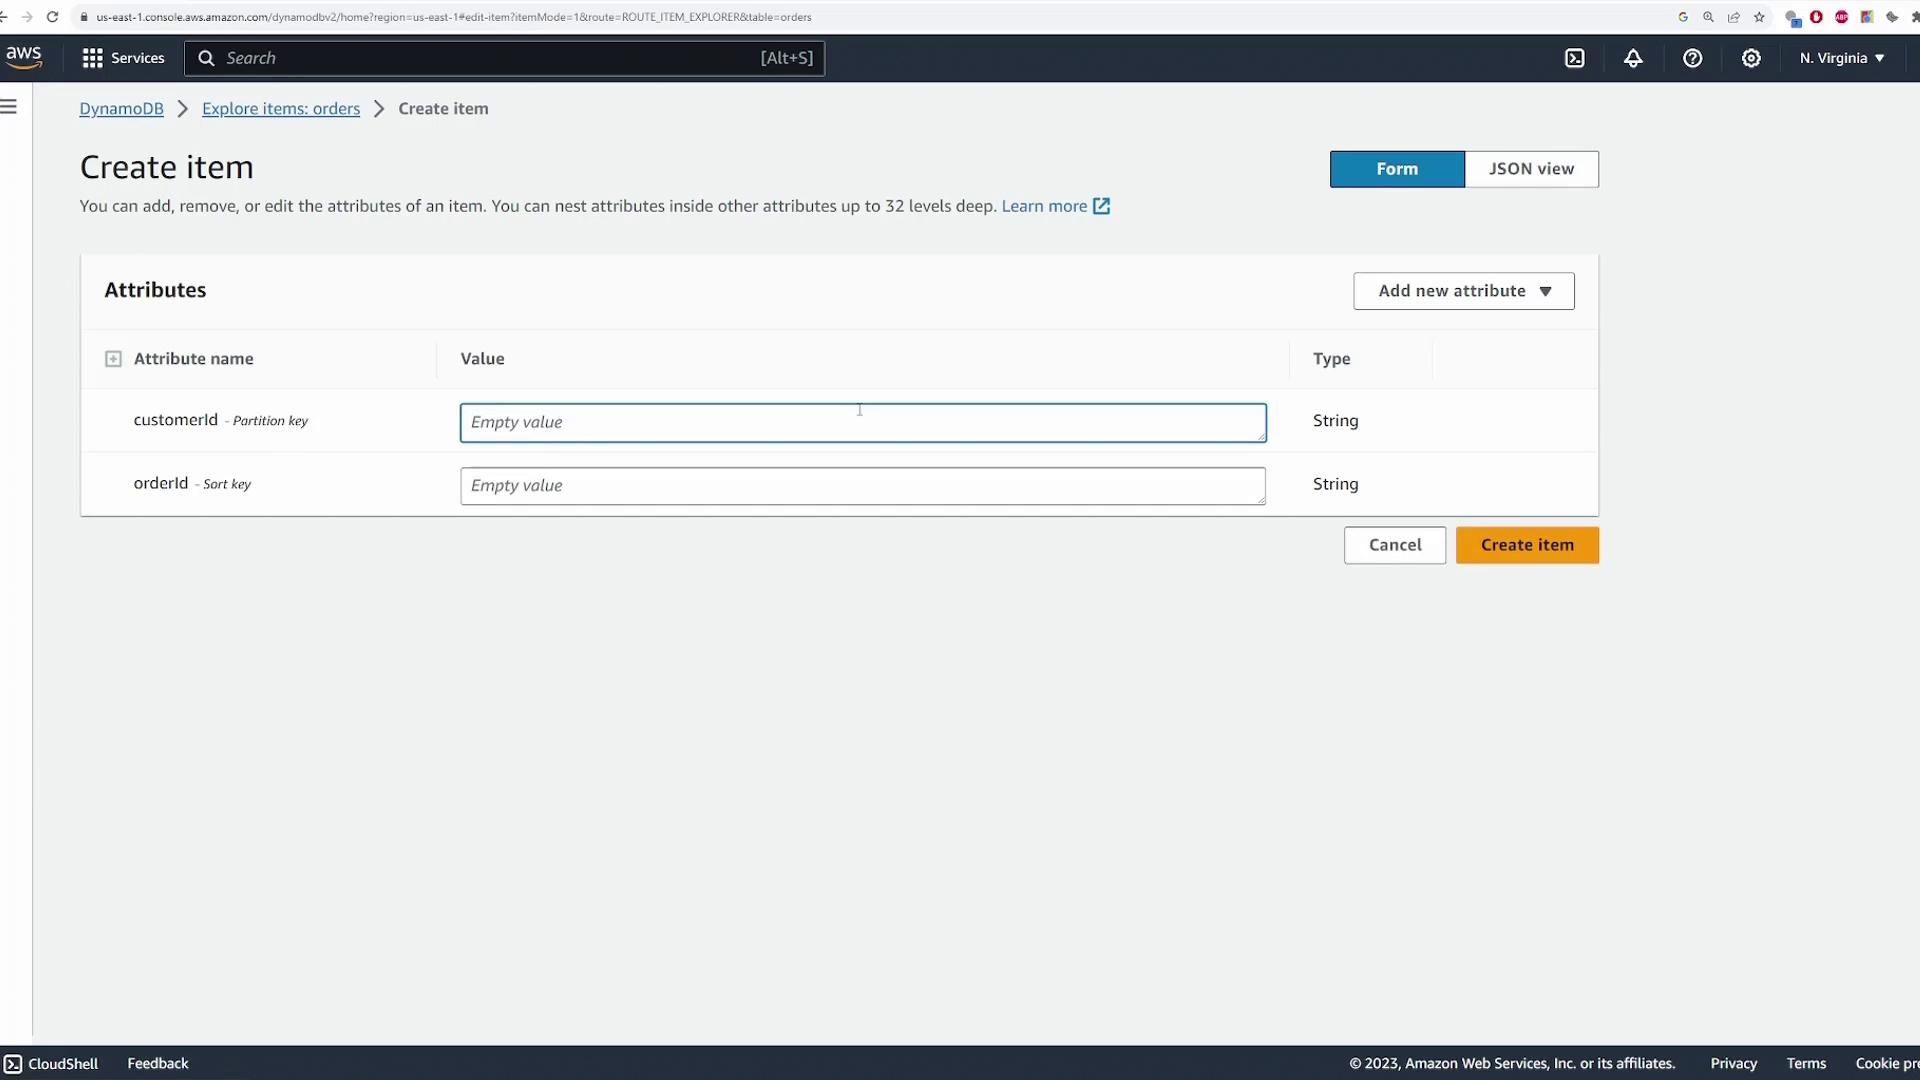
Click Create item and populate the required fields:
- Partition Key (customerId): For example, “cust1” for customer one.
- Sort Key (orderId): For example, “order10” as the order identifier.
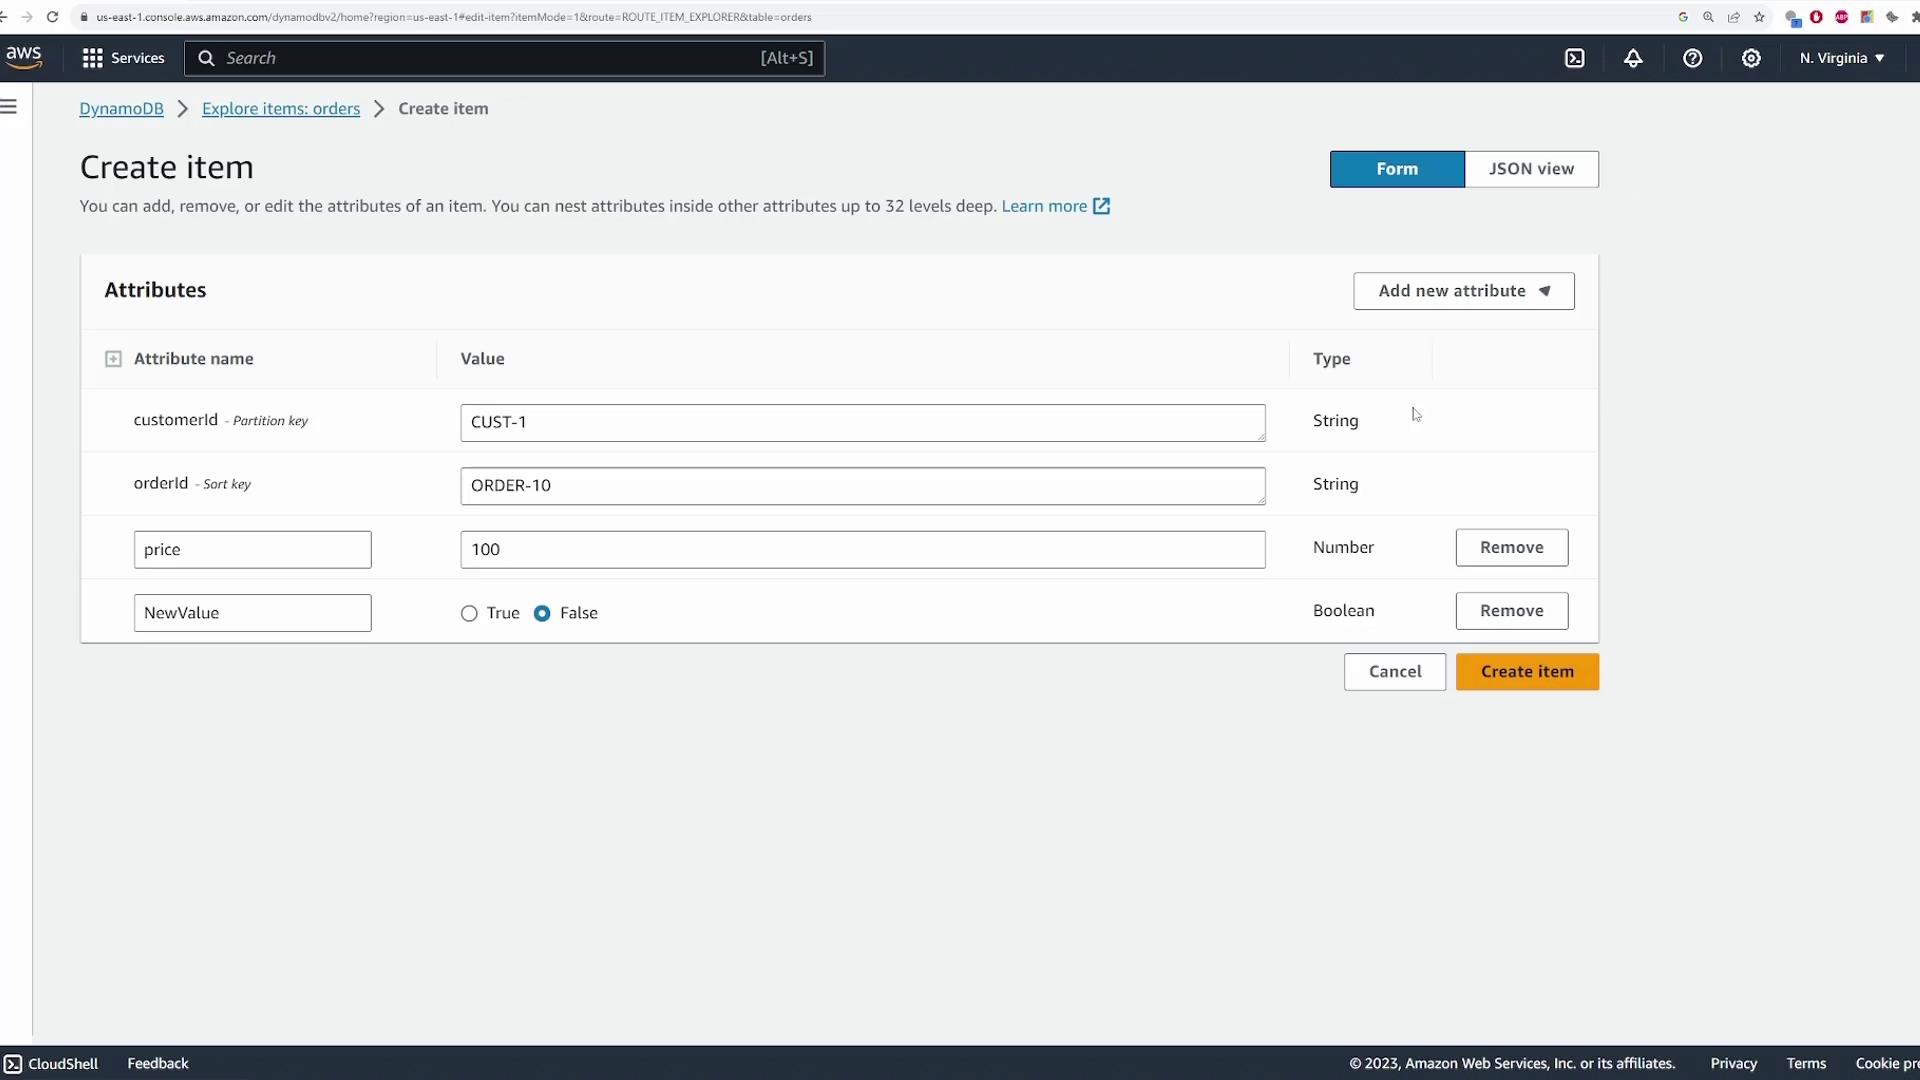
You can add additional attributes, such as:
- Price: Numeric (e.g., 100)
- Delivered: Boolean (true or false)
The following image shows the item creation interface:
Add further attributes as needed:
For demonstration purposes, add the following orders:
First Order for Customer One:
- Partition Key: cust1
- Sort Key: order10
- Price: 100
- Delivered: true
Second Order for Customer One:
- Partition Key: cust1
- Sort Key: order20
- Price: 50
- Delivered: true
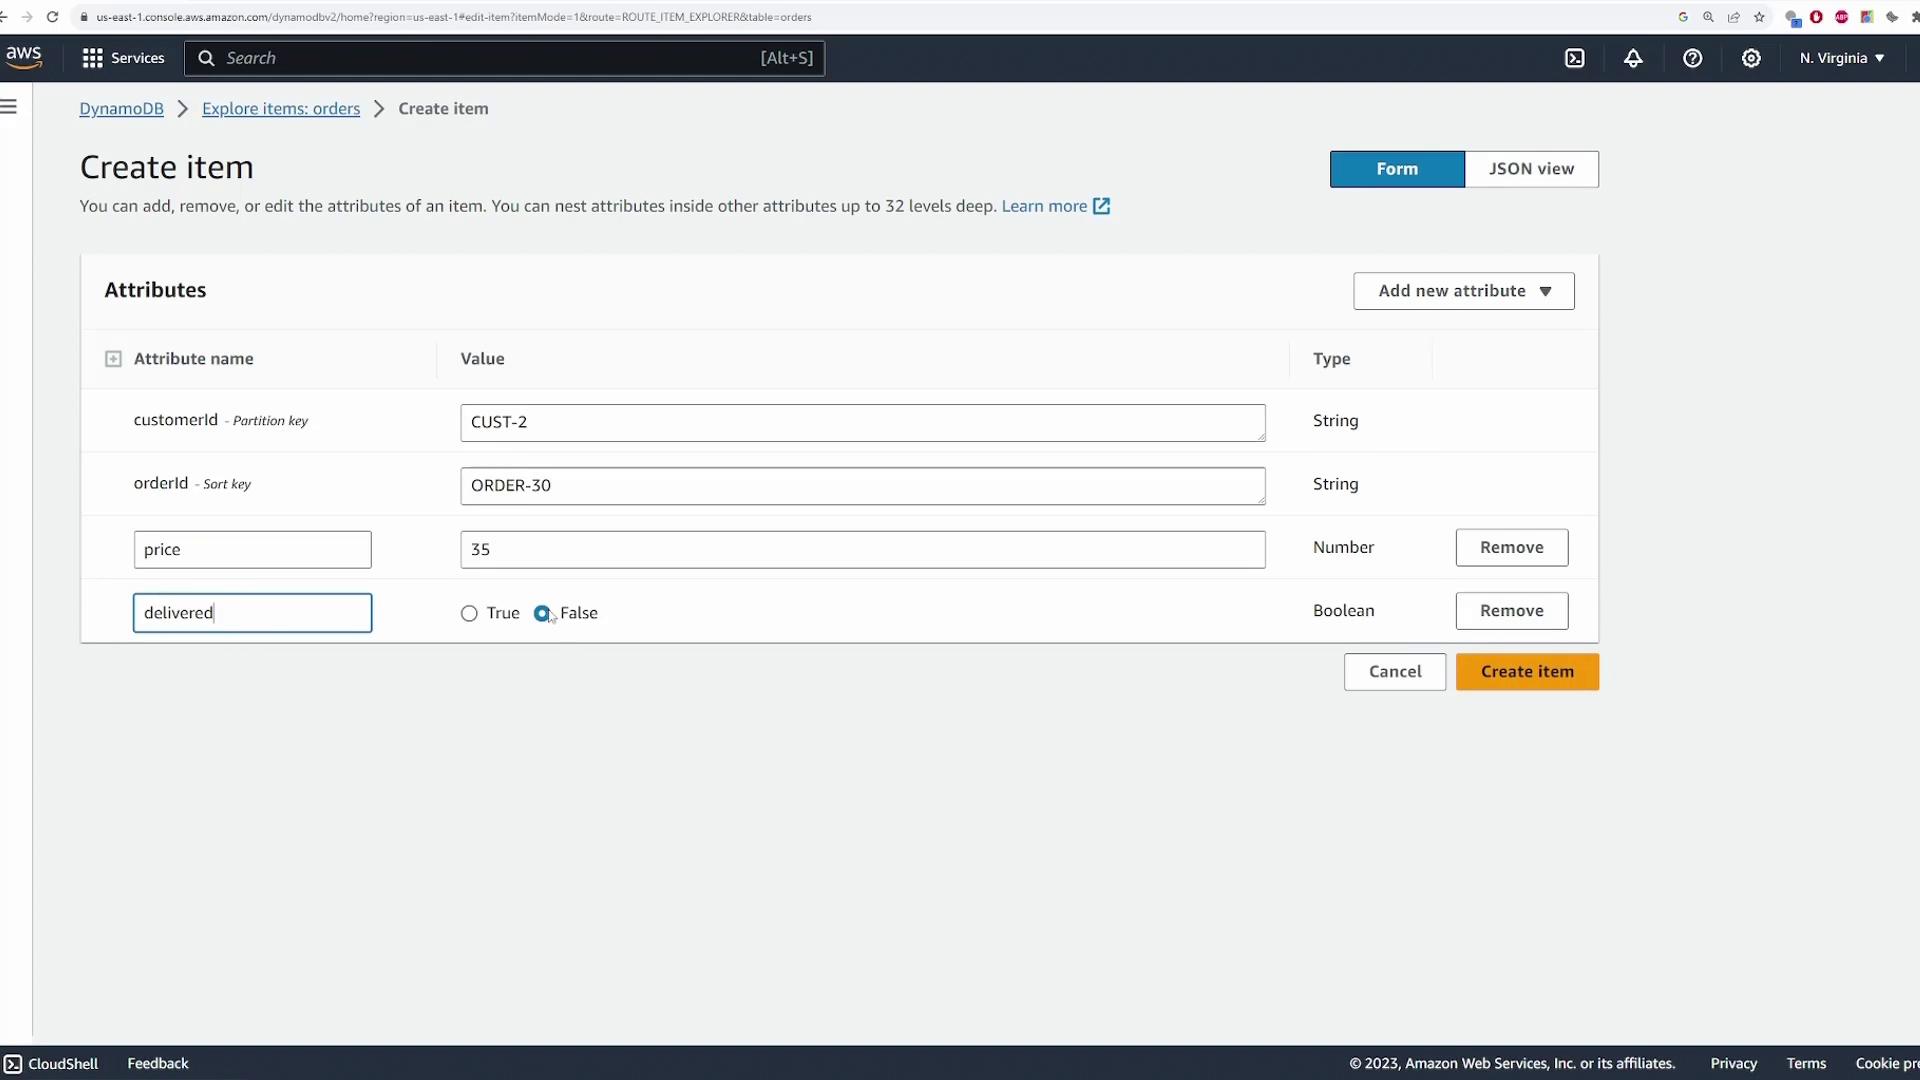
Order for Customer Two:
- Partition Key: cust2
- Sort Key: order30
- Price: 35
- Delivered: false
The image below shows another item creation interface:
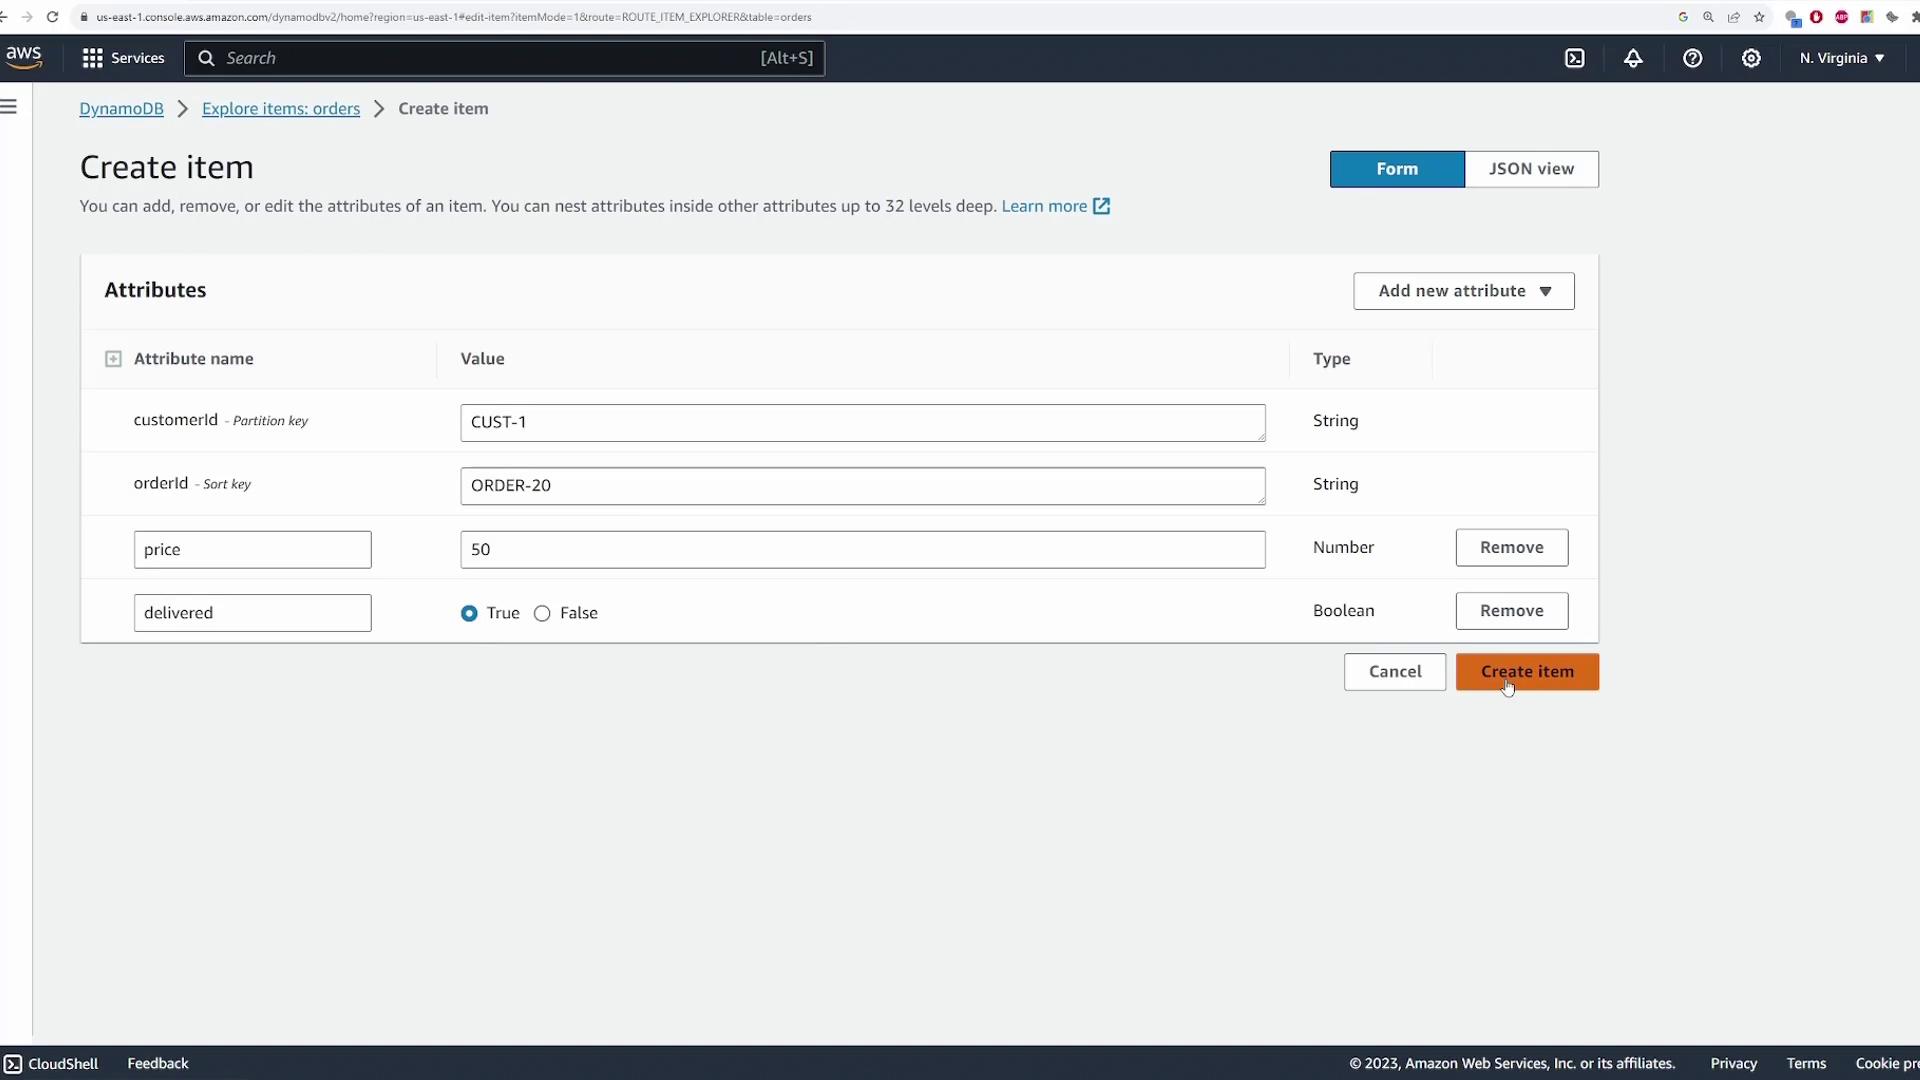
And a final form view:
After adding these items, you will have three orders stored in your table.
Querying the Table
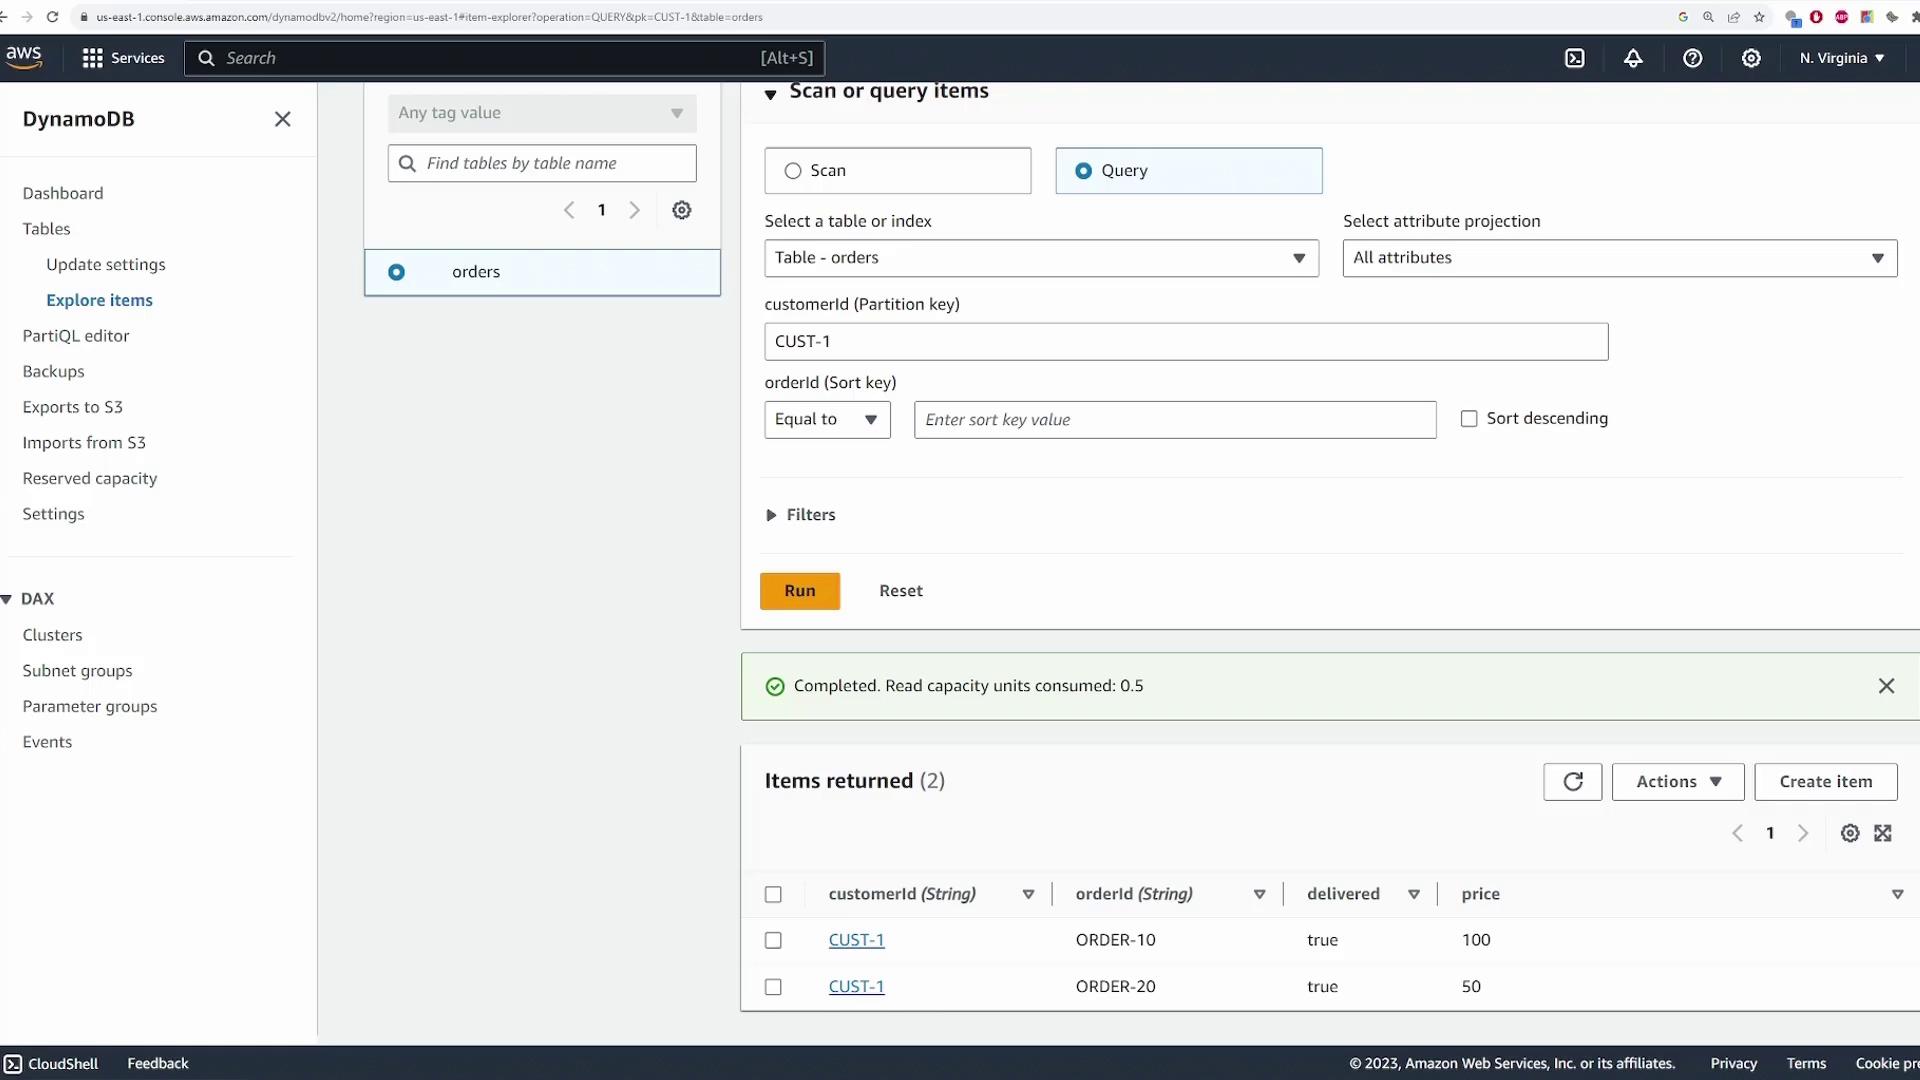
Queries are more efficient than scans, so use them to retrieve specific data based on the partition key. For example, to retrieve orders for customer one:
- Navigate to the Query Editor in the DynamoDB Console.
- Enter the partition key value (“cust1”) and run the query to return both orders associated with that customer.
See the example below:
To retrieve orders for customer two, simply change the partition key to “cust2”.
For more refined searches, you can apply filters. For example, to retrieve only orders for customer one with a price greater than 60:
- Set cust1 as the partition key.
- Add a filter condition where price > 60.
- Run the query to obtain only those orders that match the condition.
A filtered query example is displayed below:

Editing and Deleting Items
To update an existing item, select it from the table view and click Edit item. For instance, you might update the price from 100 to 120 if the order cost has changed:
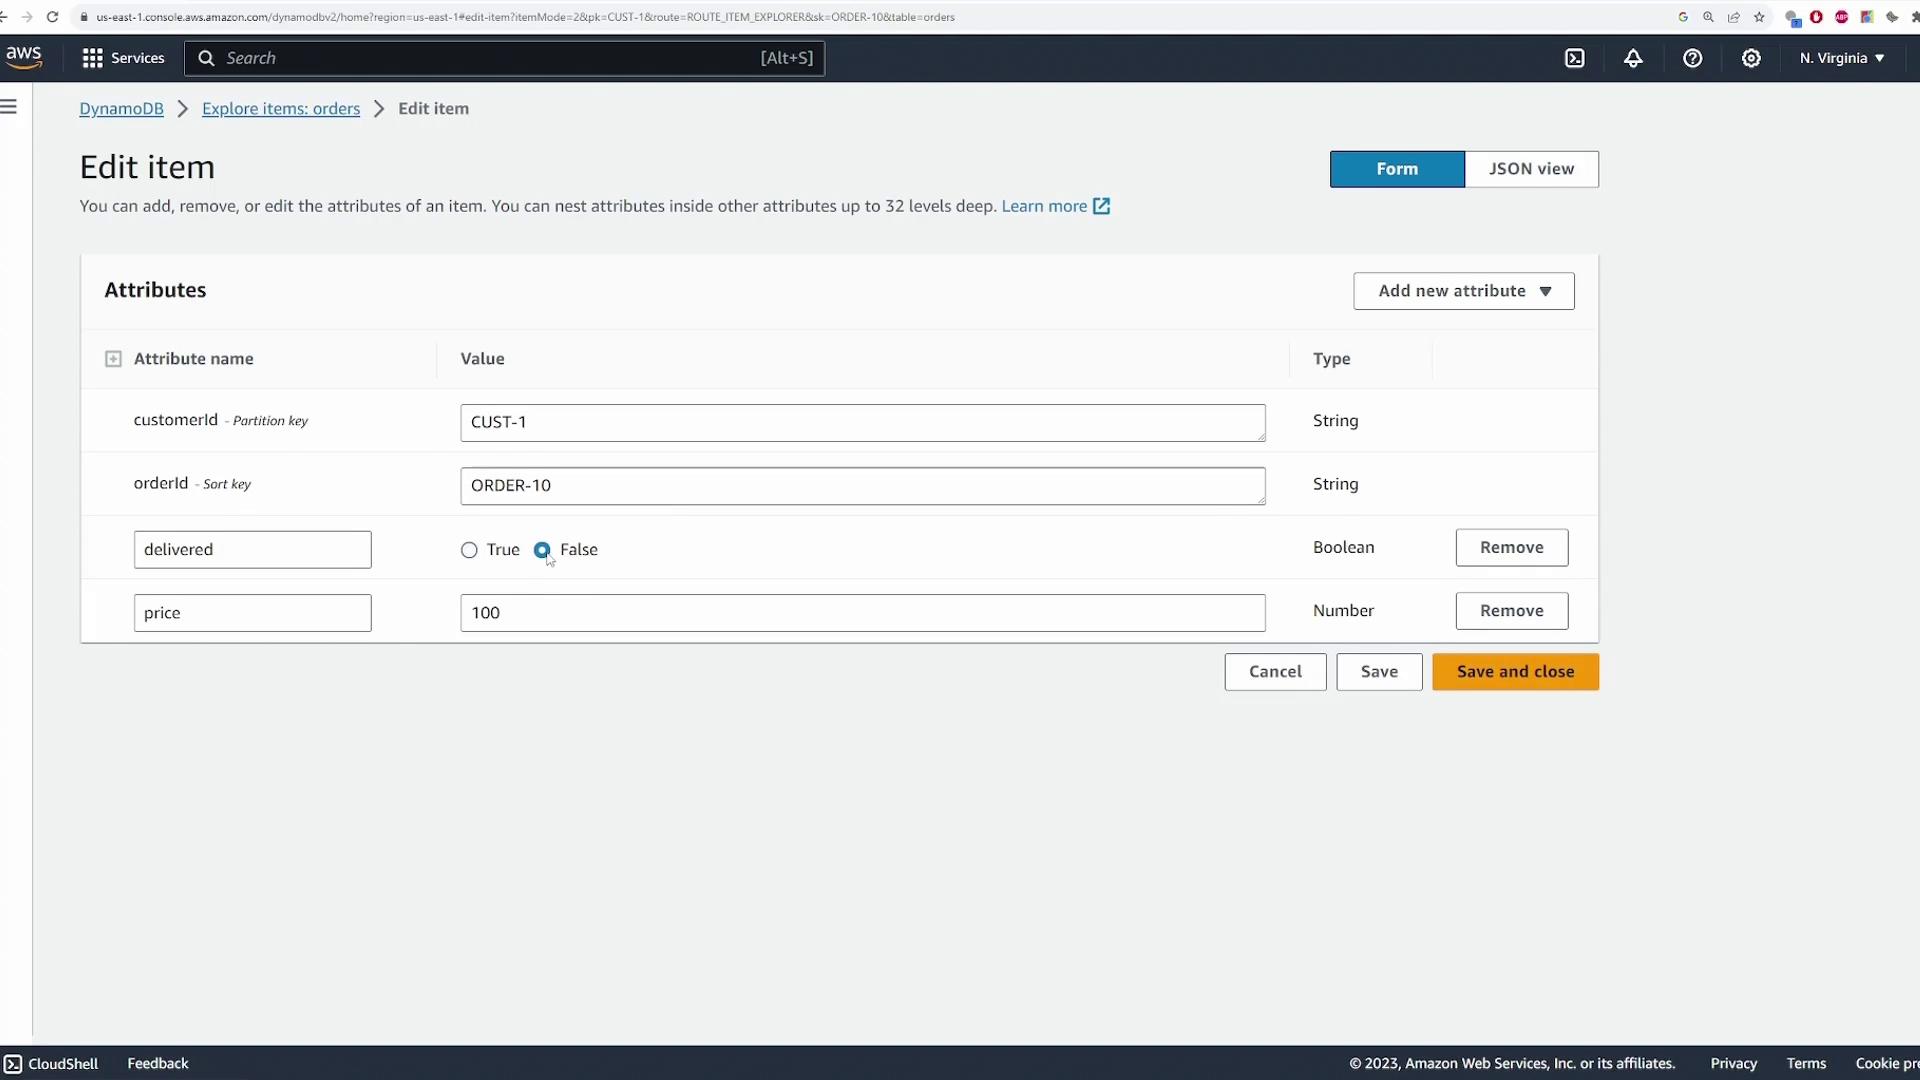
After making the changes, save your updates.
To delete an item, select it and choose Actions > Delete item. This will remove the selected item from your table.
Note
Always ensure you have a backup or have exported your data if you need to retain it before deleting any items.
Using PartiQL for Queries
DynamoDB supports PartiQL, an SQL-compatible query language that allows you to interact with your table using familiar SQL-like syntax. PartiQL translates SQL commands into DynamoDB queries, making it a useful alternative if you are more comfortable with SQL.
For further details on PartiQL, check out the DynamoDB Documentation.
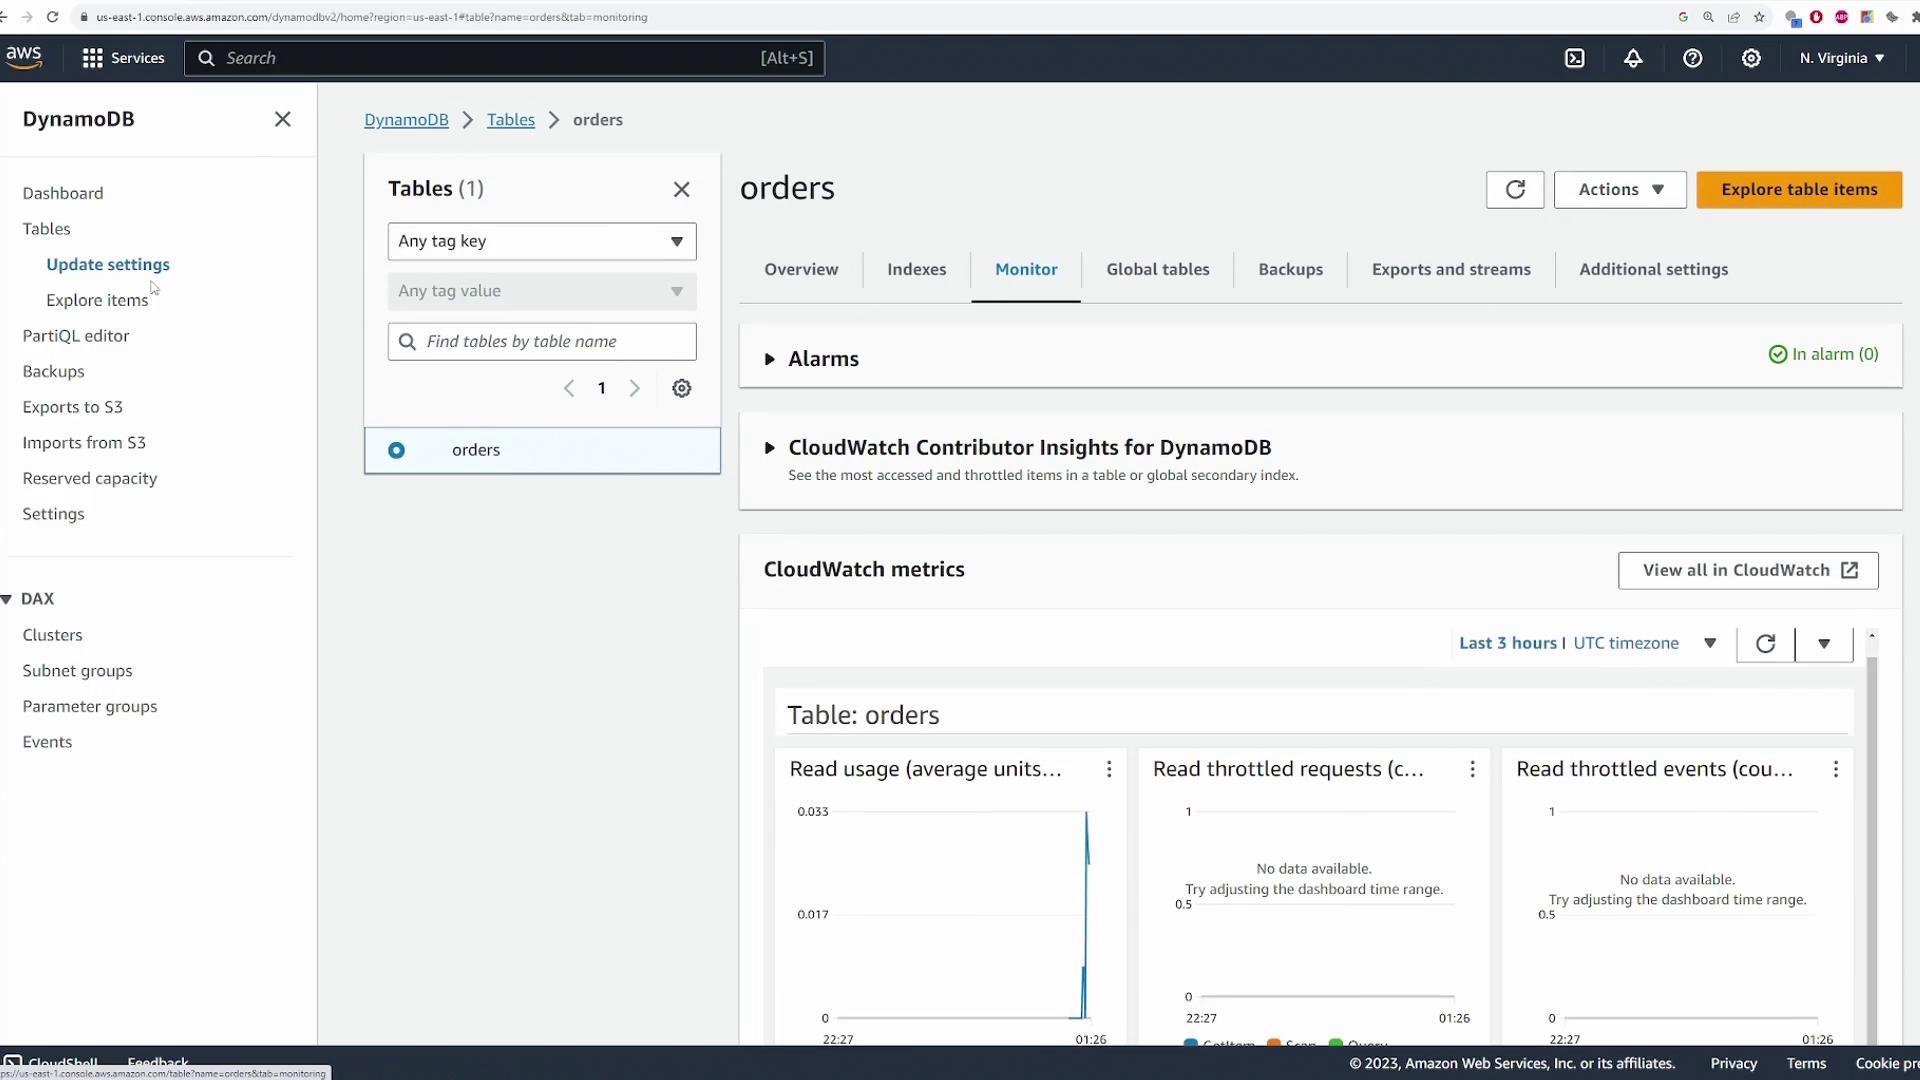
Monitoring and Cleanup
To monitor your table's performance, navigate to the Monitor tab in the DynamoDB Console. Here you can review CloudWatch metrics such as read/write usage, latency, and throttled requests.
When your demonstration is complete and you wish to clean up resources, simply select the table, click Delete, and confirm the deletion.
Warning
Deleting the table will permanently remove all stored data. Ensure you have backed up any necessary information before proceeding with the deletion.
This demonstration has guided you through creating and configuring a DynamoDB table, adding and querying items, updating and deleting entries, leveraging PartiQL for SQL-style operations, and monitoring performance. We hope this tutorial offers a solid foundation for using DynamoDB in your projects.
Watch Video
Watch video content
Practice Lab
Practice lab