AWS Solutions Architect Associate Certification
Services Migration and Transfer
Demo Move files from File Server to EFS using Datasync
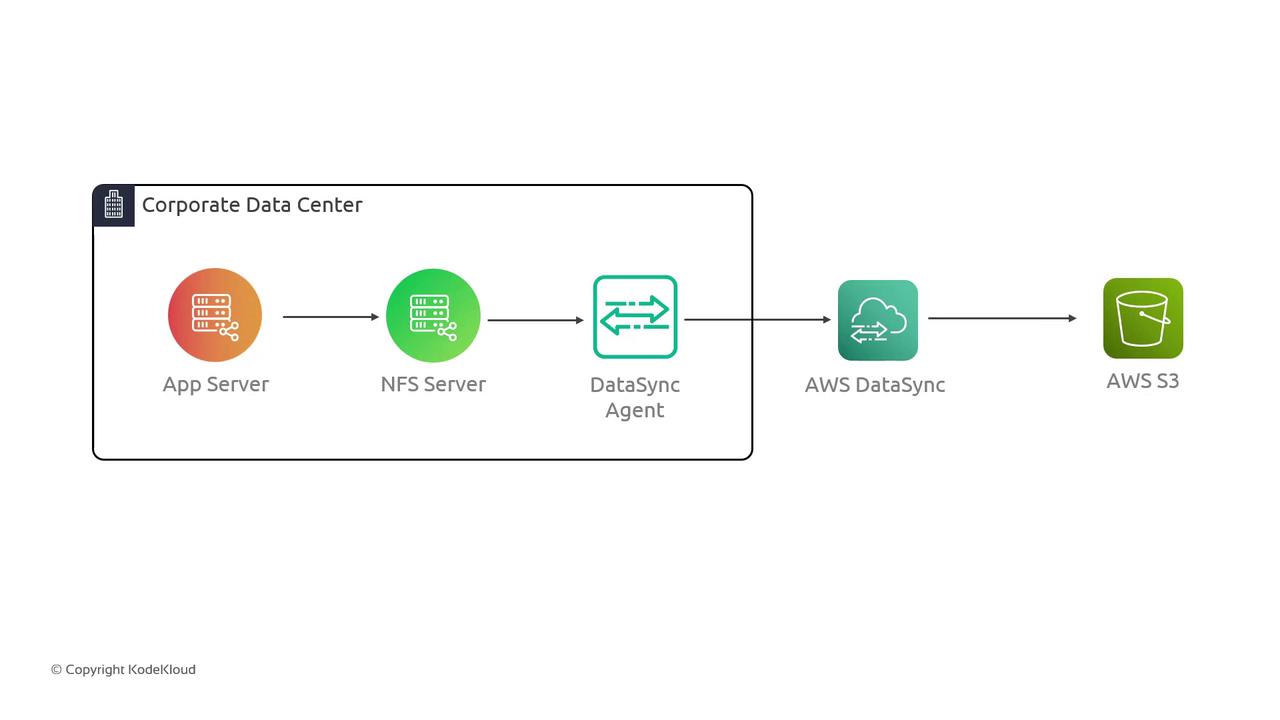
In this guide, we demonstrate how to use AWS DataSync to transfer files from an on-premises NFS server to an S3 bucket in AWS. The objective is to simulate a corporate data center environment and illustrate the seamless migration process using AWS DataSync.
The lab setup emulates an on-premises scenario where an application server accesses an NFS server to read and write data. This data is then transferred to an S3 bucket via AWS DataSync. Although the simulation represents an on-premises environment, all components reside in AWS for simplicity.
Below is the architecture diagram illustrating the data transfer flow from the corporate data center to AWS S3. The diagram shows an App Server, NFS Server, DataSync Agent, and the AWS DataSync service:
Environment Overview
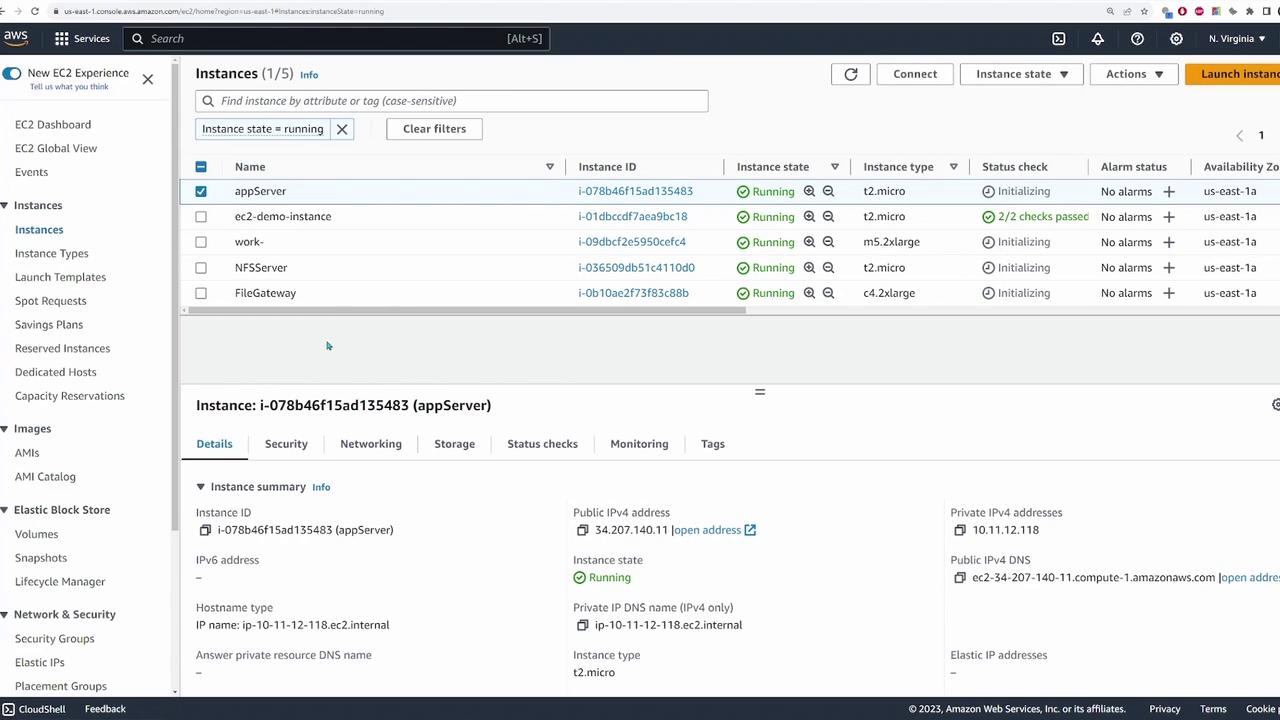
An application server in our simulated environment connects to an NFS server running within an AWS VPC. The data destined for migration is stored on the NFS server and will ultimately be copied to an S3 bucket. The following diagram shows the deployed application server and its connectivity with the NFS server:
To confirm connectivity, log in to the application server and run the command below to display mounted file systems:
df -h
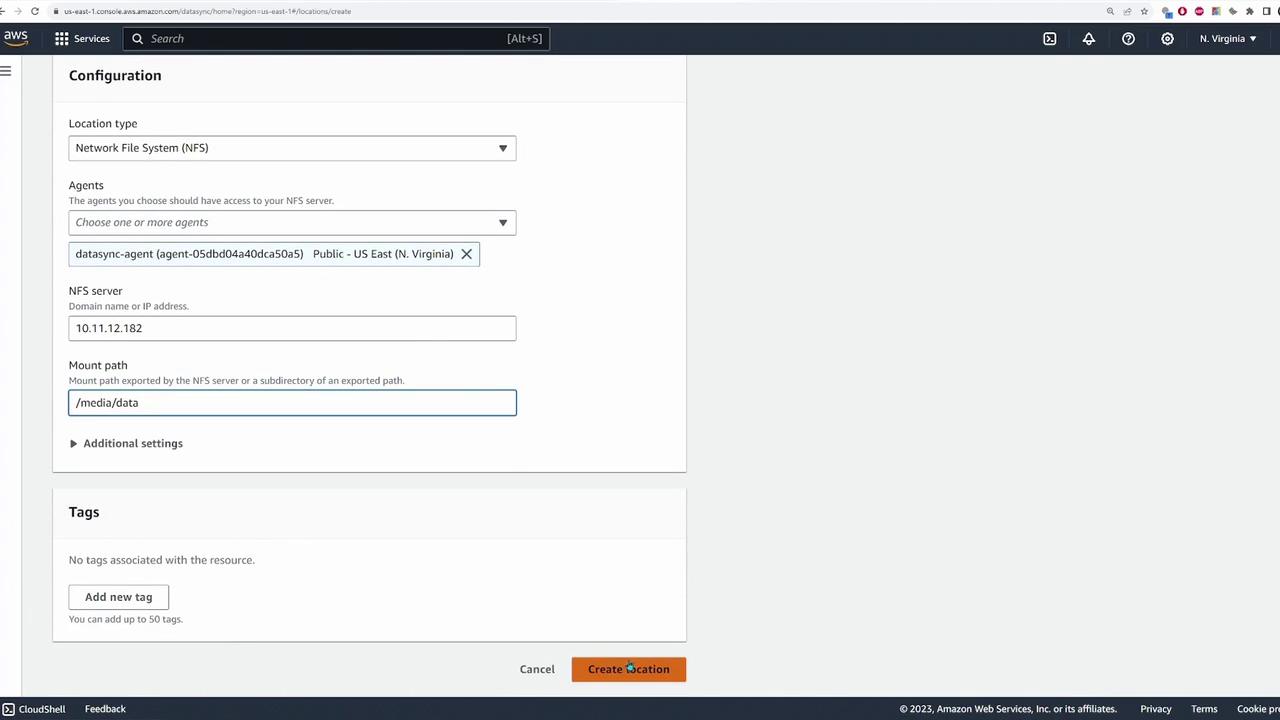
The output indicates that the NFS server is mounted at /mnt/data
with the source path 10.11.12.182:/media/data
:
Filesystem Size Used Avail Use% Mounted on
/dev 478M 0 478M 0% /dev
/dev/shm 486M 0 486M 0% /dev/shm
/run 486M 416M 485M 1% /run
/sys/fs/cgroup 486M 0 486M 0% /sys/fs/cgroup
/ 8.0G 1.8G 6.3G 23% /
/run/user/1000 98M 0 98M 0% /run/user/1000
/media/data 8.0G 1.8G 6.3G 23% /mnt/data
user@ip-10-11-12-118 ~ $
Navigating into /mnt/data
reveals a folder called images
that contains numerous JPEG files destined for migration to the S3 bucket. For example:
[ec2-user@ip-10-11-12-118 ~]$ cd /mnt/data
[ec2-user@ip-10-11-12-118 data]$ ls
images
[ec2-user@ip-10-11-12-118 data]$ cd images/
[ec2-user@ip-10-11-12-118 images]$ ls
00001.jpg 00018.jpg 00035.jpg 00052.jpg 00069.jpg 00086.jpg 00103.jpg 00120.jpg 00137.jpg 00154.jpg 00171.jpg 00188.jpg 00189.jpg 00199.jpg 00200.jpg
00002.jpg 00019.jpg 00036.jpg 00053.jpg 00070.jpg 00087.jpg 00104.jpg 00121.jpg 00138.jpg 00155.jpg 00172.jpg 00191.jpg 00200.jpg 00201.jpg
...
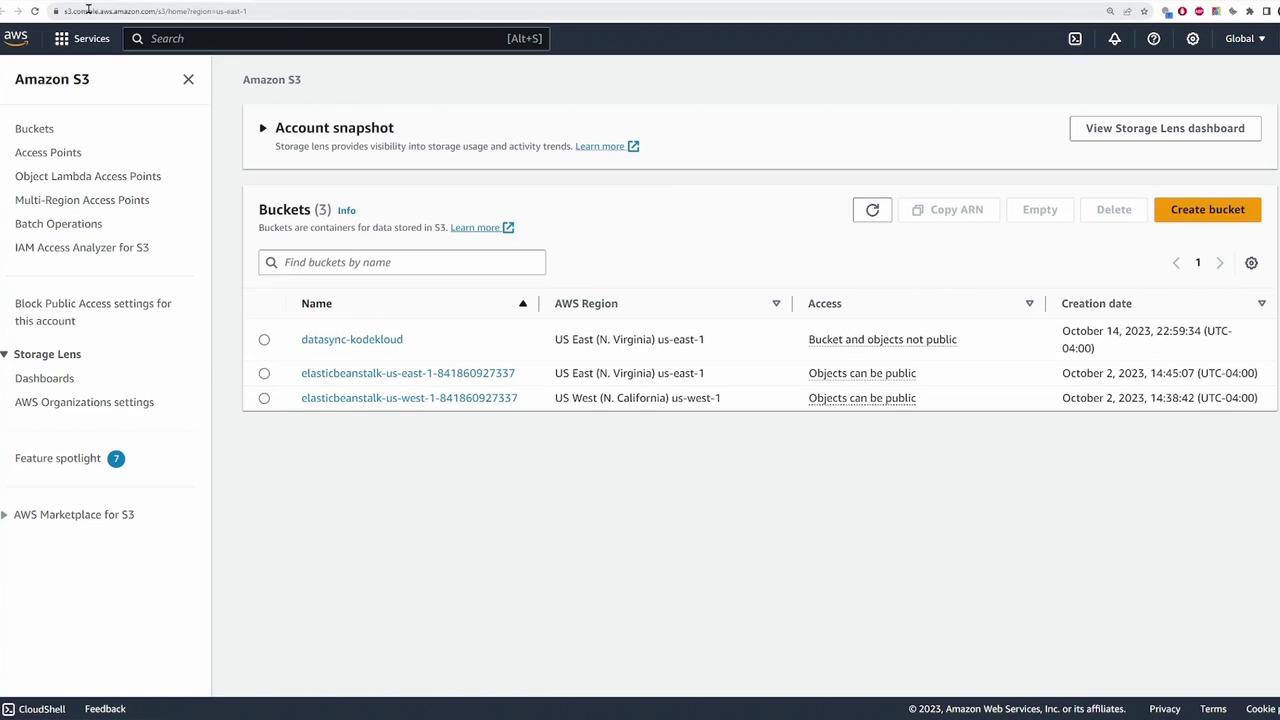
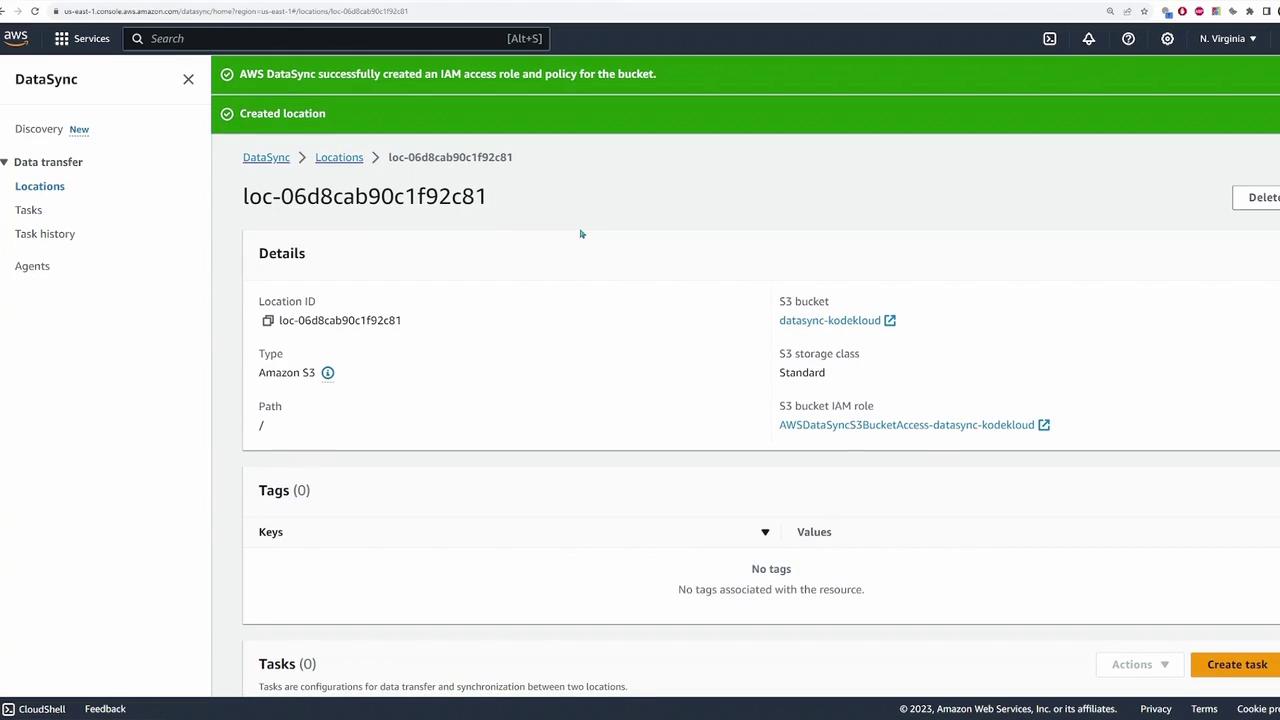
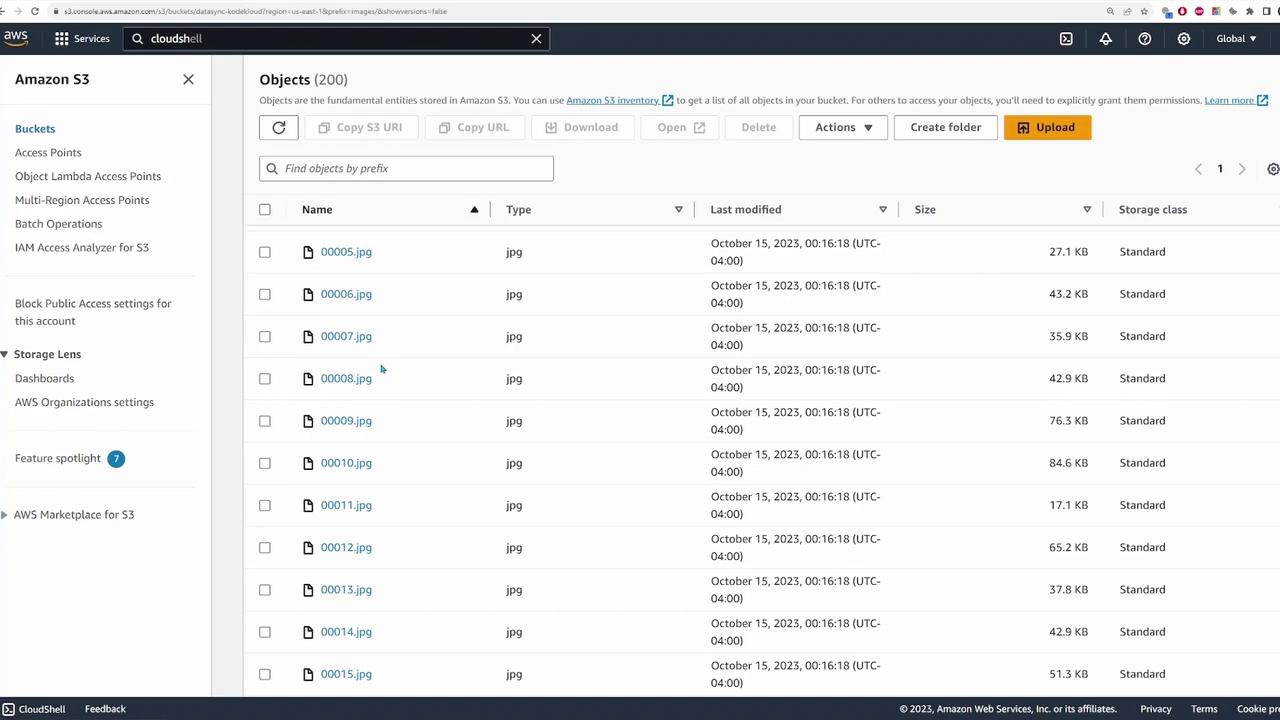
Once the files are transferred, you can verify their presence by accessing the S3 bucket (named "data sync - KodeKloud"), where the files appear under an "images" folder.
Deploying the DataSync Agent
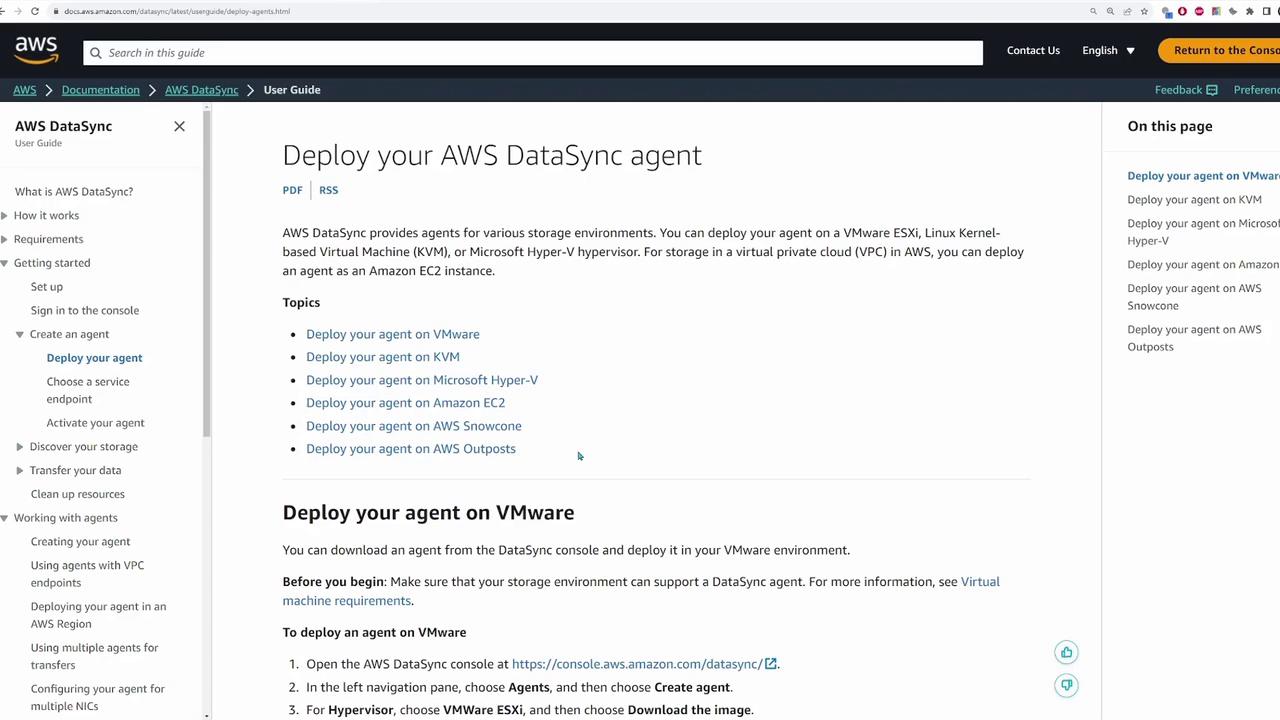
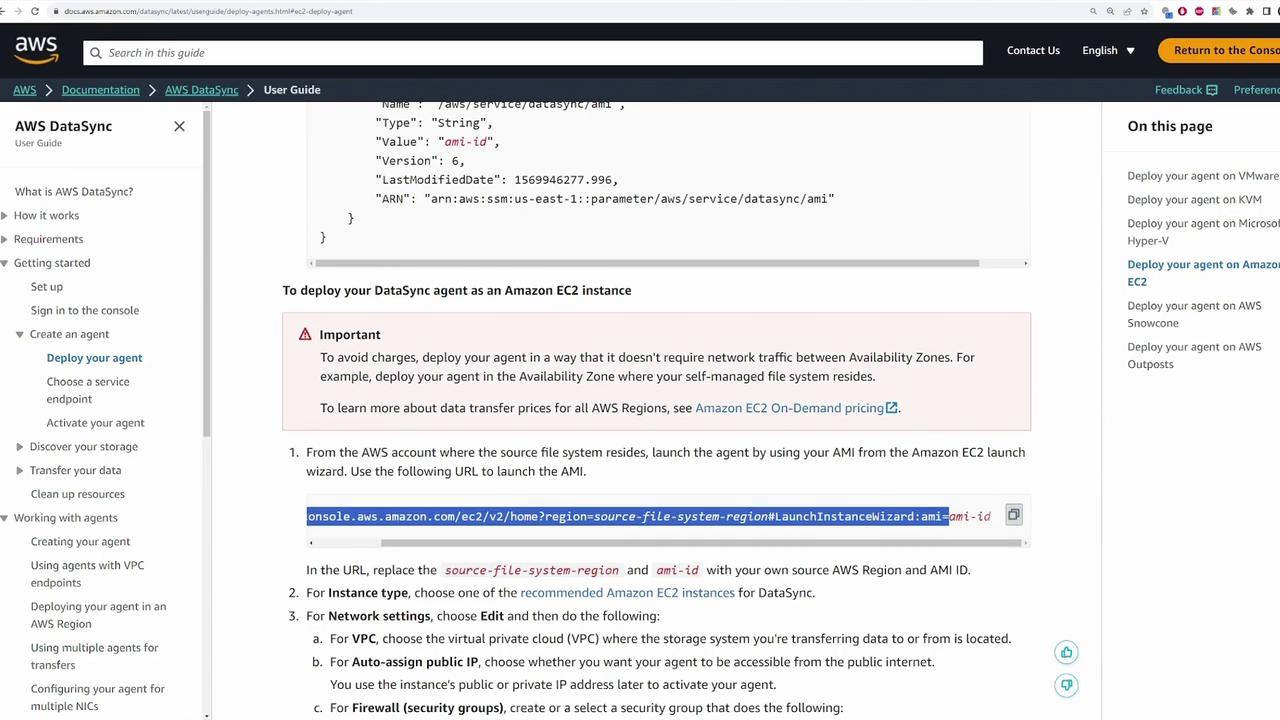
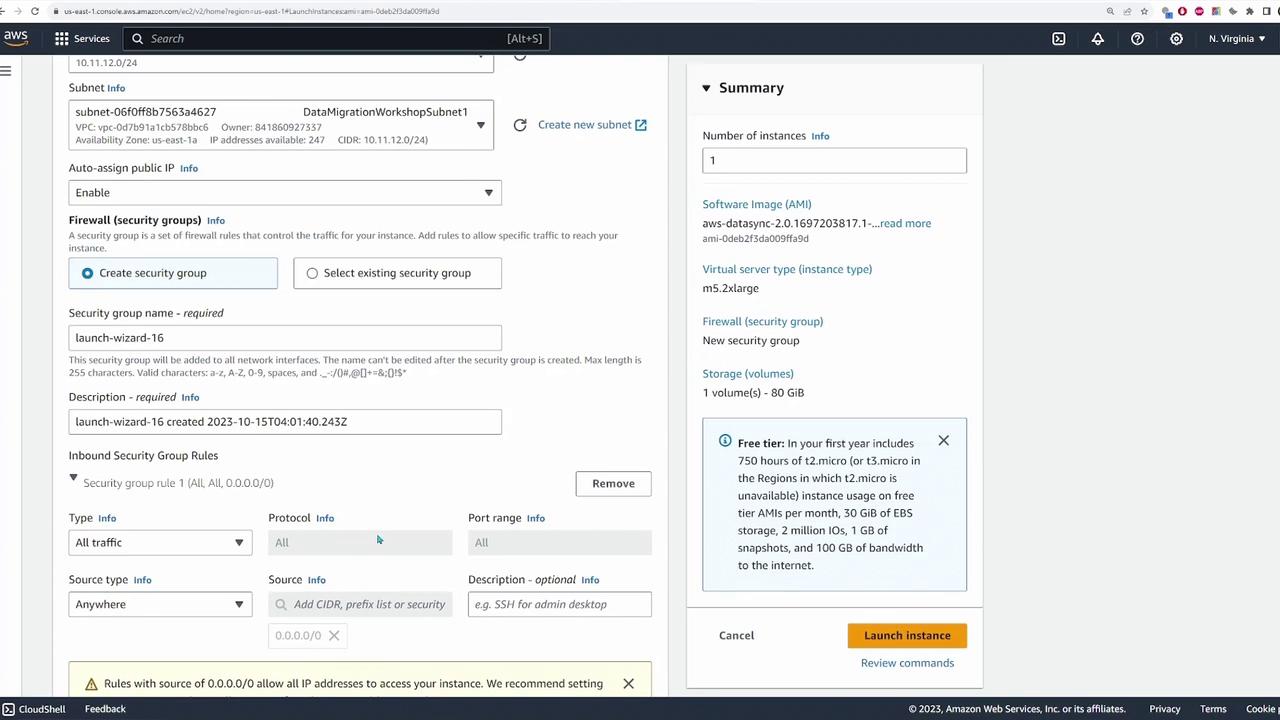
The next step is to deploy the DataSync agent. While the agent can be deployed on any supported virtualization hypervisor (e.g., VMware, KVM, or Microsoft Hyper-V), this demonstration uses an EC2 instance in AWS.
Refer to the AWS DataSync documentation for detailed information on deploying the agent in different environments, including VMware, EC2, AWS Snowcone, and AWS Outposts.
For EC2 deployment, perform the following steps:
Retrieve the latest AMI for the DataSync agent using AWS CLI:
aws ssm get-parameter --name /aws/service/datasync/ami --region us-east-1
The output will be similar to:
{ "Parameter": { "Name": "/aws/service/datasync/ami", "Type": "String", "Value": "ami-dd2f74d8a00ff34d", "Version": 88, "LastModifiedDate": "2023-10-13T19:30:54.383000+00:00", "ARN": "arn:aws:ssm:us-east-1:parameter/aws/service/datasync/ami", "DataType": "text" } }
Tip
You can run this command in AWS CloudShell if your local AWS CLI is not configured.
Launch an EC2 instance using the retrieved AMI. In the launch wizard, ensure that you update:
- Source Region: us-east-1 (or your respective source region)
- AMI: Paste the obtained AMI ID.
- Instance Type: Options like m5.2xlarge, m5.4xlarge, or c5.medium are recommended. For testing, a smaller instance might be sufficient.
- Key Pair: Select your designated key pair.
- VPC and Public IP: Choose the appropriate VPC and assign a public IP address.
- Security Group: For demonstration purposes, allowing all traffic is acceptable. In production, restrict access appropriately.
After launching the instance, register the DataSync agent through the AWS DataSync service page:
- Click on "Agents" then "Create Agent."
- Select the EC2 option (since the agent is deployed on EC2) and leave the public service endpoint enabled.
- Retrieve the activation key by refreshing the EC2 instances list and noting the public IP address of the DataSync agent.
- Paste the public IP on the DataSync registration page, assign a name (e.g., "data sync agent"), and create the agent.
A successful registration output may look like:
Successfully retrieved activation key from agent
Activation key
EVH1S-KH48T-0RF59-K77NG-V5MGL
Agent address
18.234.228.236
Creating DataSync Locations
After deploying the agent, the next step is to define the source and destination locations where DataSync will copy the files.
Source: NFS File Server
Create a source location for the NFS file server by following these steps:
- Choose "NFS" as the location type.
- Select the DataSync agent deployed earlier.
- Specify the NFS server’s private IP address and set the mount path, which in this case is
/media/data
.
An example of the connection test for the NFS mount is shown below:
[ec2-user@ip-10-11-12-118 ~]$ cd /mnt/data
[ec2-user@ip-10-11-12-118 data]$ ls
images
[ec2-user@ip-10-11-12-118 data]$ cd images/
[ec2-user@ip-10-11-12-118 images]$ ls
00001.jpg 00018.jpg 00035.jpg ... 00209.jpg
Destination: S3 Bucket
Define the destination location for your S3 bucket by following these guidelines:
- Select your S3 bucket (e.g., "data sync - KodeKloud").
- Use the "standard" storage class (or adjust as needed).
- Specify the bucket folder if required; for this demonstration, the root directory is used.
- Assign an IAM role for DataSync to access the S3 bucket. If none exists, you can opt for auto-generation of the role and policy.
Creating and Running a DataSync Task
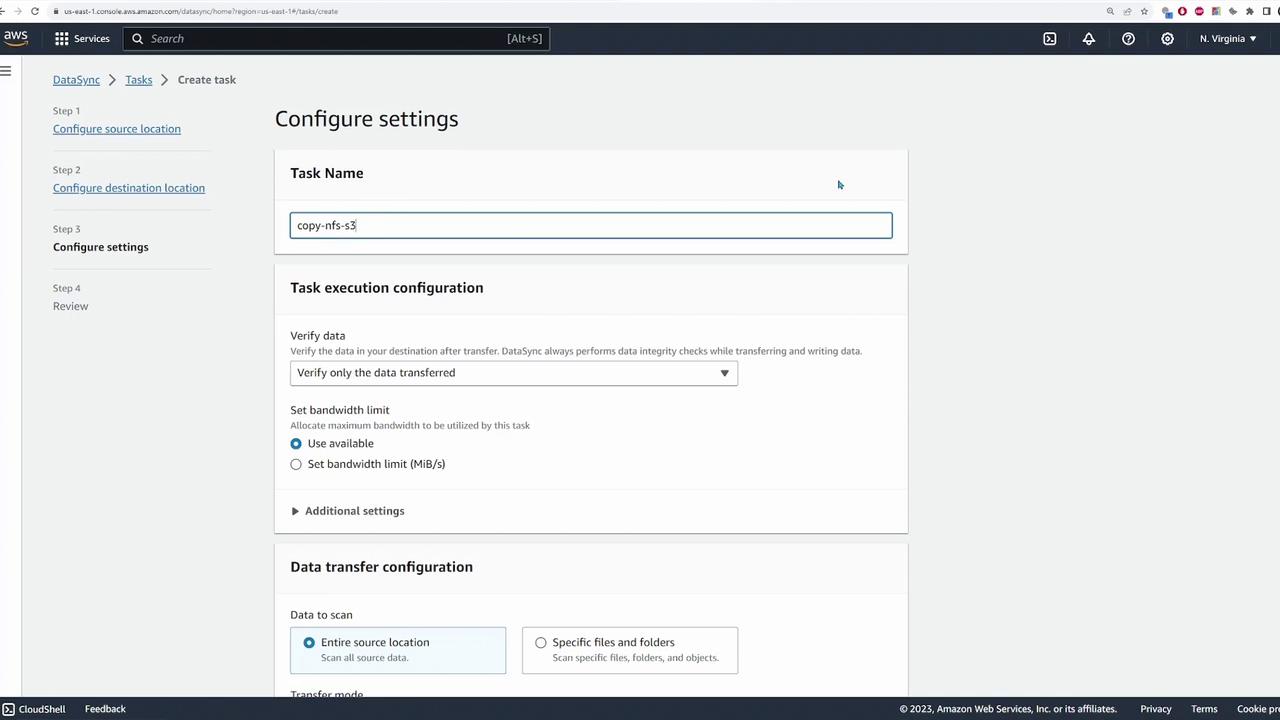
With both source and destination locations configured, you can now create a DataSync task to perform the file migration:
- Click "Create Task" and select the previously configured source (NFS) and destination (S3) locations.
- Name the task (e.g., "copy-nfs-to-s3").
- Configure the task options, including copying all files and optionally setting up logging via auto-generated CloudWatch log groups.
- Review the configuration and create the task.
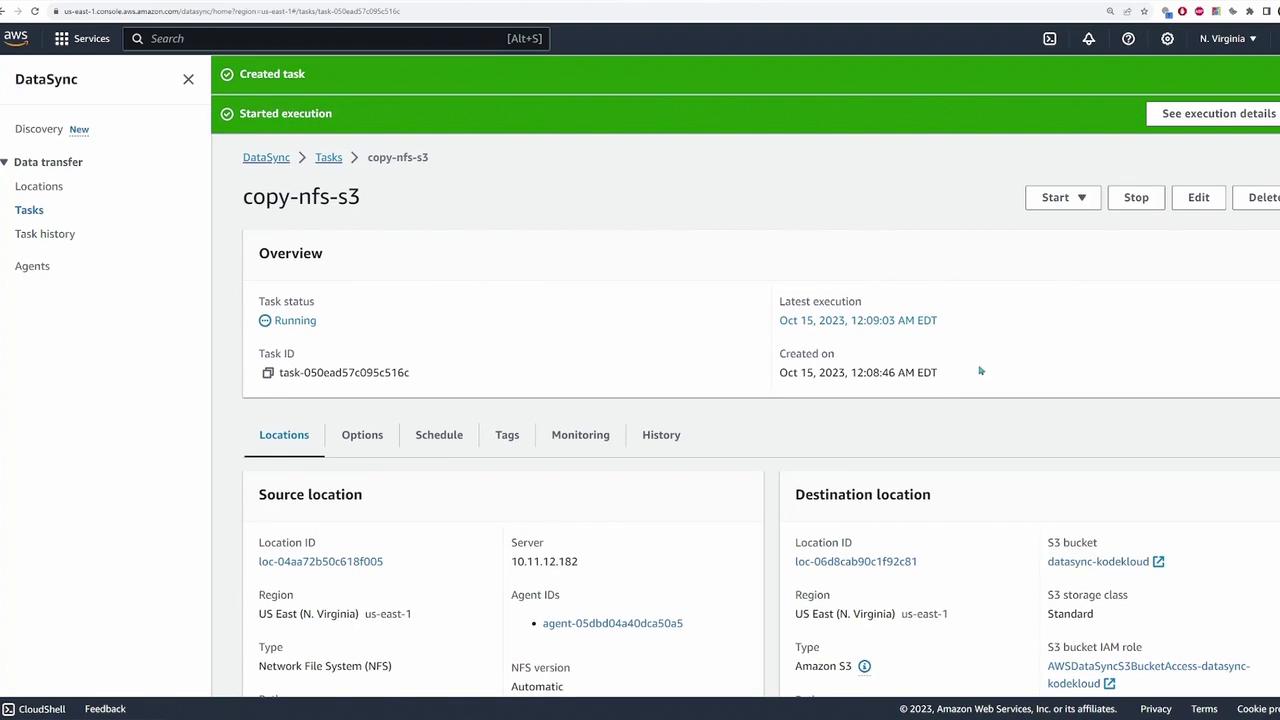
- Start the task using the default settings.
Once the task starts, you can monitor its progress, observing metrics such as throughput, file count, and data transferred from the source to destination.
When the task progresses from the launching phase to transferring files (as indicated by metrics reaching 1% and beyond), it confirms successful connectivity between the NFS server and S3 bucket. After task completion, verify the migrated files by checking the S3 bucket:
Conclusion
This guide illustrated the deployment of a DataSync agent on an EC2 instance, configuration of source and destination locations, creation of a DataSync task, and the verification process for transferring files from an NFS server to an S3 bucket using AWS DataSync. The streamlined integration between these services simplifies data migrations from on-premises environments to AWS, making it an excellent solution for modern data management.
Happy syncing!
Watch Video
Watch video content