AWS Solutions Architect Associate Certification
Services Networking
VPC Peering DEMO
In this lesson, we demonstrate how to set up VPC peering between two Virtual Private Clouds (VPCs) to allow resources in one VPC to securely communicate with resources in another without traversing the public internet.
Overview
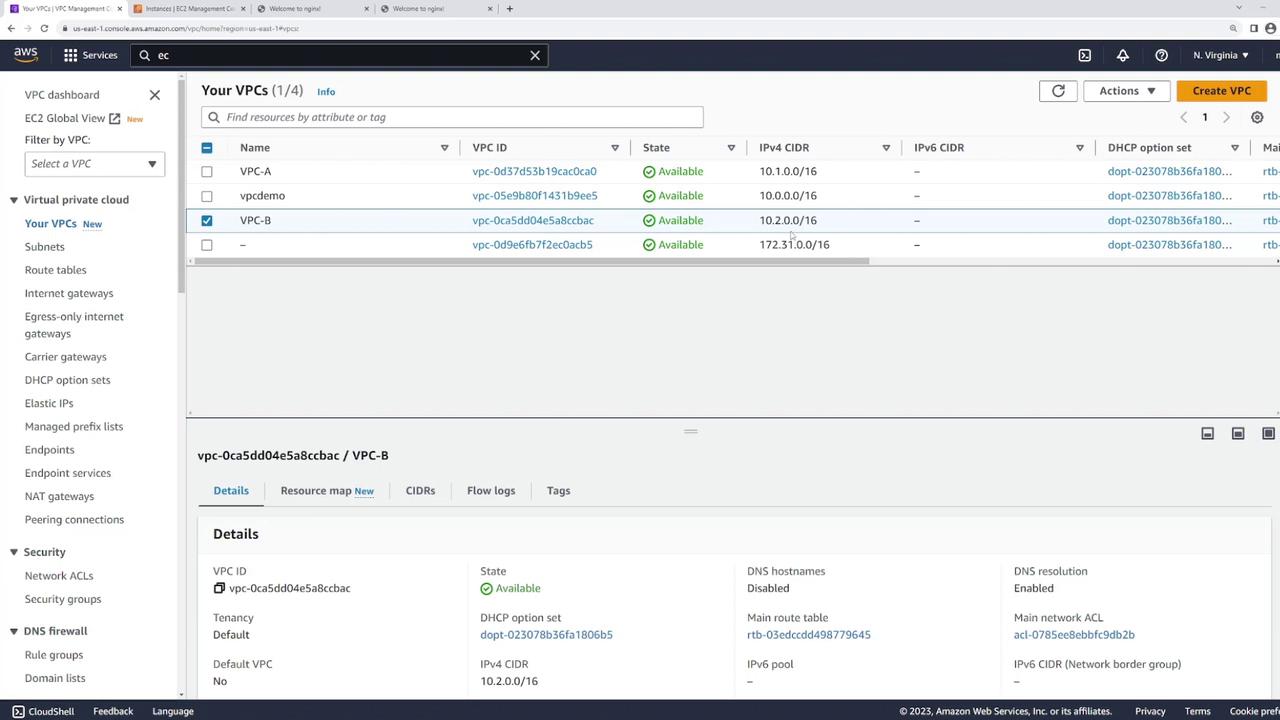
We start with two pre-configured VPCs:
- VPC-A: CIDR block 10.1.0.0/16
Contains an EC2 instance with a private IP address of 10.1.1.13. - VPC-B: CIDR block 10.2.0.0/16
Contains an EC2 instance with a private IP address of 10.2.1.139.
Initial Connectivity Test
Before establishing a VPC peering connection, attempt to ping the EC2 instance in VPC-B from VPC-A. Log in to server one (in VPC-A) and run:
[ec2-user@ip-10-1-1-13 ~]$ ping 10.2.1.139
PING 10.2.1.139 (10.2.1.139) 56(84) bytes of data.
The ping fails because VPCs are isolated by default, even if all security groups and NACLs are configured to allow traffic. This failure is expected until a VPC peering connection is established.
Creating the VPC Peering Connection
Follow these steps to configure the VPC peering connection:
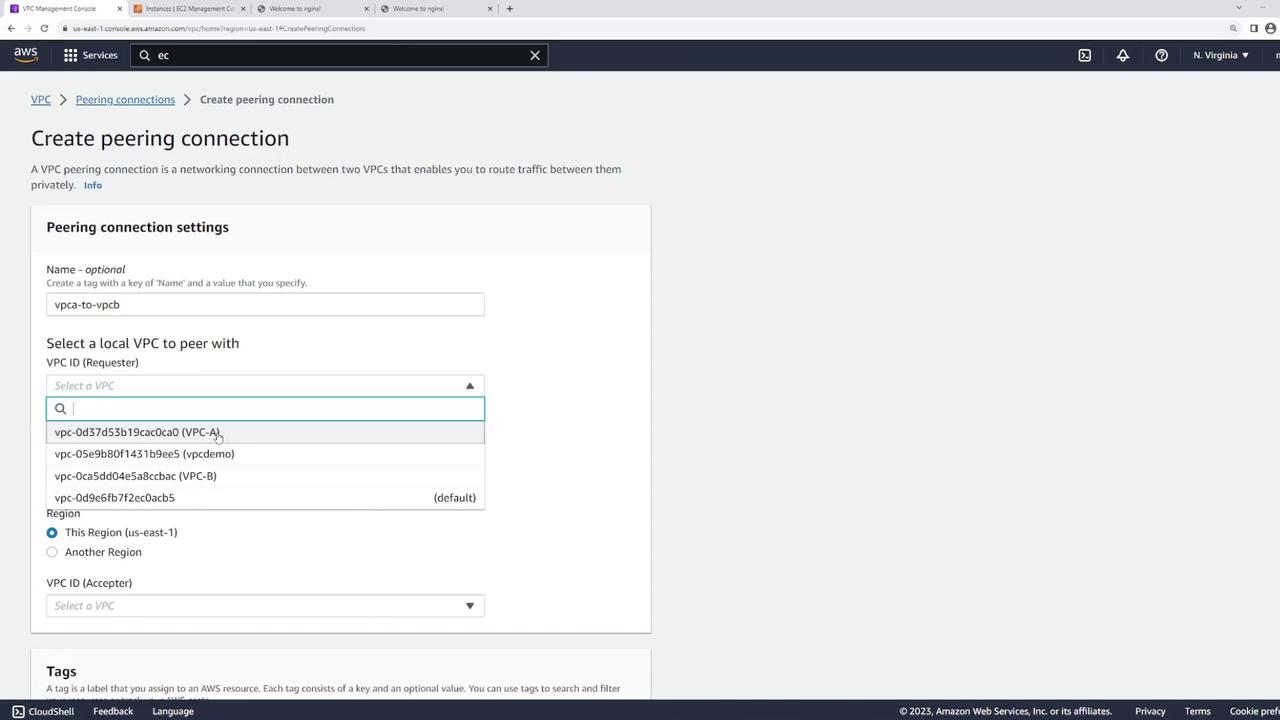
- Open the VPC peering connections section in the AWS console and click Create Peering Connection.
- Name the connection (for example, "VPC A to VPC B") for clarity.
- Select the local VPC (the requester) and specify the VPC to peer with. You can create peering connections between VPCs in the same AWS account or across different accounts.
- Since both VPCs are located in the US East 1 region, choose that region and select VPC-B as the accepter.
- Verify that the CIDR blocks do not overlap. VPC peering requires distinct CIDR blocks for proper routing.
- Click Create Peering Connection.
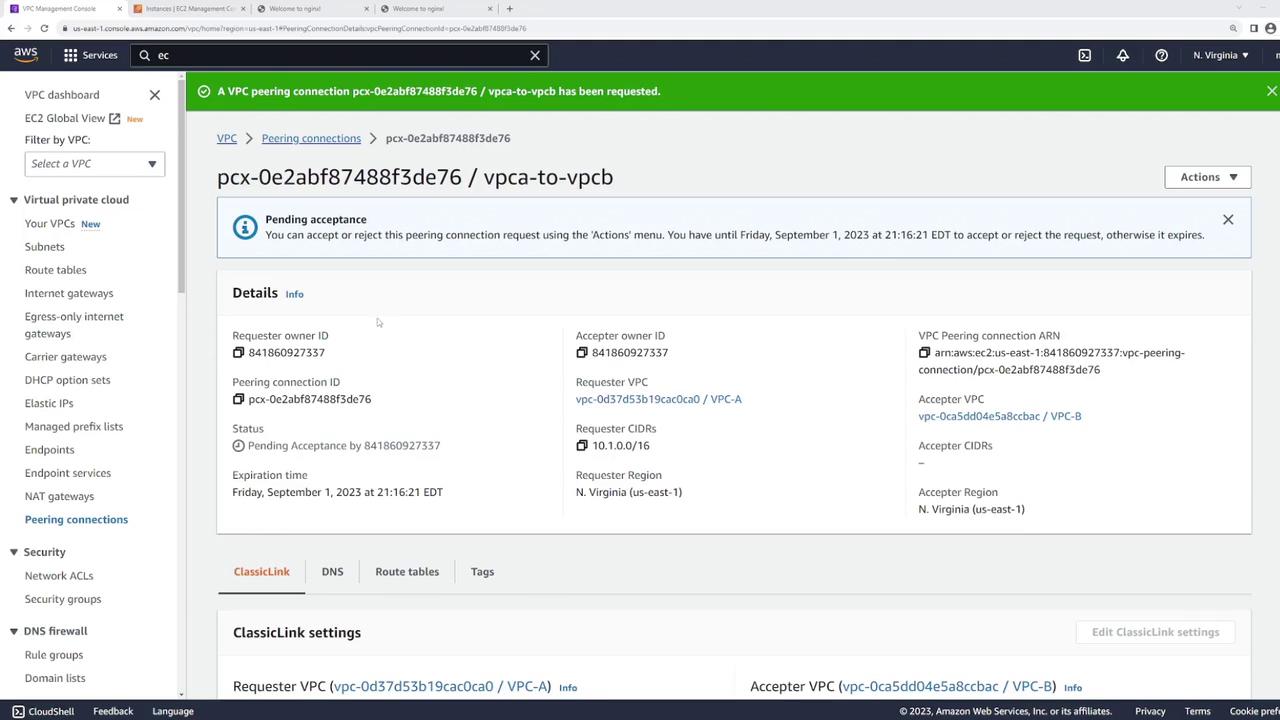
Once the request is sent, the peering connection appears in a “pending acceptance” state. Since both VPCs are in the same account, you need to manually accept the request:
- Select the pending peering connection.
- Click Actions and choose Accept Request.
Note
After accepting the peering request, the connection is established but resources still cannot communicate until the routing tables are correctly configured.
Configuring Route Tables
Even with an active peering connection, neither VPC knows how to route traffic for the other, as explained below:
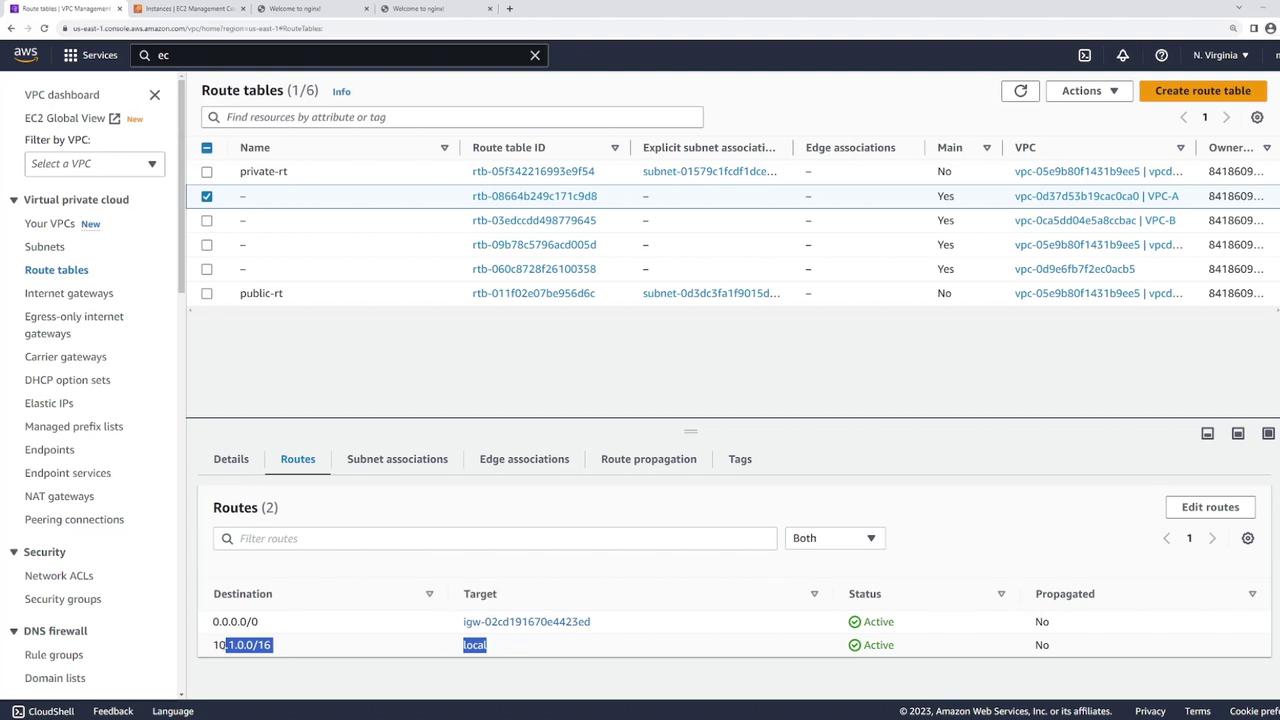
- VPC-A: Has a local route for 10.1.0.0/16 and an Internet Gateway route, but lacks a route for 10.2.0.0/16.
- VPC-B: Lacks a route for 10.1.0.0/16.
To enable communication:
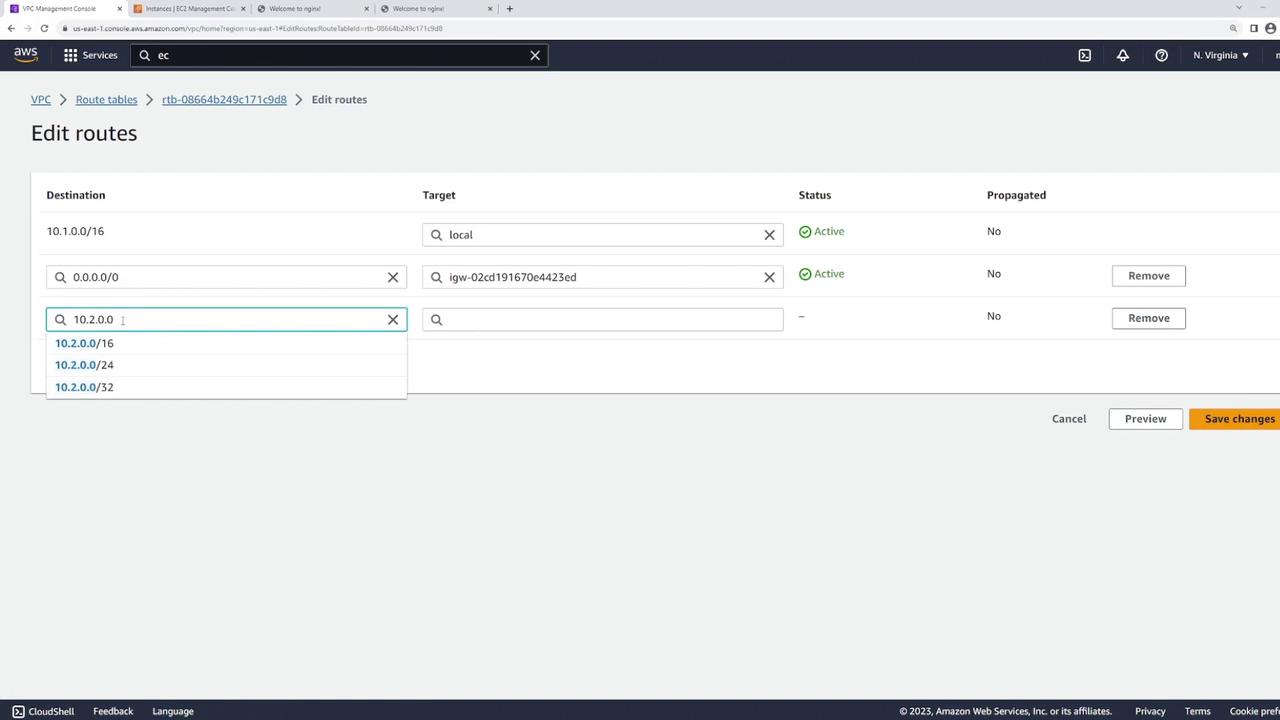
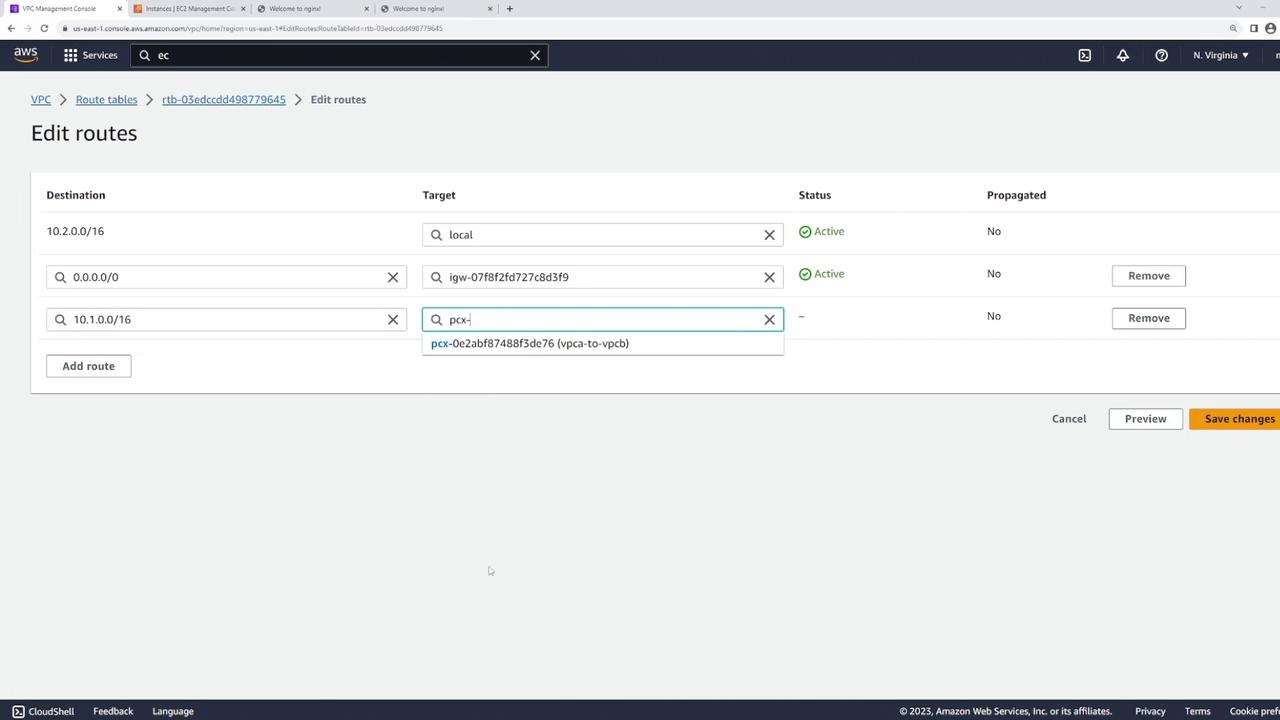
- In VPC A’s route table, add a route with the destination CIDR 10.2.0.0/16 and set its target to the VPC peering connection.
- In VPC B’s route table, add a route with the destination CIDR 10.1.0.0/16 and set its target to the same peering connection.
Warning
Ensure that the routing changes are applied to the correct route tables associated with the subnets containing your EC2 instances. Misconfigurations can prevent successful connectivity.
Testing Connectivity
After updating the route tables, test connectivity again from server one:
[ec2-user@ip-10-1-1-13 ~]$ ping 10.2.1.139
PING 10.2.1.139 (10.2.1.139) 56(84) bytes of data.
64 bytes from 10.2.1.139: icmp_seq=1 ttl=127 time=1.88 ms
64 bytes from 10.2.1.139: icmp_seq=2 ttl=127 time=1.43 ms
64 bytes from 10.2.1.139: icmp_seq=3 ttl=127 time=1.38 ms
...
--- 10.2.1.139 ping statistics ---
17 packets transmitted, 17 received, 0% packet loss, time 16027ms
rtt min/avg/max/mdev = 1.321/1.457/1.882/0.120 ms
The successful ping confirms that the VPC peering connection and routing configurations are properly set up. Traffic between the two servers now flows privately within the AWS infrastructure.
Summary
Setting up VPC peering involves:
- Sending a peering request from one VPC and accepting it in the other.
- Configuring the route tables of both VPCs to enable proper routing between them.
By following these steps, you can establish secure, private connectivity between resources in different VPCs within your AWS environment without exposing traffic to the public internet.
For additional details on VPC peering and AWS network architecture, please refer to the official AWS documentation.
Watch Video
Watch video content
Practice Lab
Practice lab