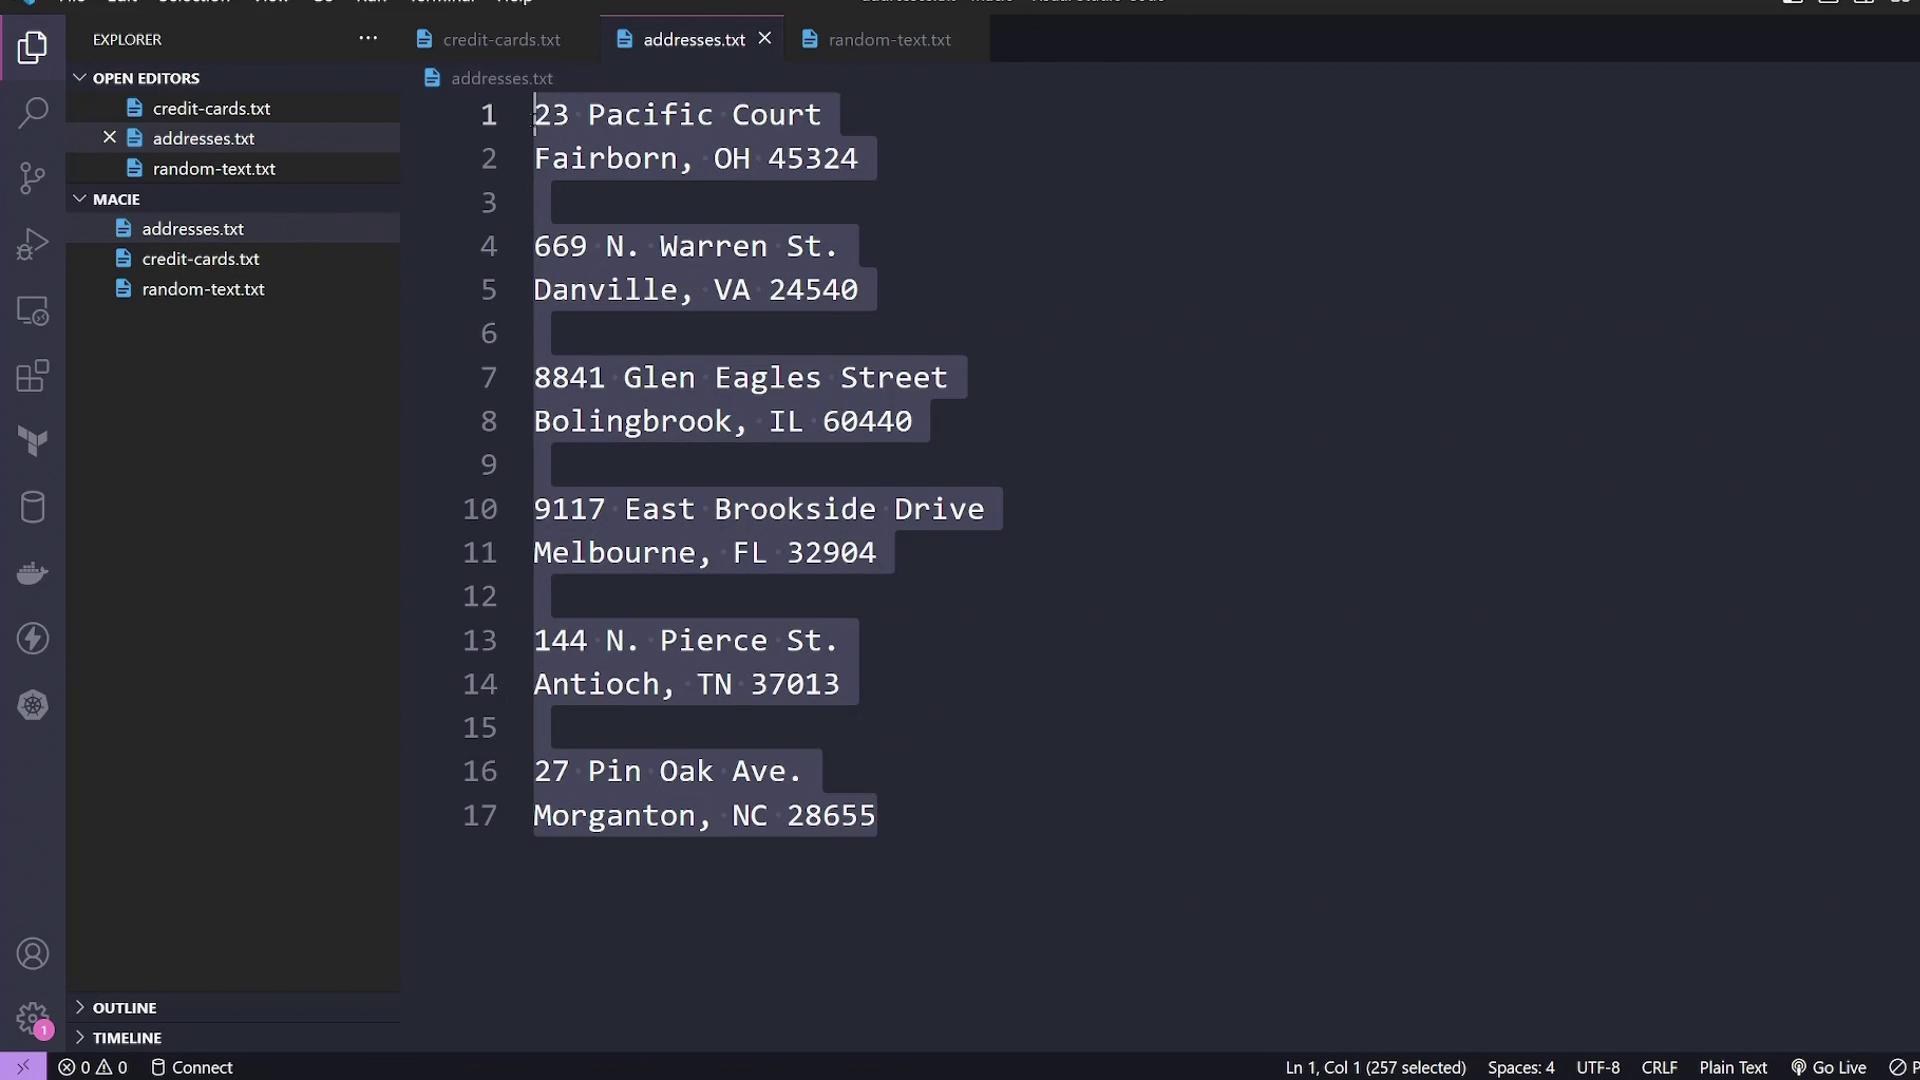
3. **random-text.txt**
This file contains random text that does not include any sensitive information. It is used to validate that Macie does not flag non-sensitive data.
The expectation is that AWS Macie will flag the sensitive information in **addresses.txt** and **credit_cards.txt**.
## Step 3: Upload Files to an S3 Bucket
Create an S3 bucket to store these files. For this demonstration, we already have a bucket named **Macie - KodeKloud**. Upload the three files into this bucket.
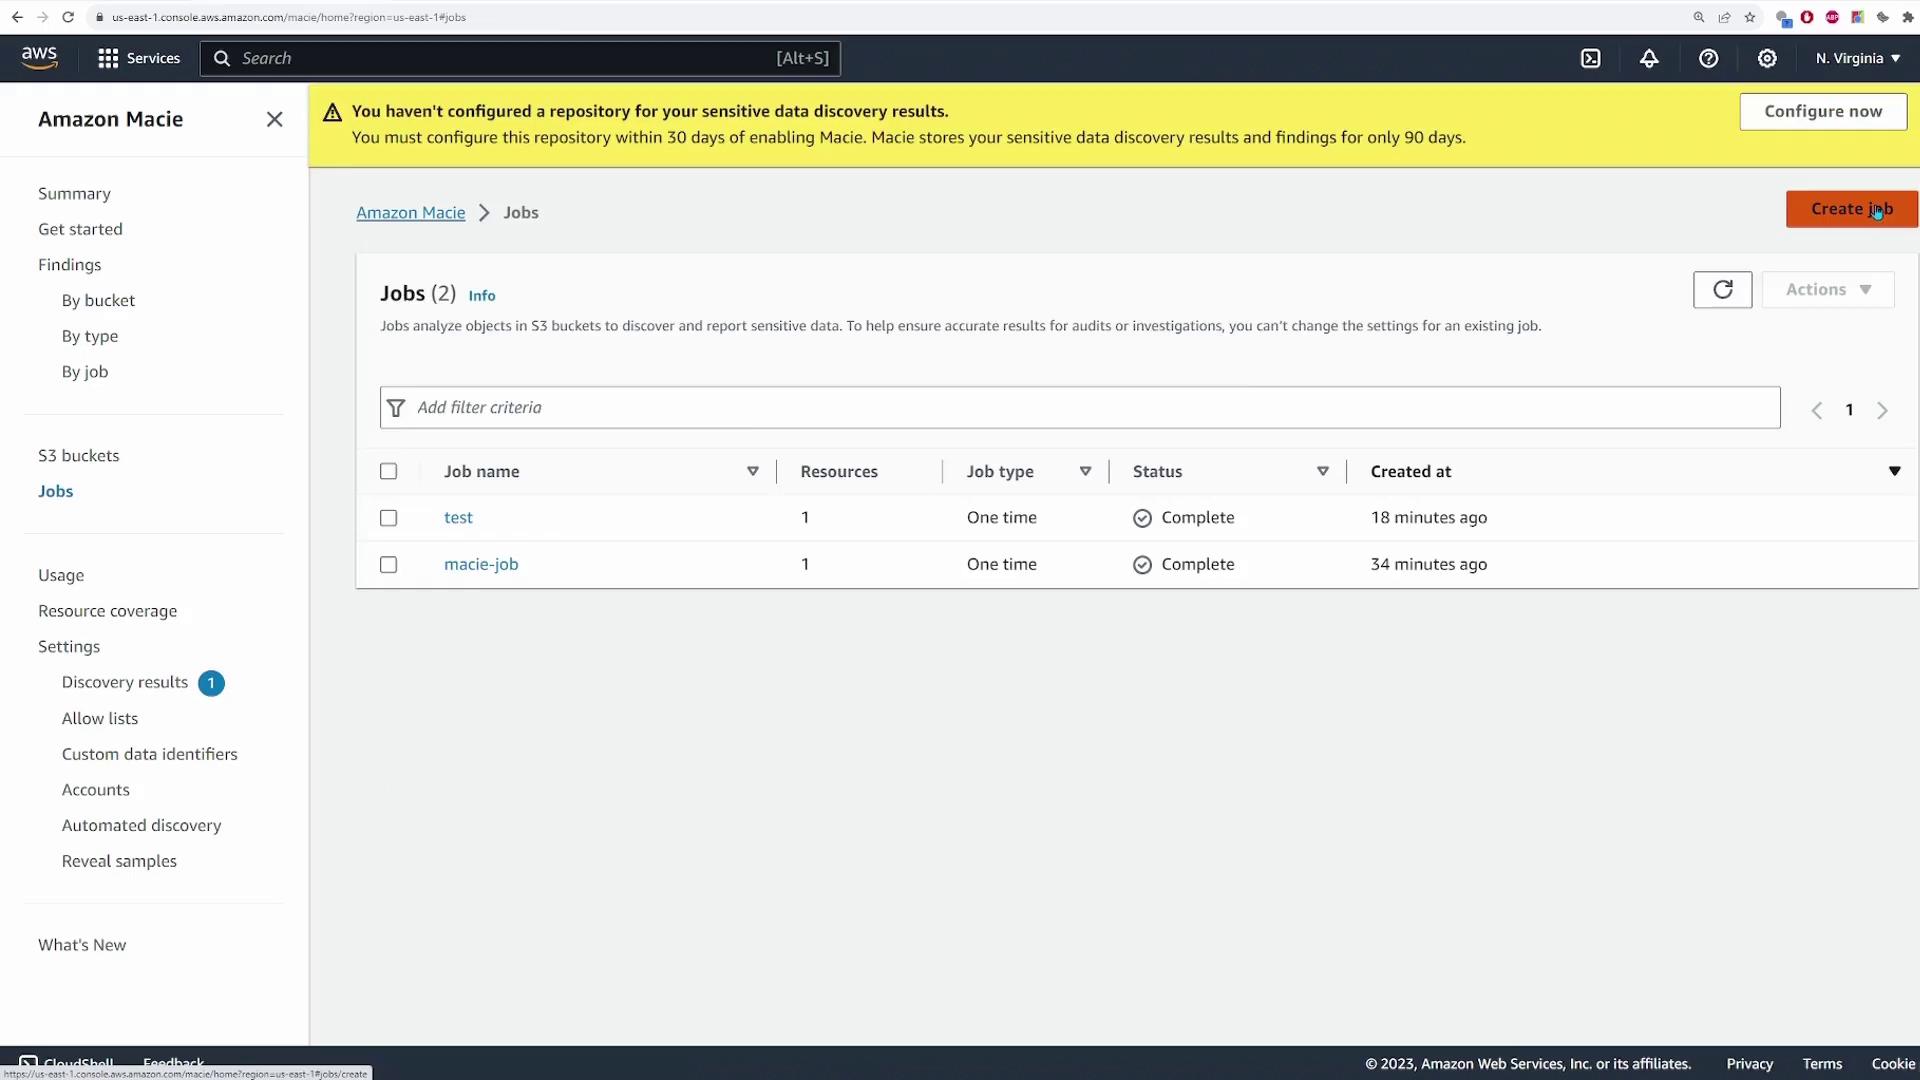
## Step 4: Create and Configure a Macie Job
Return to the Macie console and navigate to the **Jobs** section, then click on **Create job**.
<Frame>
</Frame>
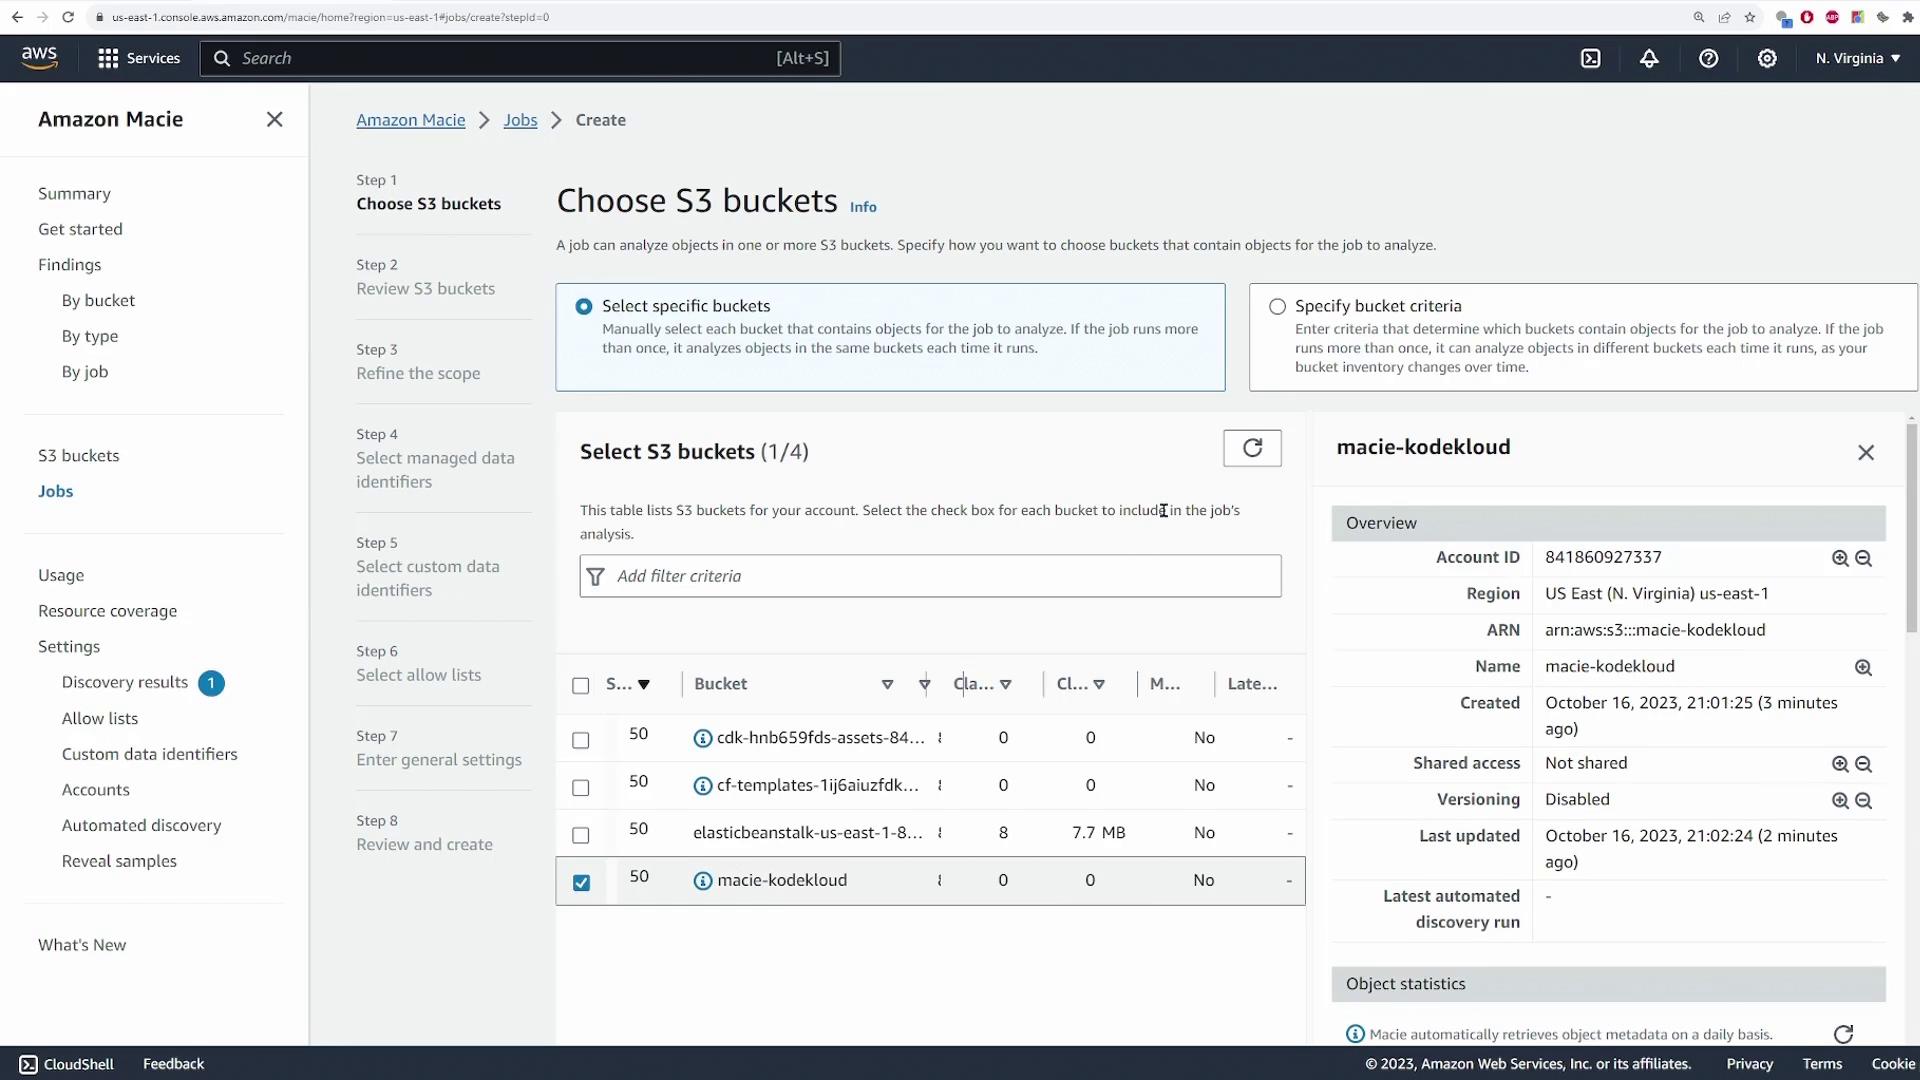
From the list of S3 buckets, select your bucket (KodeKloud) to create a job that scans the entire bucket and provides an estimated cost.
<Frame>
</Frame>
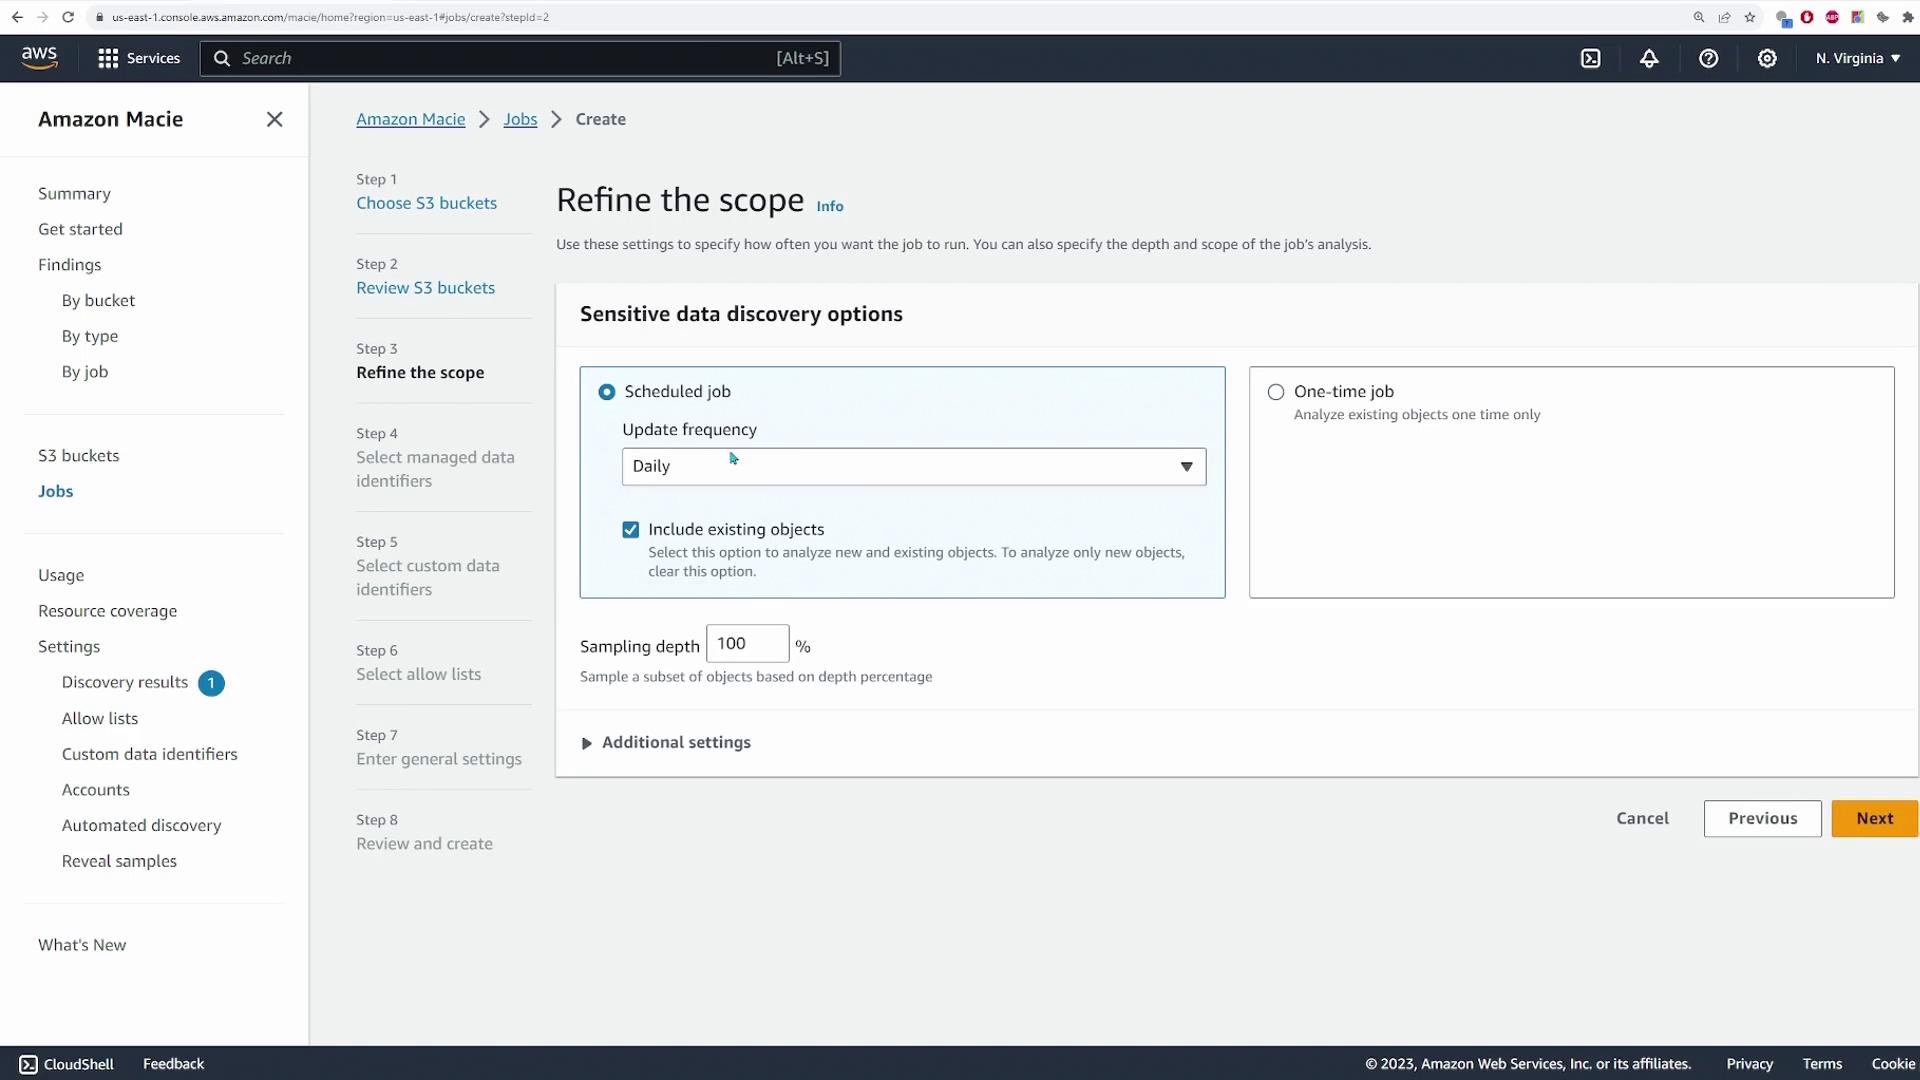
After selecting the bucket, click **Next**. At this point, you can choose whether to schedule the scan or run a one-time scan. For this demo, we will run a one-time scan.
<Frame>
</Frame>
<Callout icon="lightbulb" color="#1CB2FE">
For a thorough analysis, consider scheduling regular scans. In this demonstration, we run a one-time scan for quick validation.
</Callout>
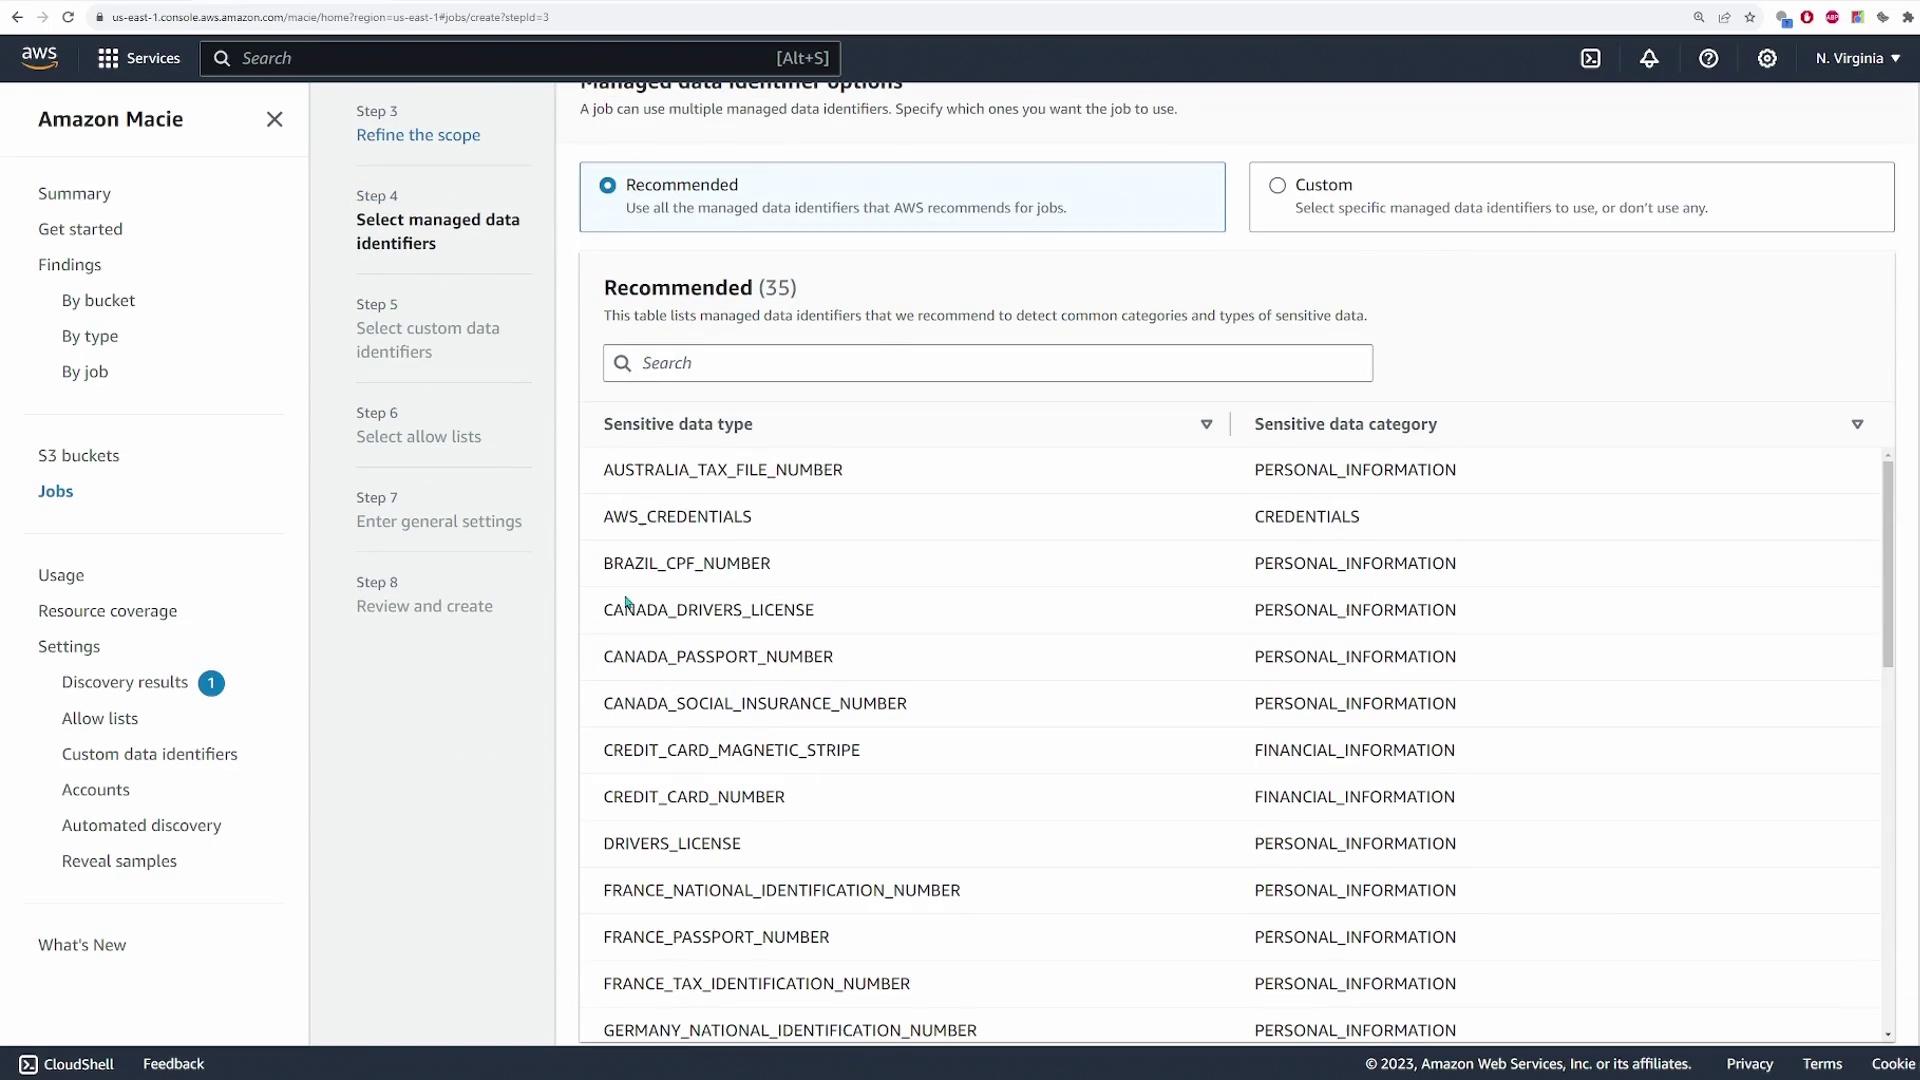
Click **Next** to proceed to the managed data identifier options. AWS Macie provides pre-built rules for detecting common sensitive data types such as social security numbers, credit card information, addresses, etc.
<Frame>
</Frame>
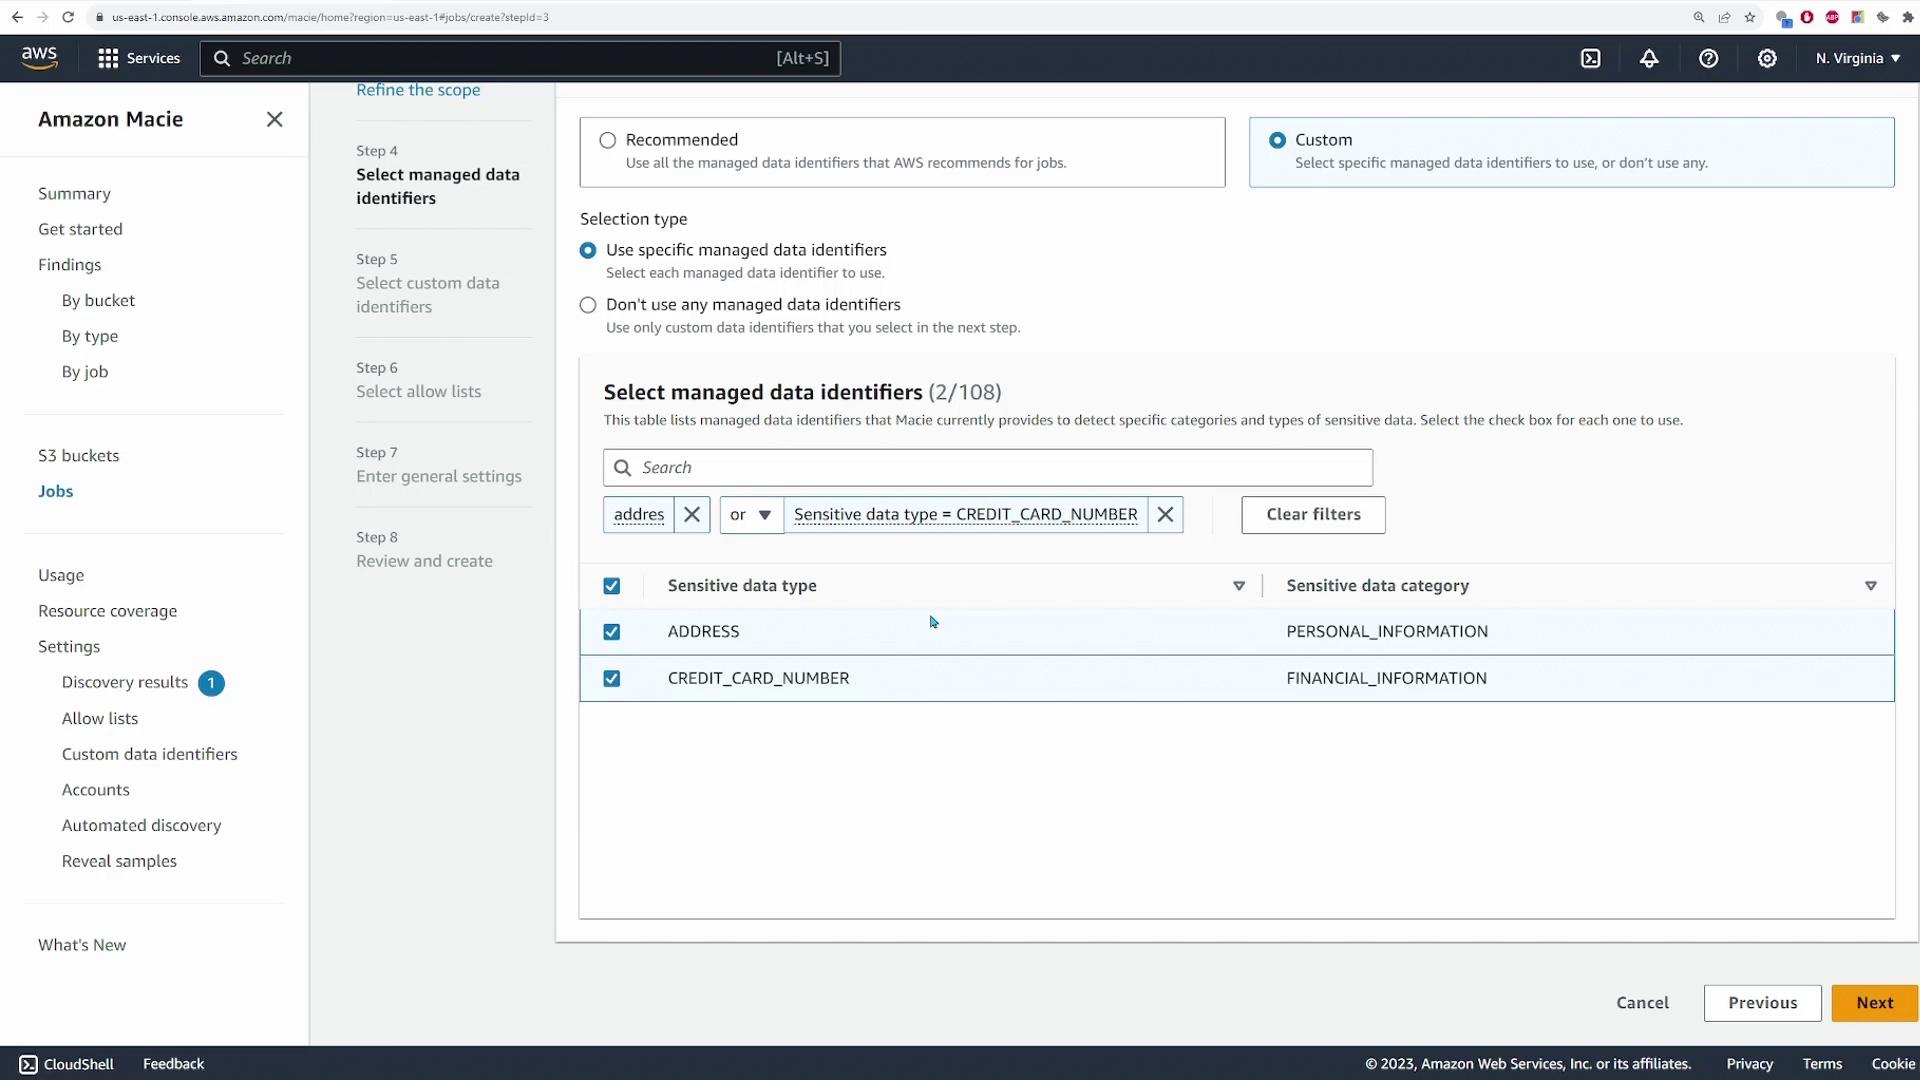
For this demo, select the following two identifiers:
- **ADDRESS**
- **CREDIT_CARD_NUMBER**
You can select additional identifiers based on your security requirements.
<Frame>
</Frame>
Click **Next** to continue. If you wish to define custom data identifiers (using regular expressions), you can do so on the next screen; however, we will skip this step for now and click **Next**.
On the subsequent page, you have the option to add text patterns for Macie to ignore. Once you have reviewed those settings, click **Next**. Then, give your job a name—in this demo, we use **Macie test job**. Click **Next** to review your configuration, and then click **Submit** to initiate the job.
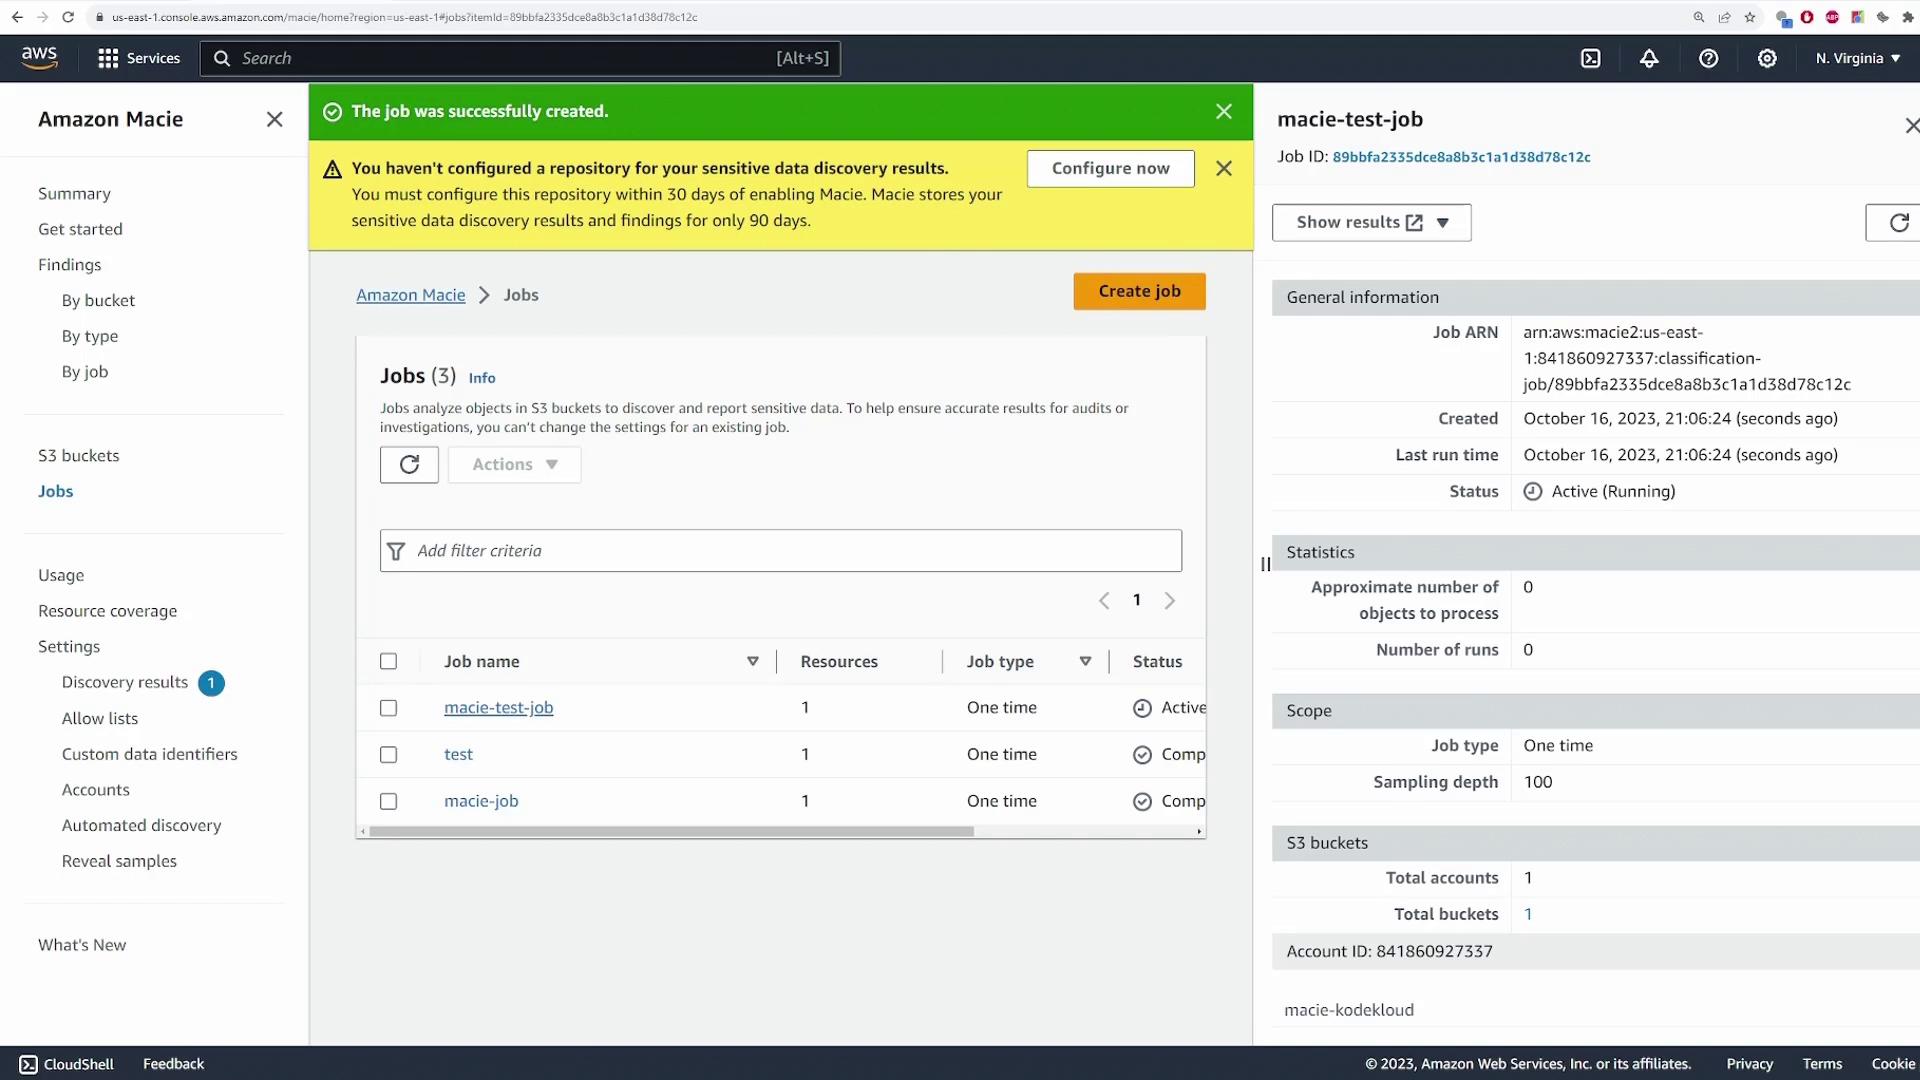
## Step 5: Monitor the Job and Review Findings
After submitting the job, AWS Macie begins scanning the designated S3 bucket. The job may take between 10 to 20 minutes to complete. Refresh the Macie console to check for a status update indicating the job has completed.
<Frame>
</Frame>
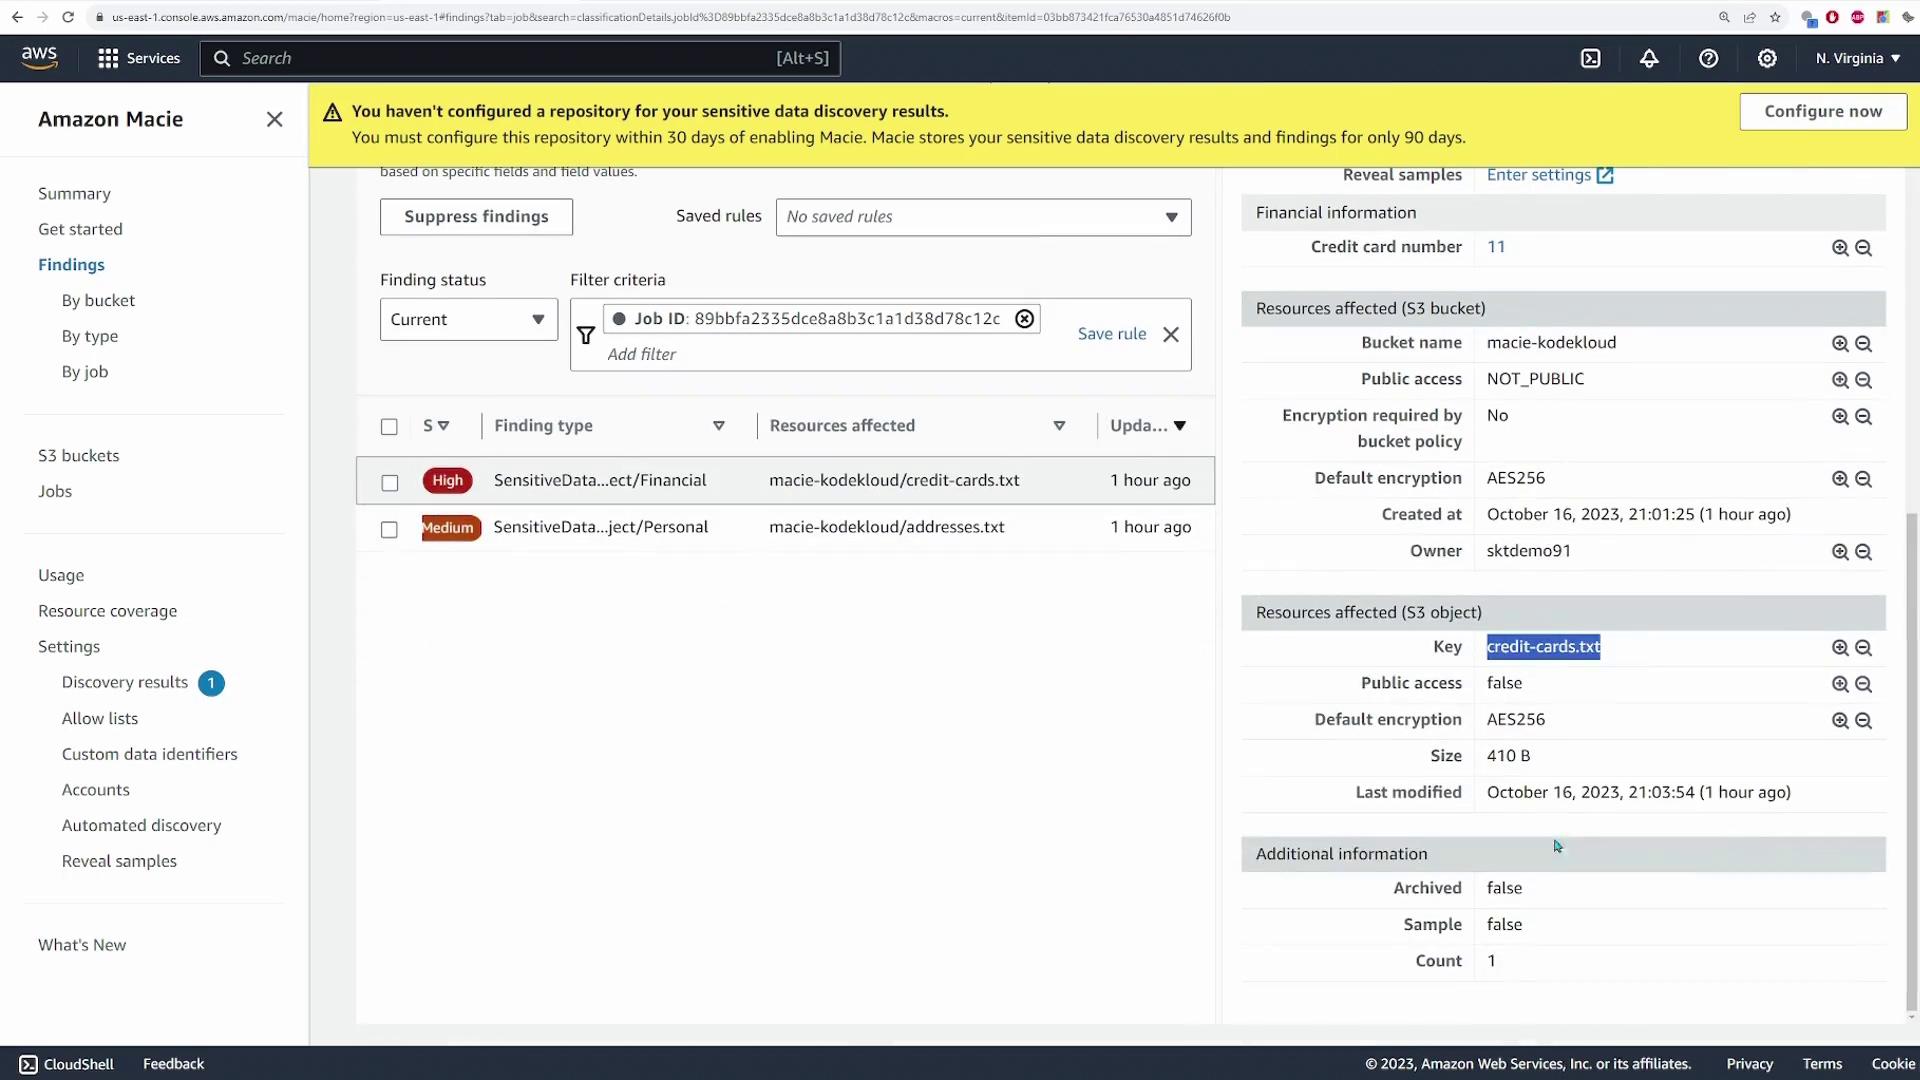
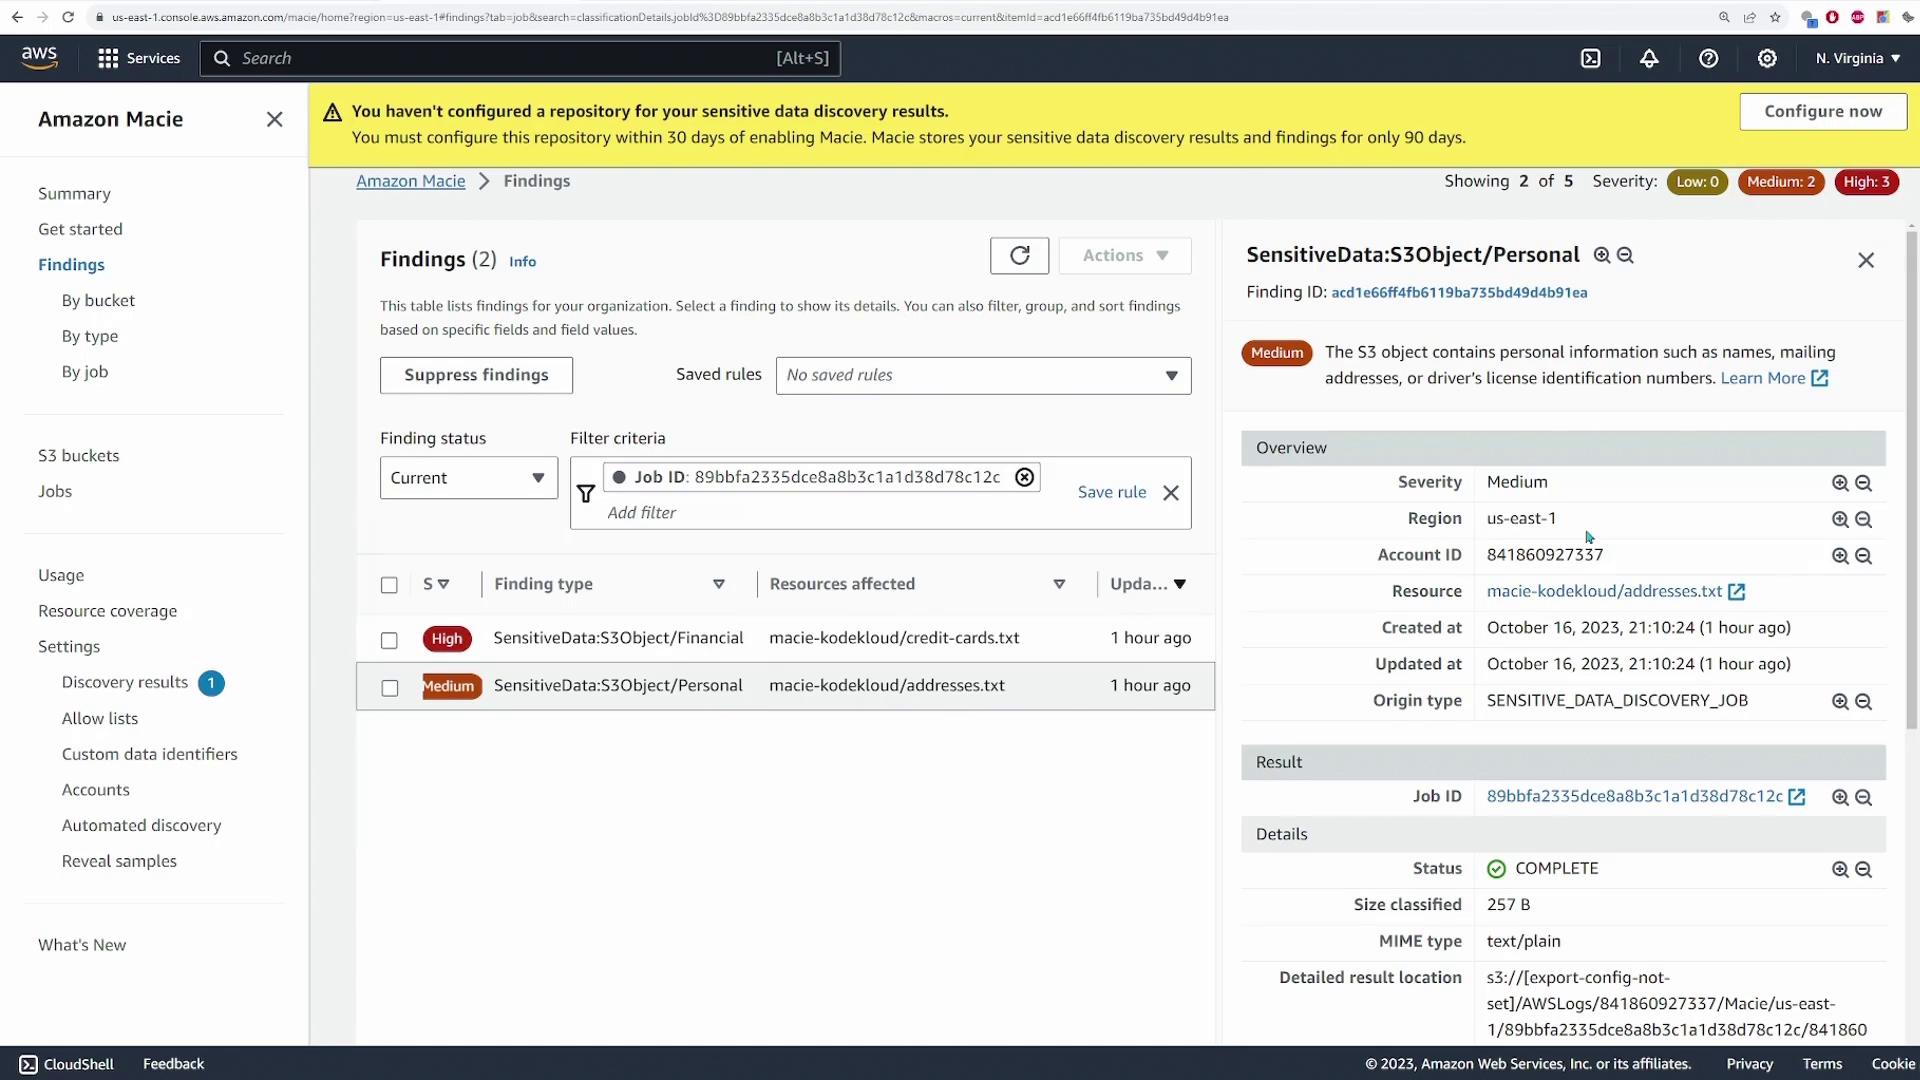
Once complete, click on **Show findings** to view the detected sensitive data. A new tab will open displaying detailed findings, including severity levels (high or medium) for each piece of sensitive data.
For example, selecting the first finding reveals details for an S3 object labeled "financial" from the **credit_cards.txt** file, showing that 11 credit card numbers were detected along with specific metadata regarding the resource.
<Frame>
</Frame>
Scrolling down will reveal findings corresponding to the **addresses.txt** file, which in this demo include four identified addresses.
<Frame>
</Frame>
<Callout icon="lightbulb" color="#1CB2FE">
The actionable findings from AWS Macie can be integrated with other systems, enabling automated notifications and remediation workflows whenever sensitive data is detected.
</Callout>
## Conclusion
This demonstration showcased how AWS Macie scans your S3 buckets—using either one-time or scheduled jobs—to identify and report sensitive data. By following these steps, you can quickly set up Macie to help safeguard your data storage and ensure compliance with data privacy standards.
Thank you for following this lesson. We look forward to seeing you in the next article.
---
For more details on securing your data environment, be sure to check out the following resources:
- [AWS Macie Documentation](https://docs.aws.amazon.com/macie/latest/userguide/what-is-macie.html)
- [Sensitive Data Discovery with AWS](https://aws.amazon.com/macie/sensitive-data/)
Happy Securing!
<CardGroup>
<Card title="Watch Video" icon="video" cta="Learn more" href="https://learn.kodekloud.com/user/courses/aws-solutions-architect-associate-certification/module/6b2d9e18-1714-499c-83d4-4d1f7ff29e66/lesson/494ec972-3050-481a-b27b-b2a966080e27"/>
</CardGroup>