Certified Jenkins Engineer
Agents and Nodes in Jenkins
Demo Utilize Docker Image Agent
In this lesson, you’ll learn how to run your build steps inside Docker containers by using the Docker Pipeline Plugin in Jenkins. We’ll explore how to configure a Docker agent via the Pipeline Syntax editor, write a Jenkinsfile that uses multiple agent types, and inspect the console output when pulling and running containers.
Prerequisites
Note
Make sure the Docker Pipeline Plugin is installed and enabled. You can verify this under Manage Jenkins → Manage Plugins.
Configuring a Docker Agent via Pipeline Syntax
- Open Pipeline Syntax in your Jenkins instance.
- Select agent from the Snippet Generator dropdown.
- Choose docker (or dockerfile) as the agent directive.
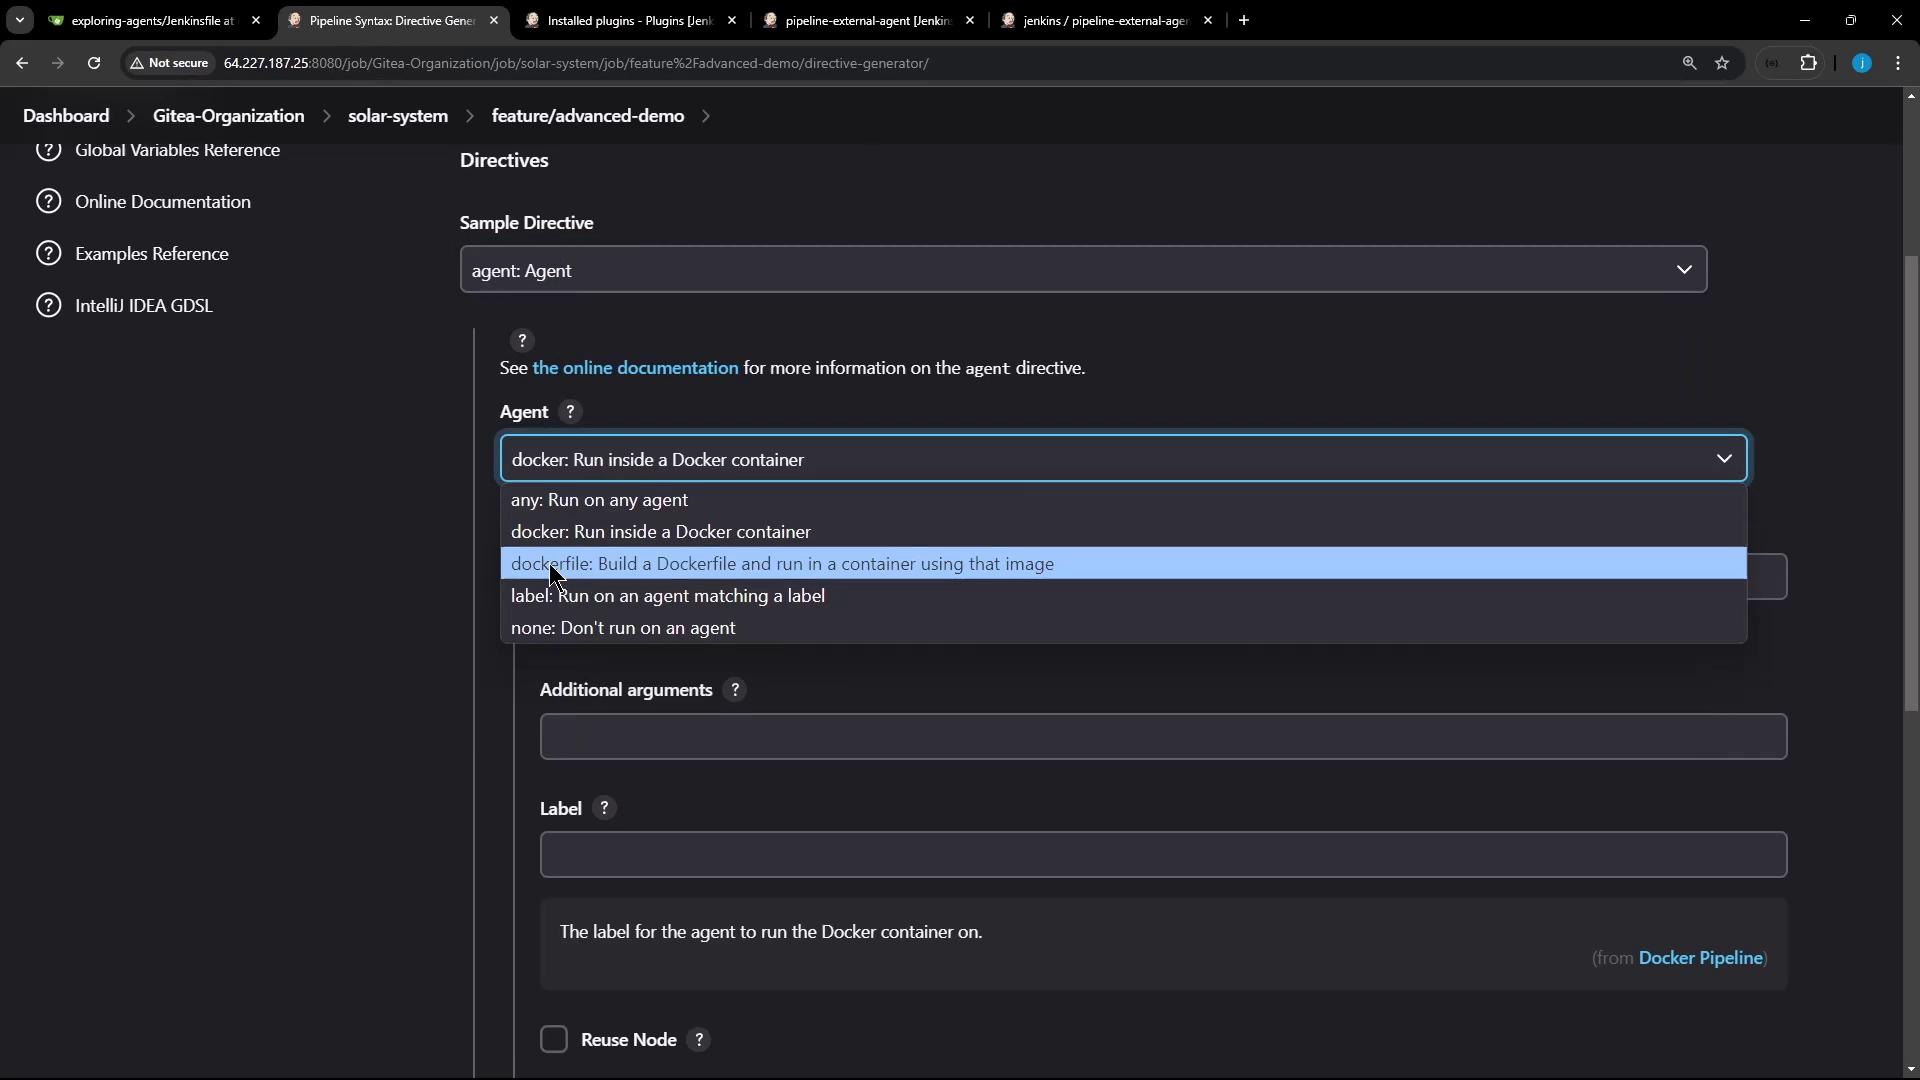
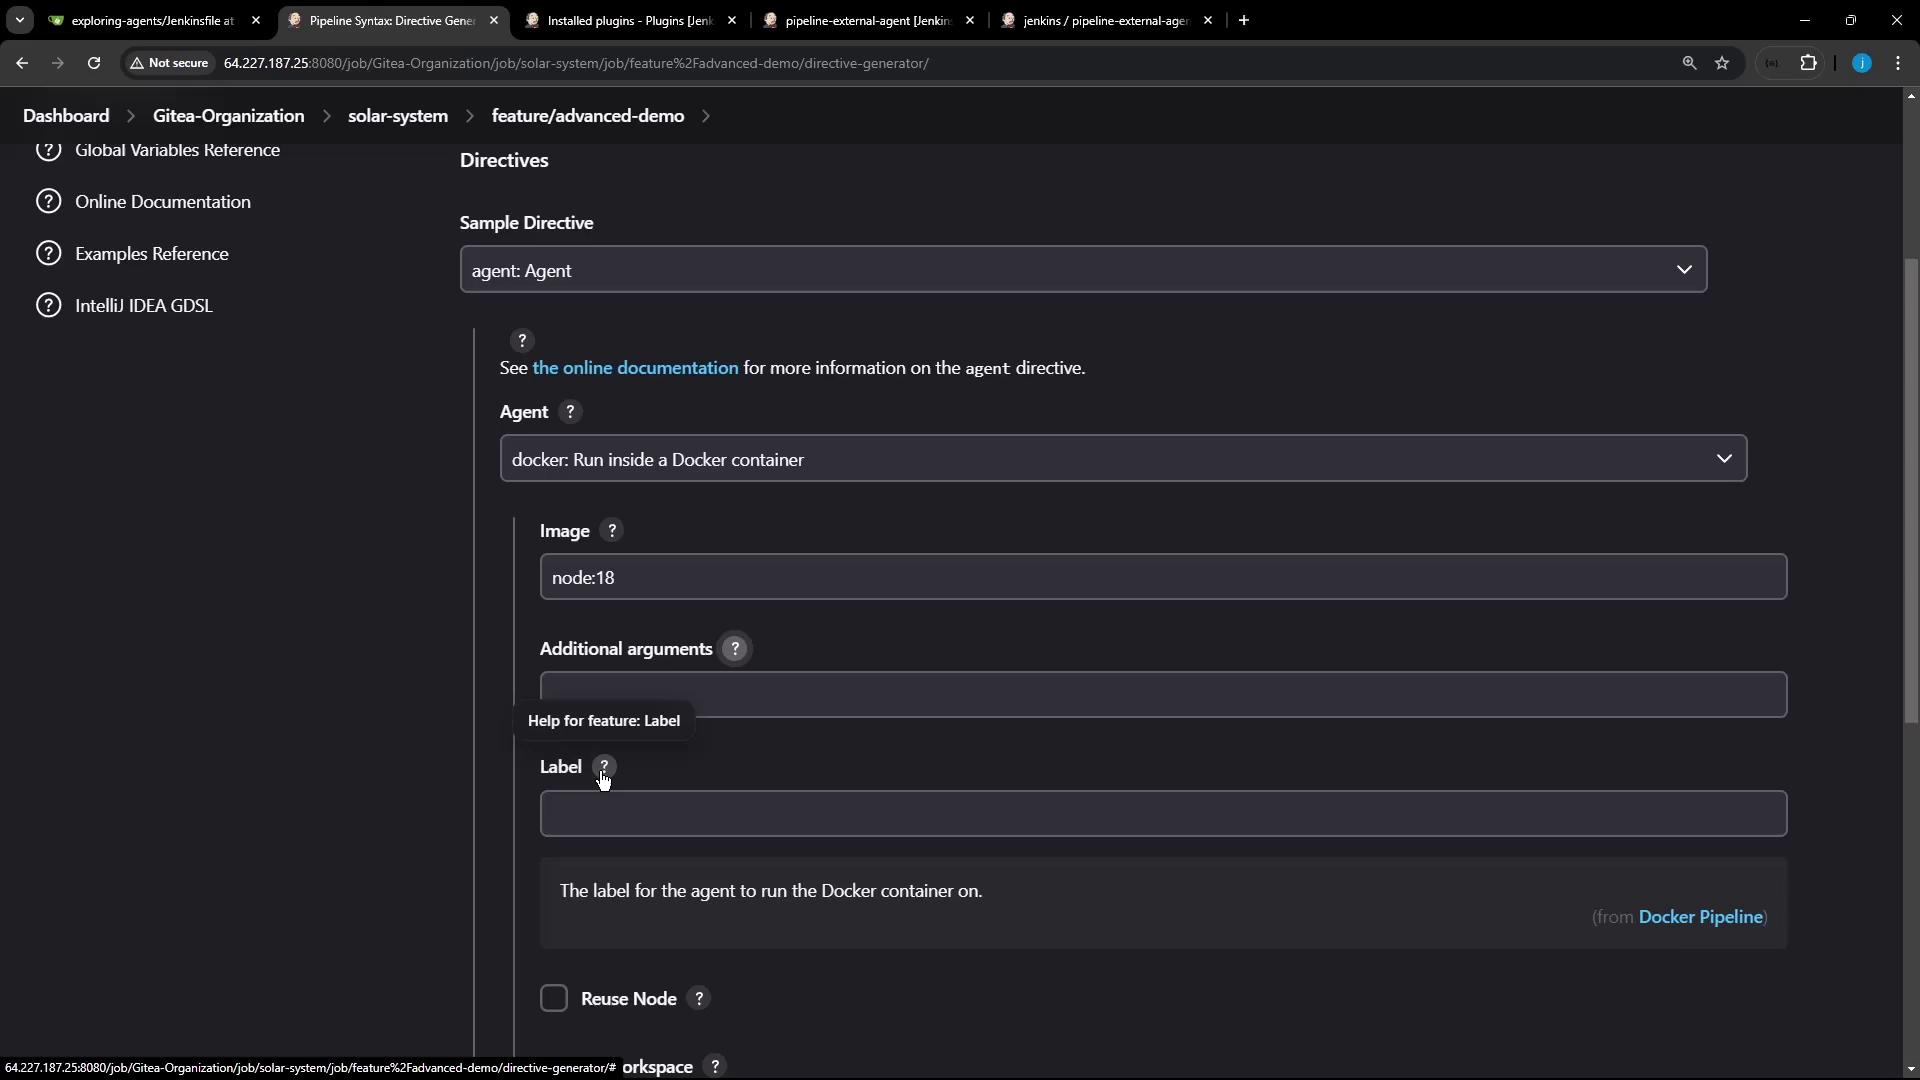
When you select docker, you can configure the following fields:
| Field | Description |
|---|---|
image | The Docker image to run (e.g., node:18-alpine). |
args | Additional flags for docker run (for example, volume mounts or --privileged). |
label | Jenkins node label where the container should run. |
workspace | Custom workspace path inside the container. |
registryUrl | URL of a private Docker registry. |
credentialsId | Credentials ID for authenticating to the registry. |
alwaysPull | When set to true, Jenkins pulls the image every time. |
A minimal Jenkinsfile using a Docker agent looks like this:
pipeline {
  agent {
    docker {
      image 'node:18-alpine'
      alwaysPull true
    }
  }
  stages {
    stage('Build') {
      steps {
        sh 'node -v'
        sh 'npm -v'
      }
    }
  }
}
For more details, see the Jenkins Pipeline Syntax Reference.
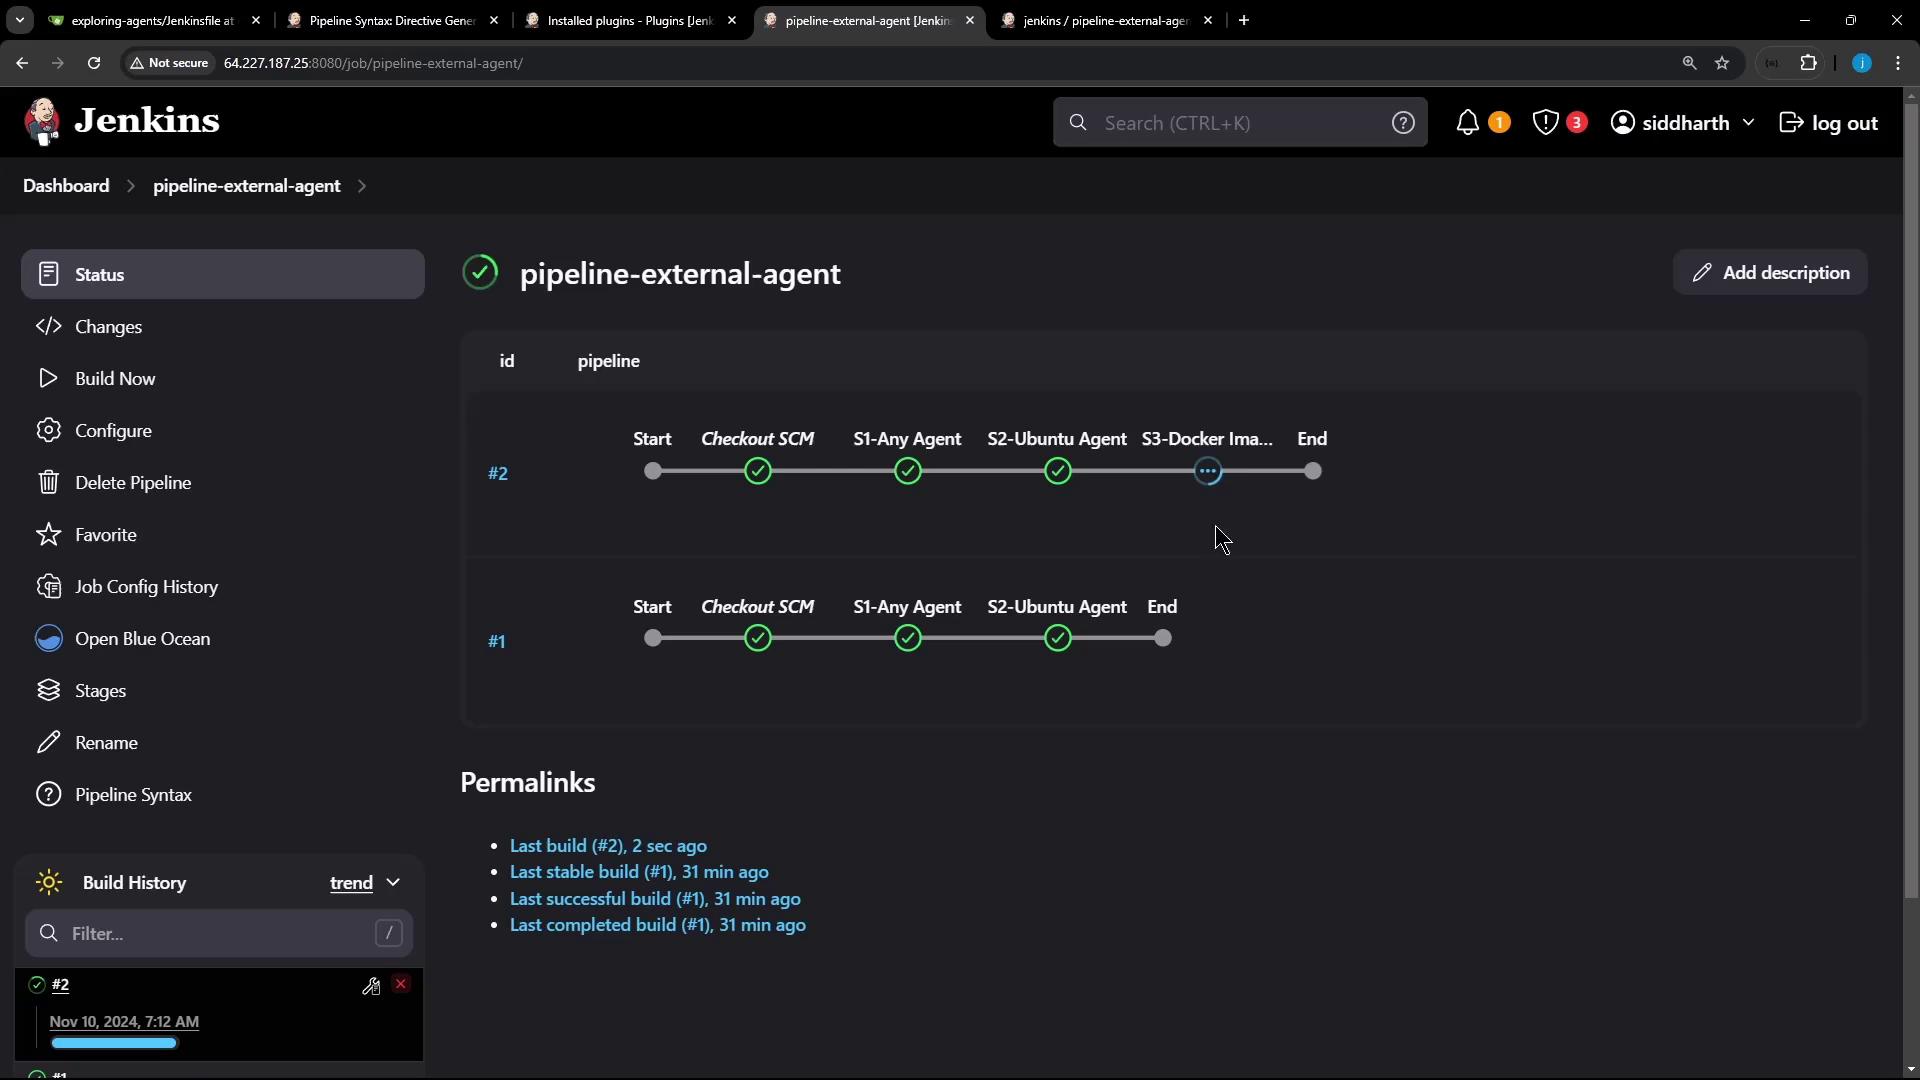
Example: Multi-Stage Pipeline with Docker and Labels
The following Jenkinsfile demonstrates:
- Running on any available agent
- Running on a specific labeled node
- Running inside a Docker container agent
pipeline {
  agent any

  stages {
    stage('S1 – Any Agent') {
      steps {
        sh 'cat /etc/os-release'
        sh 'node -v'
        sh 'npm -v'
      }
    }

    stage('S2 – Ubuntu Agent') {
      agent { label 'ubuntu-docker-jdk17-node20' }
      steps {
        sh 'cat /etc/os-release'
        sh 'node -v'
        sh 'npm -v'
      }
    }

    stage('S3 – Docker Image Agent') {
      agent {
        docker {
          image 'node:18-alpine'
          label 'ubuntu-docker-jdk17-node20'
          alwaysPull true
        }
      }
      steps {
        sh 'cat /etc/os-release'
        sh 'node -v'
        sh 'npm -v'
      }
    }
  }
}
Note
Ensure your agent labeled ubuntu-docker-jdk17-node20 has Docker installed and is connected to the Jenkins controller.
Commit the Jenkinsfile to your repository and trigger a build. You’ll see all three stages execute in sequence.
Console Output: Pulling & Running the Docker Image
When the S3 – Docker Image Agent stage runs, Jenkins pulls the image if needed:
$ docker pull node:18-alpine
18-alpine: Pulling from library/node
43c4264eed91: Pulling fs layer
369c426a5a2a: Pulling fs layer
2f21f39bd9d19: Pulling fs layer
cdcc44a82b4: Verifying Checksum
...
Status: Downloaded newer image for node:18-alpine
Then Jenkins starts a container, mounts the workspace, and runs the commands:
+ docker run -d \
    -v /home/jenkins-agent/workspace/...:/home/jenkins-agent/workspace/... \
    -e ... node:18-alpine cat

+ cat /etc/os-release
NAME="Alpine Linux"
ID=alpine
VERSION_ID=3.20.3
PRETTY_NAME="Alpine Linux v3.20"

+ node -v
v18.12.4

+ npm -v
10.7.0
After the steps complete, Jenkins automatically stops and removes the build container.
Note
Jenkins removes only the container; the pulled Docker image remains in the local cache.
Verifying on the Jenkins Host
On your Jenkins controller or agent node, confirm there are no leftover build containers:
$ docker ps -a
# No running containers (build containers have been removed)
You can see the pulled image still exists:
$ docker images
REPOSITORY   TAG         IMAGE ID       CREATED         SIZE
node         18-alpine   f48cc5826852   4 months ago    128MB
hello-world  latest      d2c94e258dcb   18 months ago   13.3kB
You’ve now seen how to configure and use Docker containers as build agents in Jenkins pipelines. This approach ensures consistent build environments, easy cleanup, and the flexibility to use any Docker image.
Links and References
Watch Video
Watch video content