Certified Jenkins Engineer
Setting up CI Pipeline
Demo Fixing Vulnerabilities Publish HTML Report
In this walkthrough, you’ll learn how to address critical vulnerabilities flagged by npm audit and OWASP Dependency-Check, then expose the HTML and JUnit reports in your Jenkins pipeline for better visibility and compliance tracking.
1. Identify Failing Dependency Scans
First, run an audit locally to pinpoint blocking issues:
npm audit --audit-level=critical
Example output:
@babel/traverse <7.23.2
Severity: critical
Babel vulnerable to arbitrary code execution when compiling specifically crafted malicious code - https://github.com/advisories/GHSA-67hx-6x53-jw92
...
8 vulnerabilities (2 moderate, 5 high, 1 critical)
To address all issues, run:
npm audit fix
In Jenkins, the Dependency Scanning stage may look like this:
stage('Dependency Scanning') {
  parallel {
    stage('NPM Dependency Audit') {
      steps {
        sh '''
          npm audit --audit-level=critical
          echo $?
        '''
      }
    }
  }
}
2. Fix the Critical Vulnerability
To resolve the critical issue in @babel/traverse, install a version ≥ 7.23.2:
npm install @babel/traverse@^7.23.2
Re-run the audit to confirm the fix:
npm audit --audit-level=critical && echo $?
# 0 (no critical vulnerabilities found)
Your package.json will update under dependencies:
{
  "dependencies": {
    "@babel/traverse": "^7.23.2",
    "cors": "^2.8.5",
    "express": "^4.18.2",
    "mongoose": "^5.13.20",
    "nyc": "^15.1.0"
  }
}
Commit the changes:
git add package.json package-lock.json
git commit -m "fix critical vulnerability in @babel/traverse"
git push
3. Verify in Jenkins
Once pushed, Jenkins triggers a new build. Both NPM Audit and OWASP Dependency Check stages should now pass:
npm install --no-audit
npm audit --audit-level=critical && echo $?
# vulnerability summary (2 moderate, 5 high)
# + echo 0
4. Publish the HTML Report
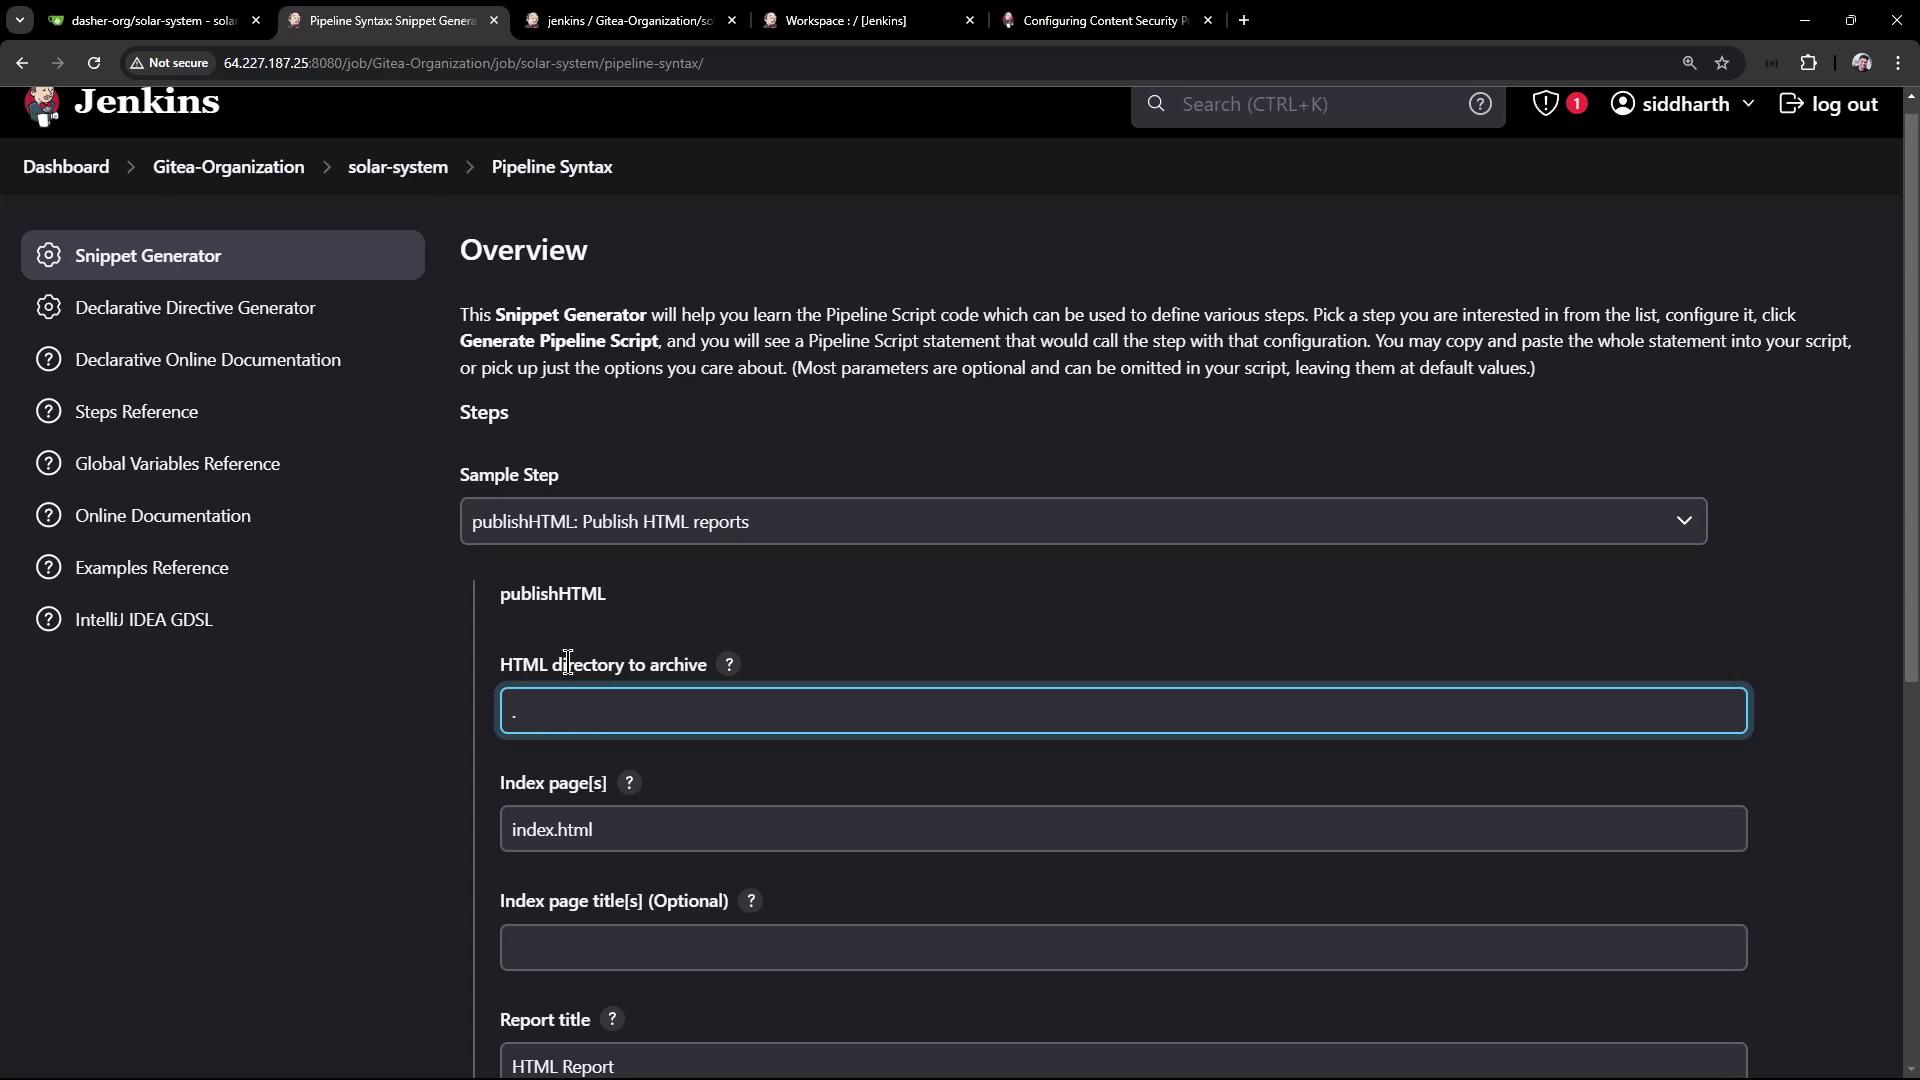
Expose the OWASP Dependency-Check HTML report in Jenkins by using the htmlPublisher step.
- Open Snippet Generator > Pipeline Syntax > htmlPublisher.
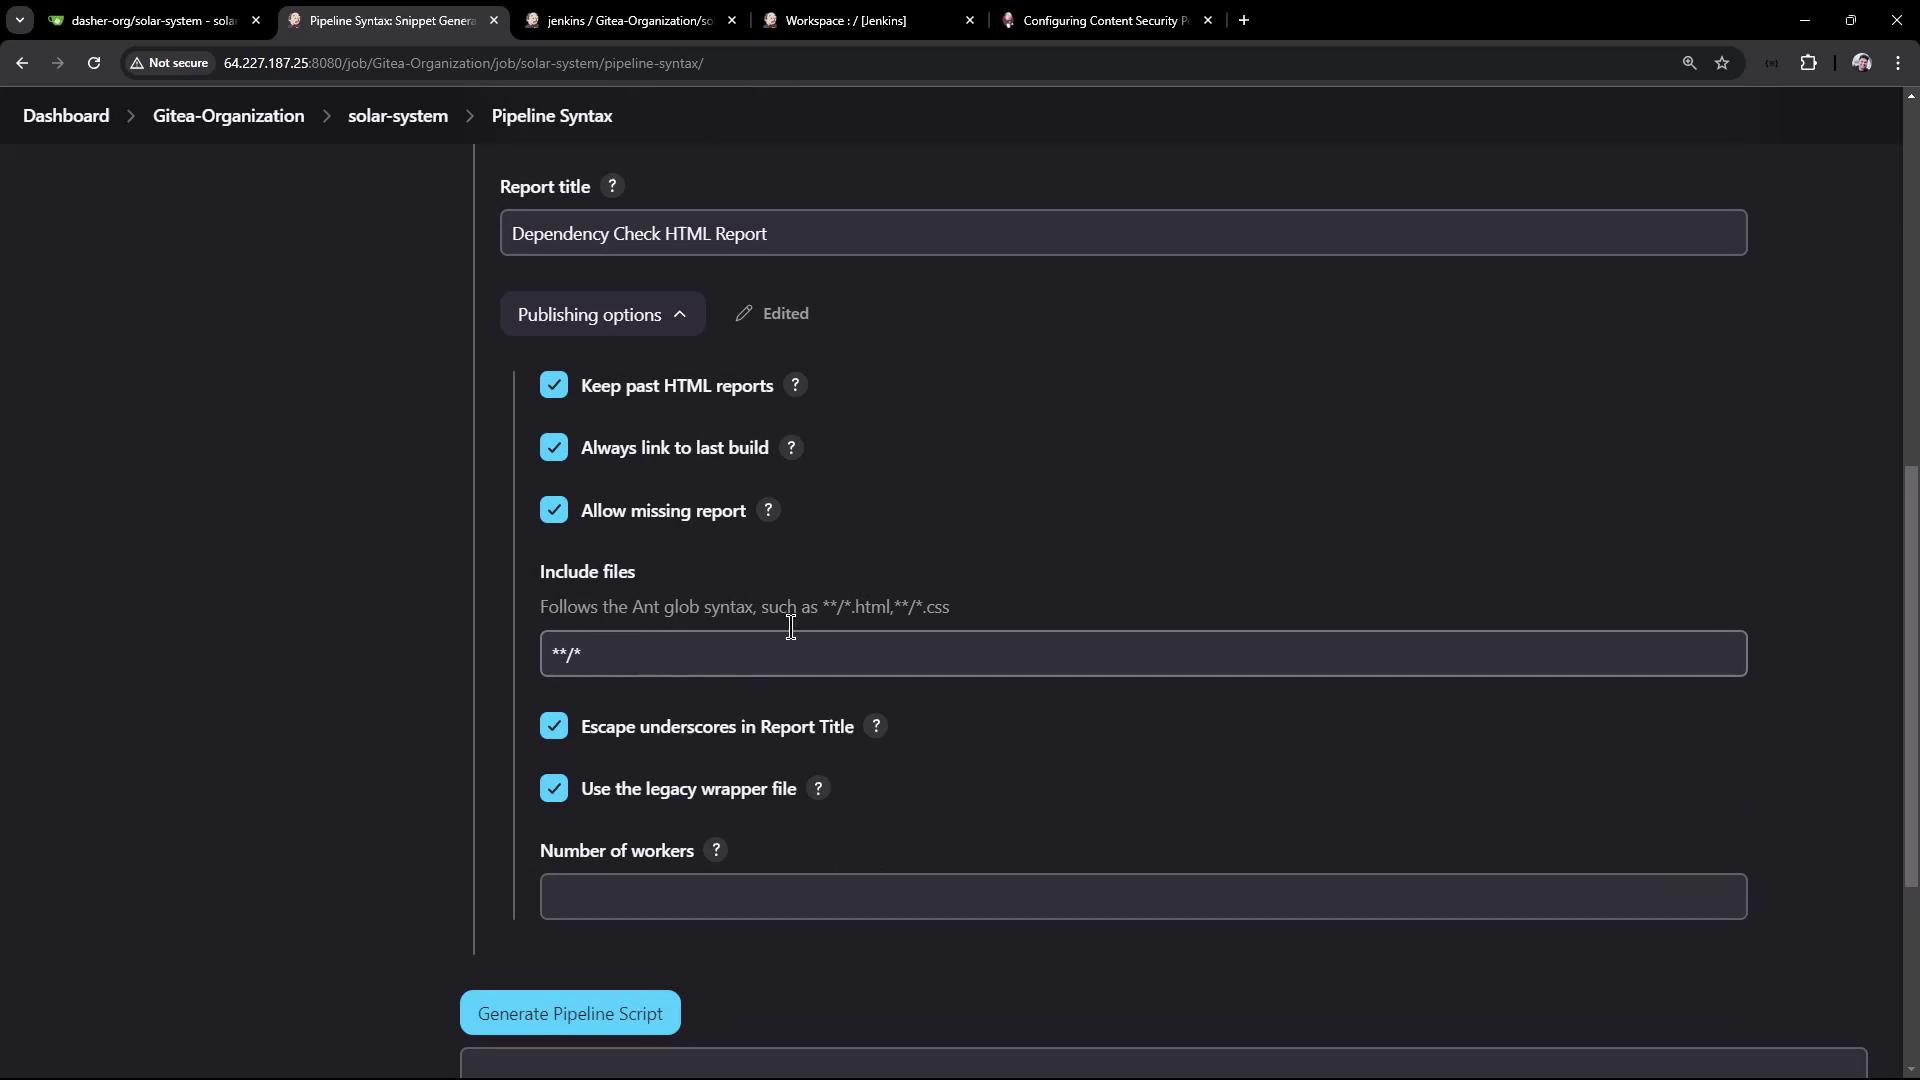
- Set:
- Report directory:
./ - Report files:
dependency-check-jenkins.html - Report name: Dependency Check HTML Report
- Report directory:
- Copy the generated Groovy snippet.
Add it to your OWASP stage:
stage('OWASP Dependency Check') {
  steps {
    dependencyCheck additionalArguments: '''
      --scan ./
      --out ./
      --format ALL
      --prettyPrint
    ''', odcInstallation: 'OWASP-DepCheck-10'

    dependencyCheckPublisher failedTotalCritical: 1,
                            pattern: 'dependency-check-report.xml',
                            stopBuild: true

    publishHTML(
      allowMissing: true,
      alwaysLinkToLastBuild: true,
      keepAll: true,
      reportDir: './',
      reportFiles: 'dependency-check-jenkins.html',
      reportName: 'Dependency Check HTML Report',
      useWrapperFileDirectly: true
    )
  }
}
Commit and push your changes:
git commit -am "publish Dependency-Check HTML report"
git push
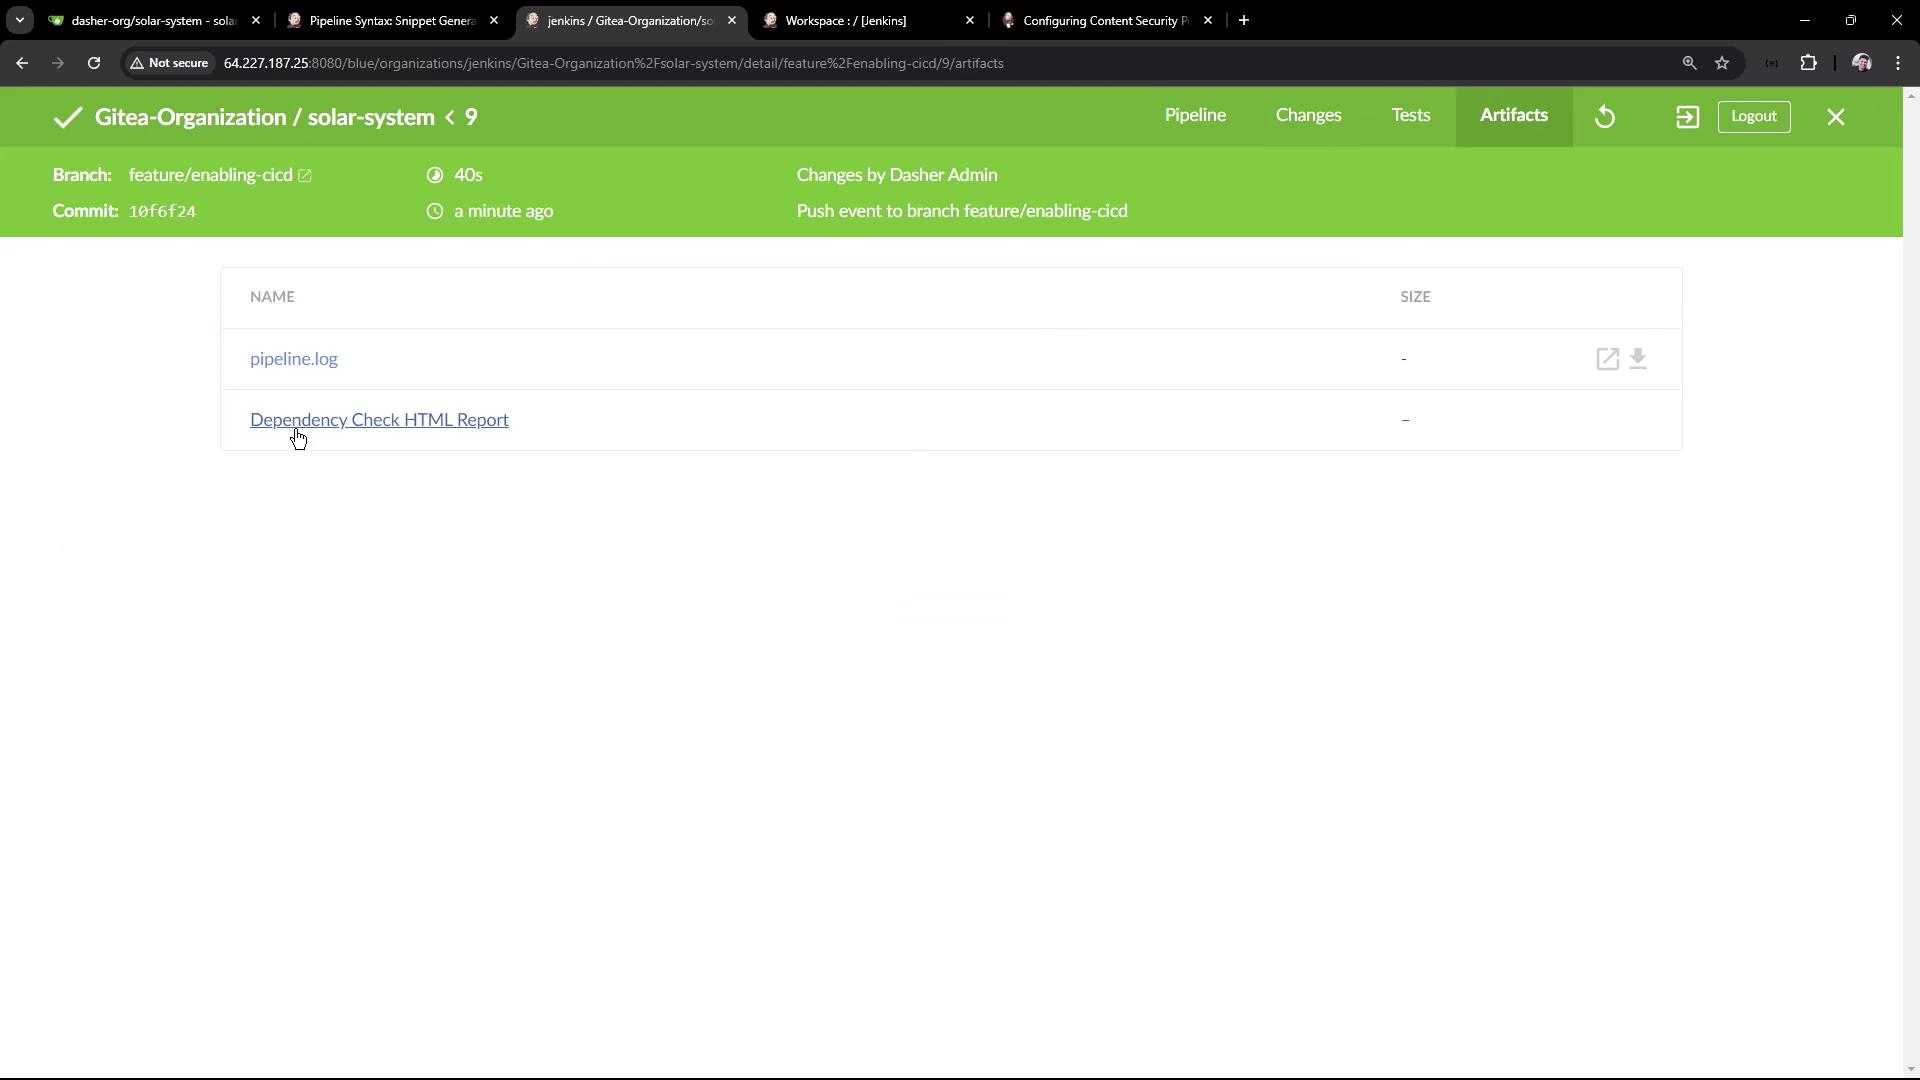
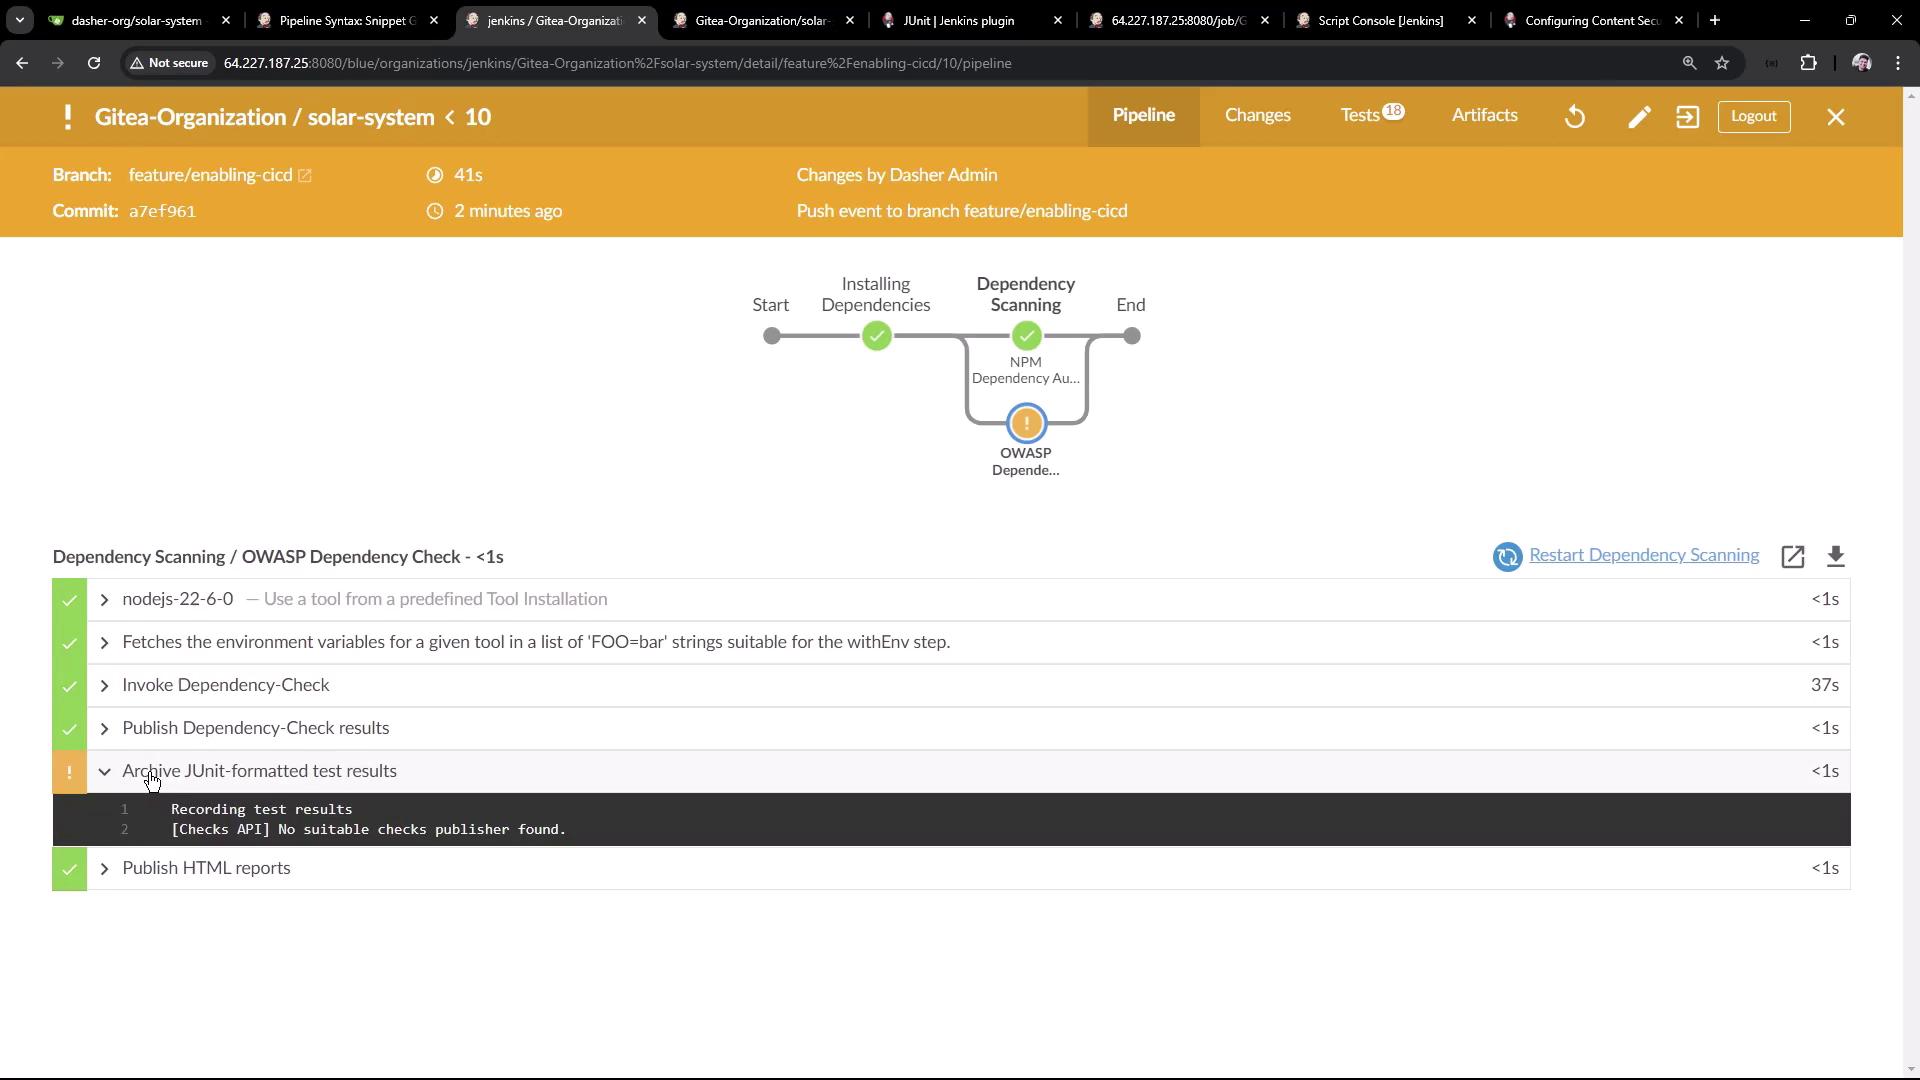
After the build completes, view the archived HTML under Artifacts:
[htmlpublisher] Archiving HTML reports...
[htmlpublisher] Archiving at BUILD level ...
Content Security Policy Note
By default, Jenkins enforces a strict Content Security Policy that may strip inline CSS/JS. To allow CSS in archived HTML reports, execute in the Script Console:
System.setProperty(
  "hudson.model.DirectoryBrowserSupport.CSP",
  "sandbox allow-same-origin; default-src 'self'; img-src 'self'; style-src 'self';"
);
Then rebuild the job to see the styled report.
5. Publish JUnit XML Results
Show OWASP results in the Test Results tab by adding a junit publisher:
- Ensure the JUnit plugin is installed.
- In Snippet Generator, select junit.
- Configure:
- Test results:
dependency-check-junit.xml - Allow empty results:
true - Keep properties:
true
- Test results:
Insert this snippet before or after your existing publishers:
junit allowEmptyResults: true,
      keepProperties: true,
      testResults: 'dependency-check-junit.xml'
Full stage example:
stage('OWASP Dependency Check') {
  steps {
    dependencyCheck /* ... */
    dependencyCheckPublisher /* ... */

    junit(
      allowEmptyResults: true,
      keepProperties: true,
      testResults: 'dependency-check-junit.xml'
    )

    publishHTML(/* ... */)
  }
}
Commit and push:
git commit -am "configure JUnit results for Dependency-Check"
git push
6. View Test Results and Reports
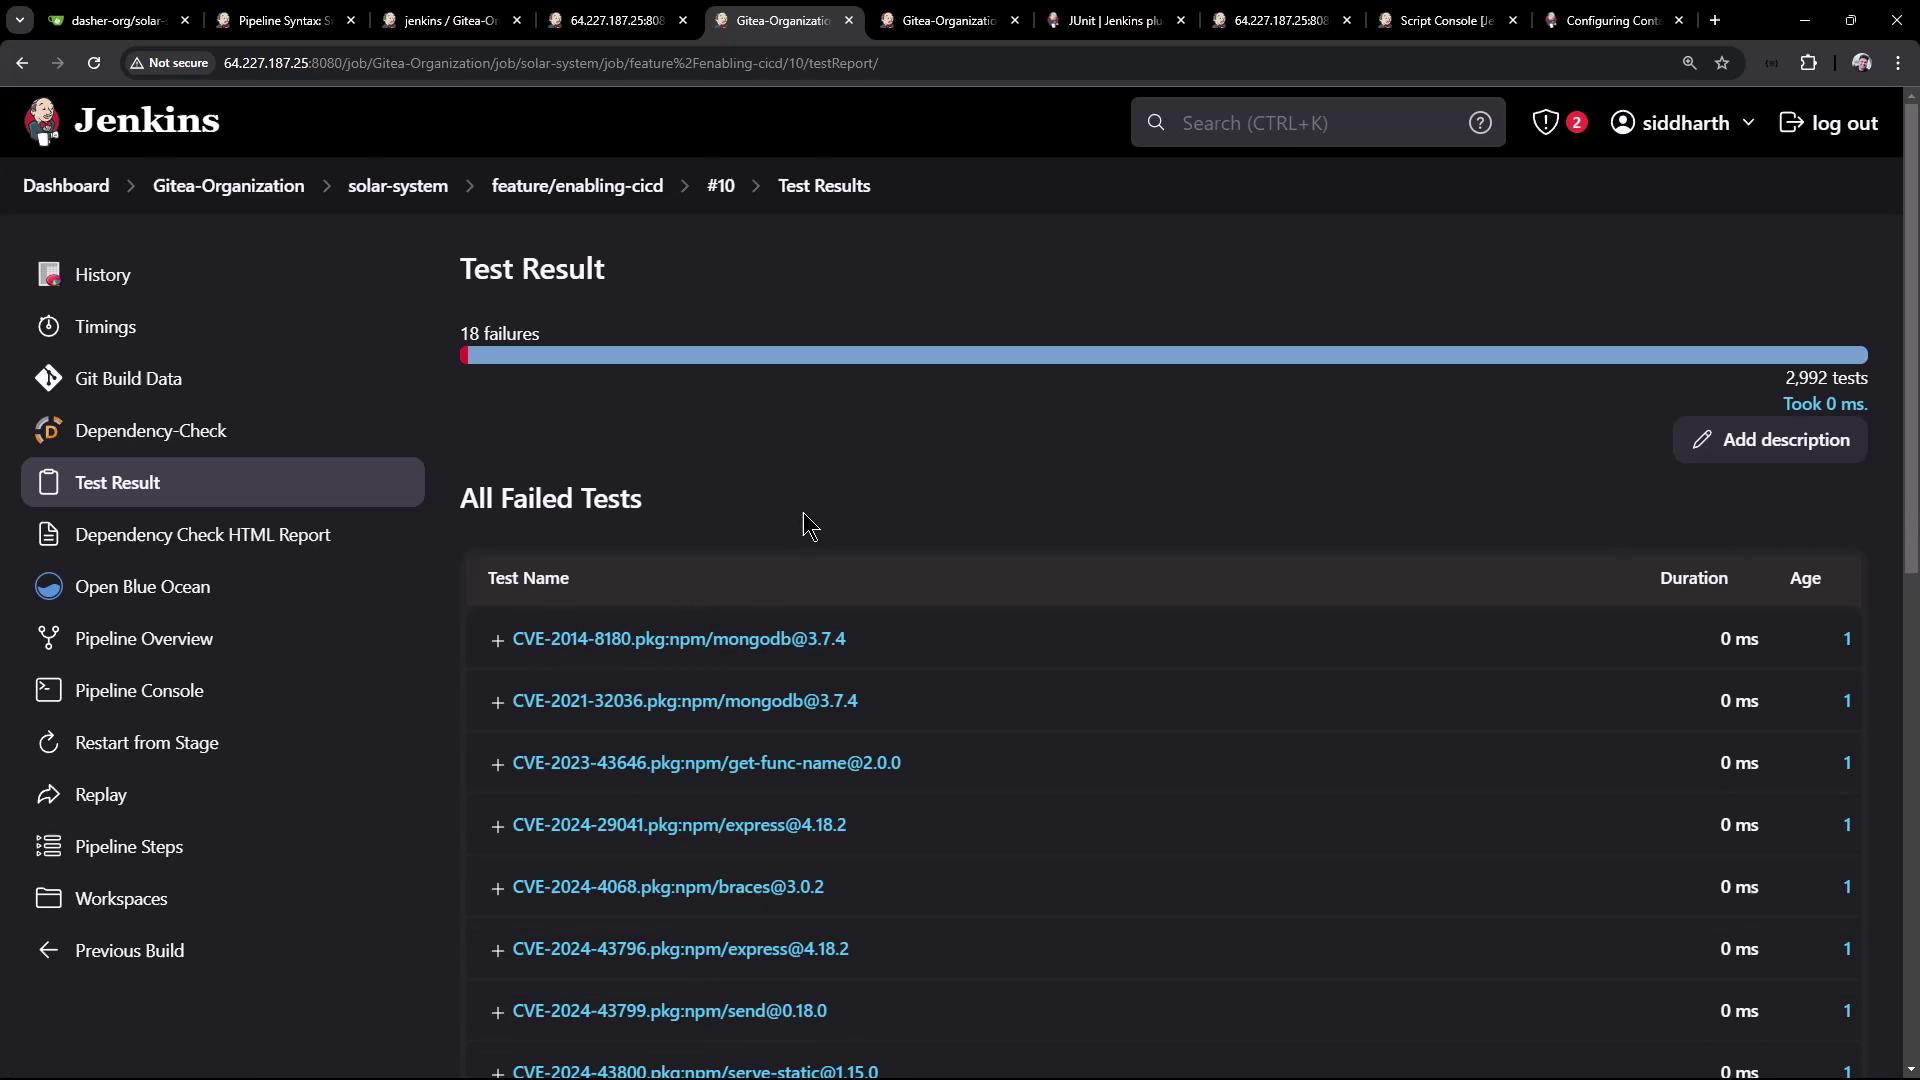
When the pipeline completes (it may show unstable if high-severity issues persist), Jenkins displays a Test Result tab:
Click Test Results to inspect passes, failures, and detailed CVSS scores, impacts, and patch guidance:
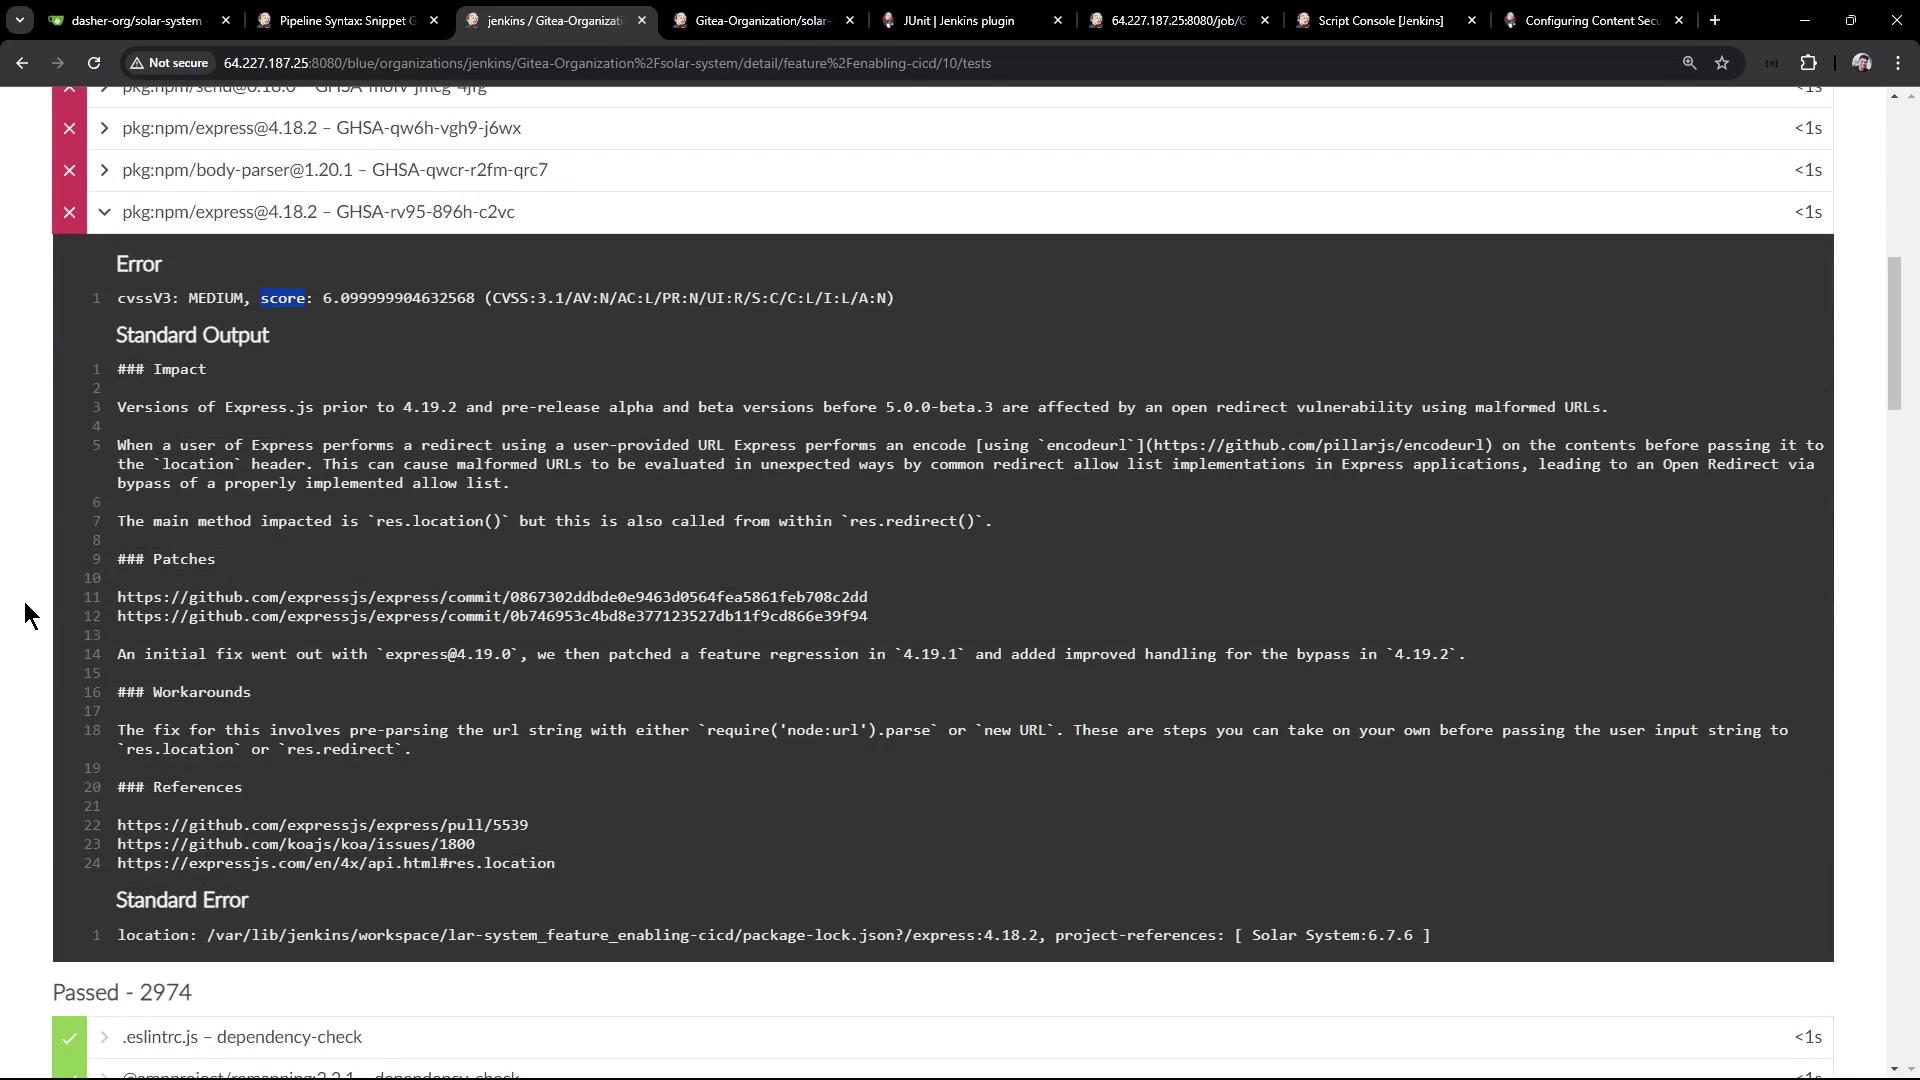
In the classic UI, the Test Results section lists failures and history:
Your Dependency Check HTML Report now renders with full CSS styling and detailed insights into library risks.
Thank you for following this guide! For further reading, check out:
Watch Video
Watch video content