- Launch the EC2 instance
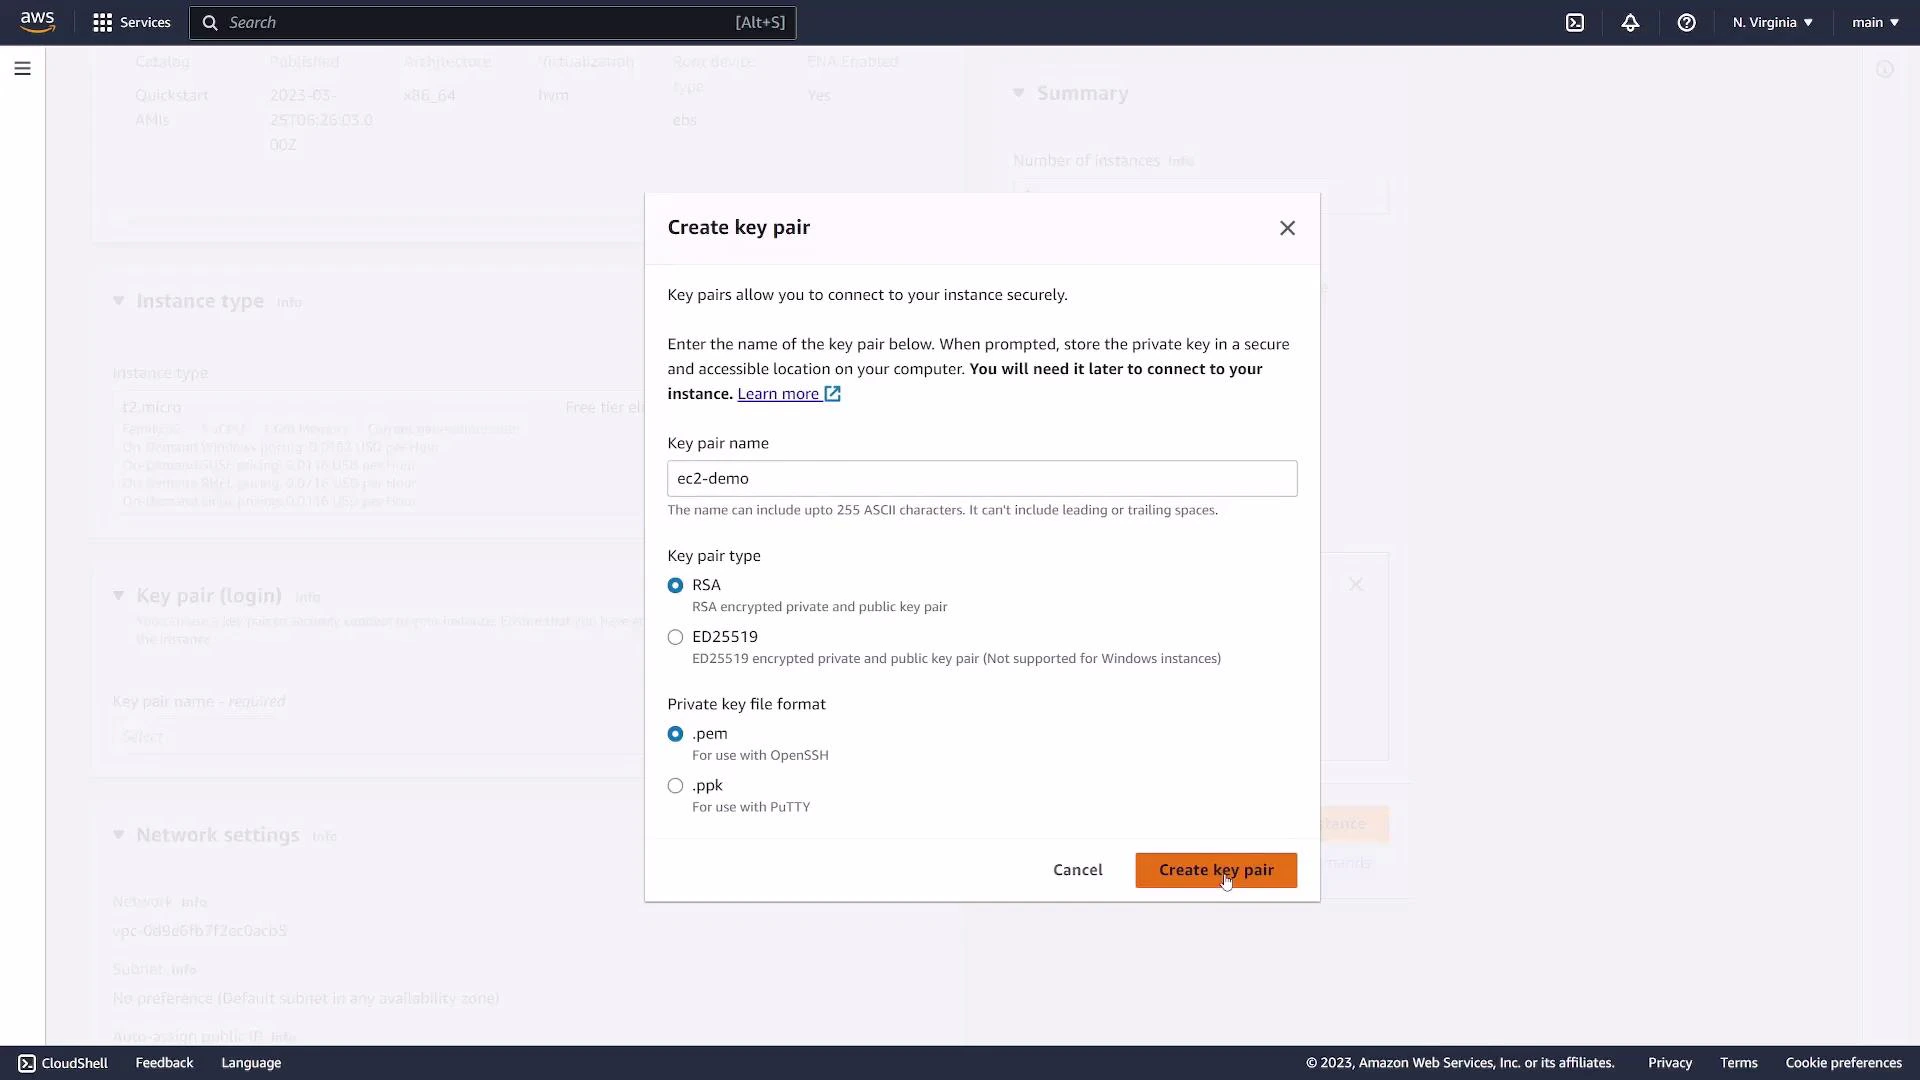
- Configure authentication (key pair)
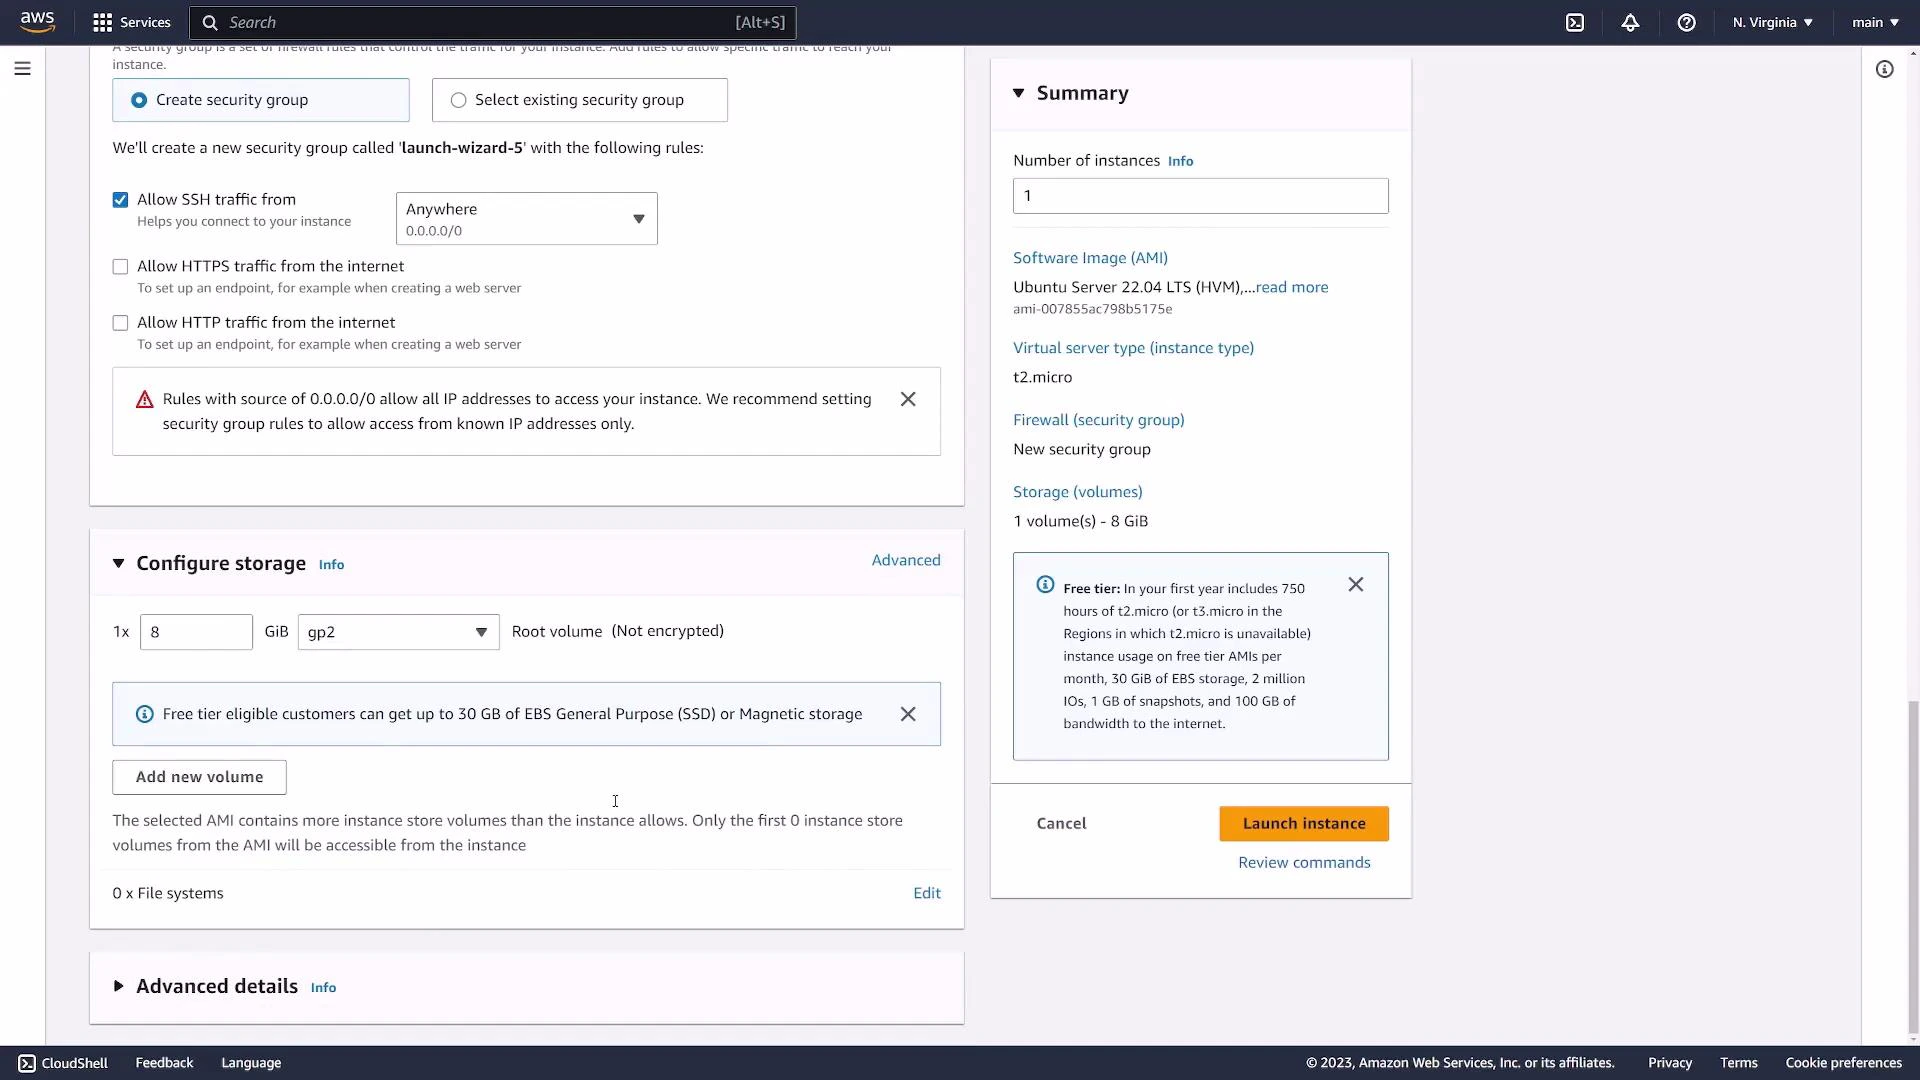
- Configure networking and security groups
- Review storage and launch
- Verify instance details and metrics
- SSH into the instance
- Stop or terminate to avoid charges
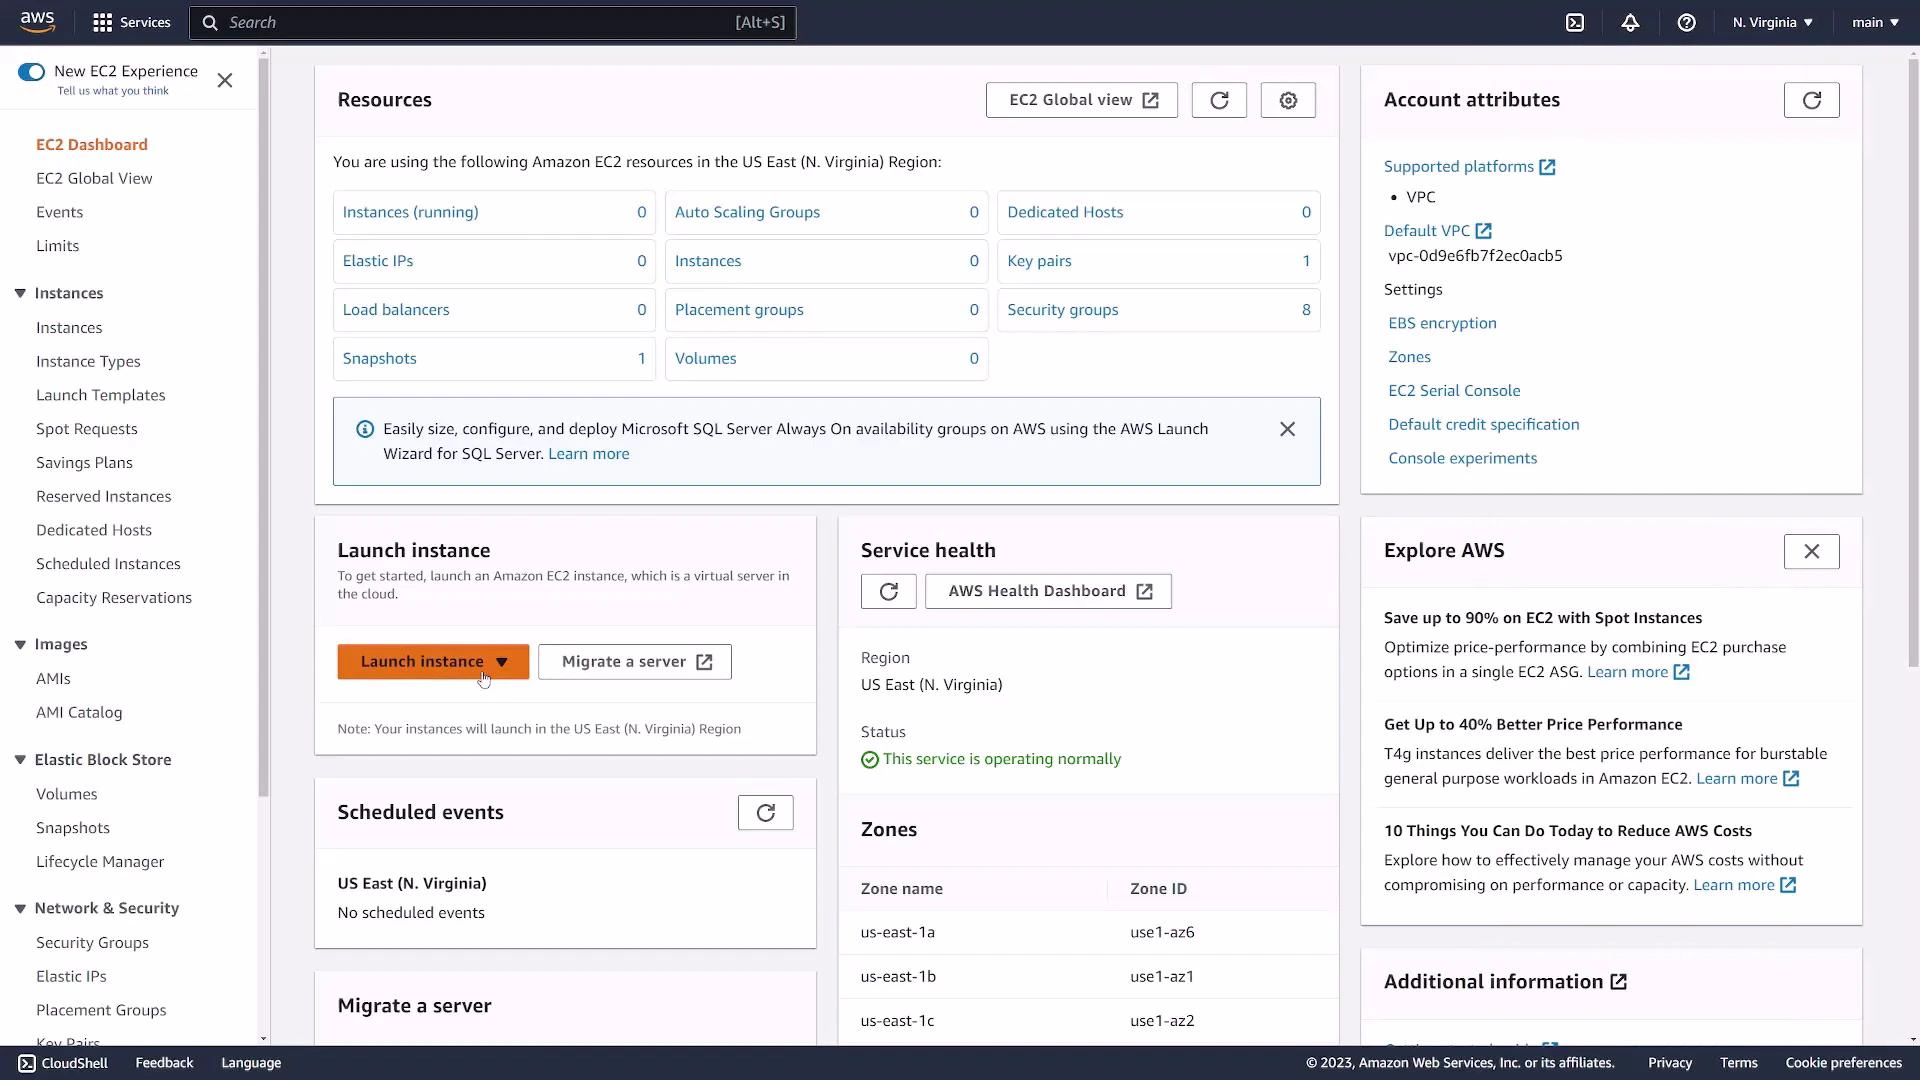
1. Name and choose an AMI
Give the instance a friendly name tag (for example: “web-server”) so it’s easy to identify later. Choose an AMI (Amazon Machine Image) to define the operating system and any preinstalled software. AMIs can be:- Amazon-provided (official images)
- Community-provided
- Marketplace images

2. Select an instance type
Pick an instance type to define vCPU, memory, and network performance. For simple demos or free-tier usage,t2.micro or t3.micro (1 vCPU, 1 GiB RAM) are common choices.
3. Configure key pair (SSH authentication)
Configure a key pair for SSH access. Key pairs are the recommended, secure method for authenticating to EC2 instances.- If you already have a key pair, select it.
- Otherwise, create a new key pair and download the private key file (
.pem). For this demo we createdec2-demo.pem.
Keep your private key file secure. After downloading, restrict permissions (for example:
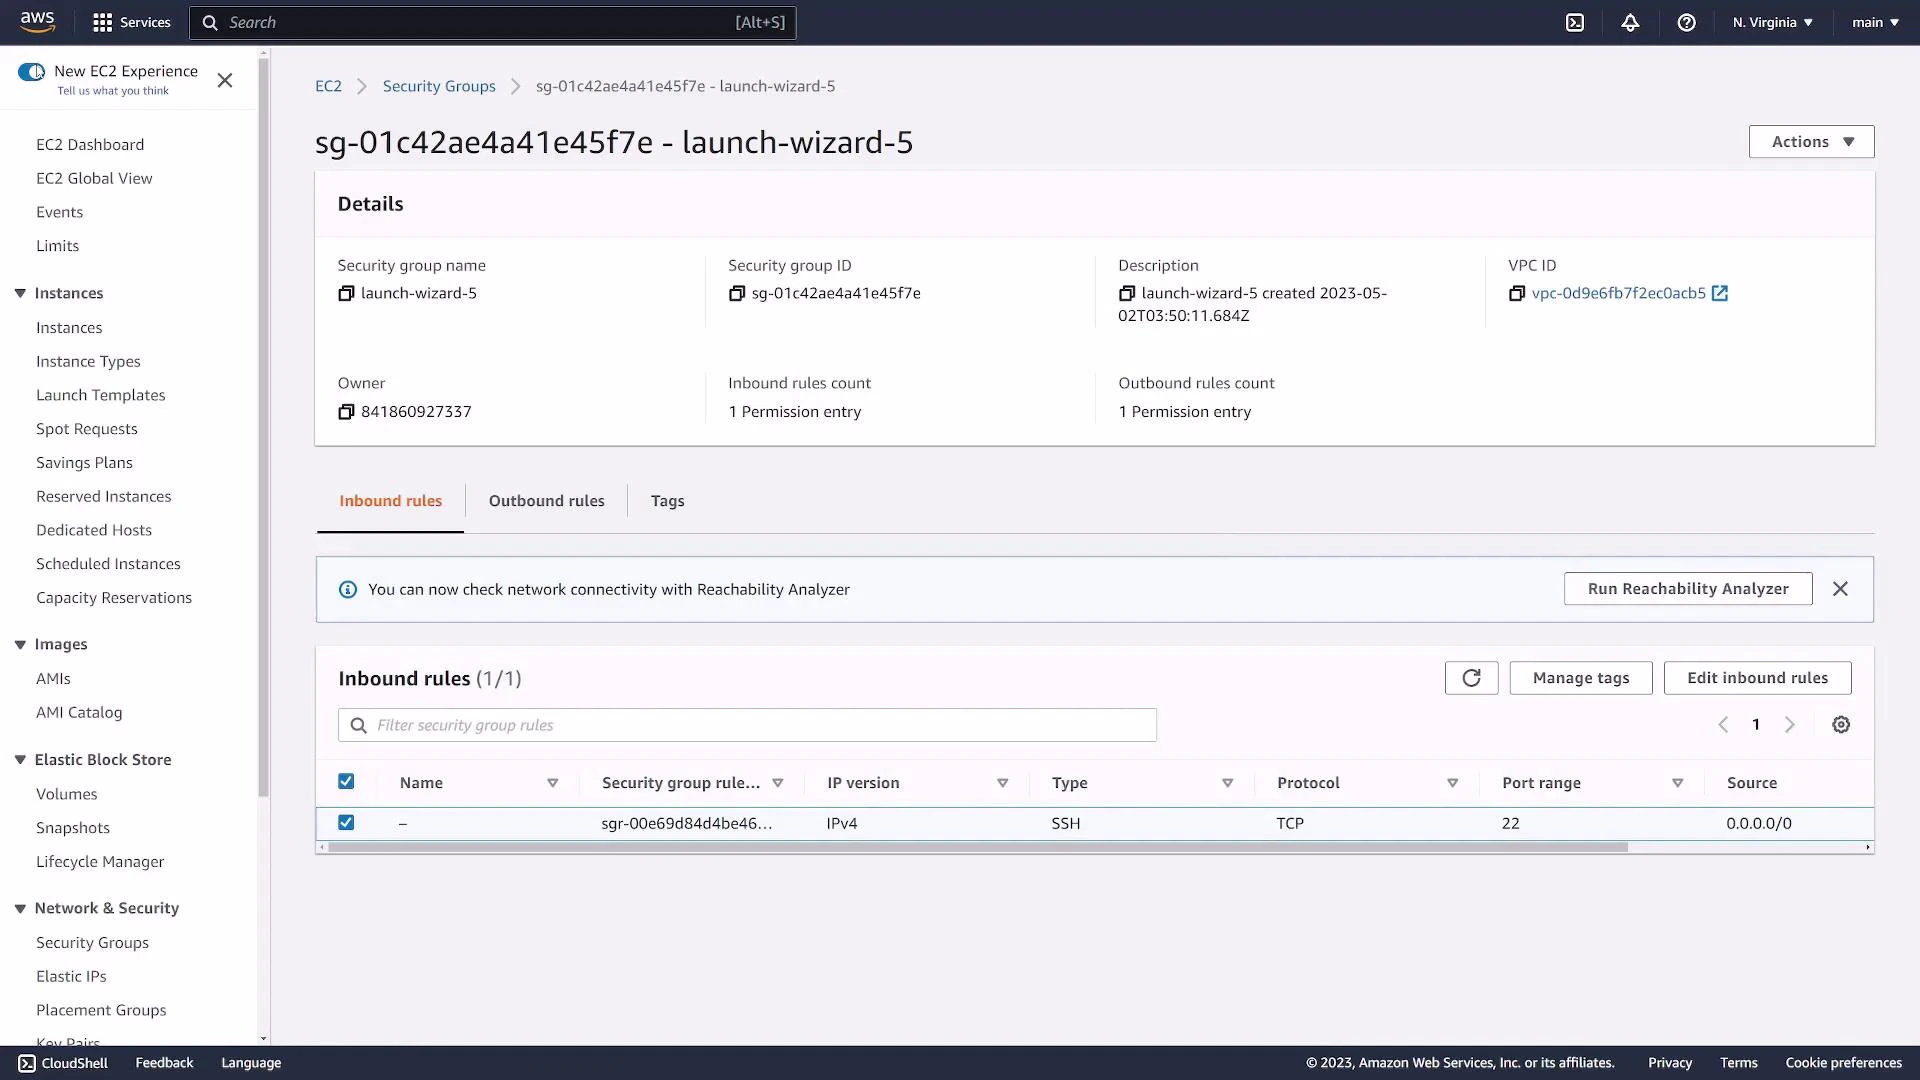
chmod 400 ec2-demo.pem) so SSH will accept the key.4. Networking and security groups
Choose the VPC and subnet (default VPC is common for simple setups). Configure security groups to control inbound/outbound traffic. Security groups act as a stateful firewall. Common rules for a public web server:- SSH: TCP 22 (restrict source to your IP if possible)
- HTTP: TCP 80 (0.0.0.0/0 for public access)
- HTTPS: TCP 443 (0.0.0.0/0 for public access)
203.0.113.5/32) rather than opening to the whole Internet.
Allowing SSH from
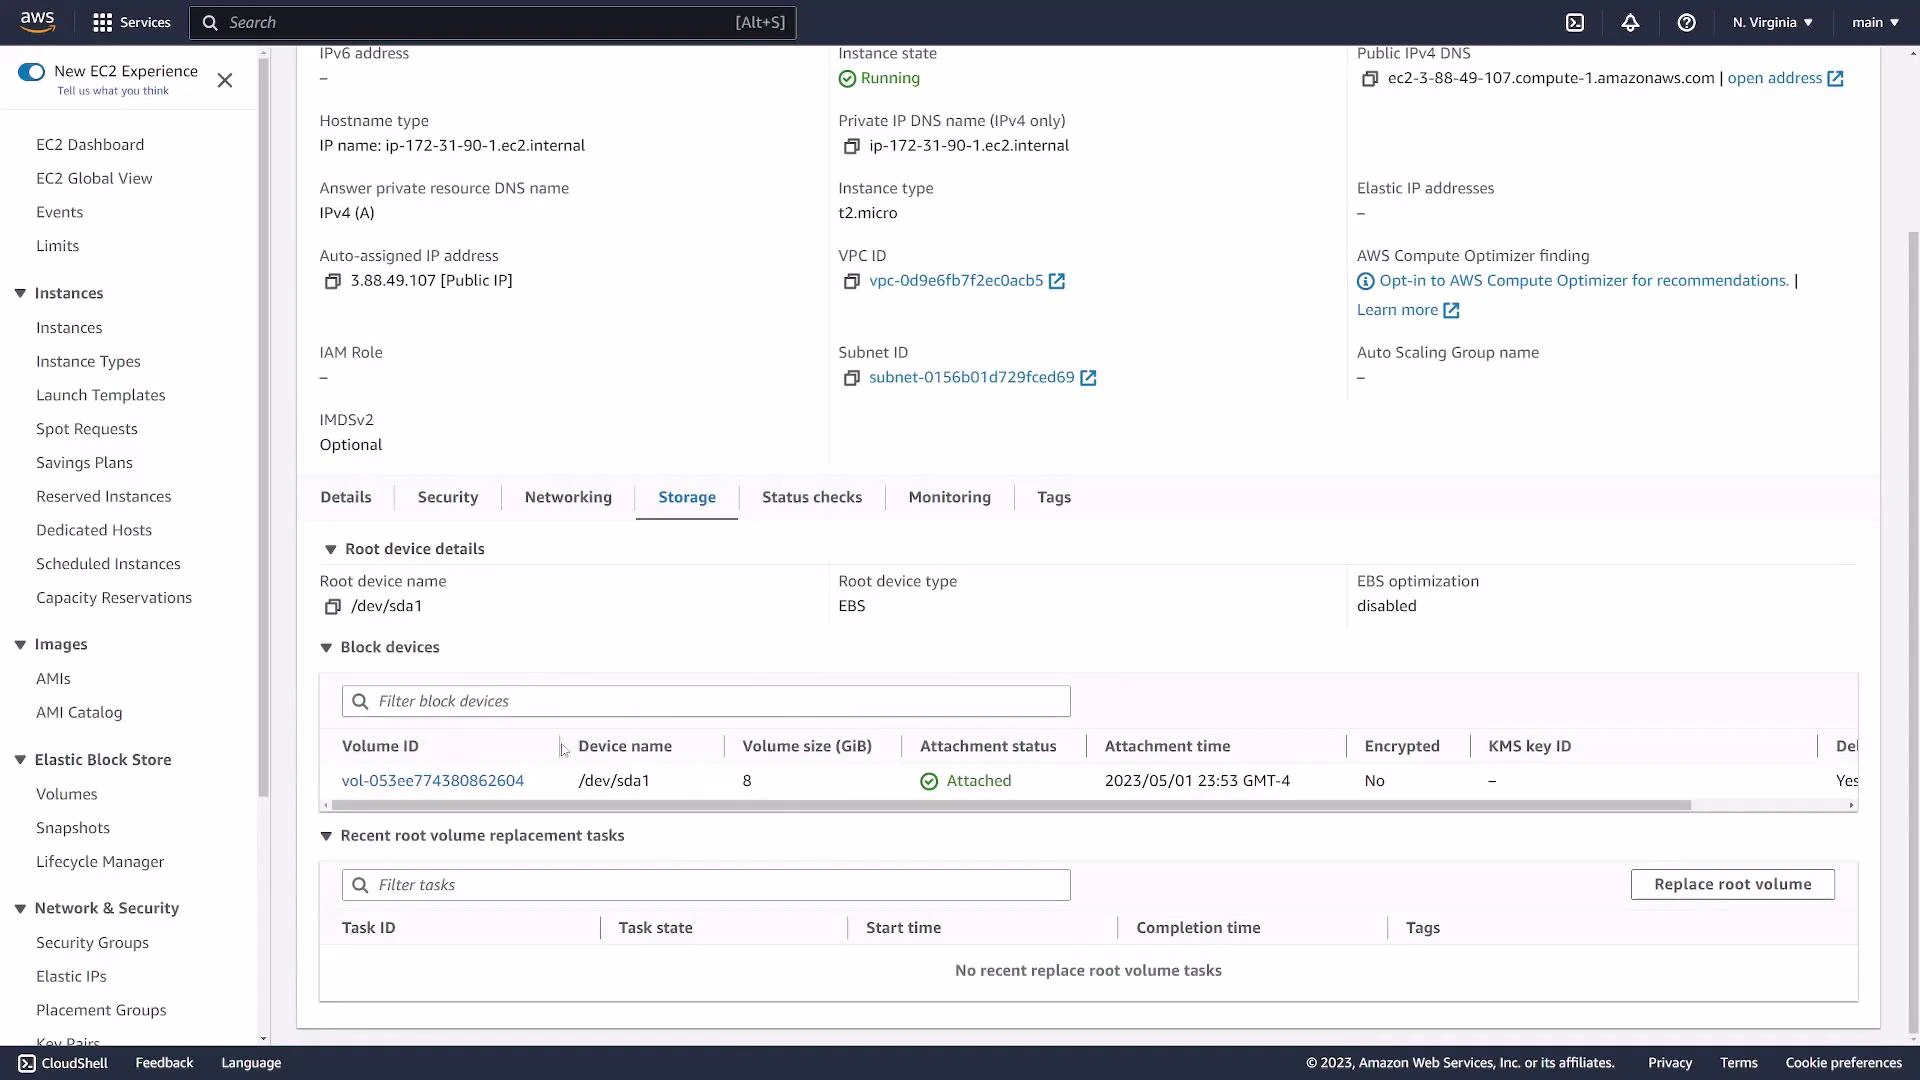
0.0.0.0/0 exposes your instance to the entire Internet. Restrict SSH to your IP whenever possible.5. Storage options
By default a root EBS volume (for example 8 GiB) is attached. Defaults are typically safe for demos; you can adjust size, volume type (gp2/gp3), and encryption as needed.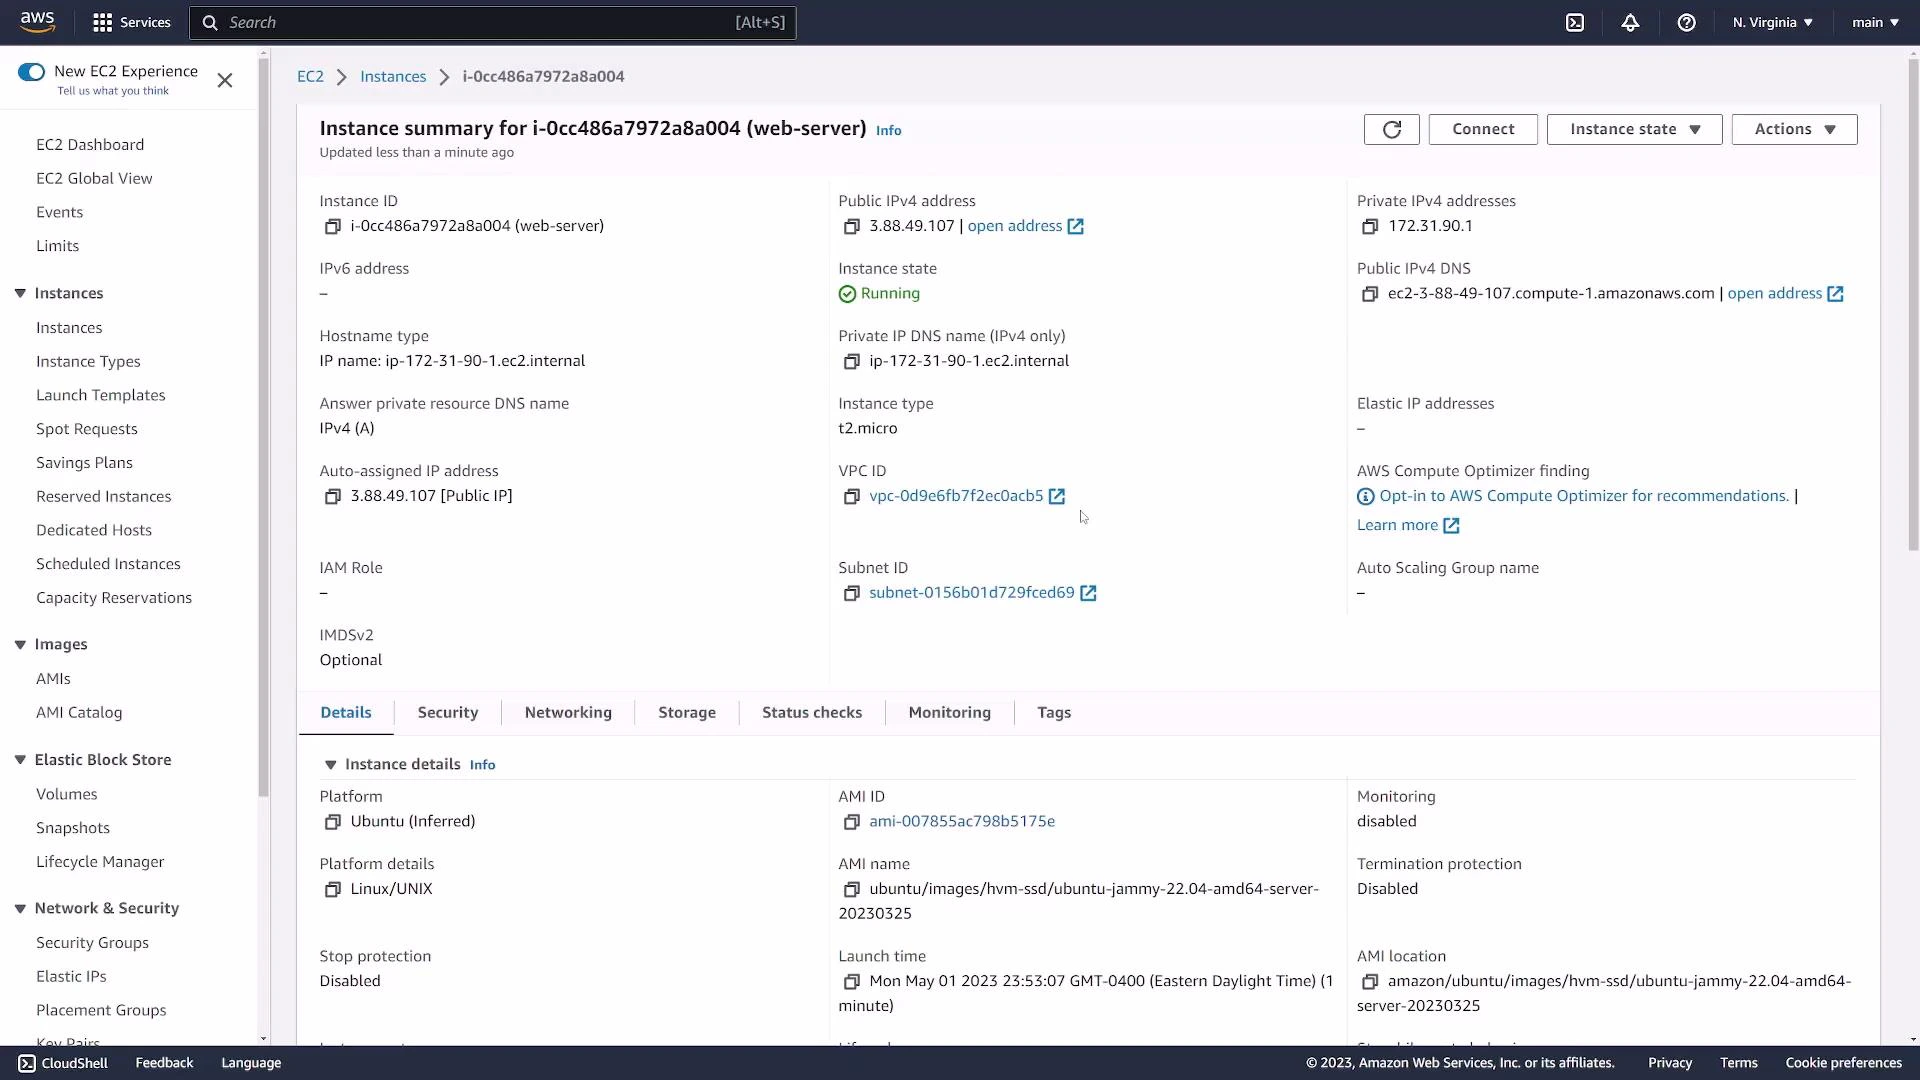
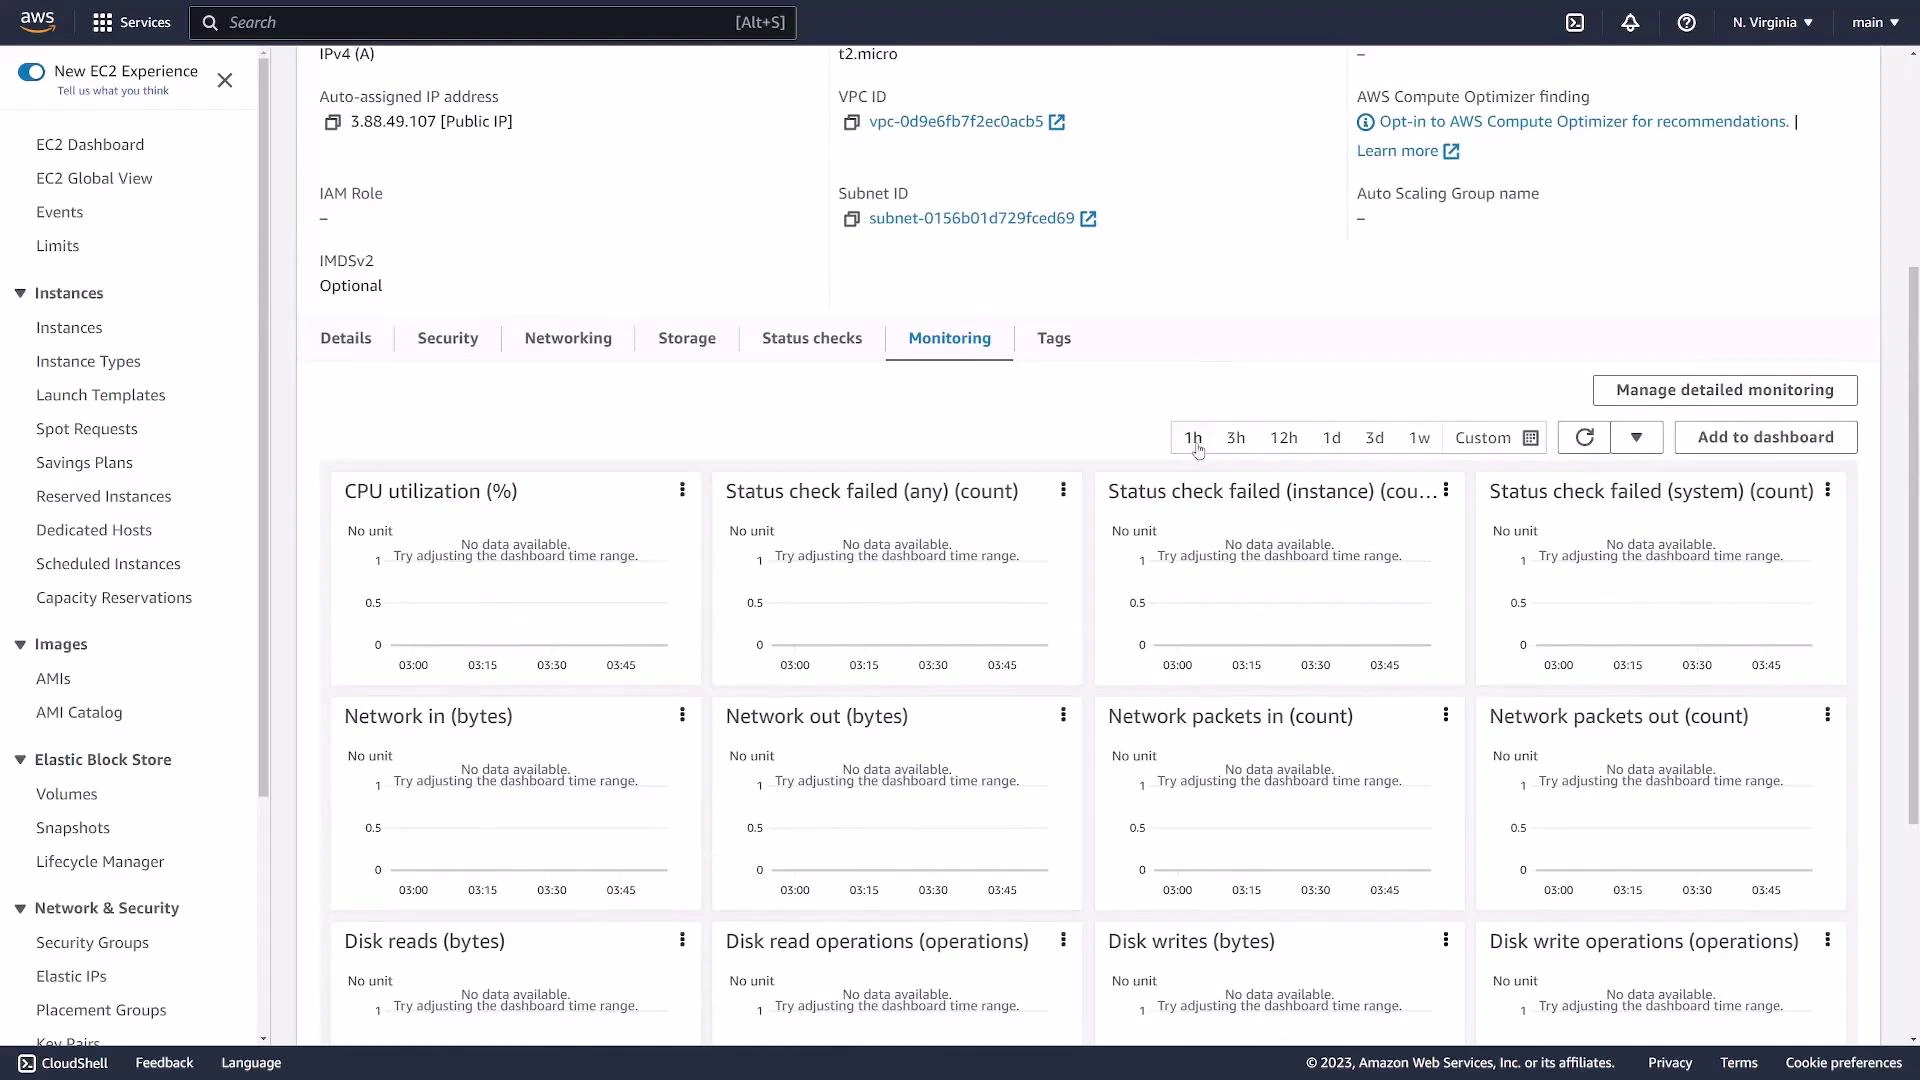
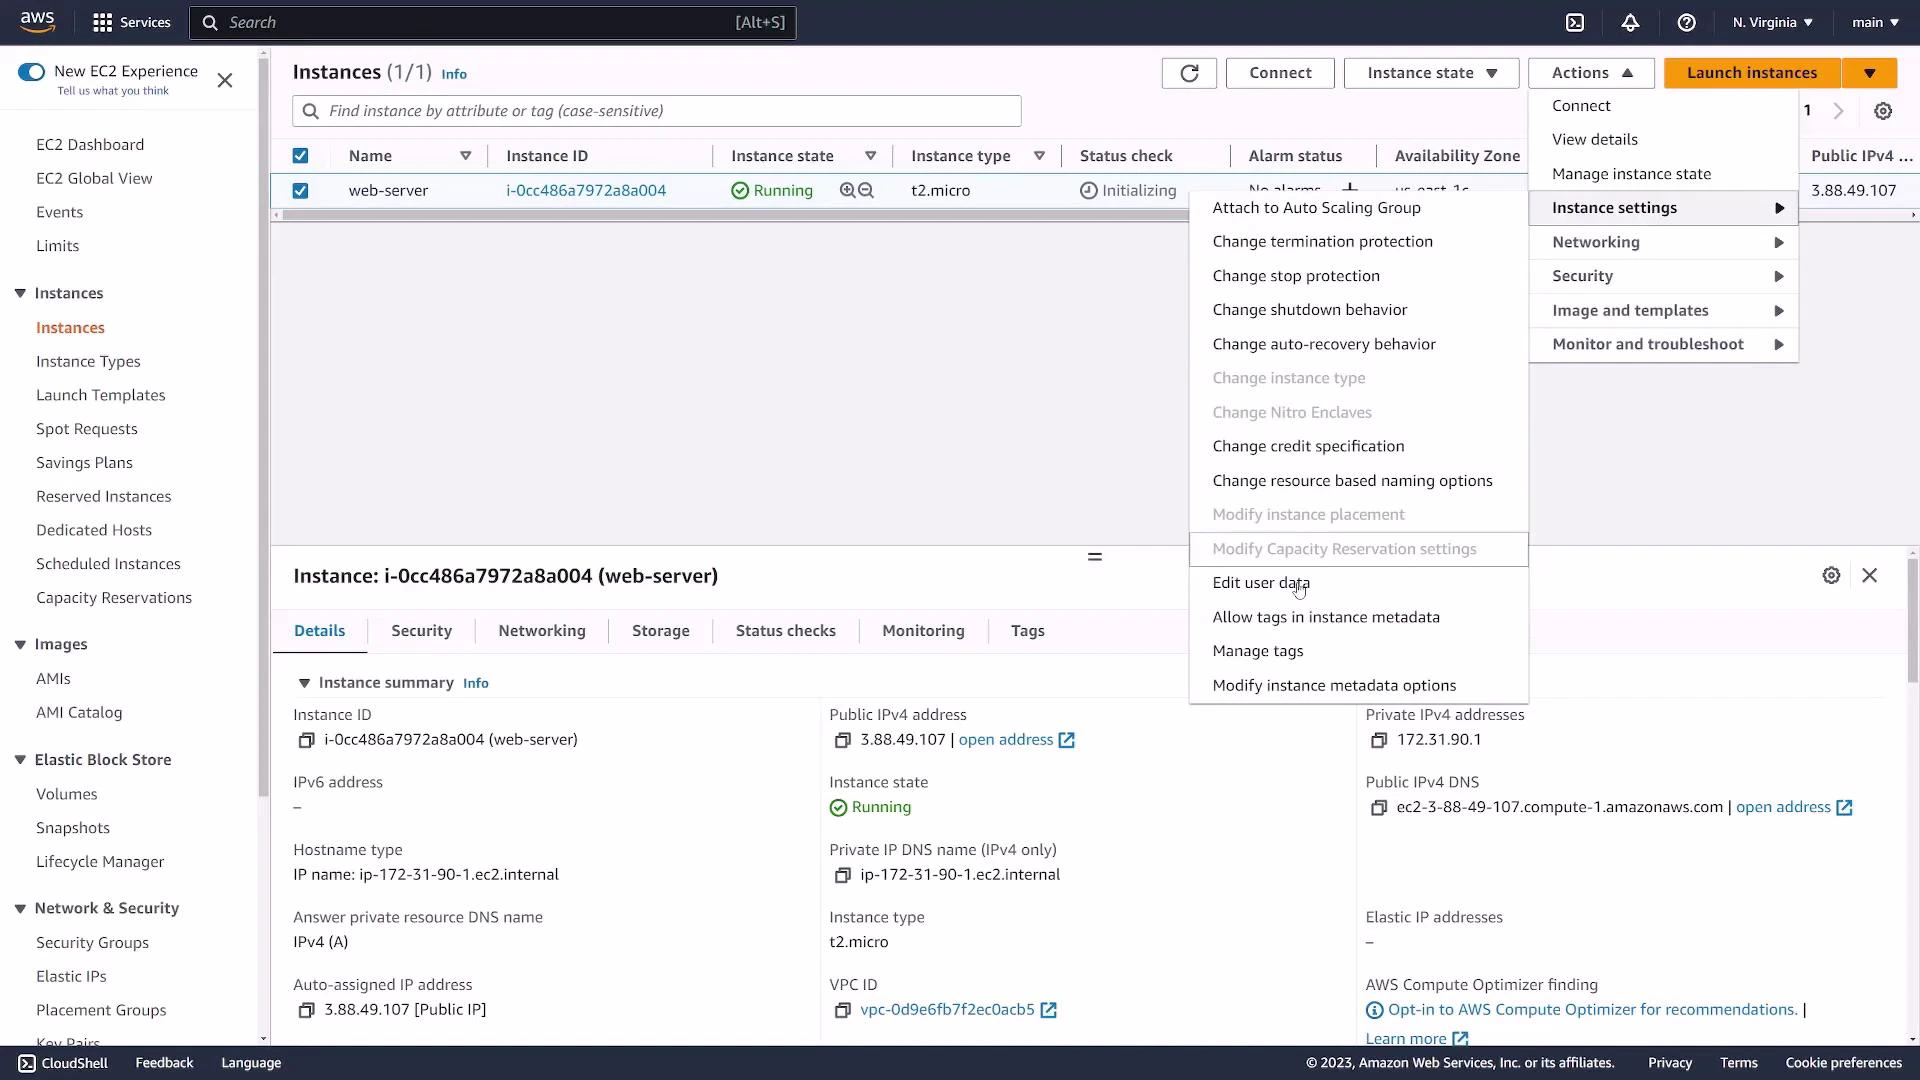
6. View instance details and settings
Click the instance ID to see fields such as:- Instance ID
- Public IPv4 address / Public DNS
- Private IPv4 address
- AMI used
- Key pair name
- Attached security group(s)
| Field | Why it matters | Example |
|---|---|---|
| Instance ID | Unique identifier for the EC2 instance | i-0cc486a7972a8a004 |
| Public IPv4 | Use for SSH or public access (if in a public subnet) | 3.88.49.107 |
| Public DNS | Alternate way to connect (resolves to the public IP) | ec2-3-88-49-107.compute-1.amazonaws.com |
| Key pair | Shows which key is allowed for SSH auth | ec2-demo |
| Security groups | Controls inbound/outbound traffic | launch-wizard-5 (sg-01c42ae4a41e45f7e) |
7. Connect via SSH
Requirements:- The private key file you downloaded (for example
ec2-demo.pem) - The instance Public IPv4 or Public DNS
- Correct username for the AMI (common defaults:
ubuntufor Ubuntu,ec2-userfor Amazon Linux,centosfor CentOS)
yes. A successful login will show a prompt such as:
If SSH fails, check:
- Security group inbound rules (SSH allowed from your IP).
- The username matches the AMI (e.g.,
ubuntu,ec2-user). - The private key file has restrictive permissions (
chmod 400 ec2-demo.pem).
8. Stop, reboot, or terminate
When finished, manage instance lifecycle via the Actions menu:- Stop: Graceful shutdown; you can start it later.
- Reboot: Restart the instance.
- Terminate: Permanently delete the instance and (usually) its attached root EBS volume, depending on the DeleteOnTermination setting.