In this lesson we’ll cover a core AWS networking concept: VPCs (Virtual Private Clouds). A VPC is a logically isolated, secure network you create in AWS. VPCs let you isolate resources so one customer’s resources cannot communicate with another’s. Within a single AWS account you can also isolate environments or applications by placing resources in separate VPCs. VPCs give you full control over networking in the cloud:
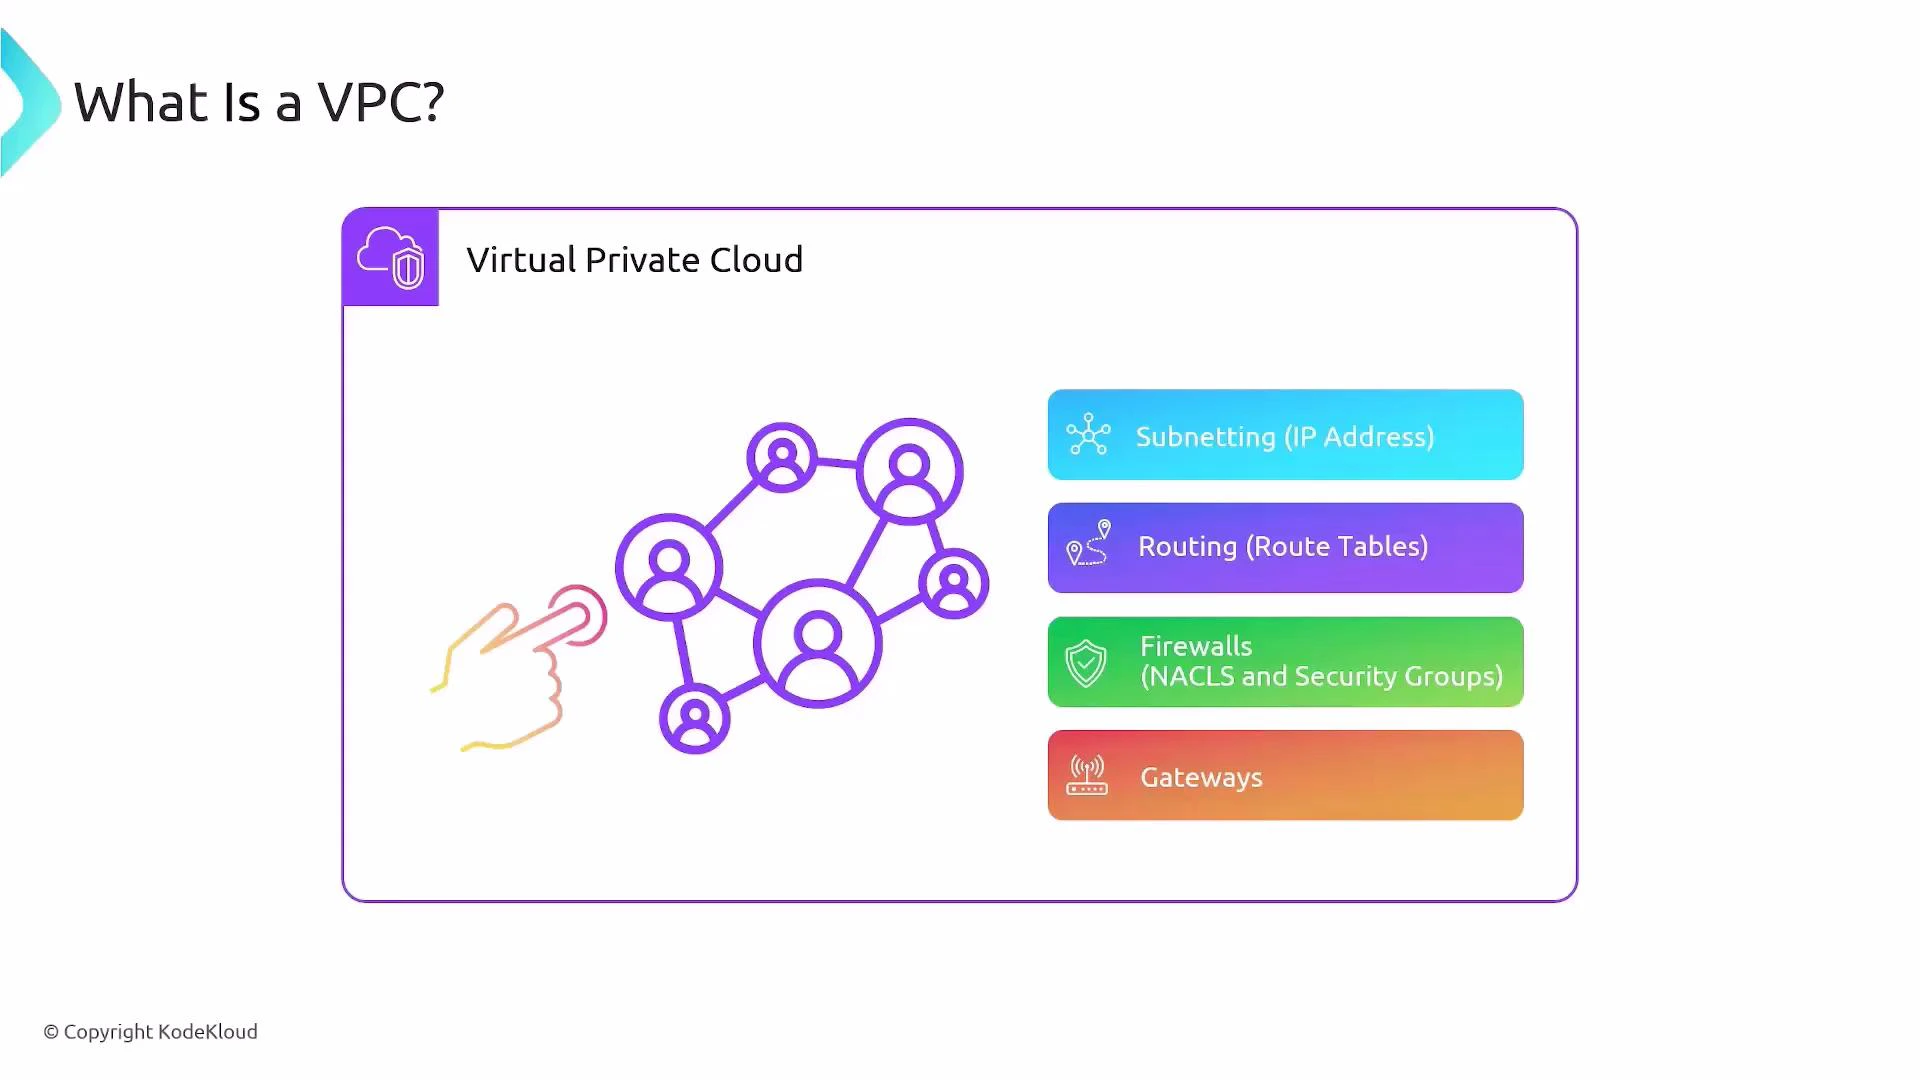
  • Subnetting — you choose the IP address ranges
  • Routing — route tables determine packet paths
  • Firewalls — Security Groups and Network ACLs control traffic
  • Gateways — Internet Gateways, NAT Gateways, Virtual Private Gateways, etc.
Conceptually this resembles managing on-premises routers, switches, and firewalls, but AWS streamlines and automates much of the operational work.
A slide titled "What Is a VPC?" illustrating a Virtual Private Cloud with a network/node icon and a finger tapping it, alongside a colored list of VPC components: Subnetting (IP Address), Routing (Route Tables), Firewalls (NACLs and Security Groups), and Gateways.

Key VPC characteristics

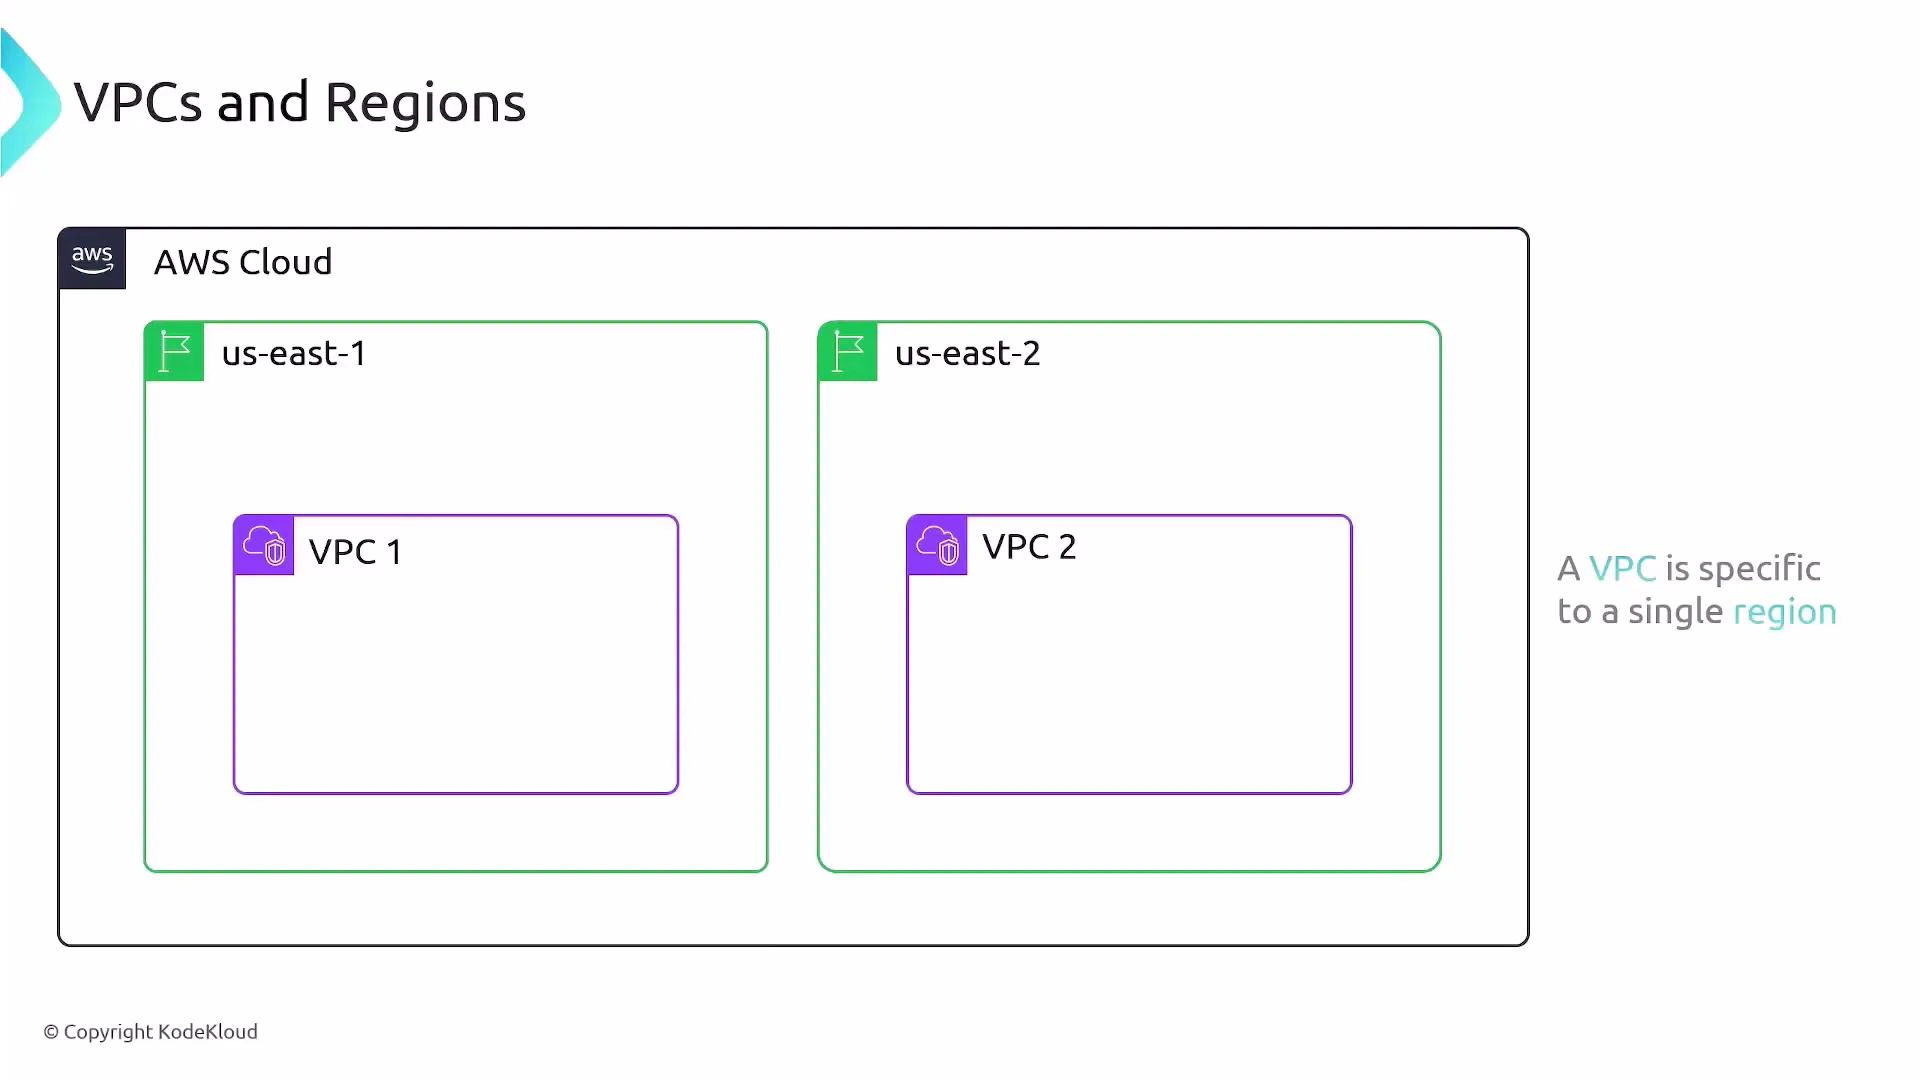
  • Region-scoped: a VPC exists in a single AWS region and cannot span regions. For example, a VPC in
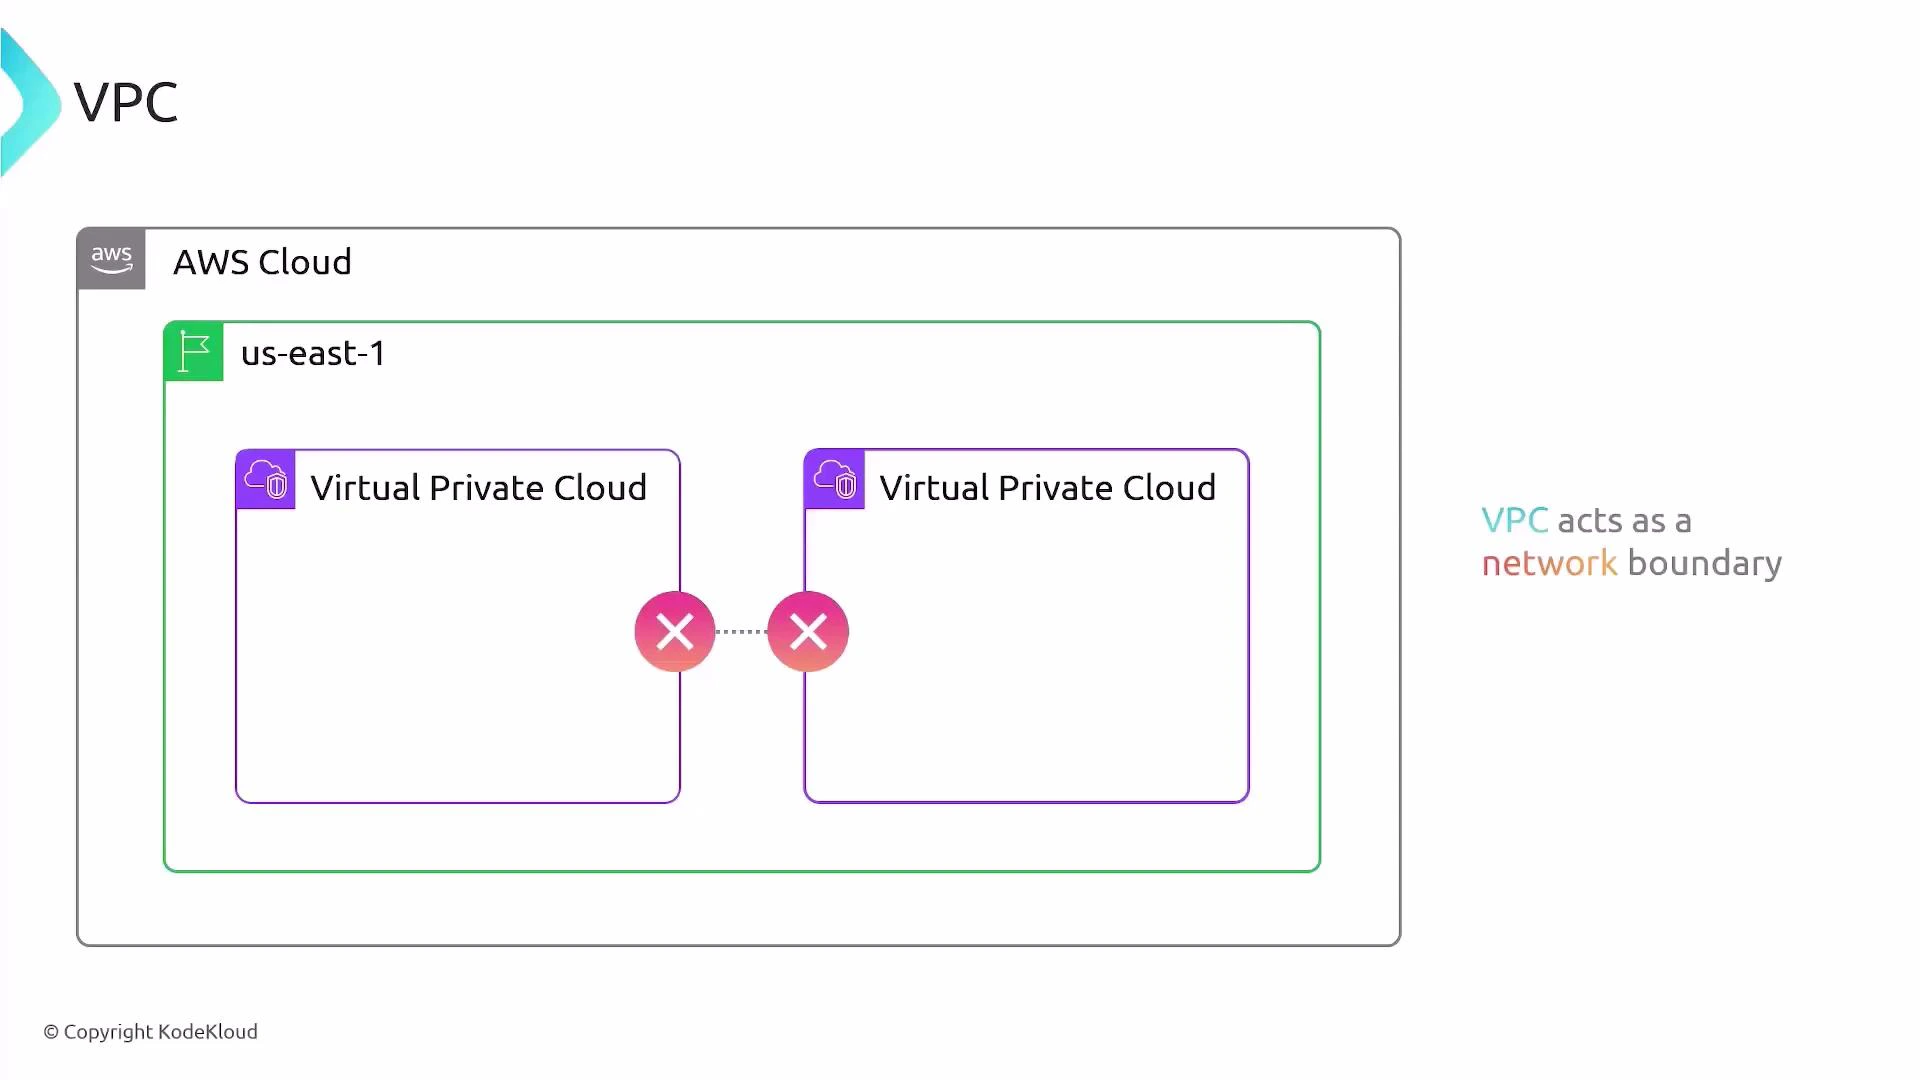
 us-east-1 is separate from a VPC in us-east-2.
  • Isolation by default: resources in different VPCs are isolated. You must explicitly enable connectivity (VPC Peering, Transit Gateway, or an internet gateway plus routing/security).
  • Control plane for networking: you design CIDR blocks, subnets, route tables, and firewall rules.
A diagram of the AWS Cloud showing two regions (us-east-1 and us-east-2), each containing its own VPC (VPC 1 and VPC 2). The image illustrates that a VPC is specific to a single region.
VPCs act as clear network boundaries. By default there is no routing between VPCs unless you configure peering, Transit Gateway, or other connectivity mechanisms.
A schematic of the AWS Cloud (us-east-1) showing two Virtual Private Clouds inside a region. It highlights that the VPC acts as a network boundary, with a blocked/disconnected connection between the two VPCs.
Each AWS region includes a default VPC created automatically. The default VPC typically uses the CIDR block 172.31.0.0/16, comes with default subnets (one per AZ), a default route table, and an Internet Gateway so you can launch instances with internet connectivity immediately.

Default VPC and default subnets

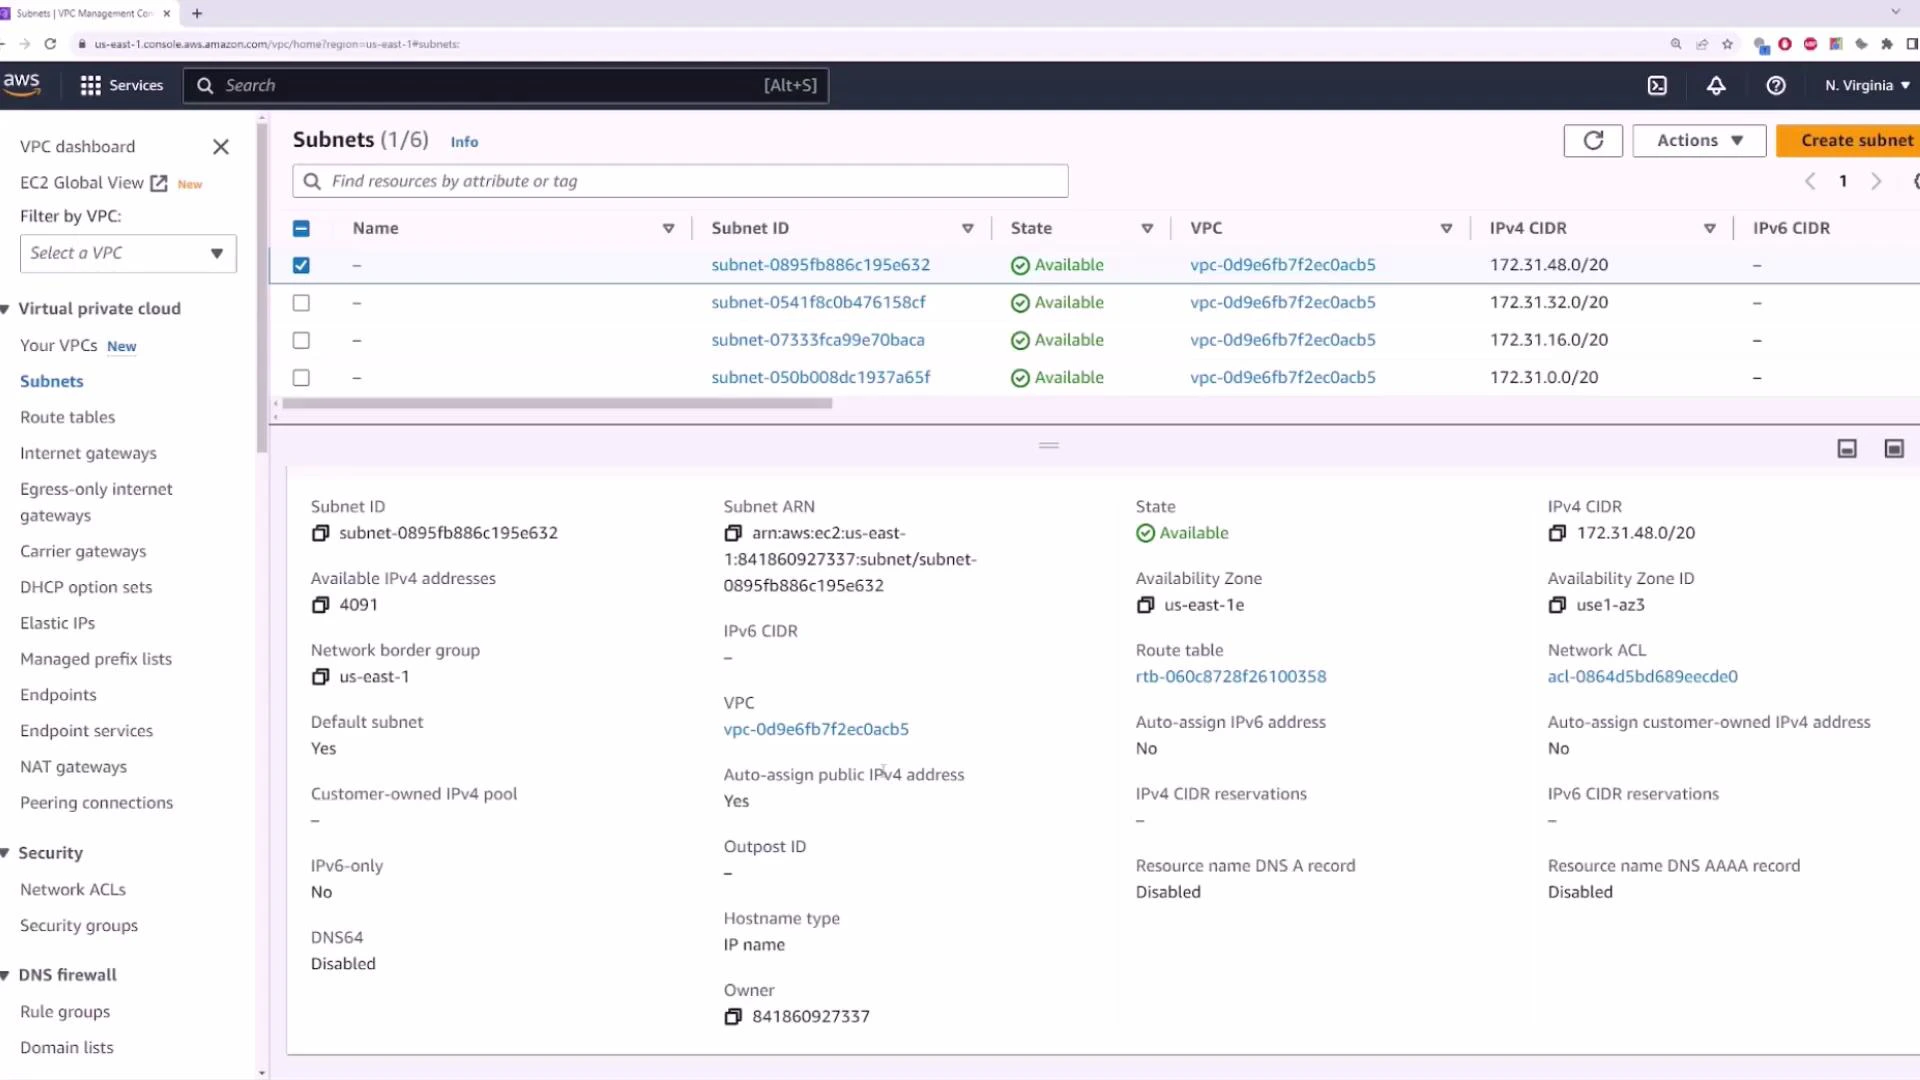
In a new AWS account you will see one default VPC per region. Each default VPC:
  • Uses 172.31.0.0/16 (by default)
  • Contains one default subnet per Availability Zone in the region
  • Has an Internet Gateway attached and a default route table that can route 0.0.0.0/0 to the IGW (if you configure subnets as public)
Use the VPC Console’s resource map and subnet list to visualize which subnets map to which AZs and which route tables are associated.
A screenshot of the AWS VPC (Virtual Private Cloud) Management Console showing the Subnets page with a list of subnet IDs, their state (Available) and IPv4 CIDR ranges. The lower pane displays detailed properties for the selected subnet (availability zone, route table, available IPs, etc.).

VPC components at a glance

ComponentPurposeAWS resource example
SubnetsSegment VPC CIDR into AZ-specific rangessubnet-xxxx
Route tablesControl routing for each subnetrtb-xxxx
Security groupsInstance-level firewall (stateful)sg-xxxx
Network ACLsSubnet-level firewall (stateless)acl-xxxx
Internet accessEnable Internet trafficInternet Gateway (igw-xxxx) or NAT Gateway
Cross-VPC connectivityConnect VPCs or on-premises networksVPC Peering, Transit Gateway, VPN Gateway

Internet access and public subnets

To enable internet connectivity for instances in a VPC you typically need:
  1. An Internet Gateway attached to the VPC.
  2. A route in the subnet’s route table directing 0.0.0.0/0 to the Internet Gateway.
  3. The instance in a subnet that auto-assigns public IPv4 addresses (or an Elastic IP attached).
  4. Security Group rules permitting the desired inbound/outbound traffic.

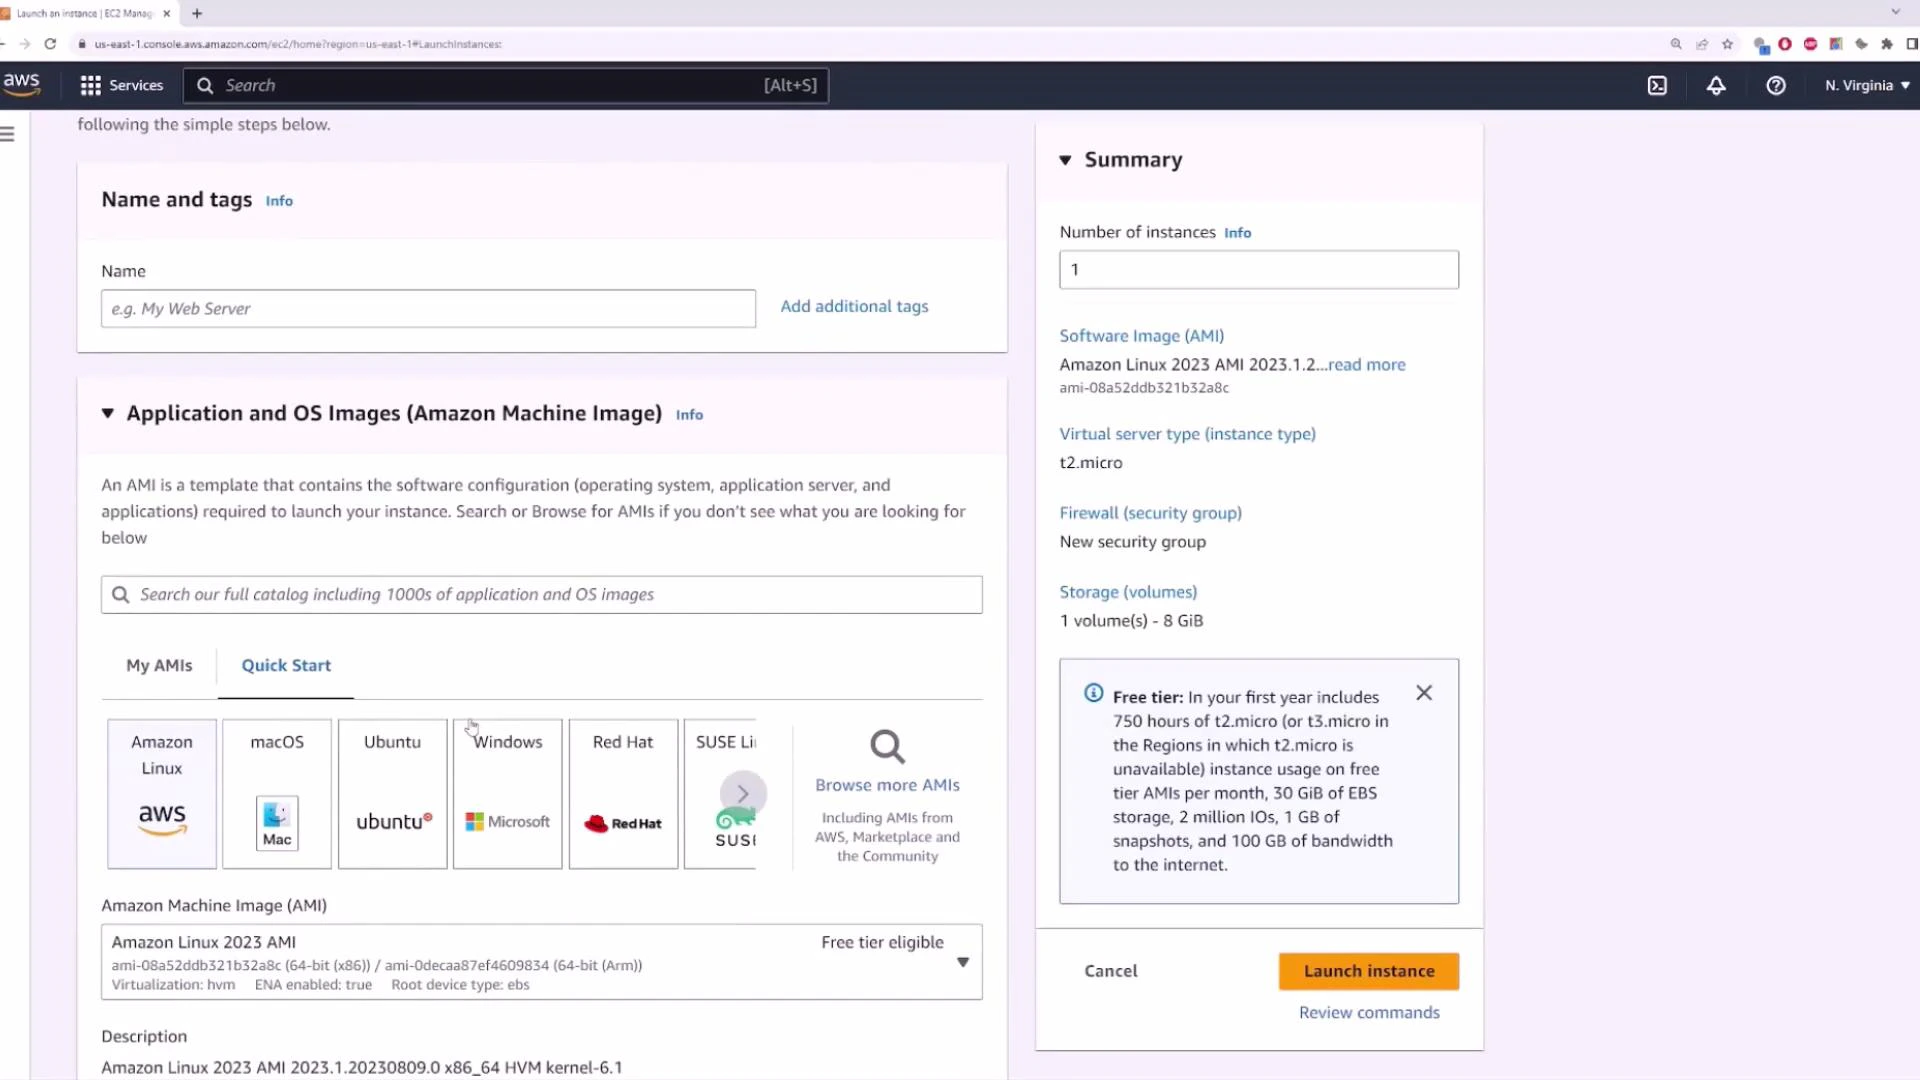
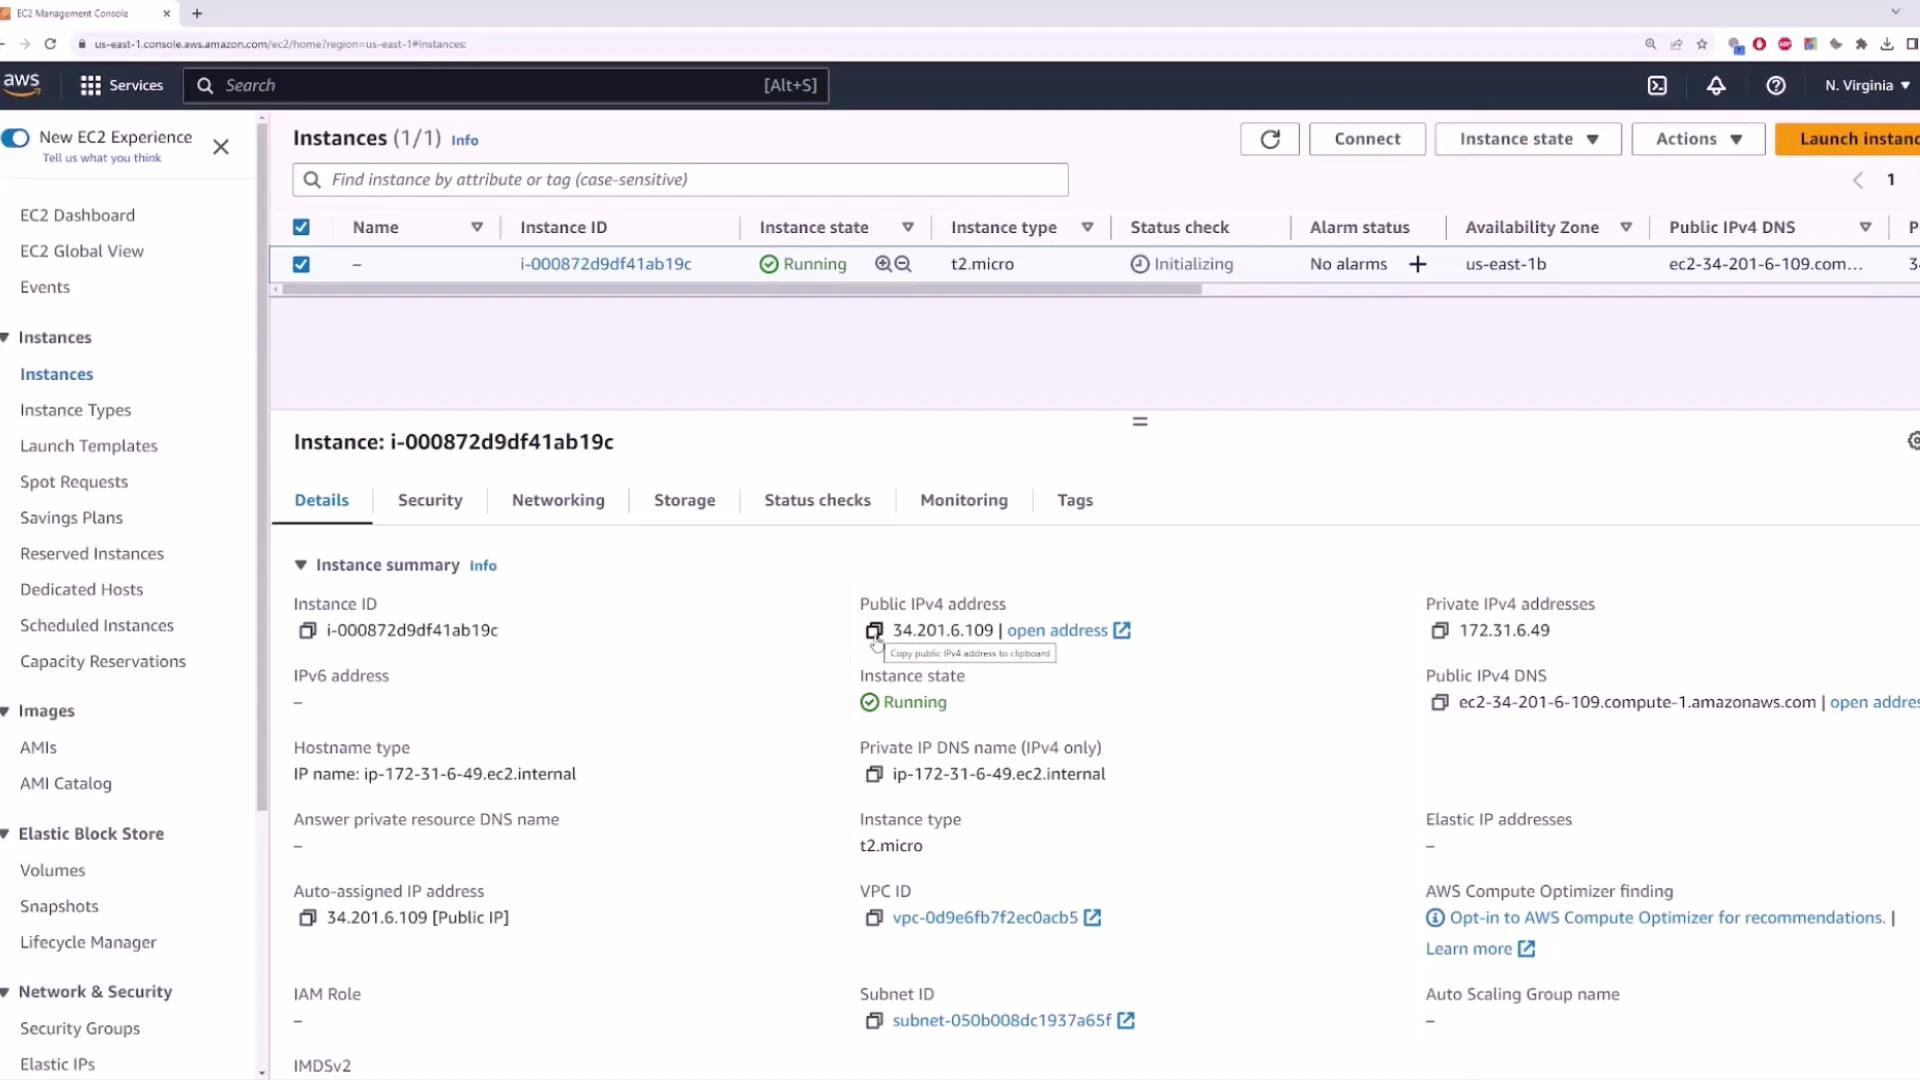
Example: Launching an EC2 instance into the default VPC

EC2 is the AWS service for virtual servers. Using the default VPC and default subnet settings lets you get an instance with internet access quickly. Steps in the EC2 Launch Wizard:
  • Choose an AMI (for example, Amazon Linux 2023)
  • Choose an instance type (e.g.,
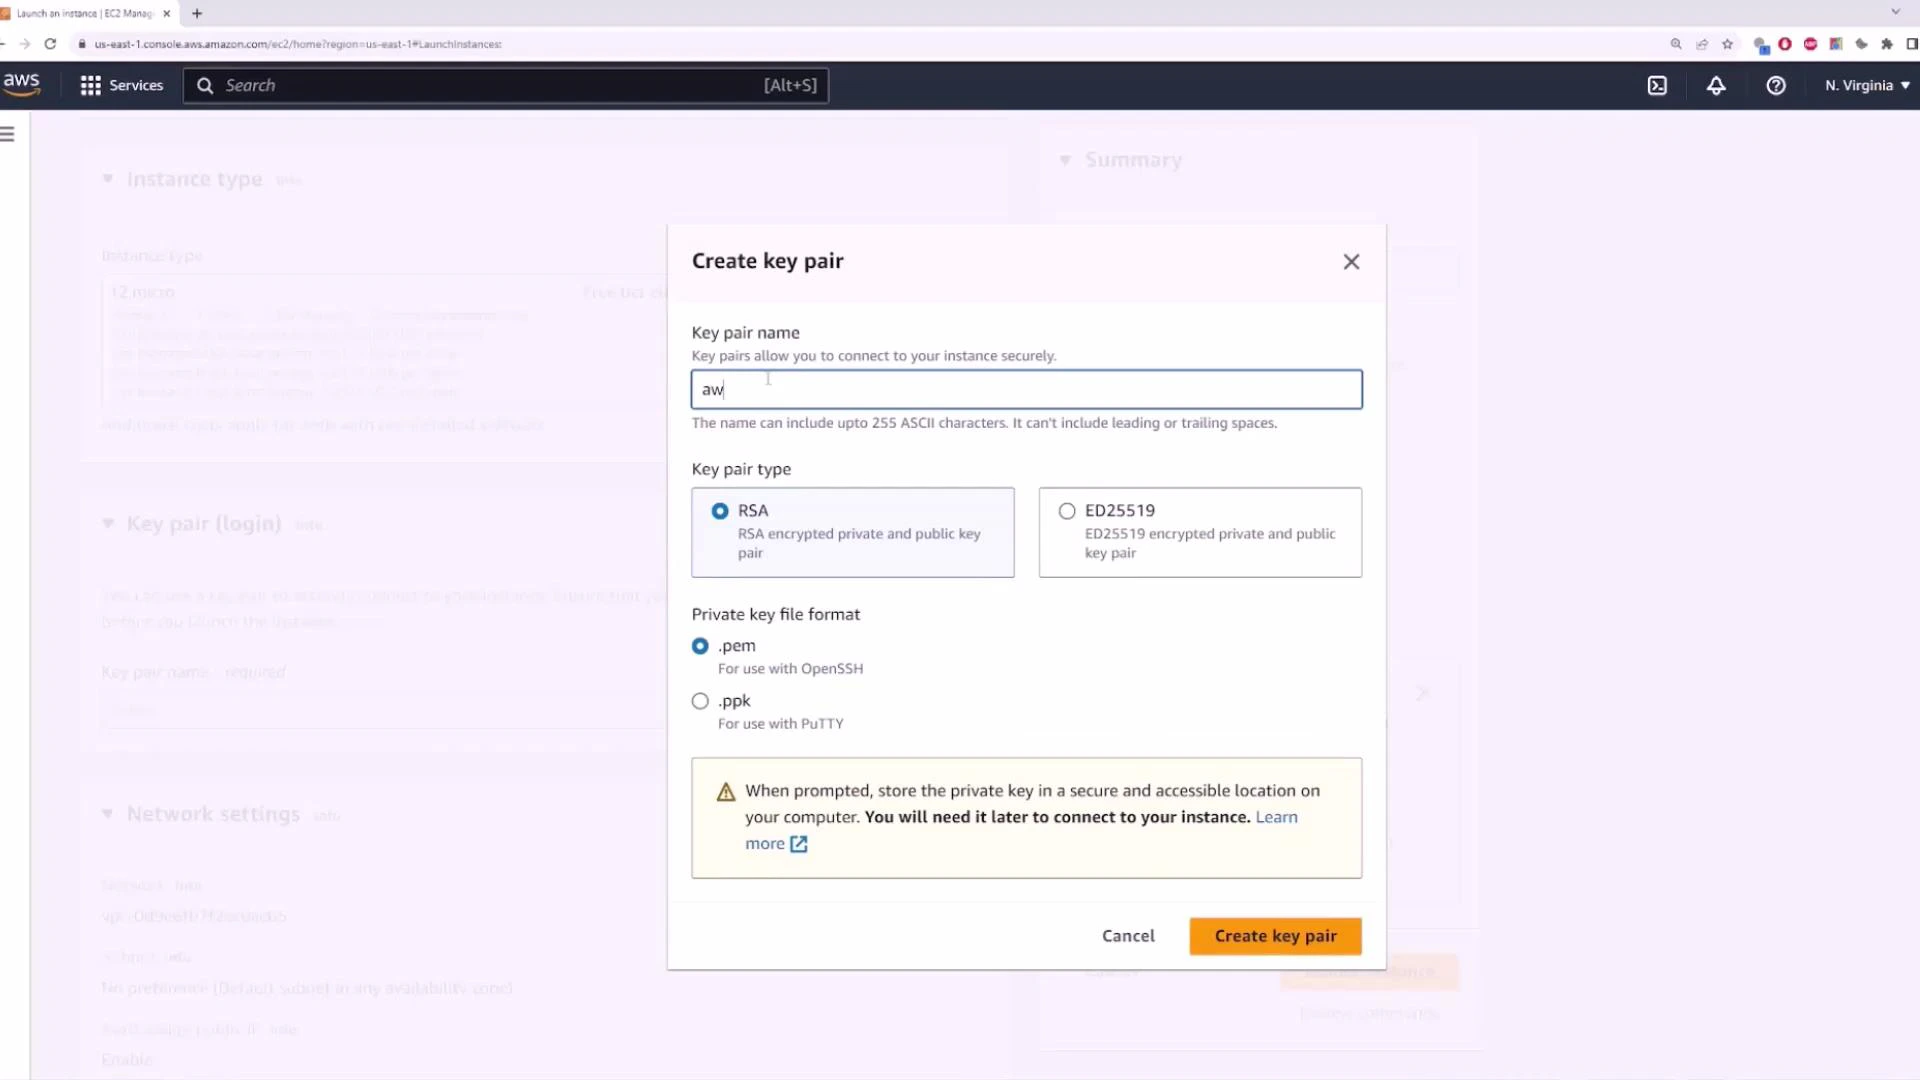
 t2.micro for free tier)
  • Create or select a key pair for SSH access (this downloads a
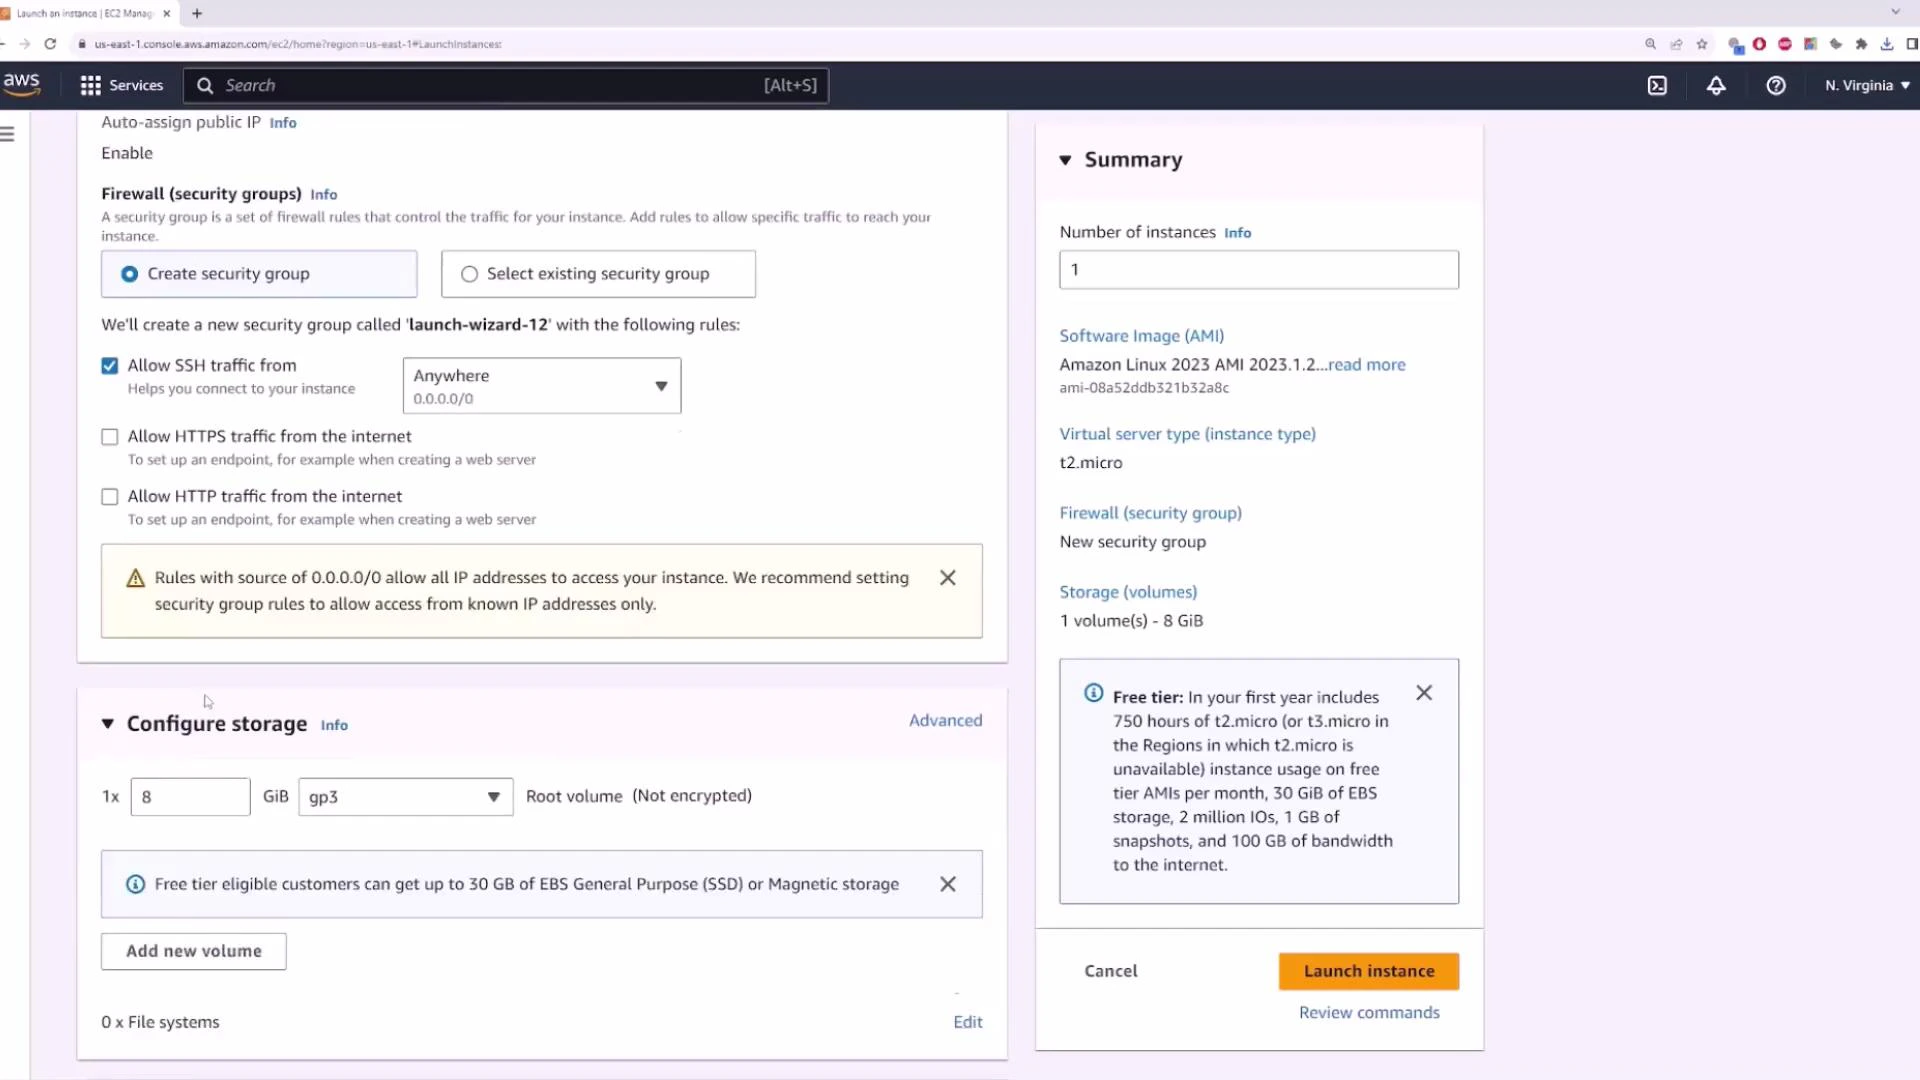
 .pem file)
  • Configure a Security Group (allow port 22 for SSH if you need remote access)
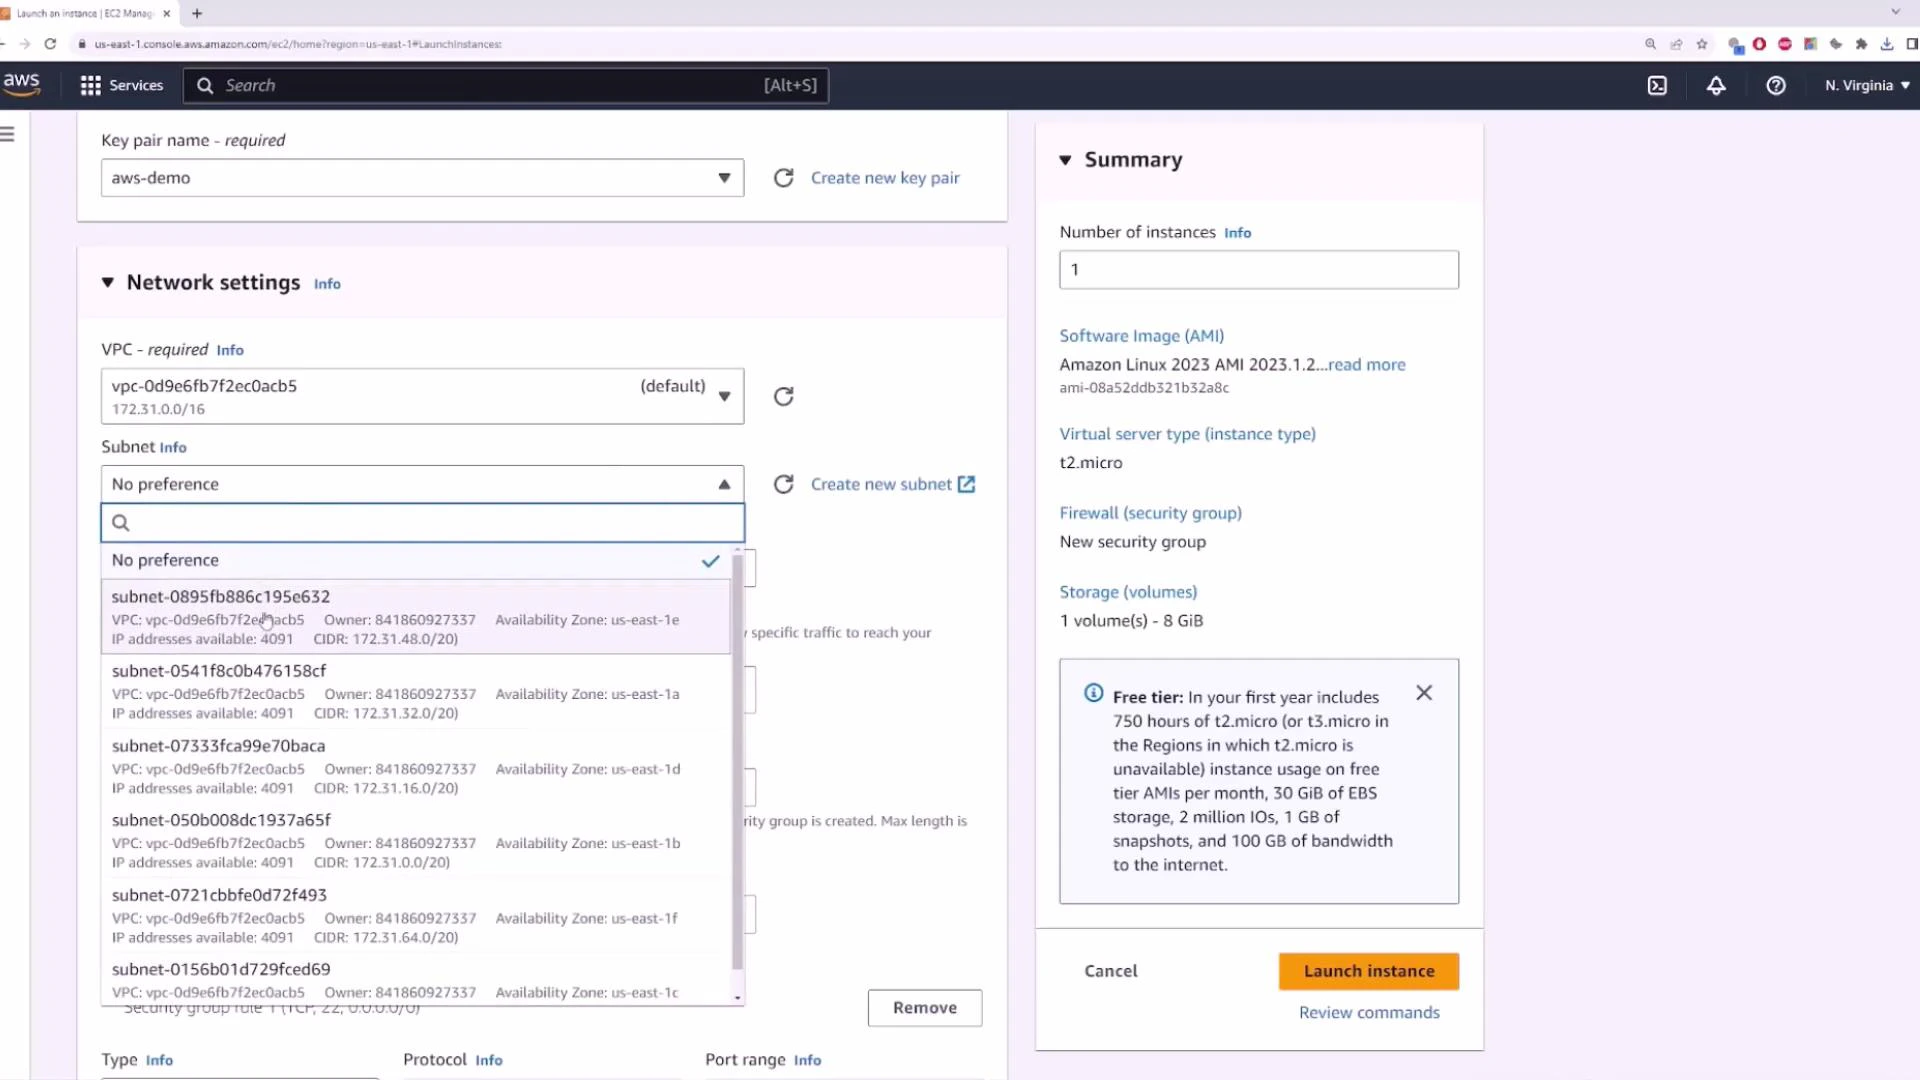
  • Select the default VPC and a default subnet (or leave subnet as “No preference”)
  • Enable Auto-assign Public IPv4 if you want the instance to receive a public IP
A screenshot of the AWS EC2 "Launch an instance" console showing the Name and tags field and the Application and OS Images (AMI) selection area on the left. On the right is a Summary panel with instance details (e.g., Amazon Linux 2023 AMI, t2.micro) and a "Launch instance" button.
When creating the key pair, pick a secure filename and download the .pem. You’ll use that to SSH into the instance.
A screenshot of the AWS Management Console showing the EC2 "Create key pair" dialog. It displays fields for the key pair name, options for RSA or ED25519, .pem or .ppk file formats, and a "Create key pair" button.
When configuring a Security Group for demo purposes you might allow SSH from anywhere (0.0.0.0/0), but for production restrict SSH to specific IP ranges.
For production workloads, never leave SSH open to the world. Restrict Security Group inbound rules to specific IP addresses or use a bastion host or AWS Systems Manager Session Manager for secure access.
A screenshot of the AWS EC2 "Launch an instance" console showing firewall (security group) options—specifically an SSH rule set to Anywhere (0.0.0.0/0)—along with storage configuration and a summary panel with a "Launch instance" button.
Make sure the instance is assigned to the default VPC (for example, a VPC ID ending in ACB5) and confirm Auto-assign Public IPv4 is enabled if you want the instance to receive a public IP automatically.
A web browser screenshot of the AWS EC2 "Launch an instance" console showing Network settings with a subnet selection dropdown, and a Summary panel on the right listing AMI, instance type, security group, storage, and a "Launch instance" button.
After launching, the instance appears in the EC2 Instances list. You will see:
  • Instance ID (e.g., i-000872d9df41ab19c)
  • Instance type (e.g., t2.micro)
  • Private IP from the subnet (e.g., 172.31.6.49)
  • Public IP if auto-assigned (e.g., 34.201.6.109)
A screenshot of the AWS EC2 Management Console showing details for a running EC2 instance. It displays the instance ID (i-000872d9df41ab19c), instance type (t2.micro), and IP addresses (public 34.201.6.109, private 172.31.6.49).
You can SSH into the instance using the PEM key you downloaded. Example Windows (PowerShell or CMD) session:
Microsoft Windows [Version 10.0.19045.3324]
(c) Microsoft Corporation. All rights reserved.

C:\Users\sanje\Documents\scratch\aws-demo>ssh -i aws-demo.pem ec2-user@34.201.6.109
The authenticity of host '34.201.6.109 (34.201.6.109)' can't be established.
ECDSA key fingerprint is SHA256:faOCPuUMP2Fvn9aHeAewW56Eei94znaTnFefIDRDg1mE.
Are you sure you want to continue connecting (yes/no/[fingerprint])? yes
Warning: Permanently added '34.201.6.109' (ECDSA) to the list of known hosts.
  ,        #_
  ~\_    ####_
  ~~\__#####\
  ~~  \####|
  ~~    \#/
  ~~     \/__    https://aws.amazon.com/linux/amazon-linux-2023
    \- ' ' ->
[ec2-user@ip-172-31-6-49 ~]$ ping -c 4 8.8.8.8
PING 8.8.8.8 (8.8.8.8) 56(84) bytes of data.
64 bytes from 8.8.8.8: icmp_seq=1 ttl=116 time=20.1 ms
64 bytes from 8.8.8.8: icmp_seq=2 ttl=116 time=19.8 ms
64 bytes from 8.8.8.8: icmp_seq=3 ttl=116 time=19.9 ms
64 bytes from 8.8.8.8: icmp_seq=4 ttl=116 time=19.7 ms

--- 8.8.8.8 ping statistics ---
4 packets transmitted, 4 received, 0% packet loss, time 3003ms
rtt min/avg/max/mdev = 19.700/19.875/20.100/0.160 ms
This SSH session and successful ping to 8.8.8.8 demonstrate that an instance launched into the default VPC (with an Internet Gateway and a public IP) can reach the internet and is reachable from the internet, subject to Security Group rules. If you’re new to EC2, this example simply shows the default VPC behavior: an Internet Gateway attached to the VPC, a default route table, one default subnet per AZ, and the option to auto-assign public IPv4 addresses so instances can communicate with the internet quickly.

Watch Video

Practice Lab