DevSecOps - Kubernetes DevOps & Security

DevOps Pipeline

Demo Create Azure VM

In this hands-on guide, you'll learn how to provision an Azure Virtual Machine (VM) using an ARM template and a parameters file from your cloned repository. After deployment, you’ll be ready to install and configure the necessary software on your VM.

Prerequisites

  • An active Azure subscription
  • A cloned repository containing:
    • setup/Azure-VM-templates/template.json
    • setup/Azure-VM-templates/parameters.json
  • A code editor (e.g., Visual Studio Code, Sublime Text)

1. Review the ARM Template

Open template.json in your editor. This ARM template declares resources for:

  • A virtual network and subnet
  • A network interface (NIC) with accelerated networking
  • A network security group (NSG) with inbound rules
  • A virtual machine instance
{
  "$schema": "https://schema.management.azure.com/schemas/2015-01-01/deploymentTemplate.json#",
  "contentVersion": "1.0.0.0",
  "parameters": {
    "location": { "value": "eastus" },
    "networkInterfaceName": { "value": "devsecops-cloud801" },
    "enableAcceleratedNetworking": { "value": true },
    "networkSecurityGroupName": { "value": "devsecops-cloud-nsg" },
    "networkSecurityGroupRules": {
      "value": [
        {
          "name": "allow-all",
          "properties": {
            "priority": 100,
            "protocol": "*",
            "access": "Allow",
            "direction": "Inbound",
            "sourceAddressPrefix": "*",
            "sourcePortRange": "*",
            "destinationAddressPrefix": "*",
            "destinationPortRange": "*"
          }
        },
        {
          "name": "default-Allow-ssh",
          "properties": {
            "priority": 1000,
            "protocol": "TCP",
            "access": "Allow",
            "direction": "Inbound",
            "sourceAddressPrefix": "*",
            "sourcePortRange": "*",
            "destinationAddressPrefix": "*",
            "destinationPortRange": "22"
          }
        }
      ]
    }
  }
}

Note

The NSG rules allow all traffic and restrict SSH to port 22. Adjust priorities and prefixes to tighten security.

Parameters File

Inspect parameters.json to see all values you’ll supply during deployment:

{
  "$schema": "https://schema.management.azure.com/schemas/2019-04-01/deploymentParameters.json#",
  "contentVersion": "1.0.0.0",
  "parameters": {
    "location": { "value": null },
    "networkInterfaceName": { "value": null },
    "enableAcceleratedNetworking": { "value": null },
    "networkSecurityGroupName": { "value": null },
    "networkSecurityGroupRules": { "value": null },
    "subnetName": { "value": null },
    "virtualNetworkName": { "value": null },
    "addressPrefixes": { "value": null },
    "subnets": { "value": null }
  }
}

All required parameters are declared; you will populate them in the Azure portal.

2. Deploy via Azure Portal

  1. Sign in to the Azure portal.
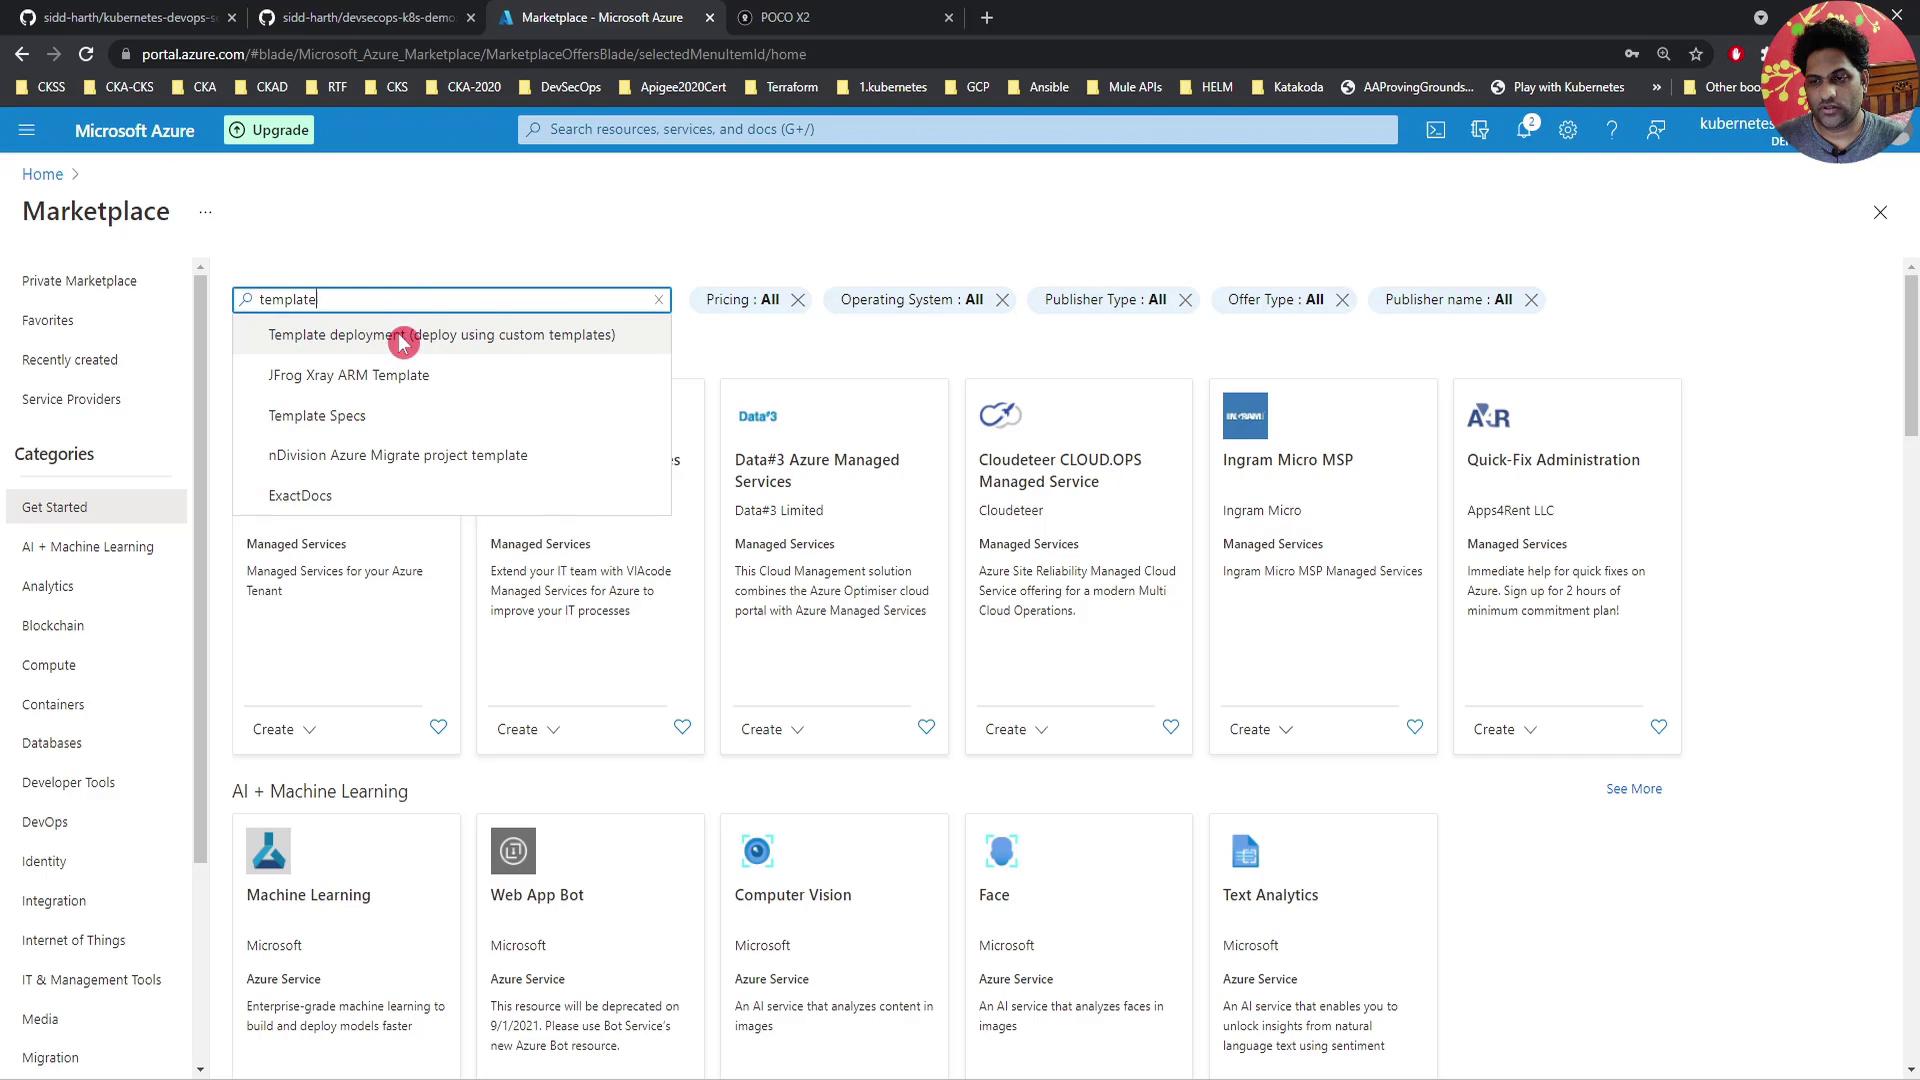
  2. In the top search bar, type Marketplace and select Marketplace.
  3. Search for template, then choose Deploy a custom templateCreate.

The image shows the Microsoft Azure Marketplace interface with a search for "template" and various managed services and AI tools listed. There is also a video call thumbnail in the top right corner.

  1. In the Custom deployment blade, click Build your own template in the editor.

The image shows a Microsoft Azure portal page for custom deployment, where users can select a template and fill in project and instance details. There is also a small video overlay of a person in the bottom right corner.

  1. Click Load file, browse to template.json in your repo, and upload it. Then Save.
  2. Select Edit parameters, choose Load file, upload parameters.json, and Save. All parameter fields will appear for you to review.
  3. Under Basics, configure:
    • Subscription: Your Azure subscription
    • Resource group: Create a new group, e.g., DevSecOps-group
    • Region: Inherited from the template

The image shows a Microsoft Azure portal page for custom deployment, with fields for subscription, resource group, and instance details. There is also a small video call window in the top right corner.

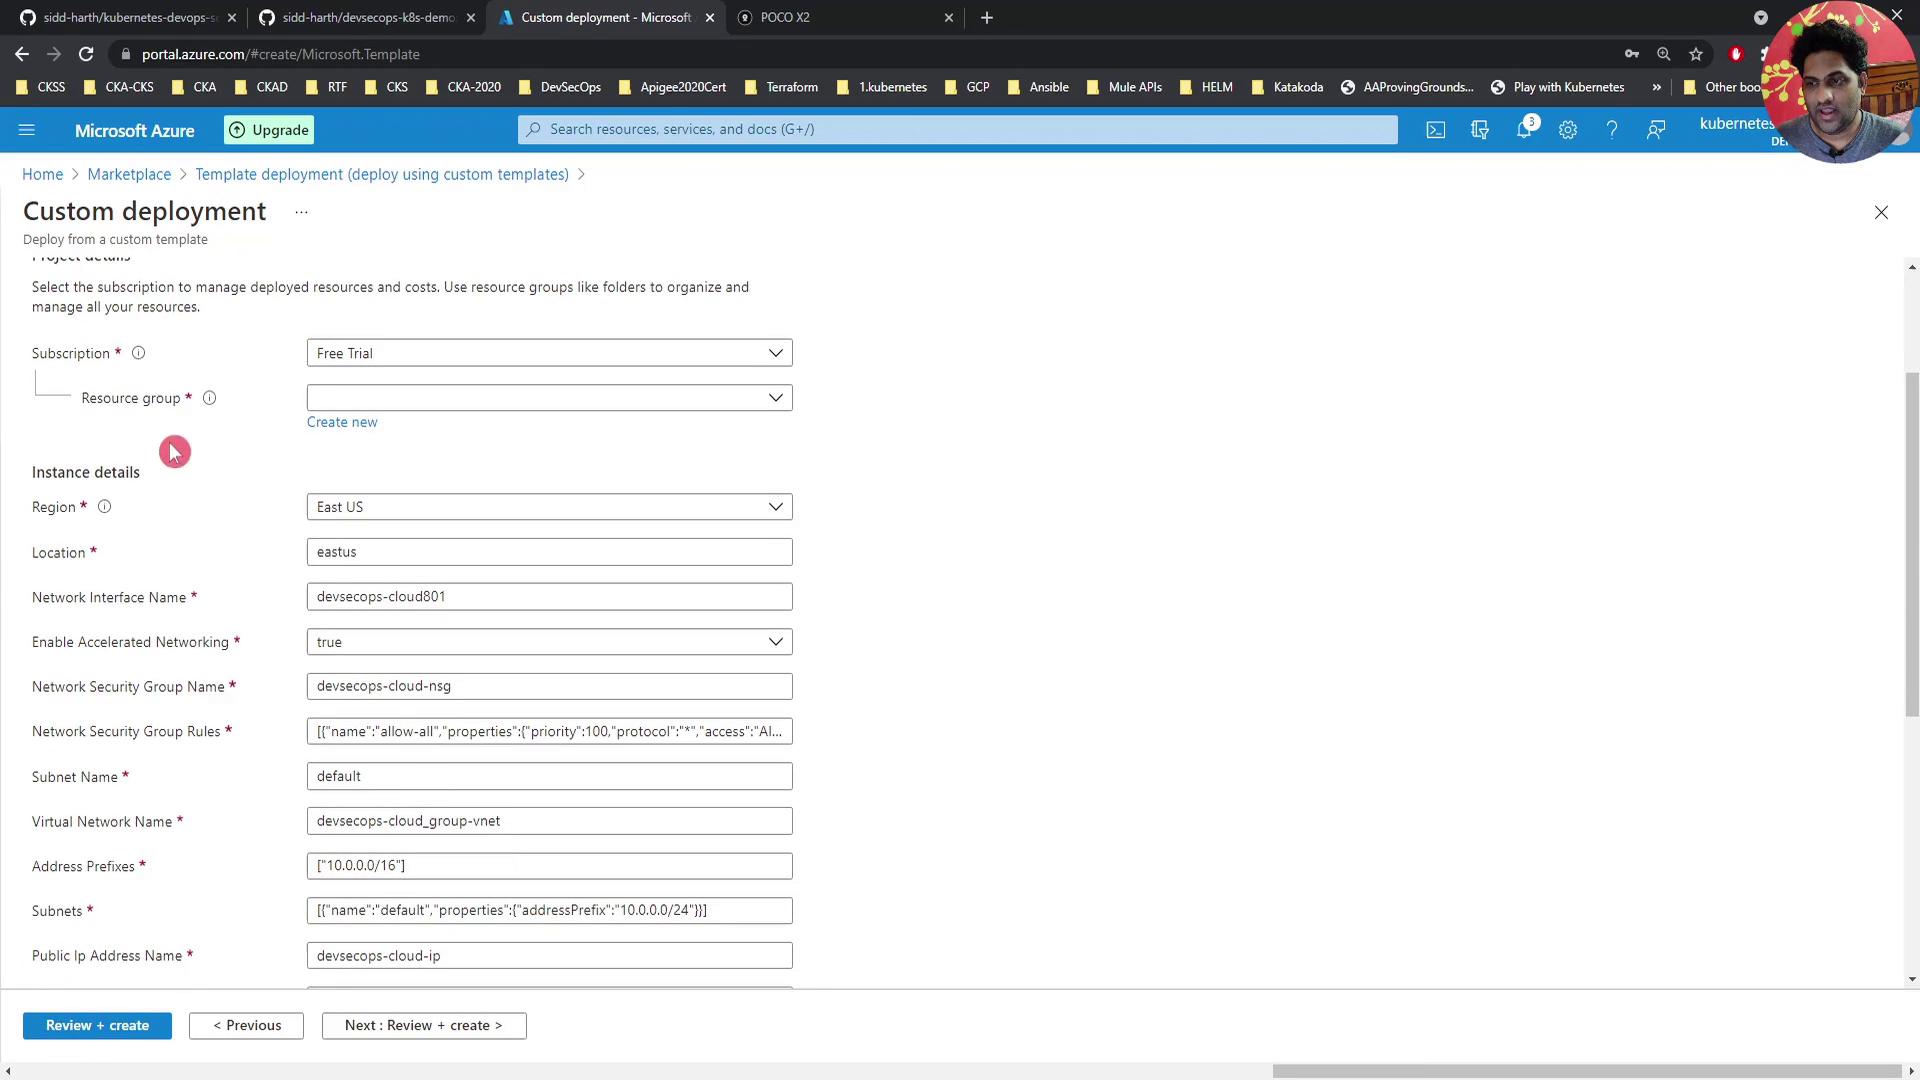
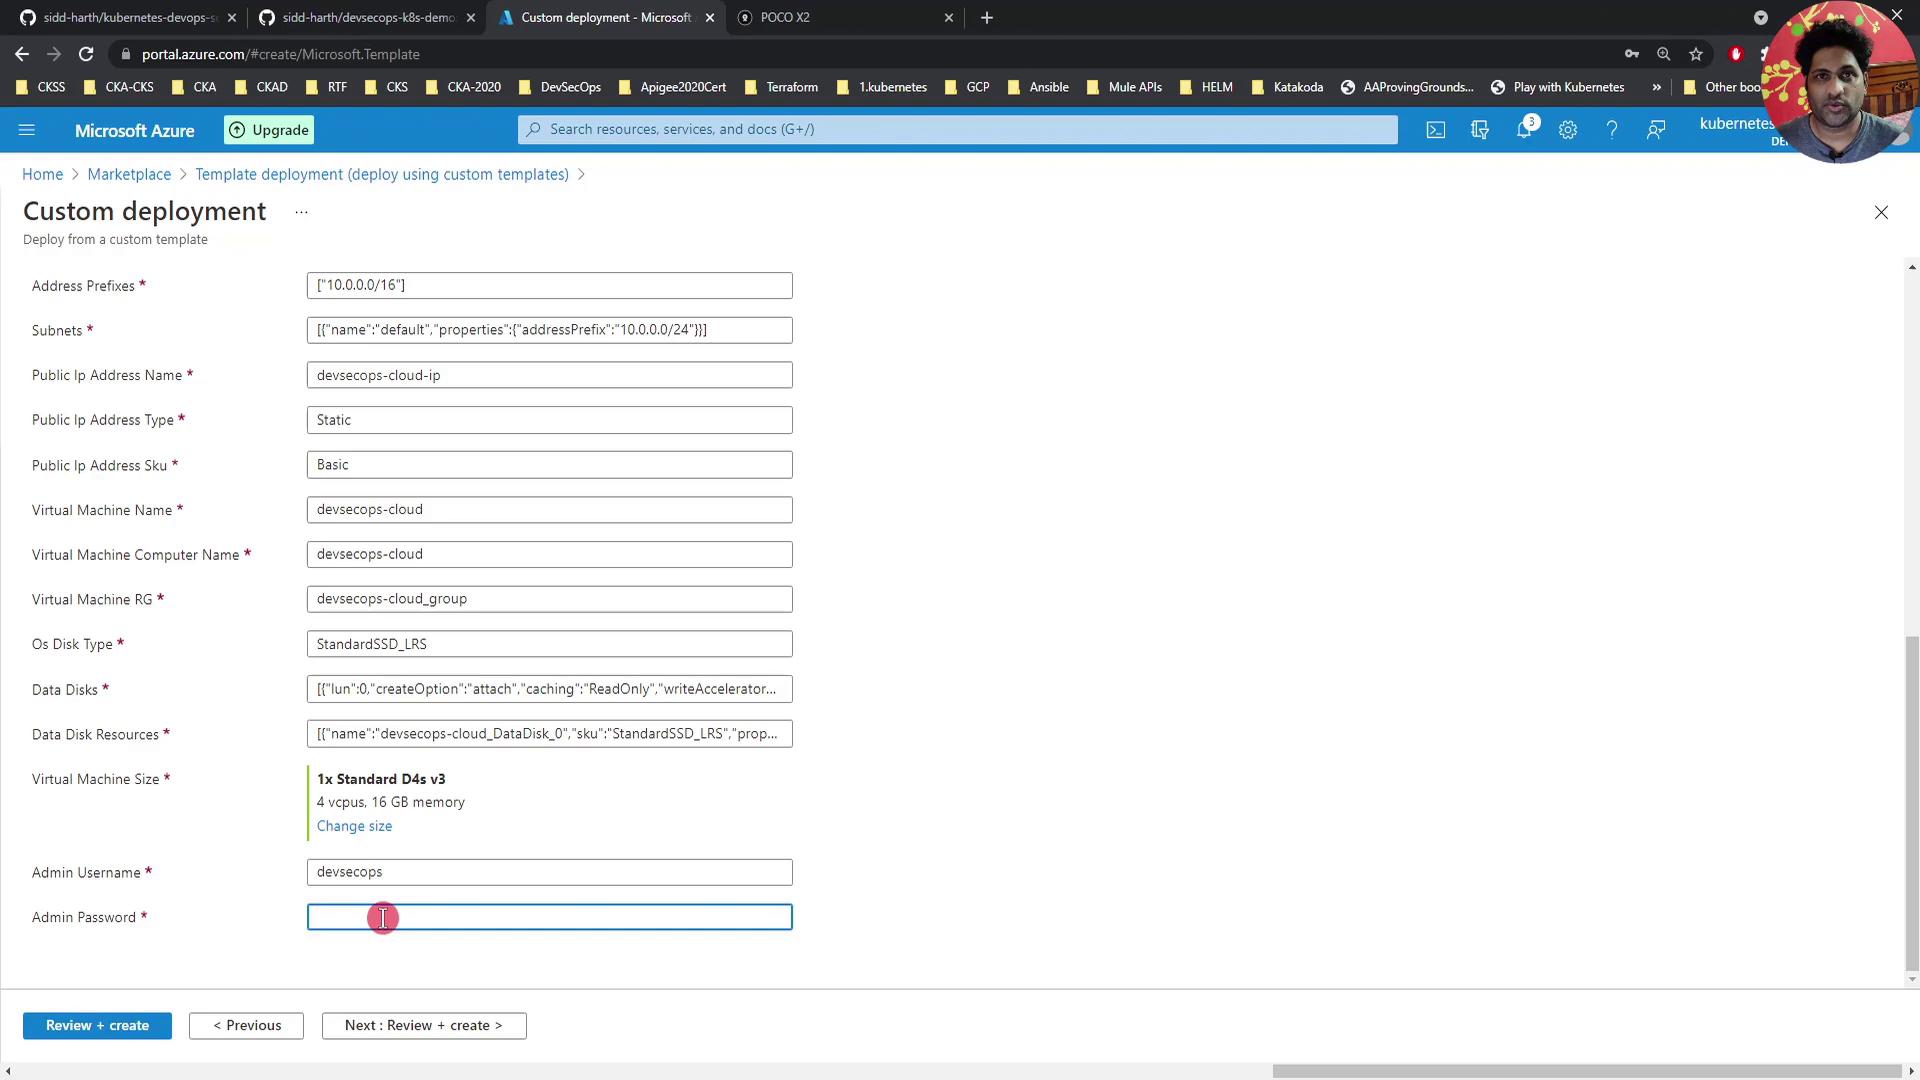
  1. Scroll to Instance details and set:
    • Size: Standard (4 vCPUs, 16 GB RAM)
    • Admin username: DevSecOps (or your choice)
    • Authentication type: Password
    • Admin password: Use a strong, unique password

The image shows a Microsoft Azure portal page for custom deployment, with fields for configuring network and virtual machine settings. A user is filling in details such as address prefixes, subnets, and virtual machine specifications.

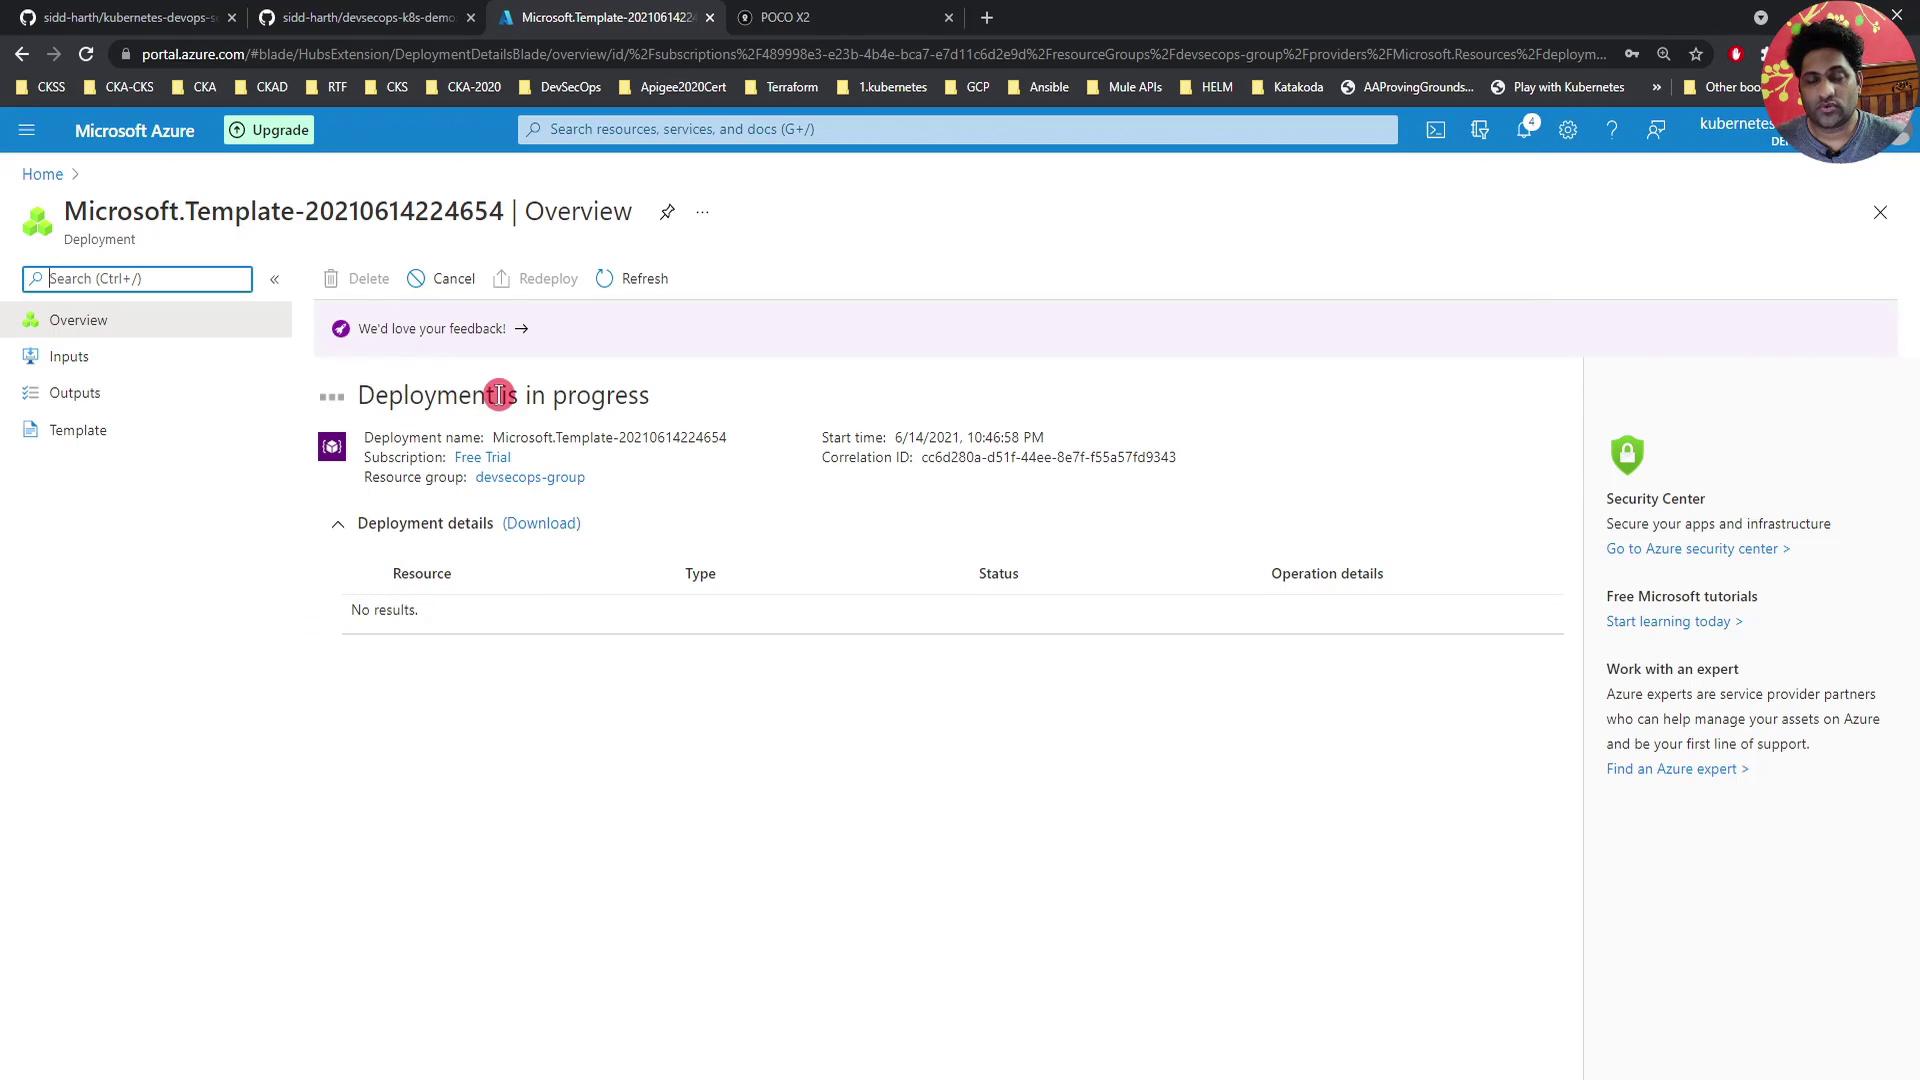
  1. Click Review + create, verify your settings, and then Create. Azure will validate and begin provisioning:
    • Virtual Network and subnet
    • NIC with accelerated networking
    • NSG with rules
    • VM instance

The image shows a Microsoft Azure portal screen with a deployment in progress for a template named "Microsoft.Template-20210614224654." The deployment is associated with a free trial subscription and a resource group named "devsecops-group."

Deployment usually completes within a few minutes. When it's done, SSH into your VM:

ssh DevSecOps@<public-ip-address>

Resource Summary

Resource TypeNamePurpose
Virtual Network & SubnetDefined in ARM templateNetworking backbone
Network Interface (NIC)devsecops-cloud801Connects VM to the subnet
Network Security Group (NSG)devsecops-cloud-nsgControls inbound traffic
Virtual MachineSpecified in parametersCompute instance for development & tests

Next Steps

Once the VM is running, you can:

  • Install Docker, Kubernetes tools, or other required software
  • Configure monitoring and backups
  • Extend your ARM template to include additional Azure resources

Enjoy your new Azure VM!

Watch Video

Watch video content

Previous
Demo Create Free Azure Account