GitHub Actions
Continuous Integration with GitHub Actions
ArchiveStore Unit Test Reports
Introduction
In this guide, you’ll learn how to archive Mocha unit test reports (JUnit XML) using GitHub Actions’ upload-artifact action. By the end, you’ll be able to:
- Generate a JUnit-style
test-results.xmllocally with Mocha. - Configure a reusable GitHub Actions workflow.
- Access archived test results directly from the GitHub UI.
Prerequisites
- A GitHub repository with Node.js and Mocha tests.
mocha-junit-reporterinstalled in your project.- A basic GitHub Actions workflow triggering on your desired event (e.g.,
pushorpull_request).
1. Generate JUnit Report Locally
Run your tests with Mocha’s JUnit reporter to produce test-results.xml in the repository root:
npm test

> Solar [email protected] test
> mocha app-test.js --timeout 10000 --reporter mocha-junit-reporter --exit
server successfully running on port - 3000
Sample test-results.xml
<testsuite name="Testing Other Endpoints it should fetch Live Status it checks Liveness endpoint" time="0.003">
  <testcase name="it should fetch Ready Status" timestamp="2023-10-12T10:34:16" tests="1" file="F:\Kodekloud-Wo">
    <testcase name="Testing Other Endpoints it should fetch Ready Status it checks Readiness endpoint" time="0.0"/>
  </testcase>
</testsuite>
2. Archive the JUnit XML in GitHub Actions
Add an Archive Test Result step to your workflow using actions/upload-artifact@v3. Below is a sample workflow named archive-unit-tests.yml:
name: Archive Unit Test Reports

on:
  push:
    branches: [ main ]
  pull_request:

jobs:
  unit-testing:
    name: Run & Archive Mocha Tests
    runs-on: ubuntu-latest
    steps:
      - name: Checkout Repository
        uses: actions/checkout@v4

      - name: Setup Node.js
        uses: actions/setup-node@v3
        with:
          node-version: '18'

      - name: Install Dependencies
        run: npm install

      - name: Run Unit Tests
        run: npm test

      - name: Archive Test Result
        uses: actions/upload-artifact@v3
        with:
          name: Mocha-Test-Result
          path: test-results.xml
Workflow Steps Breakdown
| Step | Action |
|---|---|
| Checkout Repository | actions/checkout@v4 |
| Setup Node.js | actions/setup-node@v3 with node-version: 18 |
| Install Dependencies | npm install |
| Run Unit Tests | npm test |
| Archive Test Result | actions/upload-artifact@v3 |
Note
The name field under with: serves as the artifact identifier. The path field should point to your generated test-results.xml.
3. View Artifacts in GitHub Actions
After pushing your workflow, open the Actions tab in your repository. You’ll see your workflow run listed with its status:
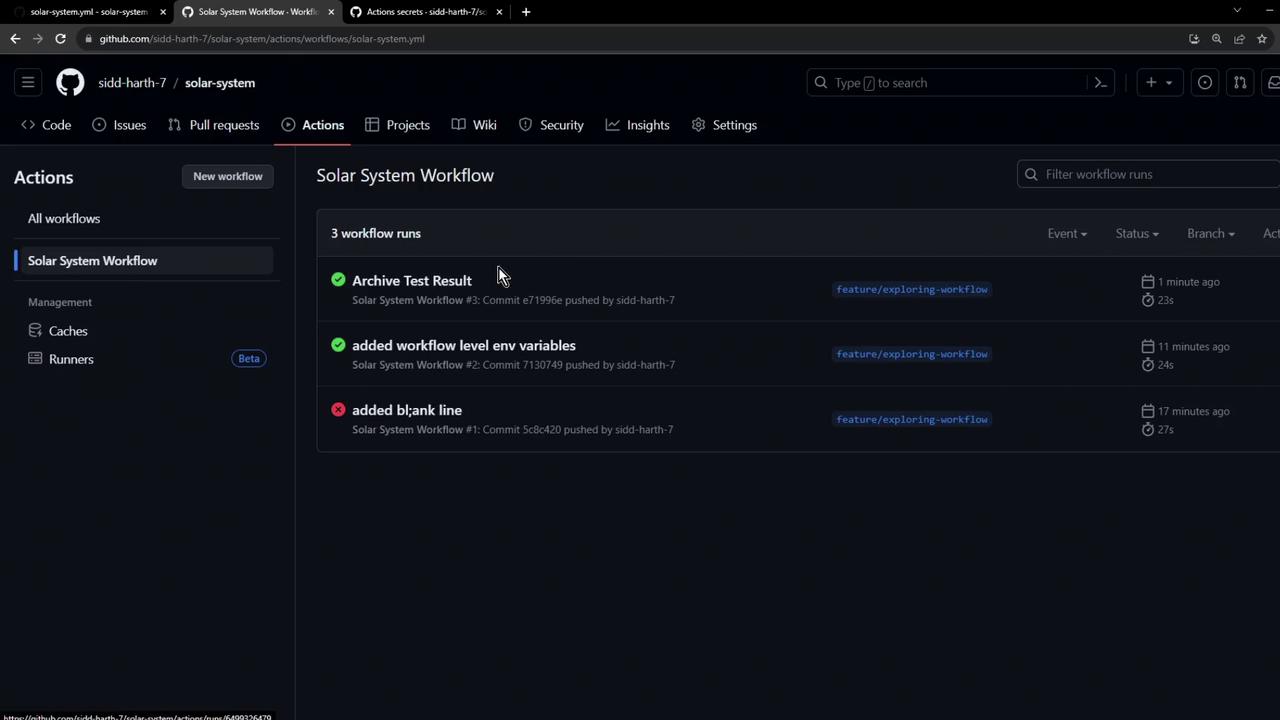
Click into the run to explore individual steps, including the Archive Test Result:
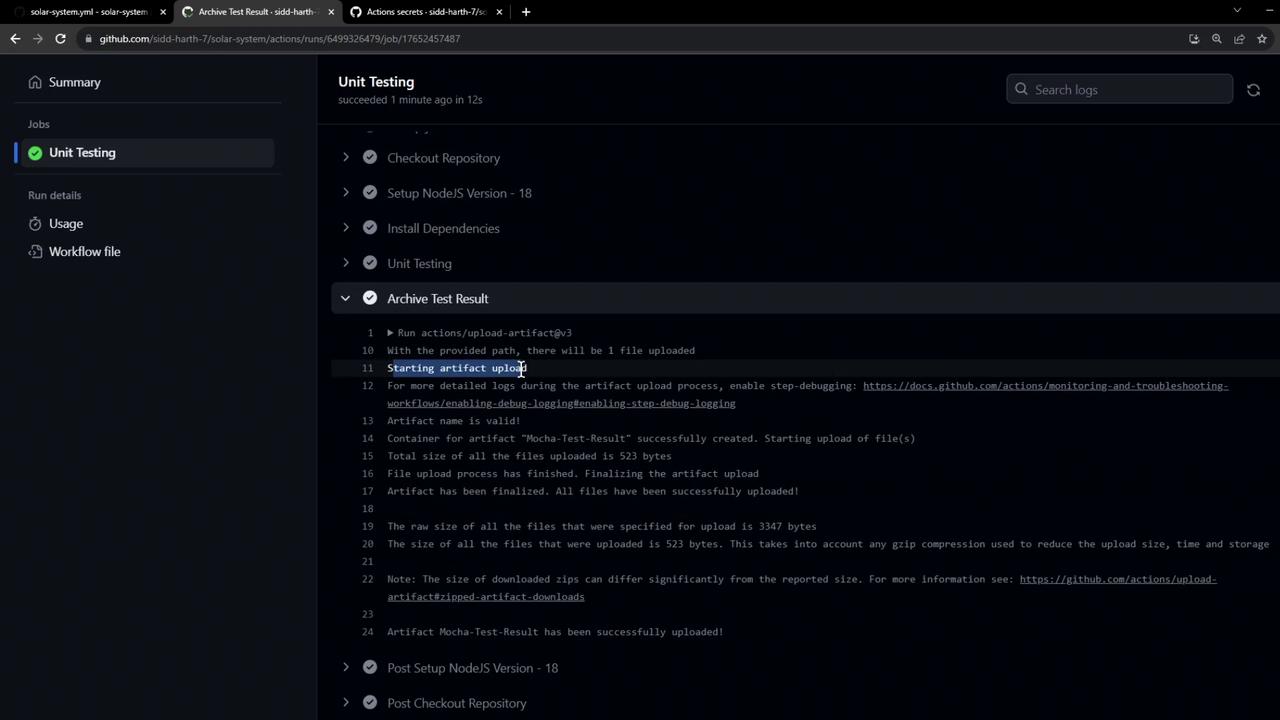
4. Upload Logs
During execution, you’ll observe logs similar to:
Run actions/upload-artifact@v3
With the provided path, there will be 1 file uploaded
Starting artifact upload
Artifact name is valid!
Container for artifact "Mocha-Test-Result" successfully created. Starting upload of file(s)
Total size of all the files uploaded is 523 bytes
File upload process has finished. Finalizing the artifact upload
Artifact has been finalized. All files have been successfully uploaded!
The raw size of all the files that were specified for upload is 3347 bytes
The size of all the files that were uploaded is 523 bytes. This takes into account any gzip compression used to reduce the upload size, time and storage.
Note: The size of downloaded zips can differ significantly from the reported size. For more information see: https://github.com/actions/upload-artifact#zipped-artifact-downloads
Artifact Mocha-Test-Result has been successfully uploaded!
5. Retention & Download
Note
Artifacts are retained for 90 days by default. You can download or delete them via the workflow summary under your repository’s Actions tab.
References
Watch Video
Watch video content