GitLab CI/CD: Architecting, Deploying, and Optimizing Pipelines

Auto DevOps

AutoDevOps Customization

In this guide, learn how to tailor your GitLab Auto DevOps pipeline to implement a timed incremental rollout deployment strategy. You’ll enable this strategy, override default jobs, and customize which tests and scans run to streamline your CI/CD process.

Timed Incremental Rollout Strategy

A timed incremental rollout gradually shifts traffic in phases:

  • Step 1: 10% traffic
  • Step 2: 25% traffic
  • Step 3: 50% traffic
  • Step 4: 100% traffic

Each phase pauses for 5 minutes by default, giving you time to validate stability and, if necessary, roll back.

The image shows a GitLab CI/CD settings page with options for configuring Auto DevOps pipelines and deployment strategies. The sidebar includes navigation options like Deploy, Operate, and Monitor.

To enable the timed rollout:

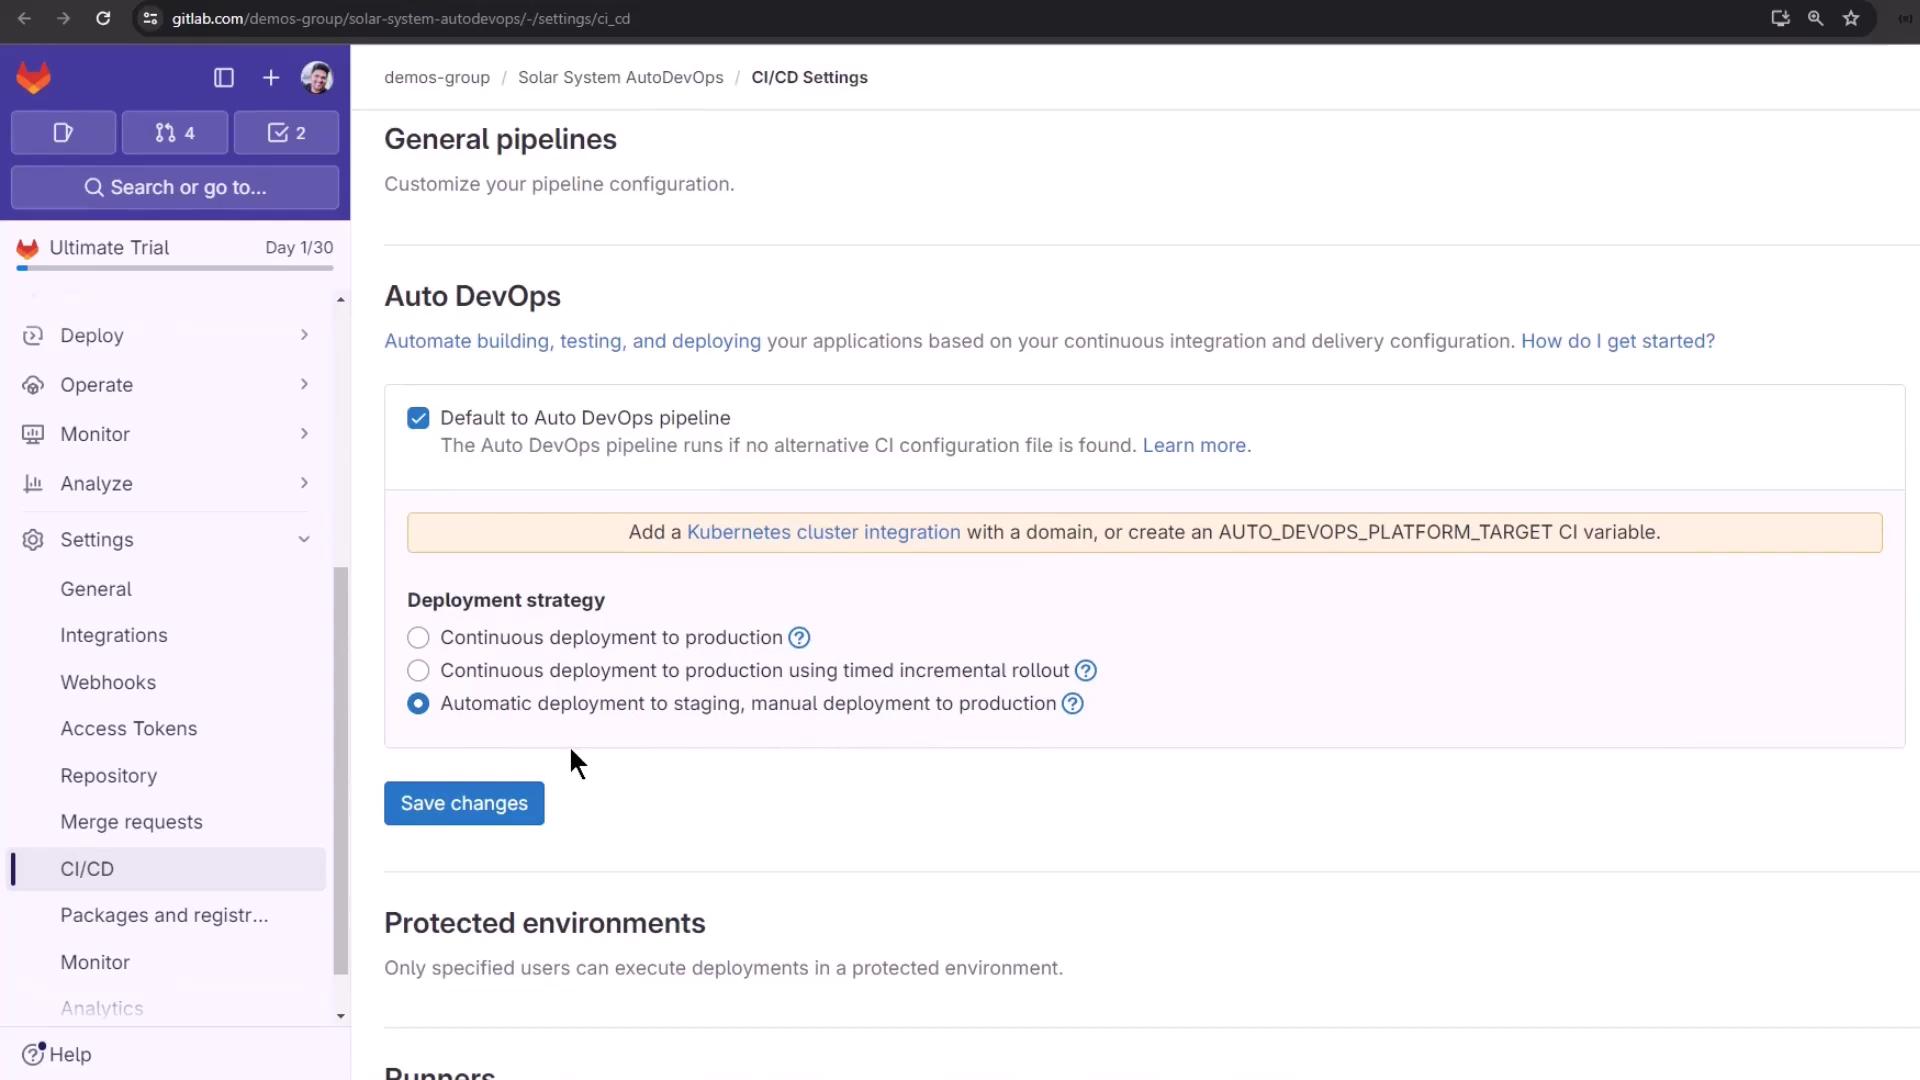
  1. Go to Settings > CI/CD > Auto DevOps
  2. Select Continuous deployment to production using timed incremental rollout
  3. Click Save changes

Note

Adjust the interval between rollout steps by setting the AUTO_DEPLOY_WAIT_TIME variable in your .gitlab-ci.yml or project settings.

Reviewing Current Pipelines

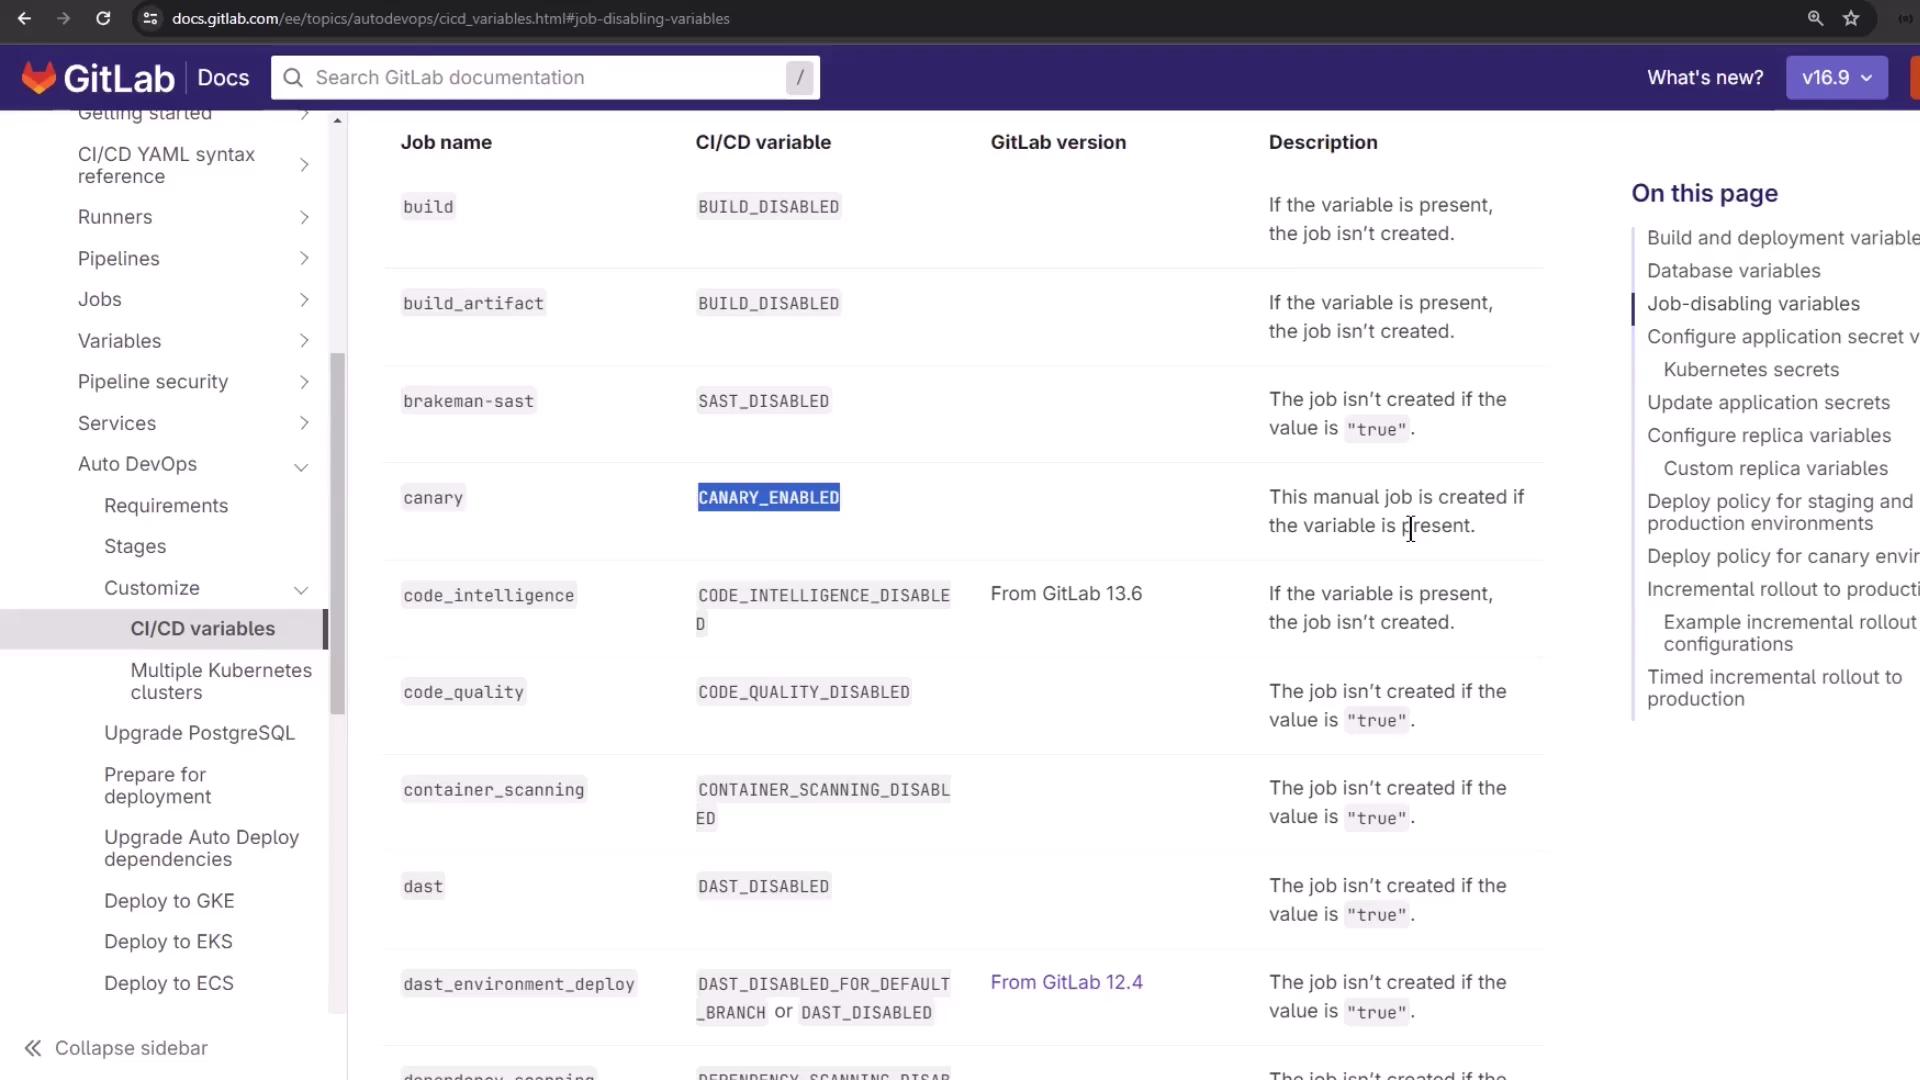
Out of the box, Auto DevOps runs up to 17 jobs across multiple stages. You can disable unused jobs—like certain tests or scans—to speed up your pipeline while retaining essential checks like secret detection.

The image shows a GitLab interface displaying a list of CI/CD pipelines with their statuses, such as "Warning," "Passed," and "Canceled." Each pipeline entry includes details like the branch name, commit ID, and the user who created it.

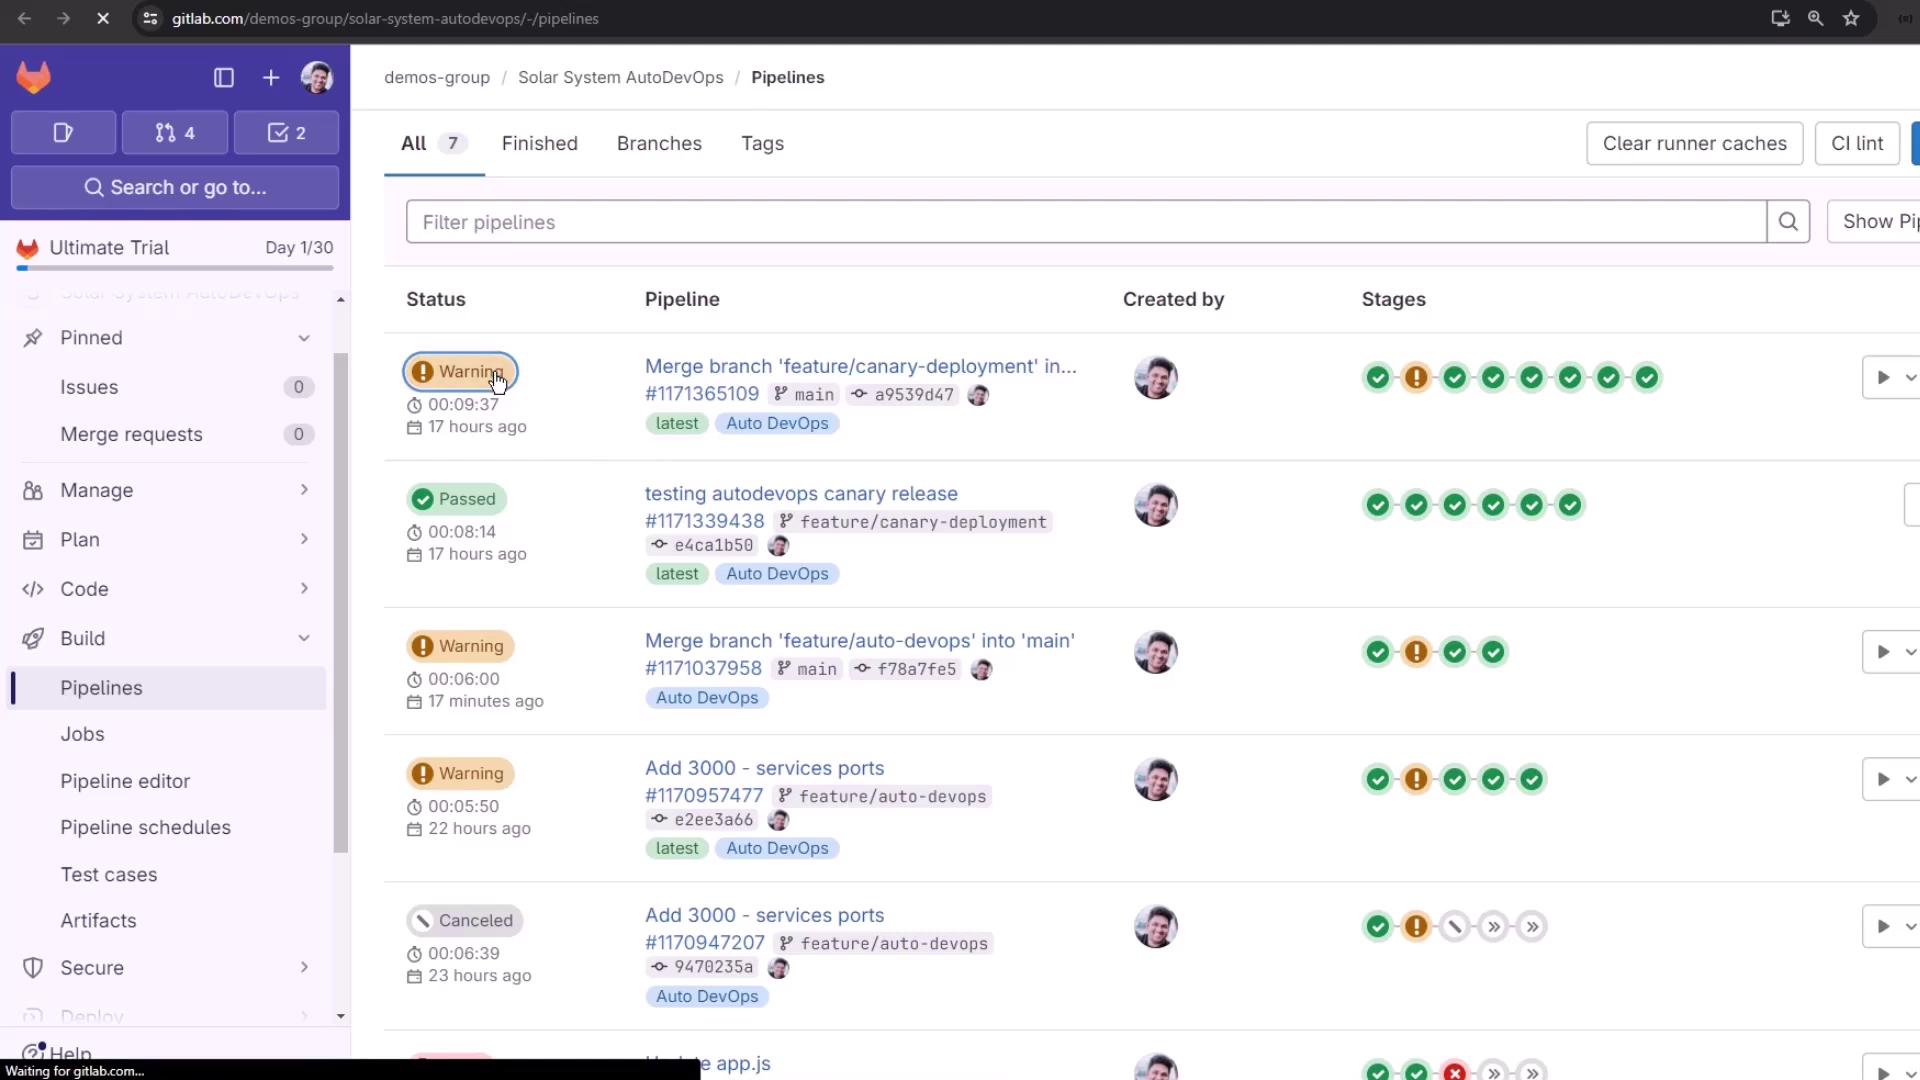
Adding Your Own .gitlab-ci.yml

Override or extend Auto DevOps by adding a custom CI configuration file at your repository root:

The image shows a GitLab repository interface with a list of files and their last commit messages. The repository is named "solar-system-autodevops" and includes files like `app-controller.js` and `README.md`.

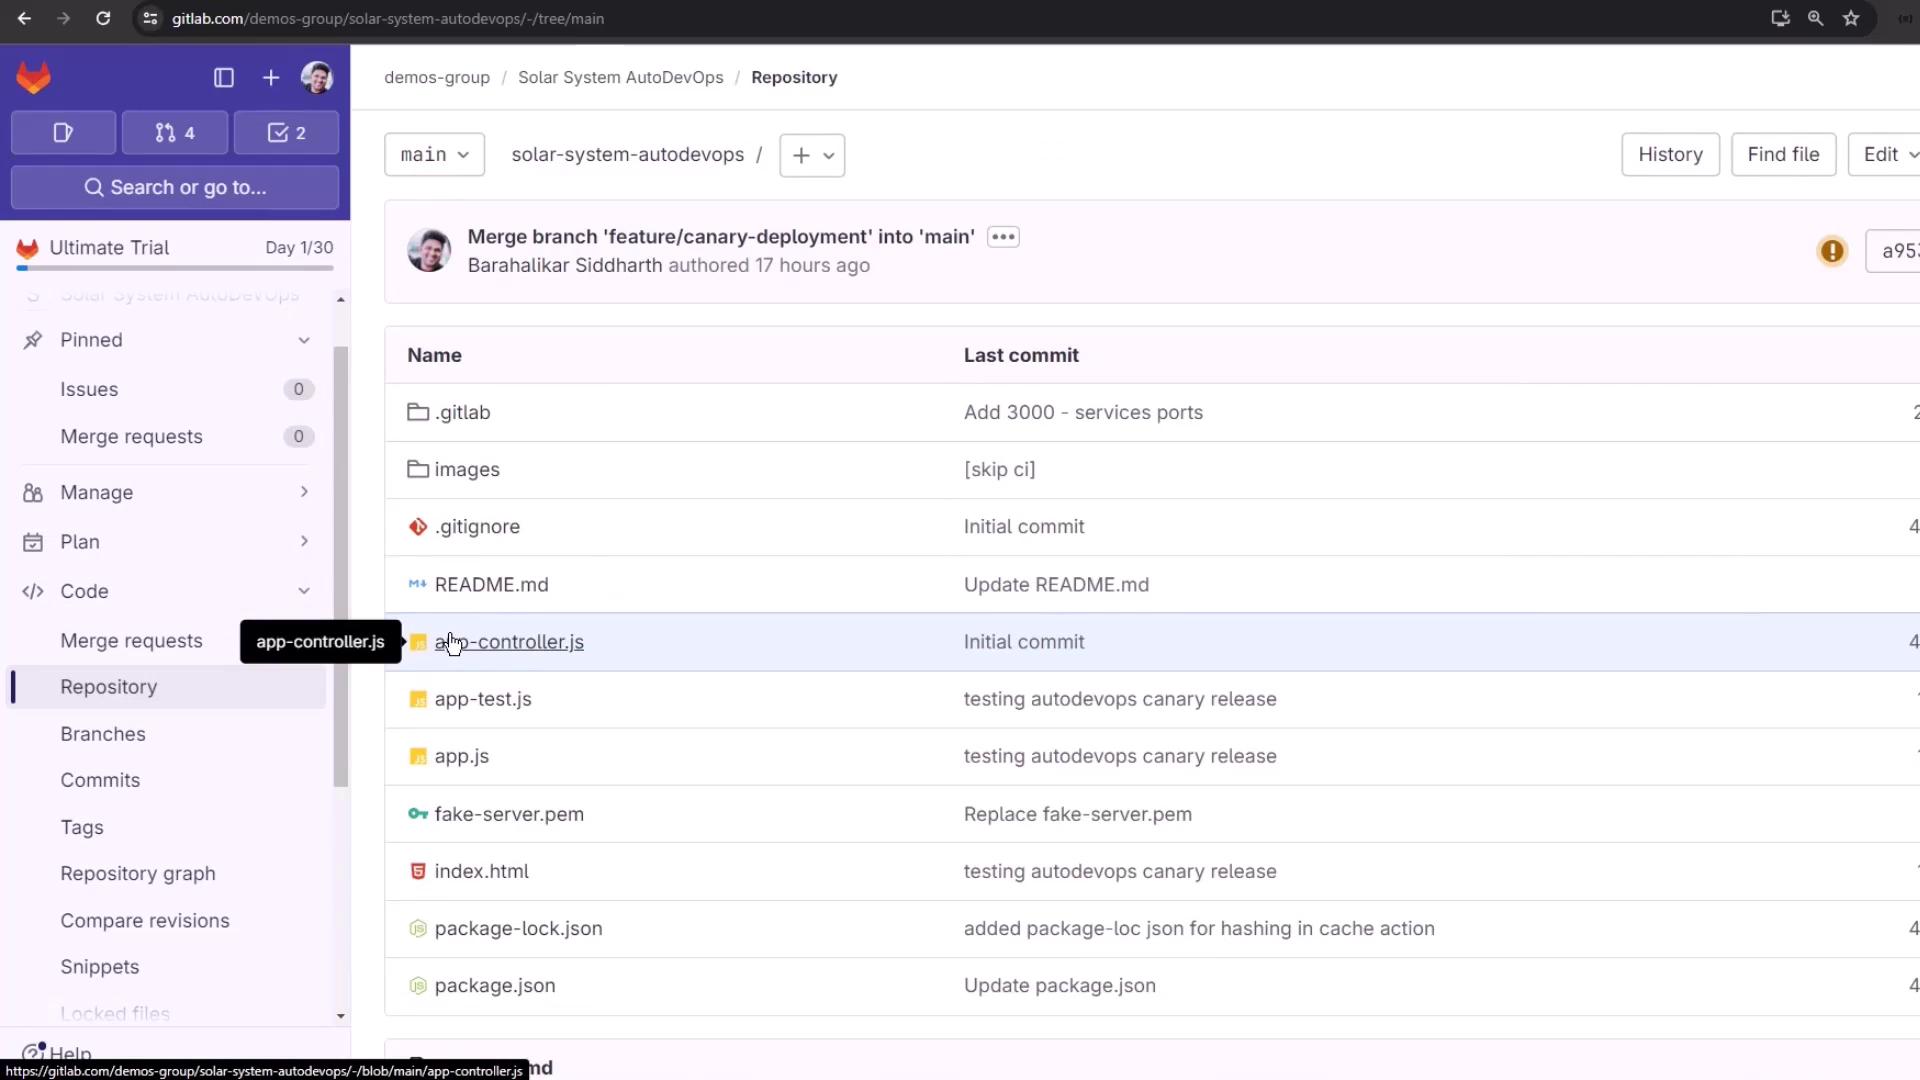
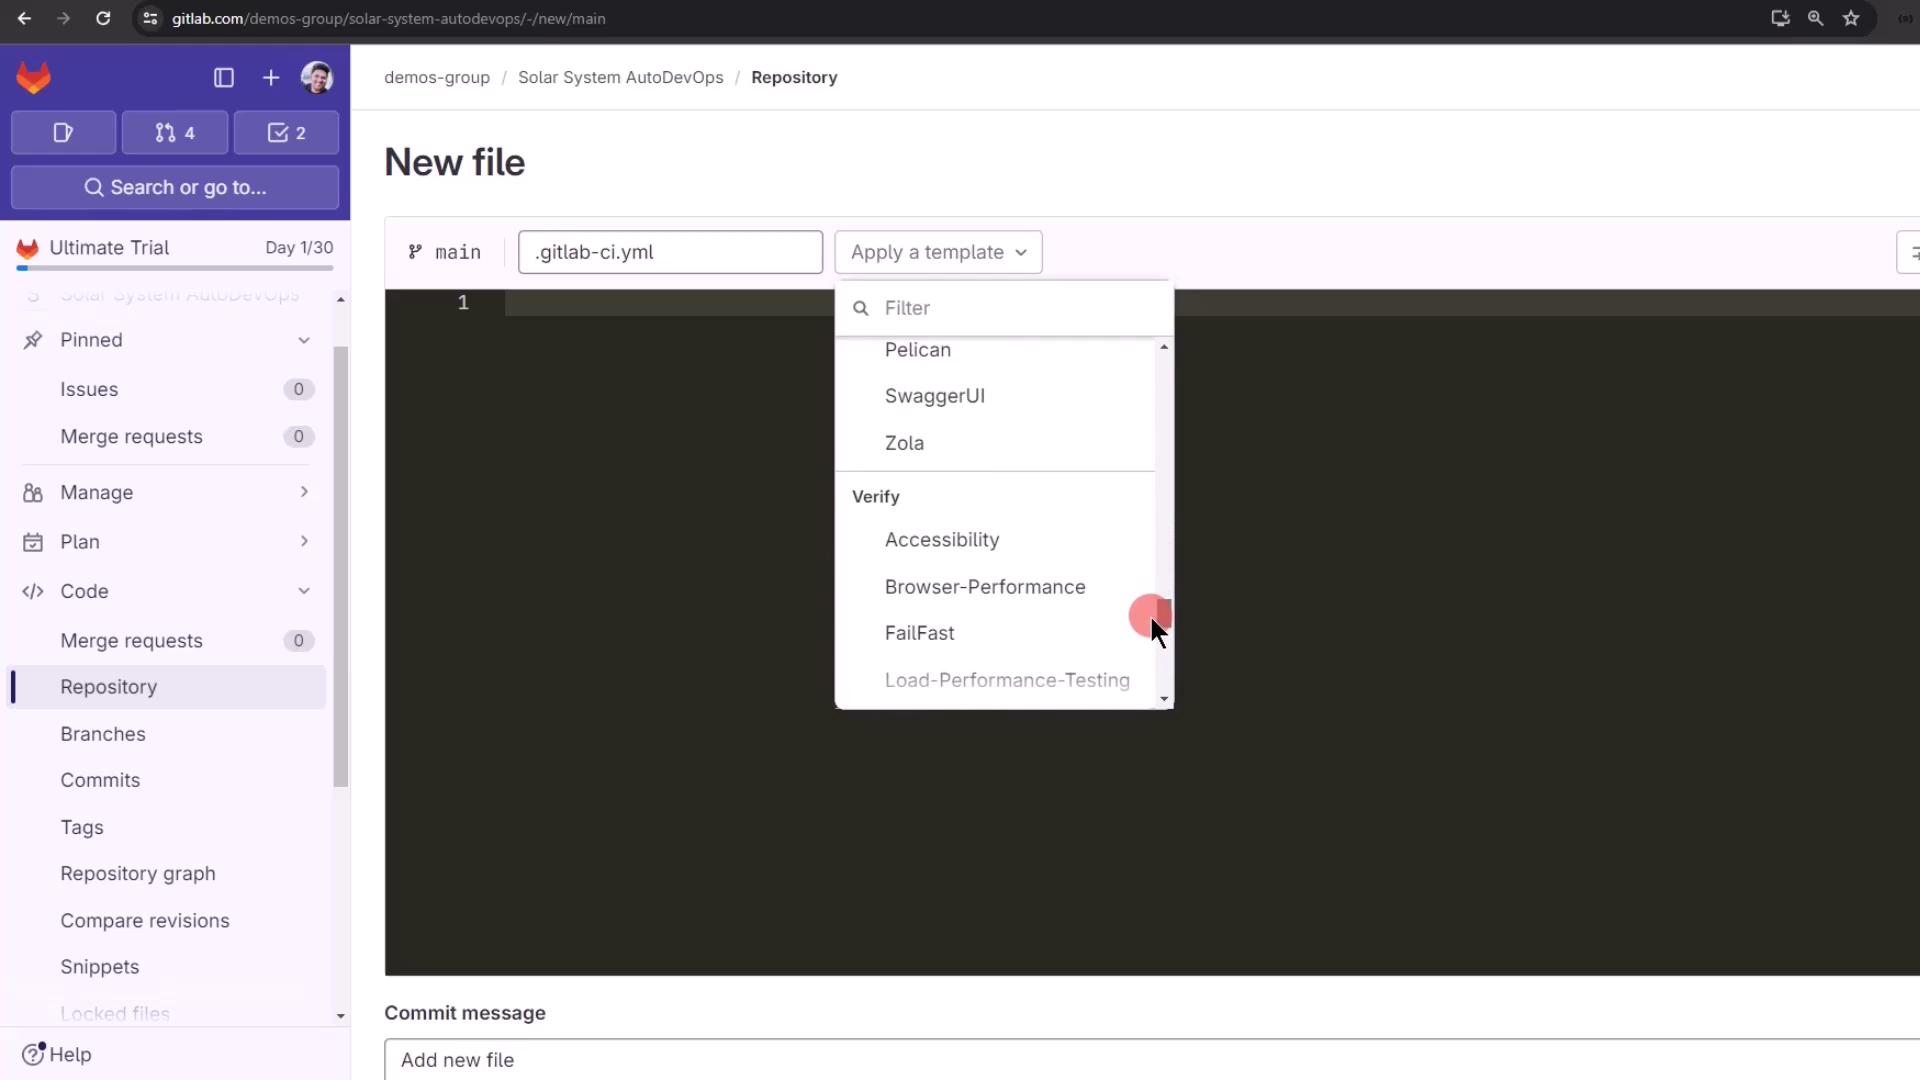
  1. In Files, click + and name the file .gitlab-ci.yml.
  2. Choose Apply a template or start from scratch.

The image shows a GitLab interface where a new file named `.gitlab-ci.yml` is being created, with a dropdown menu displaying various template options.

Including the Auto DevOps Template

Pull in the default Auto DevOps jobs without copying the full configuration:

include:
  template: Auto-DevOps.gitlab-ci.yml

Open CI/CD > Editor, paste the snippet, then click Visualize to inspect all jobs and stages.

The image shows a GitLab pipeline editor interface with a visualized pipeline flow, including stages like "staging," "canary," and "production," along with various rollout steps.

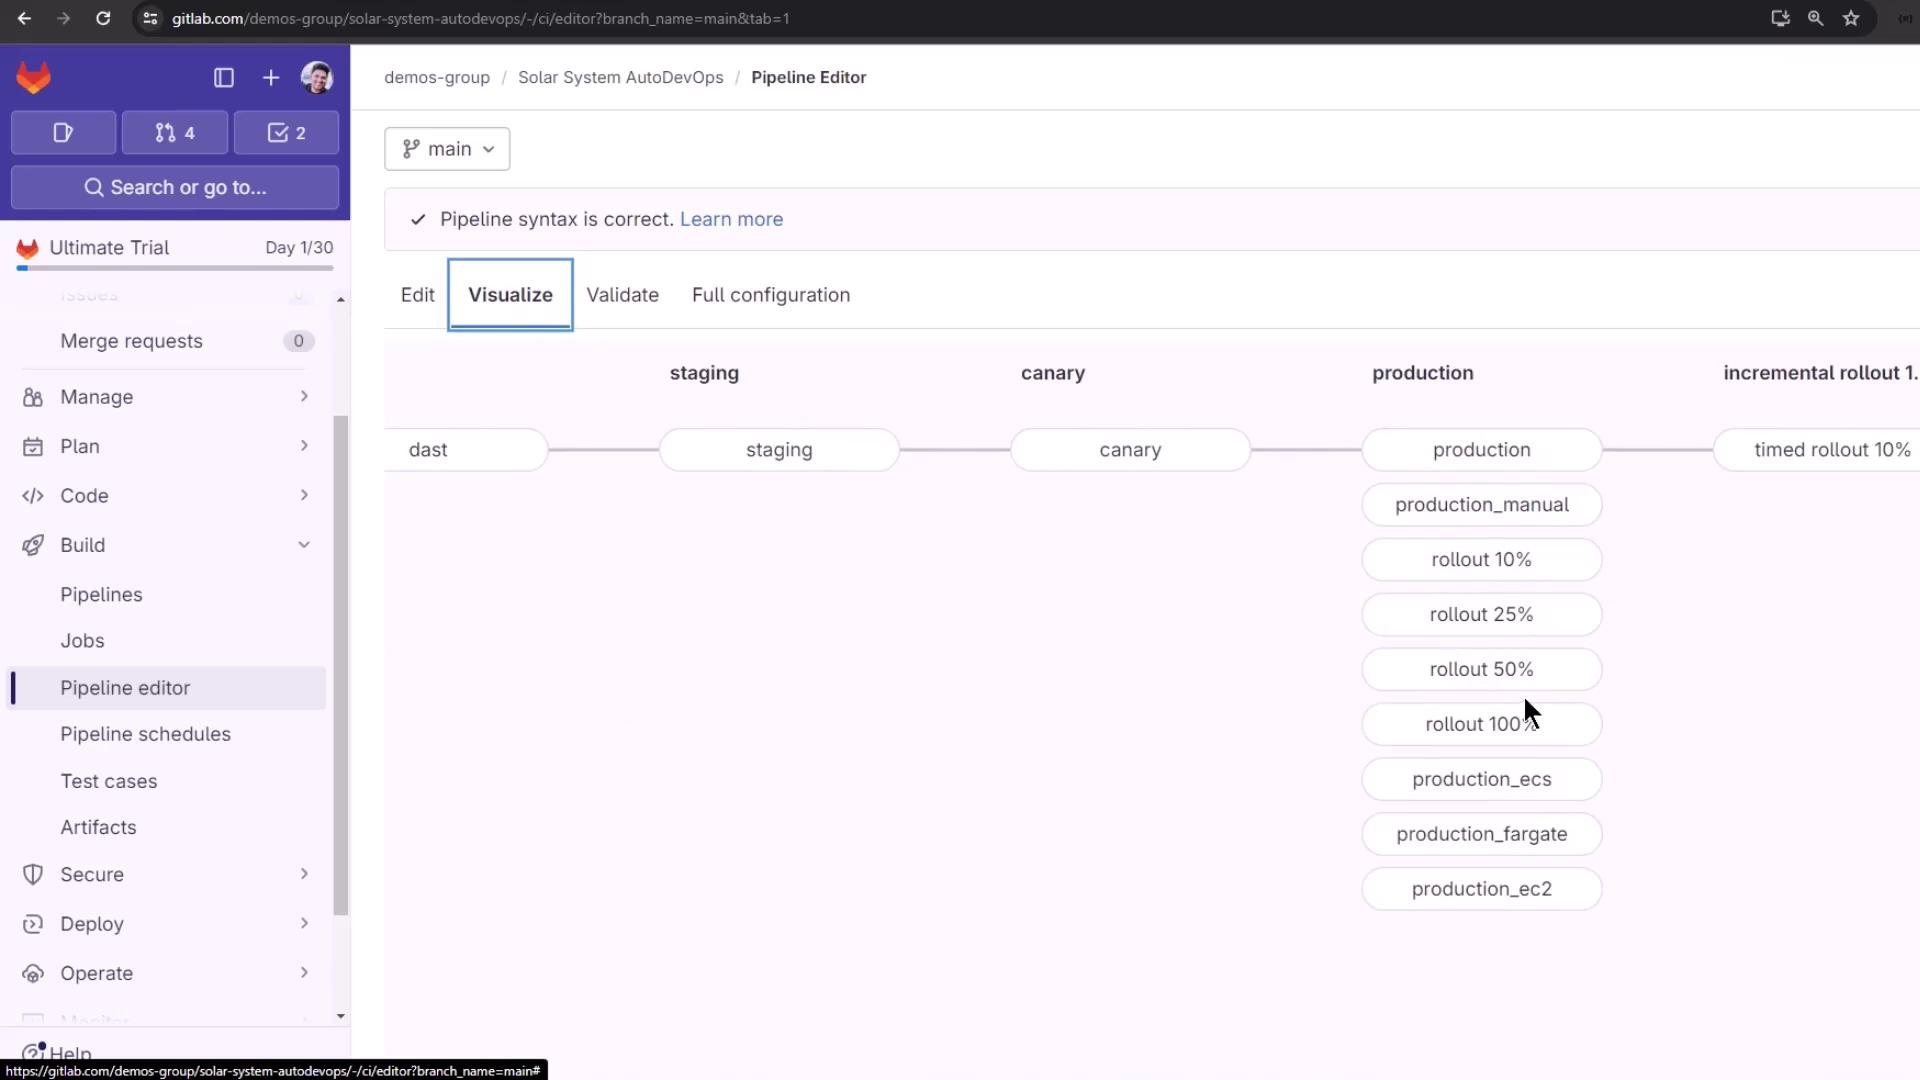
Auto DevOps Variables

The default template defines many variables you can override:

VariablePurposeExample Default
AUTO_BUILD_IMAGE_VERSIONBuild image versionv1.51.0
AUTO_DEPLOY_IMAGE_VERSIONDeploy image versionv2.80.1
DAST_VERSIONVersion of DAST scans4
SECURE_ANALYZERS_PREFIXRegistry prefix for security analyzers$CI_TEMPLATE_REGISTRY_HOST
POSTGRES_USERUsername for review app databaseuser
POSTGRES_PASSWORDPassword for review app databasetesting-password

Override these under Settings > CI/CD > Variables or in your .gitlab-ci.yml.

Disabling Unneeded Jobs

Disable specific Auto DevOps jobs by setting their variables to "true":

variables:
  TEST_DISABLED: "true"
  CODE_QUALITY_DISABLED: "true"
  DEPENDENCY_SCANNING_DISABLED: "true"
  LICENSE_MANAGEMENT_DISABLED: "true"
  SAST_DISABLED: "true"
  PERFORMANCE_DISABLED: "true"
  BROWSER_PERFORMANCE_DISABLED: "true"
  REVIEW_DISABLED: "true"
  CONTAINER_SCANNING_DISABLED: "true"

See the Auto DevOps variables documentation for a complete list:

The image shows a GitLab documentation page detailing CI/CD variables, job names, and descriptions for disabling jobs. The left sidebar lists various documentation topics, and the right side provides a table with job-related information.

Full Example .gitlab-ci.yml

Combine the include and disabling variables to simplify your pipeline:

include:
  template: Auto-DevOps.gitlab-ci.yml

variables:
  DAST_DISABLED: "true"
  CODE_QUALITY_DISABLED: "true"
  DEPENDENCY_SCANNING_DISABLED: "true"
  LICENSE_MANAGEMENT_DISABLED: "true"
  SAST_DISABLED: "true"
  PERFORMANCE_DISABLED: "true"
  BROWSER_PERFORMANCE_DISABLED: "true"
  REVIEW_DISABLED: "true"
  CONTAINER_SCANNING_DISABLED: "true"

Commit and push to trigger a streamlined set of jobs:

The image shows a GitLab pipeline interface with a series of jobs including build, test, and incremental rollout stages. The pipeline is currently running, and the jobs are organized by stage.

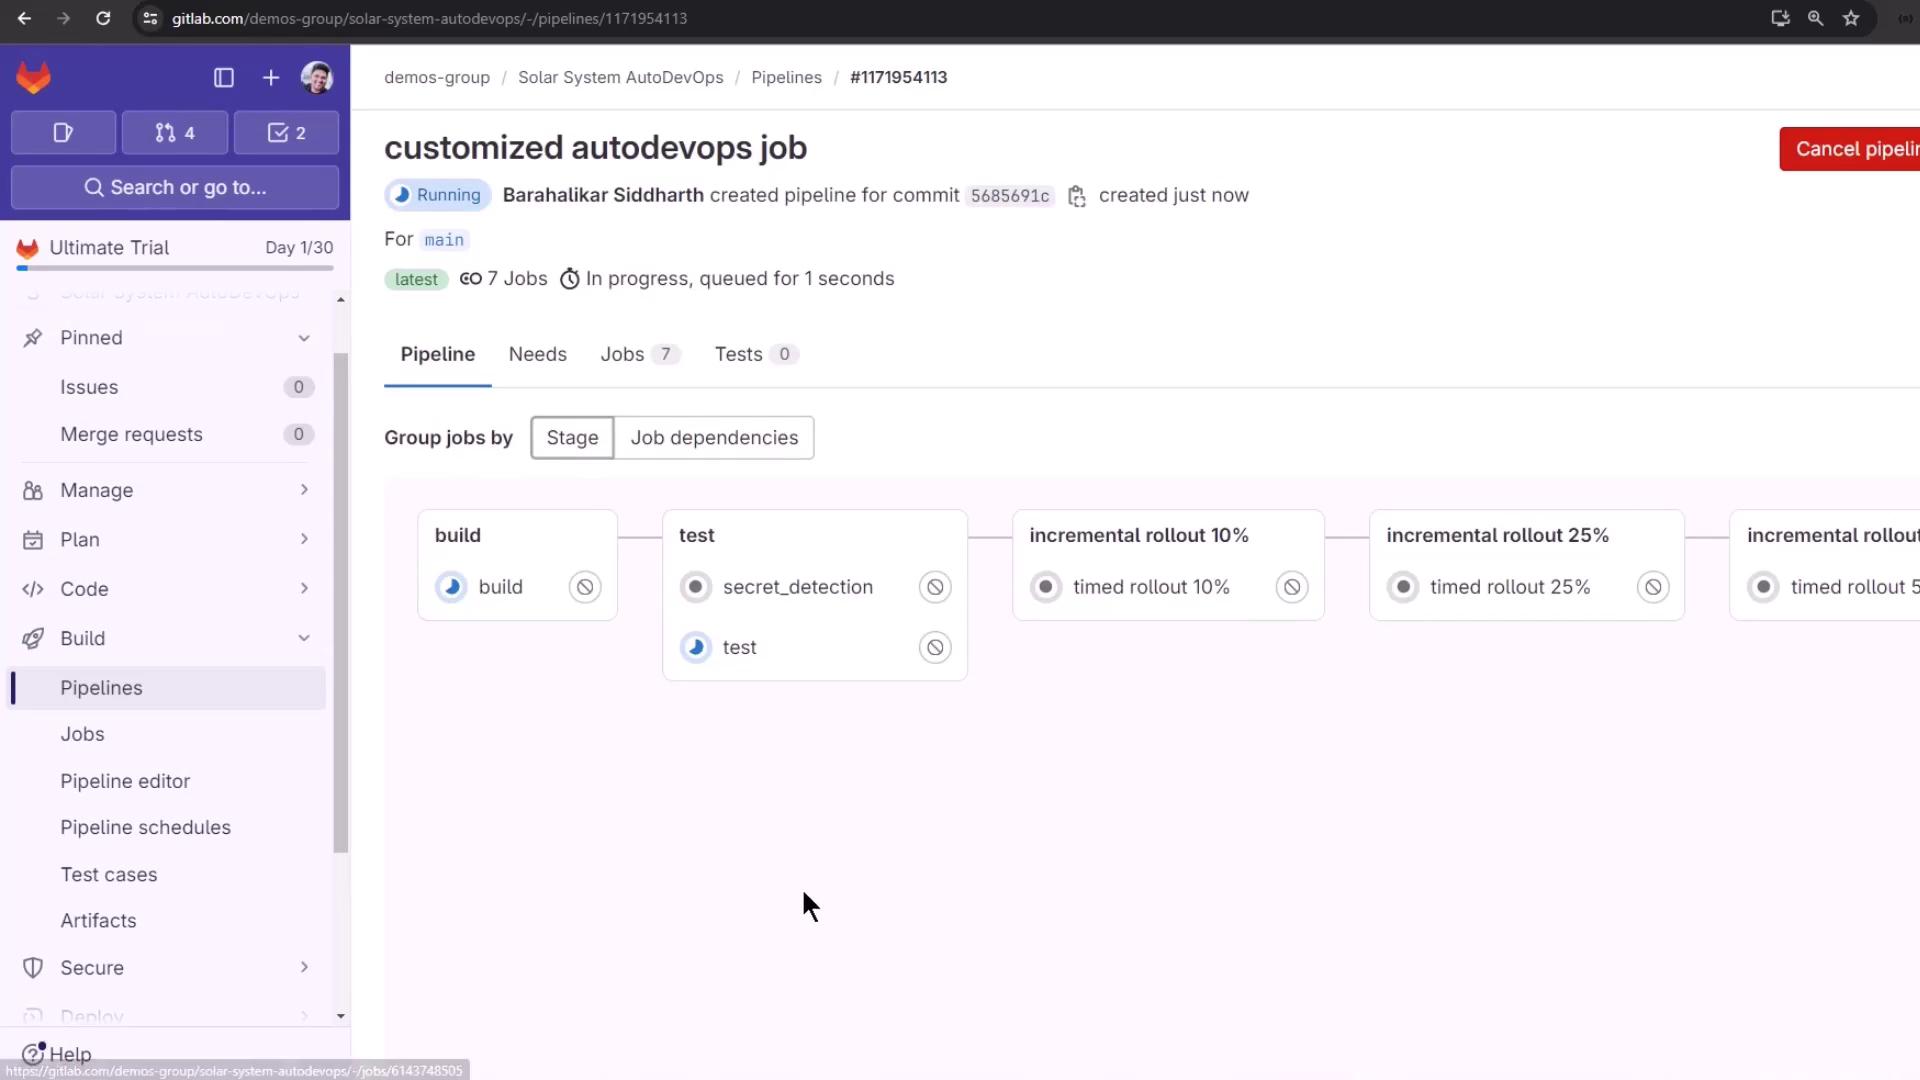
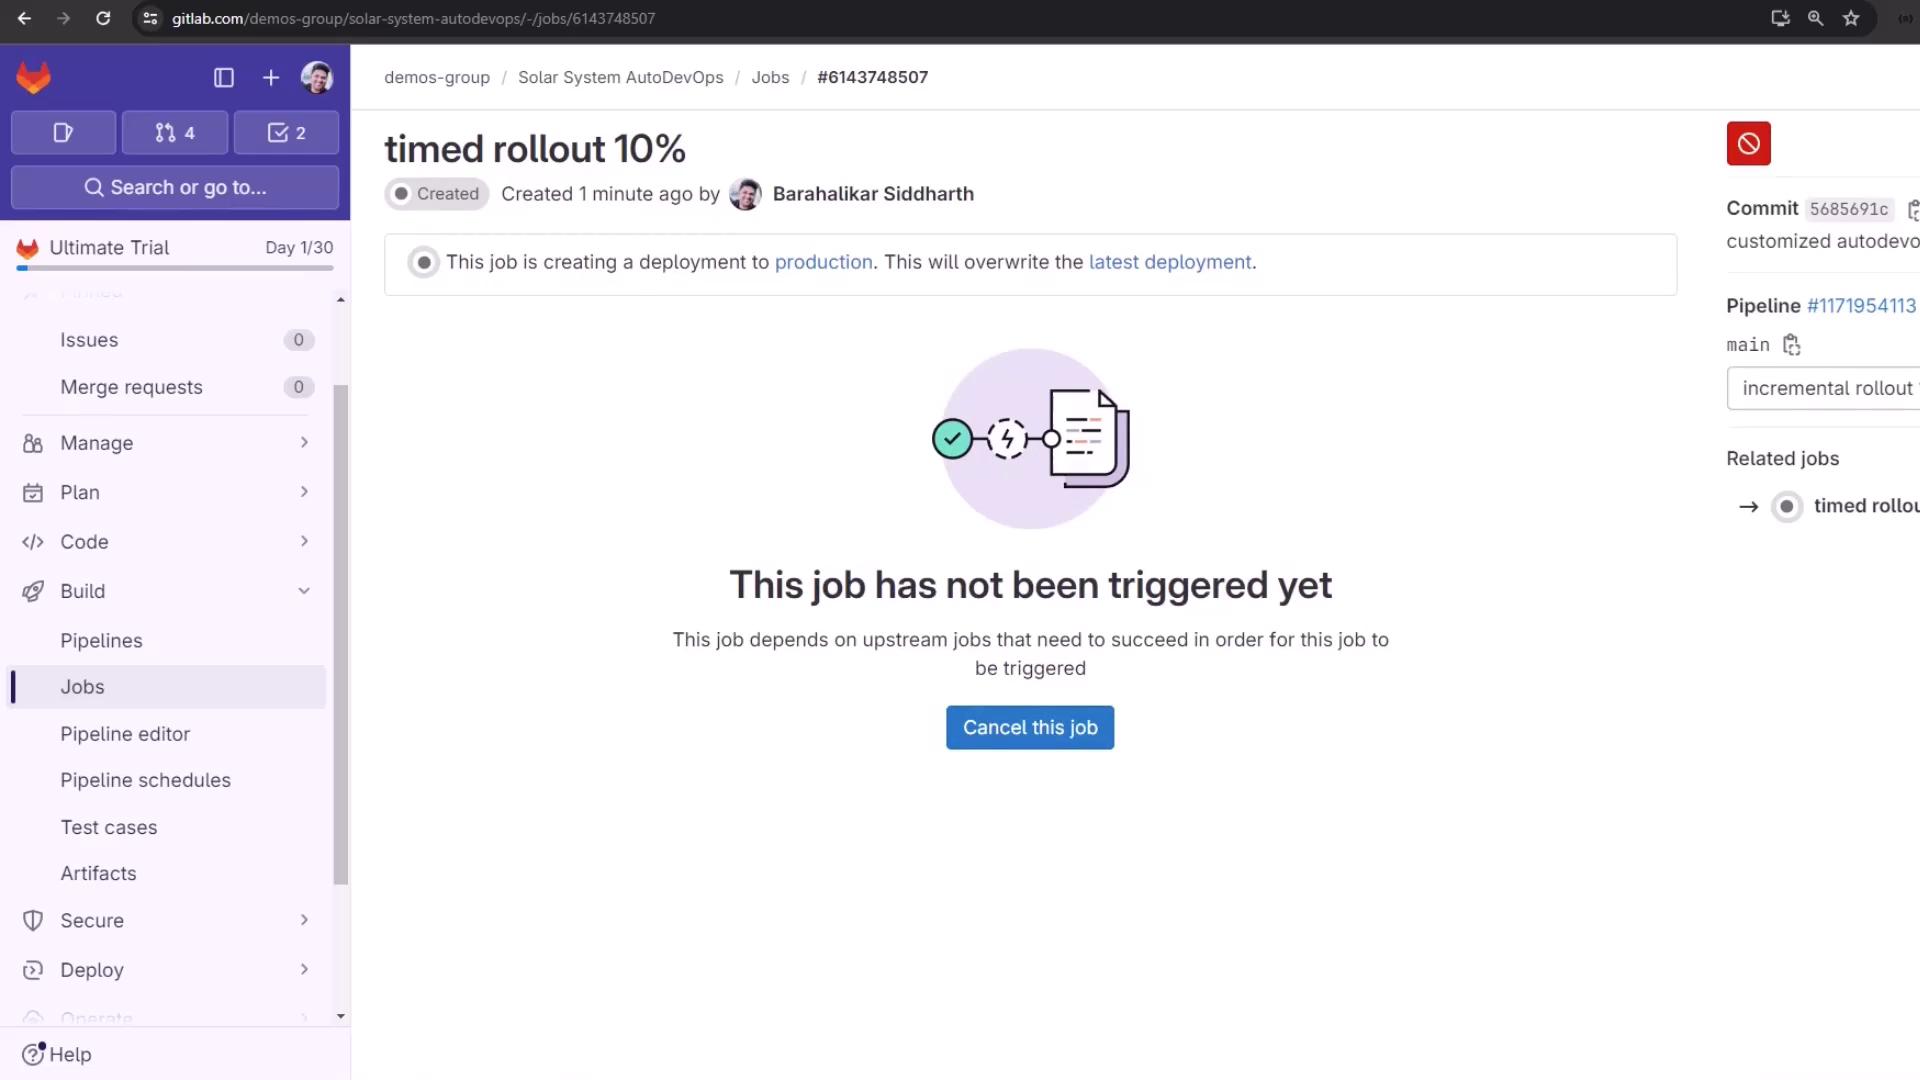
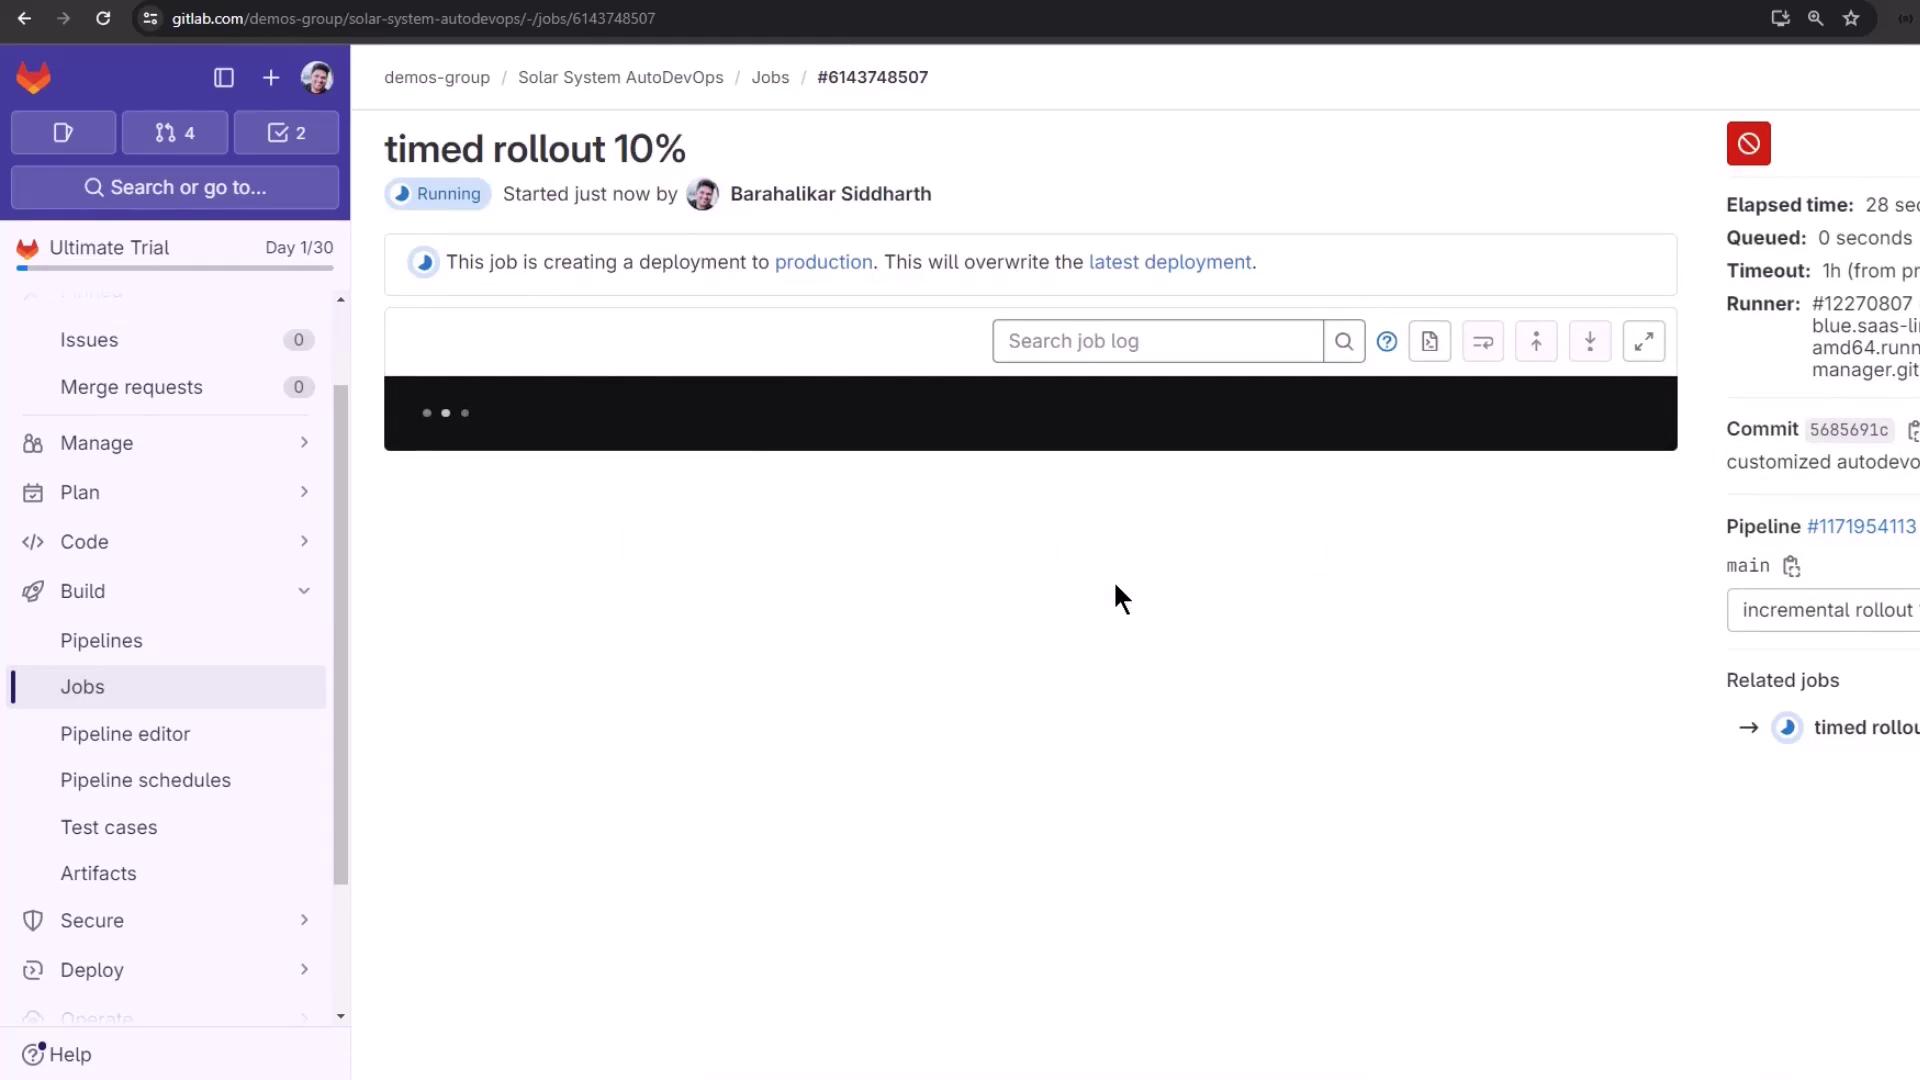
Running the Timed Rollout

After build and test, the pipeline moves through timed rollout steps (10%, 25%, 50%, 100%). Each step waits for the configured interval before proceeding.

The image shows a GitLab pipeline interface with a customized AutoDevOps job in progress, displaying stages like build, test, and incremental rollout percentages.

Before the 10% rollout, protected environments require manual approval:

The image shows a GitLab interface with a job titled "timed rollout 10%" that has not been triggered yet. It includes options for managing jobs and viewing related information.

Click Run job to start, and track progress:

The image shows a GitLab pipeline interface with a job titled "timed rollout 10%" currently running. It includes details about the job's status, commit, and pipeline information.

Once complete, the next step (25%) begins automatically after the timer expires:

The image shows a GitLab pipeline interface for a customized AutoDevOps job, displaying stages like build, test, and incremental rollout with various completion statuses.

Under the hood, Auto DevOps runs:

auto-deploy deploy canary $ROLLOUT_PERCENTAGE

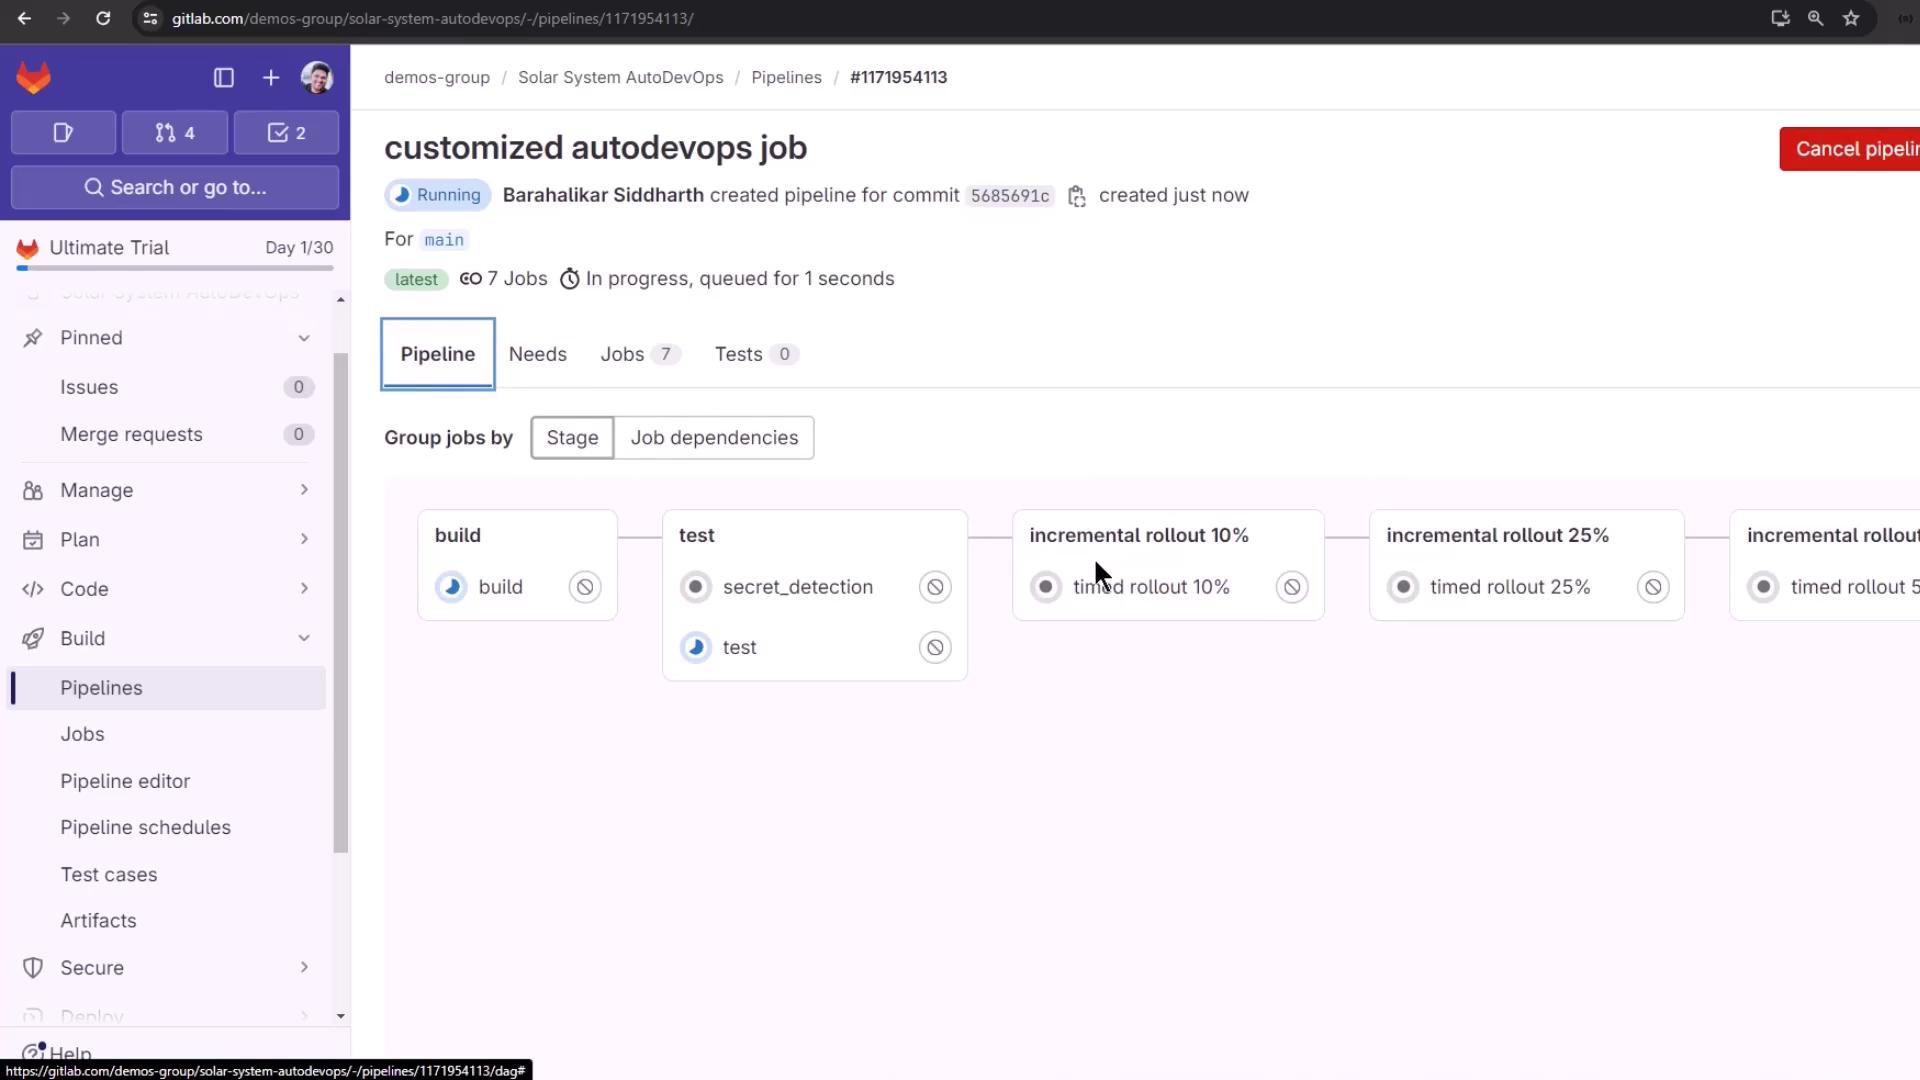
Inspecting the Deployment

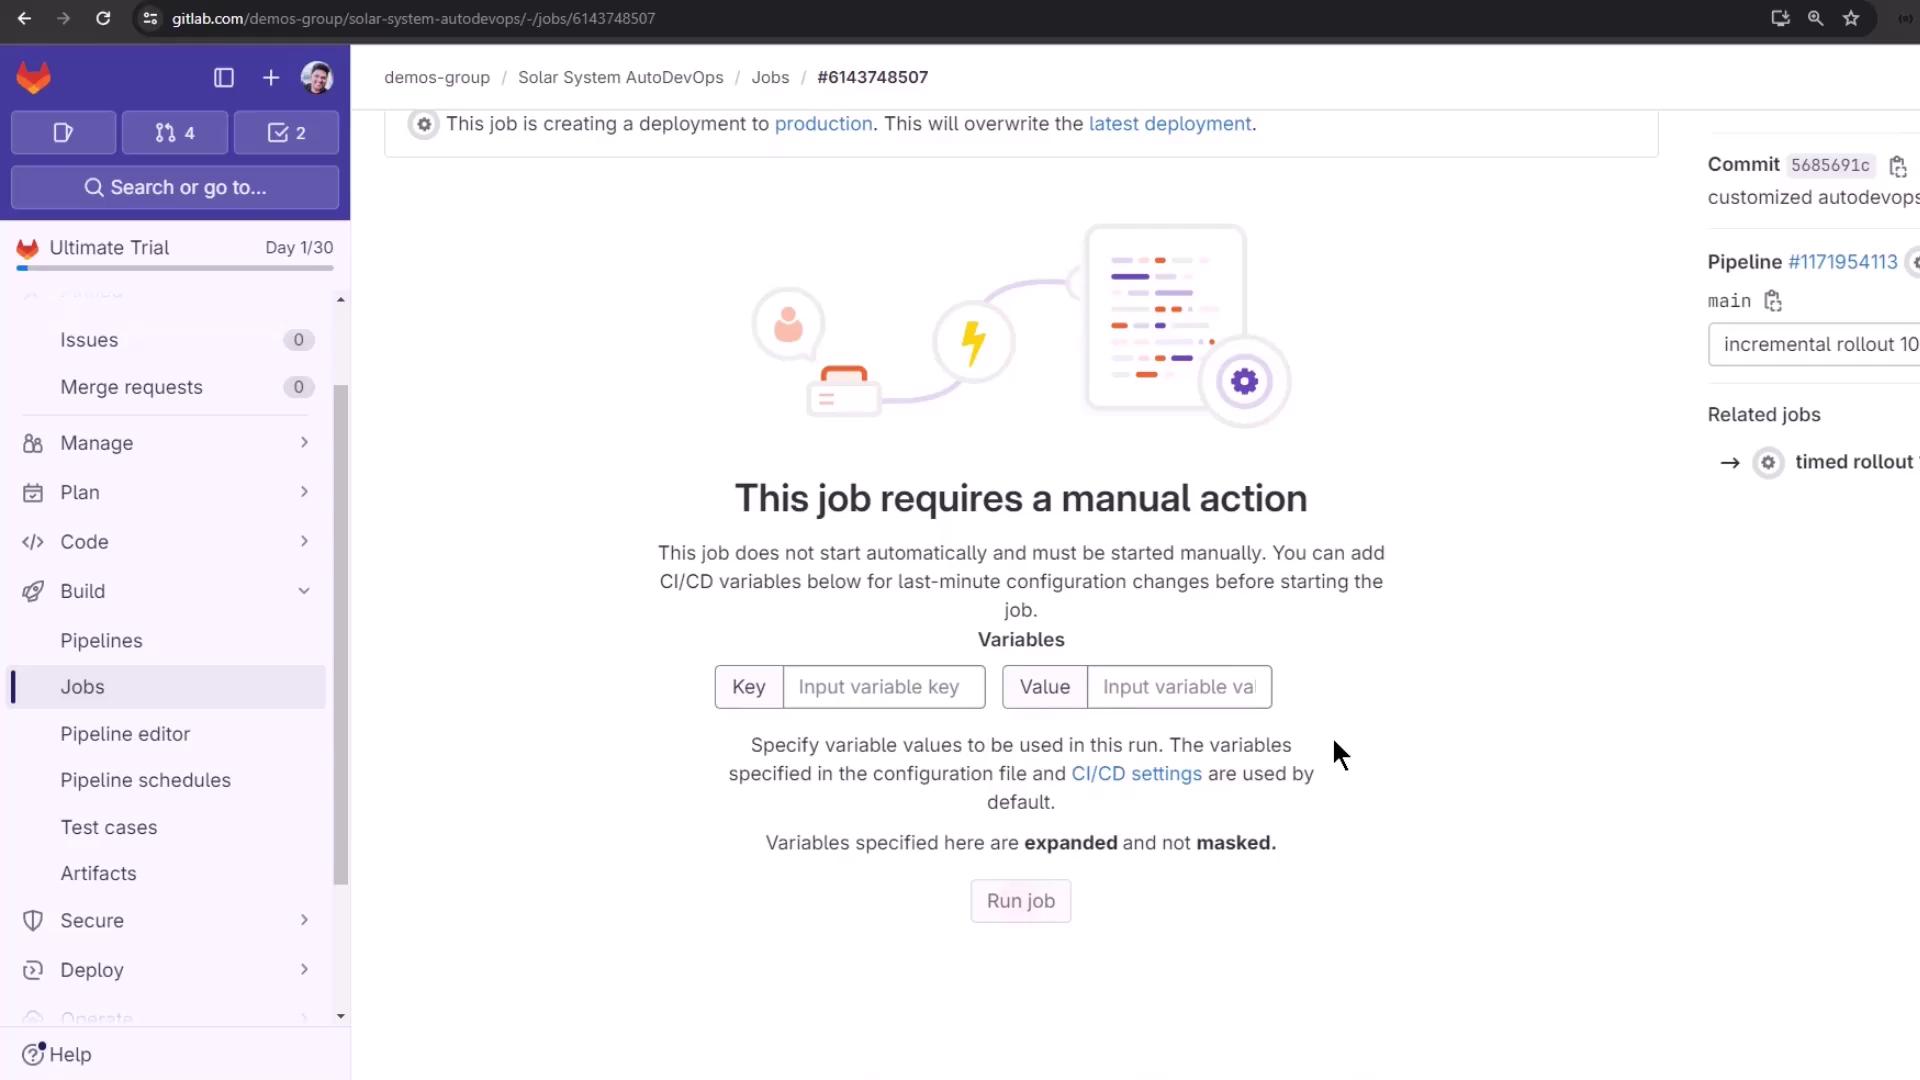
Verify canary and stable pods using the Kubernetes CLI:

kubectl -n production get pods
# Example output:
# production-canary-77cbf87488-2x5jm   1/1 Running
# production-defd6d64cf-4qgl7          1/1 Running

Traffic splits according to ingress weights configured in each rollout step.

The image shows a GitLab pipeline interface for a customized AutoDevOps job, displaying stages like build, test, and incremental rollout with various completion statuses.

Approving Protected Deployments

Protected environments halt deployments until manual approval:

The image shows a GitLab interface with a job deployment process waiting for approvals. It includes a sidebar with navigation options and a message about deploying to a protected environment.

Click Approve in the confirmation dialog:

The image shows a GitLab interface with a pop-up window for approving or rejecting a deployment. The user is about to approve deployment #14 with a comment "ok."

Then trigger any manual rollout jobs if required:

The image shows a GitLab interface indicating that a job requires manual action to start, with options to input CI/CD variable keys and values. It includes a "Run job" button and a sidebar with navigation options like Issues, Merge requests, and Pipelines.

Or use an unscheduled manual action:

The image shows a GitLab interface with a job requiring manual action for deployment. It includes options to input CI/CD variables and a "Run job" button.

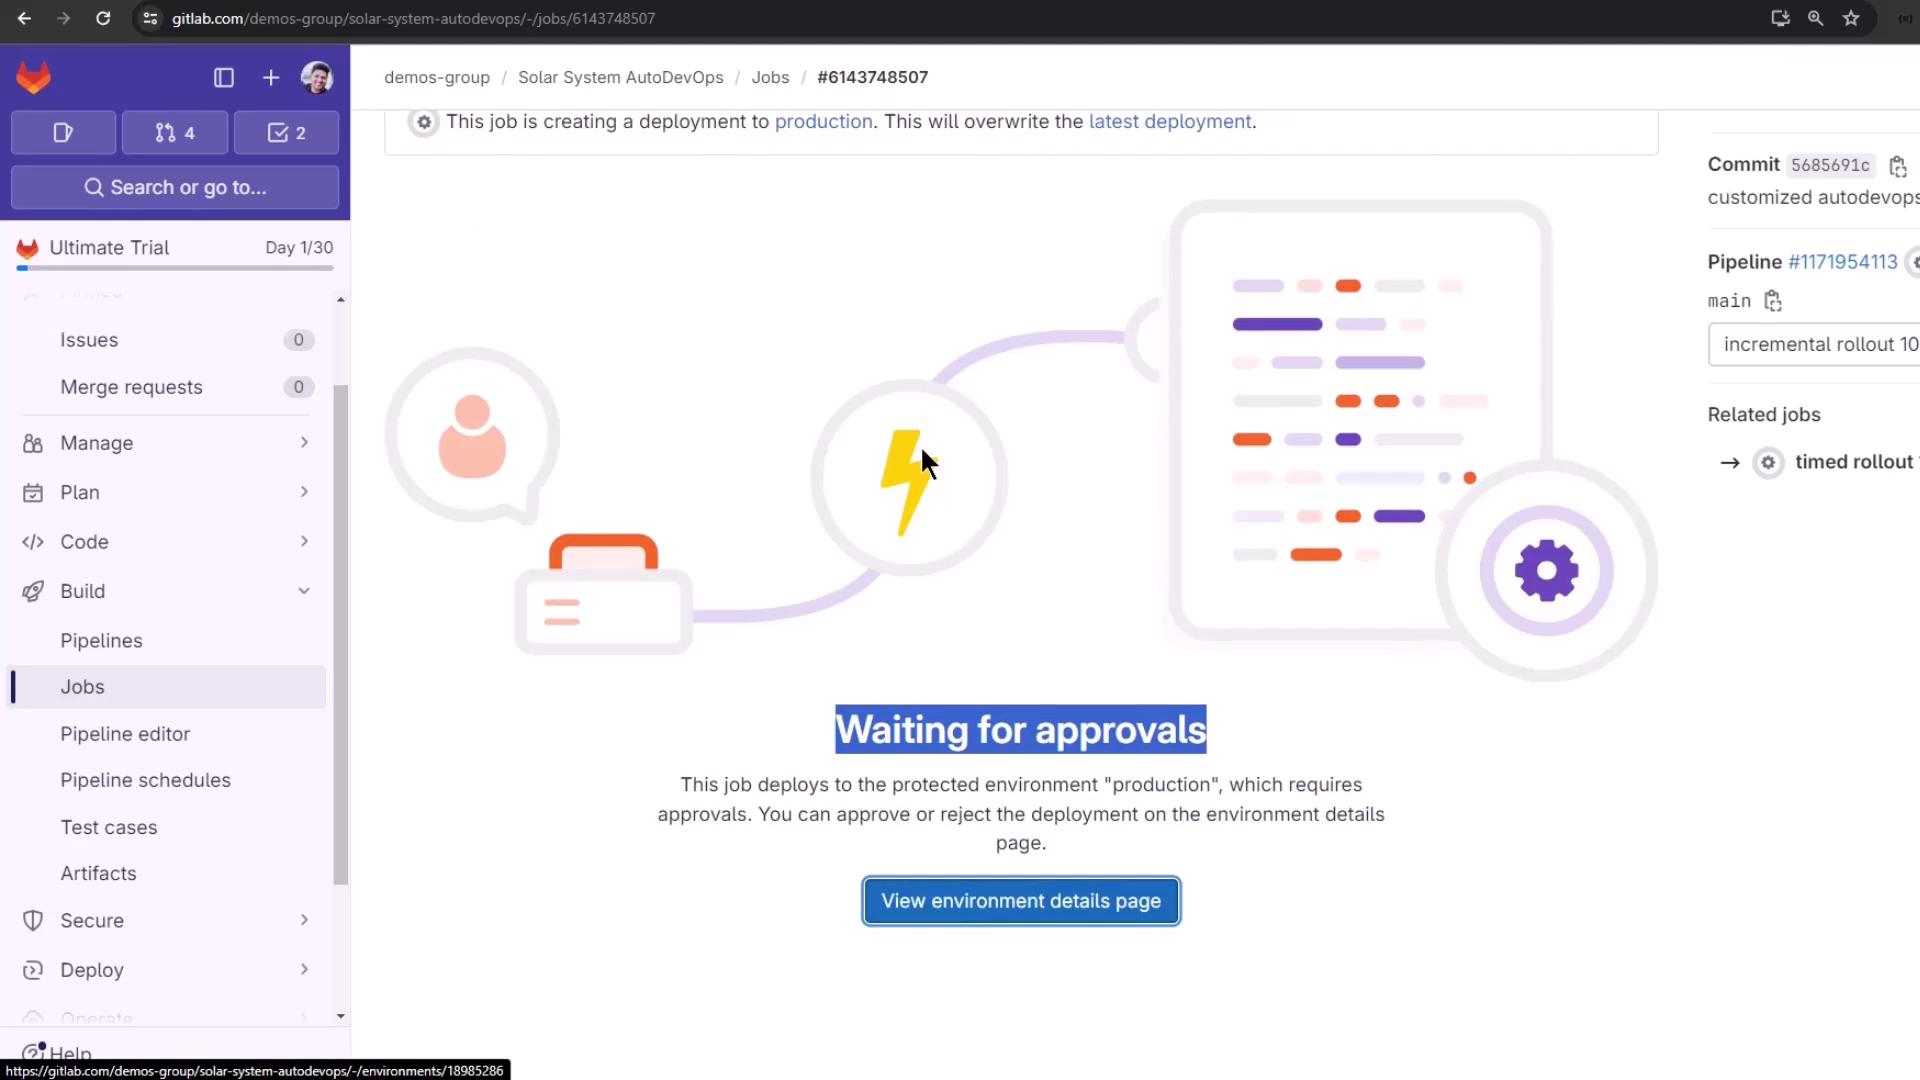
Monitoring Environments

View all deployments and their statuses under Operations > Environments:

The image shows a GitLab environment dashboard with details of deployment jobs, including their status, triggers, and branches. The sidebar displays various project management options like "Manage," "Plan," and "Code."


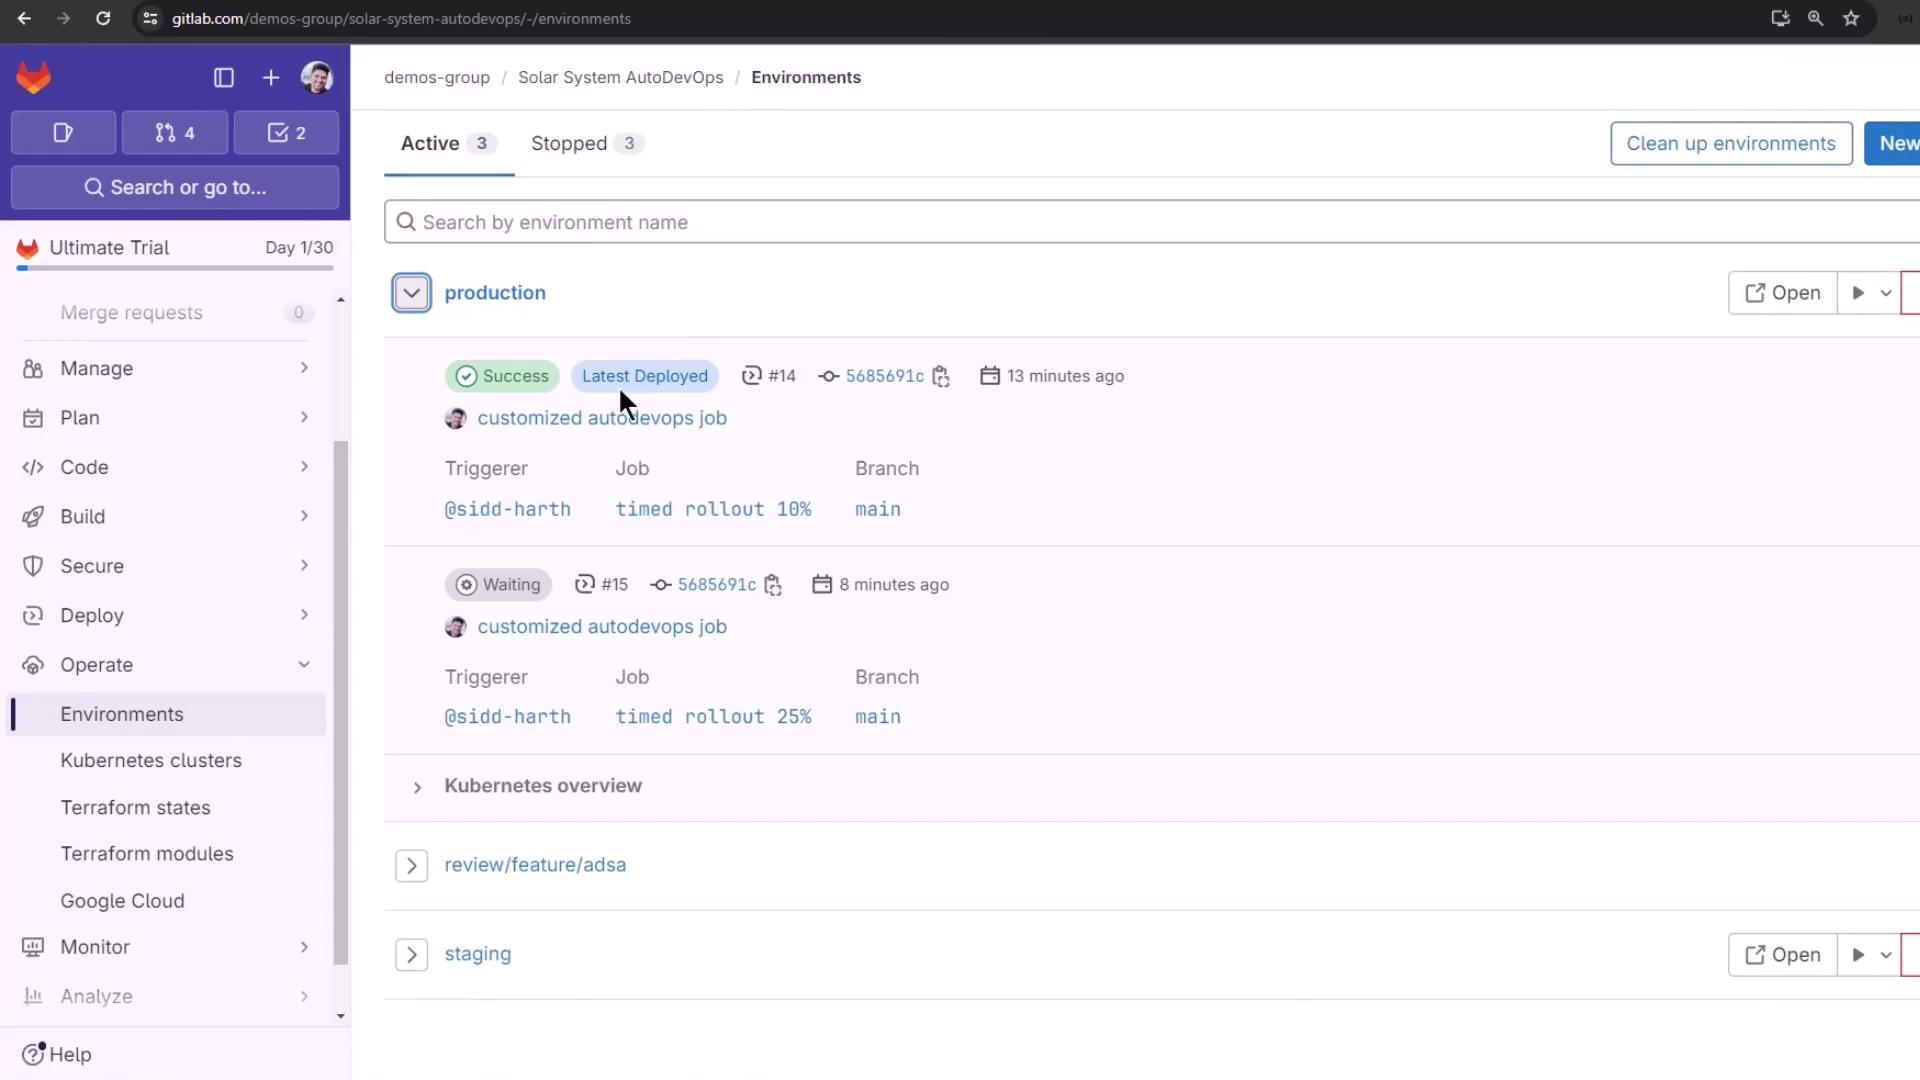
For more details, see the Auto DevOps documentation or explore these resources:

Watch Video

Watch video content

Previous
Rollback Deployment