Why Use the GitLab Kubernetes Agent?
Traditionally, CI/CD pipelines use a stored Kubeconfig file to authenticate against Kubernetes. However:- Kubeconfig files contain sensitive data (API server URL, tokens, certificates).
- Storing them as masked variables still poses a risk if compromised.
- Connecting to clusters behind firewalls or NAT gateways can be complex.
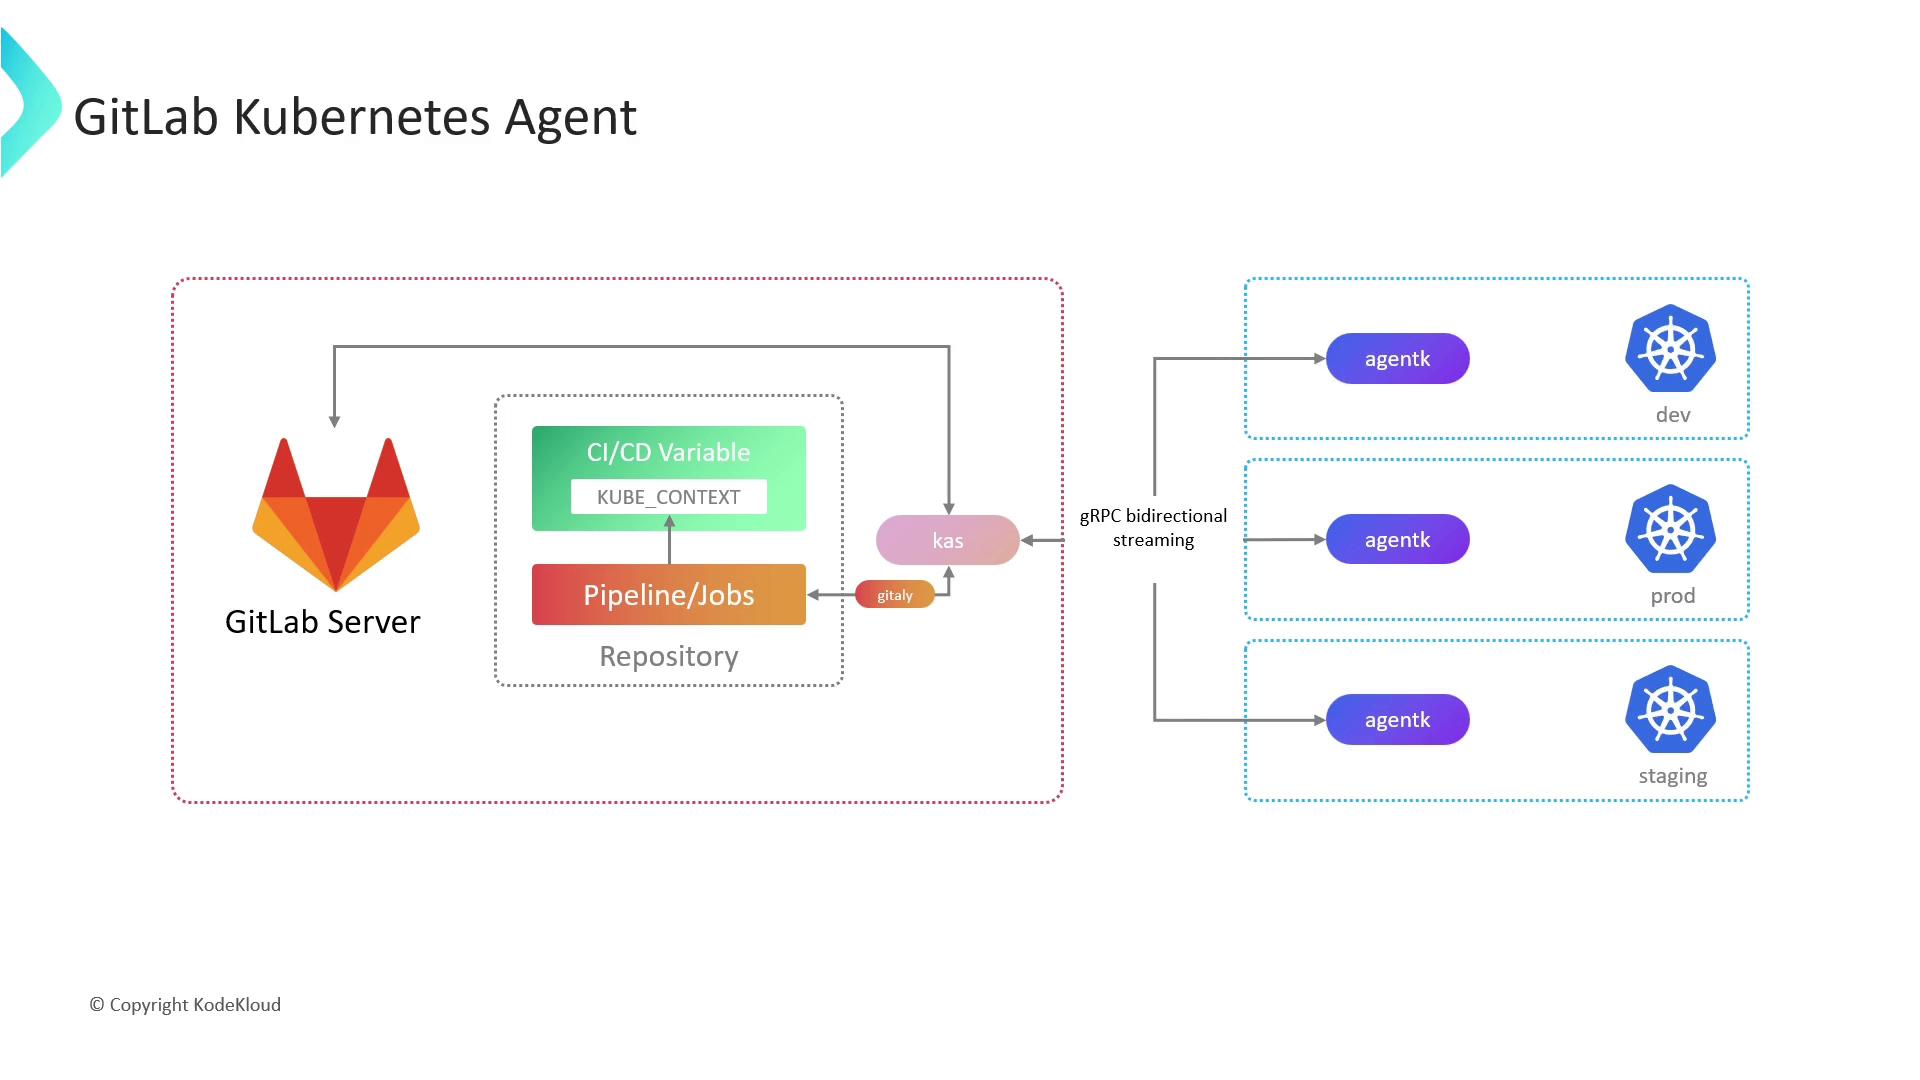
- Secure, credential-free communication
- Firewall/NAT traversal without port forwarding
- Bi-directional streaming for push and pull operations
AgentK is a lightweight pod running inside your cluster. It uses a token-based handshake with KAS to establish a persistent, encrypted channel—removing the need for direct API server exposure.
Prerequisites
- A GitLab account with Maintainer or Owner access.
- A GitLab project to register the agent and store its configuration.
- A Kubernetes cluster v1.17+ (AgentK compatibility).
helmCLI installed locally.
1. Register the GitLab Agent
- In your GitLab project, navigate to Operate > Kubernetes clusters.
- Click Add Kubernetes cluster and choose GitLab Agent.
- Provide a unique Agent name.
- GitLab will display a token and the Helm commands required for installation.
2. Install AgentK via Helm
Copy the Helm commands from the GitLab UI and execute them with your token:Keep your
<YOUR_AGENT_TOKEN> secret. Rotate the token if it is ever exposed.3. Configure the Agent
AgentK’s behavior is defined in your project’s repository at.gitlab/agent/<agent-name>/config.yaml. Customize this file to control deployments, security, and remote workspaces.
| Configuration Block | Description |
|---|---|
| gitops.manifest_projects | List of repositories with Kubernetes manifests and target namespaces. |
| gitops.ci_access | Projects allowed to use this agent in CI/CD pipelines. |
| workspaces | Remote development settings (Enterprise Edition). |
Modify
config.yaml as code and push changes to your default branch. AgentK watches this file and applies updates automatically.