In this guide, you’ll learn how to configure and manage environments and deployments in GitLab CI/CD. Environments represent the target locations—such as development, staging, or production—where your code runs. Each pipeline deployment creates a record, providing a clear history of changes and showing what version is currently live.
We’ll cover:
Defining environments in .gitlab-ci.yml
A sample pipeline with containerization, testing, and deployment
Static vs. dynamic environments
Creating environments in the GitLab UI
Viewing, rolling back, and redeploying applications
1. Defining an Environment in .gitlab-ci.yml You can declare environments directly in job definitions to track deployments and enable quick-access links.
Simple Environment Declaration deploy to production : stage : deploy script : - git push production HEAD:main environment : production
This tracks deployments under the production environment name.
Expanded Environment Configuration deploy to production : stage : deploy script : - git push production HEAD:main environment : name : production url : https://prod.example.com
name : The identifier displayed in the GitLab UI.url : External link to the live application for rapid access.
2. Example Pipeline Configuration Here’s a streamlined pipeline showcasing containerization, tests, and deployment to a Kubernetes namespace:
stages : - containerization - test - dev-deploy # 1. Build and push to GitLab Container Registry publish_gitlab_container_registry : stage : containerization needs : - docker_build - docker_test image : docker:24.0.5 services : - docker:24.0.5-dind script : - docker load -i image/solar-system-image-$CI_PIPELINE_ID.tar - docker login -u "$CI_REGISTRY_USER" -p "$CI_REGISTRY_PASSWORD" - docker tag $DOCKER_USERNAME/solar-system:$IMAGE_VERSION $CI_REGISTRY_IMAGE/ss-image:$IMAGE_VERSION - docker push $CI_REGISTRY_IMAGE/ss-image:$IMAGE_VERSION # 2. Deploy to development on Kubernetes k8s_dev_deploy : stage : dev-deploy image : alpine:3.7 before_script : - wget -qO kubectl "https://storage.googleapis.com/kubernetes-release/release/$(wget -qO - https://storage.googleapis.com/kubernetes-release/release/stable.txt)/bin/linux/amd64/kubectl" - chmod +x kubectl && mv kubectl /usr/local/bin/ - apk add --no-cache gettext script : - export KUBECONFIG=$DEV_KUBE_CONFIG - kubectl version --client -o yaml - kubectl config get-contexts - kubectl get nodes - export INGRESS_URL=$(kubectl -n ingress-nginx get svc ingress-nginx-controller -o jsonpath='{.status.loadBalancer.ingress[0].ip}') - kubectl -n $NAMESPACE create secret generic mongo-db-creds \ --from-literal=MONGO_URI=$MONGO_URI \ --from-literal=MONGO_USERNAME=$MONGO_USERNAME \ --from-literal=MONGO_PASSWORD=$MONGO_PASSWORD \ --save-config \ --dry-run=client -o yaml | kubectl apply -f - - for file in kubernetes/manifest/*.yaml; do envsubst < $file | kubectl apply -f -; done - kubectl -n $NAMESPACE get all,secret,ing artifacts : reports : dotenv : app_ingress_url.env environment : name : development url : https://$INGRESS_URL # 3. Integration tests against development k8s_dev_integration_testing : stage : dev-deploy image : alpine:3.7 needs : - k8s_dev_deploy before_script : - apk add --no-cache curl jq script : - echo "Testing endpoint : https://$INGRESS_URL" - curl -s -k https://$INGRESS_URL/Live | jq -r .status | grep -i live - curl -s -k https://$INGRESS_URL/ready | jq -r .status | grep -i ready
3. Static vs. Dynamic Environments GitLab supports two environment types:
Environment Type Description Creation Method Static Predefined before pipeline runs Manual via Operations > Environments in the UI Dynamic Generated on the fly by pipeline definitions Specified in job’s environment section in .gitlab-ci.yml
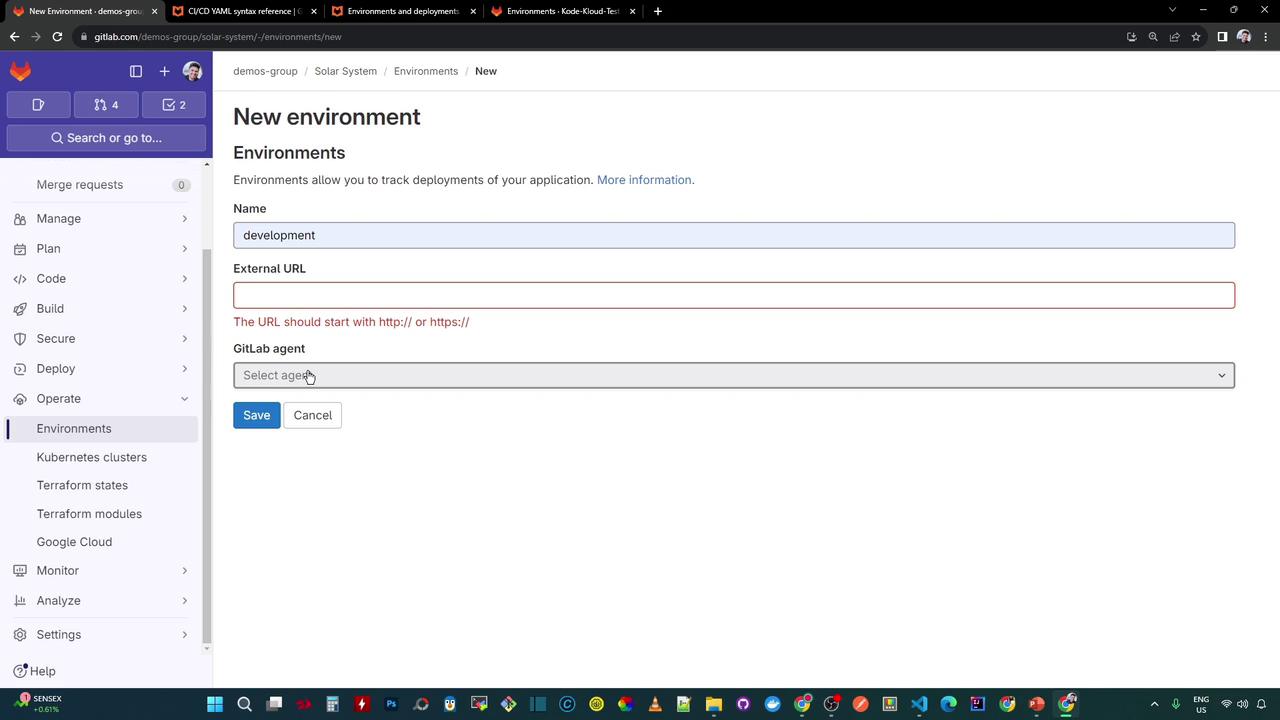
4. Creating a Static Environment
In GitLab, navigate to Operations > Environments > New environment .
Enter the Name and optional External URL .
(Optional) Link a GitLab Agent for Kubernetes.
Click Save .
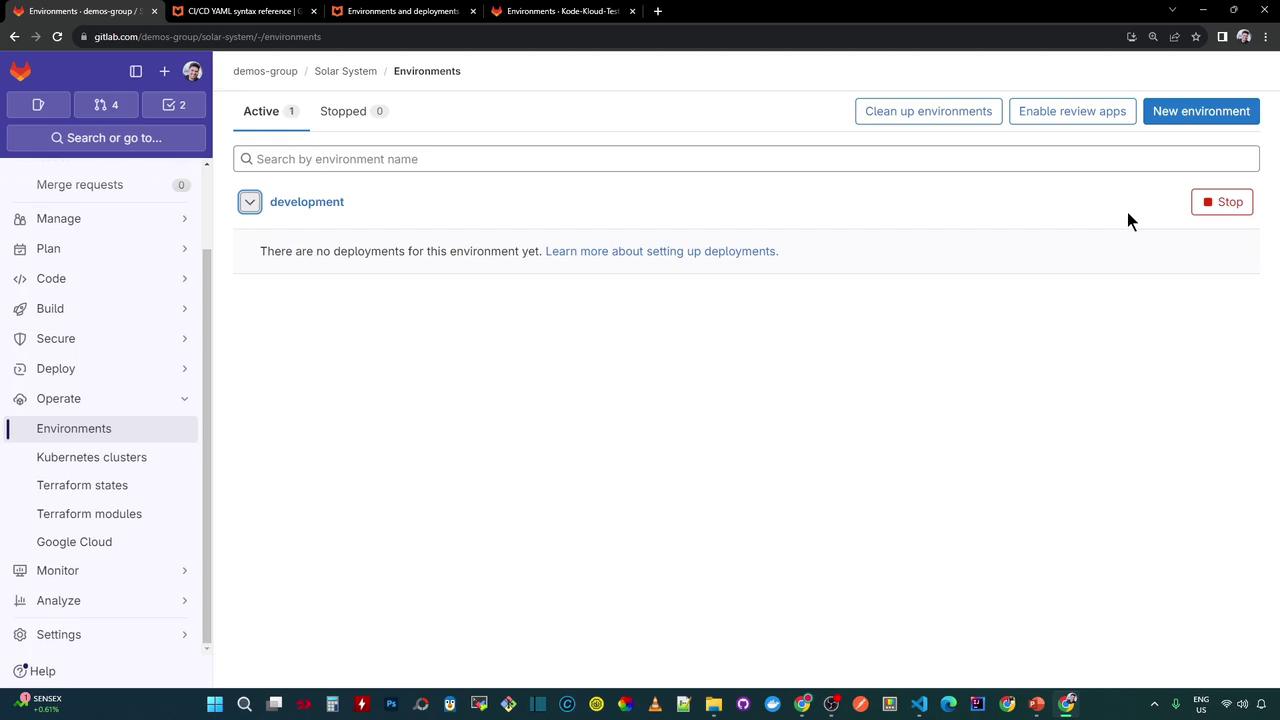
After saving, the new environment appears in the list (initially with no deployments):
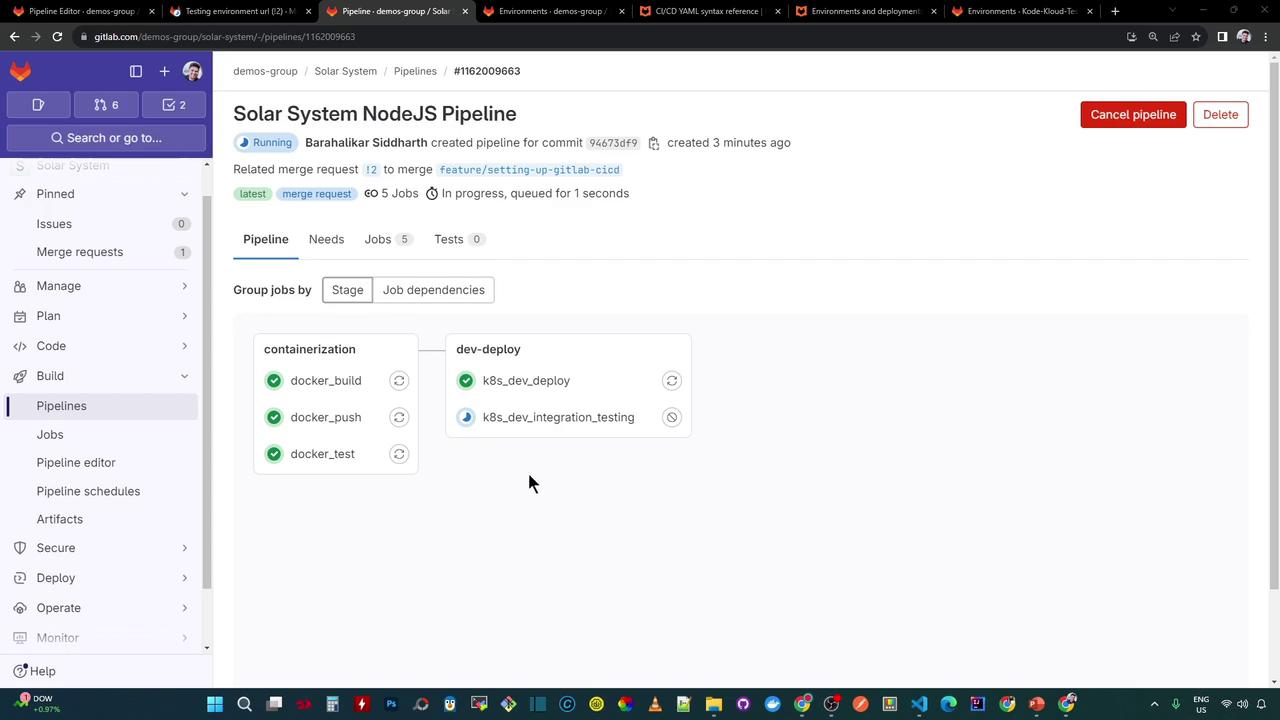
5. Running the Pipeline & Viewing Deployments Once you push changes or create a Merge Request, the pipeline executes:
Containerization Testing Deployment
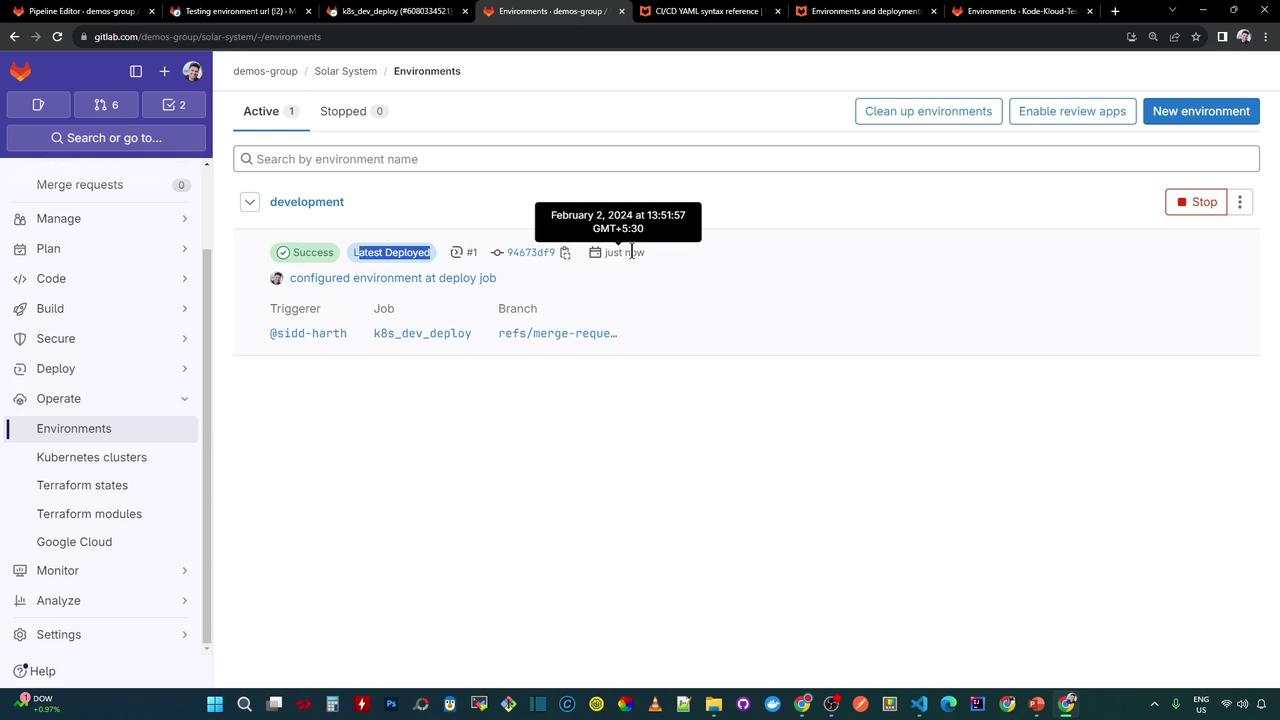
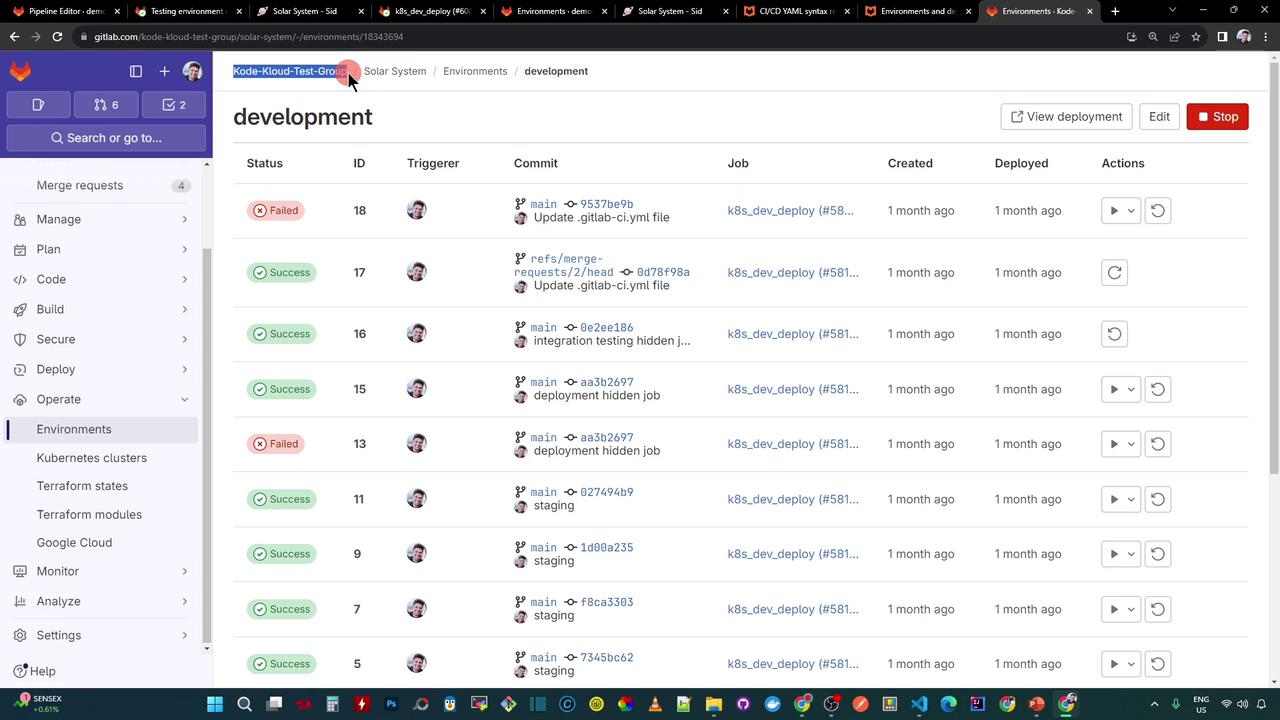
After a successful deployment, visit Operations > Environments to see deployment details: commit ID, job name, timestamp, and more.
Click Open live environment to launch your application. This link uses the url specified in your job’s environment settings and is also visible in Merge Requests for quick previews.
6. Rollback and Redeploy If a deployment fails or you need to revert changes, GitLab offers Finish , Rollback , and Redeploy actions:
Rollback : Reverts to the last successful deployment (using the recorded commit ID).Redeploy : Re-runs the deployment job for the same commit.
Use rollback carefully: any data migrations or schema changes may not be reversible.
Links and References