This guide outlines the course organization and setup for a comprehensive PyTorch learning journey.
Thank you for joining our comprehensive PyTorch learning journey! In this guide, we outline the course organization and walk you through setting up your development environment. The course is divided into four sections, each designed to gradually build your expertise in PyTorch. You will alternate between using the terminal and a code editor for coding practice, with all interactive demonstrations running inside Jupyter Notebooks.
In the first section, you will work directly within a Jupyter Notebook, running individual cells interactively while we explain the code. One useful utility function provided is a helper for visualizing tensors. This function is available in our GitHub repository, allowing you to download and experiment on your own system. Below is an enhanced version of the tensor visualization function:
Copy
import matplotlib.pyplot as pltdef visualize_tensor(tensor): num_layers = tensor.size(0) # Number of layers, e.g., 4 height, width = tensor.size(1), tensor.size(2) # Image dimensions (e.g., 82, 290) fig, axes = plt.subplots(1, num_layers, figsize=(15, 5)) # Ensure axes is iterable even when there's only one layer if num_layers == 1: axes = [axes] for i in range(num_layers): axes[i].imshow(tensor[i], cmap='gray', aspect='auto') axes[i].set_title(f'Layer {i+1}') axes[i].set_xlabel(f'Columns (Width): {width}') axes[i].set_ylabel(f'Rows (Height): {height}') axes[i].set_xticks([0, width // 2, width - 1]) axes[i].set_xticklabels([1, width // 2, width]) axes[i].set_yticks([0, height // 2, height - 1]) axes[i].set_yticklabels([1, height // 2, height])
Make sure to download the helper function from our GitHub repository to test it on your own machine.
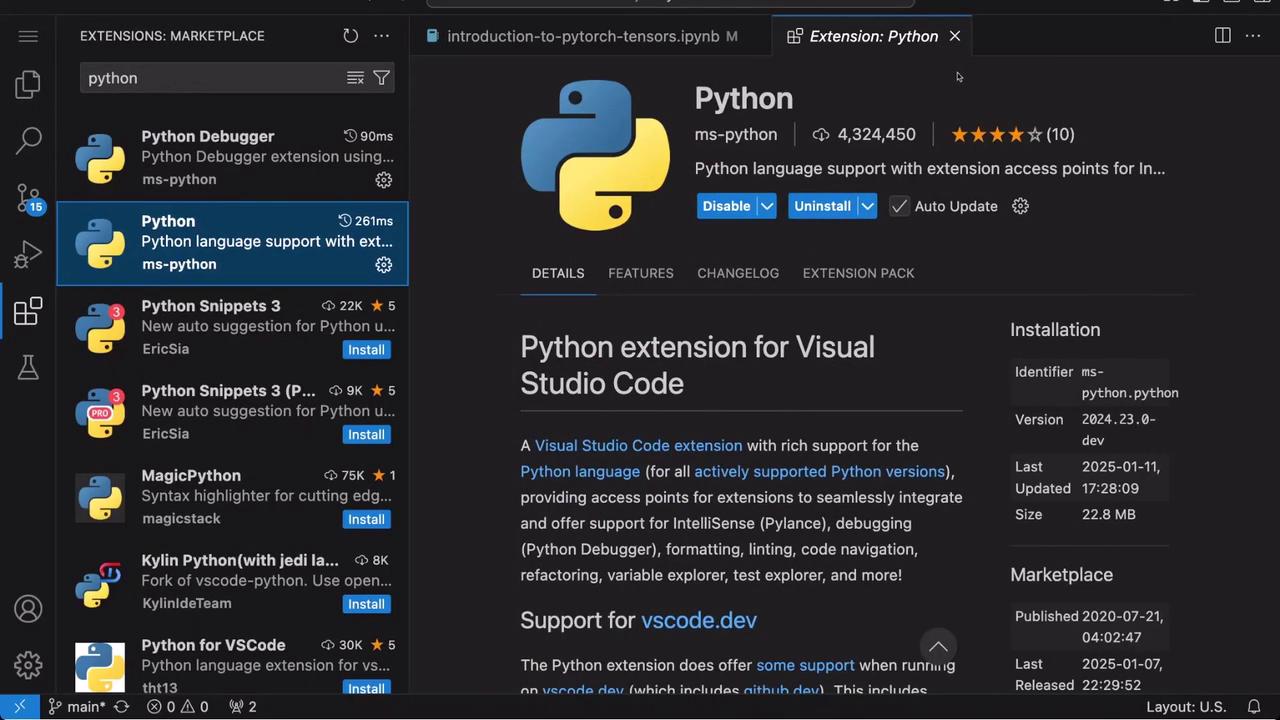
When developing in Visual Studio Code, it is essential to install the Python extension for an enhanced coding experience. This extension simplifies setting up your development environment and makes executing Python files straightforward with its integrated play button. Below is an example snippet that demonstrates how you might start working in VS Code:
Copy
# Begin by importing the torch libraryimport torch# Helper code to visualize tensors using matplotlibimport matplotlib.pyplot as pltdef visualize_tensor(tensor): num_layers = tensor.size(0) # Number of layers (e.g., 4) height, width = tensor.size(1), tensor.size(2) fig, axes = plt.subplots(1, num_layers, figsize=(15, 5)) if num_layers == 1: axes = [axes] # Further implementation as shown in Section 1...
After installing the Python extension, you have access to various features that streamline development, including debugging, snippet support, and intelligent code completion.
Section 3: Configuring Your Environment with Jupyter
To fully leverage Jupyter notebooks within VS Code, install the Jupyter extension from the marketplace. This extension allows you to run notebooks directly in VS Code and easily switch between different kernels to match your environment settings. In this section, you will also learn how to define dependencies and code a simple model class. Consider the following example:
Copy
# Define dependenciesdependencies = ['torch']import torchimport torch.nn as nnimport torch.nn.functional as Ffrom torch.hub import load_state_dict_from_url# Dictionary pointing to the URL of the modelsmodels_url = { 'fake_model': 'https://github.com/kodekcloudhub/PyTorch/raw/refs/heads/main/'}# Model class definitionclass FakeNet(nn.Module): def __init__(self): super(FakeNet, self).__init__() # Initialization code goes here def forward(self, x): # Define the forward pass return x
Ensure that you set the notebook kernel to match the environment where your dependencies are installed so that the demos and labs run smoothly.
The final section of the course introduces interactive labs. Here, you’ll alternate between using your IDE and executing commands in the terminal. For instance, you might run a Python script using the terminal as shown below:
Copy
# Begin by importing the torch libraryimport torch
When you execute your script, you might encounter outputs similar to the following:
Copy
/root/venv/bin/python3 /root/PyTorch/hubconf.py[WARN] - (starship::utils): Executing command "git" timed out.[WARN] - (starship::utils): You can set command_timeout in your config to a higher value to allow long-running commands to keep executing.
A successful run could display output like this:
Copy
root@pytorch PyTorch on 🌳 main via 🐍 v3.11.4 (venv) ➔ /root/venv/bin/python3 /root/PyTorch/hubconf.pyroot@pytorch PyTorch on 🚀 main [!]? via 🐍 v3.11.4 (venv) *
Running your scripts both in the IDE and the terminal helps solidify your understanding of PyTorch operations across different environments.
In this guide, we have detailed the course structure and demonstrated how to configure both Jupyter Notebook and Visual Studio Code for PyTorch development. By following these examples and experimenting with the provided code snippets, you will gain a robust understanding of PyTorch and its workflows.Thank you for choosing this course—now is the time to dive in and start learning!For further reading and more resources, check out the following: