Docker Compose Configuration
The following Docker Compose file defines two services: an API container and a MongoDB container. The API service uses our pre-built image “kodekloud/ecs-project2” and environment variables to connect to MongoDB, while the MongoDB service leverages persistent storage through volumes.Ensure that environment variables for MongoDB connectivity are properly set to avoid connection issues.
API Endpoints Overview
The API, built with Express and Mongoose, implements basic CRUD functionality for managing notes. The code snippets below illustrate each endpoint:GET /notes
Retrieves all notes from the database.GET /notes/:id
Retrieves a specific note by its ID.POST /notes
Creates a new note.PATCH /notes/:id
Updates an existing note.DELETE /notes/:id
Deletes a note by its ID.MongoDB Connection and Server Initialization
The snippet below uses Mongoose to connect to MongoDB. Upon successful connection, the server starts listening on port 3000.AWS ECS Setup and Task Definition
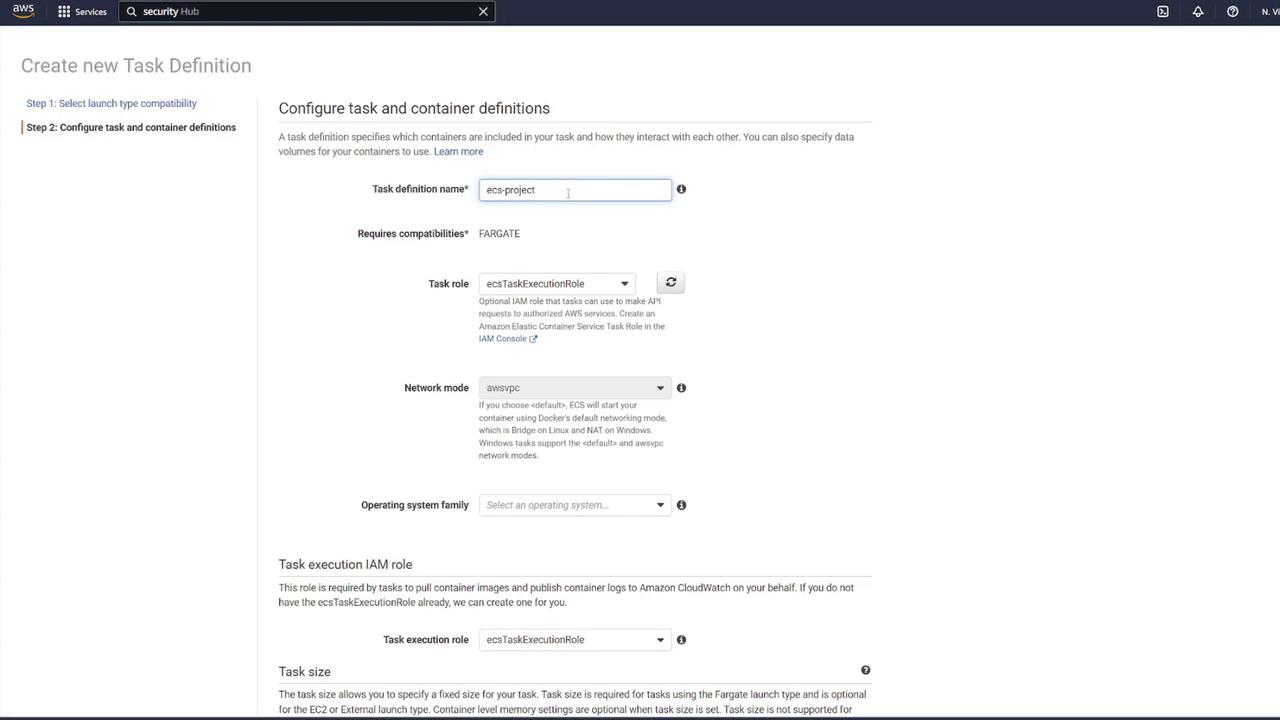
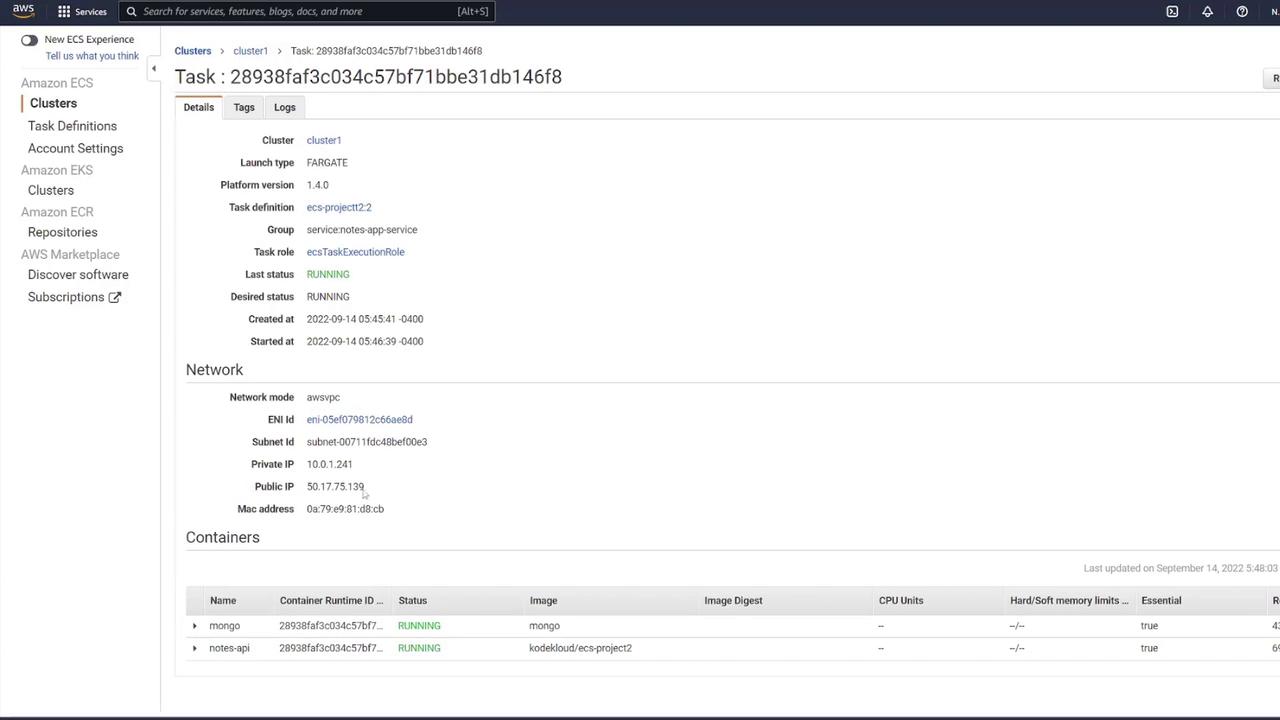
Before deploying the application on ECS, proper configuration of AWS components is crucial. This section will guide you through setting up the security group, task definition, container configurations, and volumes.ECS Task Definition and Security Group
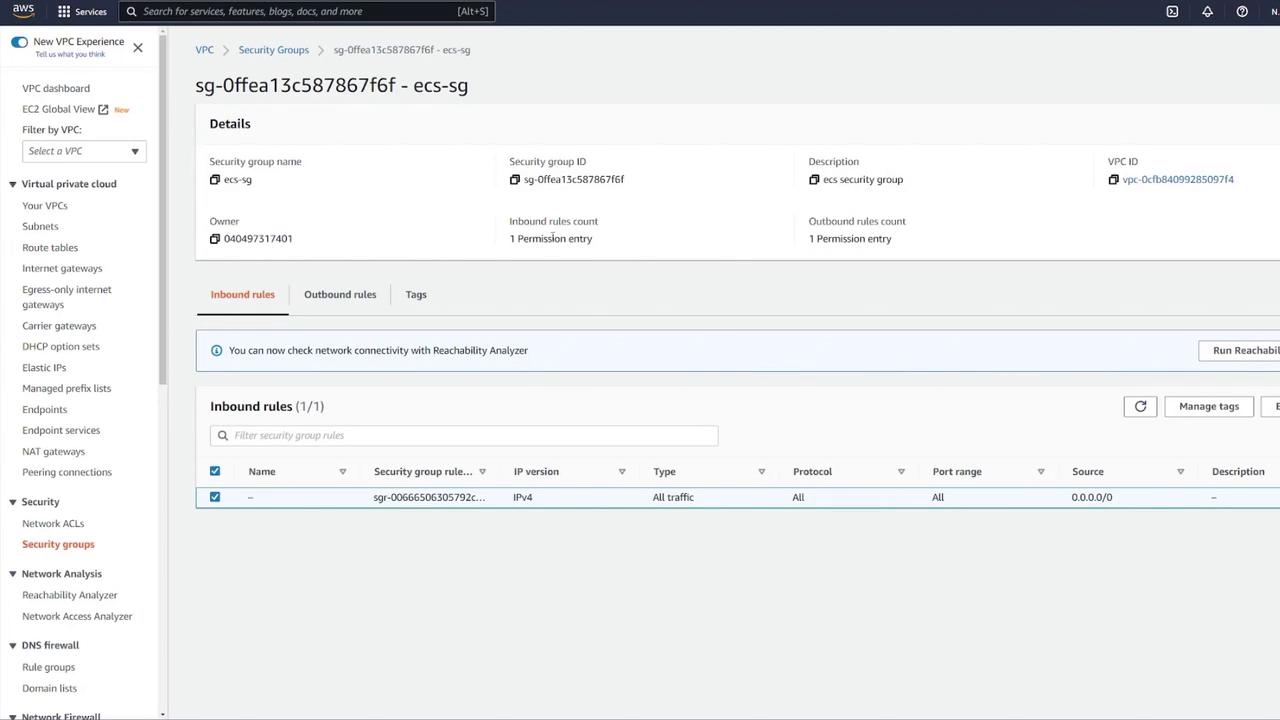
Step 1: Create a Security Group for ECS Navigate to EC2 → Security Groups. Create a new security group (e.g., “ECS-SG”) and allow all traffic temporarily. Select the correct VPC matching your ECS cluster.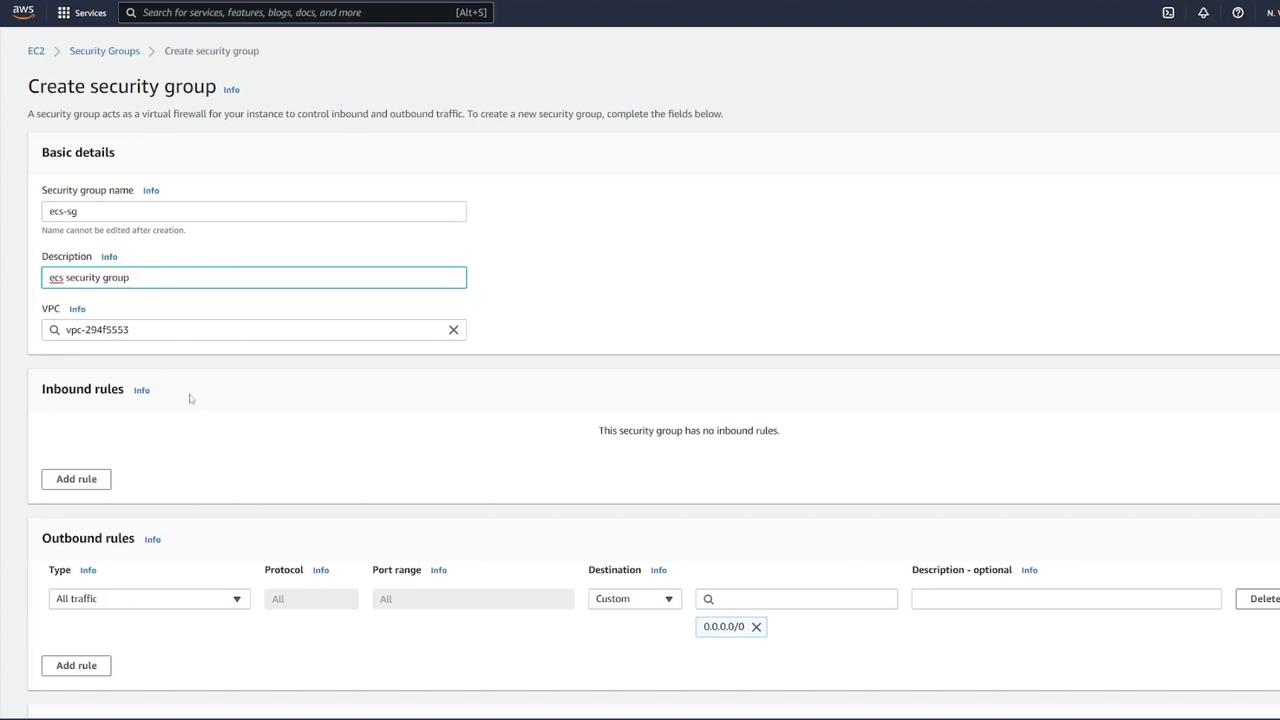

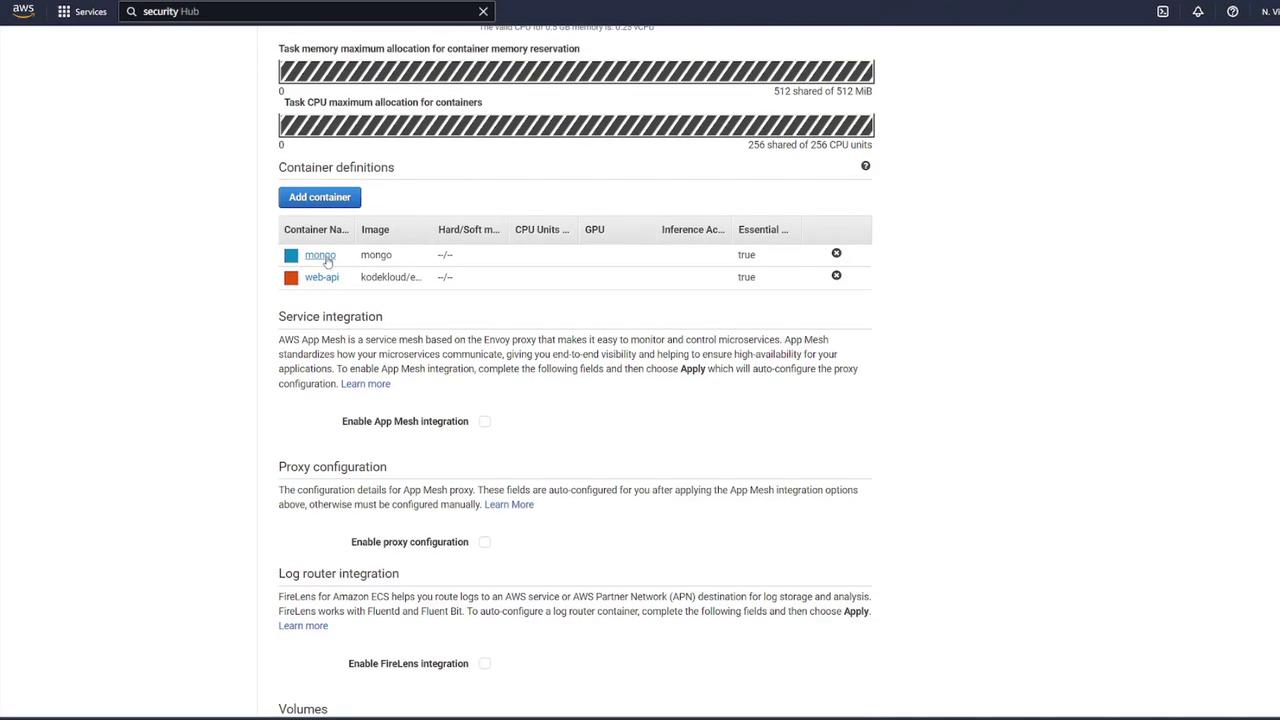
Container Configuration
-
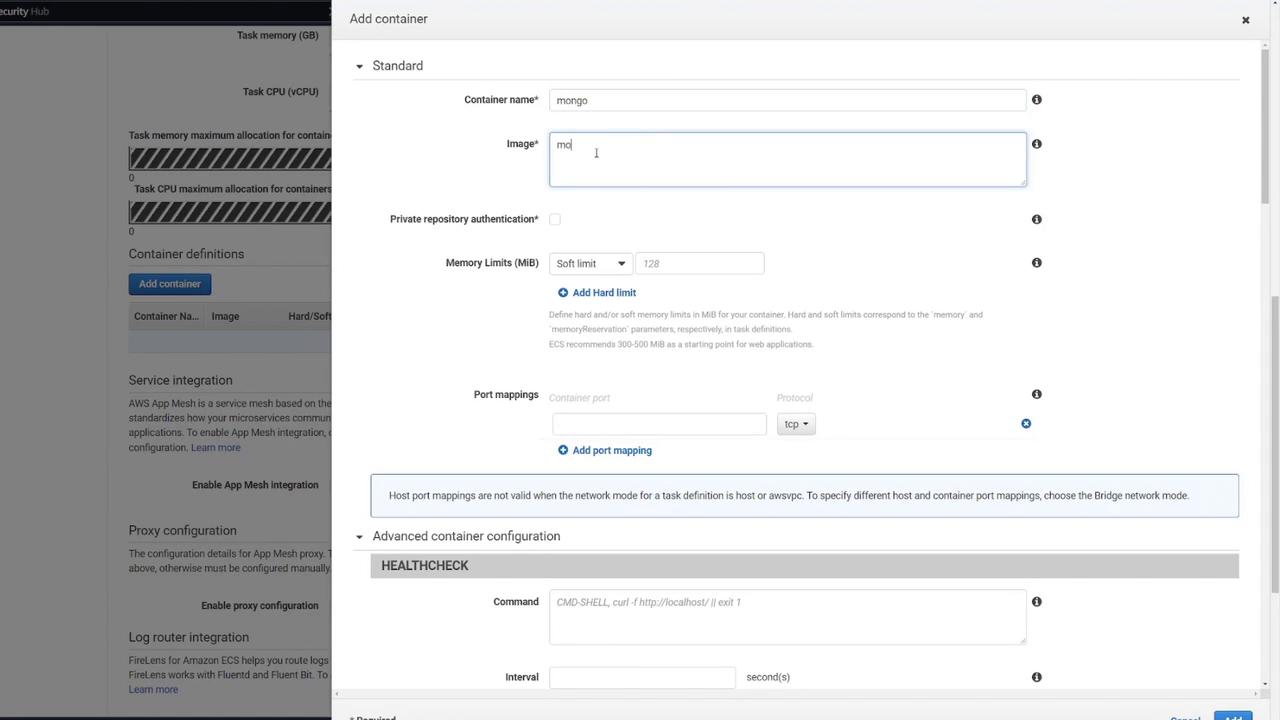
MongoDB Container
- Container Name: Mongo
- Image: Default Mongo image from Docker Hub
- Port Mapping: 27017
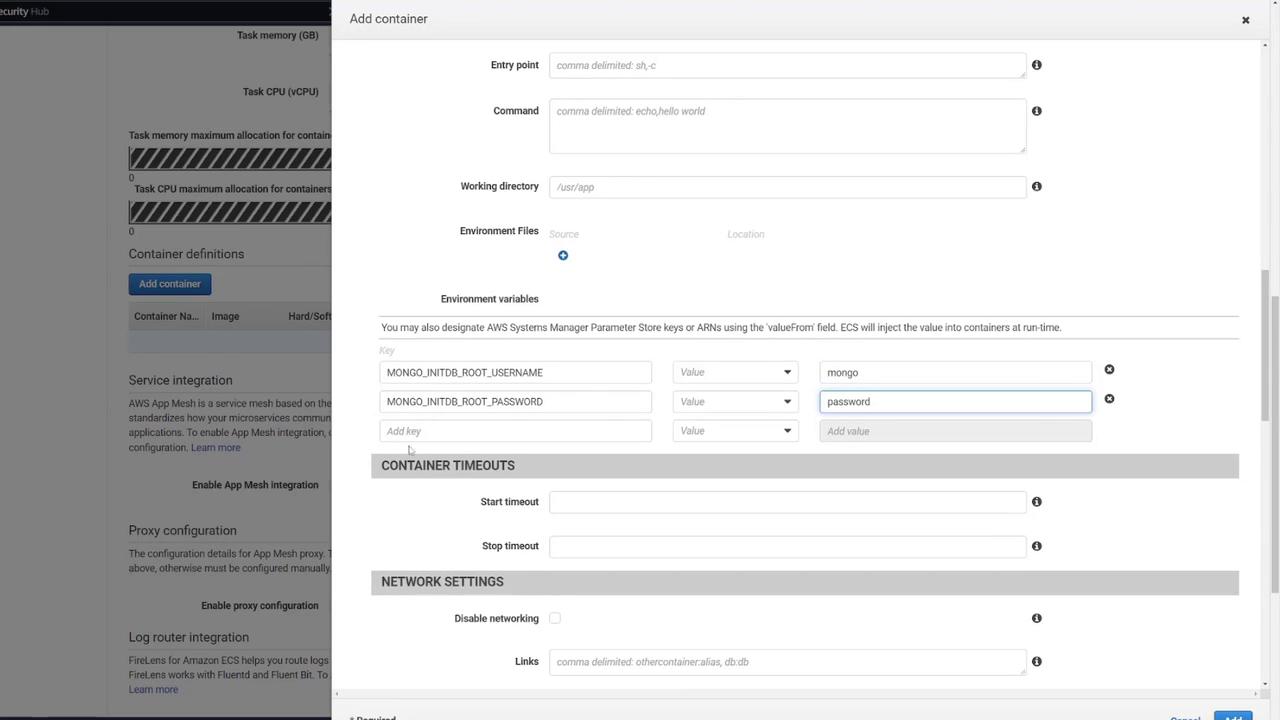
- Environment Variables:
- MONGO_INITDB_ROOT_USERNAME: mongo
- MONGO_INITDB_ROOT_PASSWORD: password
- Volume Mapping: Mount the volume (e.g., “mongo-db”) at
/data/db.
-
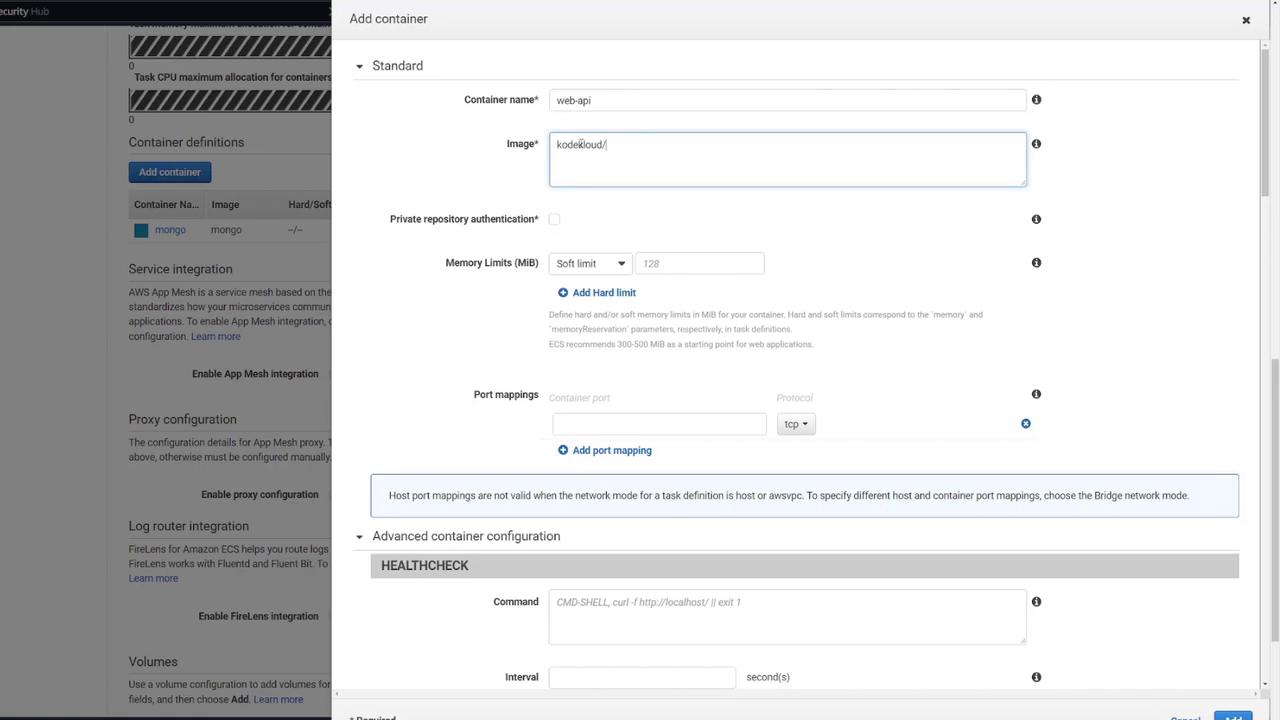
Express API Container
- Container Name: e.g., “web API”
- Image: kodekloud/ecs-project2
- Port Mapping: 3000
- Environment Variables:
- MONGO_USER: mongo
- MONGO_PASSWORD: password
- MONGO_IP: mongo (adjust to “localhost” if required in ECS)
- MONGO_PORT: 27017
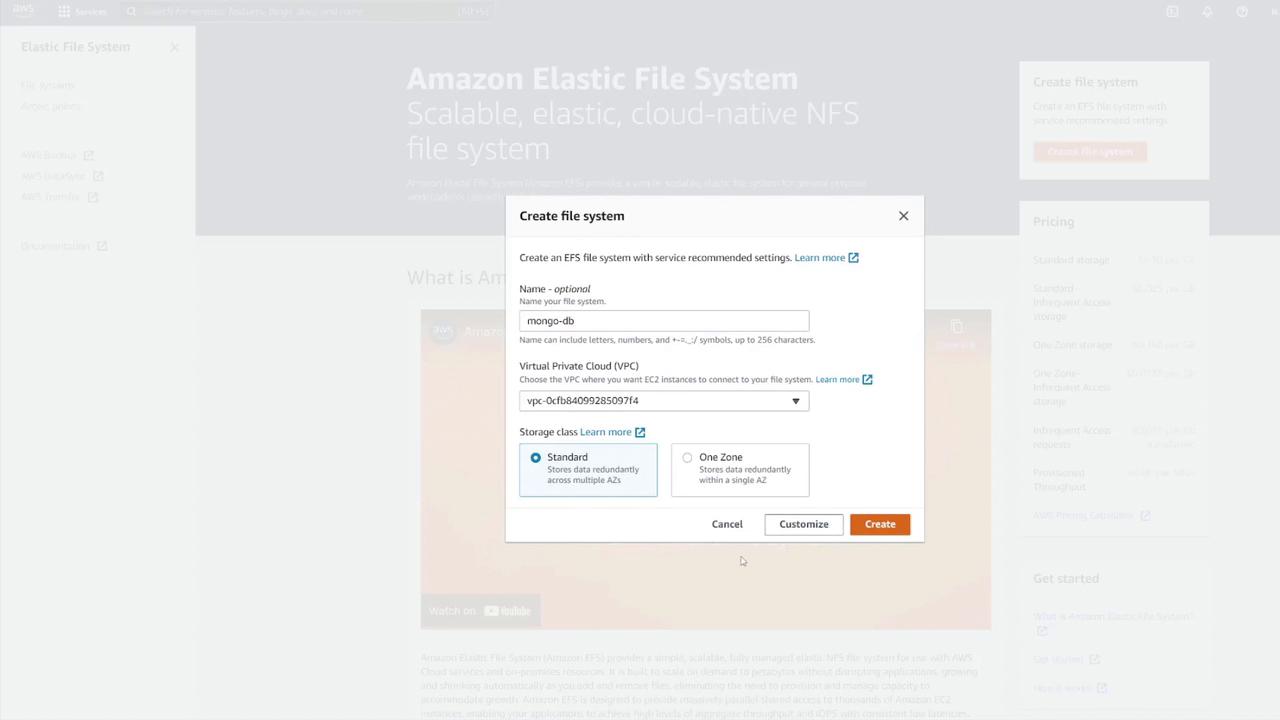
- Volume Setup for MongoDB To ensure persistent data storage, define a volume for MongoDB. In the task definition, add a volume (e.g., “MongoDB”) and select AWS Elastic File System (EFS) as the volume type.
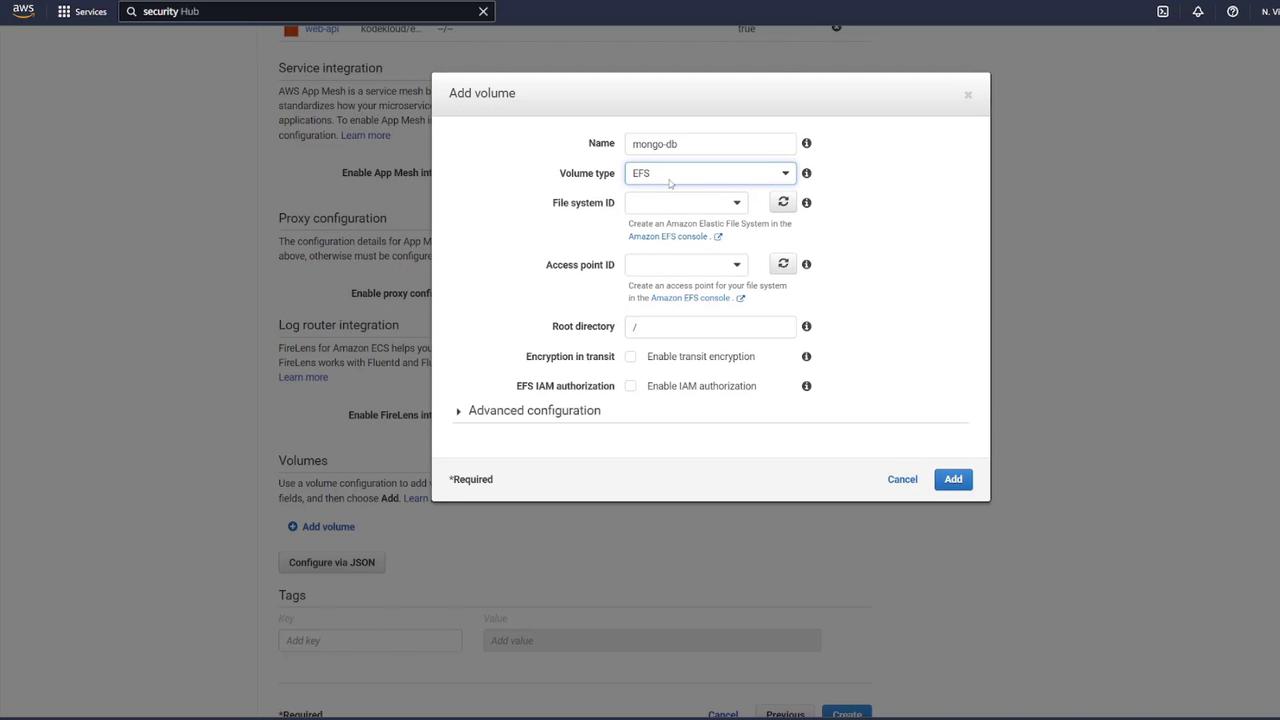
- Select “Create File System” via the provided link.
- Name the file system (e.g., MongoDB) and select the correct VPC.
- Customize the setup to include desired subnets.
- Update the EFS security group to allow only NFS access (port 2049) from your ECS security group.
/data/db.
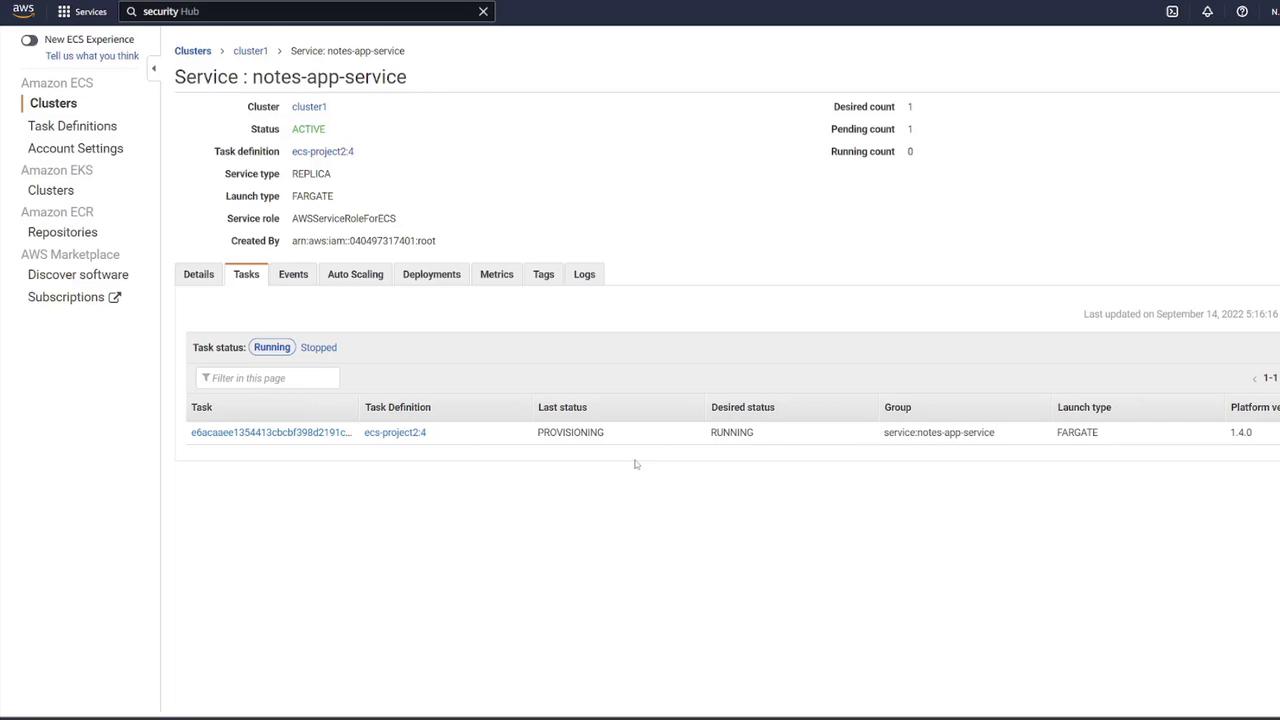
Creating the ECS Service
With the task definition ready, follow these steps to create an ECS service and attach a load balancer:- Go to your ECS cluster and click “Create Service.”
- Select Fargate as the launch type with the Linux platform.
- Choose the task definition (e.g., “ECS-Project2”) and provide a service name (e.g., “notes app service”).
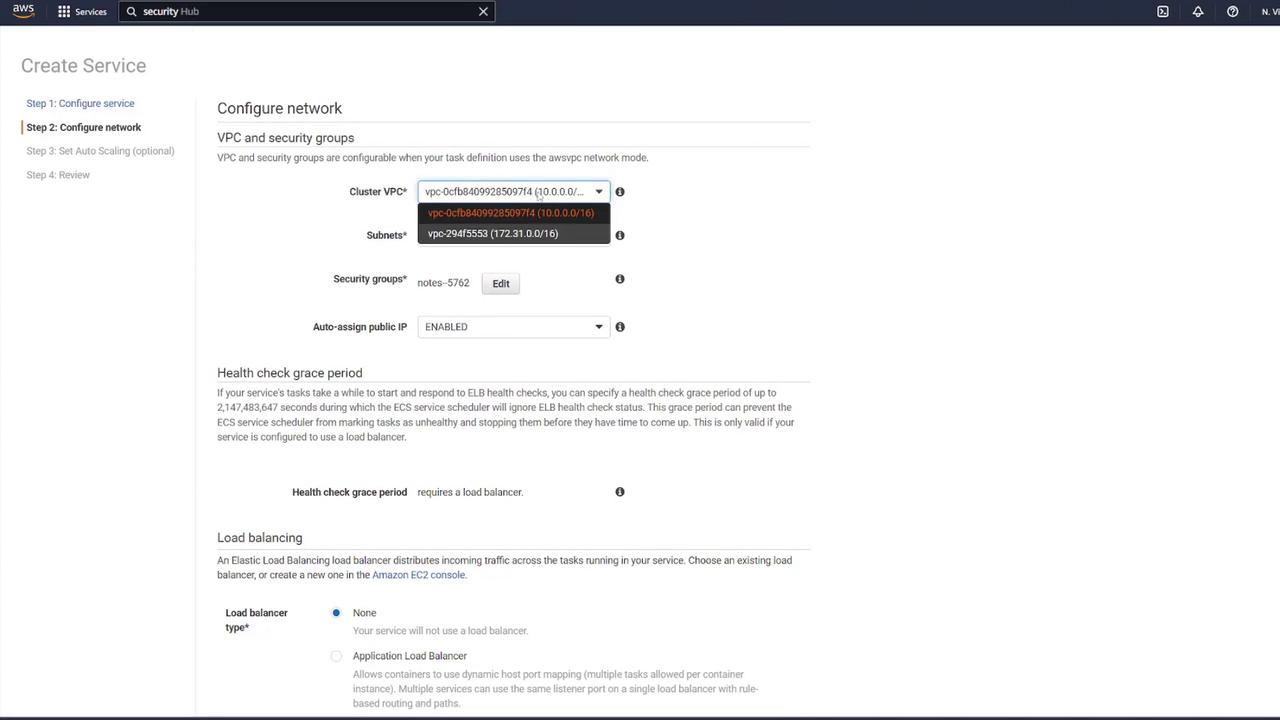
- Set the desired number of tasks to 1, ensuring the correct VPC and subnets are selected.
- For the security group, select the one created earlier (“ECS-SG”).
- Open the load balancer setup in a new tab.
- Create a new ALB (e.g., “notes LB”) using IPv4; ensure it is internet-facing and assigned to the correct VPC.
- Create a new security group for the load balancer (e.g., “LB-SG”) that permits HTTP traffic on port 80.

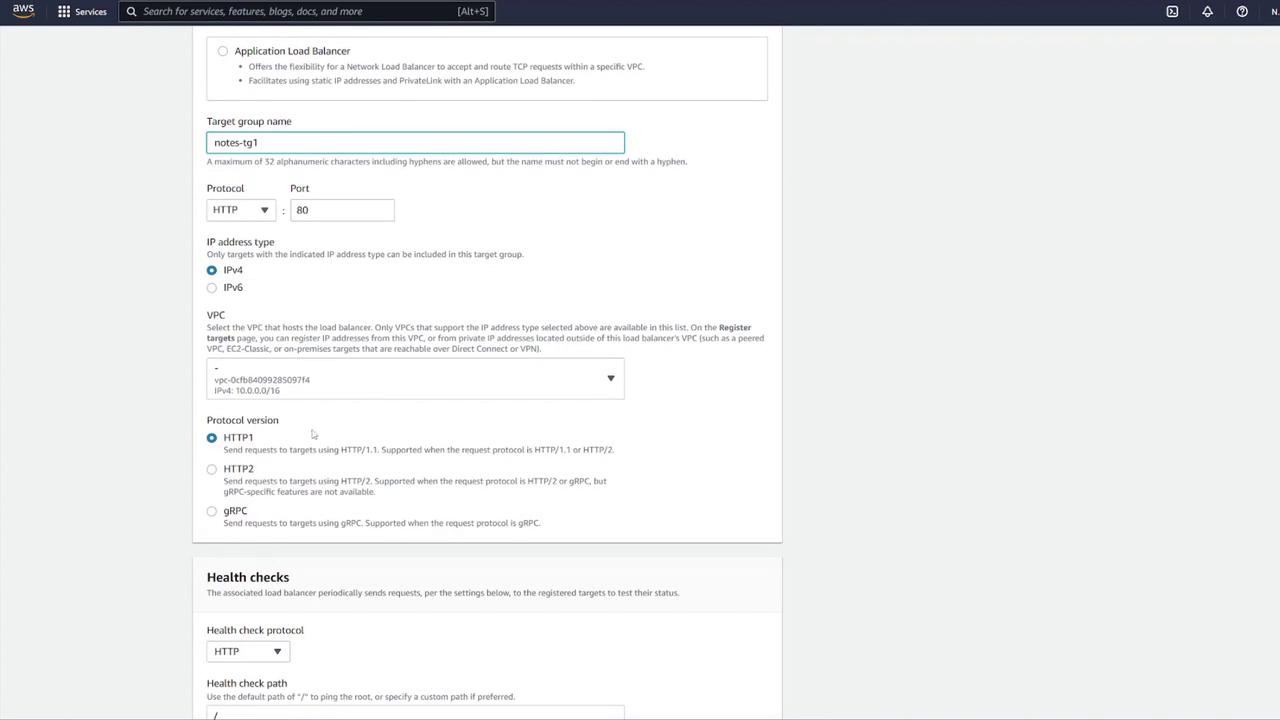
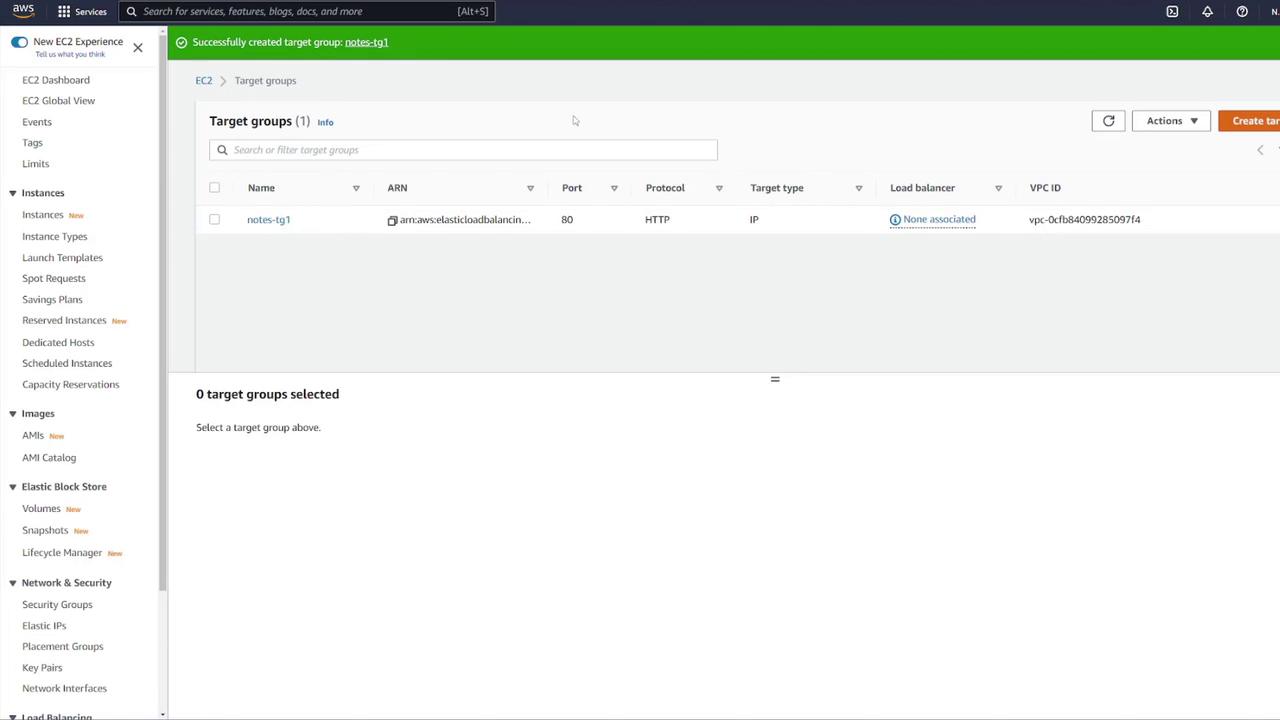
- Create a target group for the ALB:
- Choose “IP addresses” as the target type (suitable for ECS).
- Name the target group (e.g., “notes-target-group1”).
- Set the health check path to
/notesand the port to 3000.
- Assign the target group to your ALB.
- Return to the ECS service configuration. Specify that the load balancer forwards traffic on port 80 to port 3000 on the API container. Review and create the service.

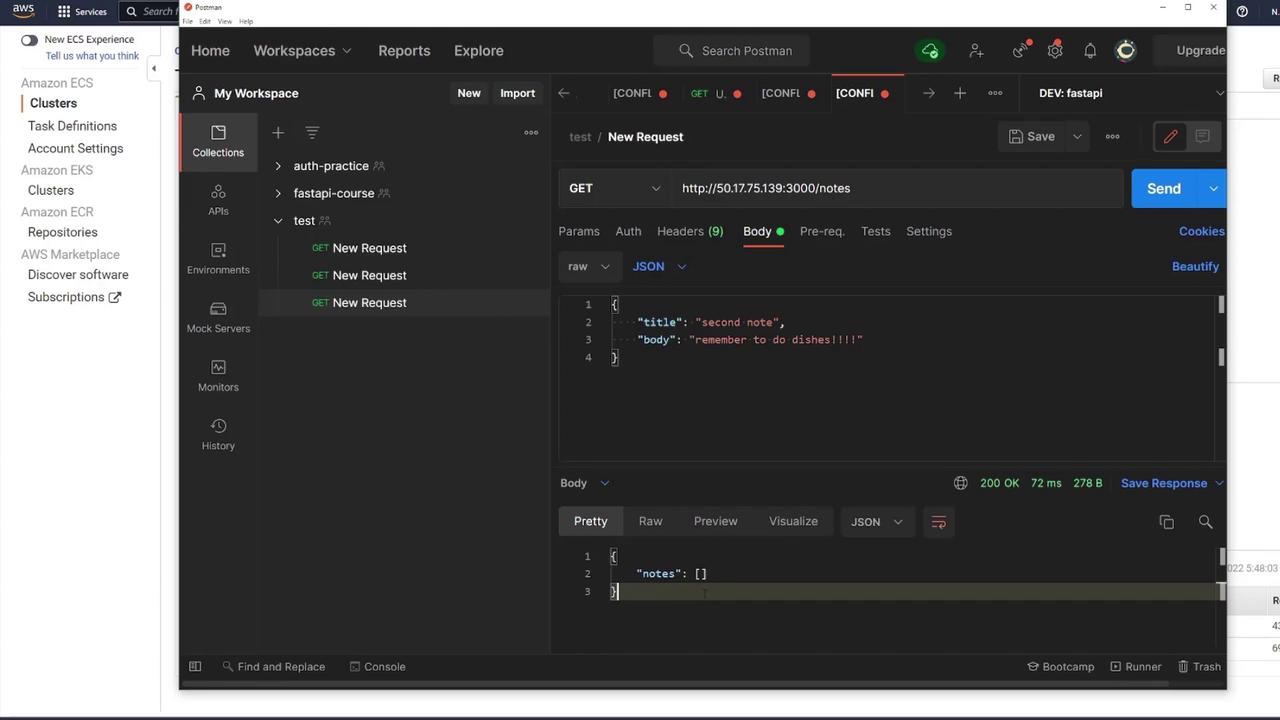
Testing the Deployment
Test the API by directly accessing the container’s IP on port 3000 via tools like Postman:- Send a GET request to
/notesto retrieve notes (an empty array if no notes are present). - For production, use the ALB DNS name; the ALB on port 80 forwards traffic to the API container on port 3000.
Securing the ECS Security Group
It is important to restrict access to your ECS resources. Currently, the ECS security group permits all incoming traffic, which is not secure. Action Steps:- Remove the rule that allows all traffic.
- Add a new rule to allow Custom TCP traffic on port 3000.
- Set the source to the load balancer security group (LB-SG) only.
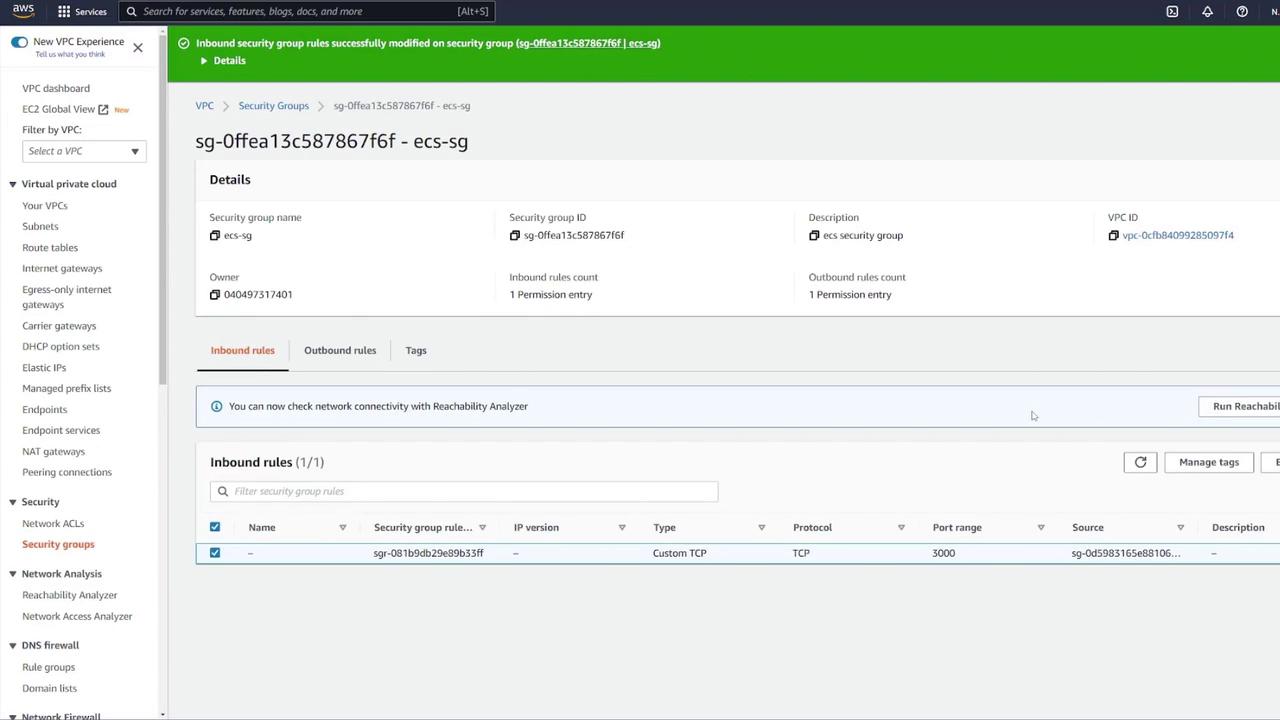
Securing your ECS security group is critical. Ensure that only the necessary traffic is allowed to minimize potential exposure and vulnerabilities.
By following these detailed steps, you have successfully deployed a containerized application on AWS ECS with a load balancer ensuring efficient traffic routing, along with security group modifications to secure your environment. For more information on container orchestration and best practices, visit Kubernetes Documentation and Docker Hub.