AWS Solutions Architect Associate Certification
Services Compute
ECS Demo Part 1
In this lesson, you will deploy a simple Node.js application to AWS ECS. Before working with ECS using the AWS Console, review the two public demo projects available on Docker Hub:
• https://kodekloud.com/ecs-project1
• https://kodekloud.com/ecs-project2
Pull these images to follow along with the lesson.
Project 1 Overview
Project 1 features a basic Node.js application using the Express framework to serve a simple HTML file. A GET request to the root path returns the HTML document.
index.html
<!DOCTYPE html>
<html lang="en">
  <head>
    <meta charset="UTF-8" />
    <meta http-equiv="X-UA-Compatible" content="IE=edge" />
    <meta name="viewport" content="width=device-width, initial-scale=1.0" />
    <link rel="stylesheet" href="css/style.css" />
    <title>Document</title>
  </head>
  <body>
    <h1>ECS Project 1</h1>
  </body>
</html>
user1 on user1 in ecs-project1 is v1.0.0 via ⎊
Express Server Code
The Express server is configured to render the HTML page. The application listens on port 3000.
const express = require("express");
const path = require("path");

const app = express();

app.set("view engine", "ejs");
app.set("views", path.join(__dirname, "views"));
app.use(express.static(path.join(__dirname, "public")));

app.get("/", (req, res) => {
  res.render("index");
});

app.listen(3000, () => {
  console.log("Server is running on port 3000");
});
user1 on user1 in ecs-project1 is 🧱 v1.0.0 via []
Dockerfile
The Dockerfile below packages the application and exposes port 3000. When configuring your ECS container, ensure that port 3000 is specified.
FROM node:16
WORKDIR /usr/src/app
COPY package*.json ./
RUN npm install
RUN npm ci --only=production
COPY . .
EXPOSE 3000
CMD [ "node", "index.js" ]
Deploying with the ECS Console
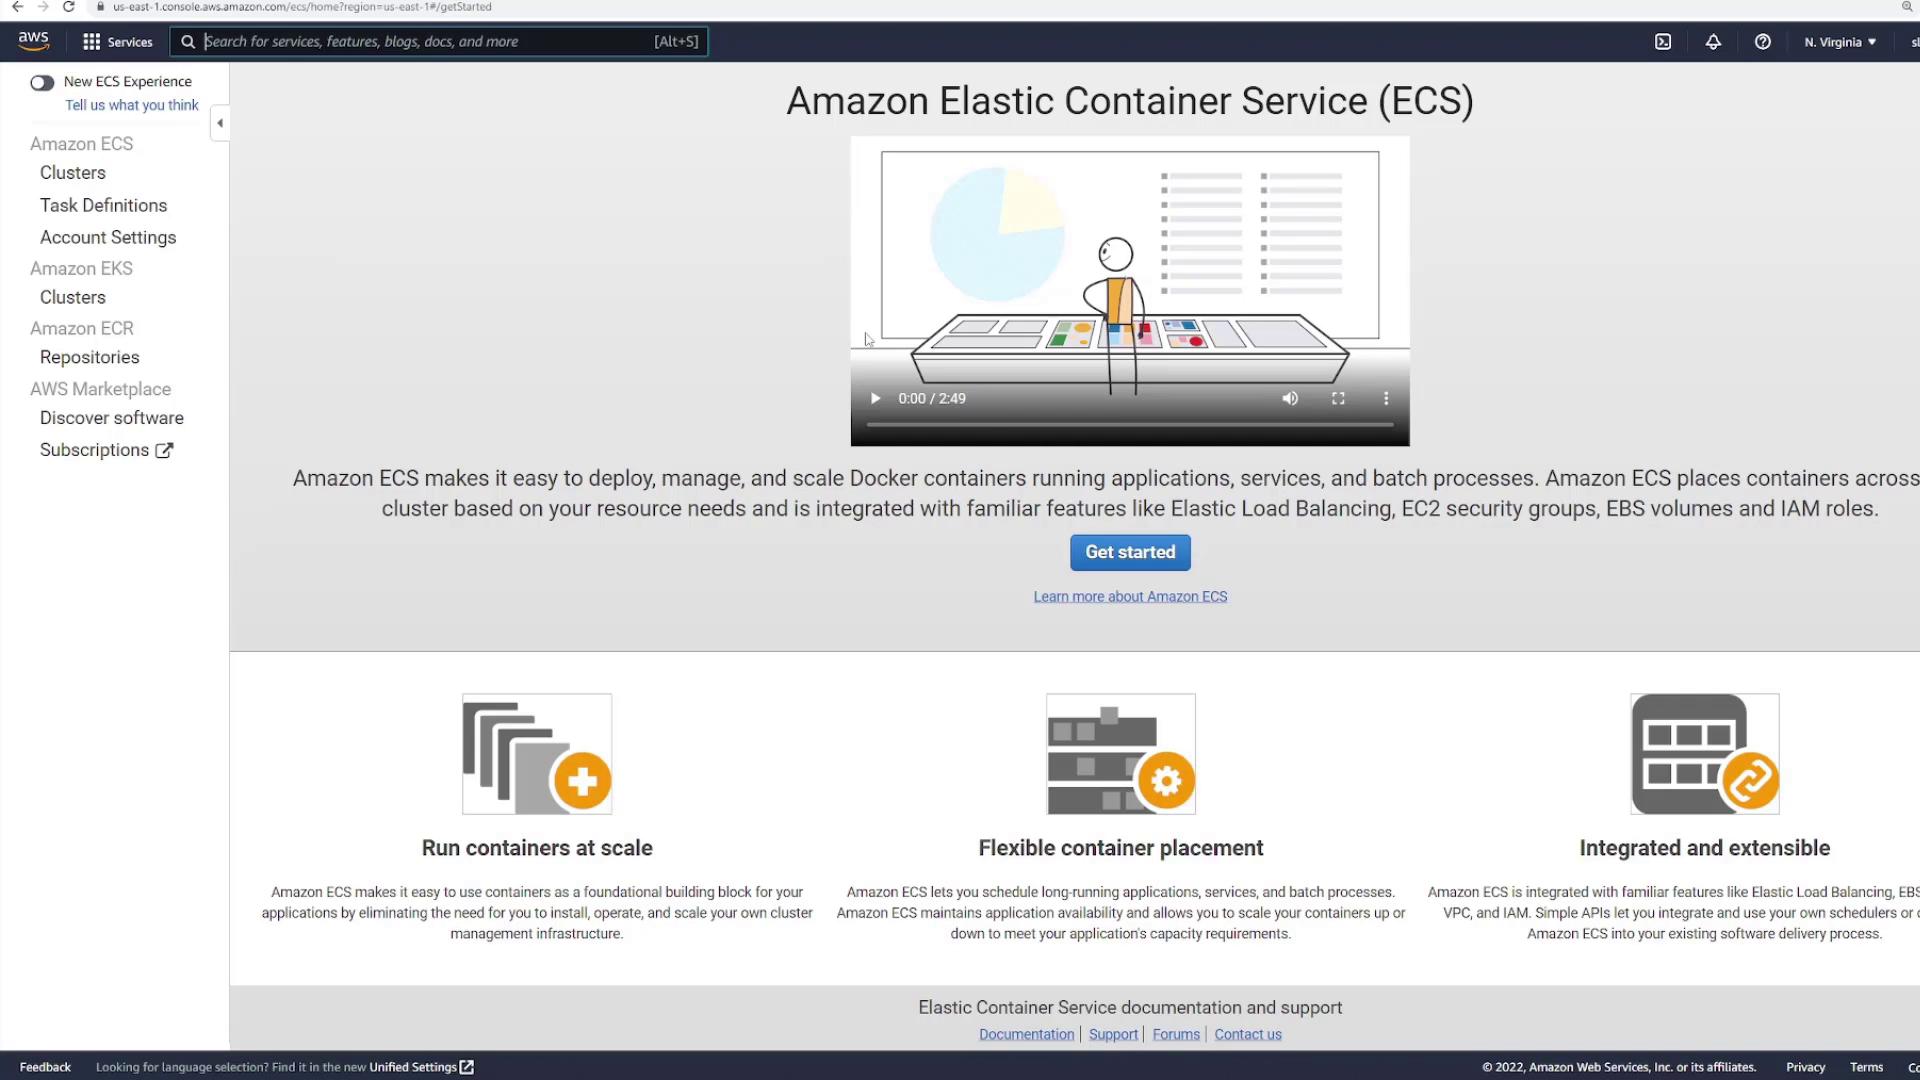
Navigate to the AWS Console and search for Elastic Container Service (ECS). When you first use ECS, you will encounter a quick-start wizard. Although the wizard includes sample apps, choose a custom configuration to understand each underlying component.
Step 1 – Using the Quick Start Wizard
When prompted by the wizard:
- Click the Get started button.
- Instead of selecting one of the example applications, choose Custom to provide your own configurations.
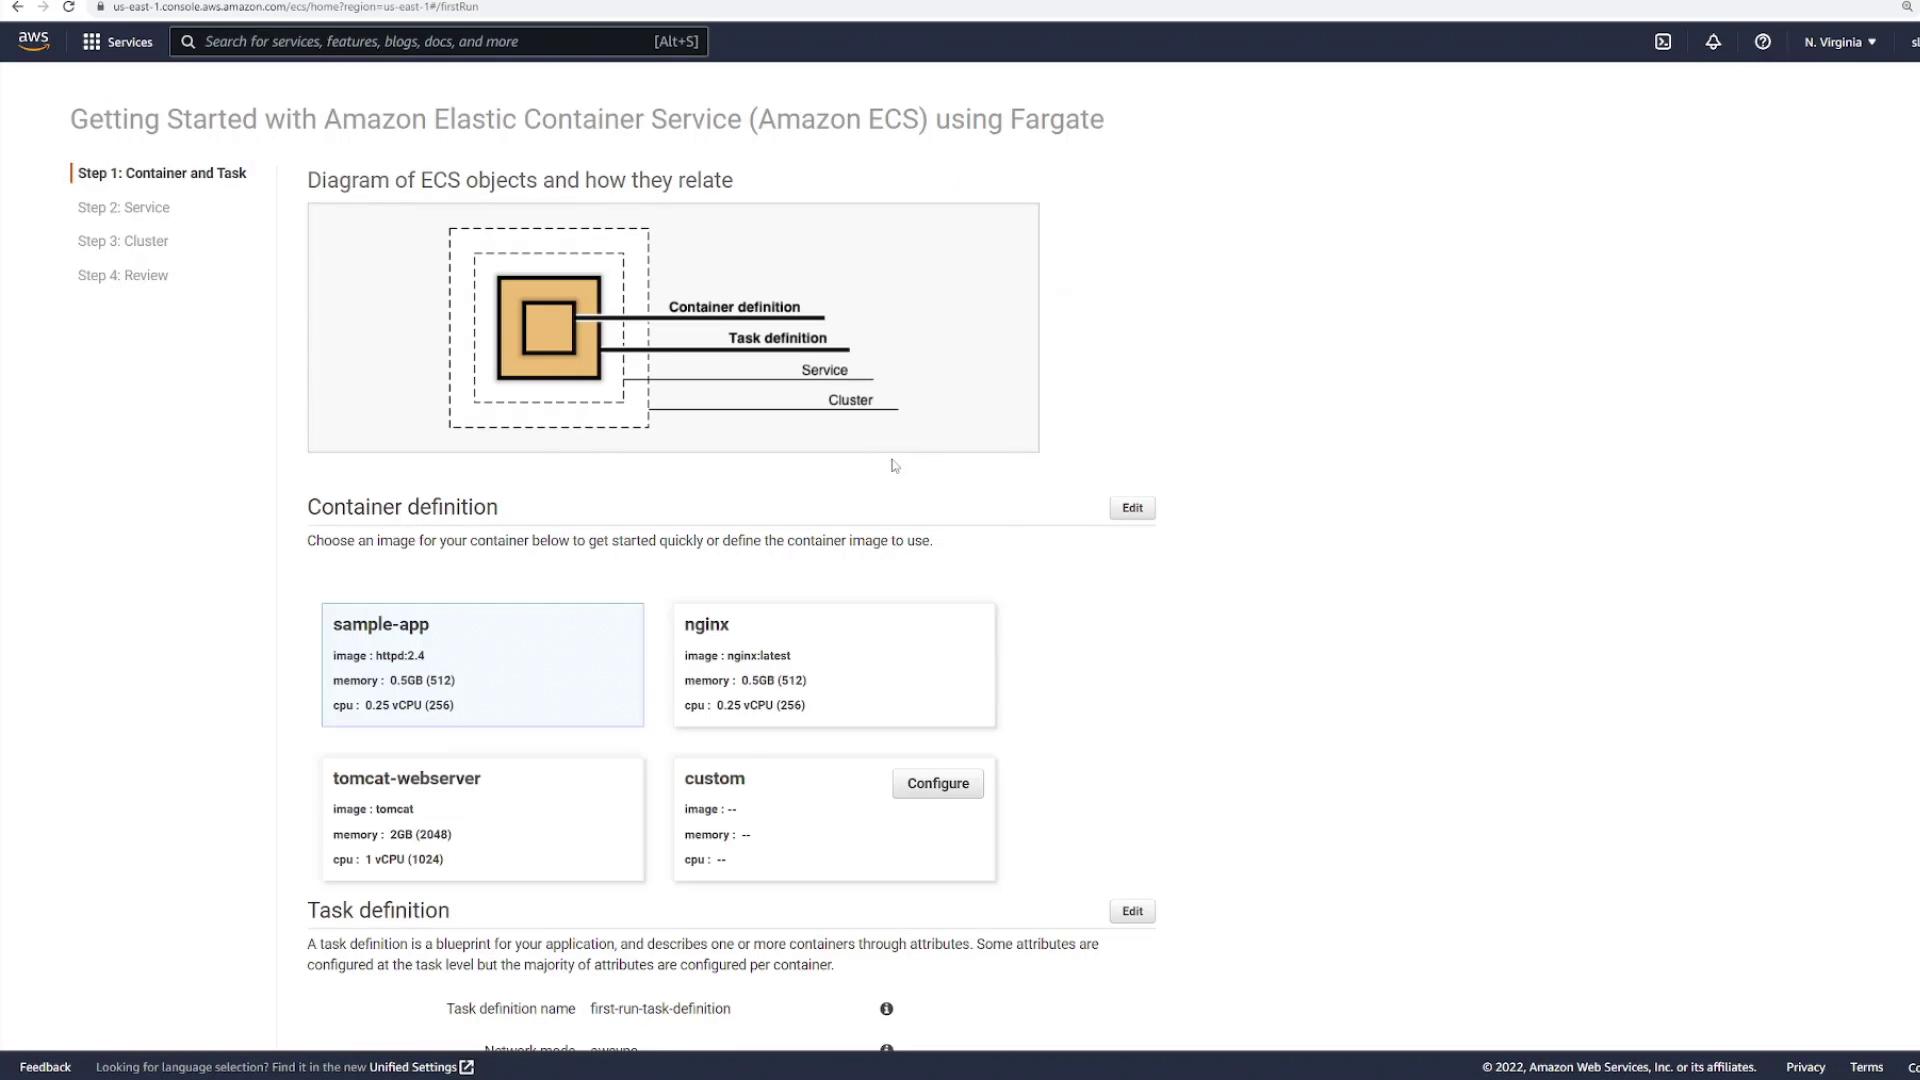
Configure the container using the following settings:
- Container Name: ECS-Project1
- Image: kodekloud/ECS-Project1 (public repository; no credentials required)
- Memory Limits: Adjust as needed.
- Port Mapping: Specify port 3000 (TCP). As the Express app listens on port 3000, set the container port to 3000.
Important
Unlike a typical Docker run command (e.g., -p 80:3000), in ECS the external port must match the container port (e.g., 3000 mapped to 3000).
For example, your Docker run command would look like:
docker run -p 3000:3000
Advanced container settings like health checks can also be configured. For example, add the following health check command:
CMD-SHELL, curl -f http://localhost/ || exit 1
These settings are similar to options found in a Docker Compose file, allowing you to specify environment variables, volumes, resource limits, and labels.
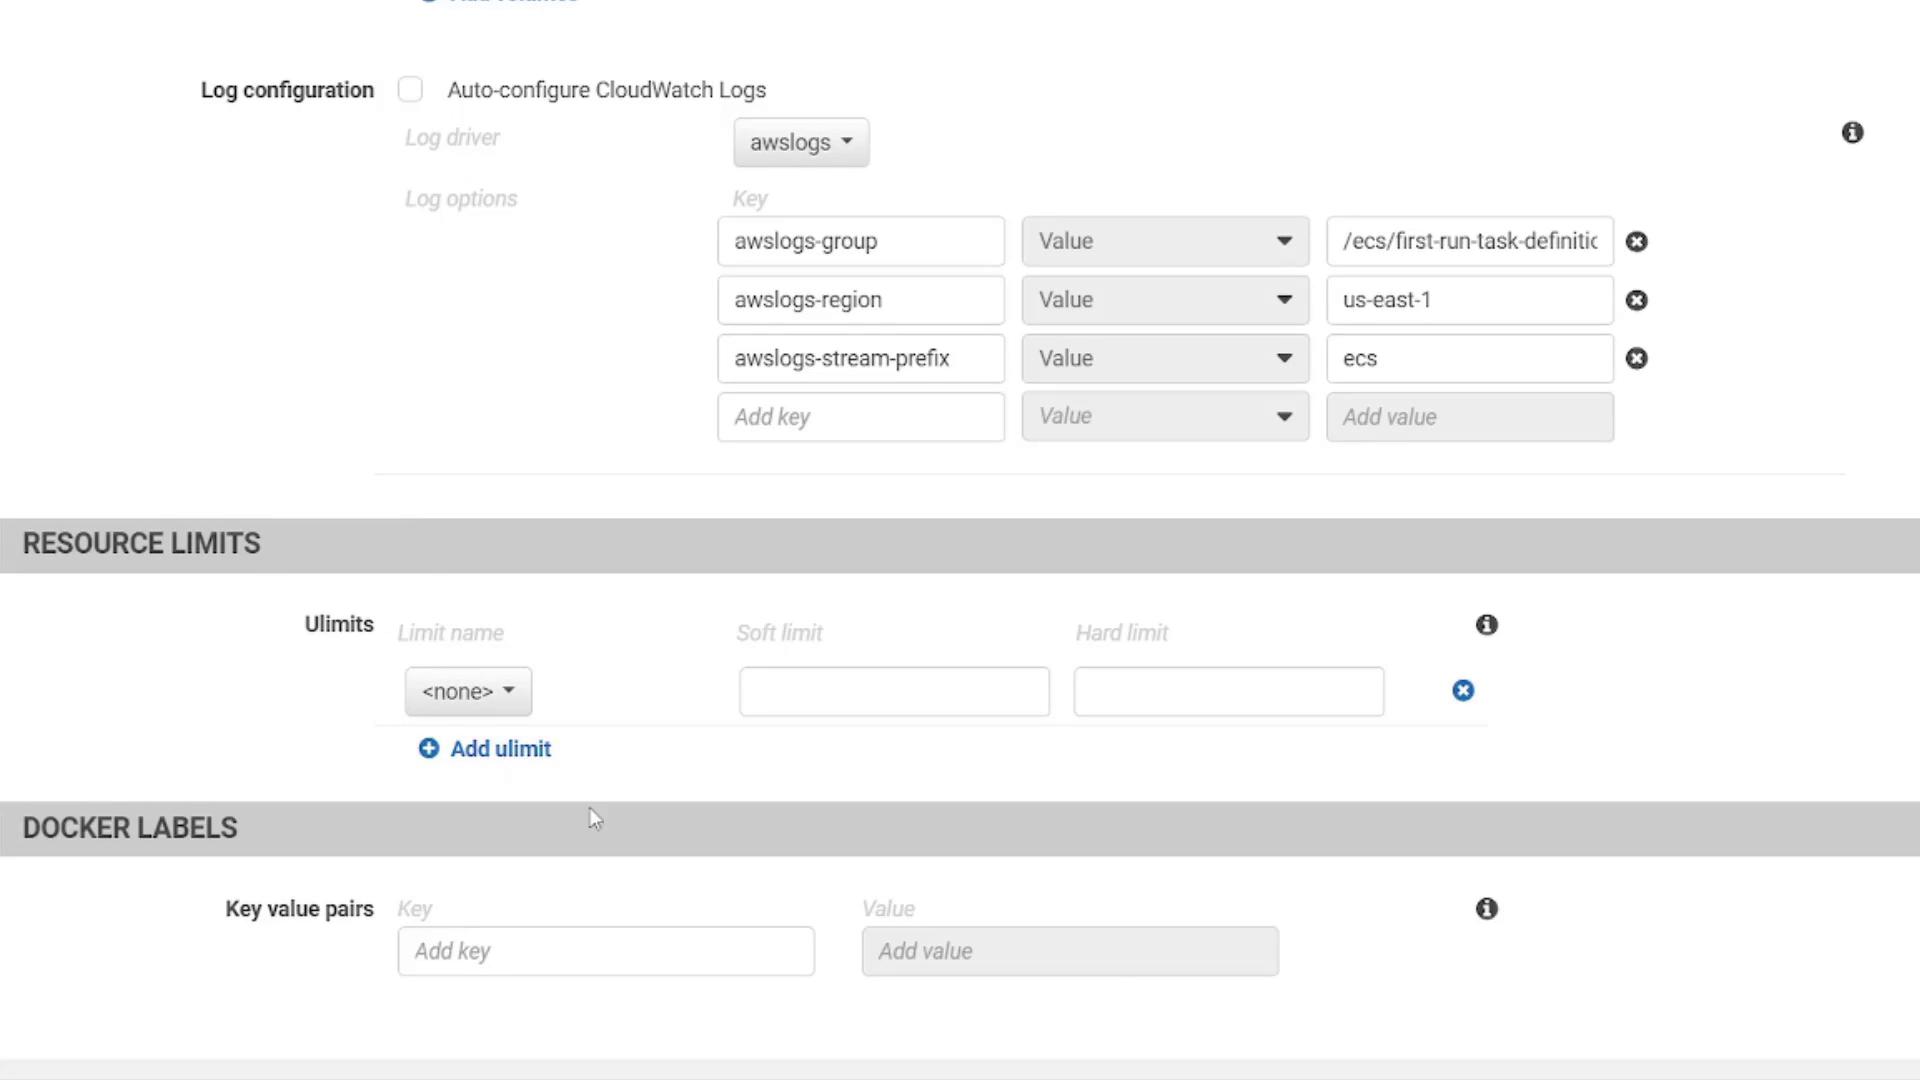
Click Update to complete the container configuration.
Service and Cluster Setup
After the container configuration, click Next to proceed to the service definition. ECS will generate a service named ECS-project1-service. You may choose to attach a load balancer (for this demo, select None). The wizard will automatically provision a new cluster and VPC along with the required subnets.

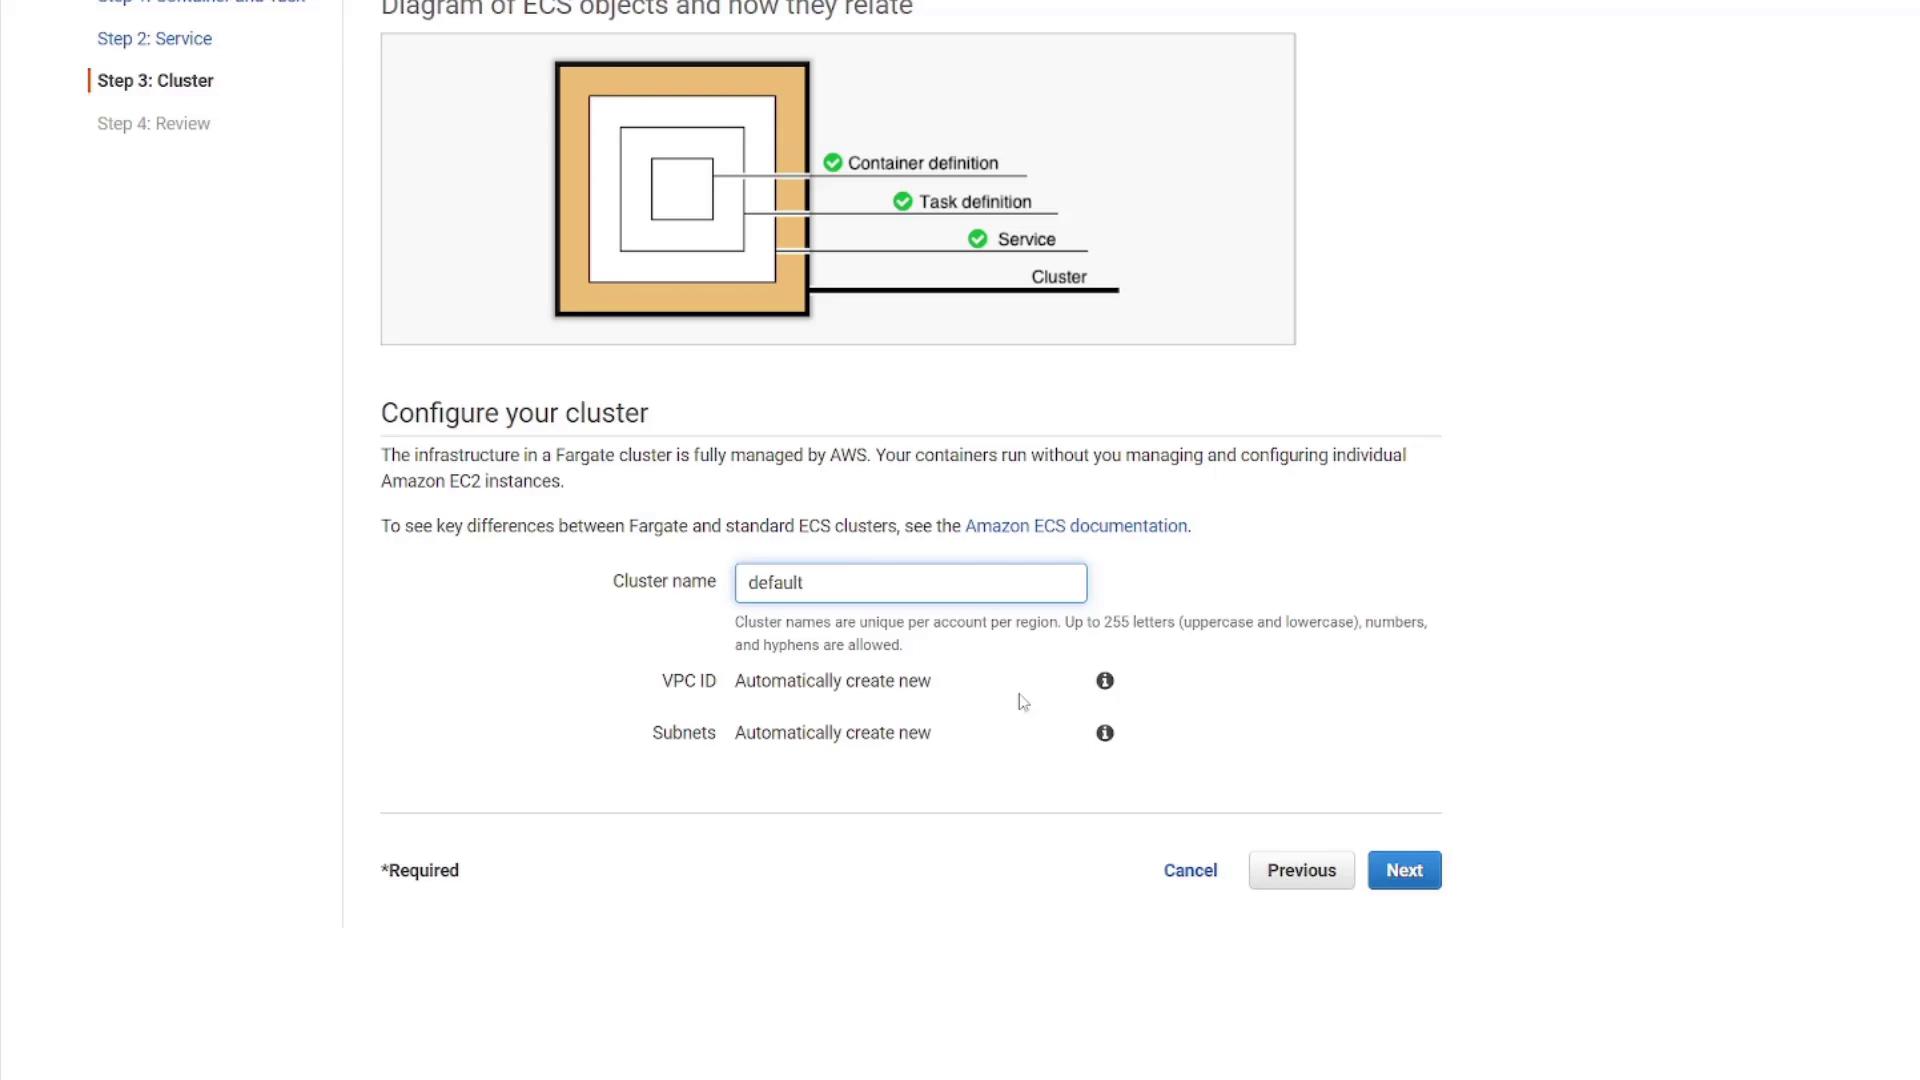
Review the configuration details for your container, task definition, service, and cluster, then click Create. After a few minutes, select View Service to verify that your application has been deployed.
Before verifying, let’s review some ECS components that were created in the background.
Exploring ECS Components
Task Definitions
Task definitions serve as blueprints for your container configurations (including port mappings, environment variables, and volumes). Under Task Definitions in the ECS Console, locate the task definition for this project, noting that revisions indicate configuration changes.
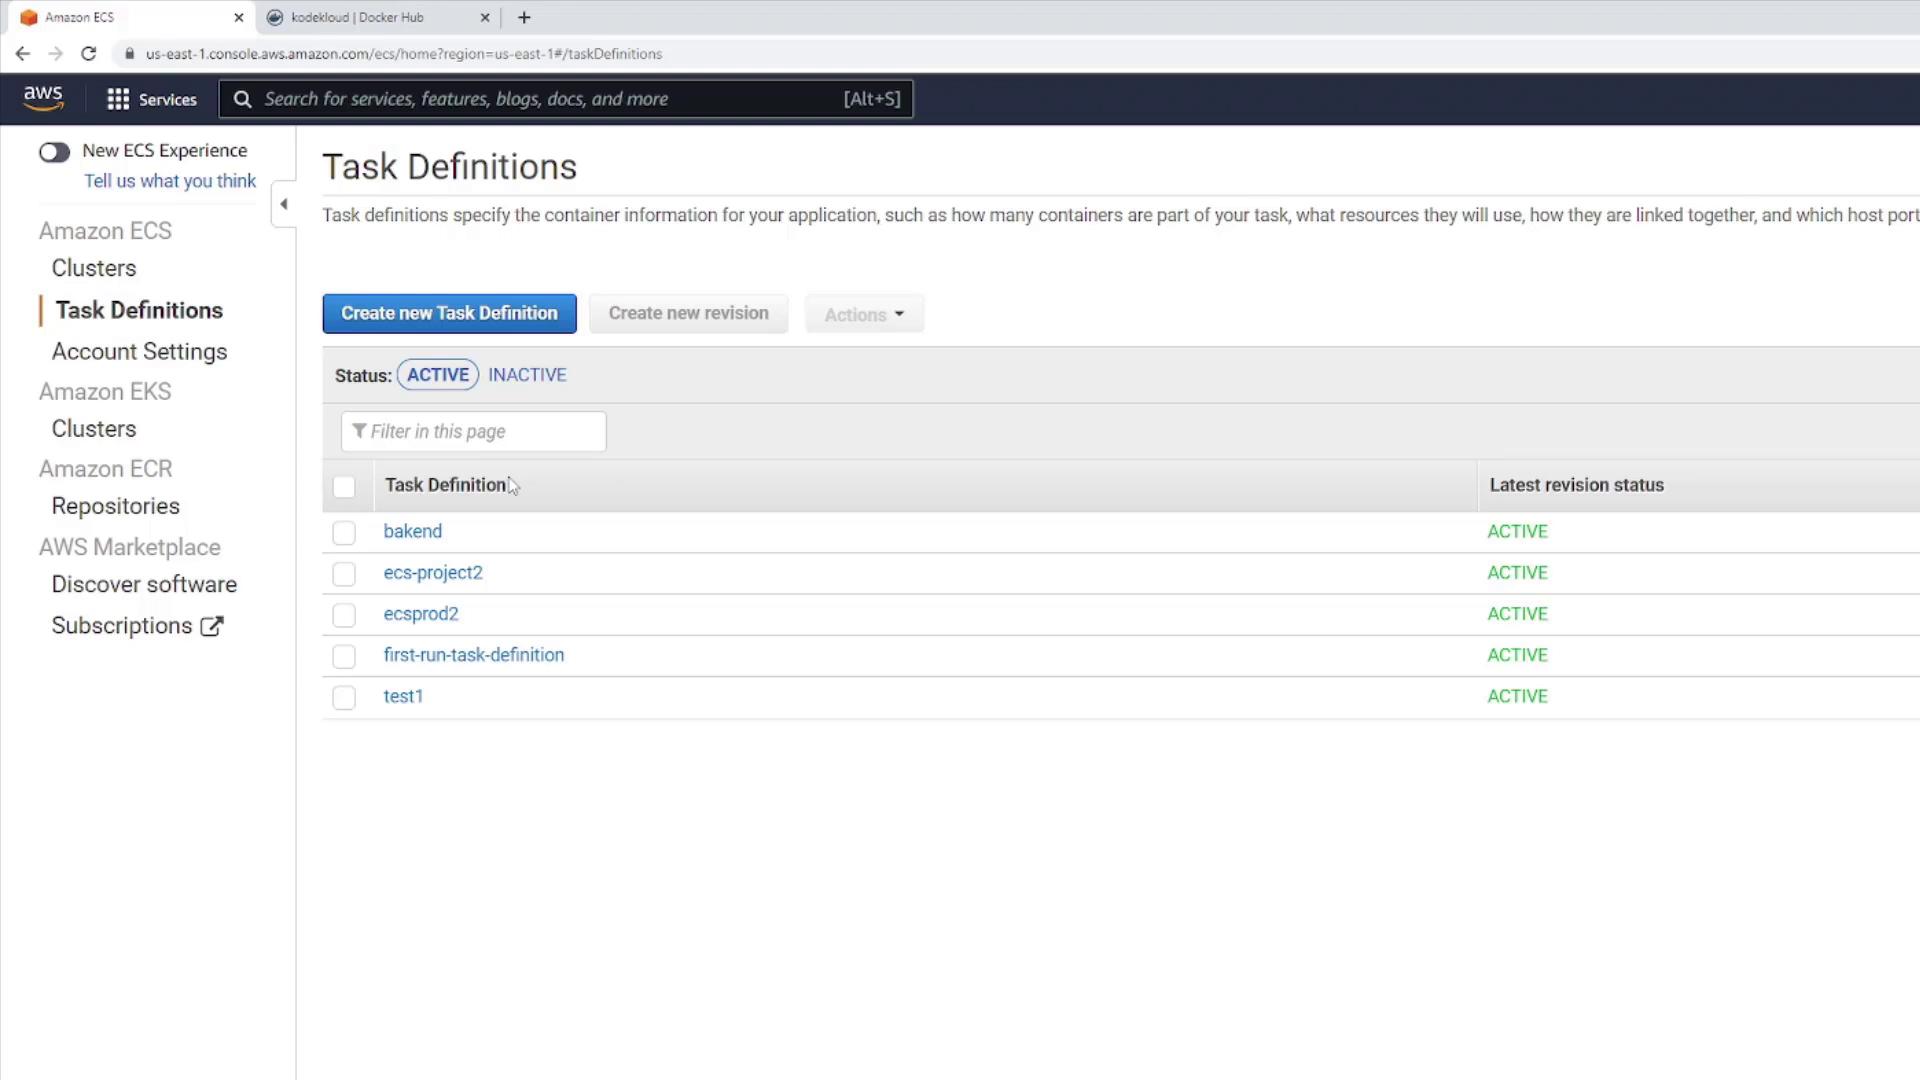
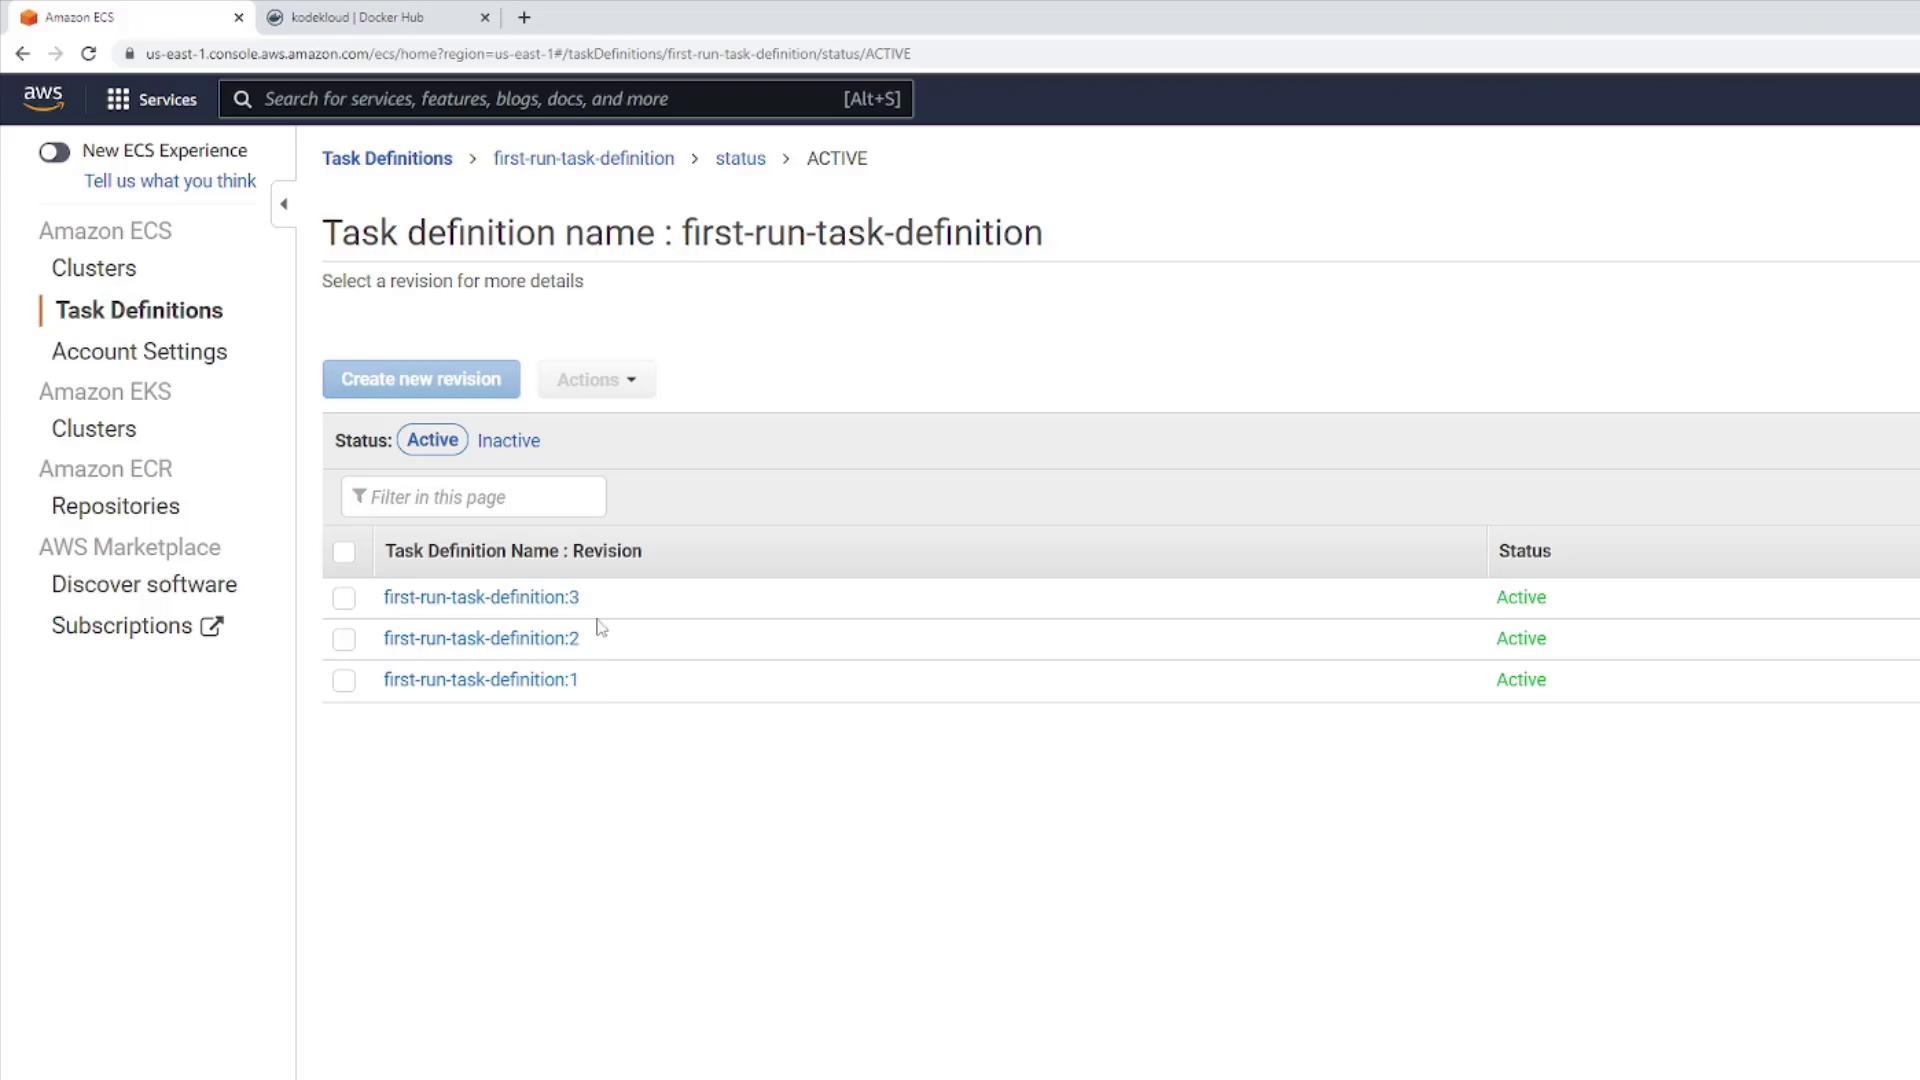
Select the relevant task definition (for example, “first-run-task-definition”). The highest revision number indicates the latest configuration.
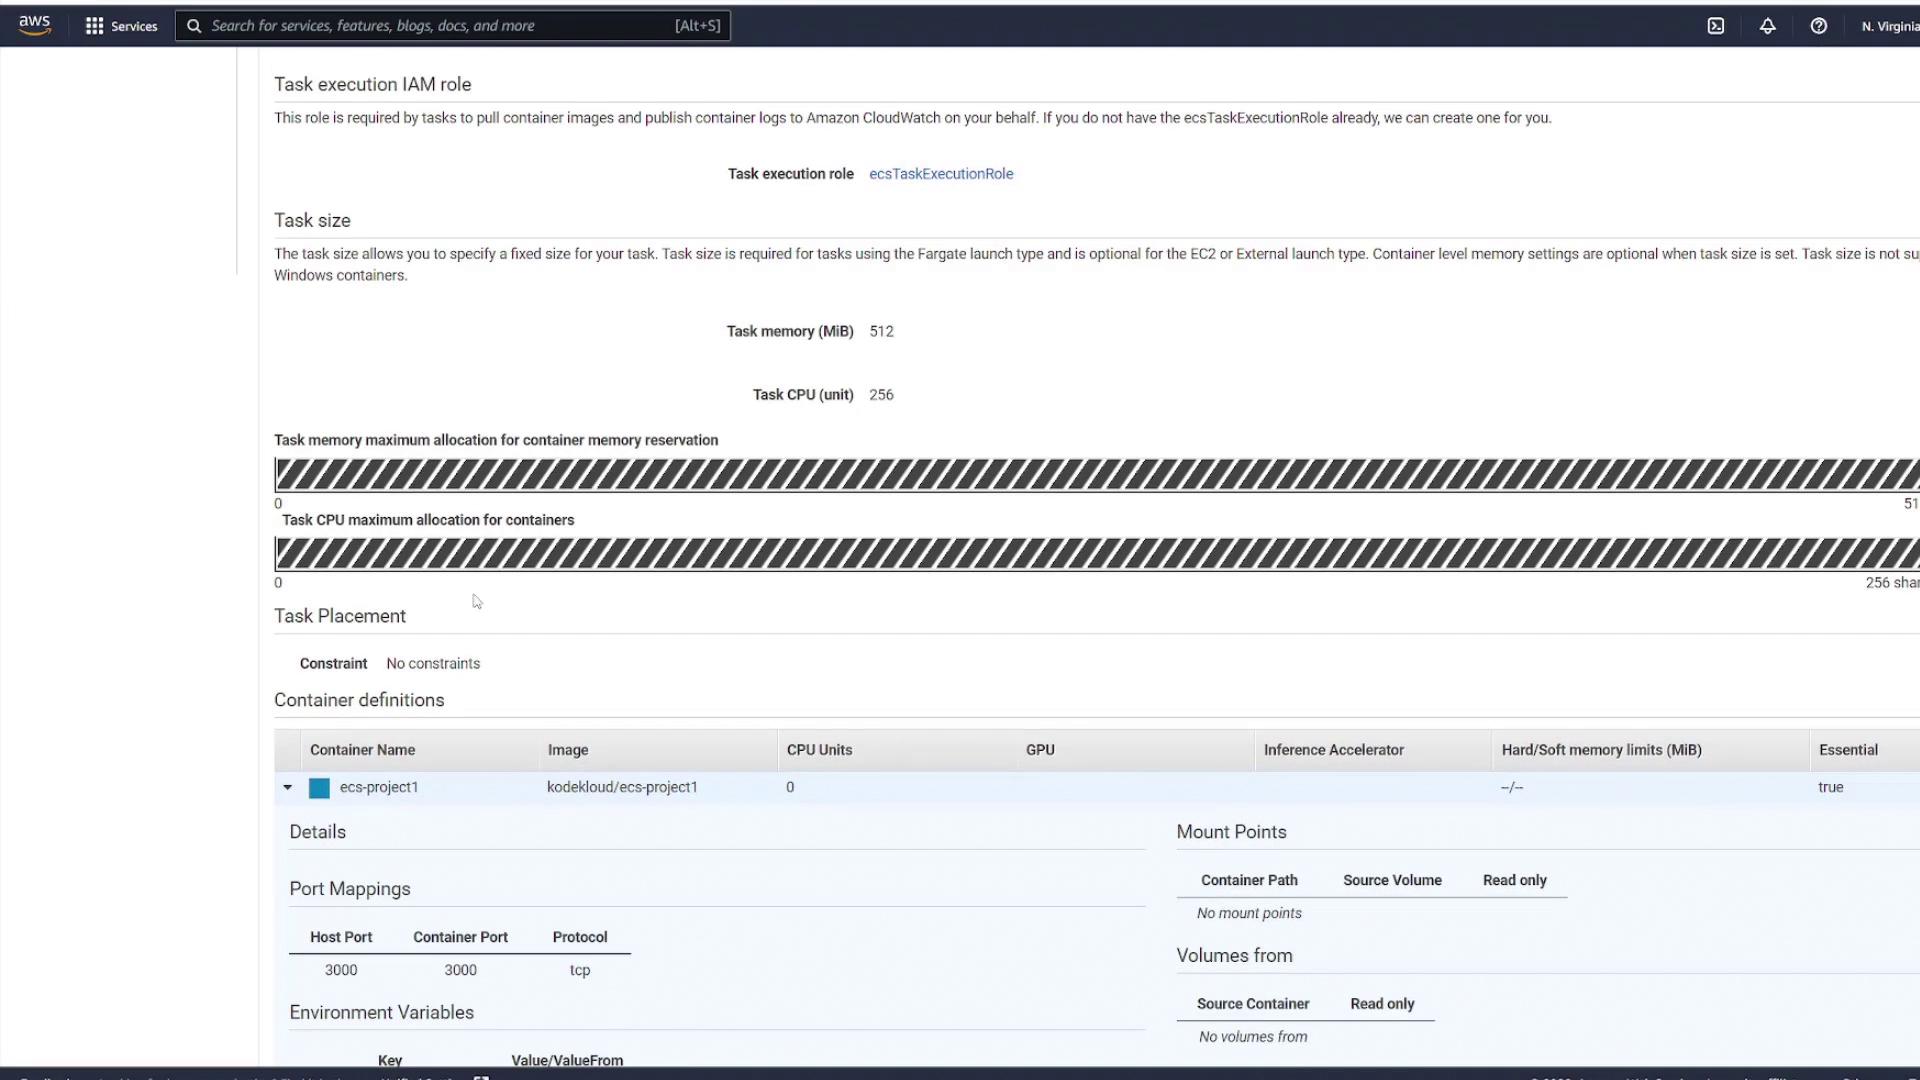
Upon reviewing the configuration, you will notice settings such as Fargate usage, memory/CPU allocations, and the host-to-container mapping (port 3000 to port 3000).
Clusters and Services
Within Clusters, the wizard-created cluster displays the active service ECS-project1-service. This service is associated with one desired task and, later, one running task.
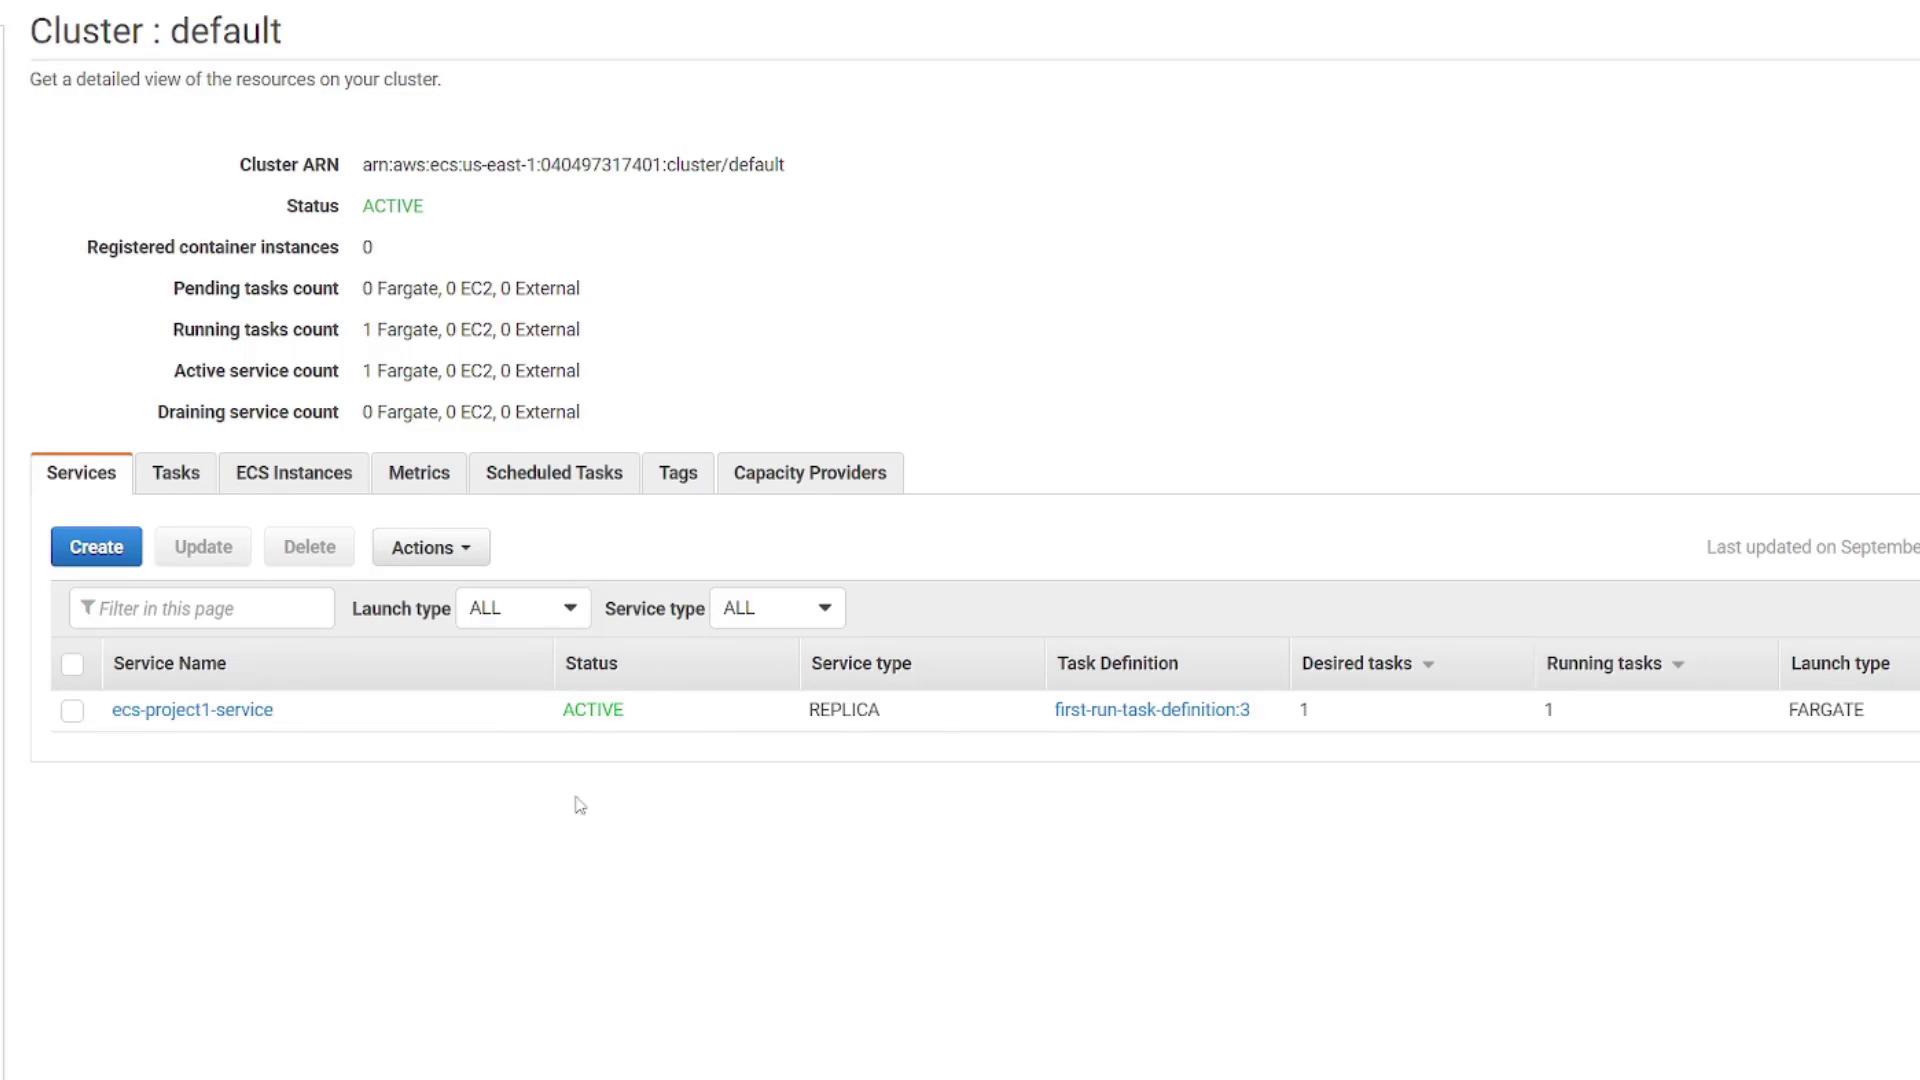
Click on the service to review the network details (VPC, subnets, and security groups).
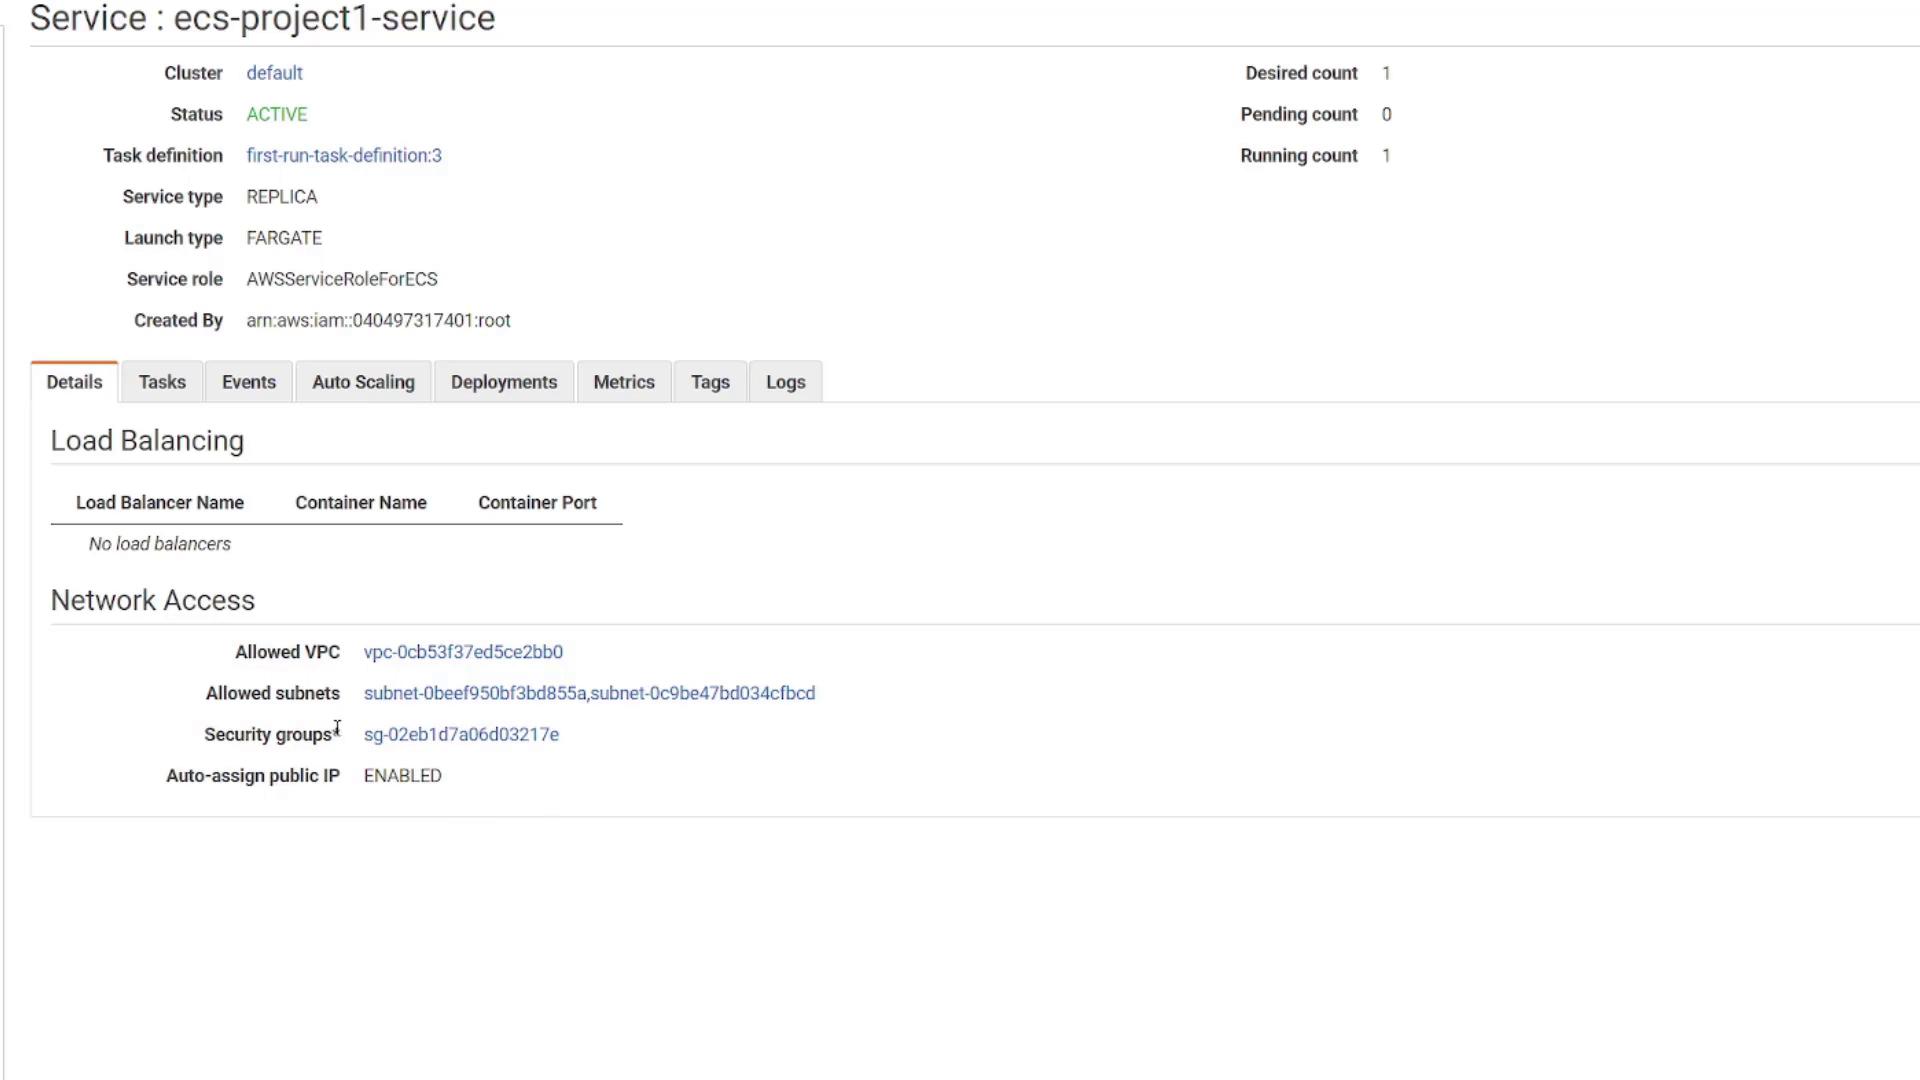
Under Tasks, you will find the running task. The details page displays a public IP address that can be used to access the application.
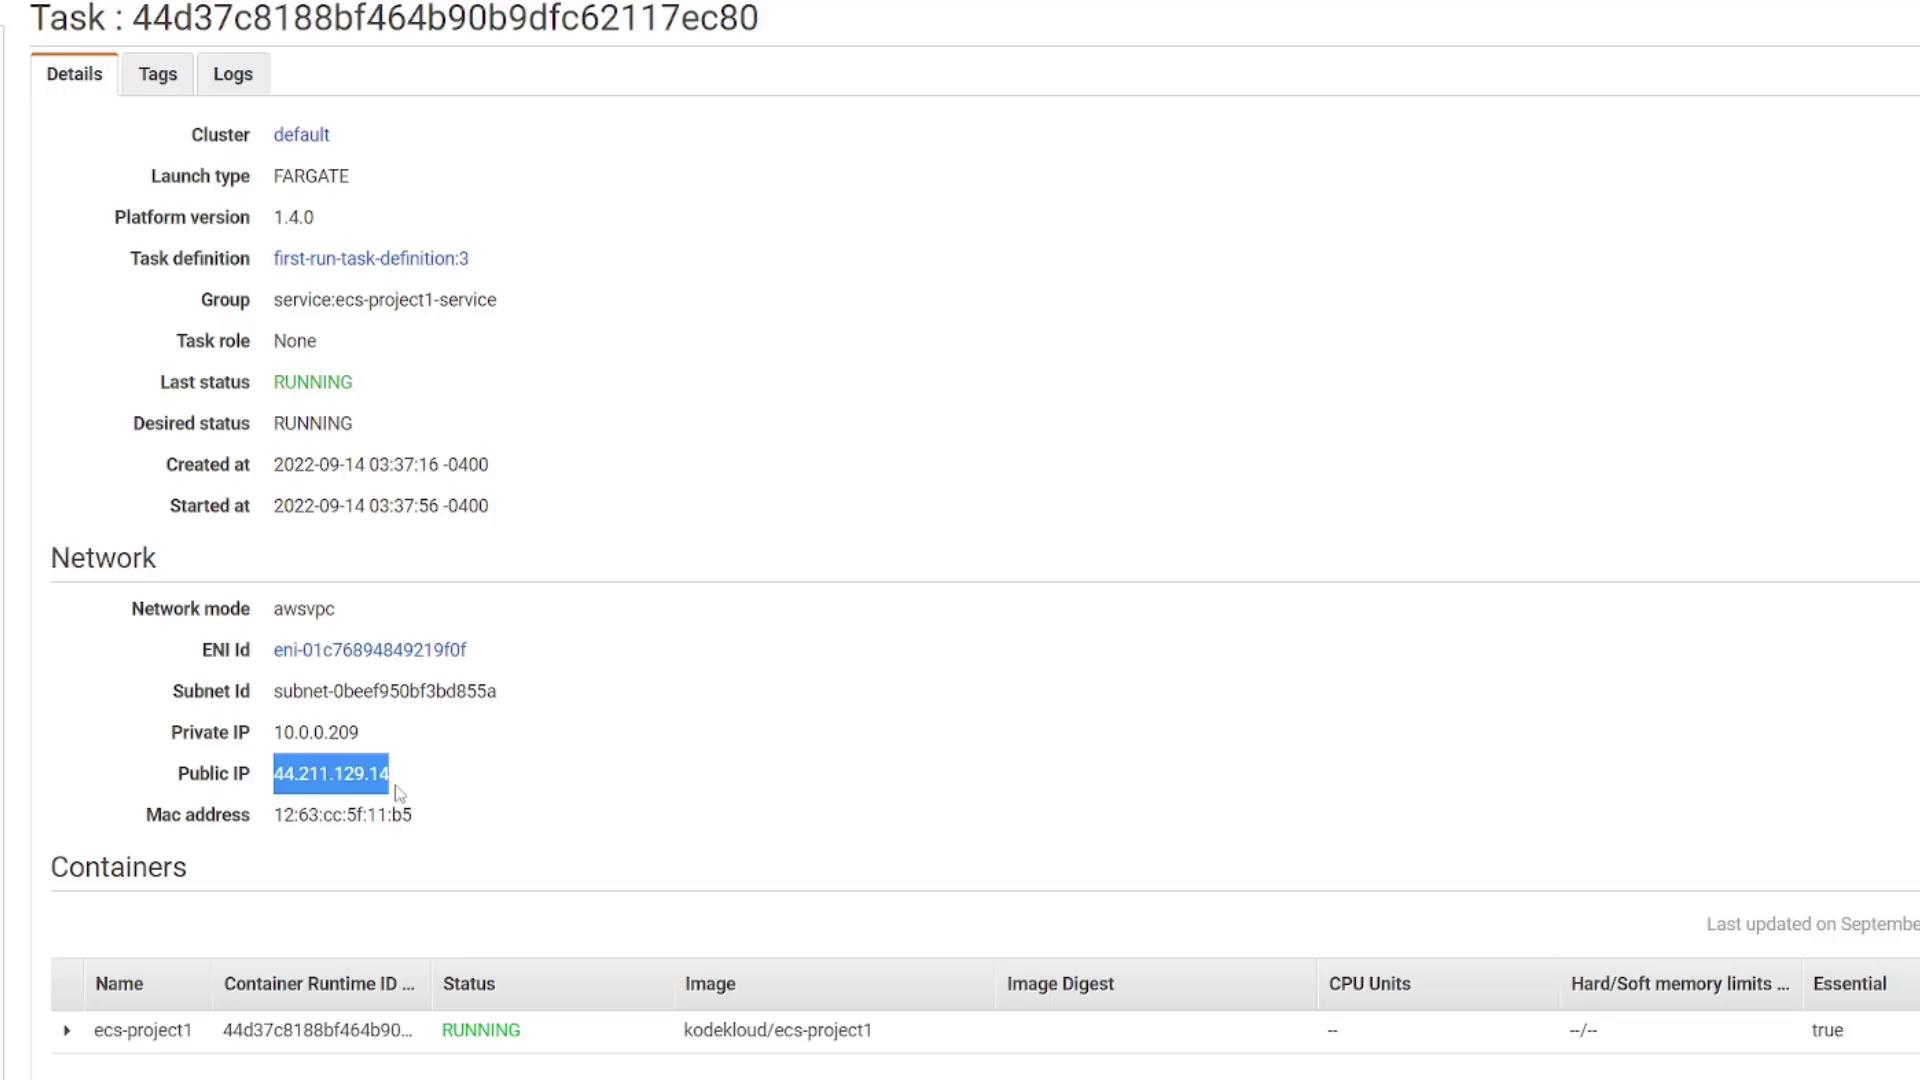
When you access the public IP on port 3000, the browser shows the simple HTML page served by your application.
IP Address Changes
If multiple tasks are running, each task will have a unique IP address. This dynamic nature is why a load balancer is crucial—it provides a stable endpoint for clients.
Tearing Down the Quick Start Deployment
After confirming a successful deployment, delete the resources created via the quick start wizard. Delete the ECS service by navigating to the cluster, selecting the service, and confirming deletion (type “delete me” when prompted). Then, delete the cluster.
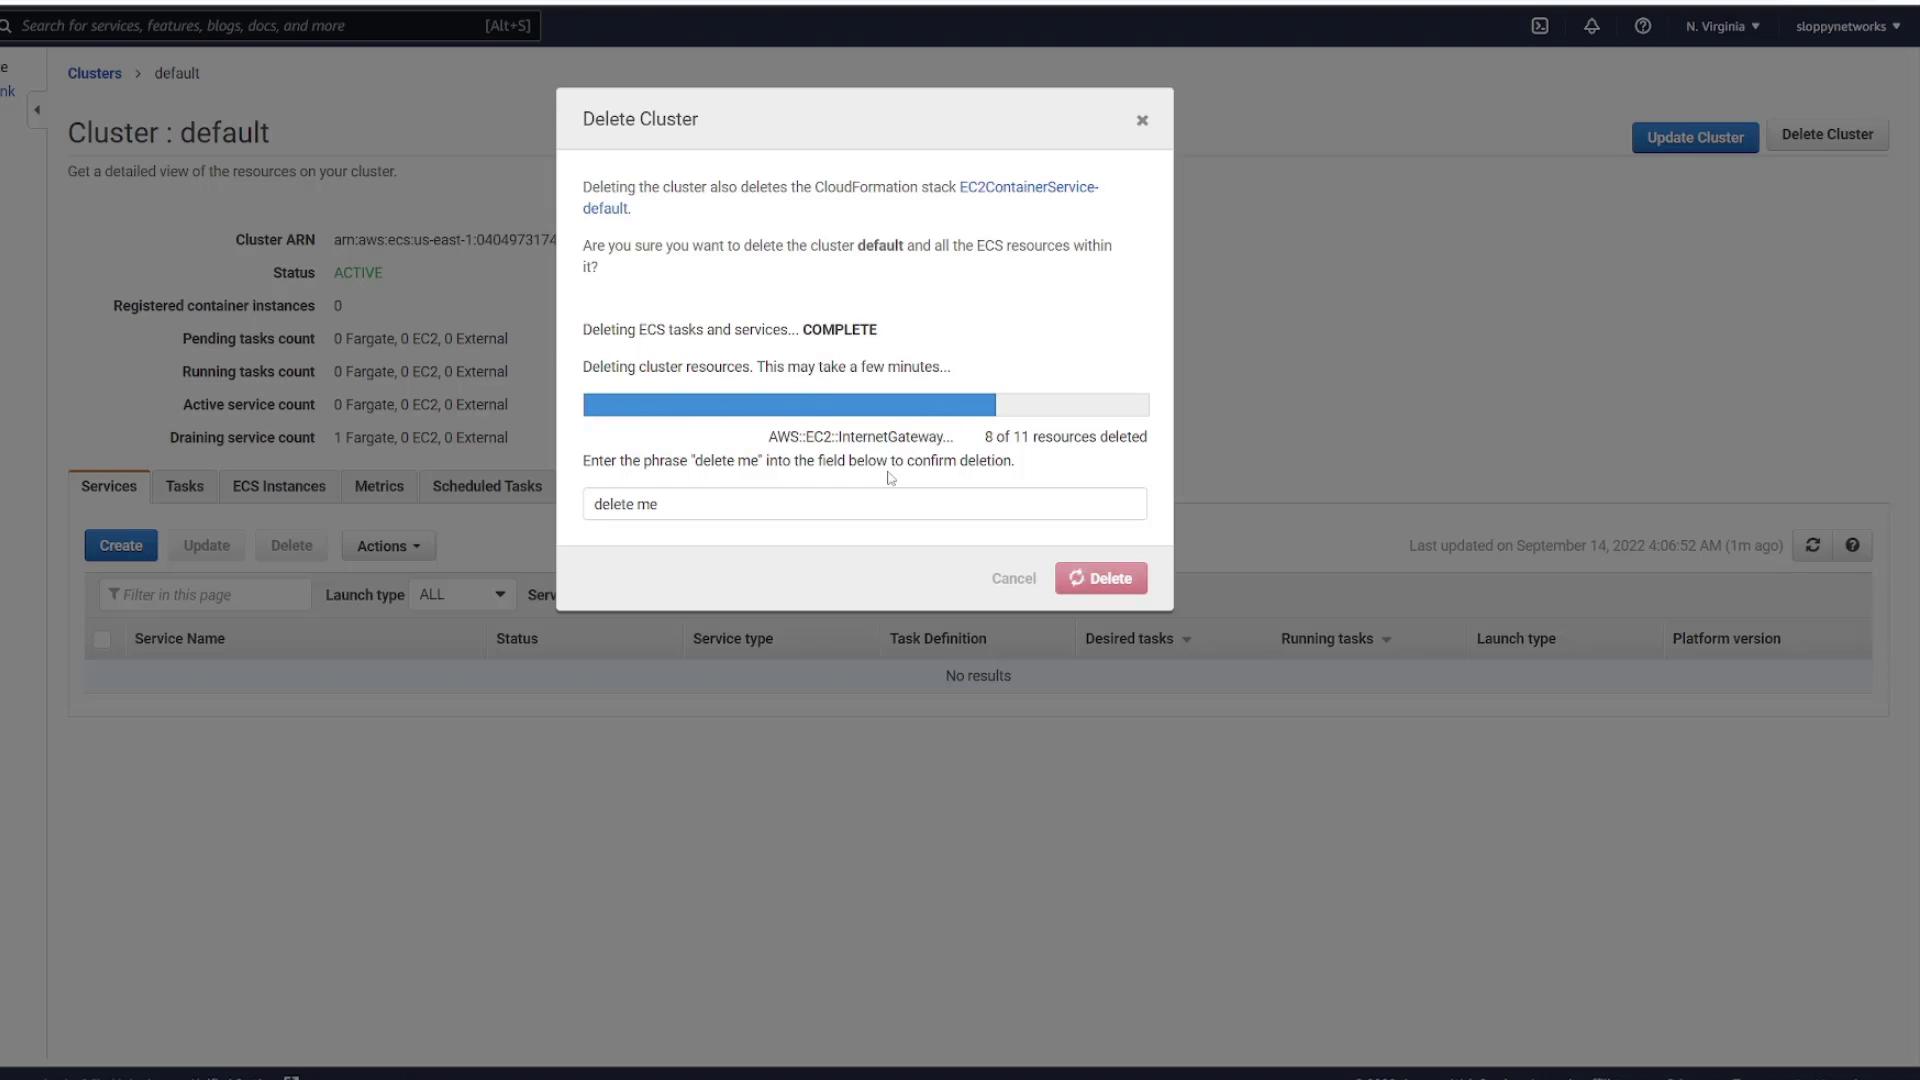
Now that the ECS configuration is removed, you can deploy the application from scratch.
Deploying from Scratch Using Fargate
Creating a New Cluster
- In the ECS Console, click Create Cluster.
- Choose the "Networking only" option (Fargate).
- Provide a cluster name (e.g., "cluster1"). Leave the default VPC CIDR block and subnets intact.
- Click Create.
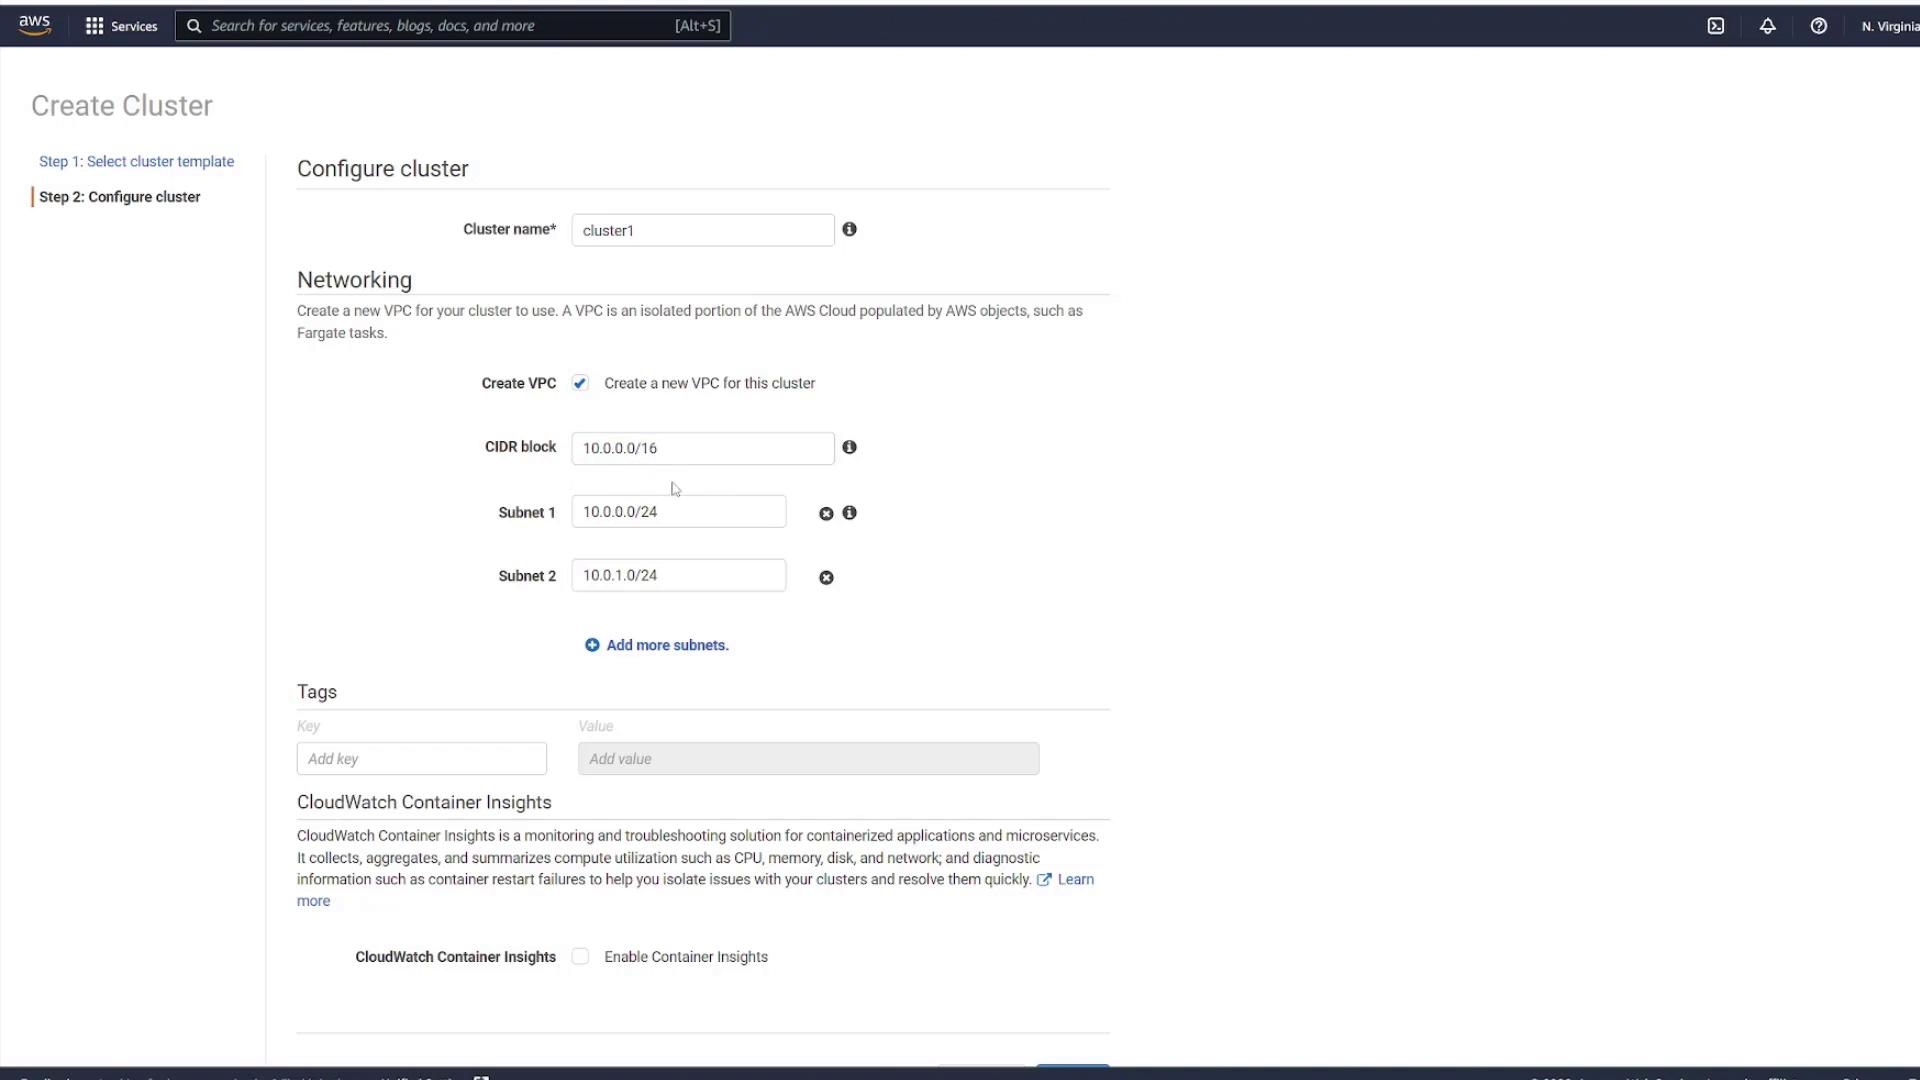
Select View Cluster to inspect the new cluster.
Creating a Task Definition
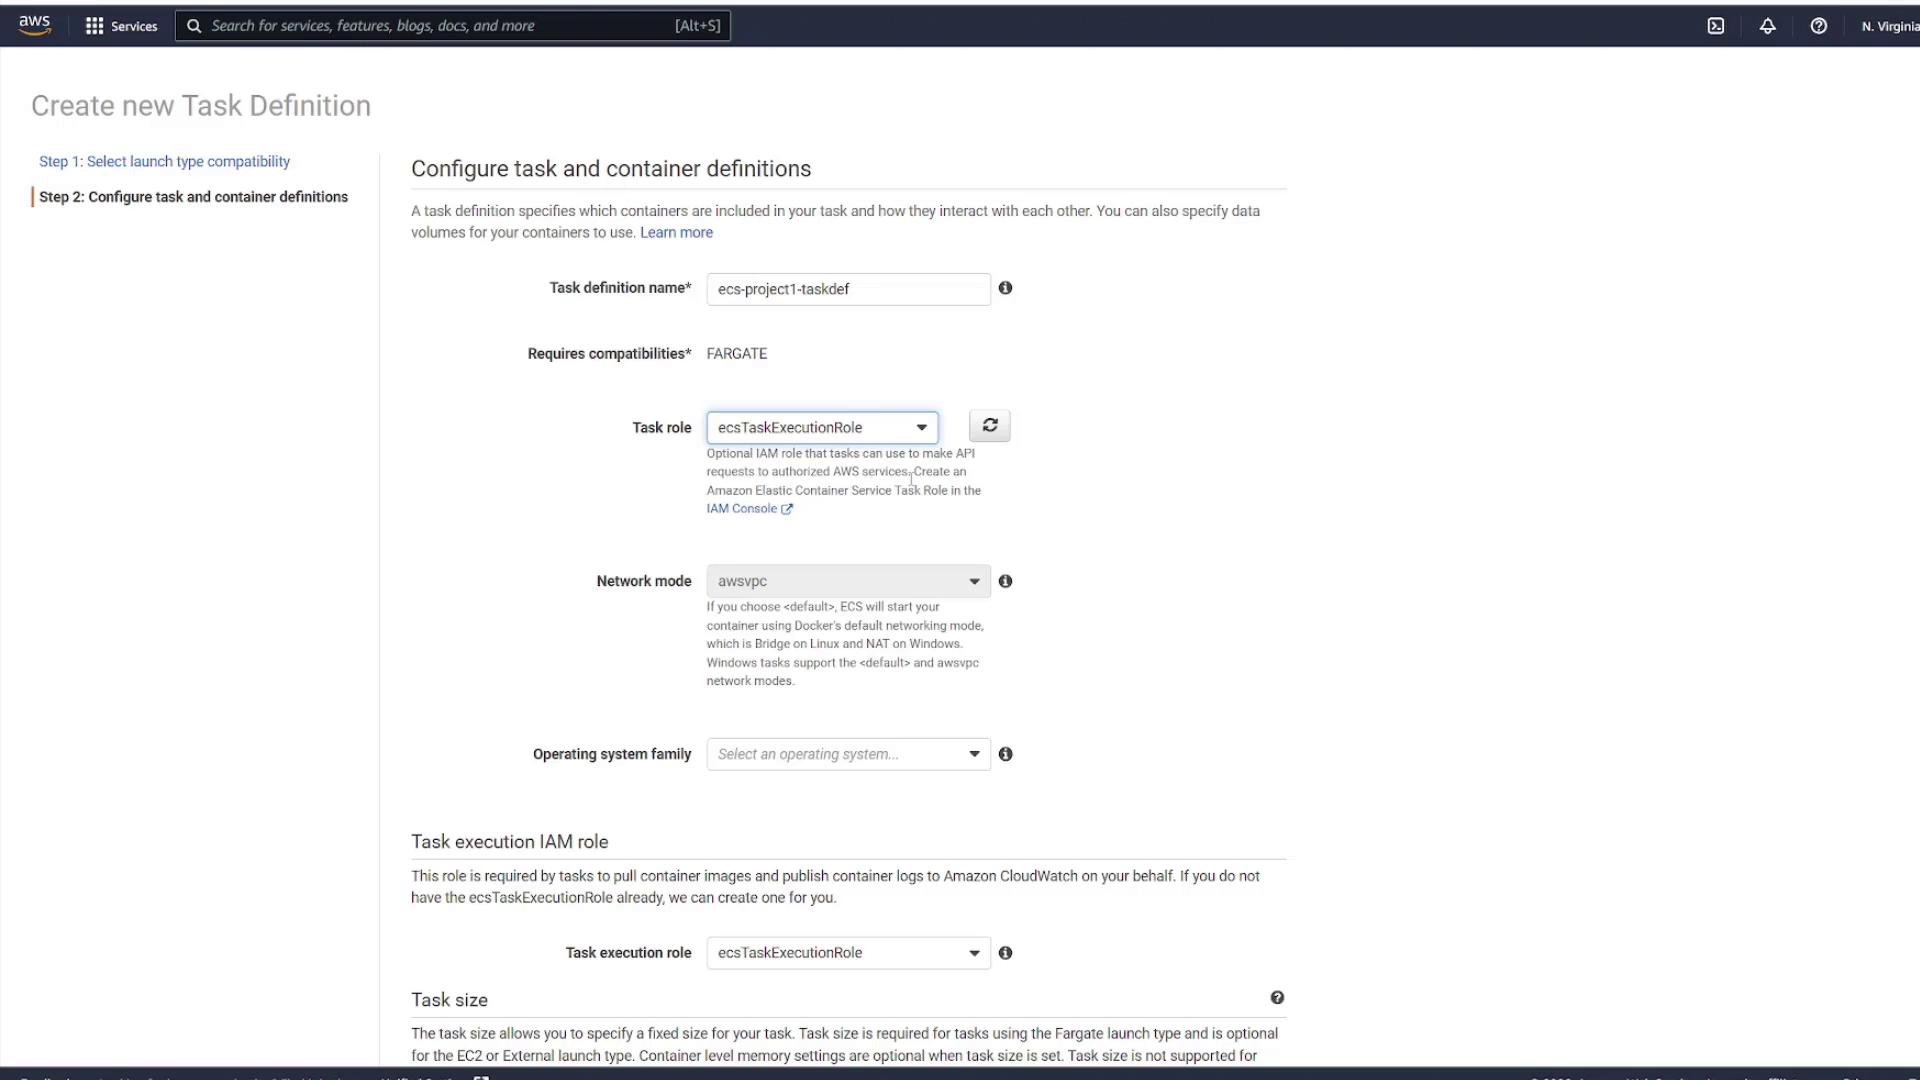
- In the ECS Console, navigate to Task Definitions and click Create new Task Definition.
- Select Fargate as the launch type.
- Name the task definition (e.g., "ECS-Project1-taskdef") and choose the appropriate IAM role (this may have been auto-created if you previously ran the quick start wizard).
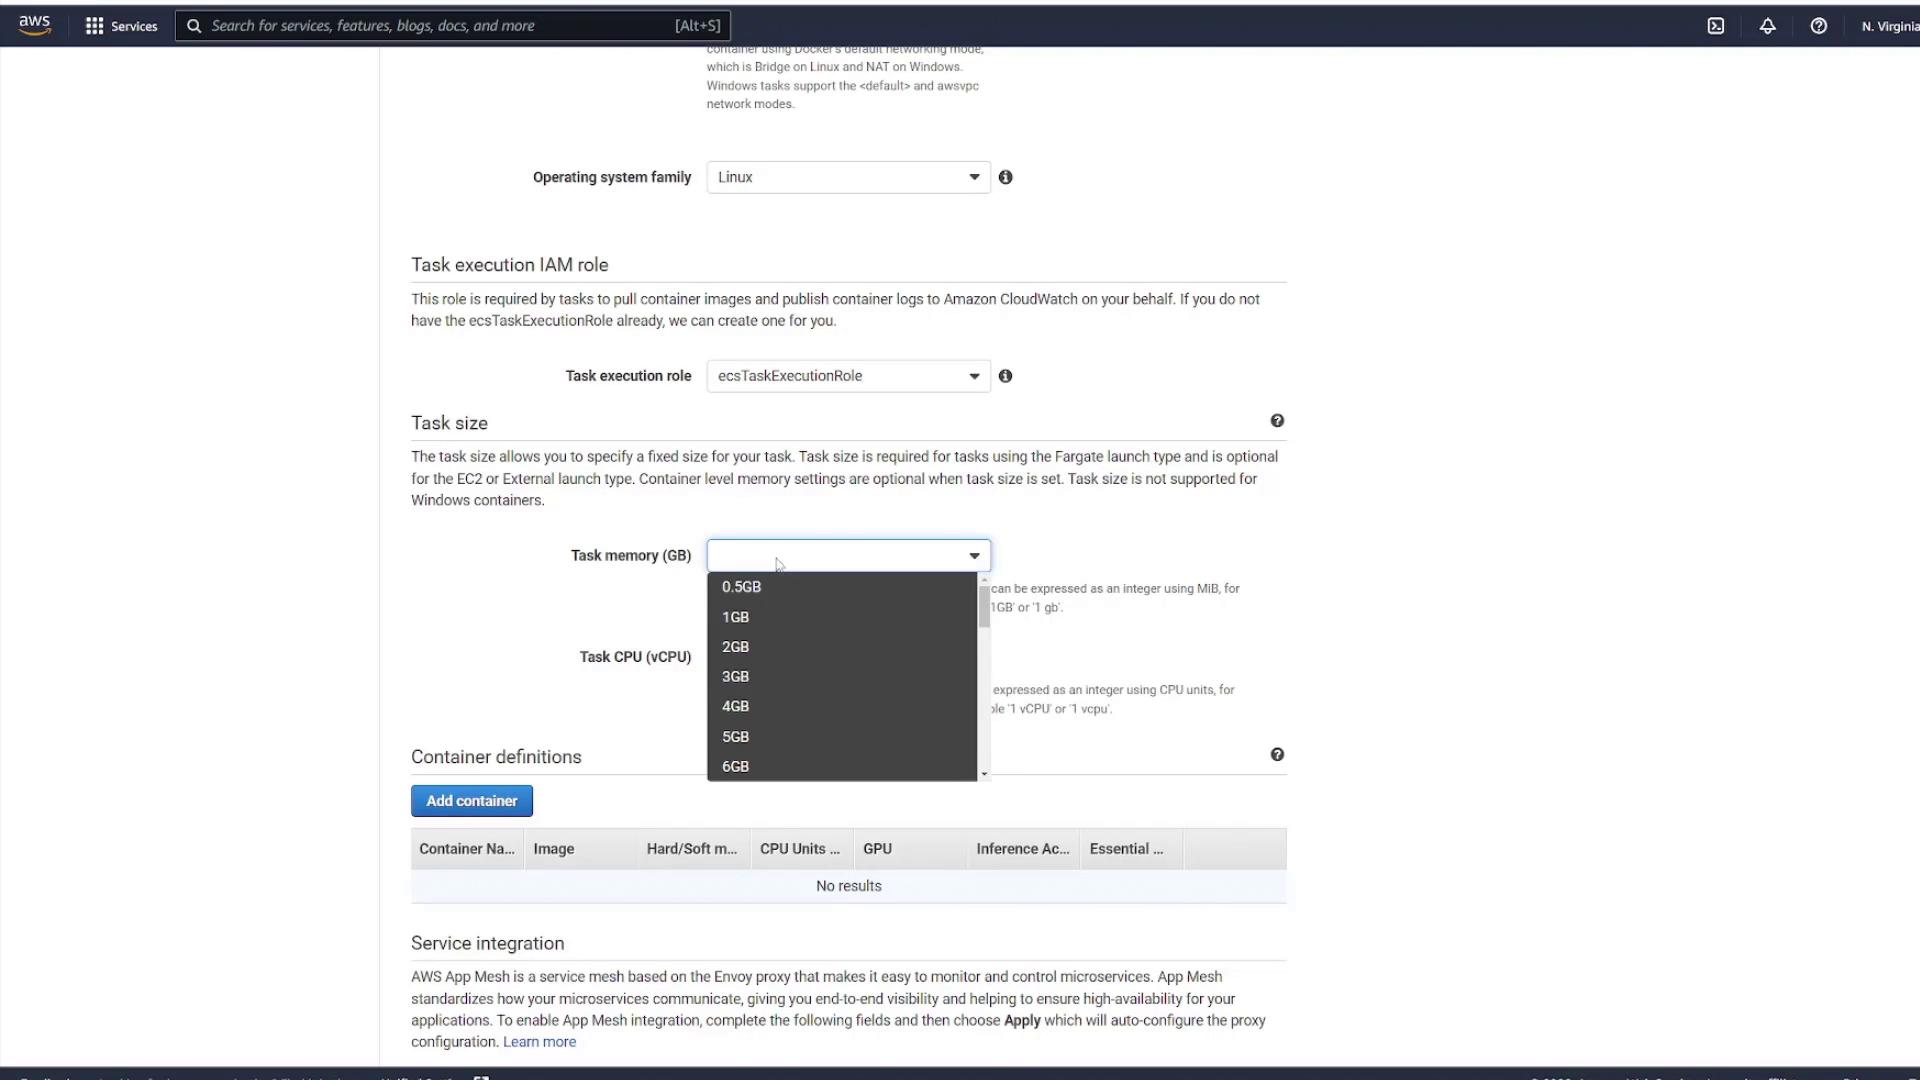
- Choose Linux as the operating system and keep the default execution role.
- Specify a minimal task size for this demo.
- Add a container with these settings:
- Container Name: node app
- Image: kodekloud/ECS-Project1
- Health Check Command:
CMD-SHELL, curl -f http://localhost/ || exit 1 - Port Mapping: 3000
Click Add and then Create to finalize the task definition.
Creating a Service from the Task Definition
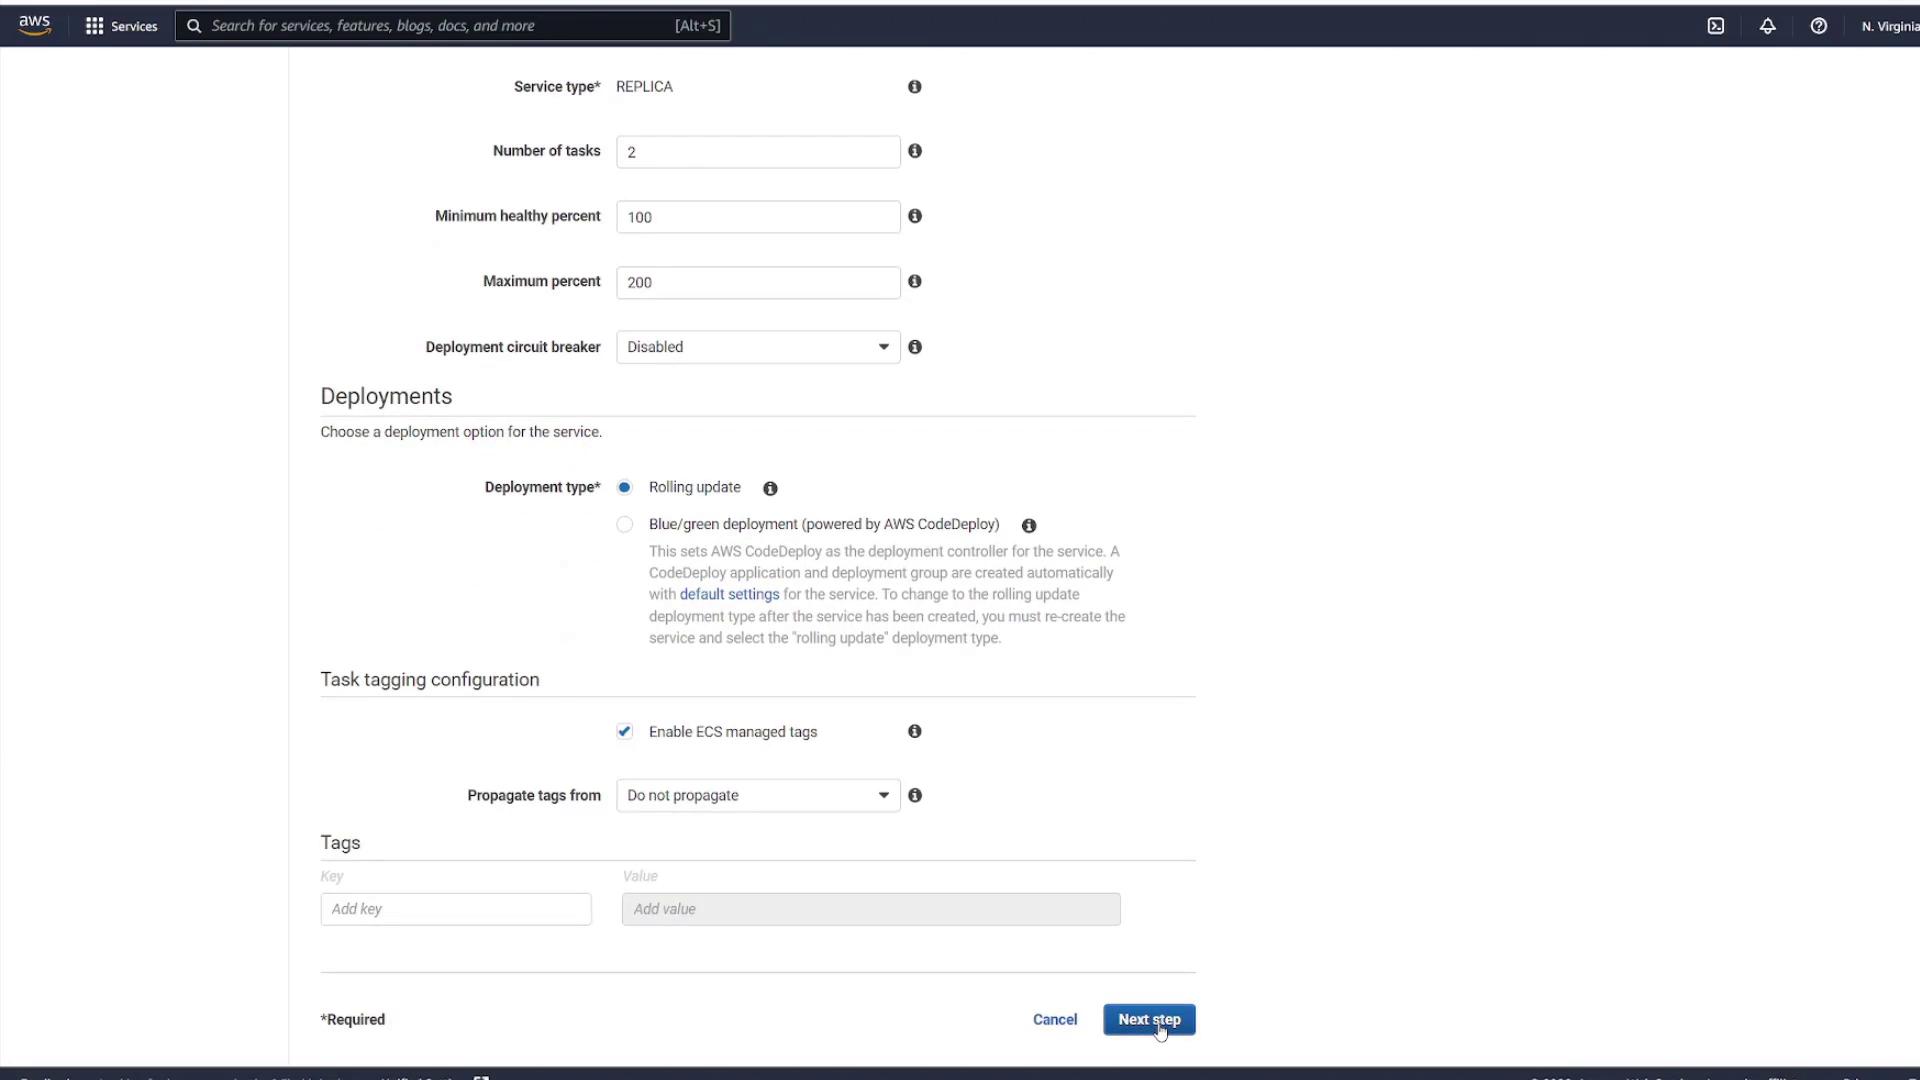
- Within your cluster ("cluster1"), go to the Services tab and click Create.
- Set the Launch type to Fargate and the Operating system to Linux.
- Select the latest revision of your task definition ("ECS-Project1-taskdef").
- Name your service (e.g., "project1-service") and choose the desired number of tasks (for instance, 2 to demonstrate scaling).
- Click Next.
- For the network configuration:
- Select the VPC created for ECS.
- Choose the two subnets.
- Edit the default security group to permit incoming traffic on port 3000 (instead of port 80).
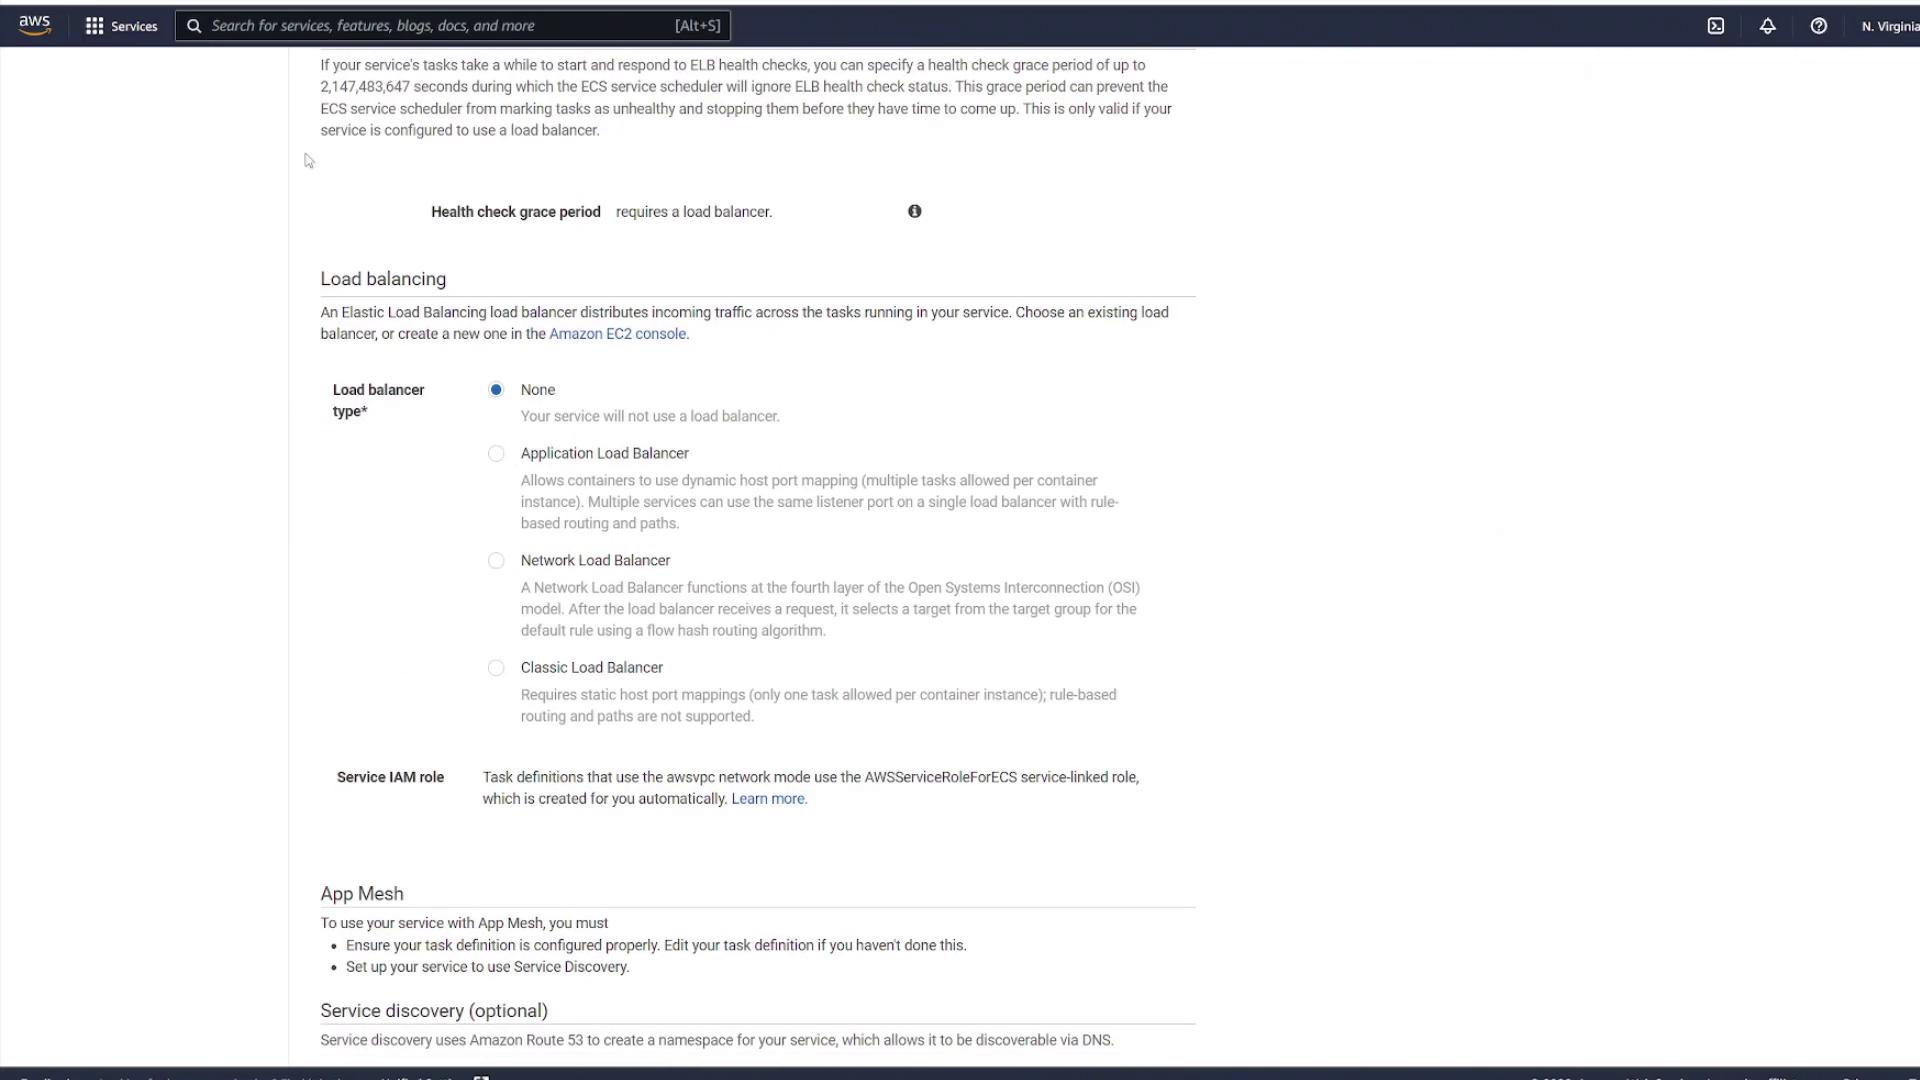
- Skip the load balancer configuration for this demo.
- Optionally disable autoscaling and click Next.

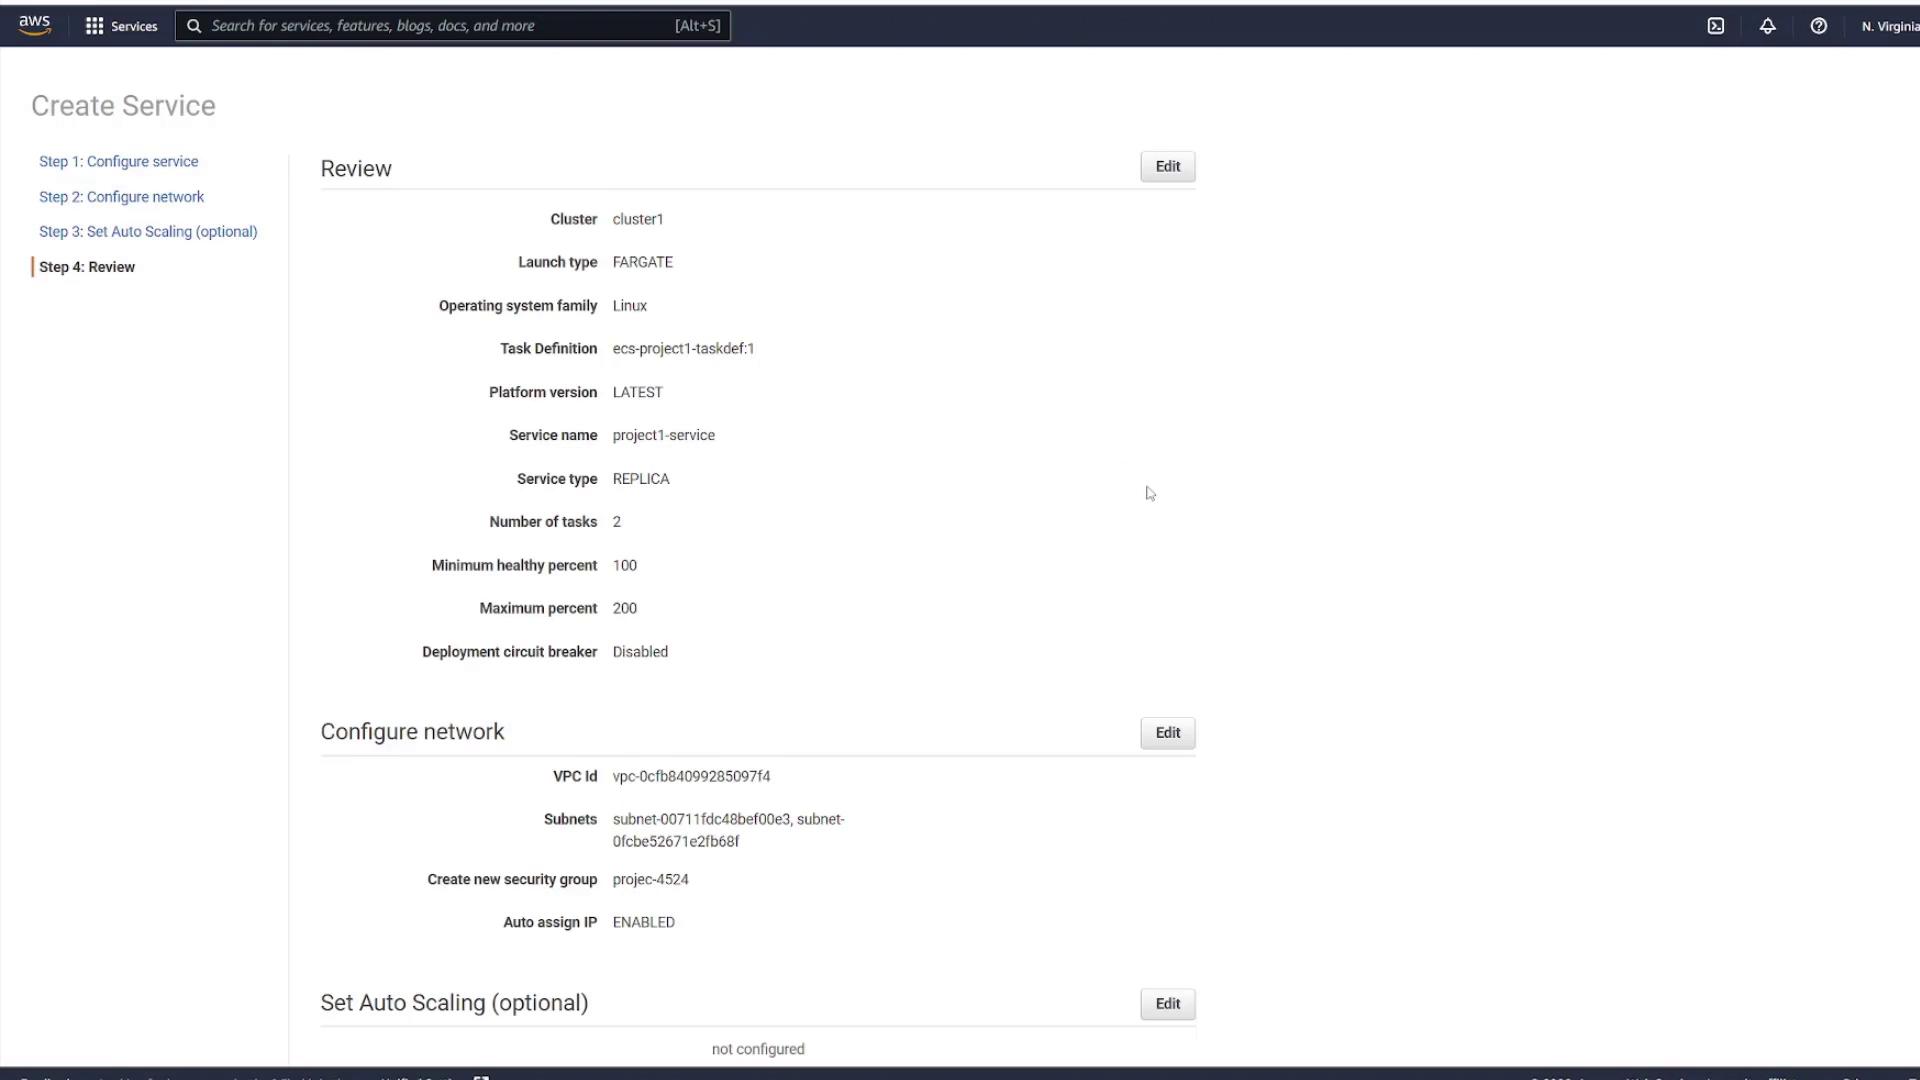
Finally, click Create Service. ECS will begin provisioning the two tasks. They may initially show a "PENDING" status until transitioning to "RUNNING."
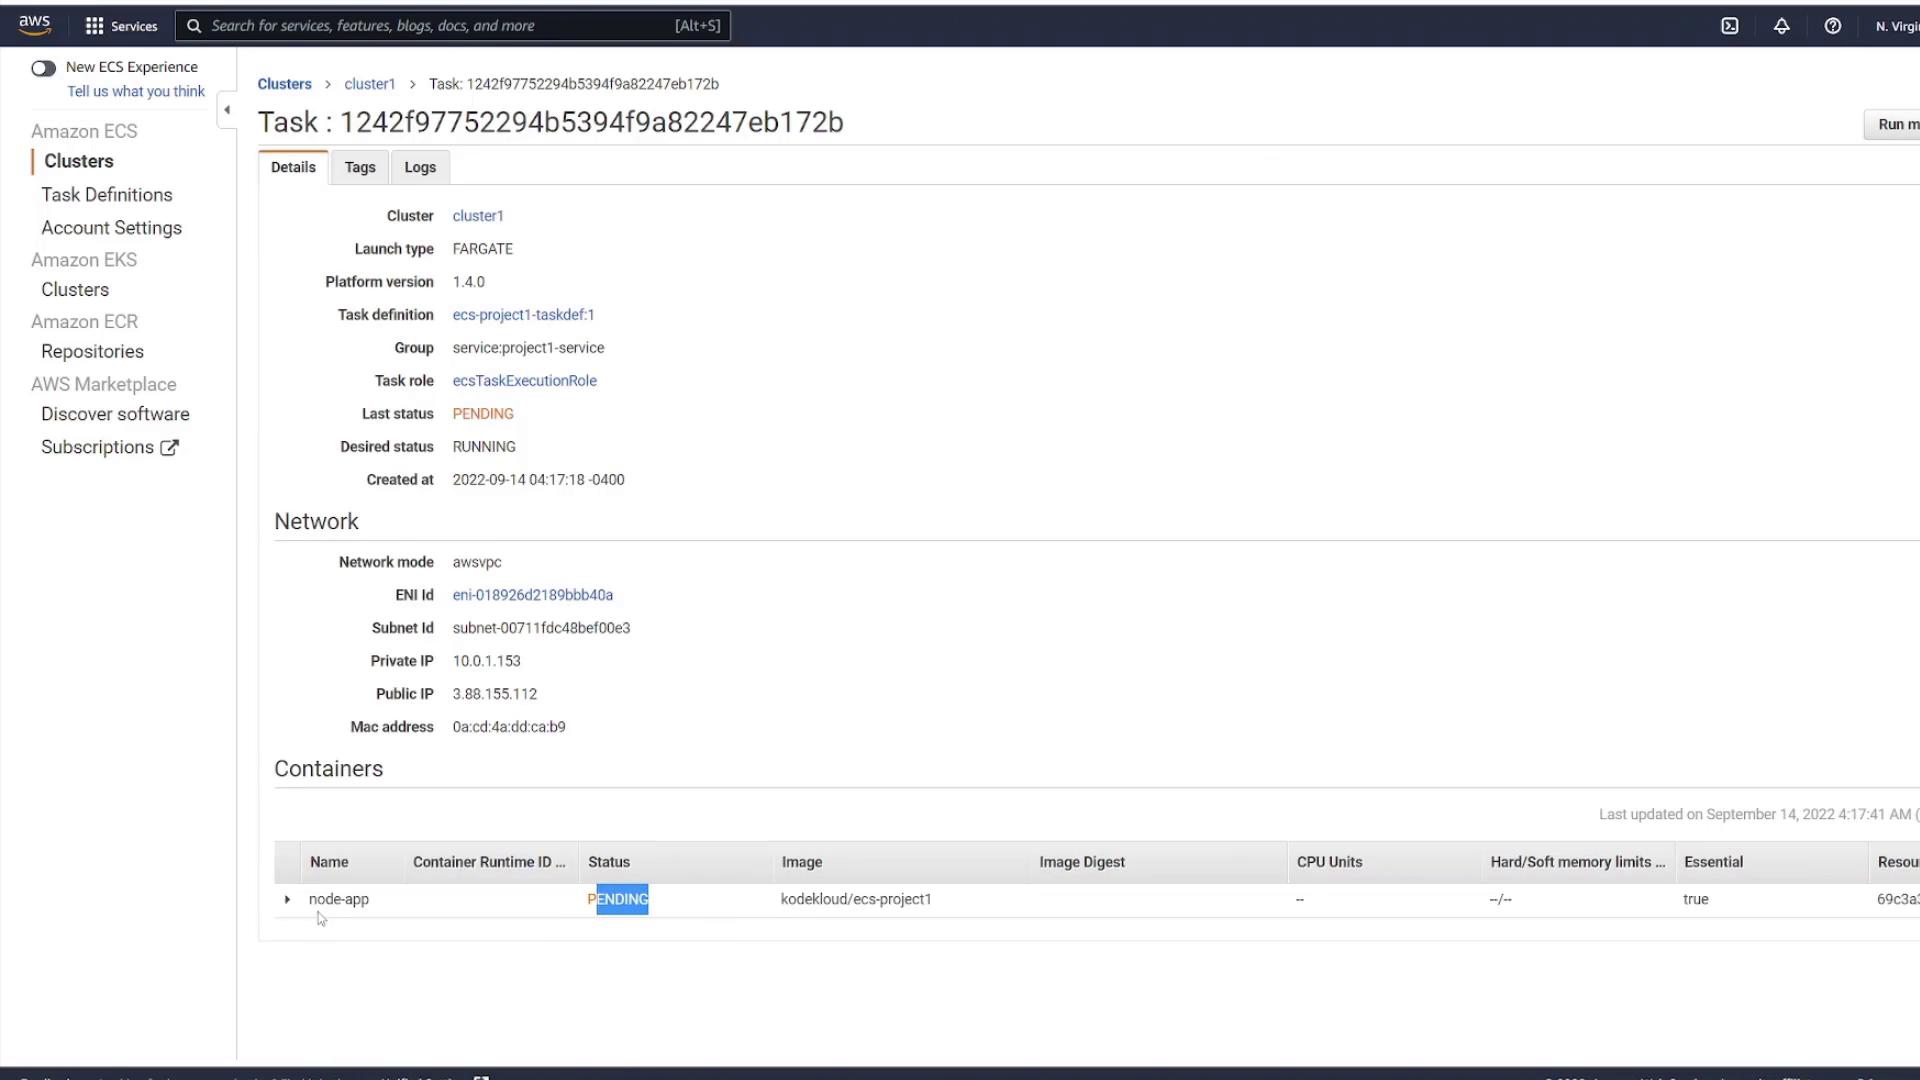
Once the tasks are running, each will receive a unique public IP. Note that manually tracking these changing IPs is not ideal; hence a load balancer is recommended, as it establishes a consistent endpoint.
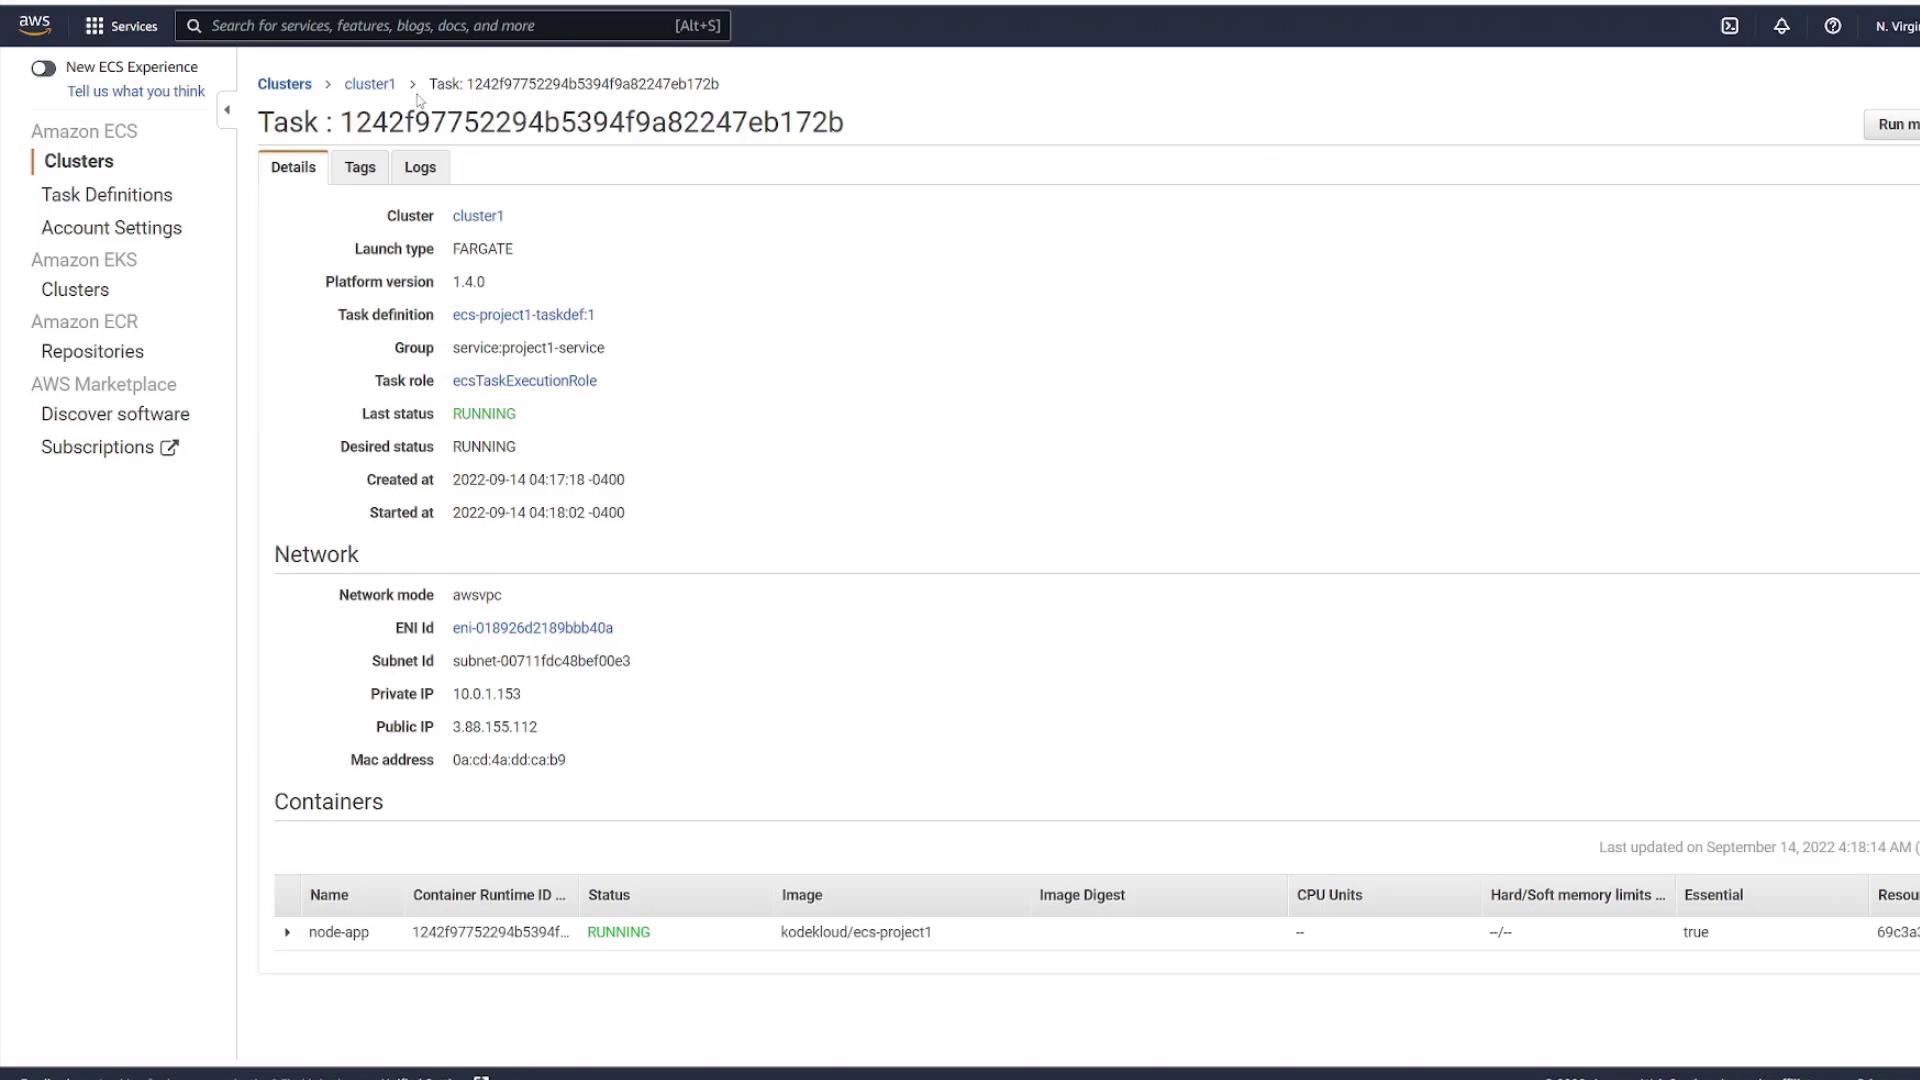
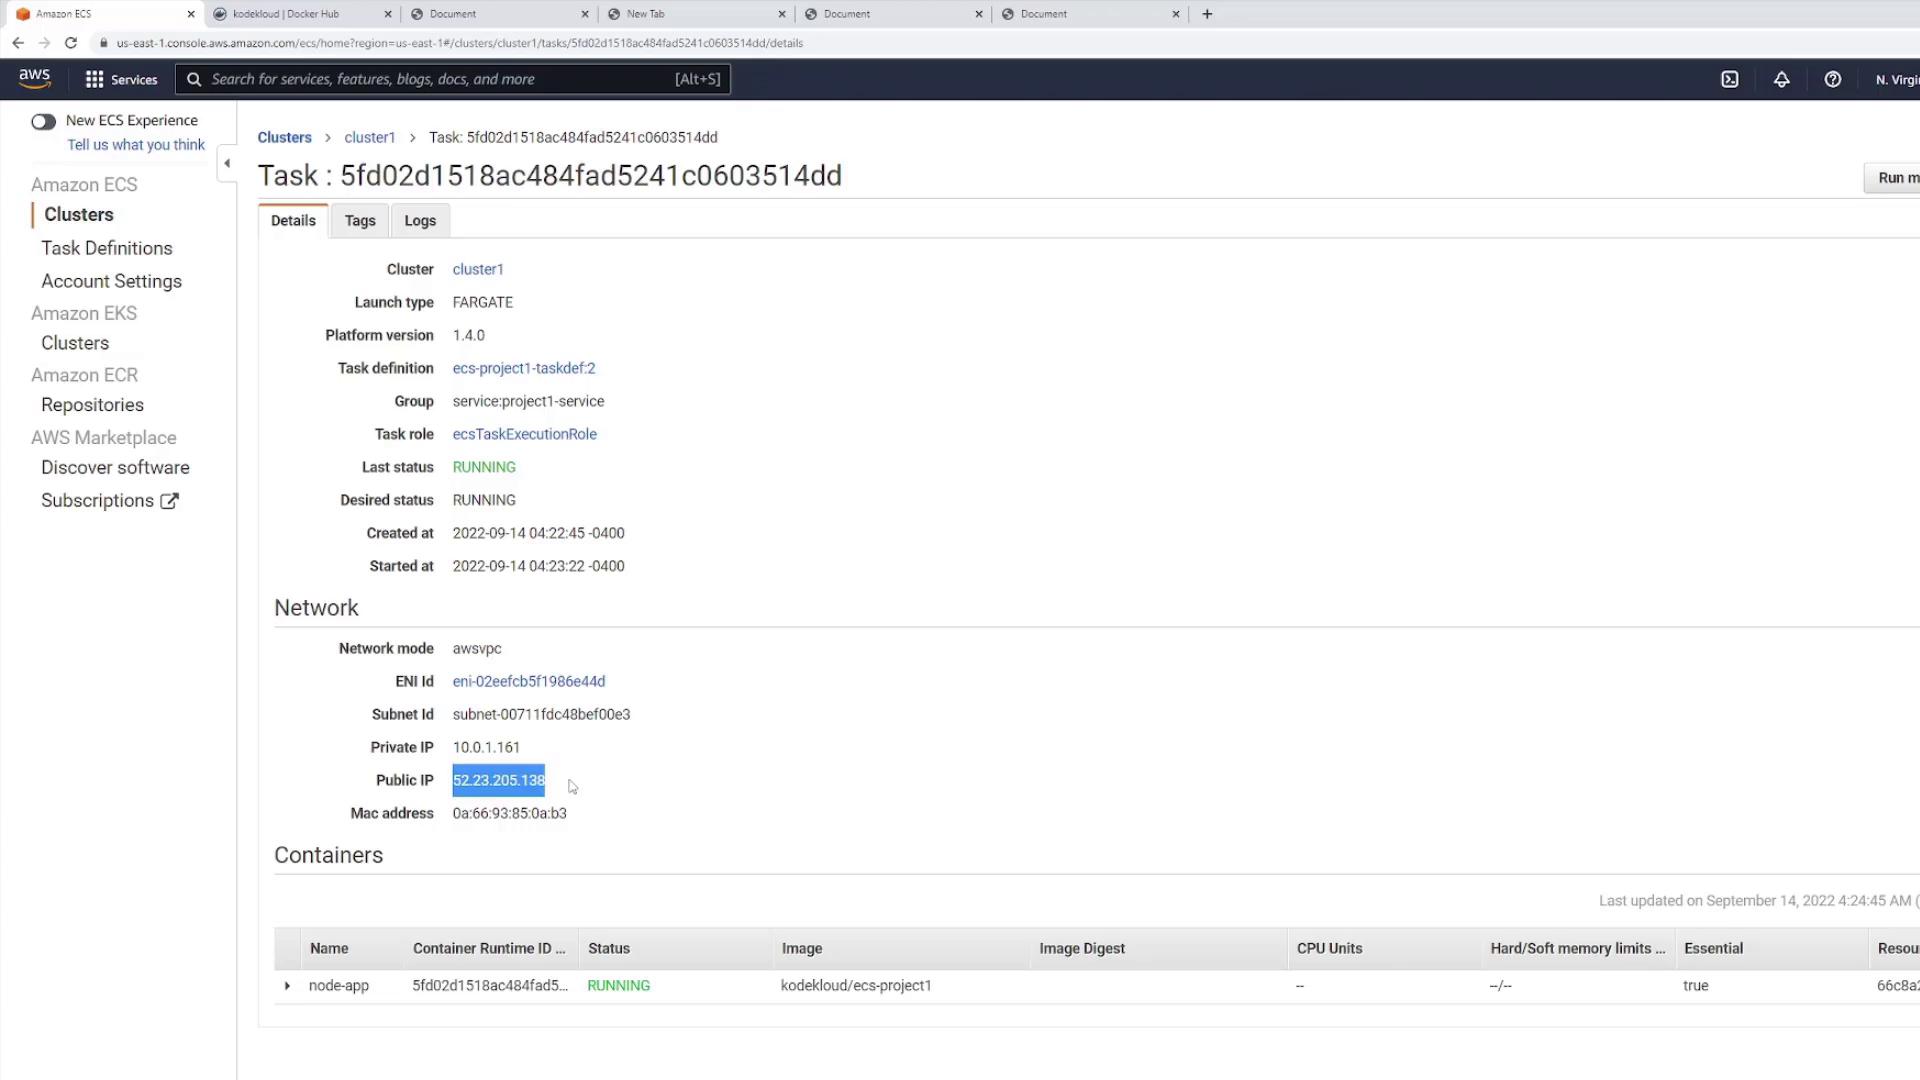
Click on a task to view its details and copy its public IP. Visiting this IP on port 3000 will display the simple HTML page of your application.

Updating the Application
Suppose you decide to update the application by modifying the HTML. For example, you can add extra exclamation points to the H1 tag.
Updated index.html
<!DOCTYPE html>
<html lang="en">
  <head>
    <meta charset="UTF-8" />
    <meta http-equiv="X-UA-Compatible" content="IE=edge" />
    <meta name="viewport" content="width=device-width, initial-scale=1.0" />
    <link rel="stylesheet" href="css/style.css" />
    <title>Document</title>
  </head>
  <body>
    <h1>ECS Project 1!!!!!</h1>
  </body>
</html>
Rebuild your Docker image and tag it:
docker build . -t kodekloud/ecs-project1
Push the updated image to Docker Hub. The output may look like:
8cba2b7a5a3d: Layer already exists
2713d962e94: Layer already exists
72140ff0de3: Layer already exists
93a6676ff620: Layer already exists
c77311ff52e: Layer already exists
ba9804f7abed: Layer already exists
a5186a09280: Layer already exists
1e69438976e4: Layer already exists
47b6660a2b9b: Layer already exists
5cbc21d19fb: Layer already exists
07b905e91599: Layer already exists
20833a96725e: Layer already exists
latest: digest: sha256:98216dd964fd5bb910fb23a527ed9d804b5cedacaa47fb45264cebe664006b size: 3261
user1 on user1 in ecs-project1 [!] is v1.0.0 via ⬢ took 4s
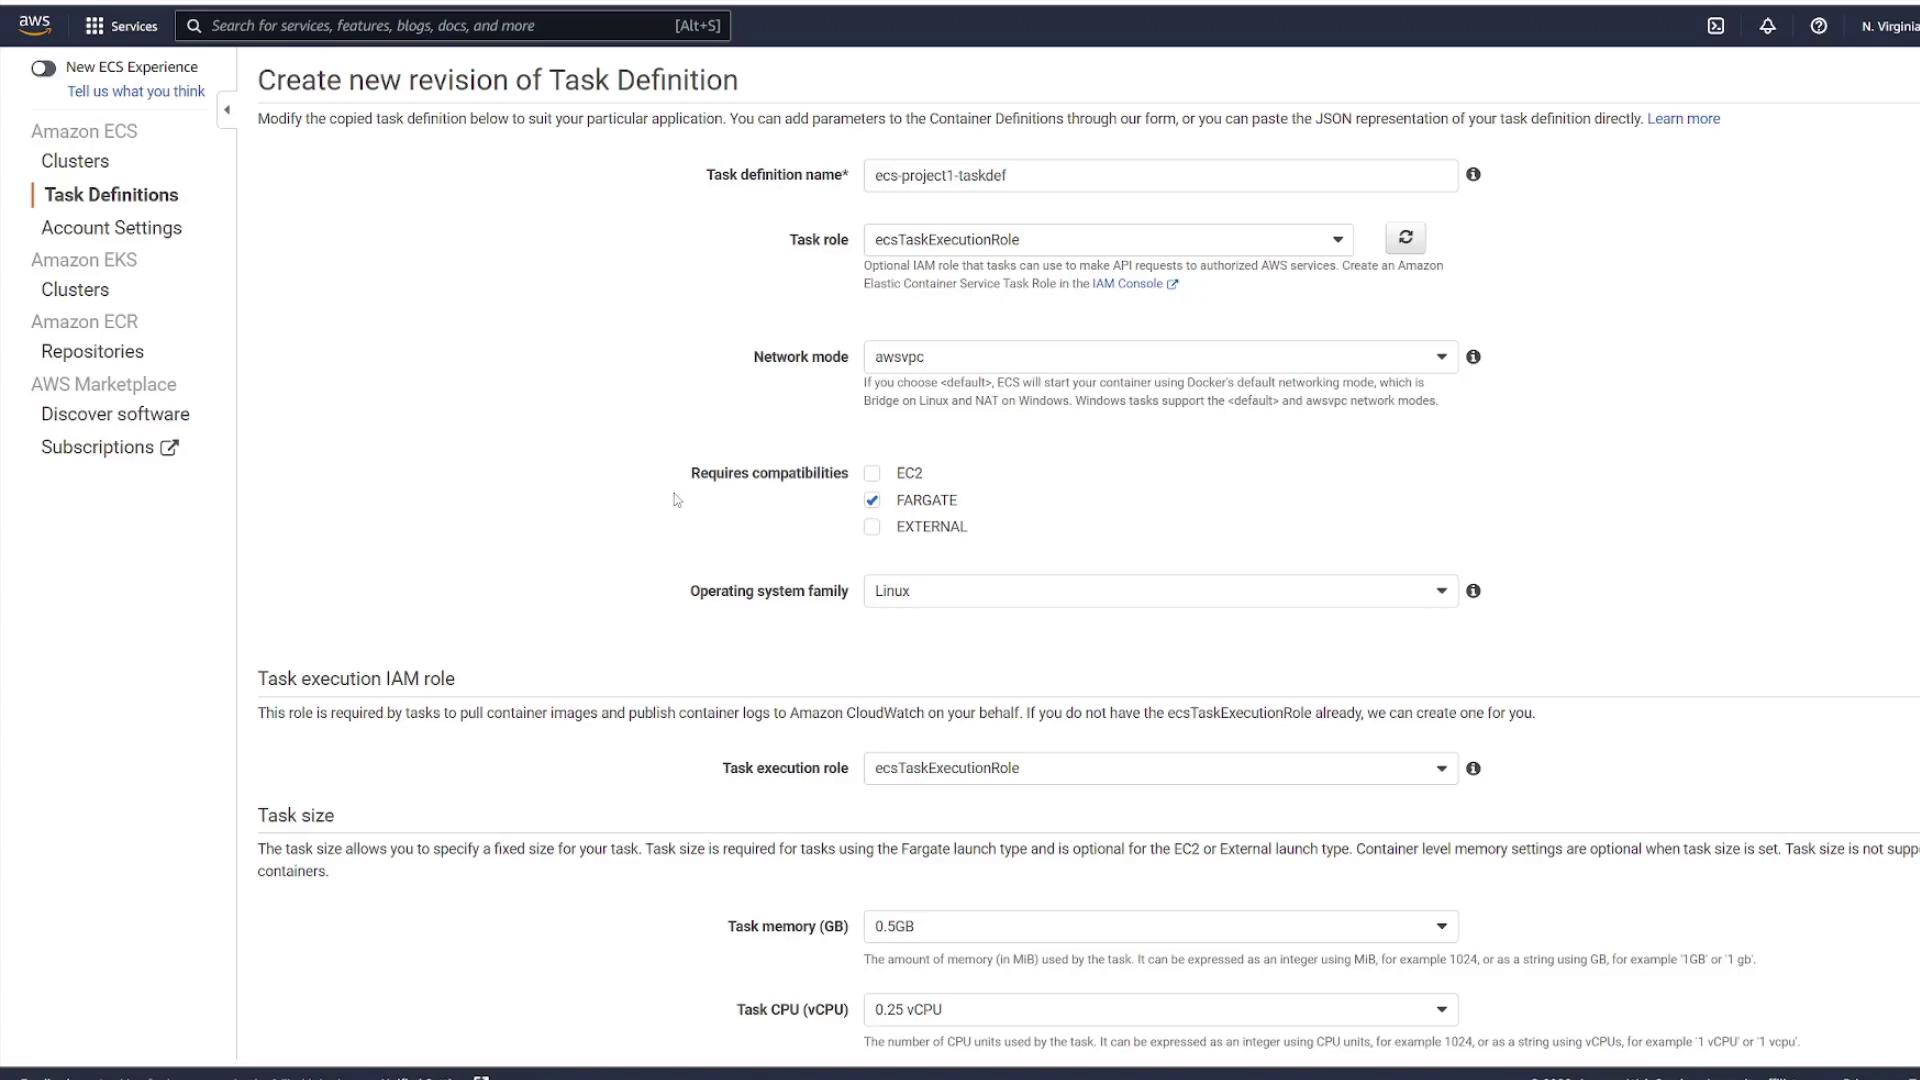
The ECS service must be notified of this update. In the ECS Console, update the service by selecting Update and then opting for Force new deployment. This command instructs ECS to pull the latest image and deploy new tasks. Alternatively, if you modify the task definition (even if only the image tag changes), create a new revision and update your service to use this latest revision.
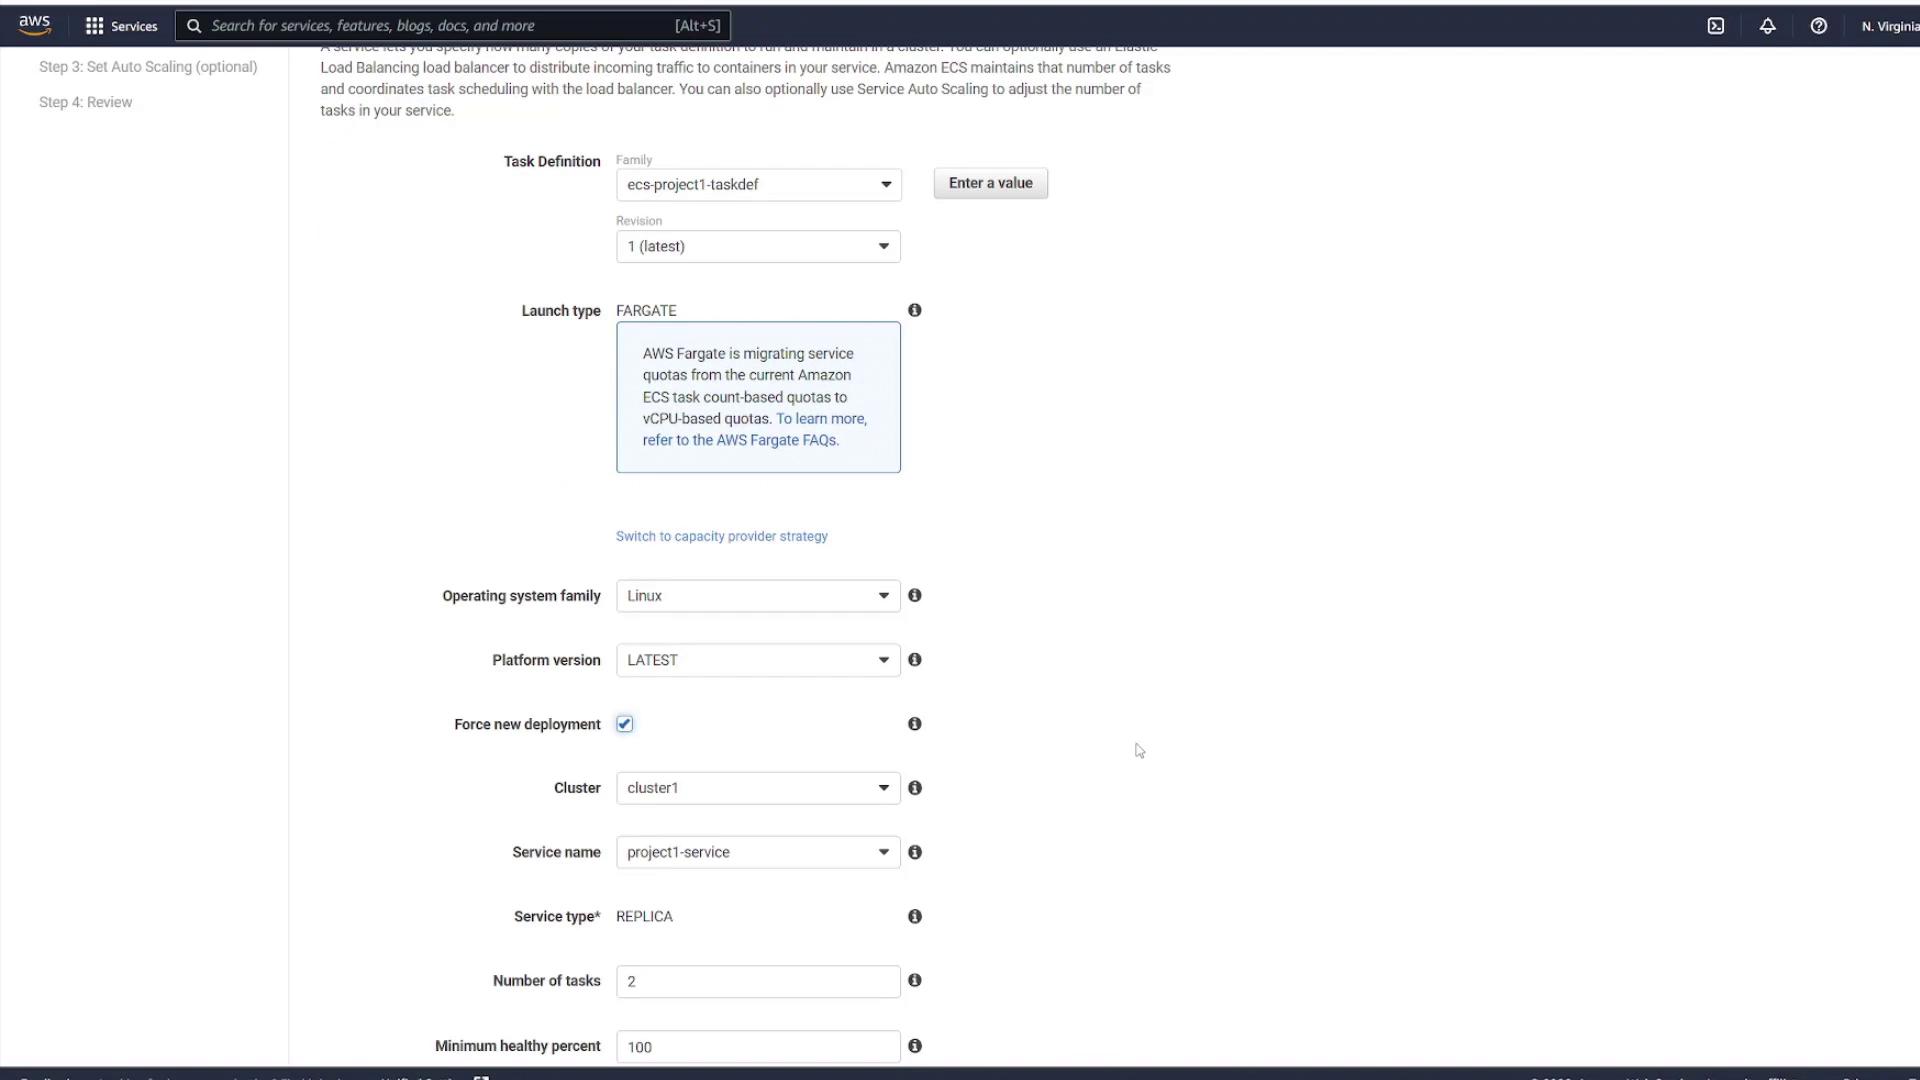
If you create a new revision of the task definition, update the service appropriately.
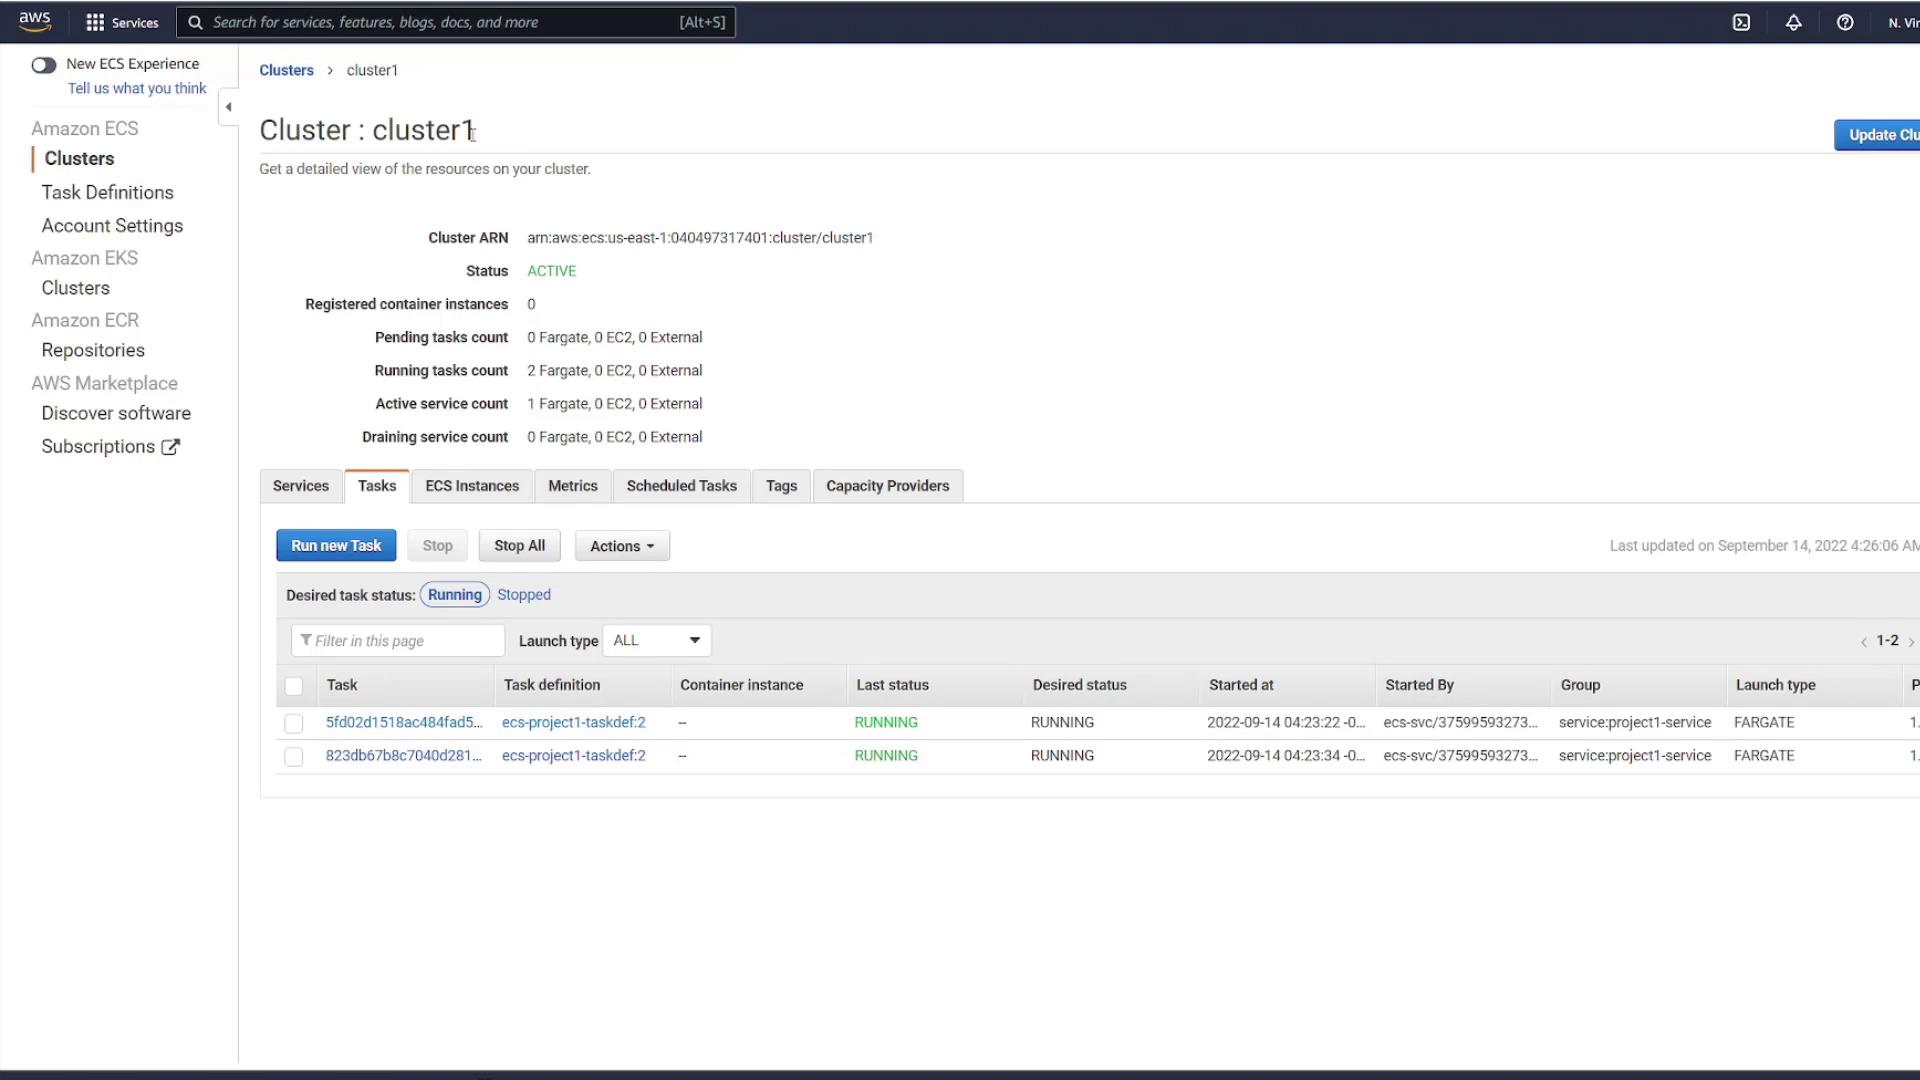
After the update, the ECS Console will display both the old and new tasks running side by side until the health checks pass and the old tasks are terminated. The new tasks will receive different public IP addresses:
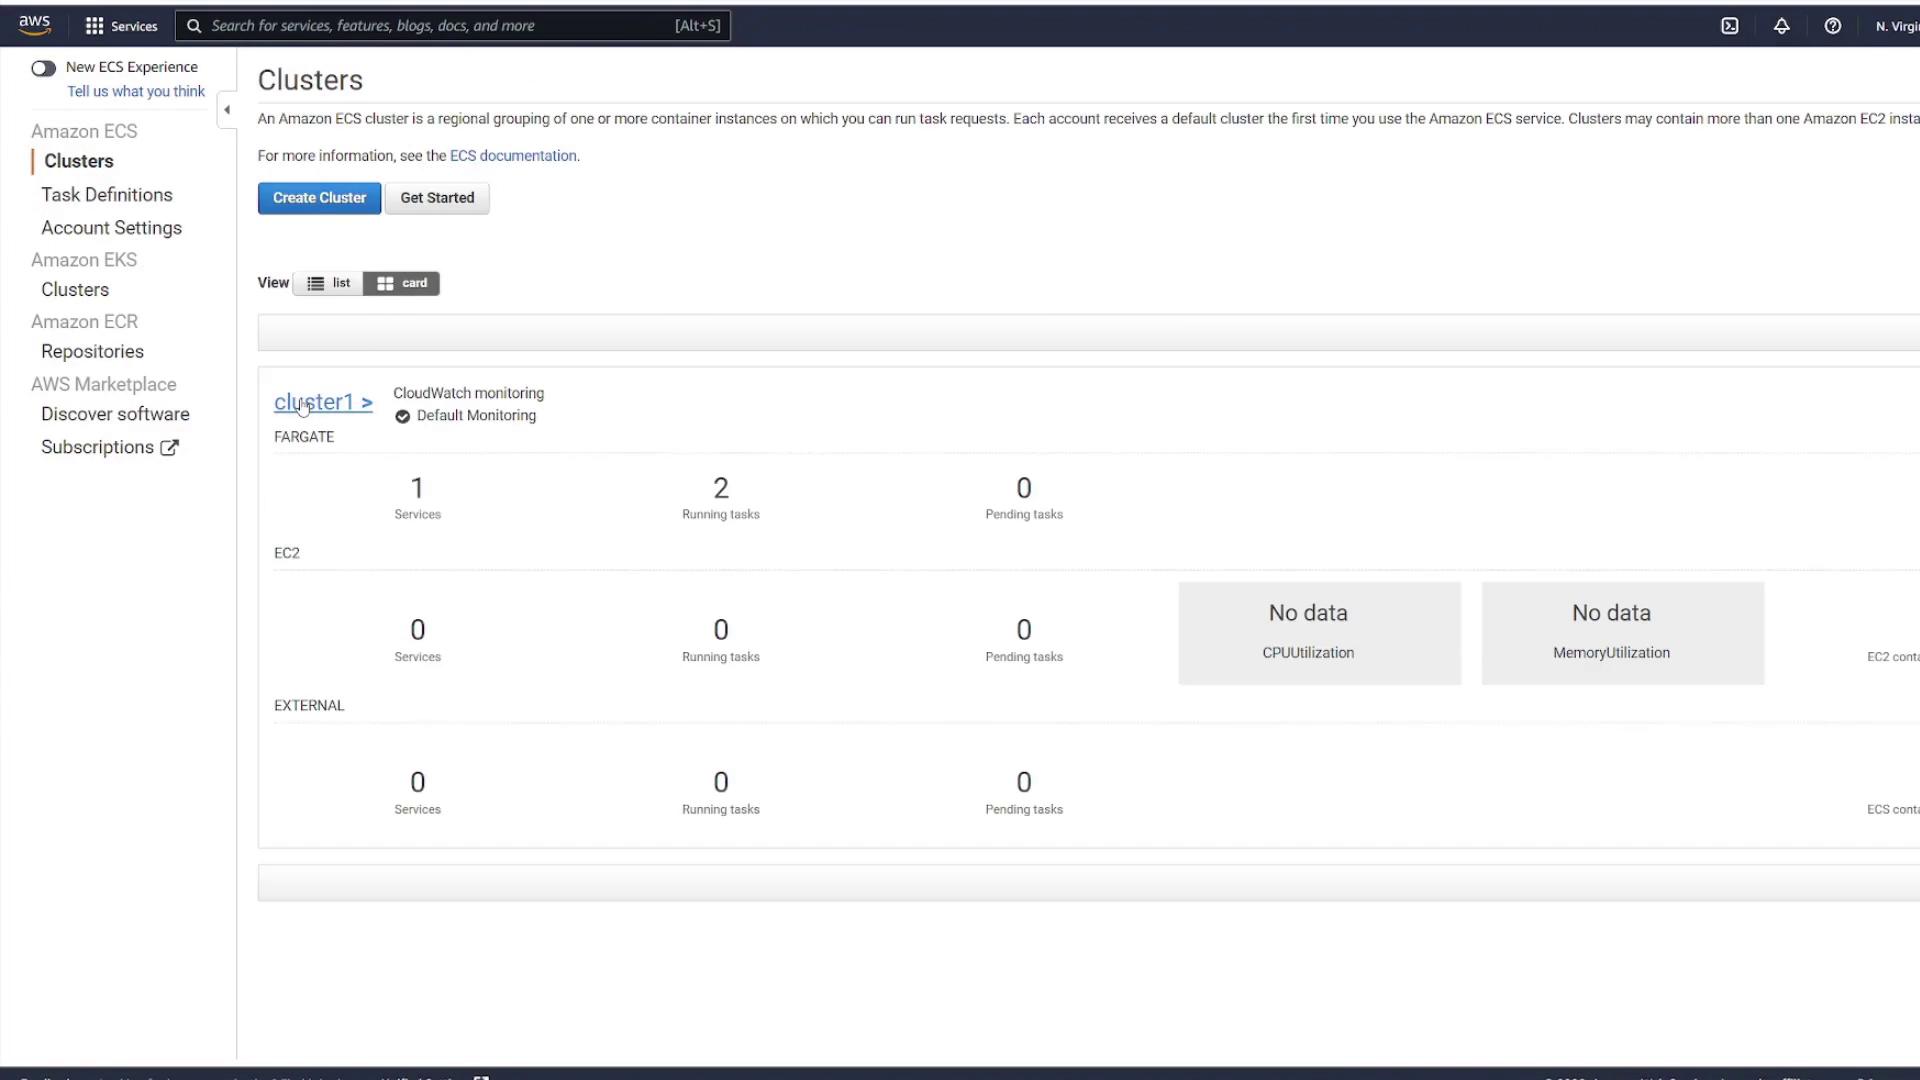
Refreshing the service confirms that the new tasks are active with the updated application. This dynamic change of IPs further reinforces the necessity of a load balancer to provide a stable endpoint.
Cleanup and Next Steps
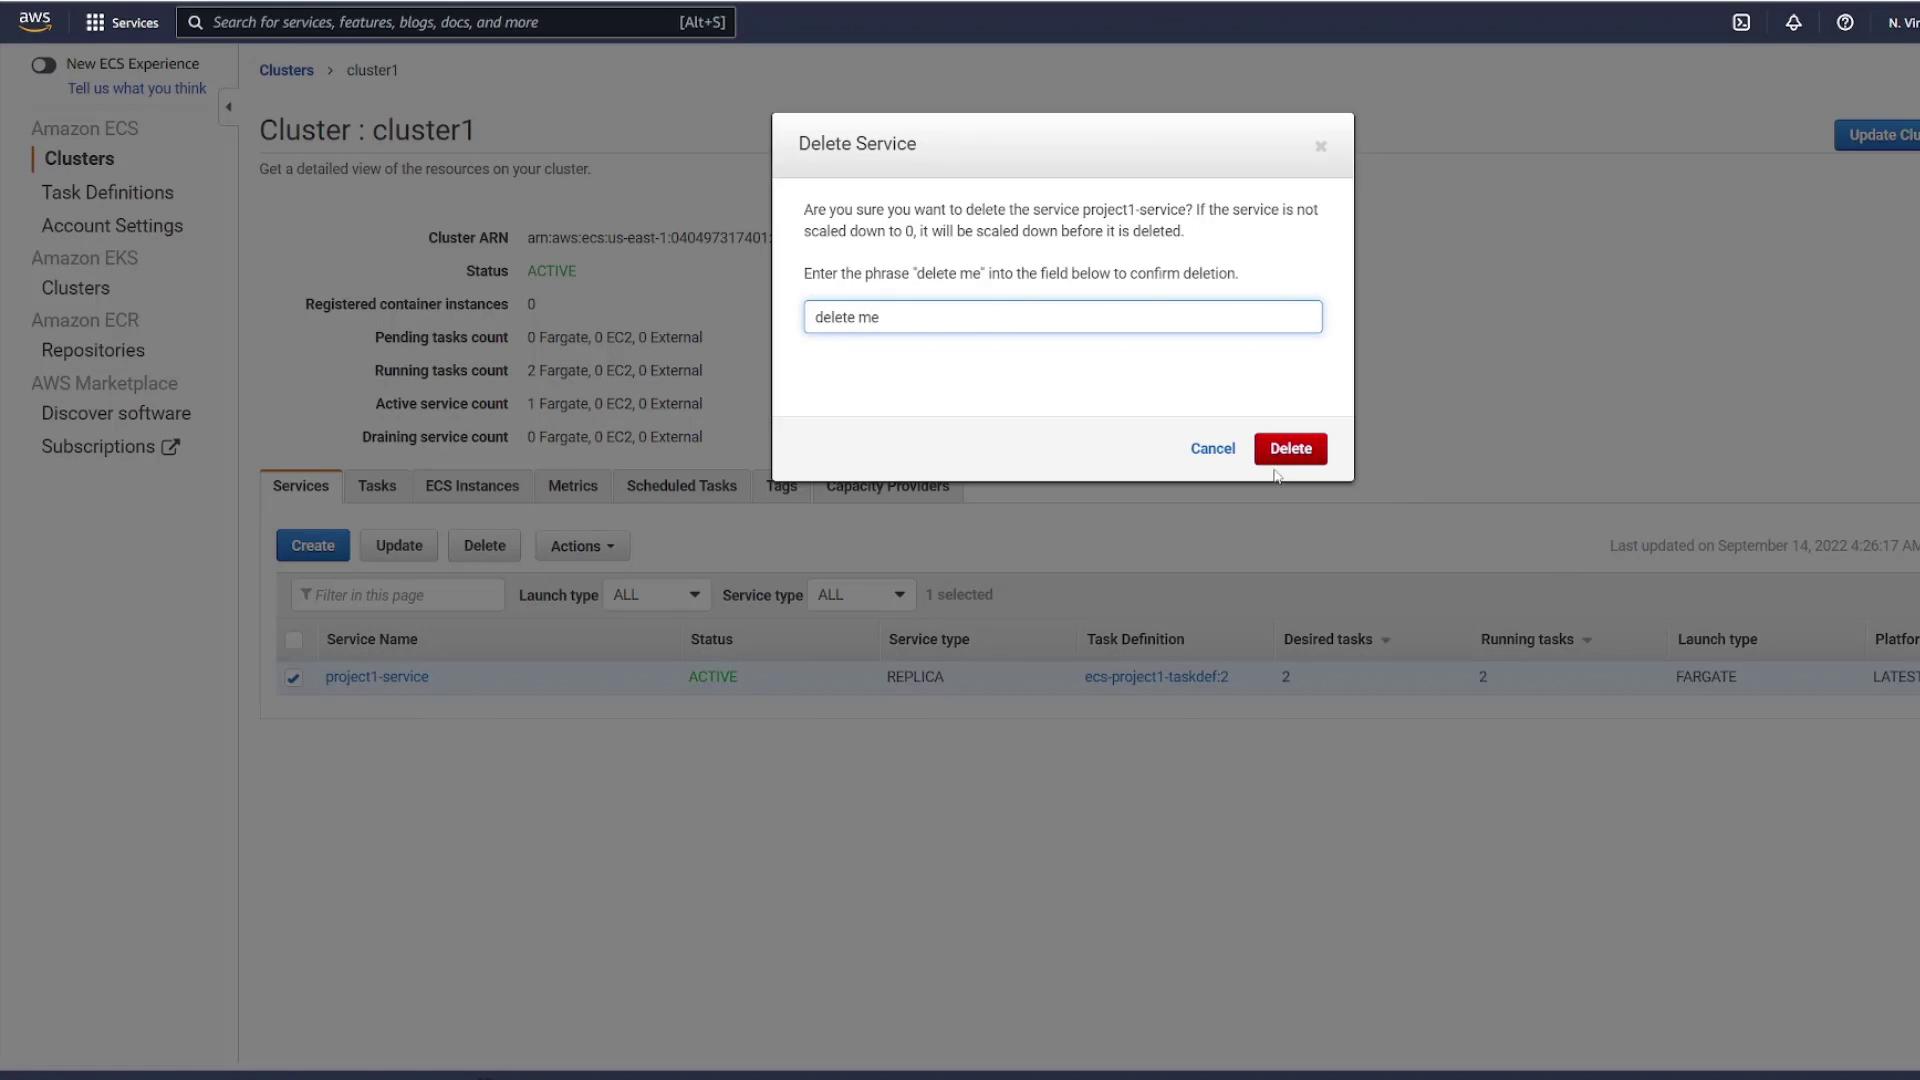
After verifying the updated deployment, you can delete the application resources if desired. In the ECS Console, delete the service (confirm by entering “delete me”) and ensure all tasks are terminated.
Next, we will demonstrate how to deploy a more complex application that includes a database, persistent storage (volumes), and a load balancer to ensure a single, stable endpoint for your front-end applications.
Happy deploying!
Watch Video
Watch video content