Learn to create and deploy an AWS Lambda function using the AWS Management Console, including configuration, testing, triggers, and performance monitoring.
In this guide, you’ll learn how to create and deploy an AWS Lambda function from scratch using the AWS Management Console. This tutorial covers configuring a Lambda function, testing it with custom events, adding triggers such as an API Gateway, incorporating third-party libraries using Lambda layers, and monitoring performance with CloudWatch.
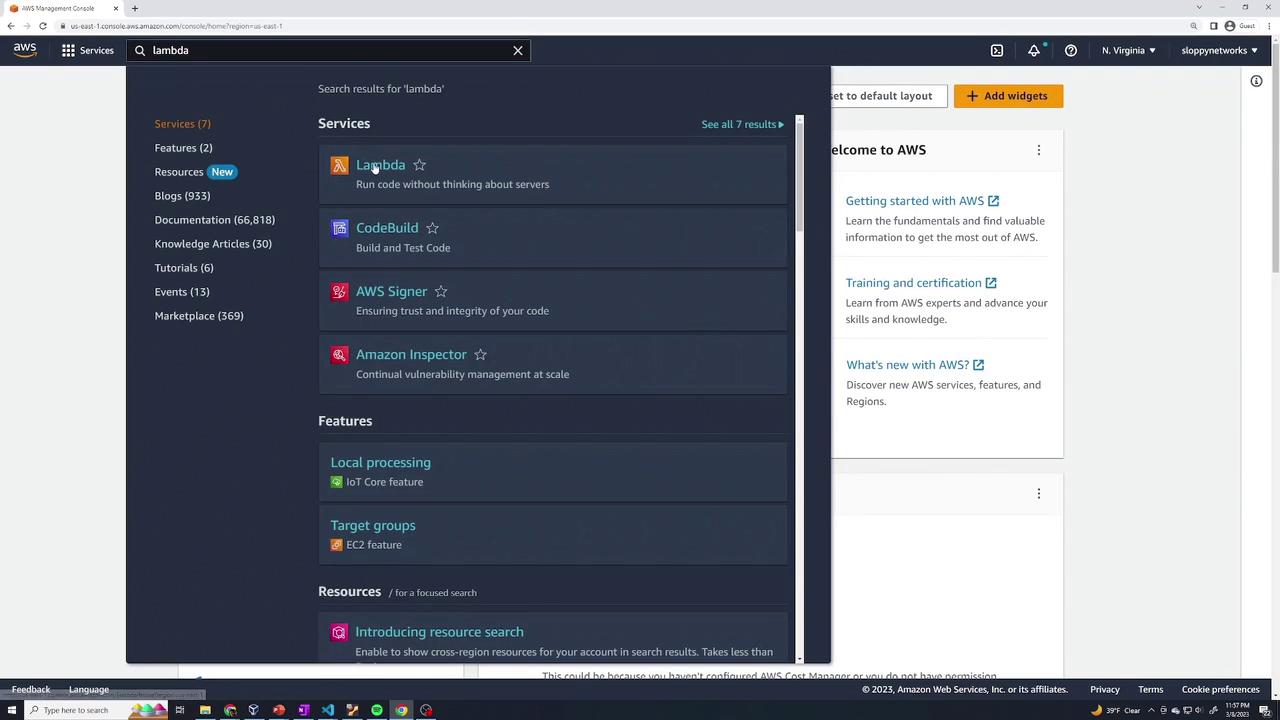
Begin by searching for the Lambda service in the AWS Management Console search bar.
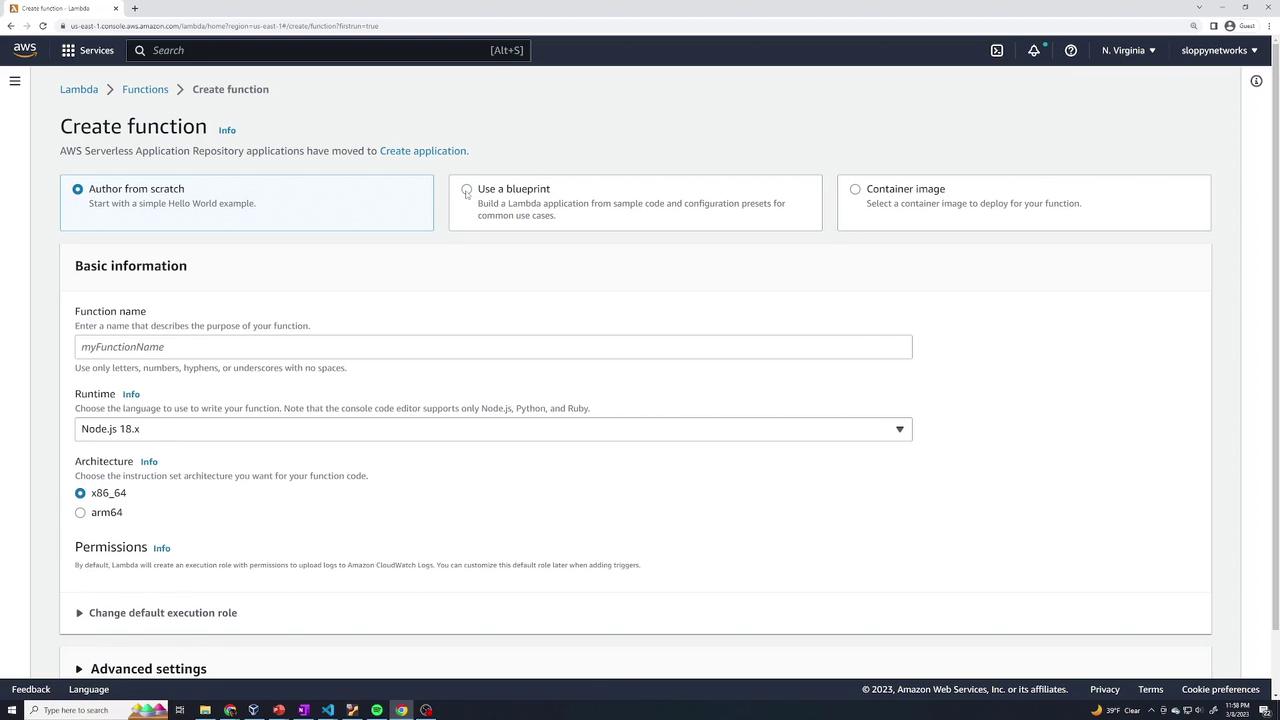
Once in the Lambda service, click Create a function. You will then see several options:
Author from scratch: Write code entirely from scratch.
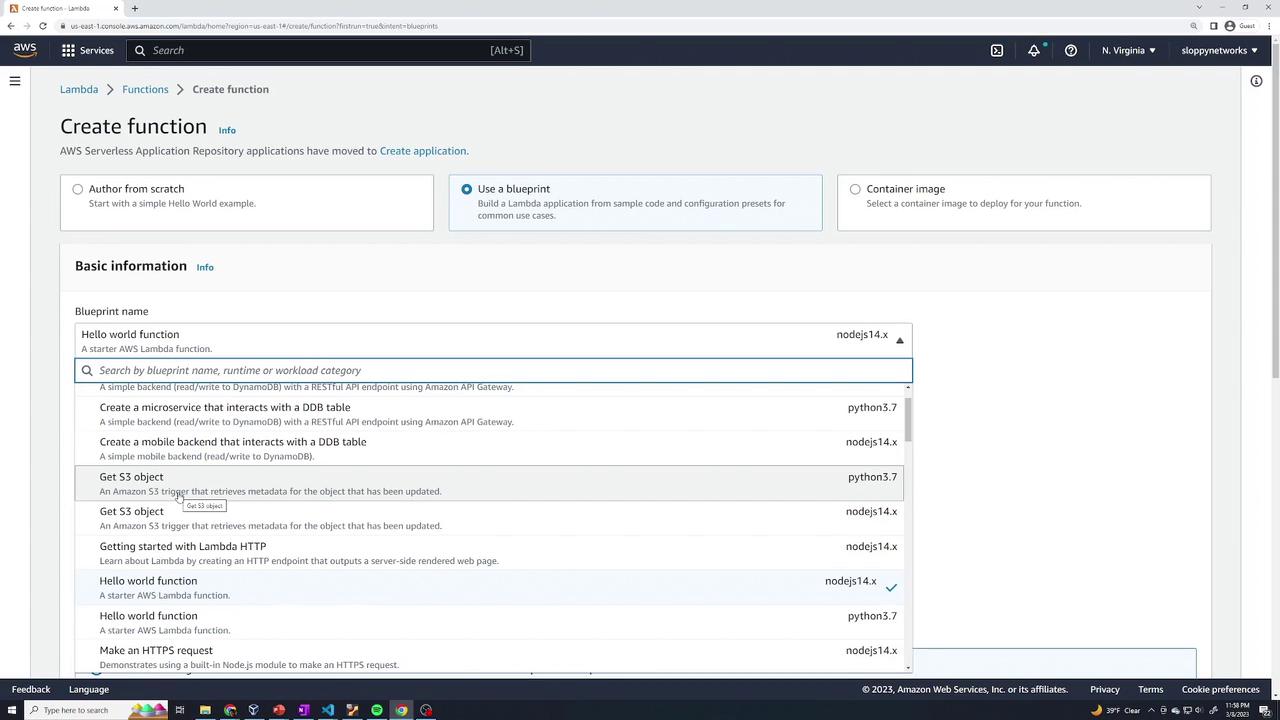
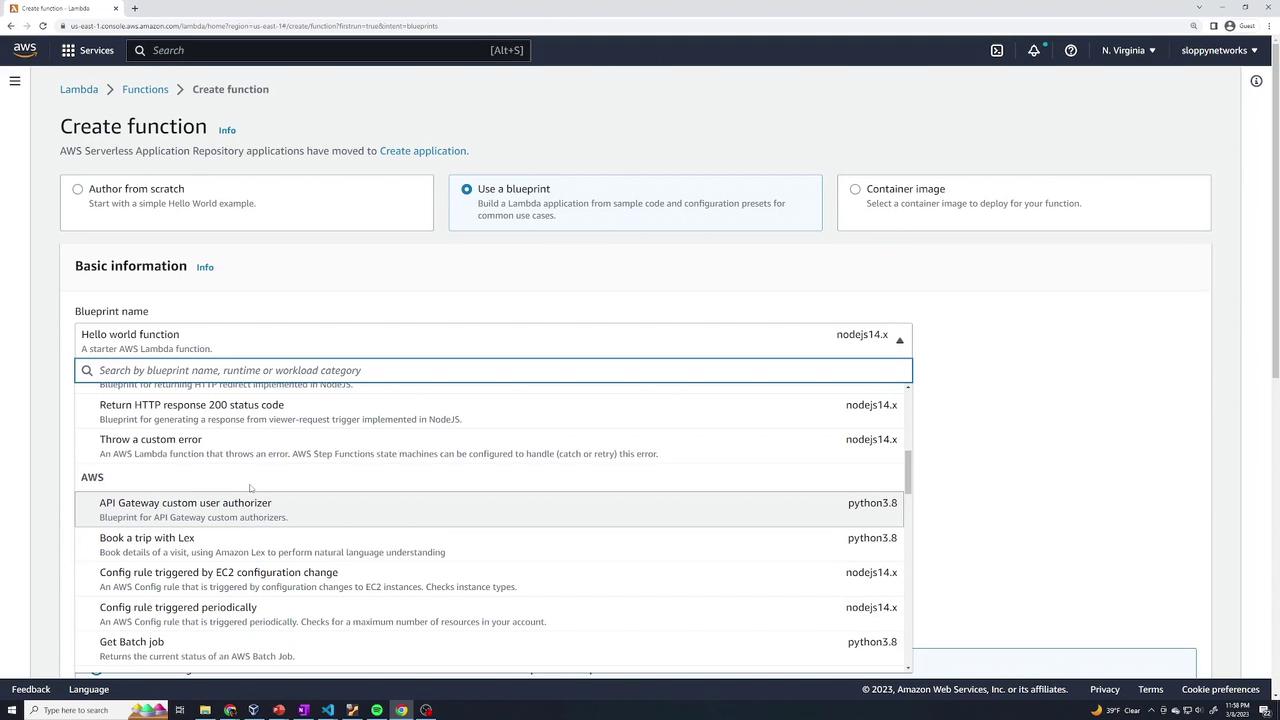
Use a blueprint: Choose from AWS-provided blueprints for common tasks (e.g., processing an S3 upload, configuring an API Gateway trigger, etc.).
Container image: Package your application as a container image if preferred.
For this demo, select Author from scratch.Next, supply a name for your function (e.g., “my-first-function”) and choose the runtime. AWS Lambda offers a variety of runtimes such as .NET, Go, Java, Node.js, Python, and Ruby. In this example, we will use Node.js. You may also select the architecture and configure the execution role. By default, Lambda creates a new role with CloudWatch Logs upload permissions. Alternatively, you can use an existing role or create a new one from an AWS policy template.
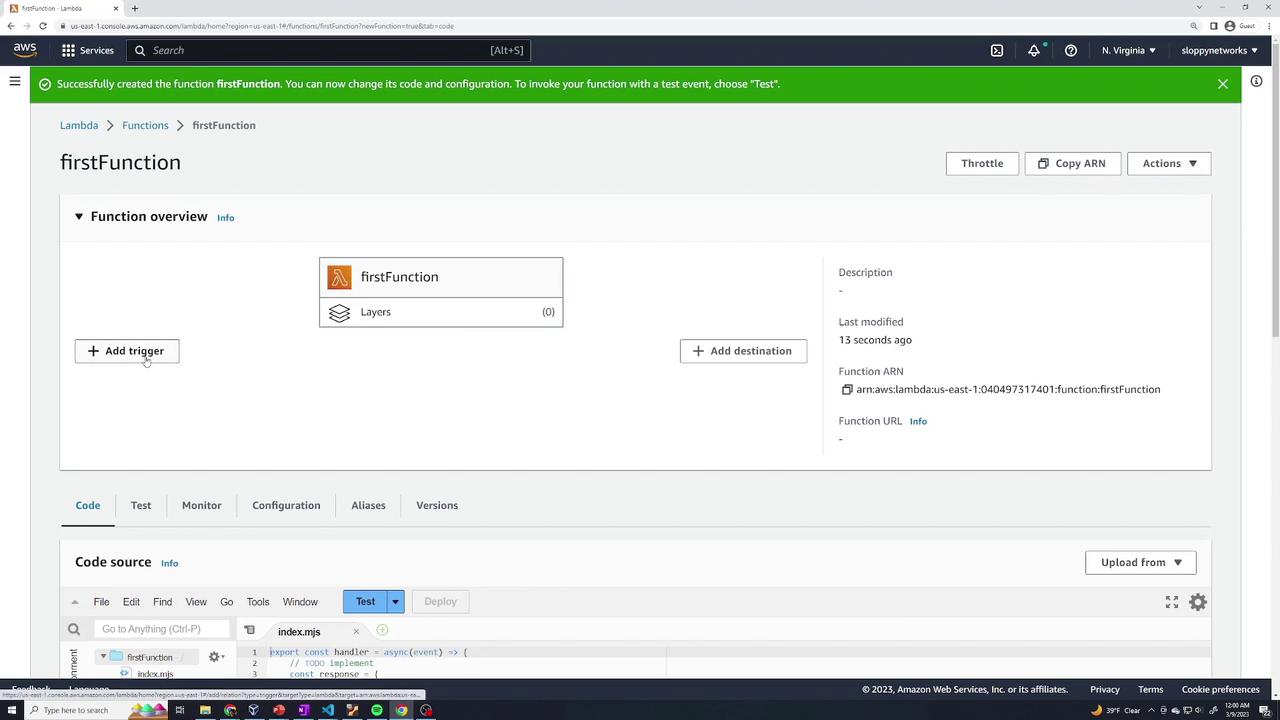
Leave the optional settings (like VPC configuration) unchecked and click Create function.After creation, you’ll see a graphical overview of your function. The interface includes a trigger section that indicates when your function will run. AWS Lambda can be initiated by various sources, including API Gateway, S3, SNS, SQS, Alexa, Apache Kafka, and more.
To review available triggers, click Add trigger. You will see a list of potential trigger sources.
This simple function always returns a status code of 200 along with a message. Such a response is particularly useful when integrating your function with an API Gateway that expects specific response formatting.
You can test your Lambda function directly using the built-in test functionality without needing an external trigger. Click the Test button to configure a test event. Initially, you will be provided with a sample JSON event similar to this:
You can customize this test event, for example by renaming it to “test one” and modifying its content to include a product identifier:
{ "products": "TV"}
When you run the test, AWS passes this JSON object as the event to your Lambda function. Initially, your function returns a static message. To utilize the event data in your code, update your function as follows:
After deploying the changes, re-run the test to see the function returning the product data (e.g., "Product": "TV"). The log output will display details such as request IDs, duration, memory usage, and more, which are viewable in CloudWatch Logs.
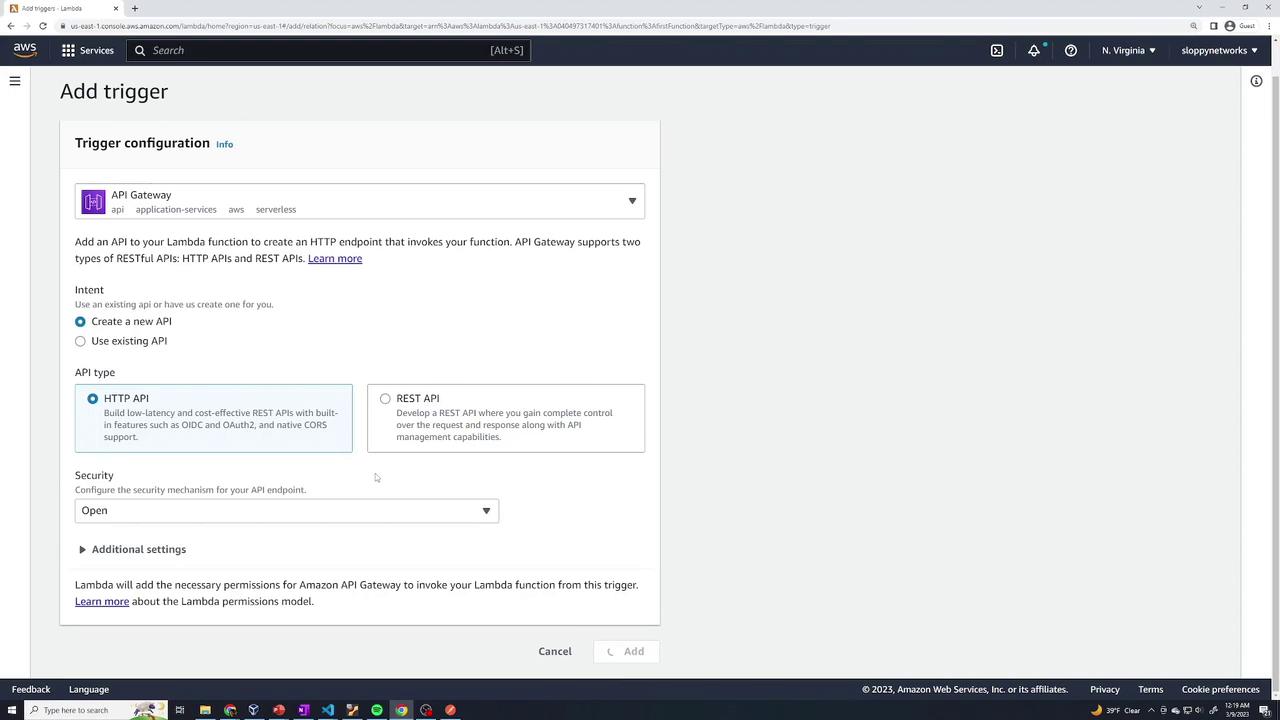
To allow external HTTP requests to invoke your function, add an API Gateway trigger:
In the Lambda console, click Add trigger.
Select API Gateway.
Choose Create a new API and configure its settings. For the demo, you can leave the security settings open.
Click Add.
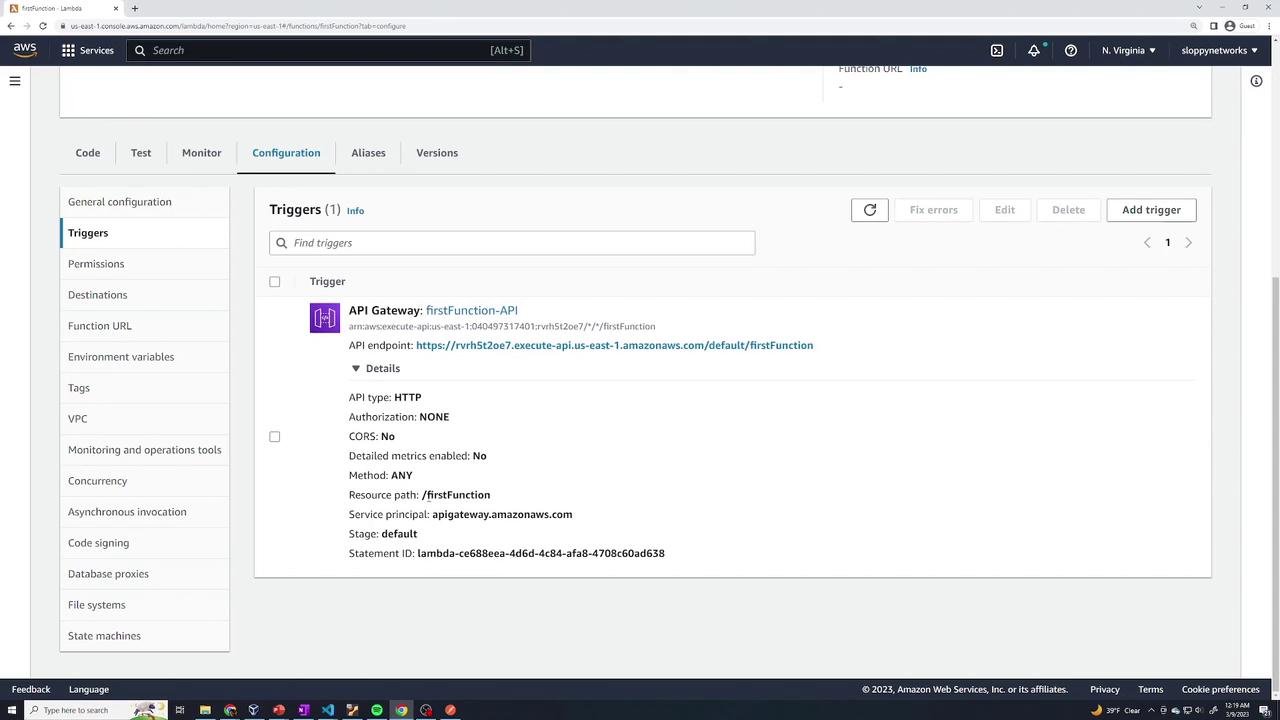
An API Gateway is now attached to your function. You can view the API endpoint details in the configuration tab.
The endpoint URL, including the specific path (e.g., “first function”), will be displayed. Copy this URL and use your browser, curl, or Postman to send a GET request. If properly configured, you will receive a response from your Lambda function (e.g., “lambda trigger example”).
For more advanced functionality, you may need to use third-party libraries. In this example, we’ll integrate the Node.js library bcryptjs to hash a user-supplied password.On your local development machine, install bcryptjs by running:
npm install bcryptjs
The console output should resemble:
C:\Users\sanje\Documents\scratch\demo\lambda>npm install bcryptjsadded 1 package, and audited 2 packages in 1sfound 0 vulnerabilitiesC:\Users\sanje\Documents\scratch\demo\lambda>
Notice that a new folder named node_modules is created, which contains the bcryptjs code.Now, modify your Lambda function code to import and utilize bcryptjs:
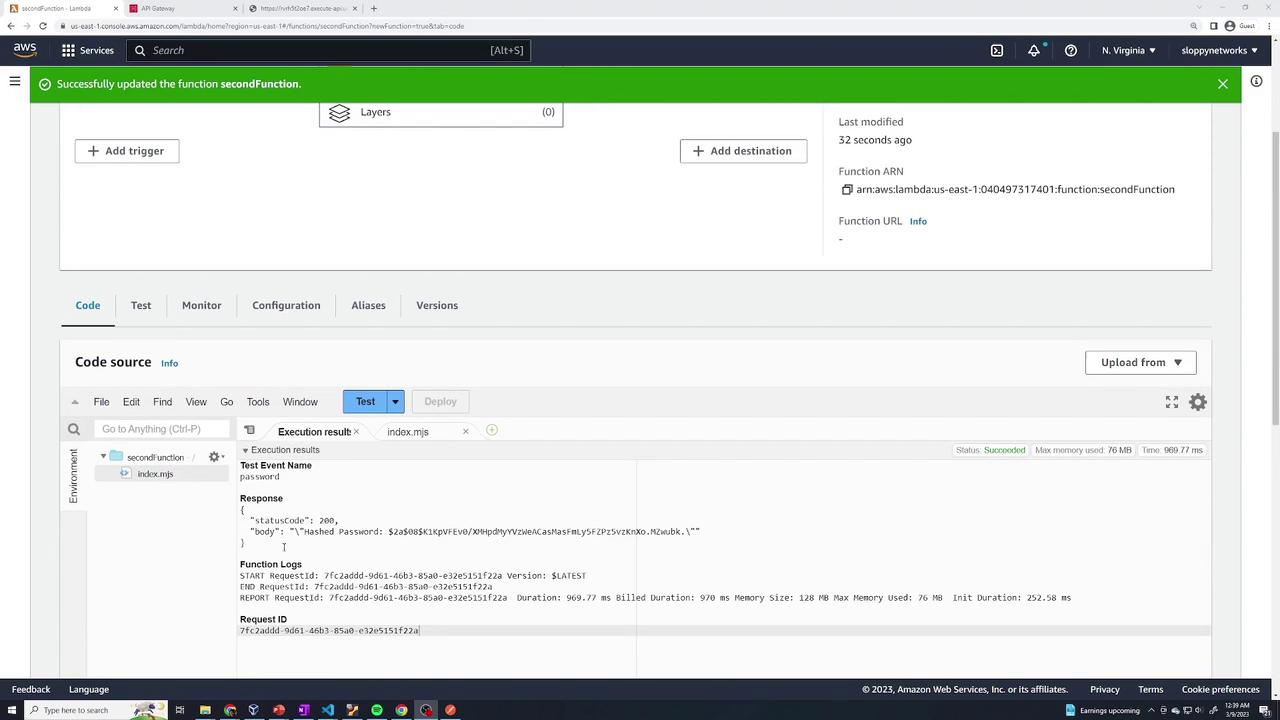
To prevent errors like the package not found error, bundle your code along with all required third-party dependencies. One way to do this is to zip your project directory—including your code file and the node_modules folder—and then upload the zip file directly to AWS Lambda. This approach ensures that AWS Lambda has access to bcryptjs and other dependencies.After uploading the zip file, deploy your changes and run your test again. Your function should now return a successful response with the hashed password.
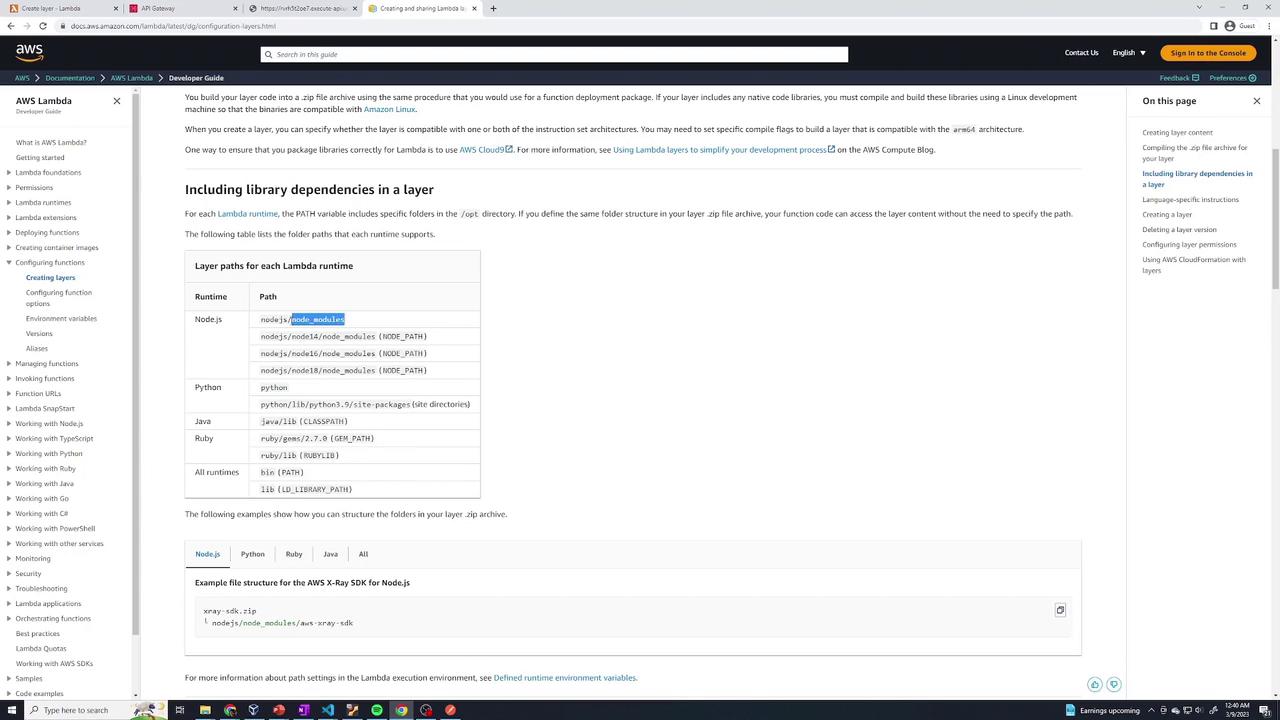
An alternative solution for managing dependencies is to use Lambda layers. Layers allow you to package libraries separately and share them across multiple functions.To create a Lambda layer for bcryptjs:
Prepare the folder structure required by Lambda. For Node.js, create a folder named Node.js (or nodejs as per the documentation) and move your node_modules folder inside it.
Zip the Node.js folder. For example, name the zip file hash-layer.zip.
In the Lambda console, navigate to Layers and click Create layer.
Name your layer (e.g., “hash”) and upload the zip file.
Select the supported runtime (Node.js) and create the layer.
Next, associate the newly created layer with your Lambda function:
Open your function in the Lambda console.
In the Layers section, click Add a layer.
Choose Custom layers and select your “hash” layer.
Add the layer and deploy your function.
Your function now loads bcryptjs from the layer instead of bundling it with the function code.
For further details on folder structure and additional instructions, refer to the AWS Lambda Developer Guide.
After adding the layer, test your function to ensure that bcryptjs is correctly imported and the output meets expectations.
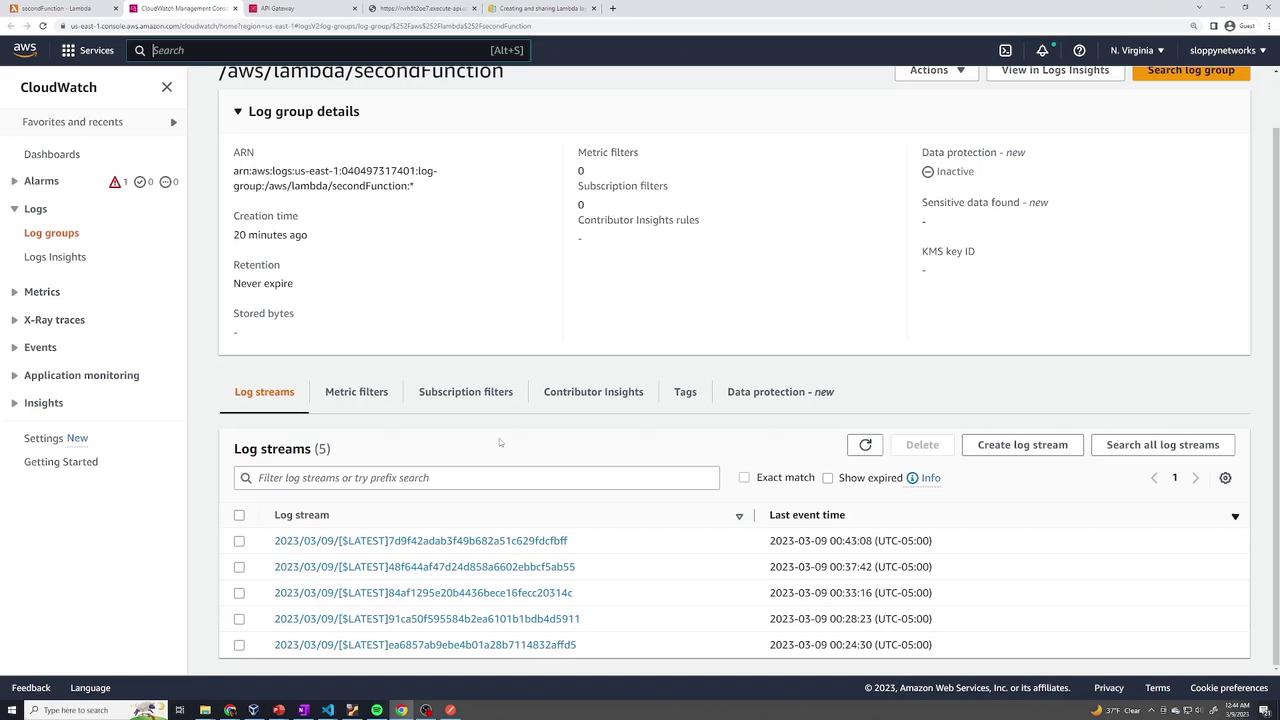
AWS Lambda integrates seamlessly with Amazon CloudWatch to monitor your function’s performance. In the Monitoring tab, check metrics such as invocation count, duration, errors, and throttling. For more detailed information, click View logs in CloudWatch.Example log snippet:
In this guide, we covered how to create a simple AWS Lambda function, test it using custom event data, and extend its functionality by adding an API Gateway trigger and third-party libraries. We discussed methods for bundling dependencies and using Lambda layers for efficient code management, alongside monitoring performance with CloudWatch logs. With AWS managing the underlying infrastructure, you can focus on designing, implementing, and deploying your serverless applications with ease.Happy coding with AWS Lambda!