AWS Solutions Architect Associate Certification
Services Compute
Step Functions Demo
In this article, we demonstrate how to work with AWS Step Functions by creating a simple state machine that processes events from a camera service. Imagine a scenario where a smart doorbell captures video upon detecting motion. The recorded event is sent to our state machine, which then evaluates whether the motion indicates a threat or is merely a false alarm. Depending on the outcome, different Lambda functions are triggered to handle each case.
Creating a New State Machine
Begin by searching for "Step Functions" in the AWS Console. This will take you to the page where you can create your first state machine. Click on Create state machine.
A state machine is the location where you build your workflow logic by combining individual steps that process your tasks.
AWS offers a variety of templates to help you get started quickly. For this demo, we will select the blank template to build our workflow from scratch.
After choosing the blank template, you are directed to the authoring window for your state machine.
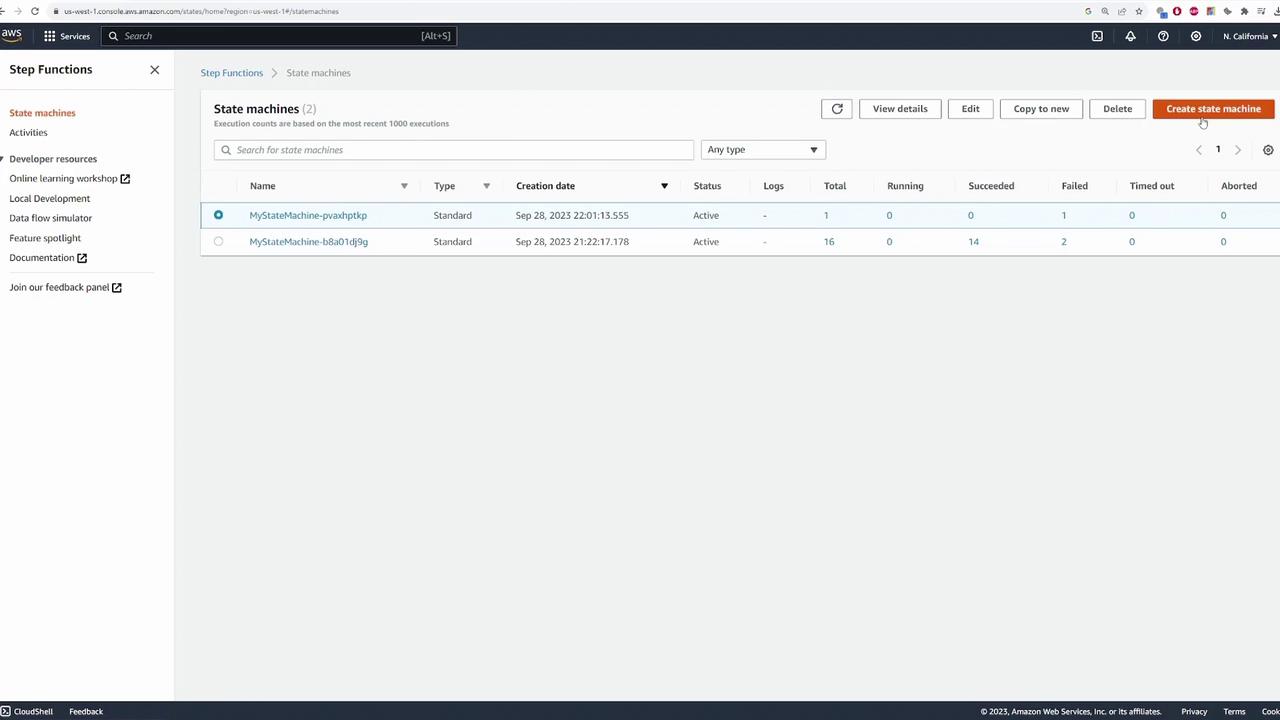
Overview of the State Machine Authoring Window
At the core of the authoring window, you will see the graphical depiction of your state machine workflow. The flow begins from the Start node and progresses to the End node as all steps are executed.
On the left side, you'll find various actions and integrations with other AWS services. Popular integrations include invoking AWS Lambda functions, publishing to SNS, or executing ECS tasks. Scrolling down reveals many additional options for customizing your workflow.
The Flow section enables you to incorporate advanced logic into your state machine, such as if-then-else conditions with a choice state, parallel execution of steps, or wait states to introduce delays. The right panel displays specific configuration options for each state—allowing you to set parameters like function selection and error handling.
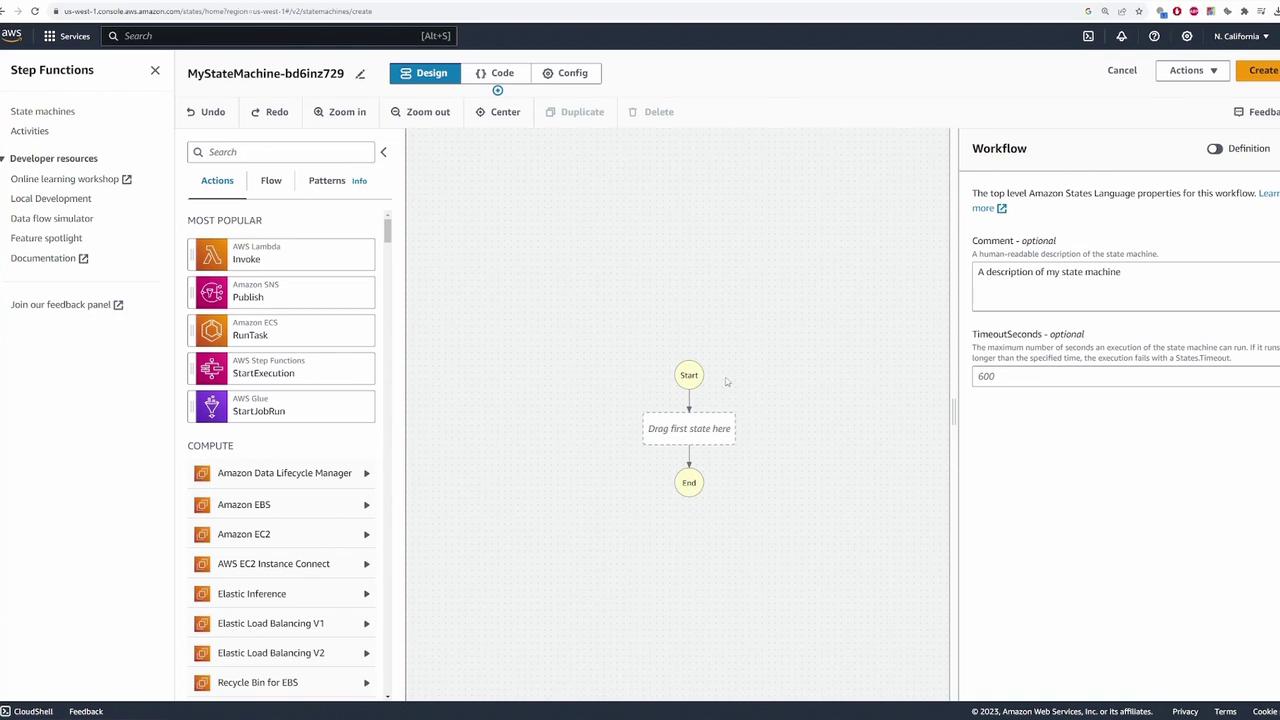
Demo Application Scenario
In our demo scenario, a camera records an event and sends the data (such as an image or video clip) to the state machine. The first step in the workflow is to invoke a Lambda function named detect_threat, which analyzes the input to determine if the event represents a threat.
The detect_threat Lambda function uses simple logic to simulate threat detection by randomly returning either "THREAT" or "NO_THREAT":
export const handler = async (event) => {
// Determine if there's a threat
const result = Math.random() < 0.5 ? "THREAT" : "NO_THREAT";
return { result };
};
After dragging the Lambda function into the workflow, rename the state to Detect Threat. Select the optimized integration type and choose the appropriate Lambda function (in this case, detect_threat) from the dropdown menu.
Next, configure the payload so that the state input is forwarded to the Lambda function. This ensures that the event data triggering the state machine is available for analysis. You can also adjust error handling by defining retry intervals, maximum attempts, and backoff rates. For this demo, the wait-for-callback feature is disabled, and the state transitions to End after execution.
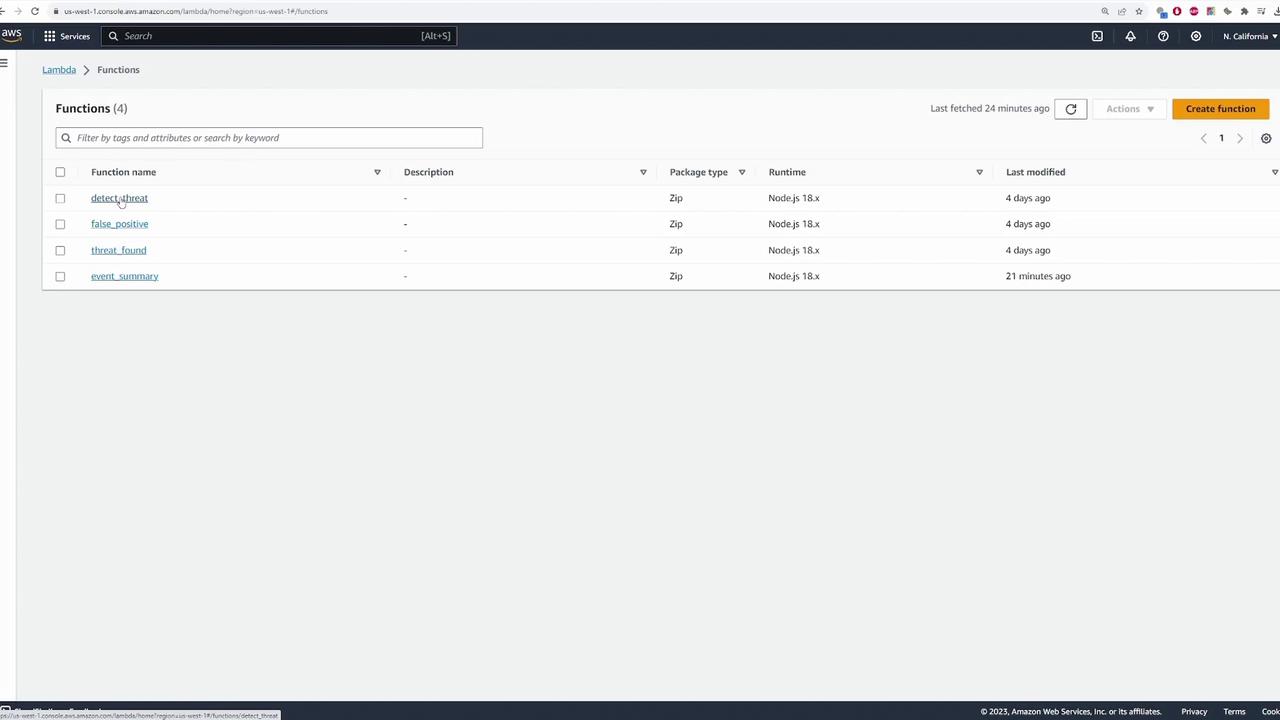
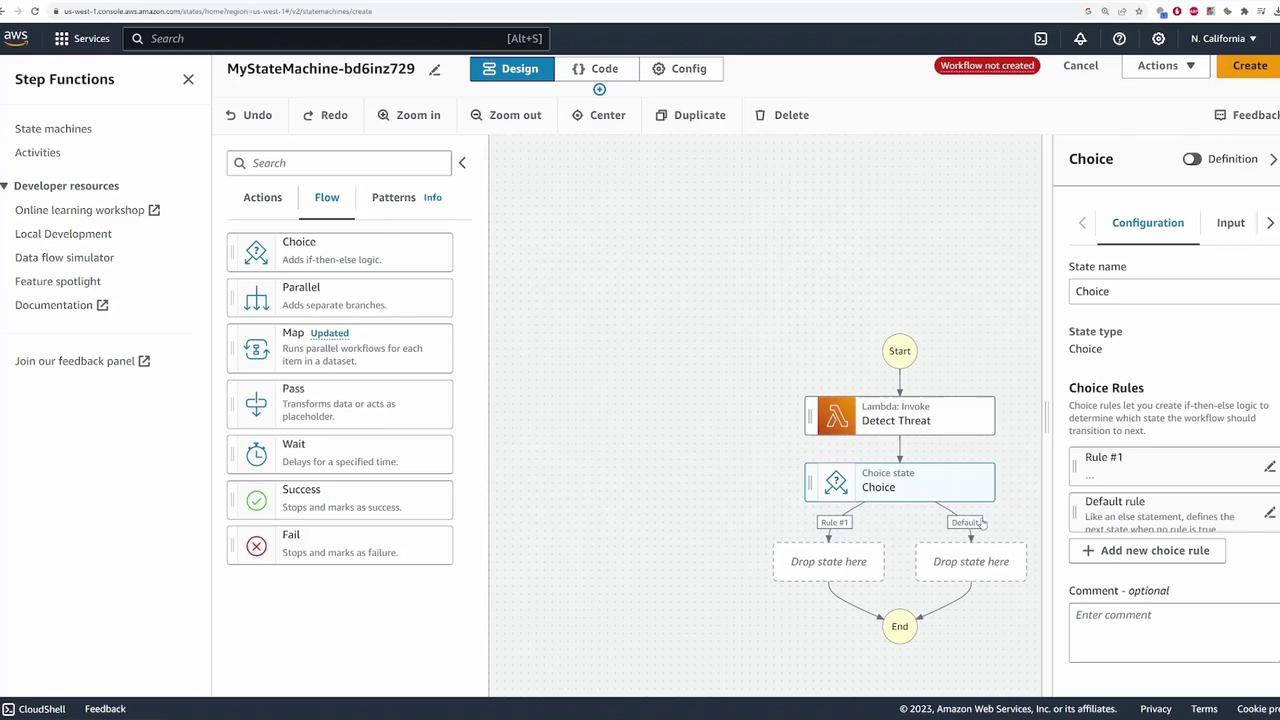
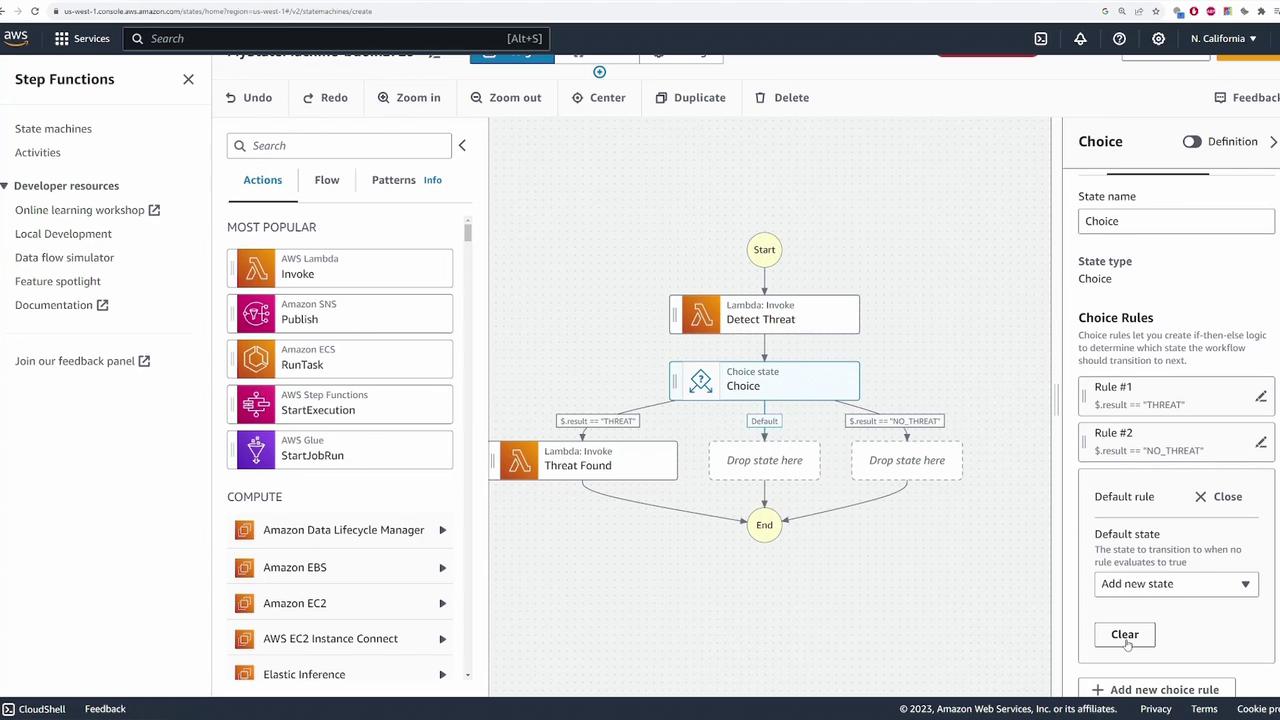
Adding Decision Logic with a Choice State
Based on the output from detect_threat, the state machine must decide which branch to follow. This is accomplished by adding a choice state to the workflow.
Configure the choice state with two conditions:
If Result Equals "THREAT":
- Set the condition by specifying the variable
$.result
, choosing "is equal to" as the comparator, and enteringTHREAT
as the string value. - Drag a new Lambda state into the workflow and name it Threat Found.
- Select the corresponding Lambda function (e.g., threatfound) from the dropdown.
- Configure the branch to end the workflow after execution.
- Set the condition by specifying the variable
If Result Equals "NO_THREAT":
- Add another rule where the result is equal to
NO_THREAT
. - Drag in the Lambda state for handling false positives, name it No Threat, and select its associated Lambda function (e.g., falsepositive).
- Set the transition for this branch to lead to the End state.
- Add another rule where the result is equal to
Once the rules are configured, the diagram visually illustrates the conditional branches.
You can also remove any default conditions if they are not required. The final configuration should clearly display two branches: one for THREAT
and another for NO_THREAT
.
Lambda Function Logic for Post-Detection
After the detect_threat function returns its result, the state machine executes one of two Lambda functions:
Threat Found Function:
This function runs when a threat is detected. It may handle actions such as sending alerts and notifications.False Positive Function:
This function addresses situations where the detected event is a false alarm. Here is a simple implementation:export const handler = async (event) => { // Logic for a false positive detection return "threat found"; };
In a real-world application, these functions might include more advanced logic like sending emails via Amazon SES, logging events to a database, or performing additional verification steps.
Note
For production environments, ensure that each Lambda function is thoroughly tested and secured according to AWS best practices.
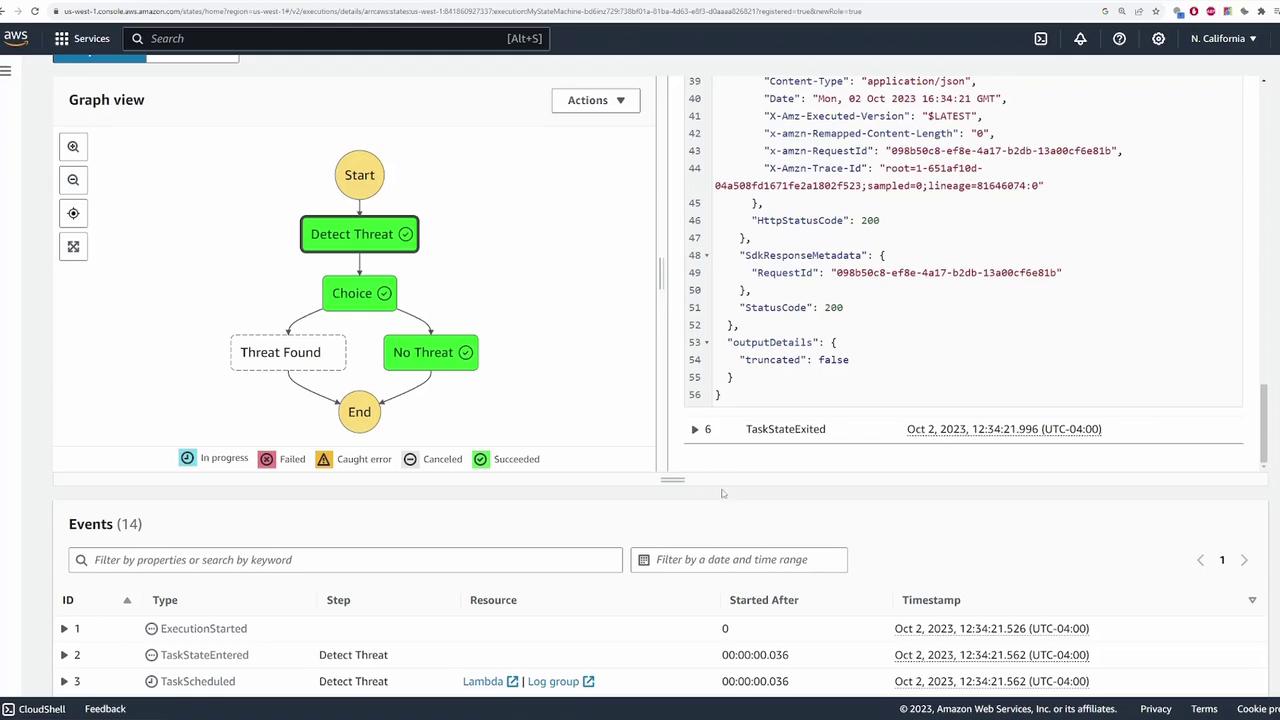
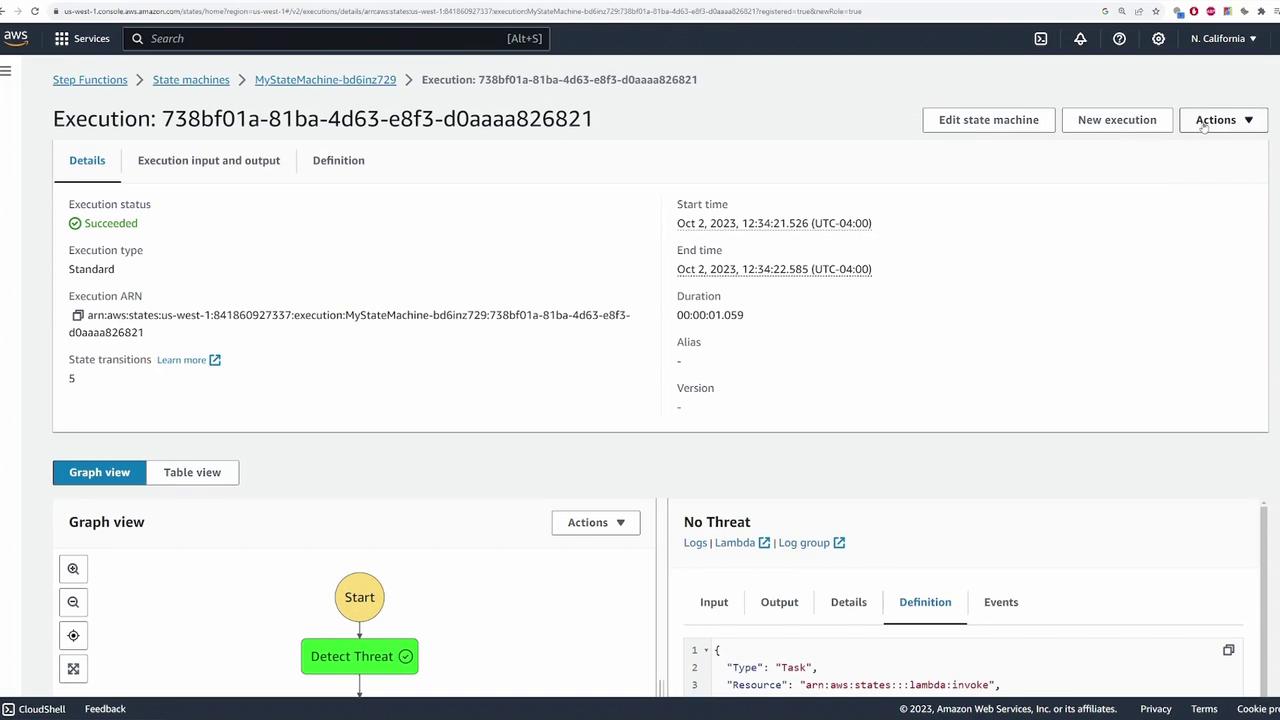
Testing the State Machine
After configuring all states and decision logic, click Create. AWS automatically provisions the necessary IAM role with permissions that allow the state machine to invoke the configured Lambda functions and access other services like AWS X-Ray.
If you encounter errors related to error handling (such as an extraneous error catcher on the Detect Threat state), simply remove or adjust the configuration.
Once the state machine is created, test it by initiating an execution. Provide sample input data simulating a camera event. For example, you may supply a simple JSON payload like:
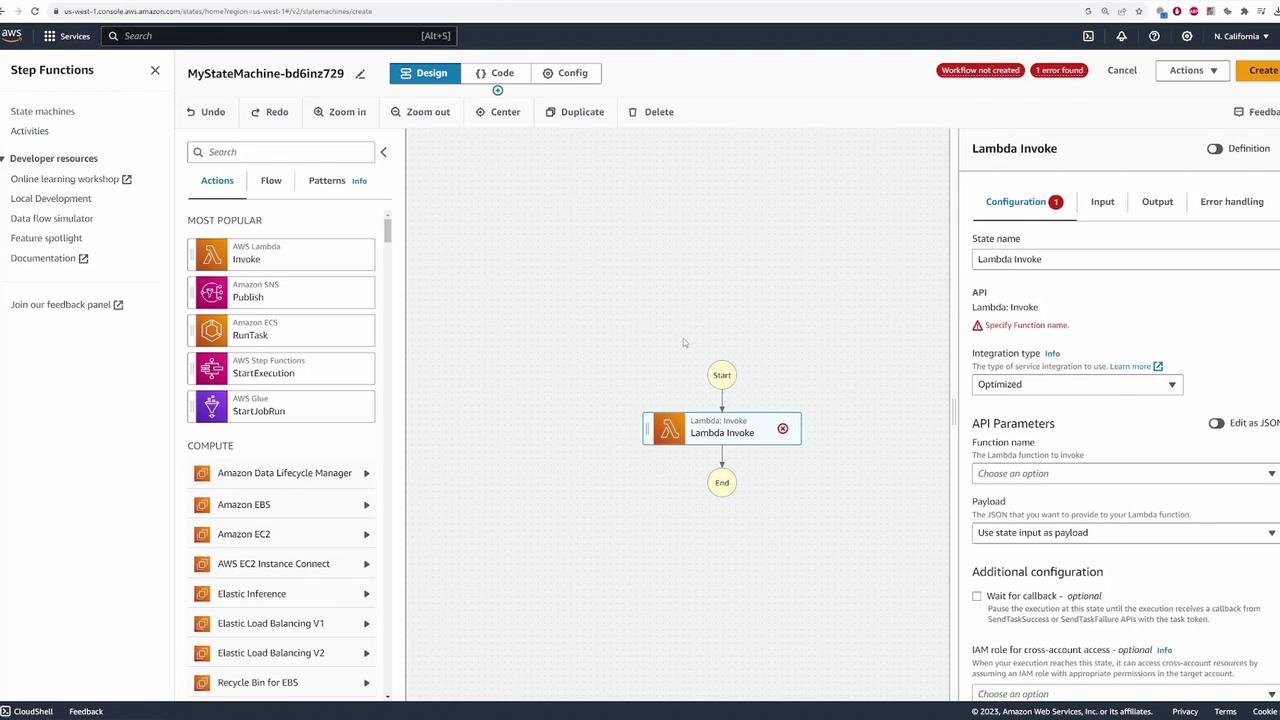
{
"comment": "Insert your JSON here"
}
Or to mimic a realistic event:
{
"camera_id": "ssldfjsikd-234-sdfs",
"object_id": "video1.mp4"
}
After you start the execution, the console displays a graphical representation of the execution path. Colors within the diagram indicate which branches were followed—for example, starting at Detect Threat, moving to the Choice state, then progressing along either the threat or false positive branch, and finally reaching the End state.
Click on any state in the execution graph to inspect detailed information such as input, output, configuration parameters, and an event log. This is instrumental in troubleshooting and understanding your workflow.
For instance, one execution might show that the detect_threat function returned "NO_THREAT"
, triggering the false positive function. A different execution might reveal the threat branch being taken.
After multiple executions, review the summary in the state machine main window. This summary provides a breakdown of successful, failed, timed out, or aborted runs. You can examine these details in either a graphical view or table format.
Conclusion
This demo has guided you through building a simple AWS Step Functions state machine that processes an event from a simulated camera service. We implemented conditional logic based on Lambda function outputs to handle distinct branches for threat and false positive scenarios. This example serves as a foundation for developing more complex workflows by integrating multiple AWS services and advanced custom logic.
Explore Further
Consider expanding this demo by integrating additional services like Amazon SES for notifications or more advanced error handling strategies. For more information, explore the AWS Step Functions Documentation.
Watch Video
Watch video content