AWS Solutions Architect Associate Certification
Services Networking
Custom VPC Demo
In this lesson, you will learn how to create and delete a Virtual Private Cloud (VPC) in AWS. This step-by-step demonstration covers creating a new VPC, reviewing its configuration, and then deleting it. Future lessons will explore additional features and capabilities of VPCs in more depth.
Note
Remember that VPCs are region-specific. Ensure you select the appropriate AWS region before proceeding.
Step 1: Select Your AWS Region
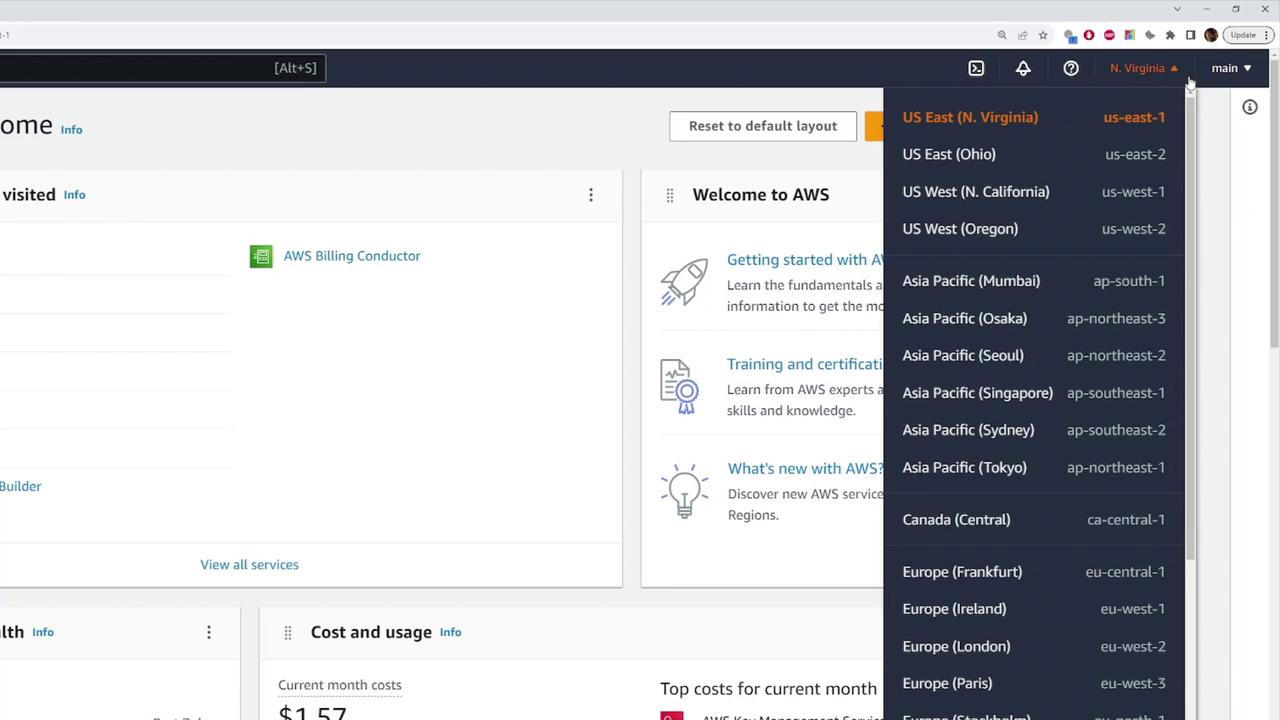
First, log in to your AWS Management Console and choose the region where you want to deploy your VPC. For example, if you select the US East (N. Virginia) region, your VPC will be created there. If your deployment requires a different region, simply select the one that fits your needs.
Step 2: Navigate to the VPC Dashboard
Use the search bar at the top of the AWS console to search for "VPC." This action will direct you to the VPC page where you can view all VPC-related networking resources. To see an overview of your VPCs, click on "Your VPCs" in the left-hand navigation panel.
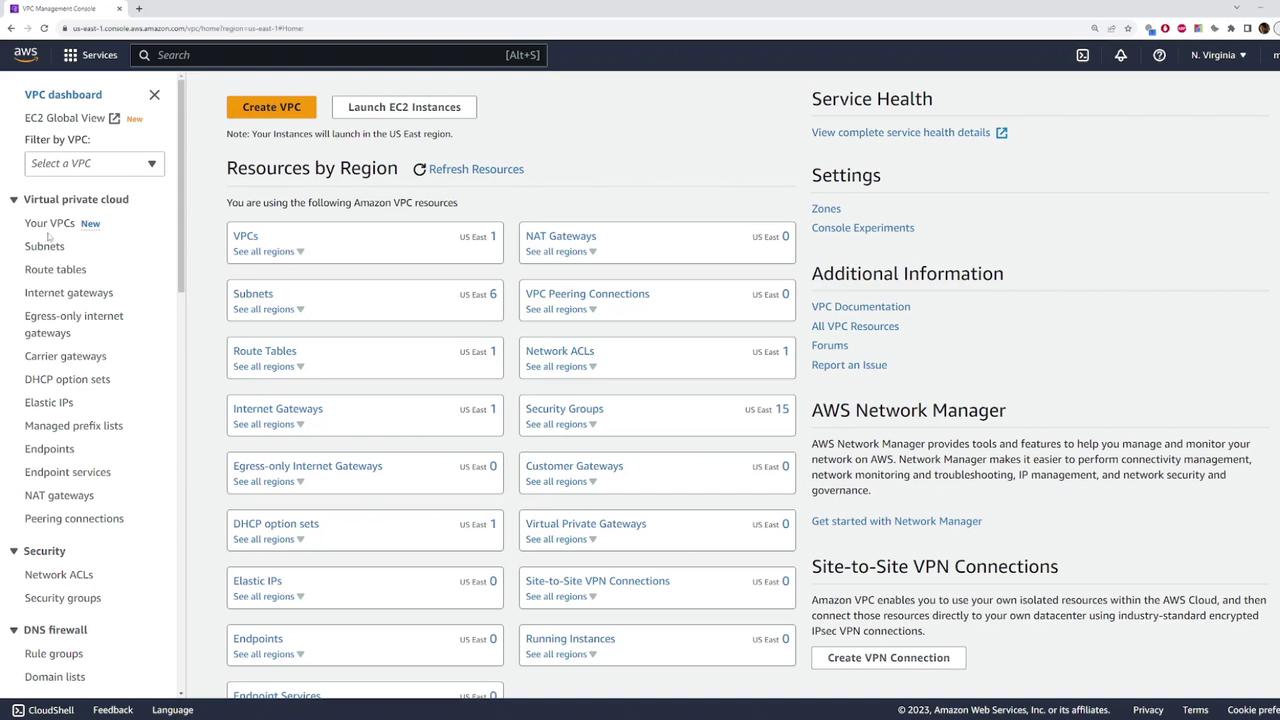
If your AWS account is new, you might see one default VPC. You can identify it by scrolling horizontally until you find the "default VPC" label. AWS provides a default VPC to help you get started quickly; however, for this demonstration, we will create a custom VPC to explore the process without using the default configuration.
Step 3: Create a Custom VPC
- Click the Create VPC button.
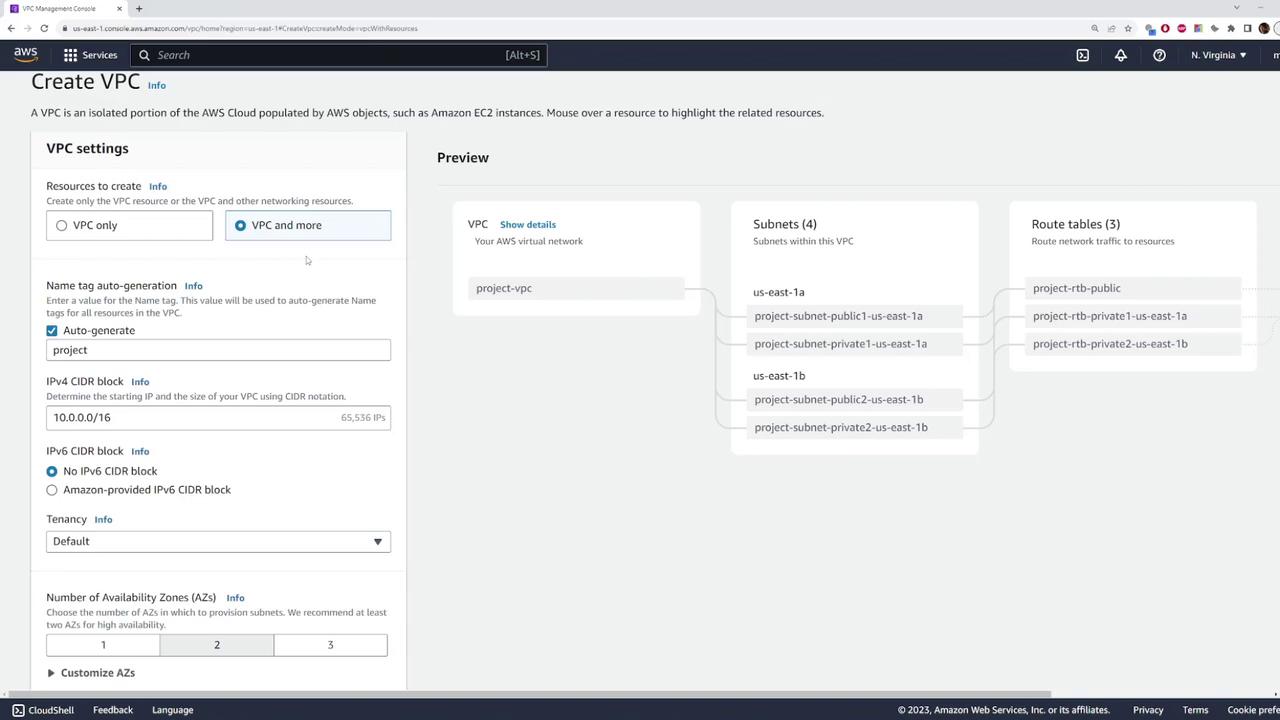
- AWS now provides two options:
- Create a standalone VPC
- Deploy a VPC along with a full set of networking resources (subnets, route tables, Internet Gateways, and NAT Gateways)
For this demo, we will select the VPC-only option for simplicity.
In the configuration panel:
- Name Tag: Enter a descriptive name for your VPC (e.g., "demo VPC").
- IPv4 CIDR Block: Set the CIDR block to
10.0.0.0/16for this demonstration. - IPv6 CIDR Block: Optionally, add an IPv6 CIDR block. You can either use one that you own or let AWS auto-provide one. For this lesson, the default settings for IPv6 will be used.
- Tenancy: Keep the tenancy option at its default value unless you have specific requirements.
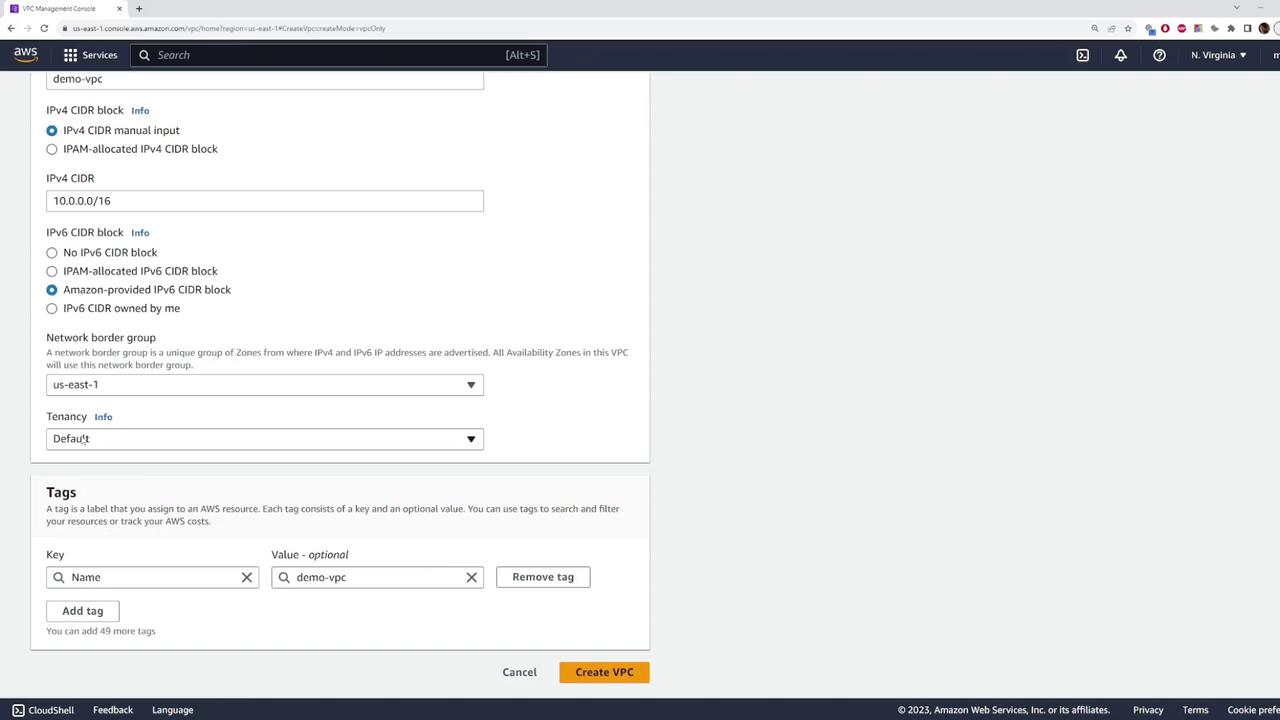
After reviewing your settings and tags, which should now include your "demo VPC" name tag, click Create VPC. The deployment process is typically quick, and a green status bar will indicate when it is complete.
Step 4: Review the VPC Details
Once the custom VPC is created, inspect its details on the VPC information page. Here you'll find valuable information such as:
- VPC ID
- Current State: Usually marked as "available"
- DNS Settings
- IPv4 and IPv6 CIDR Blocks
- Tenancy Status
AWS also creates a default route table for the VPC to manage traffic routing. Additionally, explore sections for network ACLs (which control access by permitting or blocking traffic) and the resource map that lists all resources associated with the VPC.
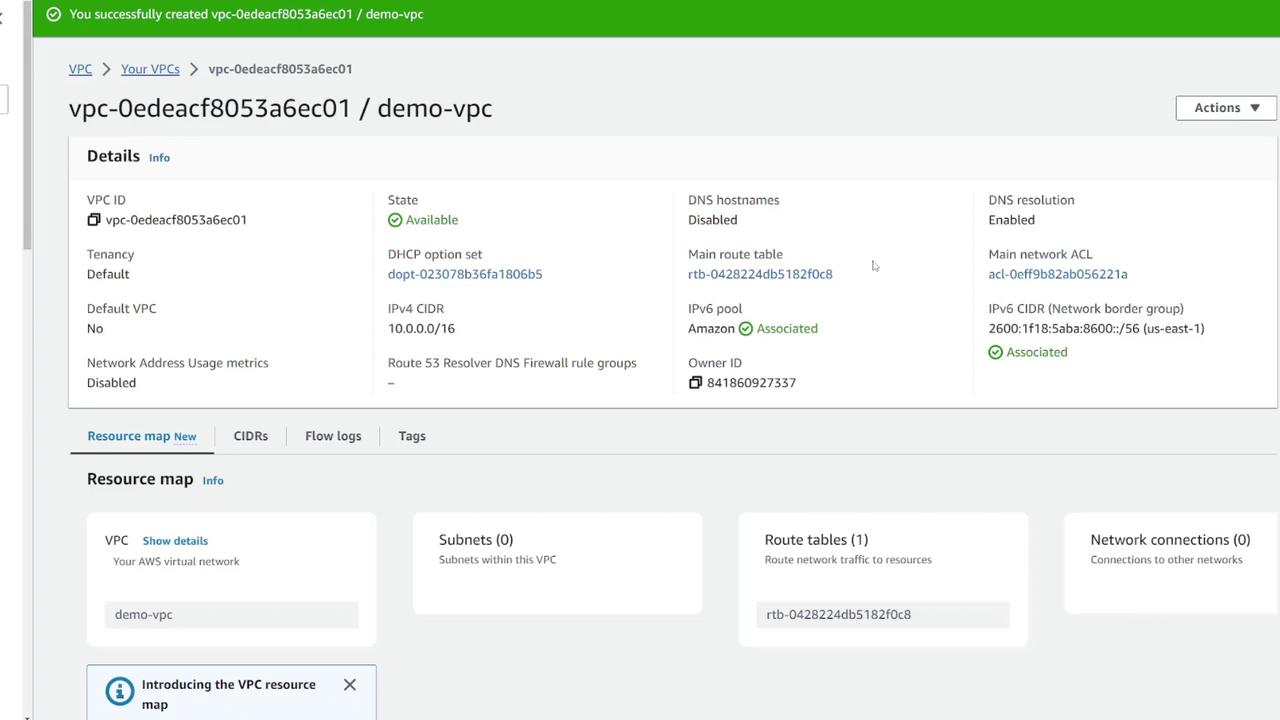
This demonstration highlights the simplicity of managing a custom VPC: select your region, define your CIDR block, and modify other settings as required.
Step 5: Delete the Custom VPC
When you are ready to clean up, you can delete your custom VPC by following these steps:
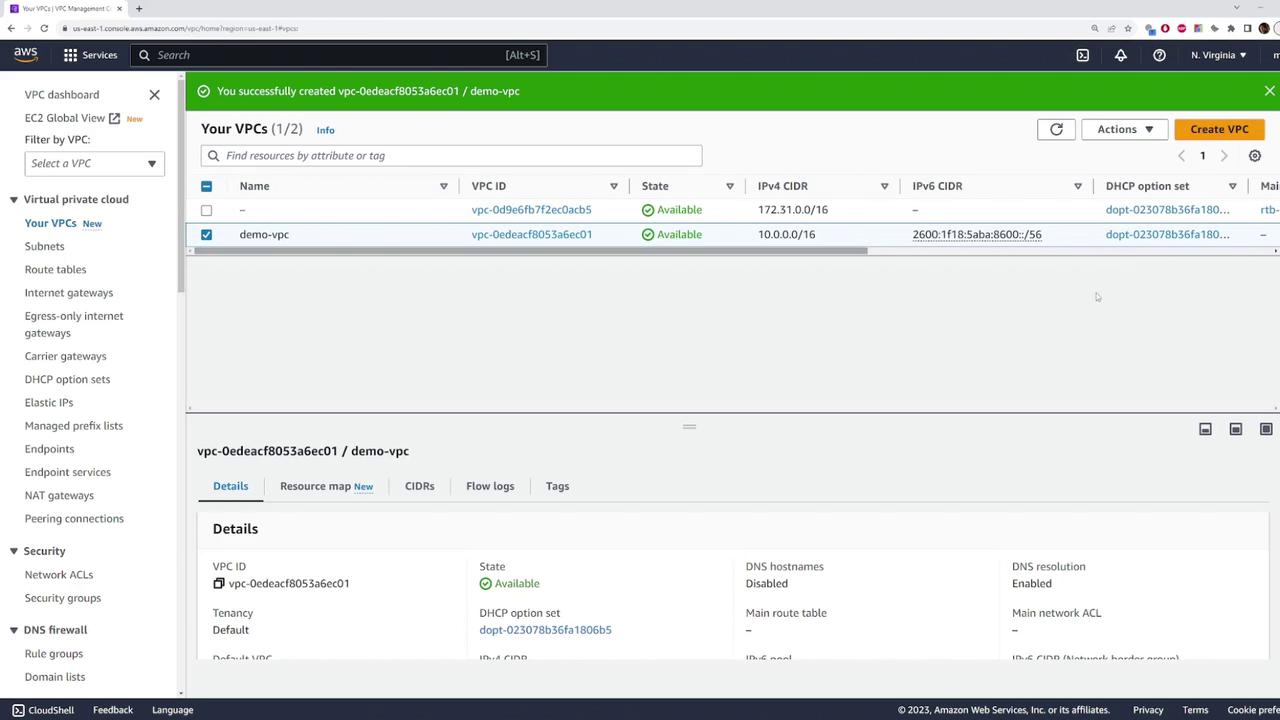
- Select your custom VPC from the "Your VPCs" list.
- Click the Actions button.
- Choose Delete VPC.
- Confirm the deletion by typing the word "delete." This action will permanently remove the custom VPC from your account.
Reminder
Deleting a VPC is permanent. Ensure that you have backed up any necessary configurations or data before proceeding.
Conclusion
This quick demo has shown you how easy it is to create and delete a custom VPC in AWS. By carefully selecting your region, configuring your CIDR block, and reviewing key settings, you can establish a custom network environment that suits your needs. For additional insights on networking and AWS best practices, explore more tutorials and official documentation.
For more details, check out these resources:
Happy networking!
Watch Video
Watch video content