Accessing the Default VPC
Begin by navigating to the VPC section in the AWS Management Console. You can access this by selecting “VPC” from the list of services or by searching for “VPC.” Although the console may display a specific region (e.g., Northern Virginia), note that the default VPC configuration remains consistent across all AWS regions. For new AWS accounts, you will observe that there is only one default VPC created, even though additional security groups might be visible that are not part of the default configuration.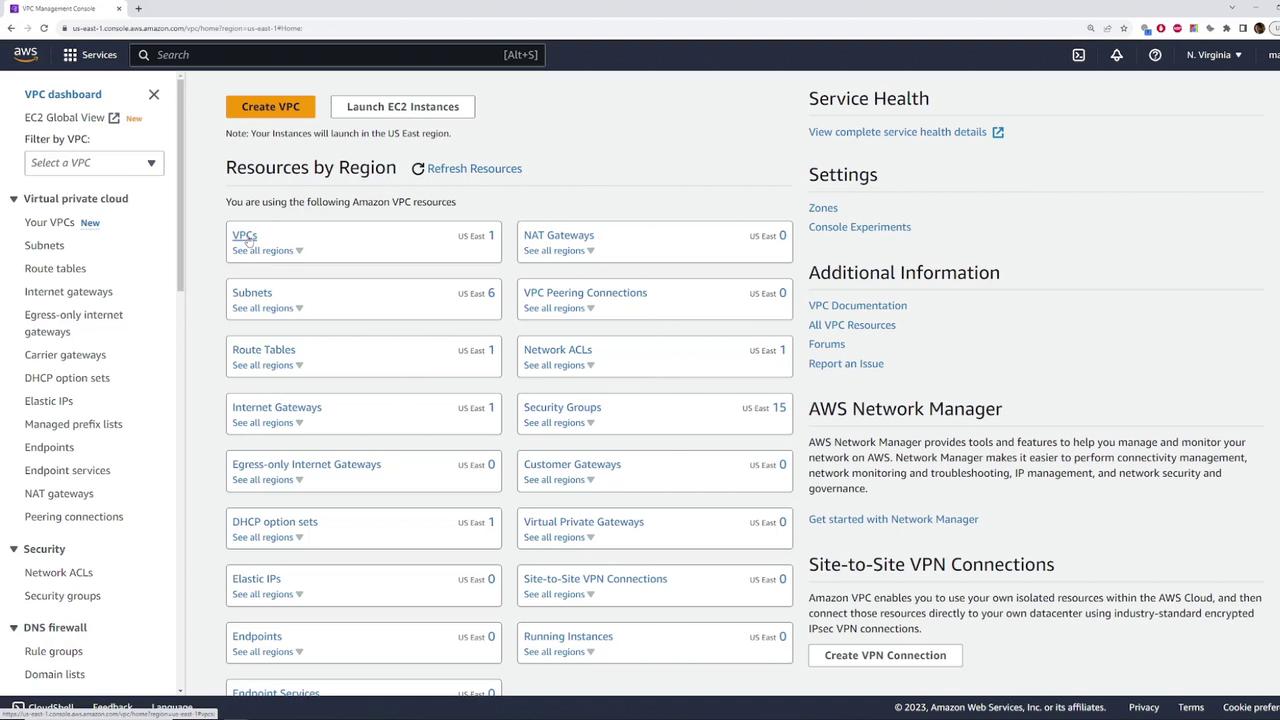
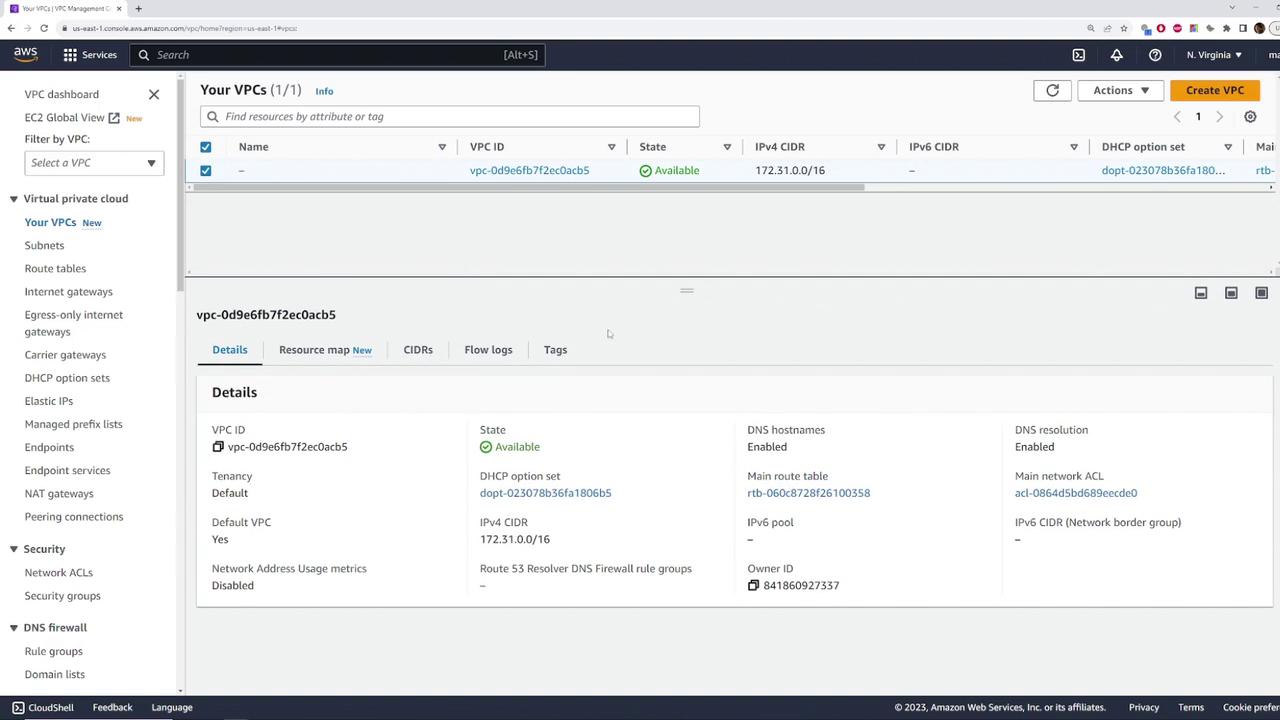
Inspecting the Default VPC Details
Click on the default VPC to view its detailed configuration. Here are the key elements you will notice:- The VPC state is “available.”
- The CIDR block is set to 172.31.0.0/16.
- It is explicitly marked as the default VPC.
Exploring Different Regions
To verify consistency across regions, switch to another region, such as Ohio, and confirm that the default VPC setup is identical. In any region, you will find one VPC with the same CIDR block (172.31.0.0/16) and the default designation. Returning to the Northern Virginia region, you can now dive deeper into the VPC resources.Examining the Default Subnets
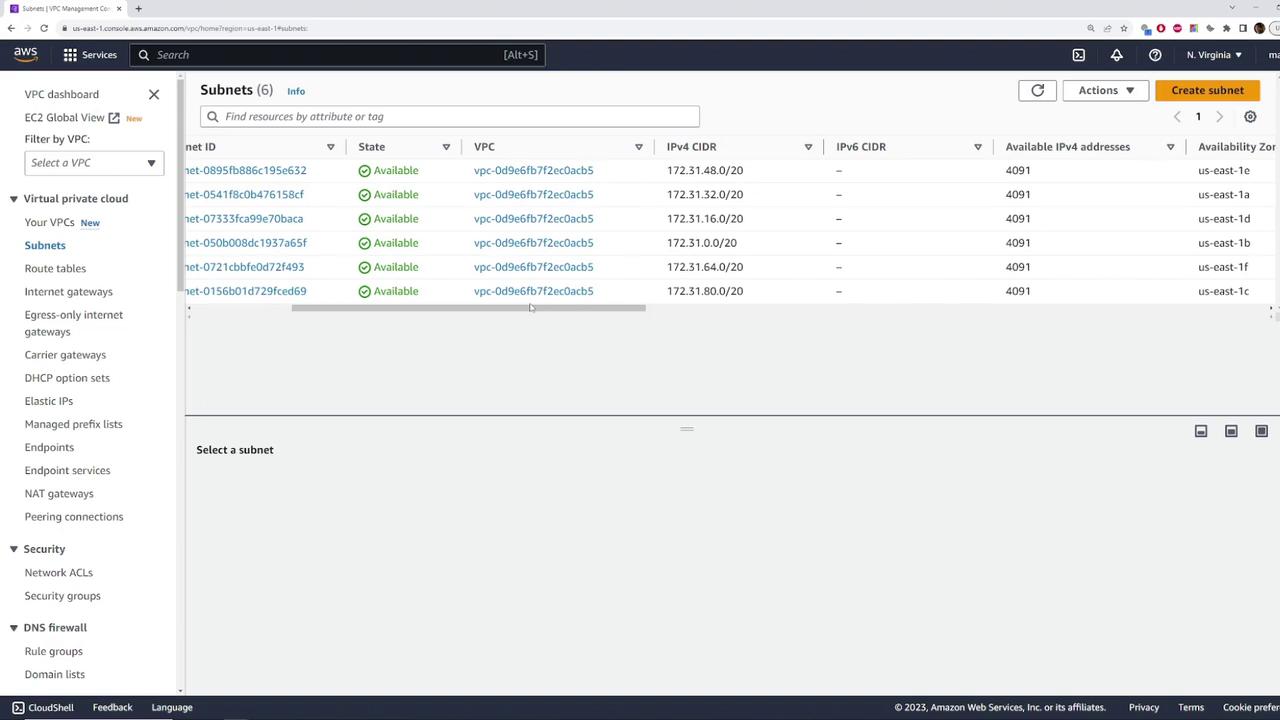
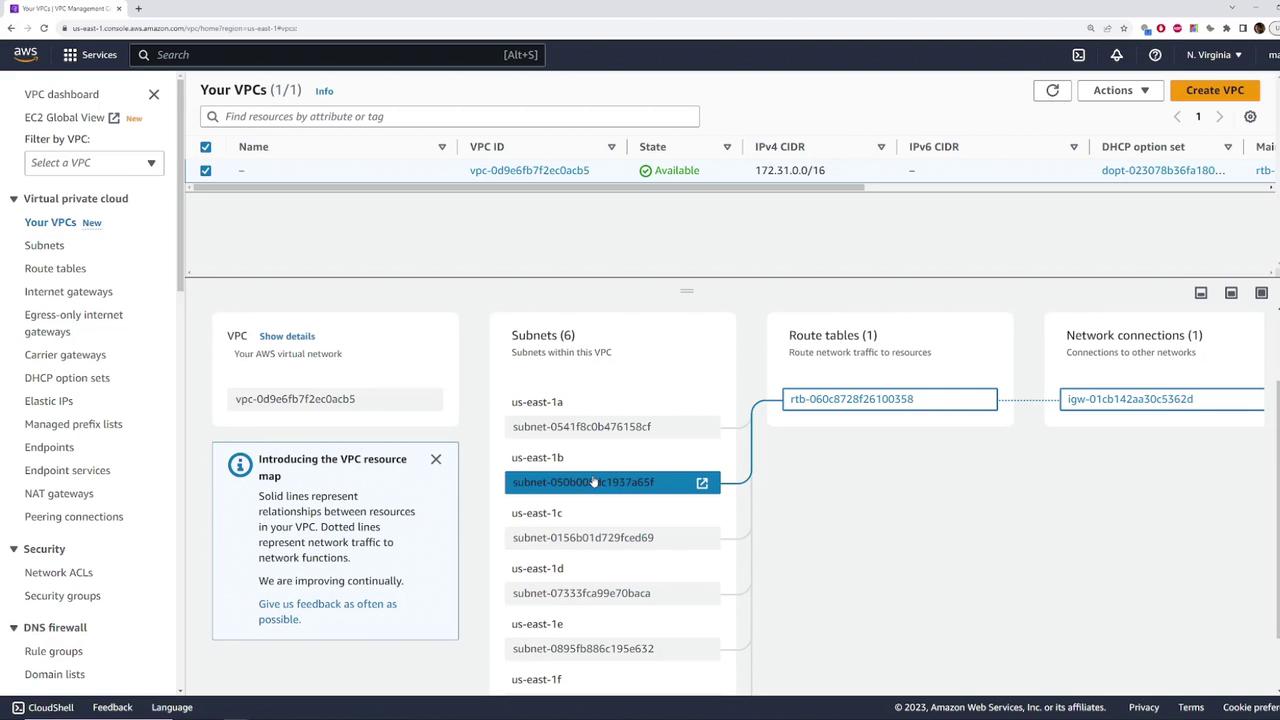
Under the default VPC, navigate to the “Subnets” section. Here are some important observations:- The VPC ID is displayed in a truncated format (for example, ending in ACB5).
- There are six subnets, each associated with the default VPC.
Route Tables, Network ACLs, and Internet Gateway
The default VPC includes a route table that manages the traffic between the subnets. By clicking on the route table, you can review its configuration, which appropriately directs subnet traffic. While we are not covering the route table in detail here, it plays a crucial role in routing network traffic.An Internet Gateway is automatically created and attached to the default VPC. This gateway allows resources within the VPC to access the internet. With the correct routing settings, any instance launched within a default subnet will have an auto-assigned public IPv4 address.
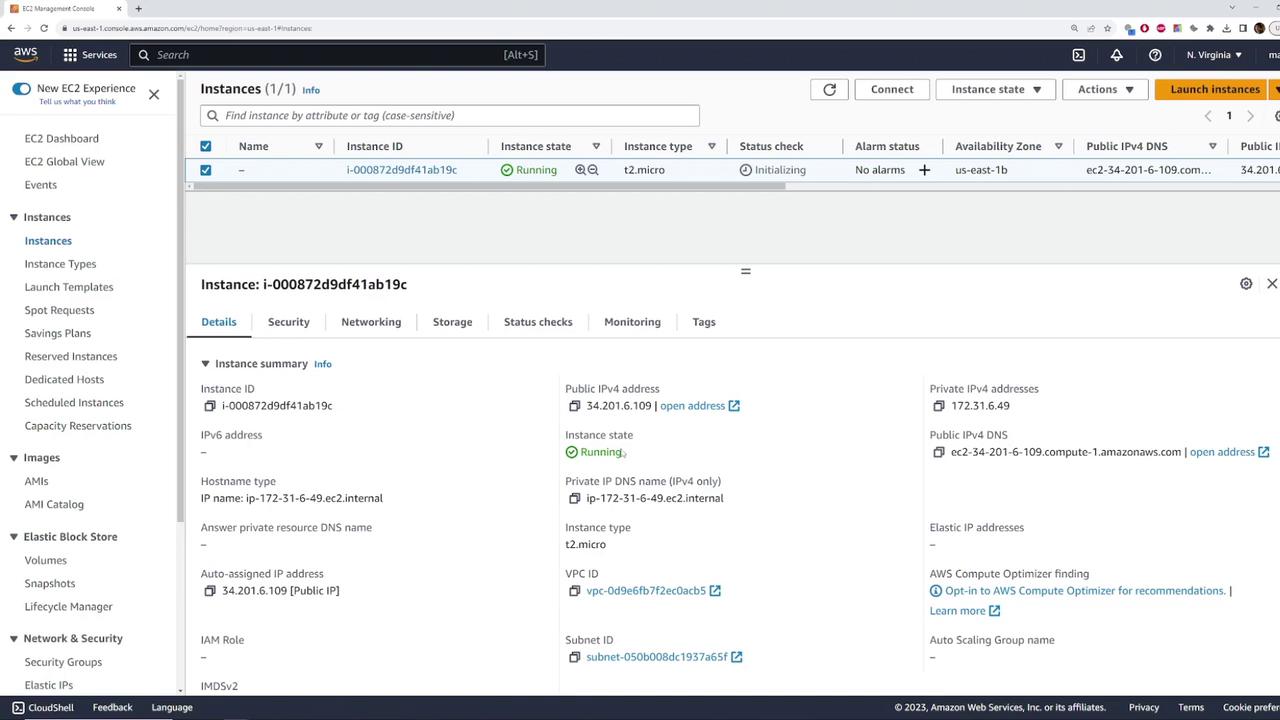
Deploying an EC2 Instance to Validate Internet Connectivity
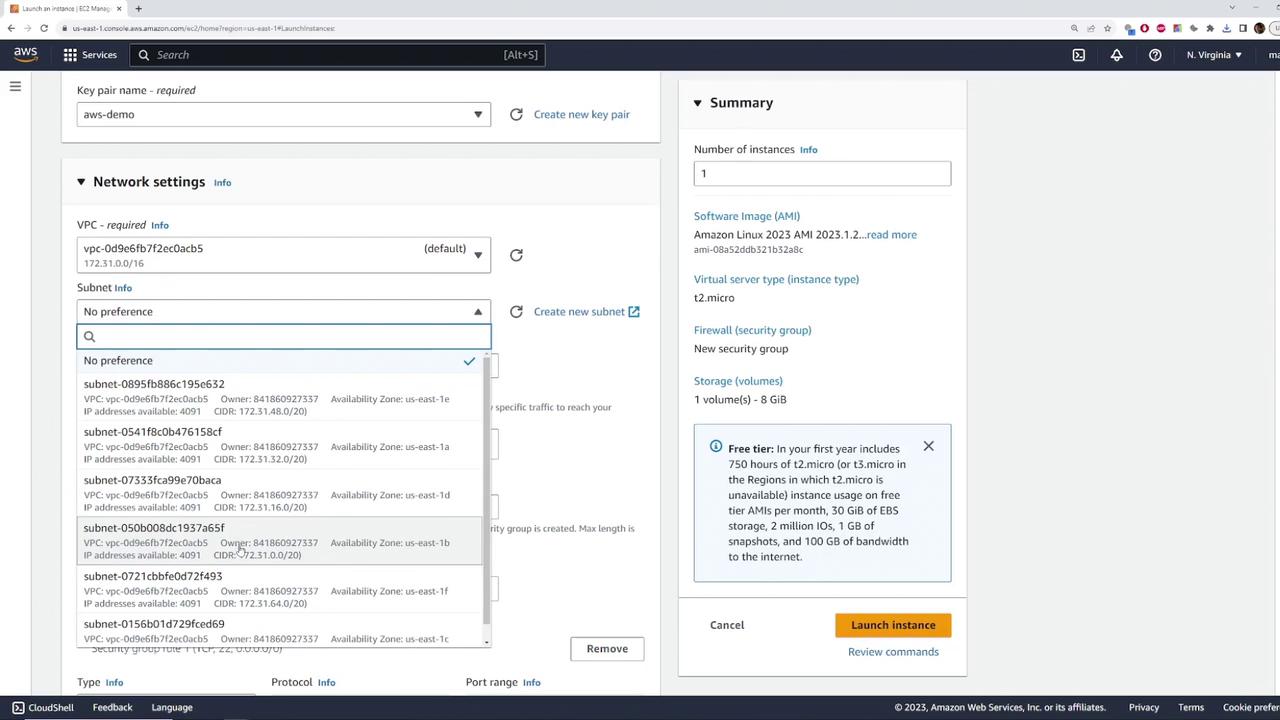
To demonstrate the functionality of the default VPC, follow these steps to deploy an EC2 instance:- Open the EC2 section in the AWS Management Console.
- Launch a new instance using the default settings (for example, choose Amazon Linux and a T2 micro instance).
- During network configuration, confirm that the instance is launched in the default VPC with the CIDR block 172.31.0.0/16 and select one of the default subnets.
- Ensure the instance is set to auto-assign a public IPv4 address for immediate internet access.
- The instance is in a running state.
- It has a private IP address from the subnet.
- It has automatically been assigned a public IP address.