AWS Solutions Architect Associate Certification
Services Networking
Elastic IP Demo
In this guide, we demonstrate how to use Elastic IPs with an AWS EC2 instance. Before you begin, ensure that you have the following pre-configured in your AWS environment:
- A Virtual Private Cloud (VPC)
- A public subnet (configured with an attached gateway)
- A server deployed to the public subnet named "my server" that initially receives a dynamic public IP address
Initial Setup
Make sure that your server, "my server", is running on a public subnet with an automatically assigned IP address before proceeding. This demo assumes that the initial public IP is 52.90.159.117.
Demonstrating Dynamic IP Behavior
Before configuring an Elastic IP, it's important to understand how dynamic public IP addresses behave. Follow these steps:
- Navigate to the EC2 dashboard.
- Stop the instance and wait until it shows a "stopped" state (this may take a few minutes).
- Notice that the public IP address is no longer displayed.
- Start the instance again.
- Observe that the new public IP address is different and may begin with a "3" rather than a "5".

This behavior indicates that the public IP is dynamic. Every time the instance is restarted, it receives a new public IP, which can disrupt access if the IP is hardcoded in client configurations.
Introducing Elastic IPs
AWS offers Elastic IPs as a solution to the issue of changing public IPs. An Elastic IP is a static public IP address that remains associated with your account regardless of the instance's state. Whether the server is stopped or restarted, the Elastic IP remains constant, ensuring uninterrupted access.
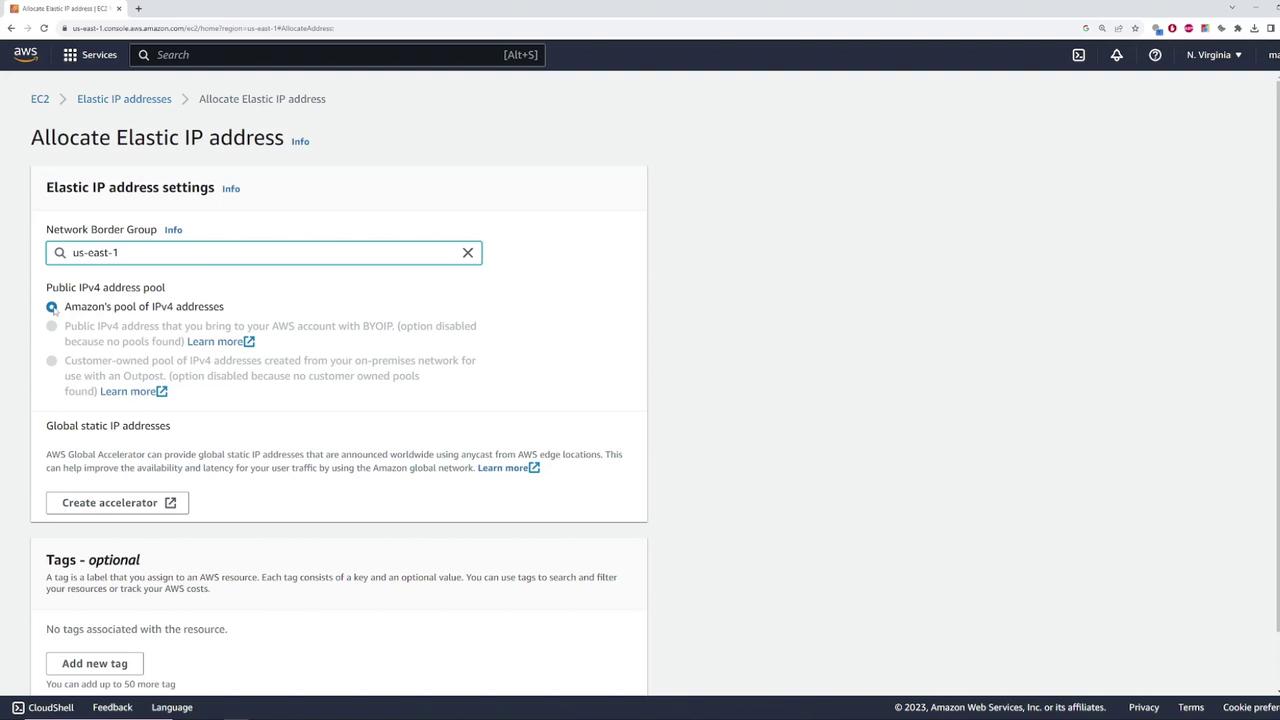
Allocating an Elastic IP
To reserve an Elastic IP, complete the following steps:
- Navigate to the EC2 dashboard.
- Click on "Elastic IPs."
- Select "Allocate Elastic IP address."
AWS will automatically choose an IP address from the Amazon pool of IPv4 addresses and assign it to your account.
After the allocation, assume the assigned Elastic IP is 35.173.92.86. This static IP is now reserved exclusively for your account.
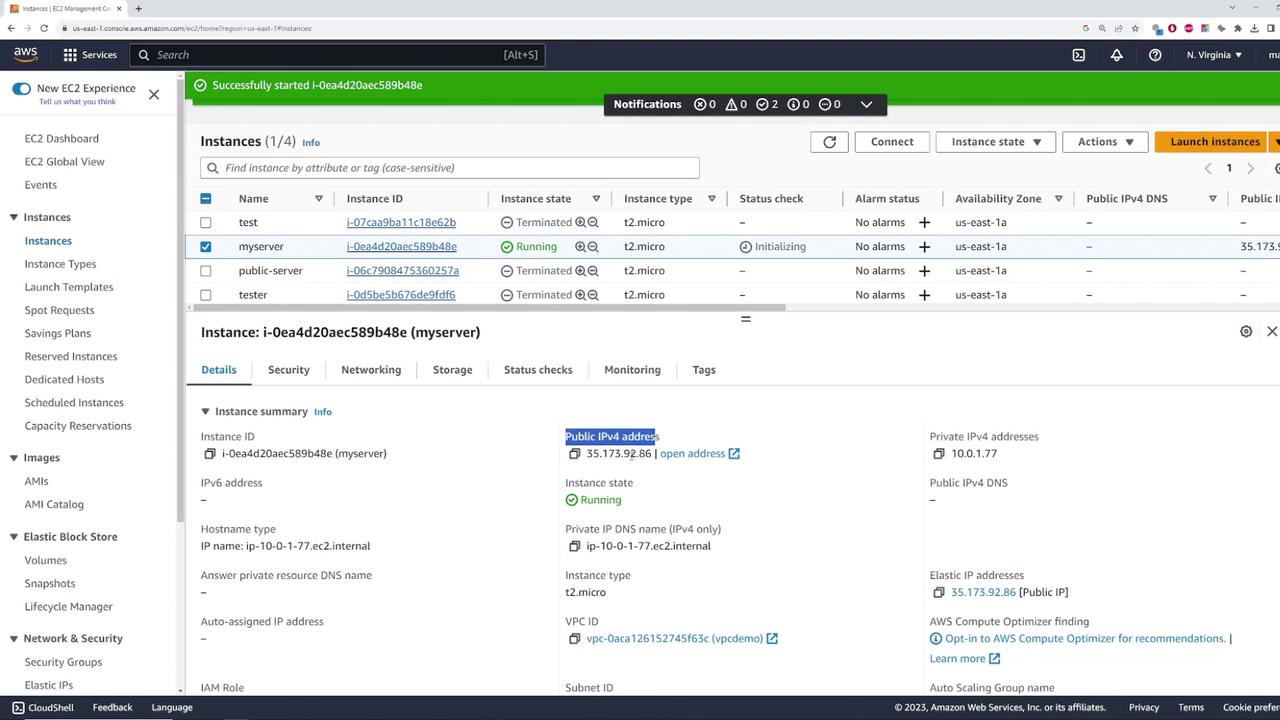
Associating the Elastic IP with an Instance
Once you have allocated an Elastic IP, associate it with your instance by following these steps:
- In the EC2 dashboard, select the Elastic IP and click on “Actions.”
- Choose "Associate Elastic IP address."
- Specify the instance (or network interface) that the IP should be associated with.
If the instance has multiple private IP addresses, select the appropriate one (in this demo, there is only one).

On successful association, the instance now displays the Elastic IP (35.173.92.86) as its public IP address.
Verifying Connectivity
To test that your Elastic IP is functioning correctly, run a ping test from your terminal:
C:\Users\sanje\Documents\scratch\aws-demo>clear
'clear' is not recognized as an internal or external command,
operable program or batch file.

C:\Users\sanje\Documents\scratch\aws-demo>ping 35.173.92.86

Pinging 35.173.92.86 with 32 bytes of data:
Reply from 35.173.92.86: bytes=32 time=22ms TTL=112
Reply from 35.173.92.86: bytes=32 time=21ms TTL=112
Reply from 35.173.92.86: bytes=32 time=15ms TTL=112
Reply from 35.173.92.86: bytes=32 time=19ms TTL=112

Ping statistics for 35.173.92.86:
    Packets: Sent = 4, Received = 4, Lost = 0 (0% loss),
Approximate round trip times in milli-seconds:
    Minimum = 15ms, Maximum = 22ms, Average = 19ms
The successful ping confirms that the Elastic IP (35.173.92.86) is correctly routing traffic to your instance.
Ensuring Elastic IP Persistence
To confirm that the Elastic IP remains persistent across instance reboots:
- Stop the instance via the EC2 dashboard.
- Restart the instance.
- Verify that the public IP continues to be 35.173.92.86.
This persistence guarantees uninterrupted connectivity even when the instance is restarted.
Releasing an Elastic IP
If you no longer need the reserved Elastic IP and wish to avoid unnecessary charges, follow these steps to release it:
- In the EC2 dashboard, select your Elastic IP.
- Under "Actions," choose "Release Elastic IP."
If you receive a prompt indicating that the IP cannot be released due to an active association, first disassociate the IP. - After disassociating, release the Elastic IP address.
The IP is now removed from your account and will no longer incur charges.
Release Caution
Before releasing your Elastic IP, ensure that no critical services rely on this IP address. Releasing an Elastic IP might lead to service interruptions.
Summary Table
Below is a quick reference table summarizing the key steps for working with Elastic IPs:
| Step | Action | Expected Outcome |
|---|---|---|
| Dynamic IP Demonstration | Stop and restart the instance | Public IP changes from 52.90.159.117 to a new value |
| Allocating an Elastic IP | Allocate a new Elastic IP in EC2 dashboard | A static IP (e.g., 35.173.92.86) is assigned to your account |
| Associating the Elastic IP | Associate the Elastic IP with your instance | The instance now consistently uses the Elastic IP |
| Verifying Connectivity | Ping the Elastic IP | Successful replies confirm connectivity |
| Ensuring Elastic IP Persistence | Reboot the instance | Elastic IP remains unchanged |
| Releasing the Elastic IP | Disassociate and release the Elastic IP | Elastic IP is removed from your account |
By following these steps, you ensure your server uses a fixed public IP address, mitigating potential disruptions from dynamic IP changes.
For more detailed information about AWS EC2 and Elastic IPs, explore the AWS Documentation and AWS Elastic IP FAQs.
This concludes our demonstration on using Elastic IPs with AWS EC2 instances.
Watch Video
Watch video content