AWS Solutions Architect Associate Certification

Services Networking

Internet Gateways VPC Demo

In this guide, we demonstrate how to create a public subnet in AWS. By starting from scratch—with the creation of a VPC and its subnet, followed by attaching an Internet Gateway—you’ll learn how to enable public connectivity for your EC2 instances.

Step 1: Create a VPC and a Public Subnet

Begin by navigating to the VPC dashboard in the AWS Console:

  1. Create a new VPC with a CIDR block of 10.0.0.0/16. You can optionally assign an IPv6 CIDR block if needed.
  2. Add a subnet to your VPC using the CIDR block 10.0.1.0/24 and give it a descriptive name such as "public subnet". There is no need to specify an availability zone unless you have a preference.

With these steps, your basic VPC configuration is ready.

Step 2: Launch an EC2 Instance for Connectivity Testing

Next, switch to the EC2 dashboard and launch an EC2 instance using the following guidelines:

  • Select an Amazon Linux AMI.
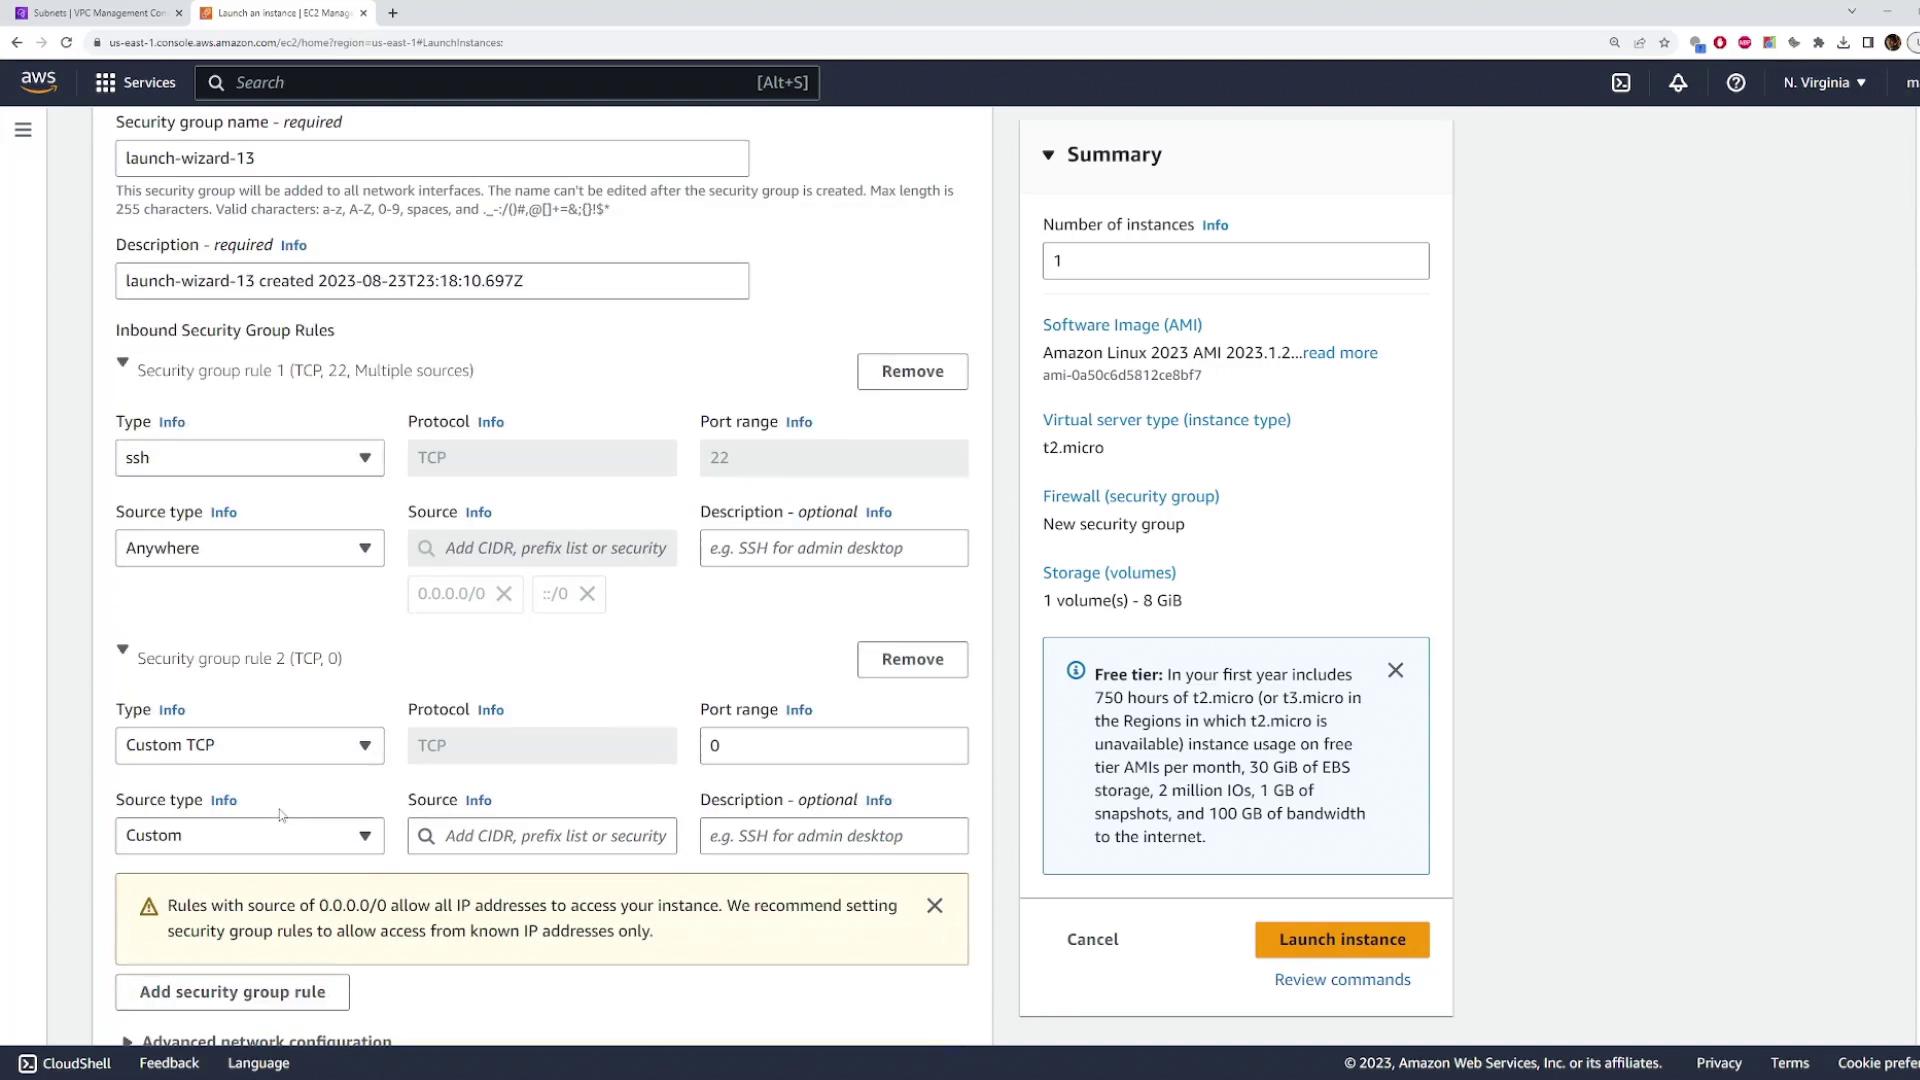
  • Choose the T2 Micro instance type (eligible for the free tier).
  • Use your pre-existing key pair (for example, aws-demo.pem) to allow secure SSH access.
  • Under network settings, select the VPC you just created along with the corresponding public subnet.
  • Ensure that the auto-assign public IP option is enabled so that the instance receives a public IP address.

A security group is automatically created to allow SSH access (port 22). You can also add additional rules (such as for ICMP) if required.

The image shows an AWS EC2 instance launch configuration screen, detailing security group settings and a summary of the instance specifications. It includes options for setting inbound security rules and a summary of the instance type and storage.

After launching the instance, allow a few moments for it to initialize. Verify that the instance is running and note its public IP address.

The image shows an AWS EC2 management console with details of two instances, one terminated and one running, including instance IDs, types, and public IP addresses.

Open your terminal and test connectivity using the public IP. For example, execute:

ping 54.159.89.36

You can also attempt an SSH connection:

ssh -i aws-demo.pem [email protected]

Expected Behavior

If the ping or SSH commands hang or time out, it is because the subnet is still private by default—even though the instance has a public IP assigned.

Step 3: Attach an Internet Gateway

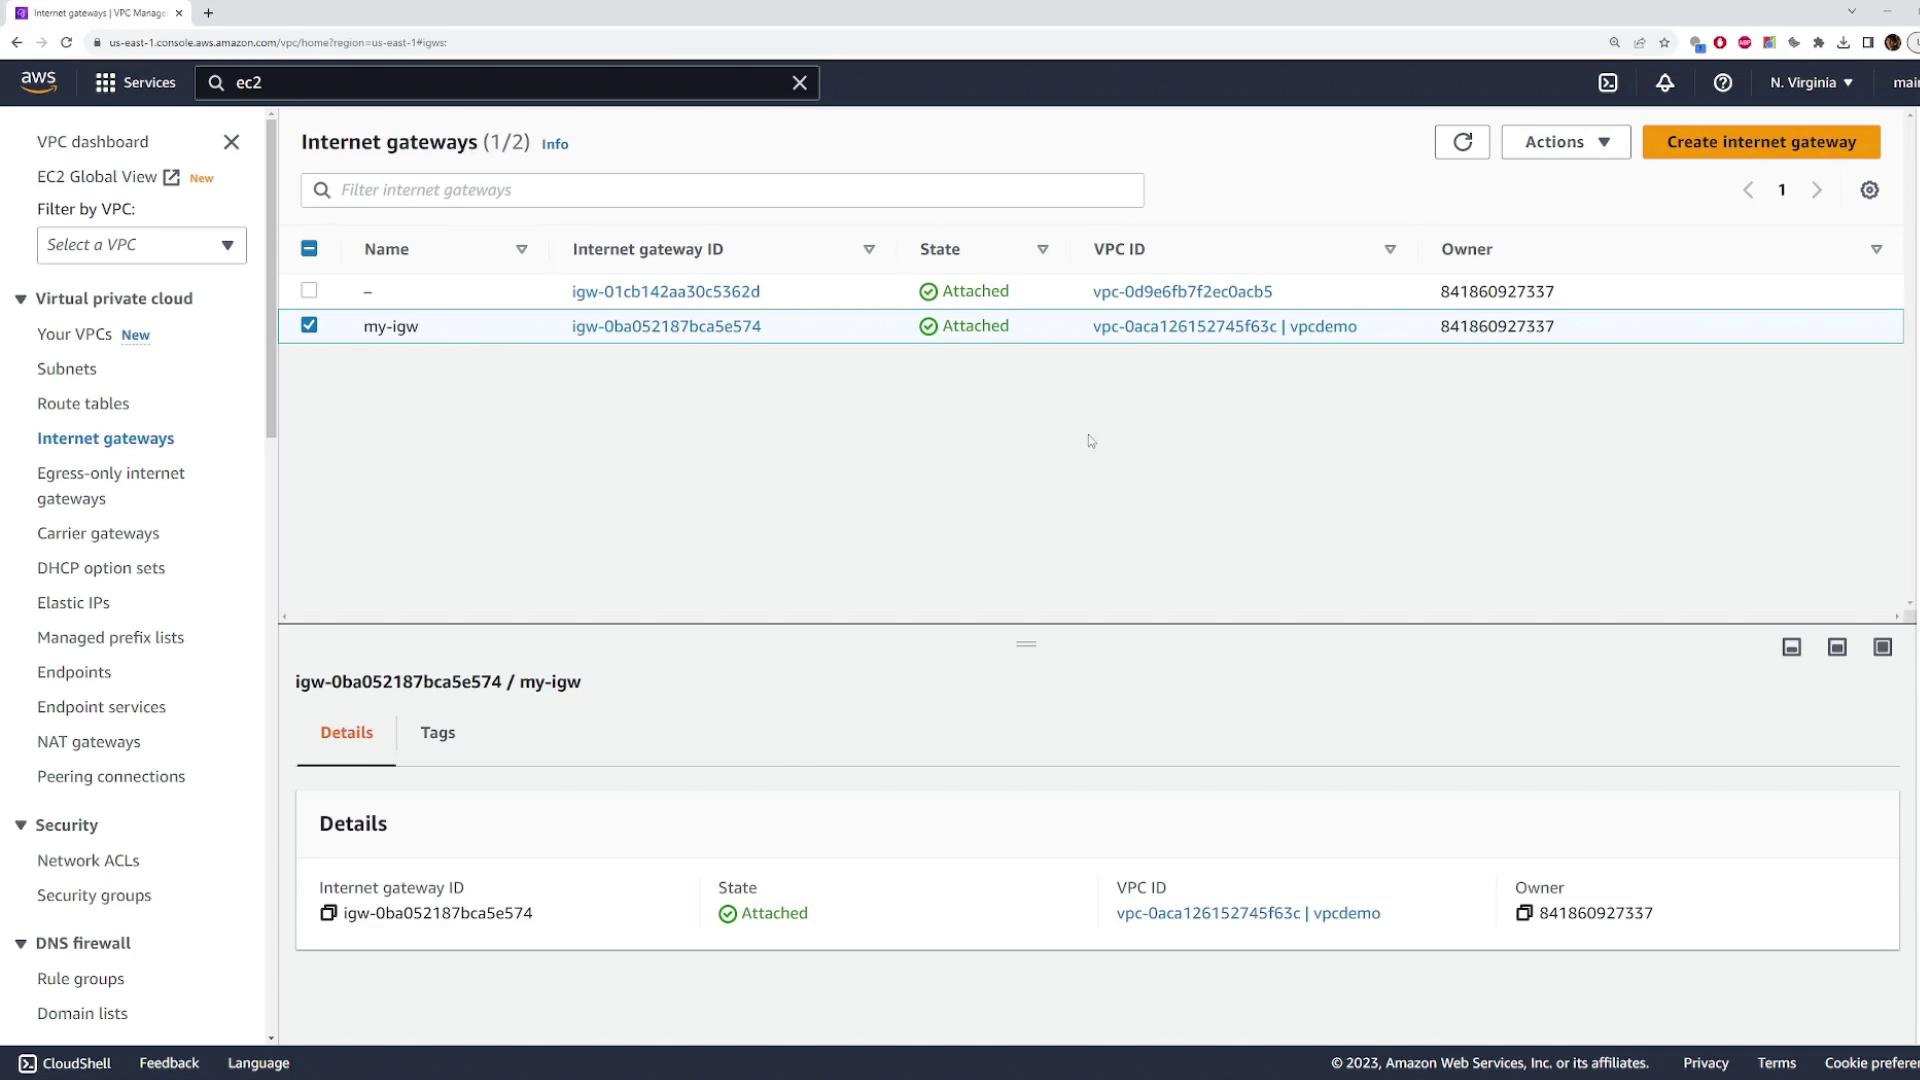
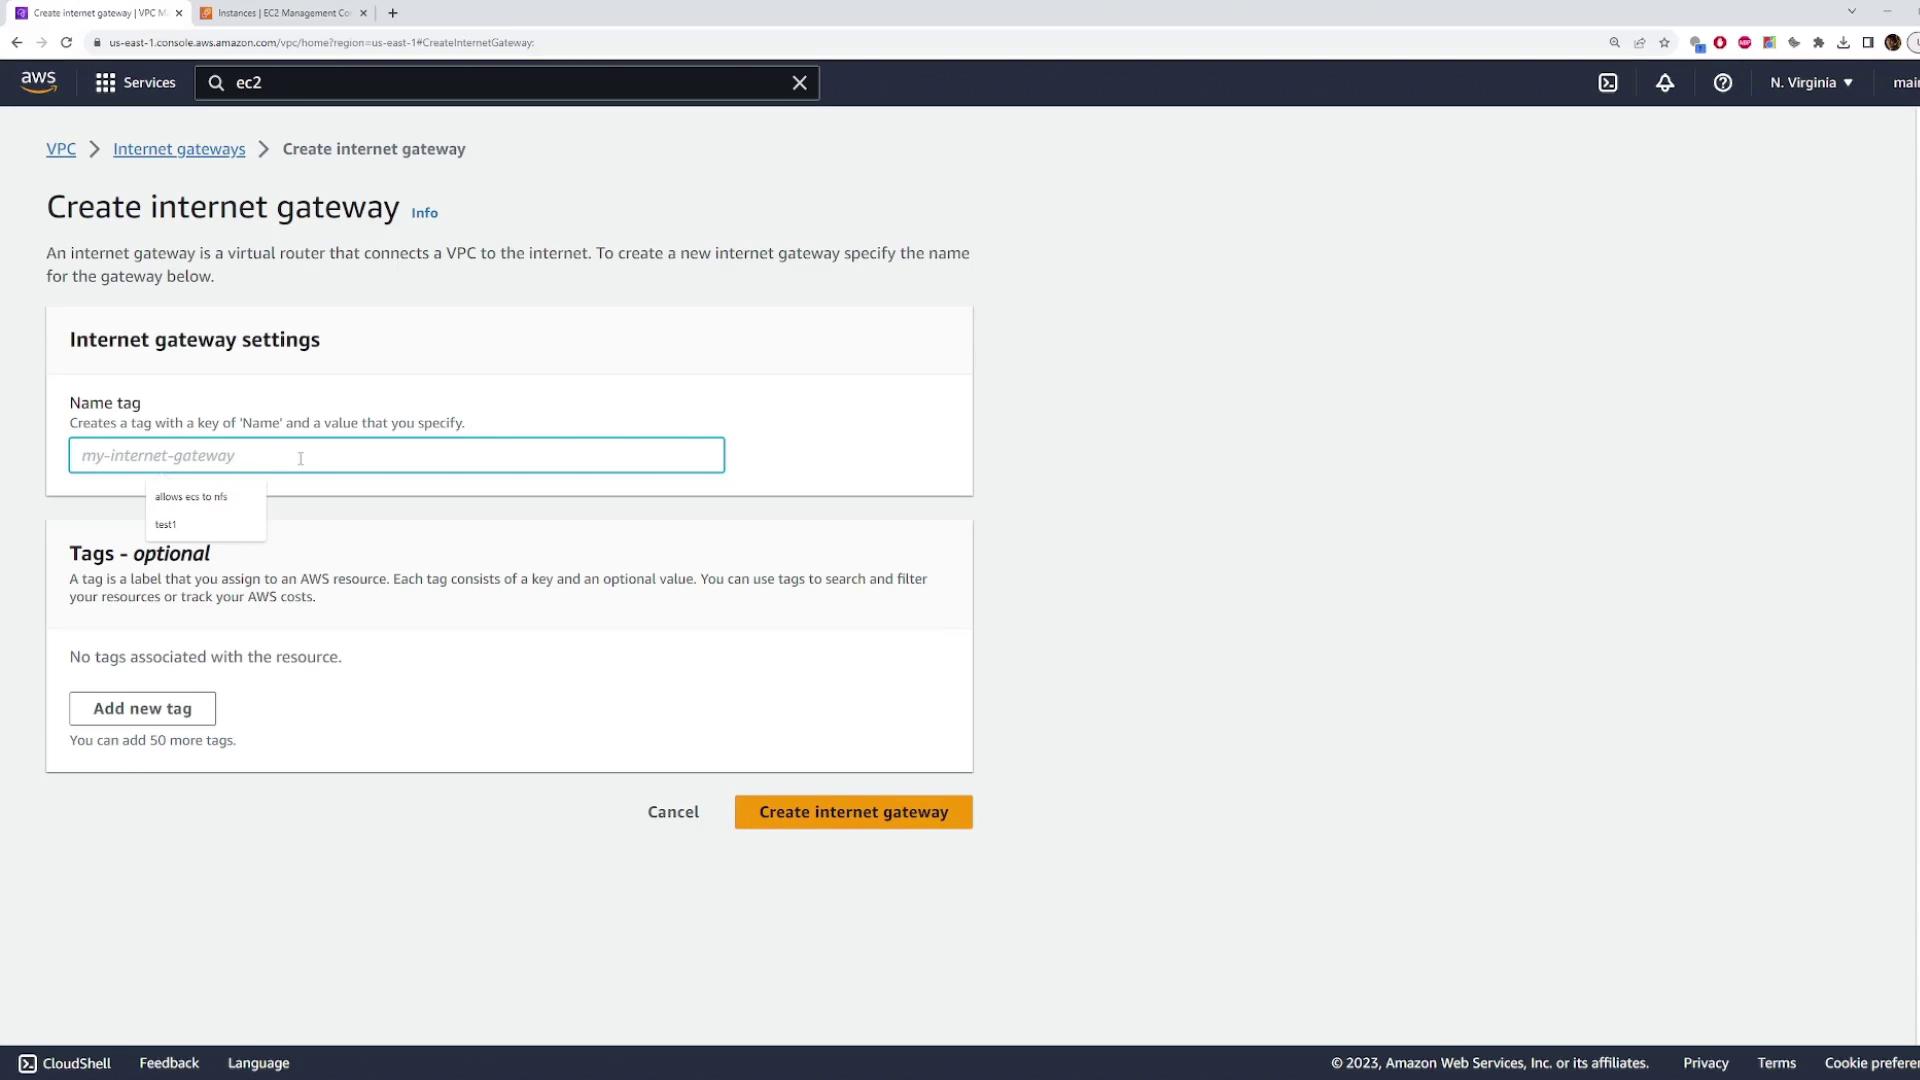
To provide Internet access to your subnet, follow these steps to attach an Internet Gateway (IGW):

  1. In the VPC dashboard, select "Internet Gateway" and click to create a new Internet Gateway. Give it a meaningful name, such as "my Internet Gateway".

    The image shows an AWS console interface for creating an internet gateway, with fields for naming and tagging the gateway.

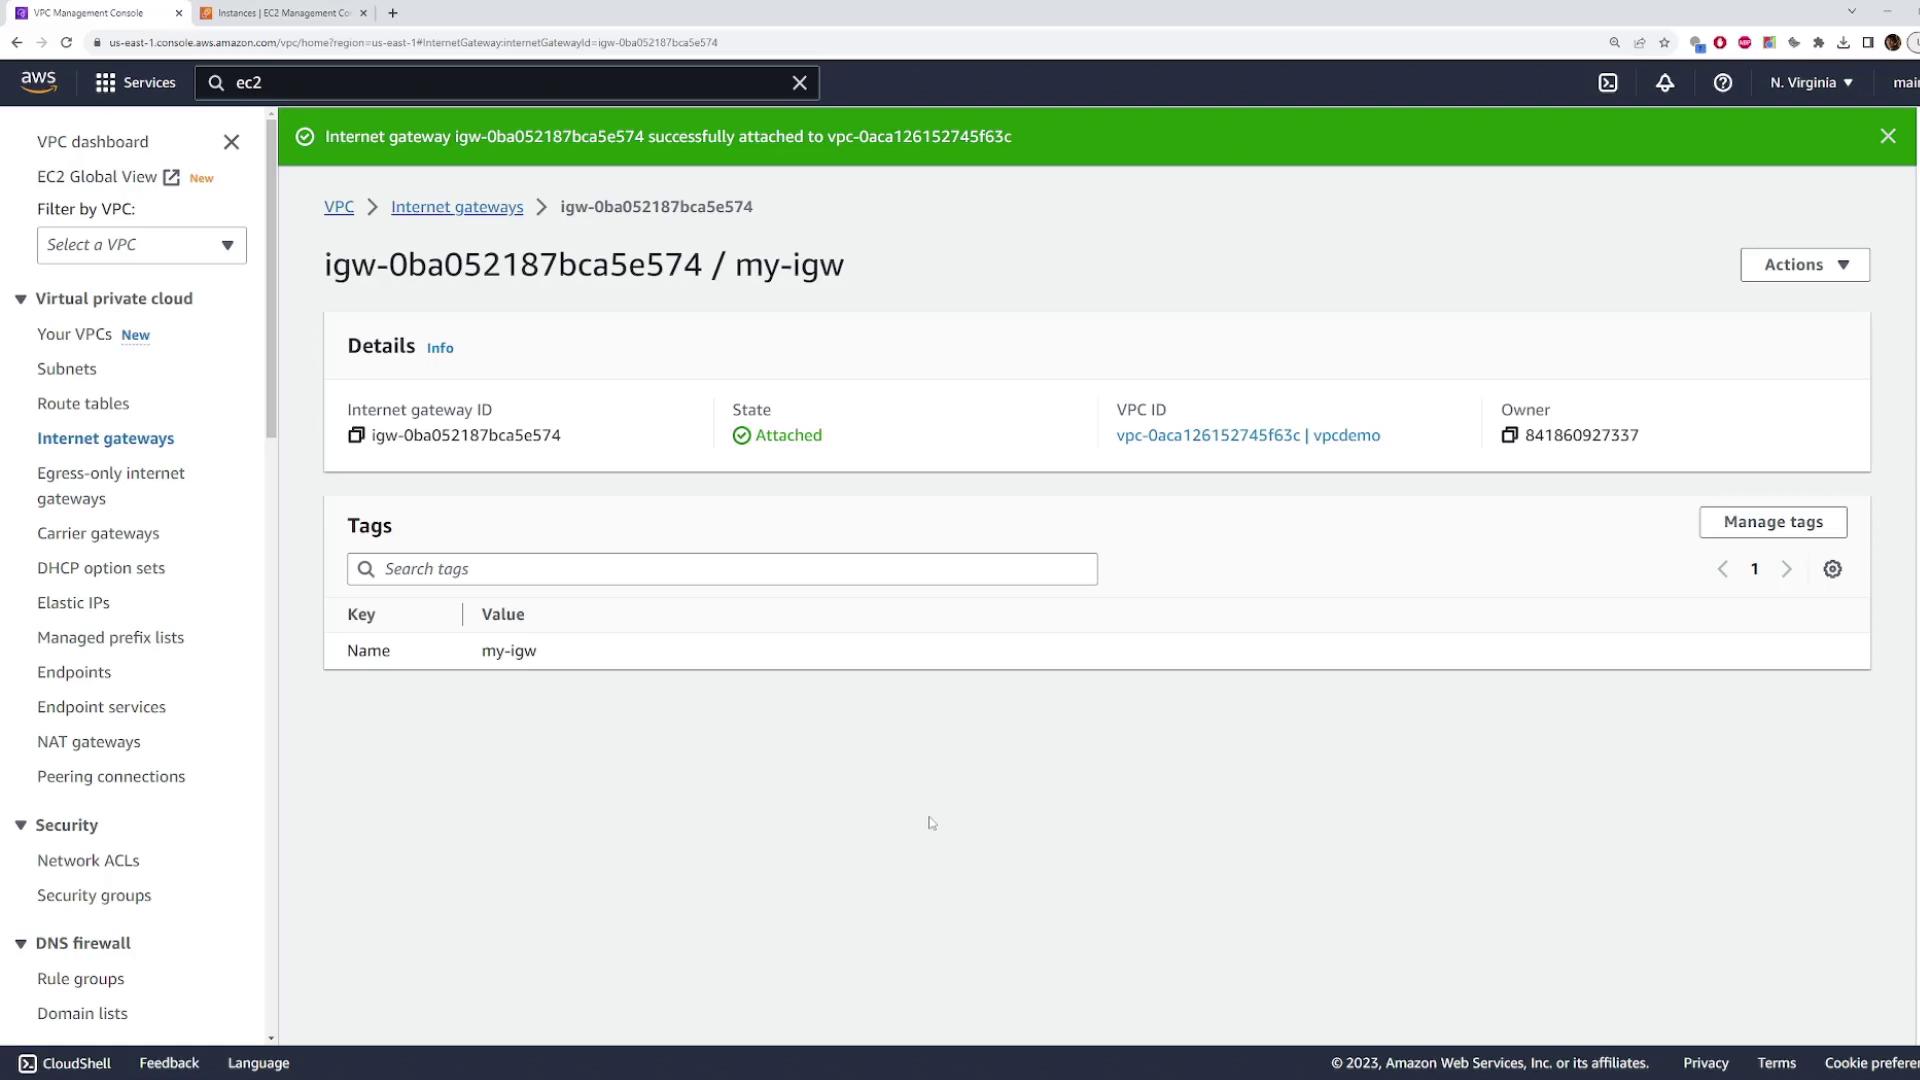
  2. Once created, attach the Internet Gateway to your VPC by selecting your VPC from the available list.

    The image shows an AWS Management Console screen displaying details of an internet gateway that is successfully attached to a VPC. The gateway ID is "igw-0ba052187bca5e574" and it is labeled "my-igw".

After attaching the internet gateway, re-test connectivity with the ping command. If the instance is still unreachable, the subnet’s route table likely requires an update.

Step 4: Update the Route Table

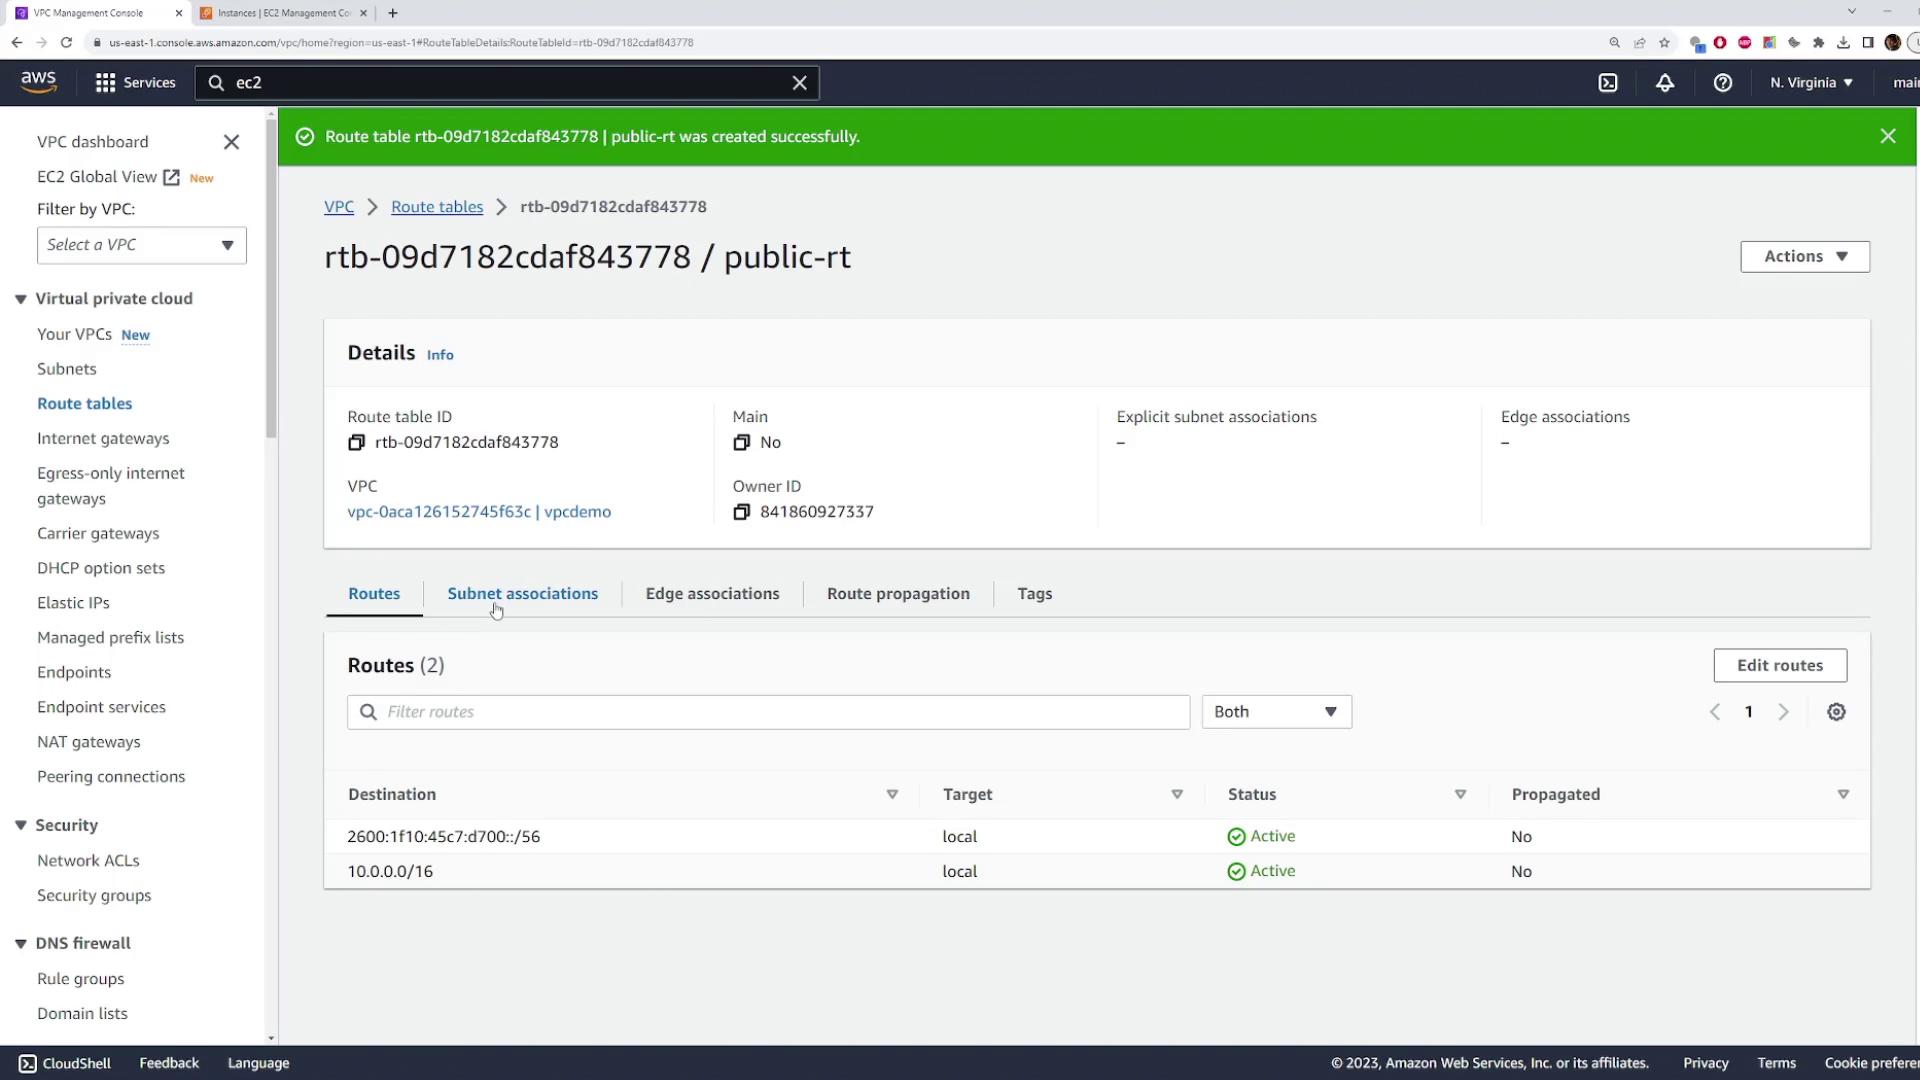
To route Internet-bound traffic, update the route table associated with your public subnet:

  1. In the VPC console, locate the route table associated with your public subnet. If your subnet still uses the default route table, consider creating a custom route table for clarity.

  2. Create a new route table for your demo VPC and name it (for example, "public route table").

  3. Associate your public subnet with this new route table.

  4. Edit the route table to add a default route with a destination of 0.0.0.0/0 and set the target to your Internet Gateway.
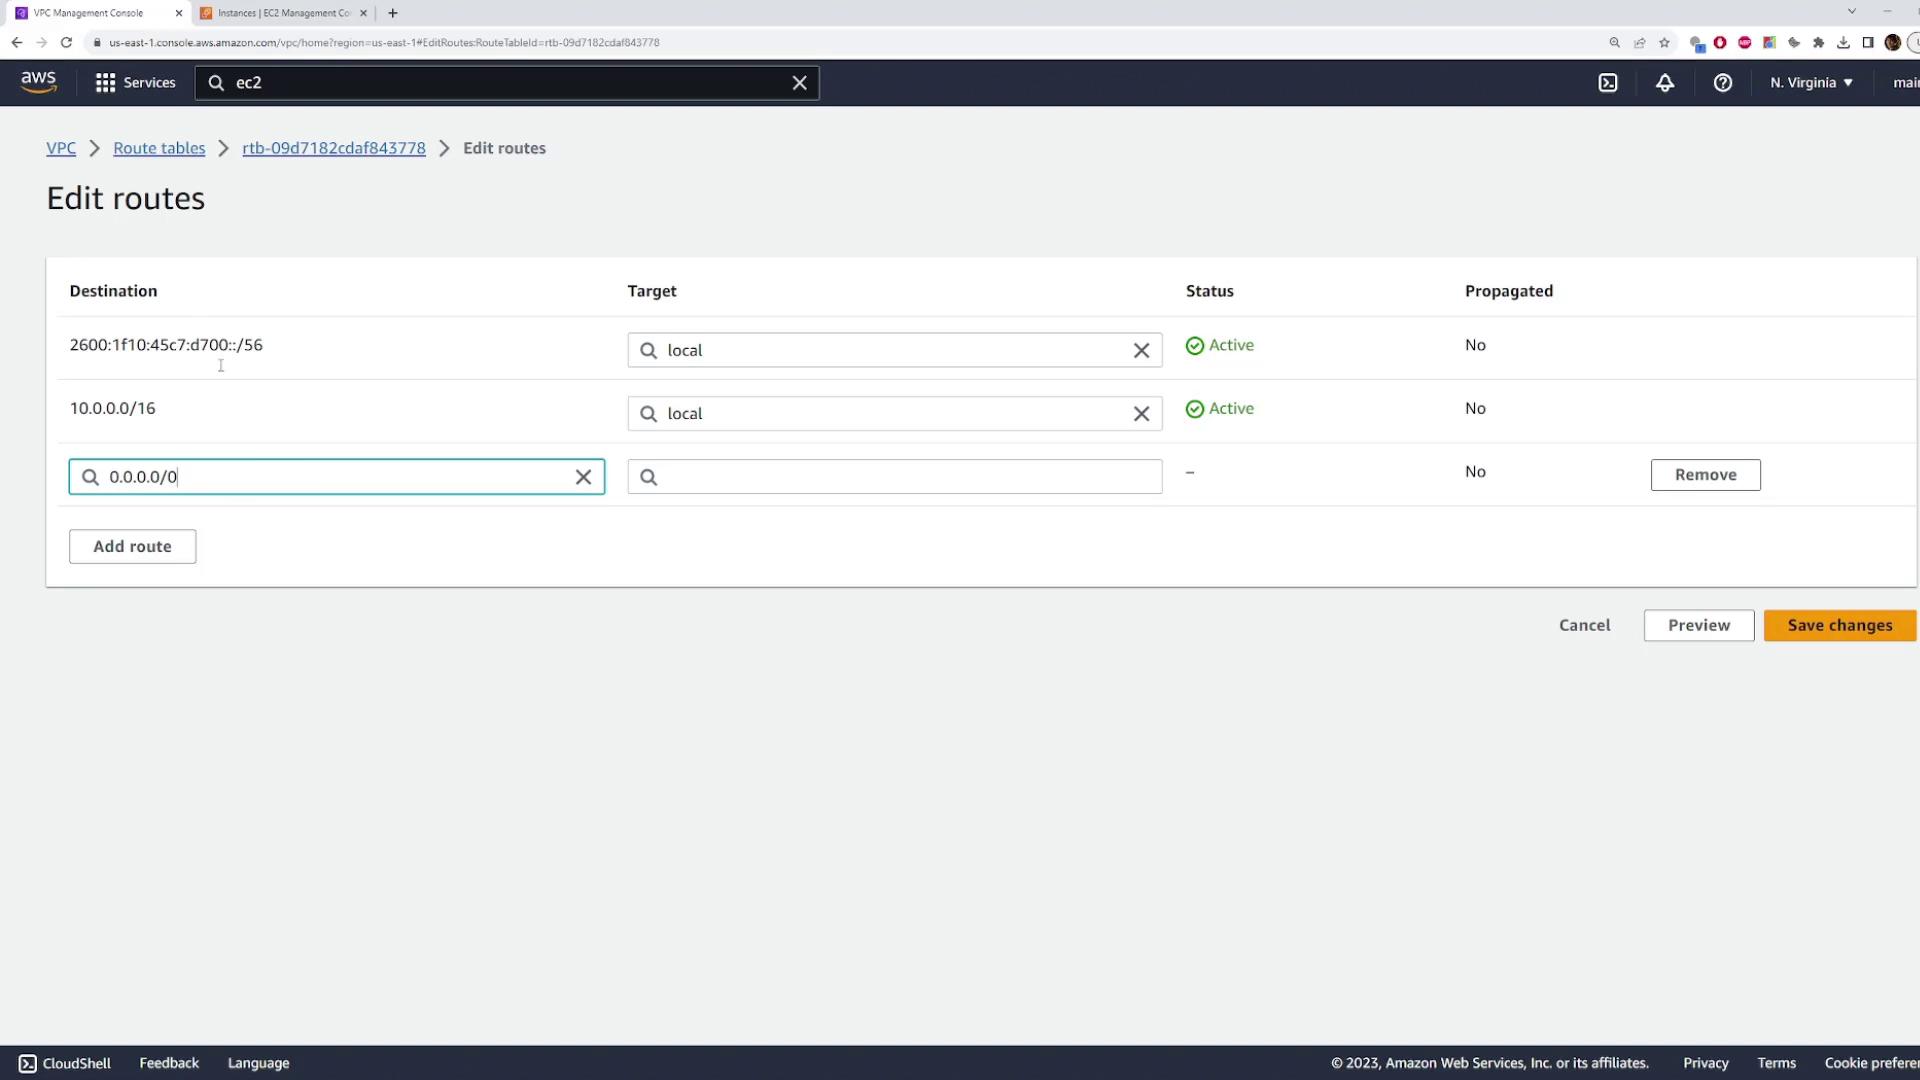
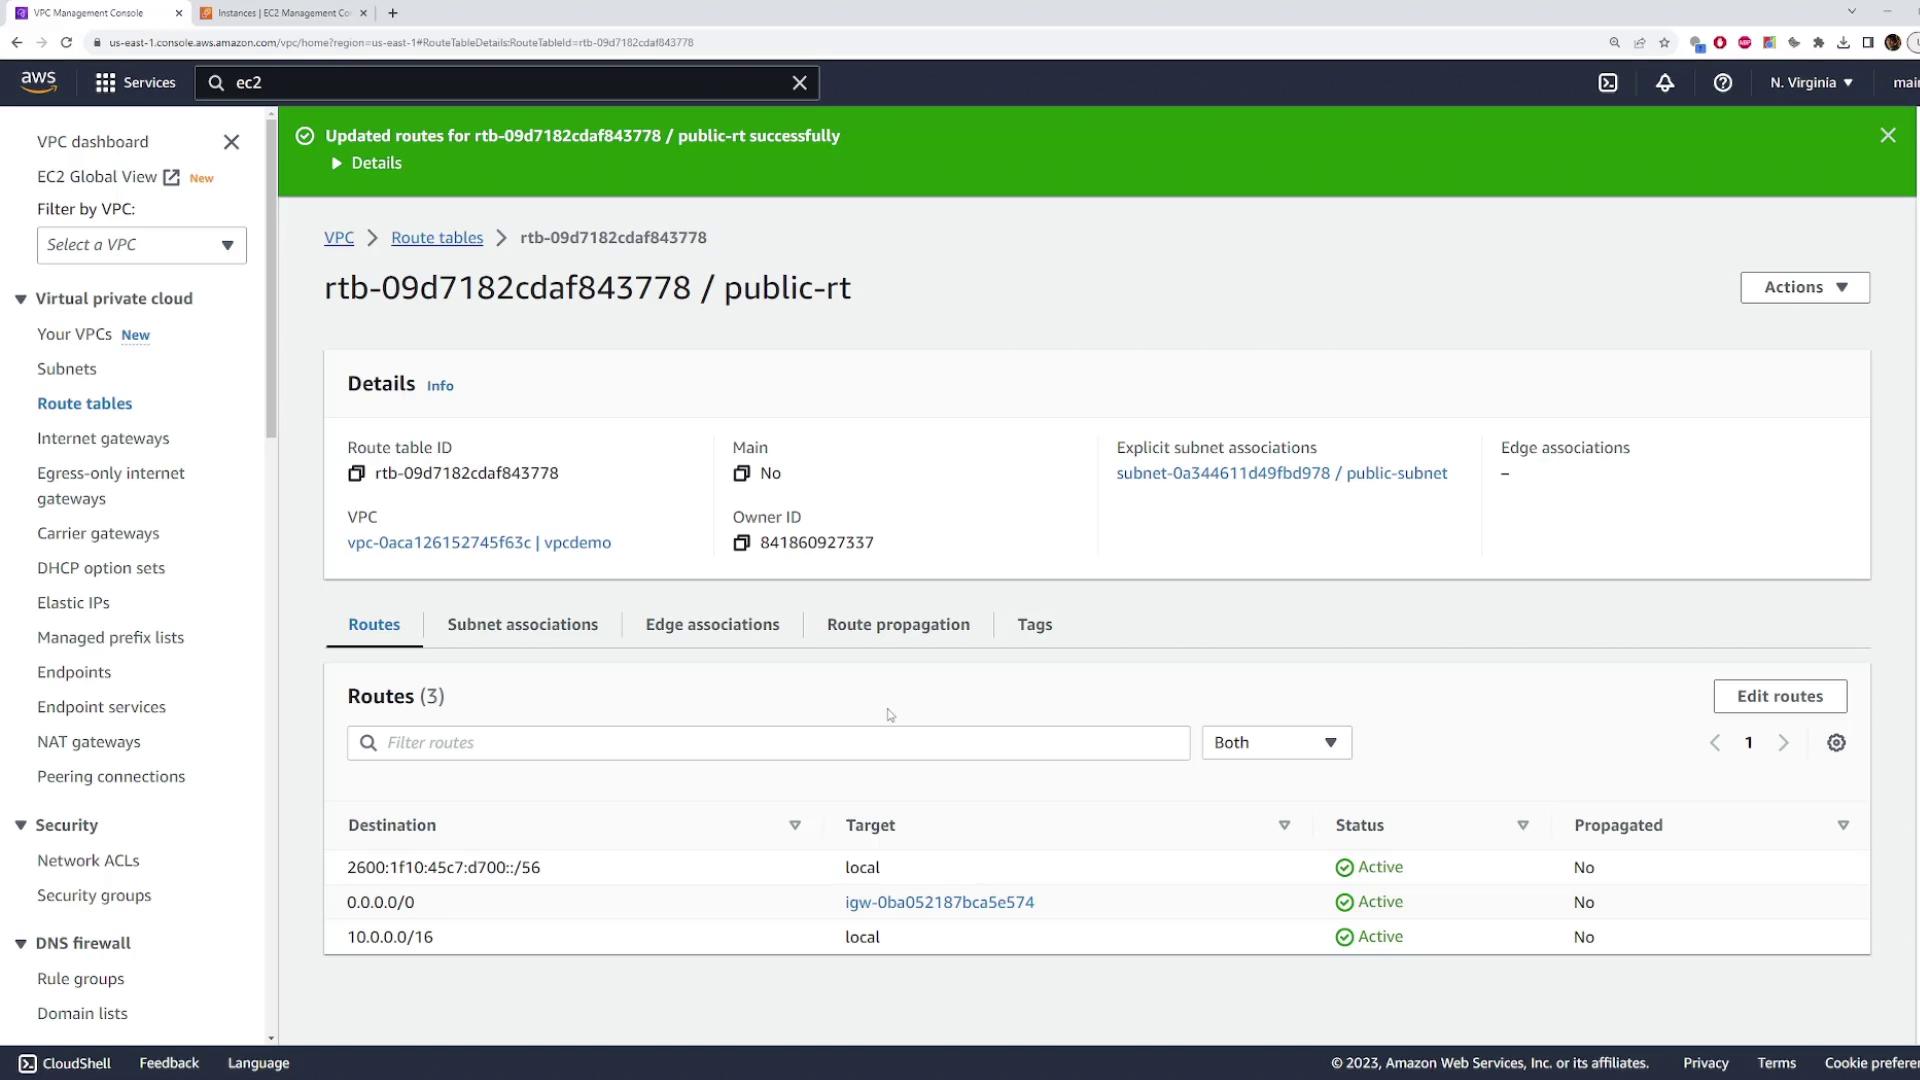
    The image shows an AWS Management Console screen displaying details of a route table within a Virtual Private Cloud (VPC), including route information and subnet associations.

    The image shows the AWS Management Console with a focus on editing VPC route tables. It displays routes with their destinations, targets, statuses, and propagation settings.

    The image shows an AWS Management Console screen displaying details of a route table in a VPC, including route destinations and their targets.

  5. Save the changes.

After these modifications, your subnet is configured as public, and all traffic destined for the Internet will be directed through the attached Internet Gateway.

Step 5: Verify Internet Connectivity

Once the route table is updated, verify that your EC2 instance is publicly accessible:

  • Ping the public IP address again:

    ping 54.159.89.36
    
  • Attempt an SSH connection:

    ssh -i aws-demo.pem [email protected]
    

A successful response (e.g., a ping reply with “Reply from 54.159.89.36: bytes=32 time=27ms TTL=112”) confirms that your instance is now accessible over the Internet. An example output might look like:

Ping statistics for 54.159.89.36:
    Packets: Sent = 4, Received = 4, Lost = 0 (0% loss)

Success Confirmation

The successful ping and SSH connection indicate that attaching the Internet Gateway and updating the route table have effectively transformed your private subnet into a public subnet.

The image shows the AWS Management Console displaying the "Internet gateways" section under the VPC dashboard, with details of two internet gateways listed.

At this point, any resources deployed in the configured subnet are publicly accessible over the Internet, provided that the necessary security group and network ACL settings permit the desired traffic.

For more details on setting up secure and scalable AWS architectures, consider reviewing the following resources:

Watch Video

Watch video content

Previous
Internet Gateways VPC