This guide explains how to update an application, rebuild a Docker image, and deploy it using Amazon ECS.
In this guide, you’ll learn how to update your application, rebuild and push a new Docker image to Docker Hub, and deploy the updated image using Amazon ECS. Follow along to modernize your deployment process and ensure seamless application updates.
Begin by modifying your application. For this demonstration, we update the HTML file by adding extra exclamation points to the H1 tag. The updated HTML file now appears as follows:
Next, build a new Docker image to incorporate your changes. Tag the image as “KodeKloud/ecs-project1” and execute the Docker build command. The console output may look similar to this:
user1 on user1 in ecs-project1 [!] is v1.0.0 via took 3s
Once the Docker image is built successfully, push it to Docker Hub. During the push, you may notice that many layers already exist. Finally, the output provides a digest confirming a successful push:
Refreshing your application immediately after pushing the updated image may still display the old version. This happens because ECS hasn’t been notified of the change. To update your deployed service, follow these steps in the ECS Console:
Navigate to Clusters and select your cluster.
Choose the service you wish to update.
Click on Update.
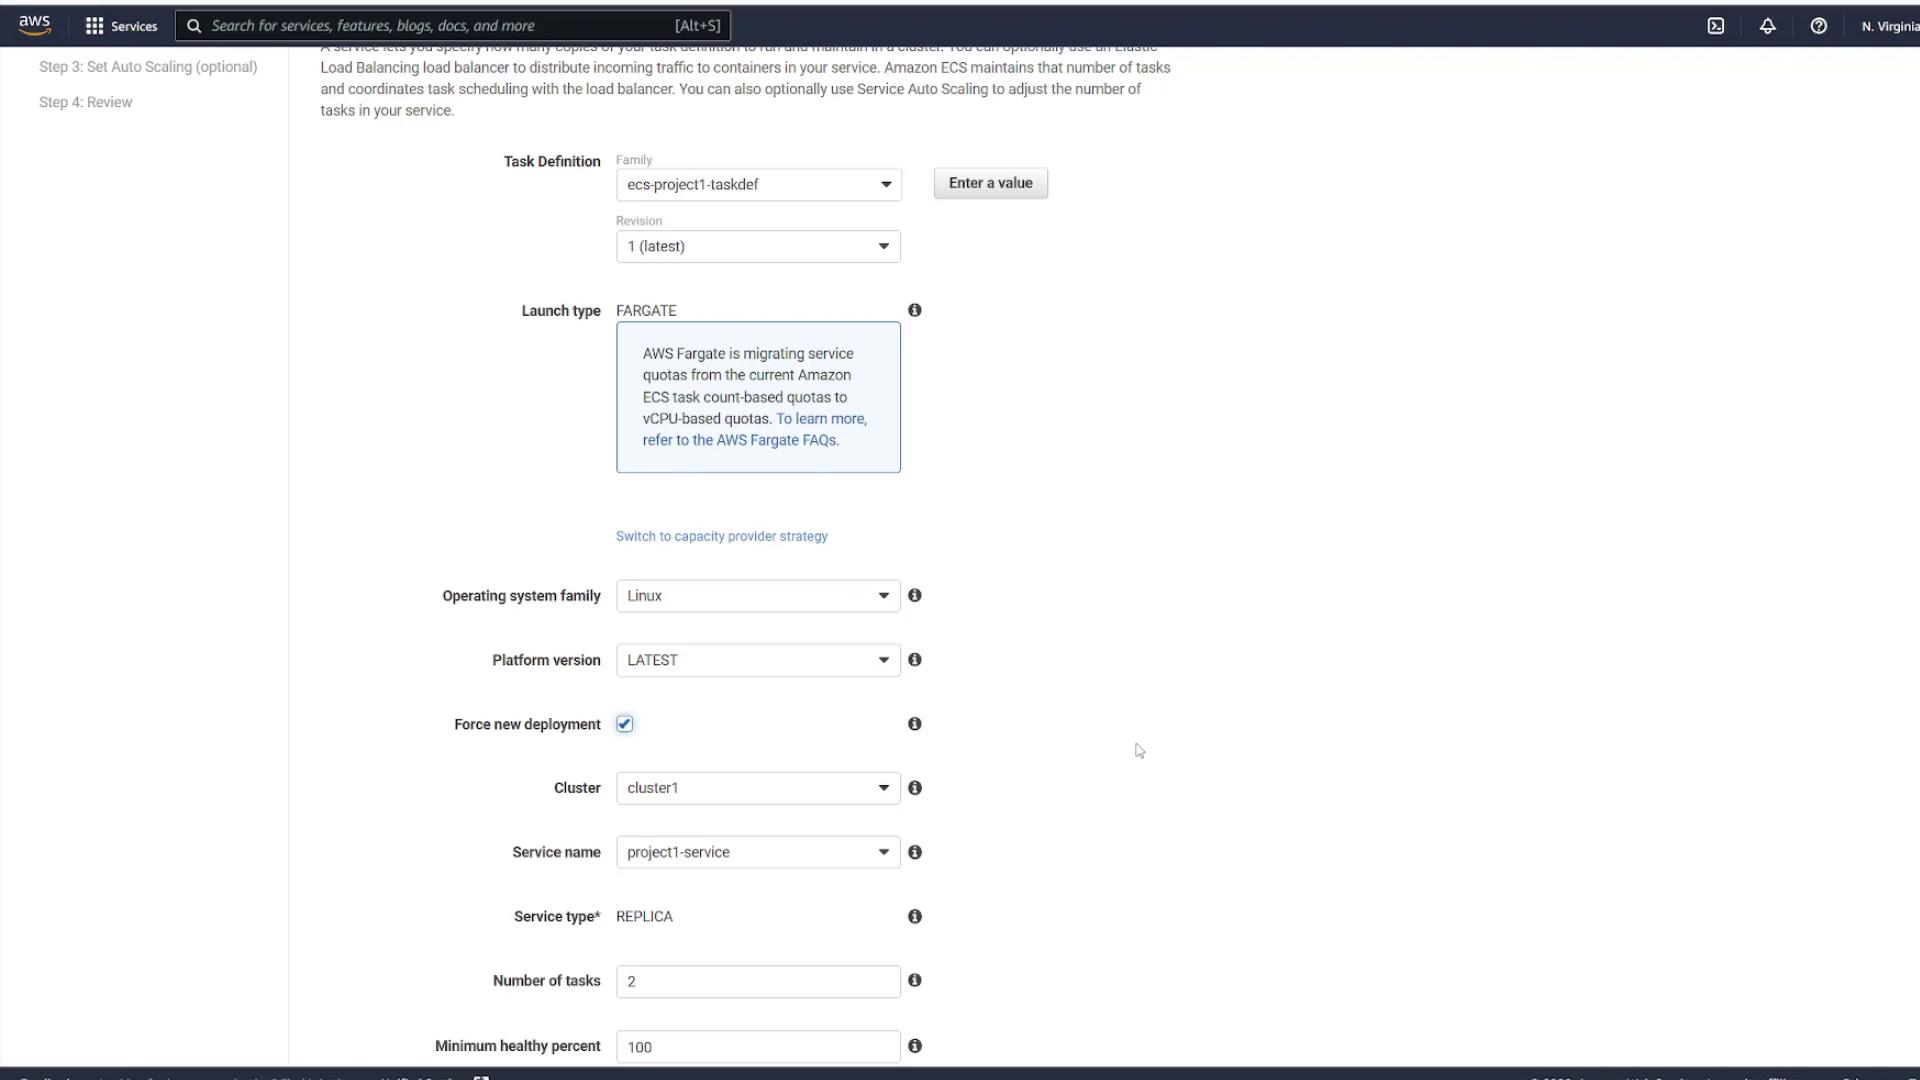
Enable the Force New Deployment option.
Forcing new deployment instructs ECS to pull the latest image and replace the old tasks with new ones.
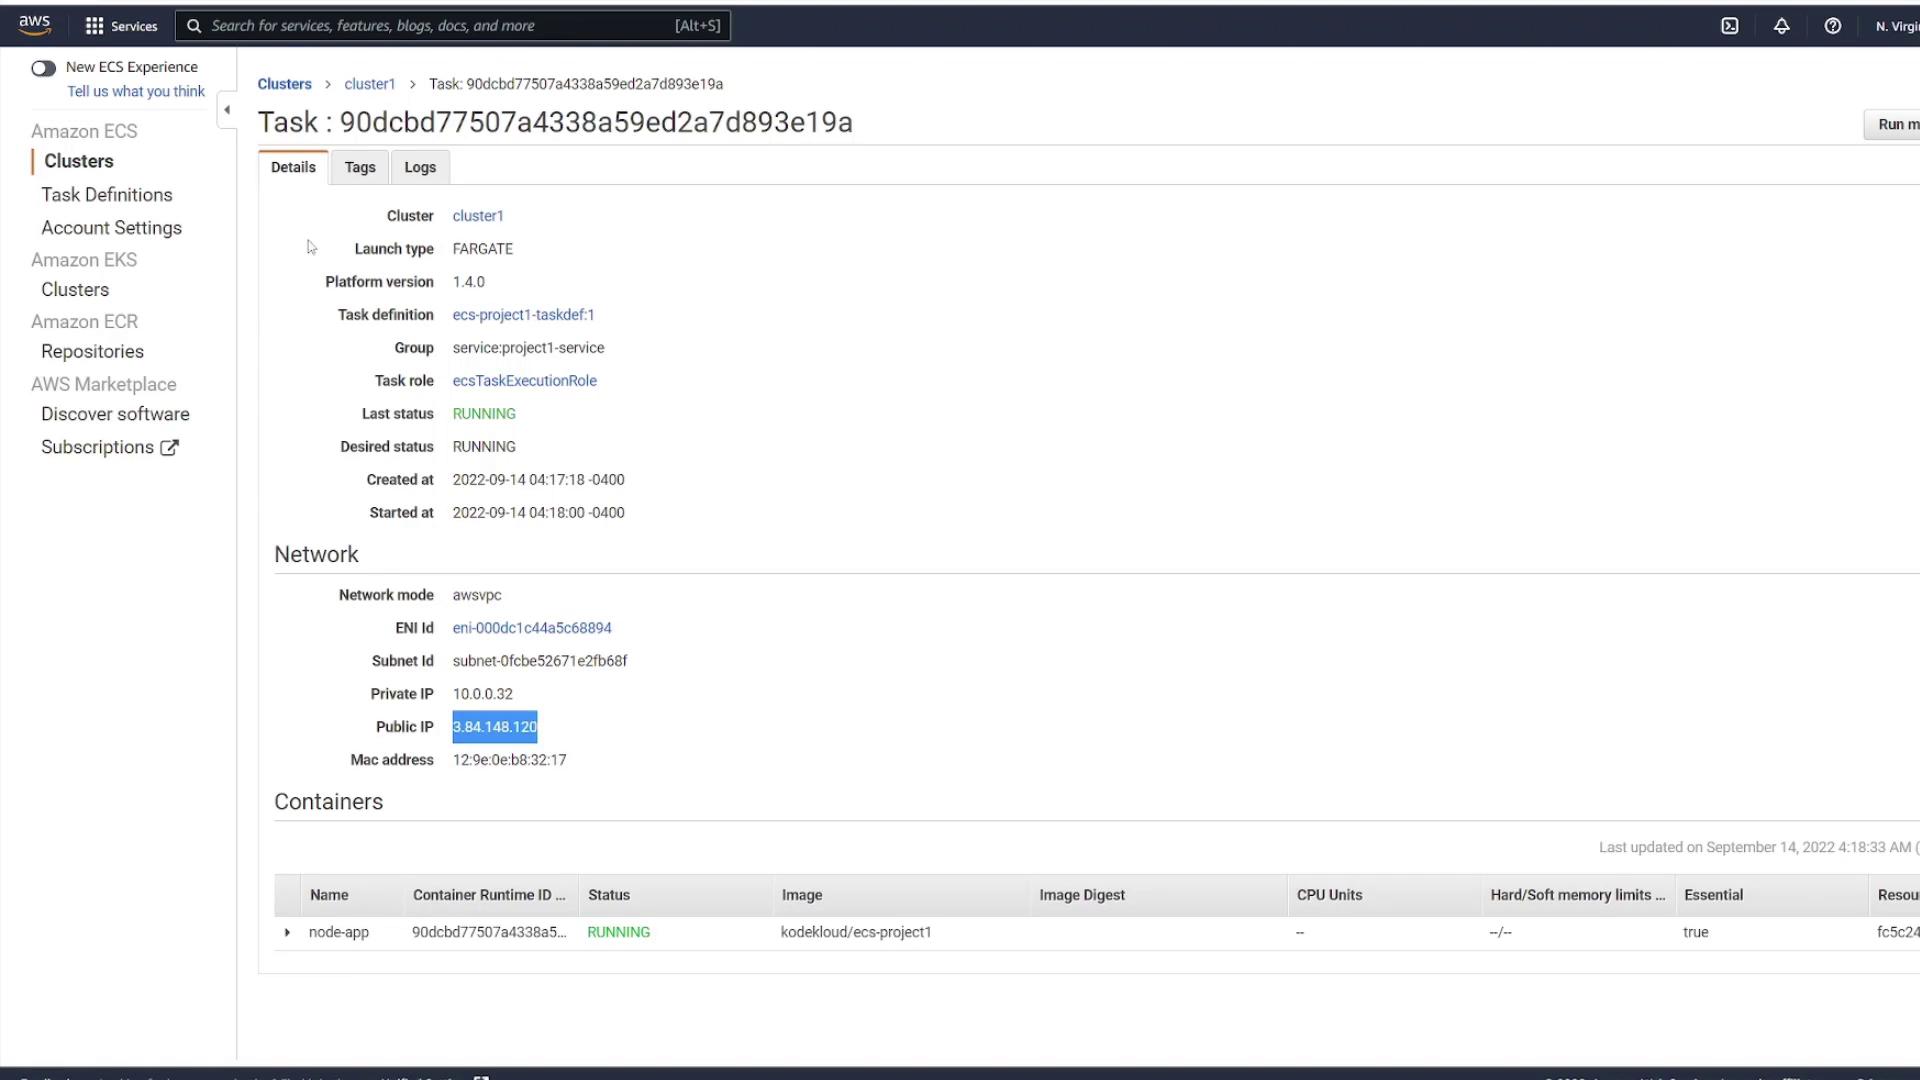
The diagram below shows the AWS ECS Task Details page, which provides essential information about running tasks, including network settings and container statuses:
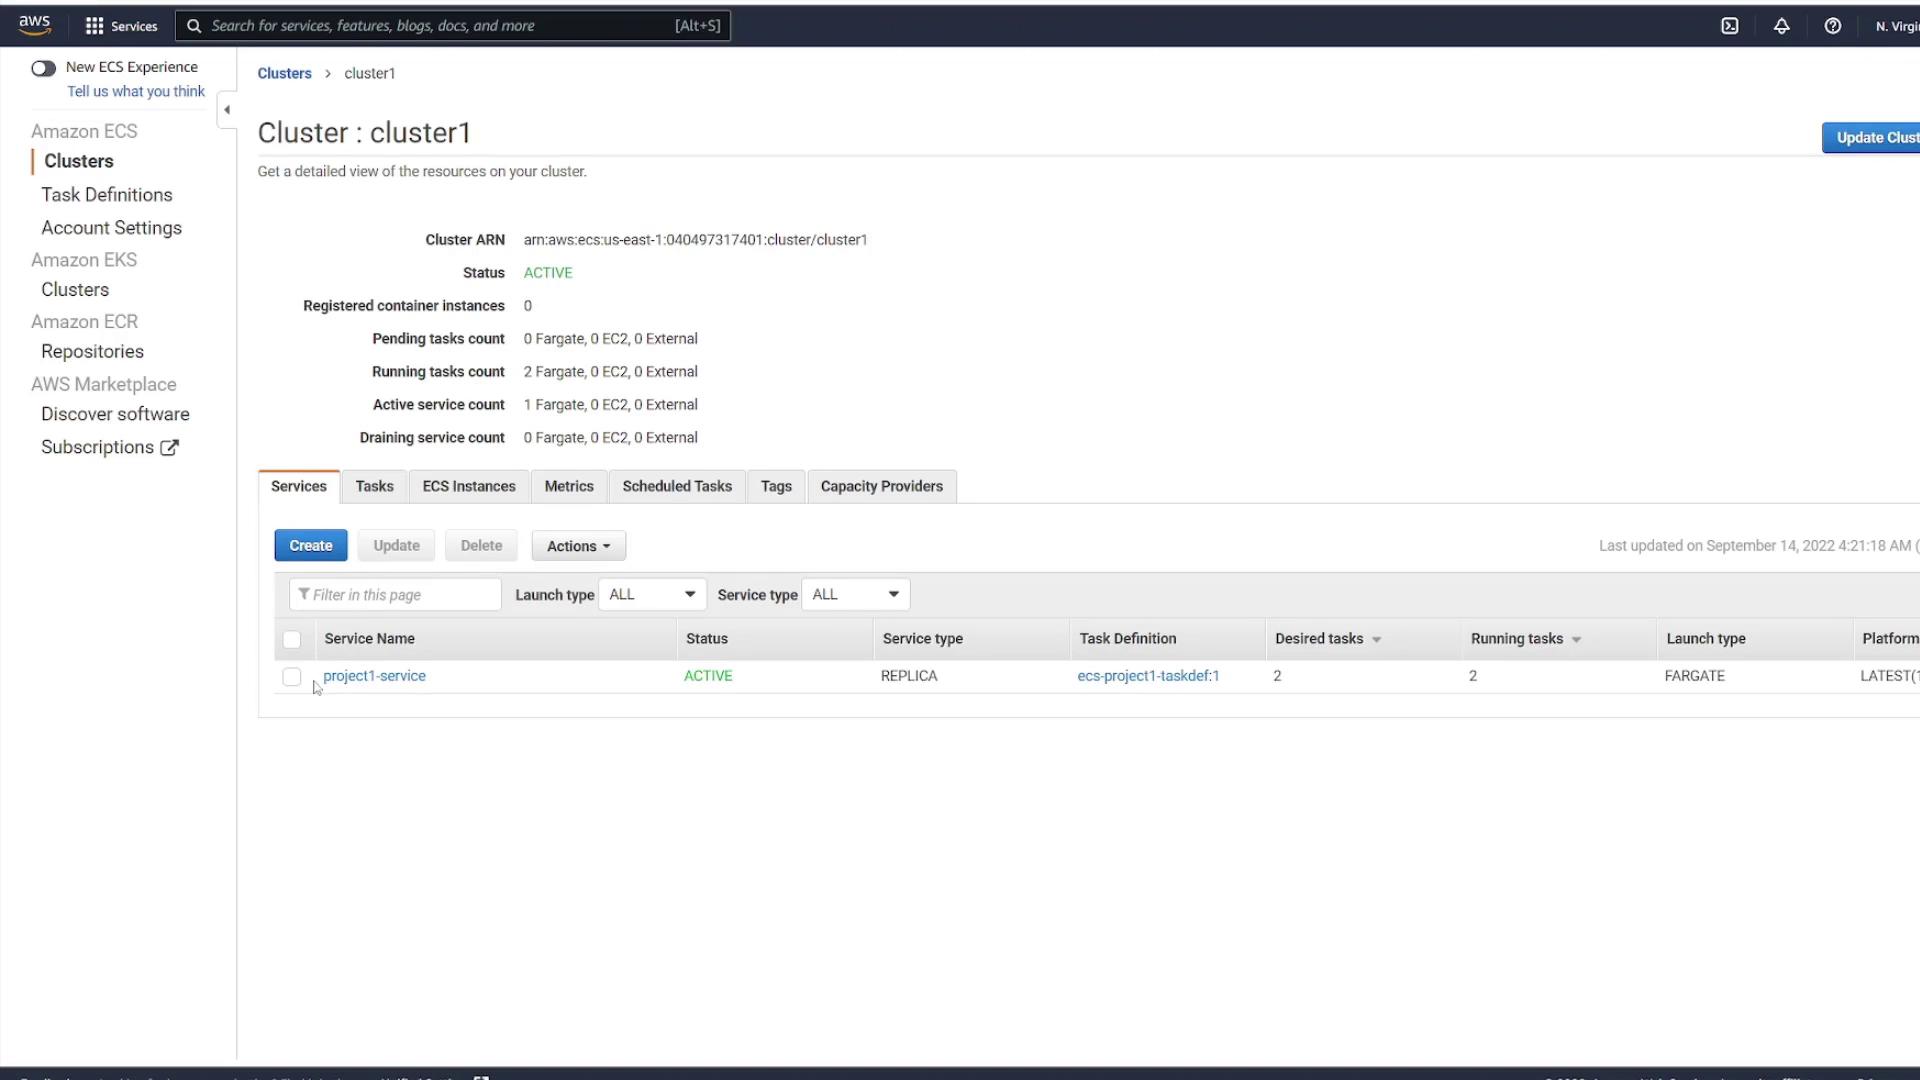
Additionally, observe the following diagram that illustrates a cluster with an active service:
After applying the force deployment, ECS pulls the updated image and redeploys the tasks. Review the ECS Service Configuration screen as shown in the following diagram:
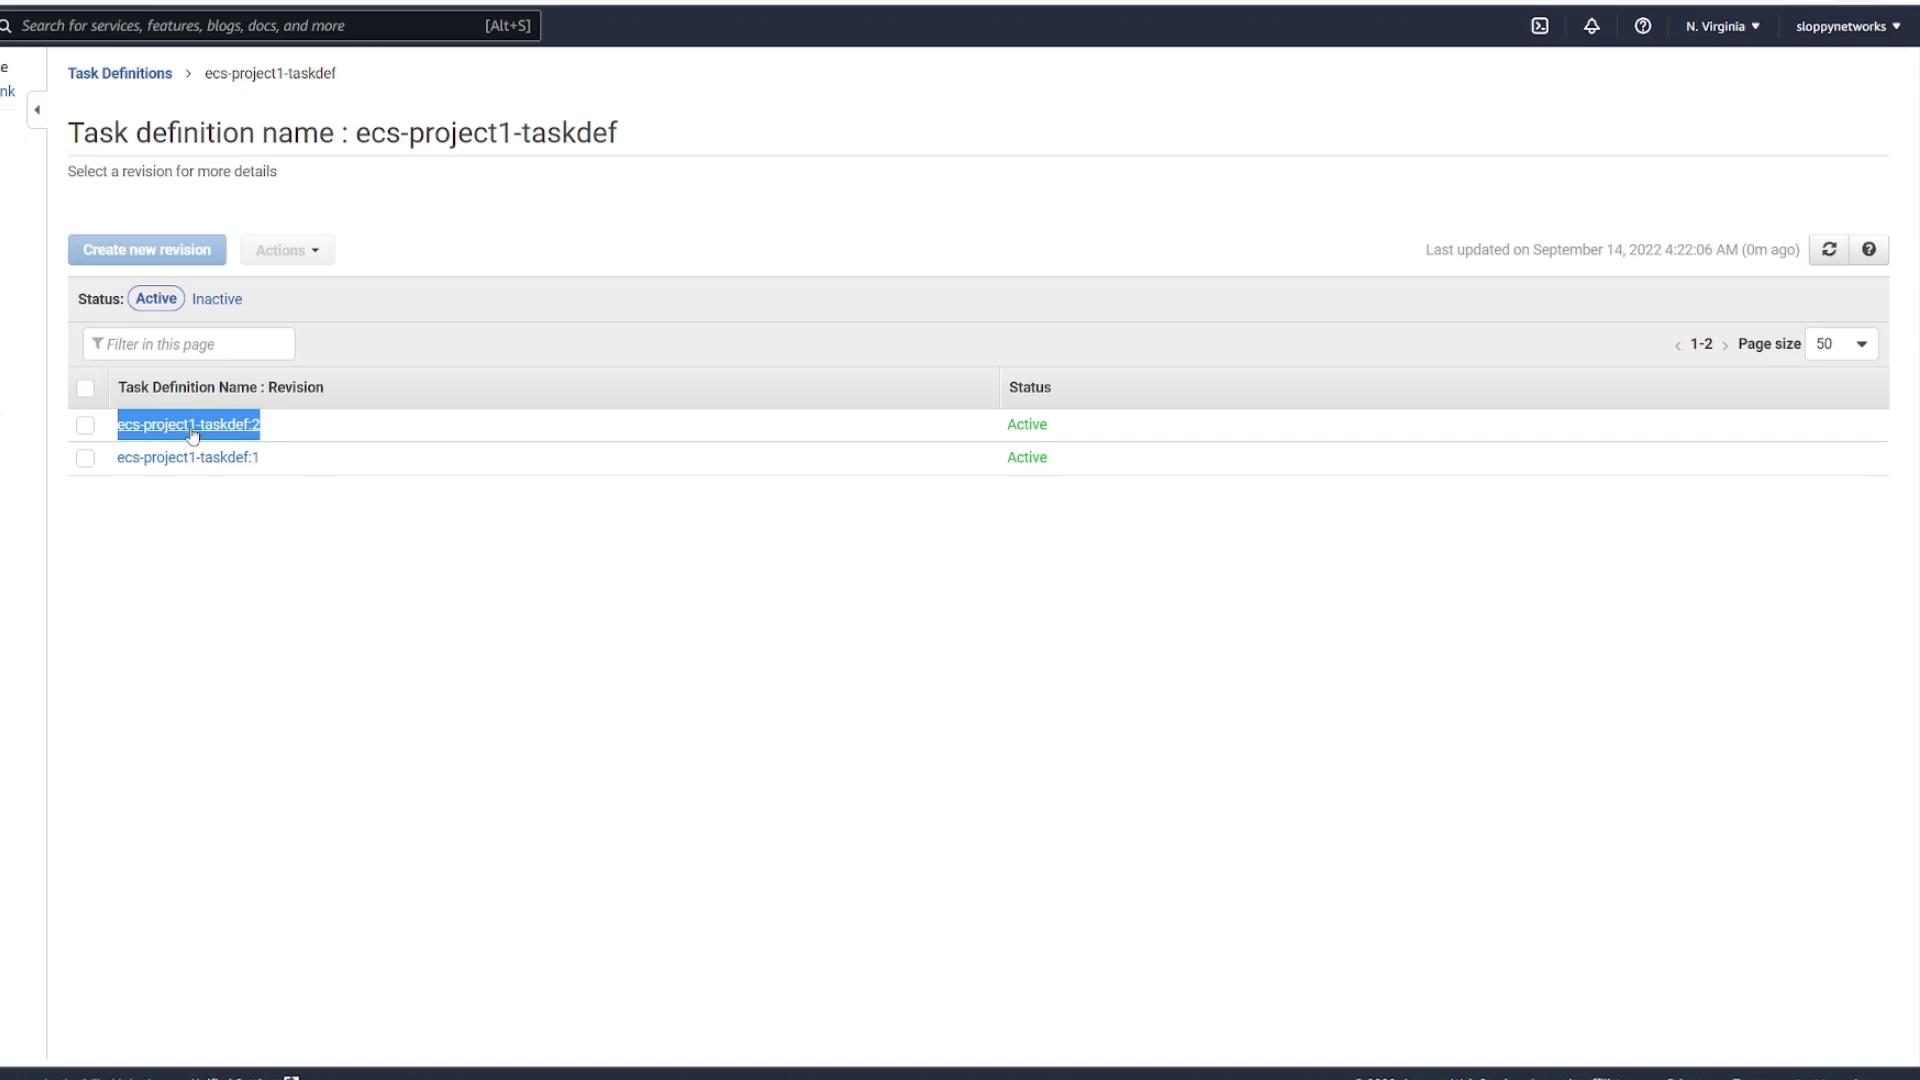
If you also modify the task definition file, a new revision of the task definition is created. For example, after updating “ecs-project1-taskdef”, the ECS console may display multiple revisions:
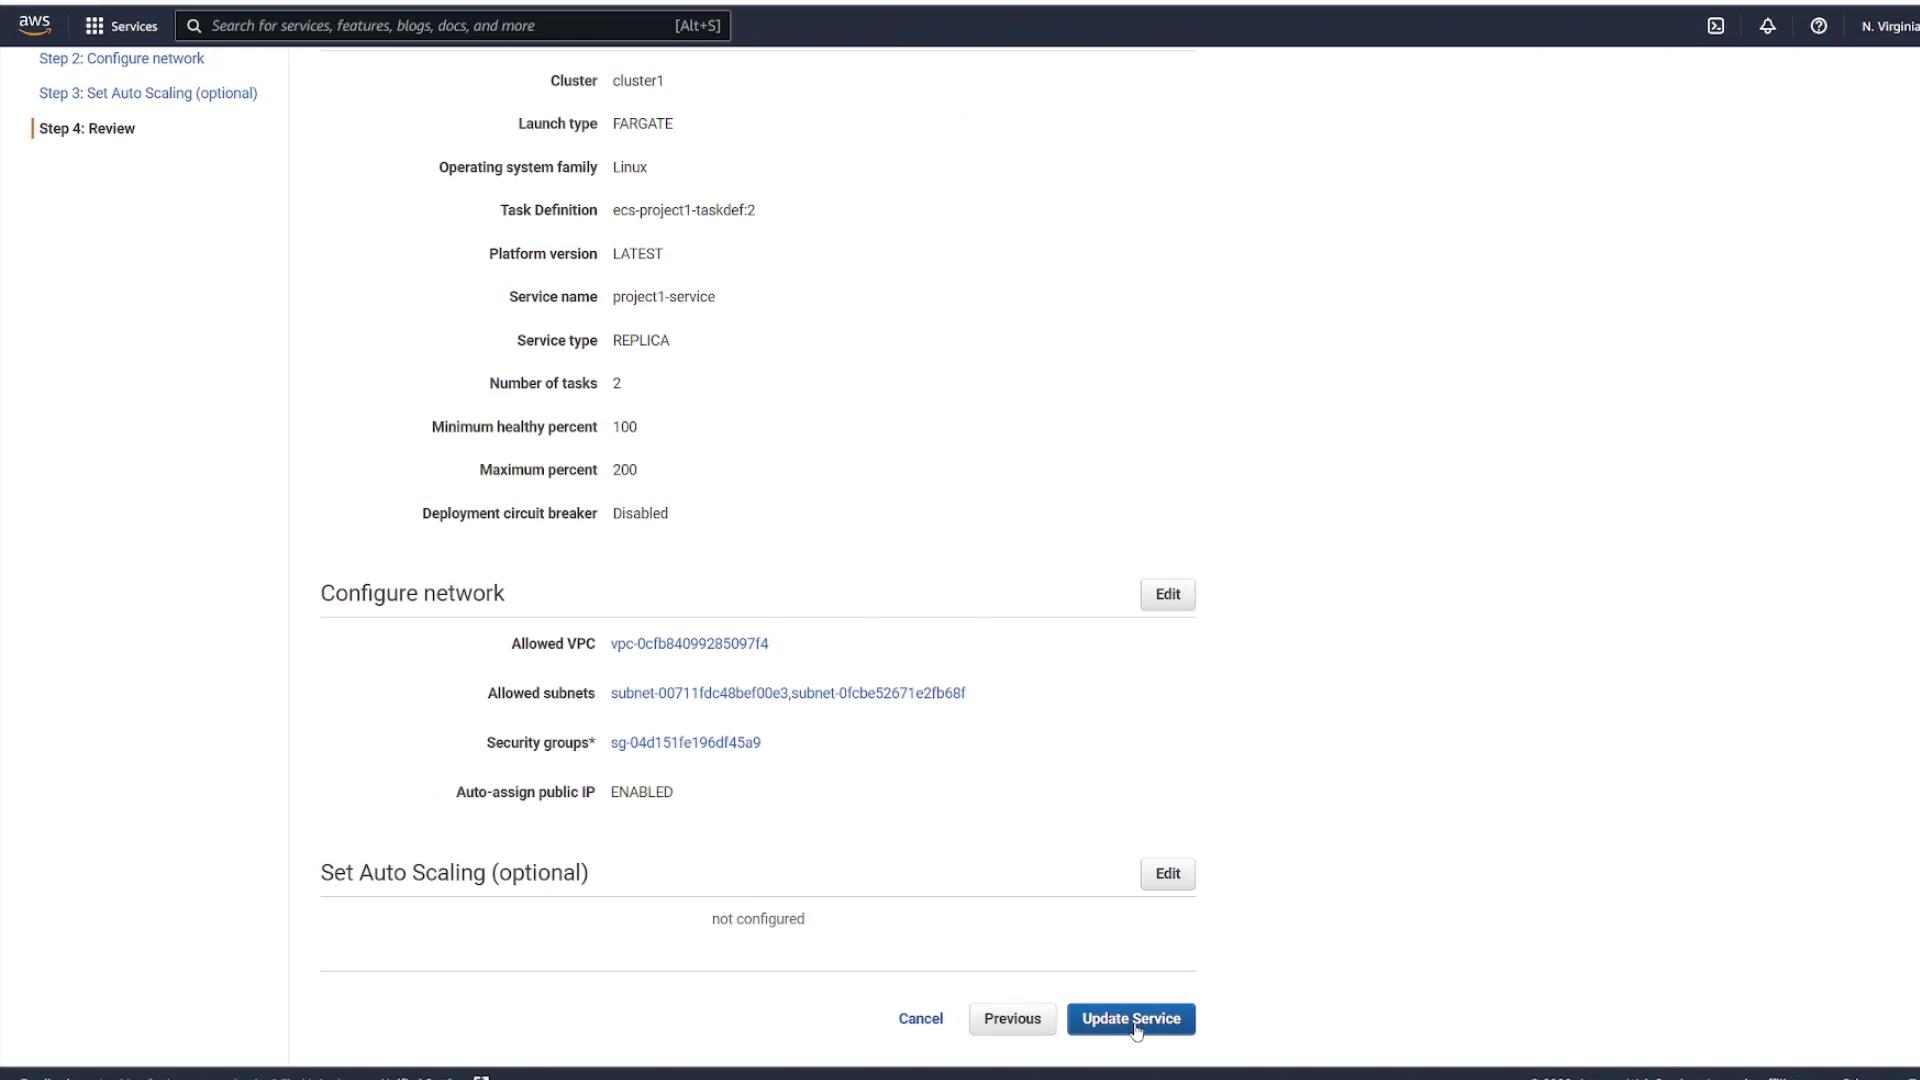
Then, review the updated service configuration before finalizing the update:
After updating the service, ECS starts new tasks using the latest image while gradually shutting down the older tasks once the new ones pass all health checks. You can monitor this transition in the ECS Tasks view.
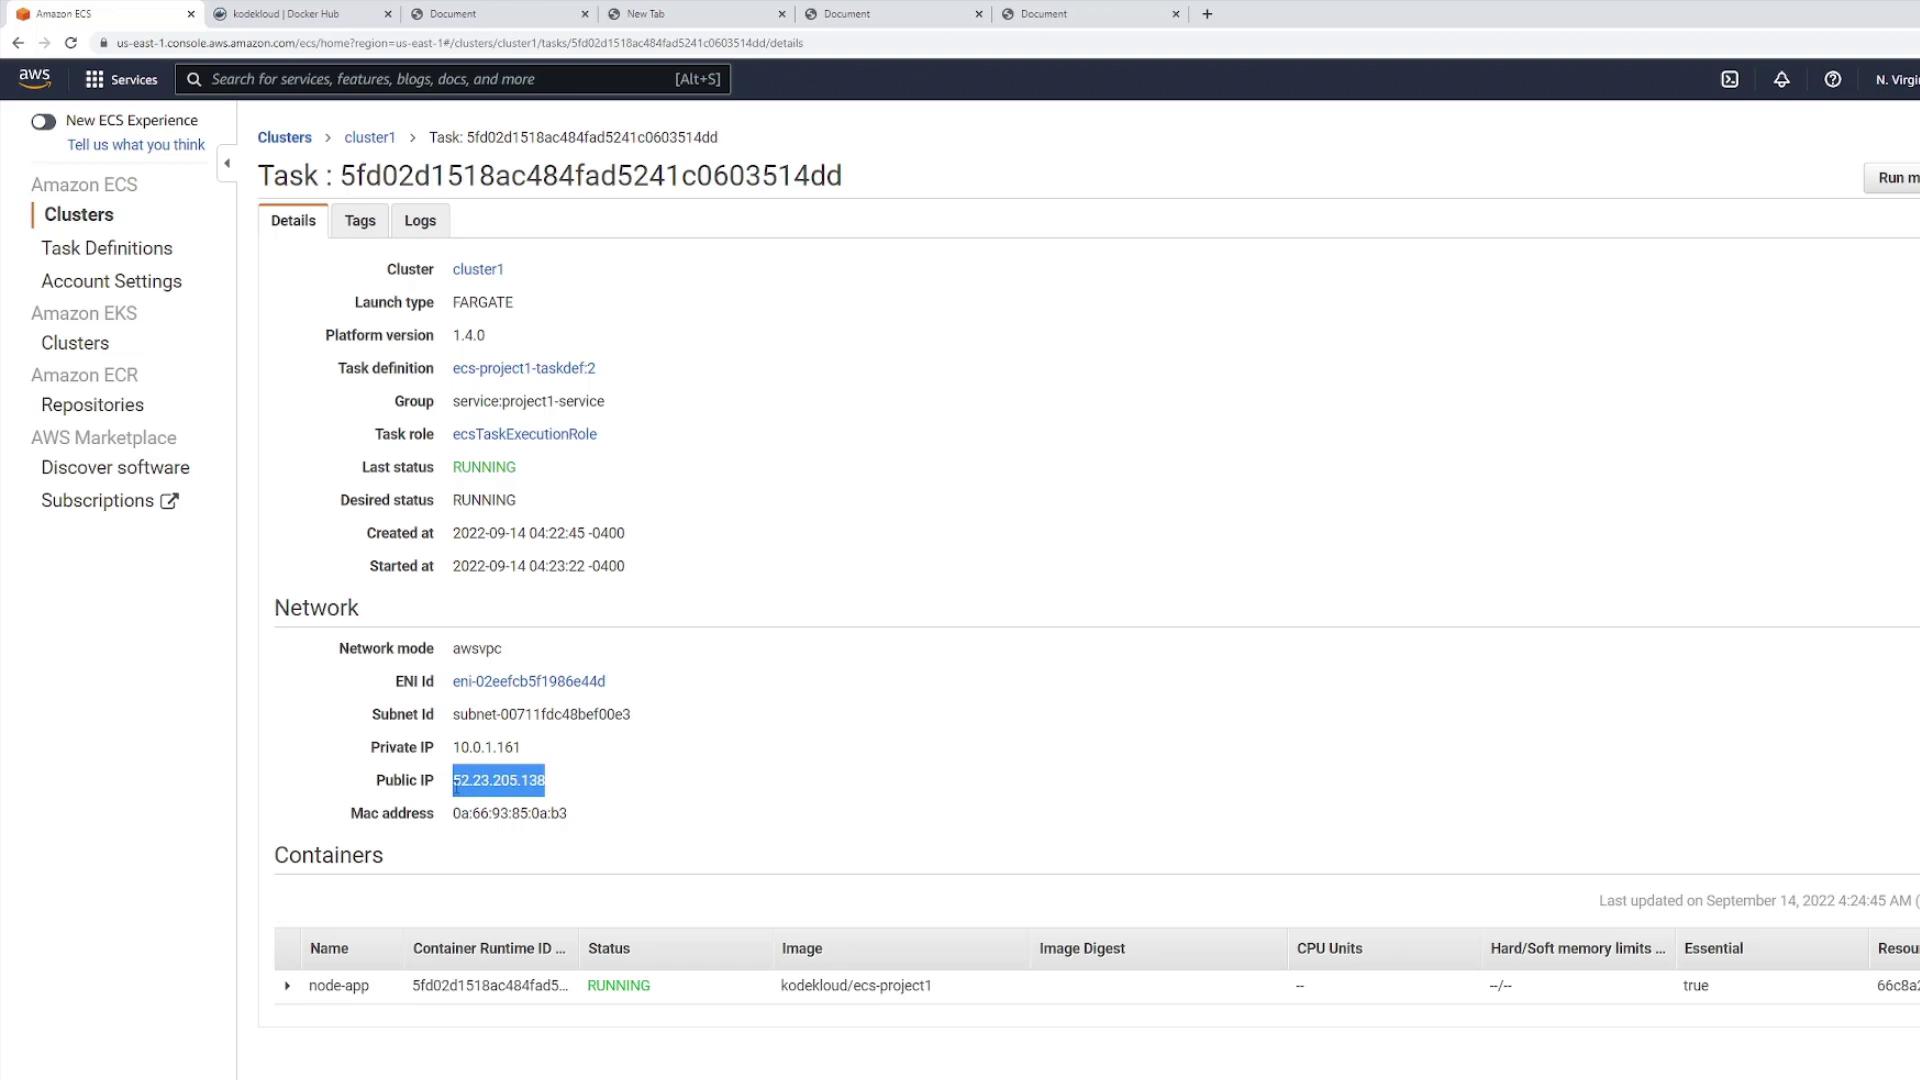
After the deployment, refresh the ECS service page and inspect one of the running tasks. Keep in mind that the task’s IP address changes with each new deployment. The diagram below illustrates the network details and container status of a running task:
Once you confirm the update on port 3000, you’ll notice the additional exclamation points in the H1 tag. However, be aware that changes in IP addresses could affect clients accessing the application directly.
A load balancer addresses the potential issue of changing IP addresses by providing a consistent endpoint. It automatically routes traffic to the updated task IP addresses after each deployment, ensuring uninterrupted client connectivity.
By integrating a load balancer, you simplify deployment updates while maintaining reliable access to your application, regardless of changes in the infrastructure.For further reading on container orchestration and managing deployments, consider exploring the following resources: