kodekloud/ecs-project1 and kodekloud/ecs-project2.
Demo web pages:
Project 1 is a minimal Node.js + Express app that serves a simple HTML page.
Project 1 — application files
Example HTML served at the root (views/index.ejs or similar):Launching the app using the ECS console (Quick Start wizard)
- Sign in to the AWS Management Console and search for “ECS” → Elastic Container Service.
- If you’re new to ECS, use the “Get started” (quick start) wizard to bootstrap resources — it speeds up the initial deployment. After the wizard completes, you can delete the created resources and re-deploy manually to learn each component in detail.
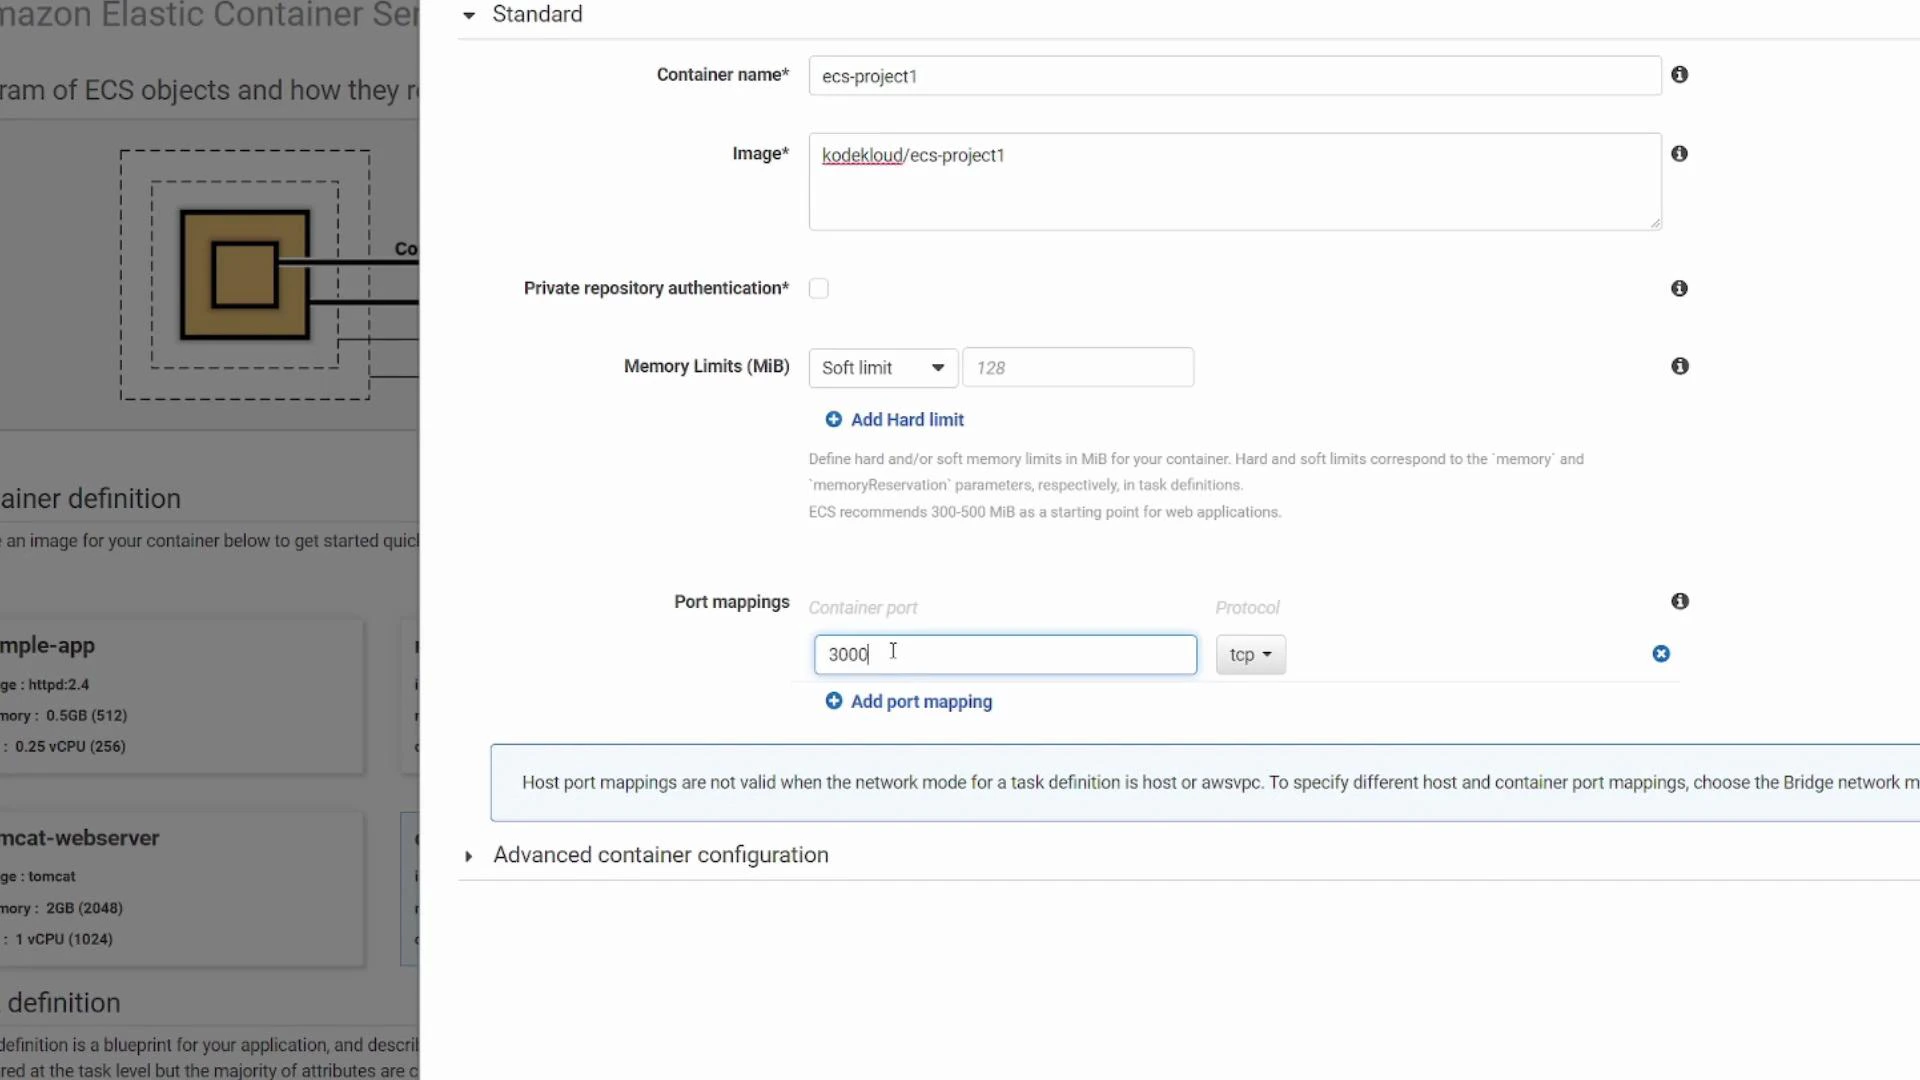
- In the wizard choose:
- “Custom” for container configuration.
- Container name: e.g.
ecs-project1 - Image:
kodekloud/ecs-project1 - Container port: 3000 (TCP) — this matches the port the app listens on inside the container.
When using Fargate with awsvpc networking, the host port is effectively the same as the container port you configure. If you need to expose the container on a different external port or run multiple containers that would otherwise require the same host port, use a load balancer or choose a different networking mode/EC2 setup and configure host ports accordingly.
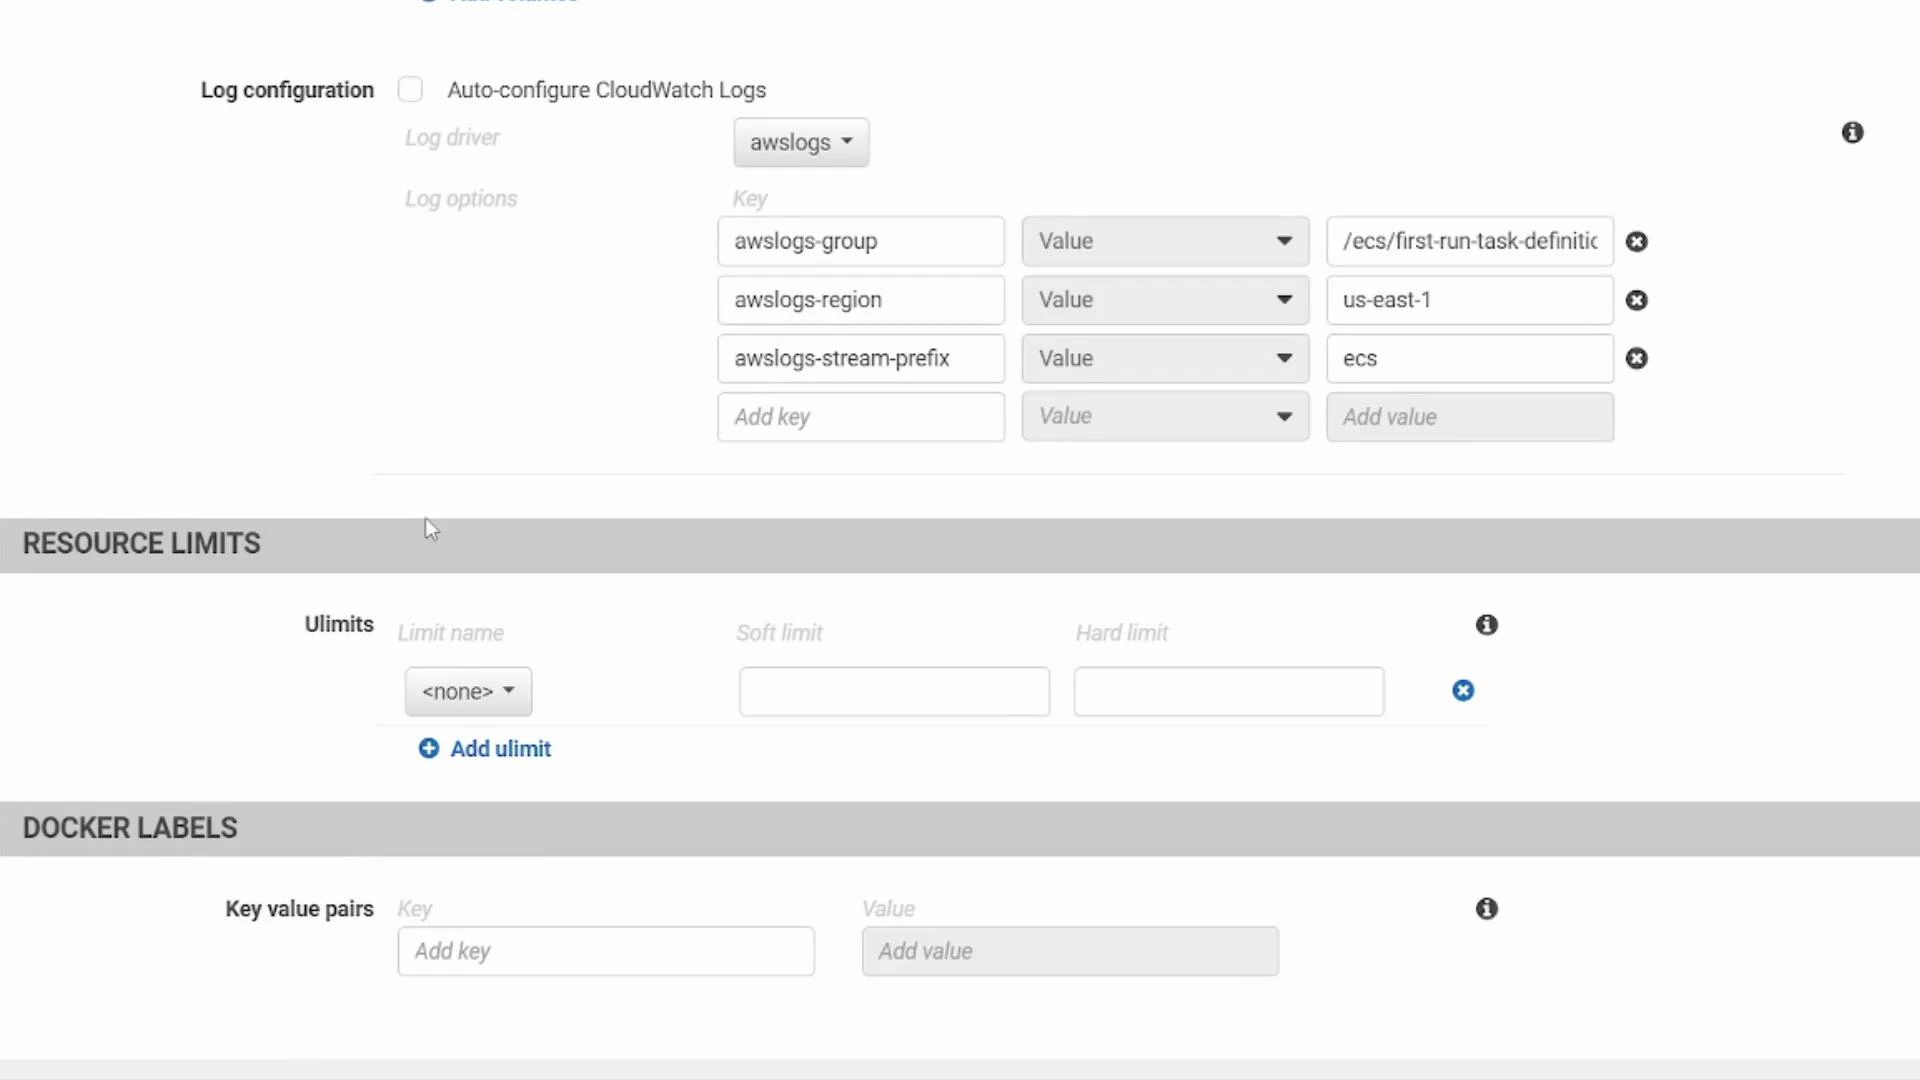
Advanced container settings to consider
Open the advanced container configuration to set:- Health checks (container-level probes)
- Environment variables
- Volumes and mount points
- Logging (awslogs for CloudWatch)
- Resource limits (CPU/memory)
- Docker labels
- awslogs-group
- awslogs-region
- awslogs-stream-prefix
docker run.
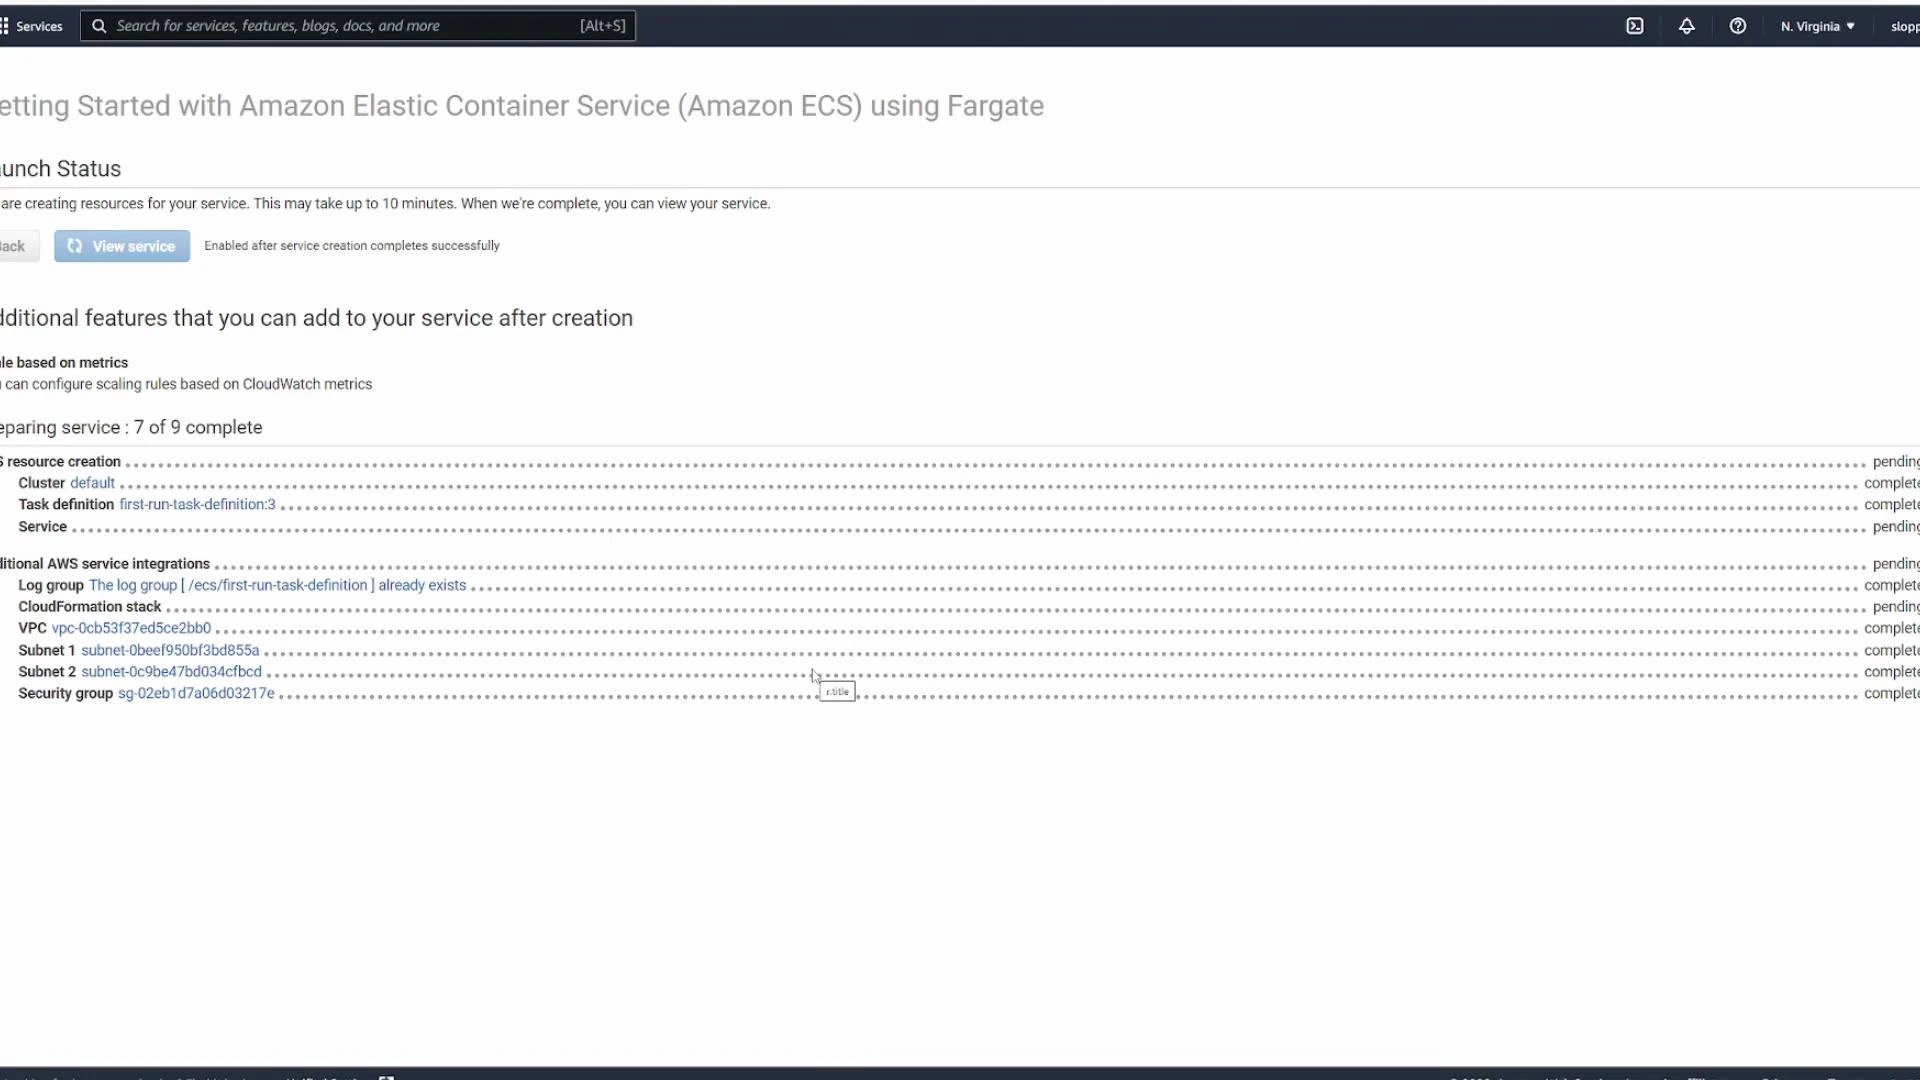
Service and cluster creation (wizard)
Continue the wizard to define the service:- The wizard proposes a service name, e.g.
ecs-project1-service. - For this quick-start, leave the load balancer option set to “None” (you can add a load balancer later for external traffic or blue/green deployments).
- The wizard creates a cluster and supporting networking resources by default.
- Cluster: logical grouping of the compute resources where tasks run.
- Wizard-created cluster typically includes a dedicated VPC and subnets (it does not use your default VPC unless you opt in).
- Container definition
- Task definition
- Service
- Cluster
- Networking (VPC, subnets, security group)
Post-deployment: verify, test, and clean up
- Inspect running tasks in the cluster to verify status and task logs.
- If your tasks are in private subnets, you may need a load balancer, NAT, or a public subnet with correct security group rules to access the app externally.
- Test the application by hitting the task ENI (if public) or the load balancer DNS (recommended for production traffic).
- How task definitions map to container settings
- How services maintain desired task counts and perform deployments
- How networking (VPC, subnets, security groups) and load balancers connect external traffic to tasks
Quick reference table
| Resource Type | Purpose | Example / Notes |
|---|---|---|
| Task Definition | Describes one or more containers for a task | Contains container image, port mappings, CPU/memory, env vars |
| Service | Runs and maintains desired number of tasks | Use to attach load balancer or update deployments |
| Cluster | Logical group for tasks and services | Wizard creates a dedicated VPC/subnets by default |
| Load Balancer | Distributes external traffic to tasks | Recommended for production and multiple tasks on same port |
| CloudWatch Logs | Centralized logging for containers | Configure awslogs-group & stream prefix in task definition |
Links and references
- Amazon ECS documentation: https://docs.aws.amazon.com/ecs/
- AWS Fargate overview: https://docs.aws.amazon.com/AmazonECS/latest/developerguide/Fargate.html
- awsvpc networking mode: https://docs.aws.amazon.com/AmazonECS/latest/developerguide/task-networking.html
- AWS CloudWatch Logs: https://docs.aws.amazon.com/cloudwatch/index.html
- Docker Compose reference: https://docs.docker.com/compose/
Public container images are convenient for demos, but avoid using unvetted public images in production. Always validate or build your own images, scan for vulnerabilities, and control image sources via private registries or IAM-based access.