GitLab CI/CD: Architecting, Deploying, and Optimizing Pipelines
Optimization Security and Monitoring
Adding a Pipeline status amp Code Coverage Badge
Badges in GitLab offer a concise, visual way to display essential project metrics—such as build health and test coverage—directly in your repository. Each badge is a small image that links to a URL, and you can define them at either the project or group level. They appear right below your project description, keeping stakeholders informed at a glance.
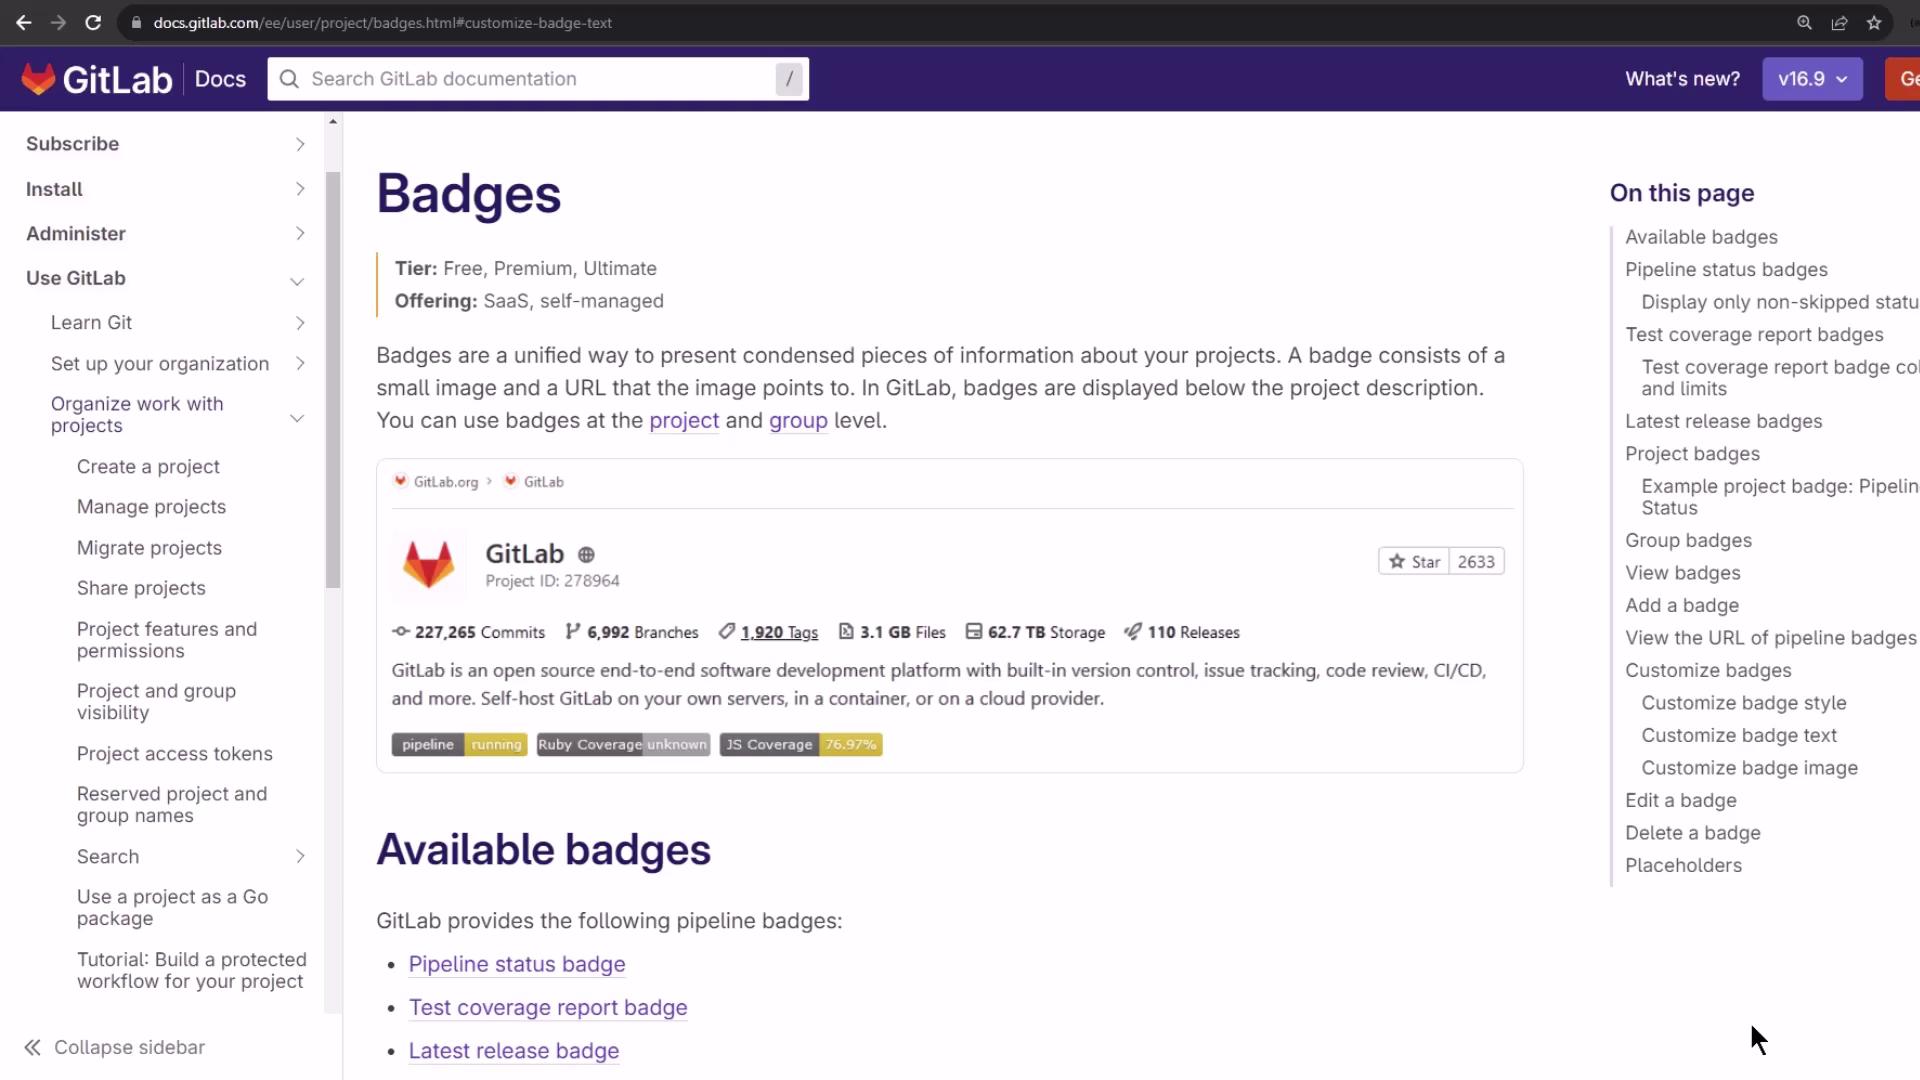
Types of GitLab Badges
Use GitLab’s built-in badges or roll your own to surface the data your team cares about:
| Badge Type | Description |
|---|---|
| Pipeline status | Shows the latest pipeline state (pending, running, passed, failed, etc.). |
| Test coverage report | Displays the percentage of code covered by tests, based on your coverage job output. |
| Latest release | Indicates your project’s most recent release version. |
| Custom badge | Let you specify any image URL and link for other metrics (e.g., security scan). |
You can also adjust badge colors and styles to match your organization’s branding.
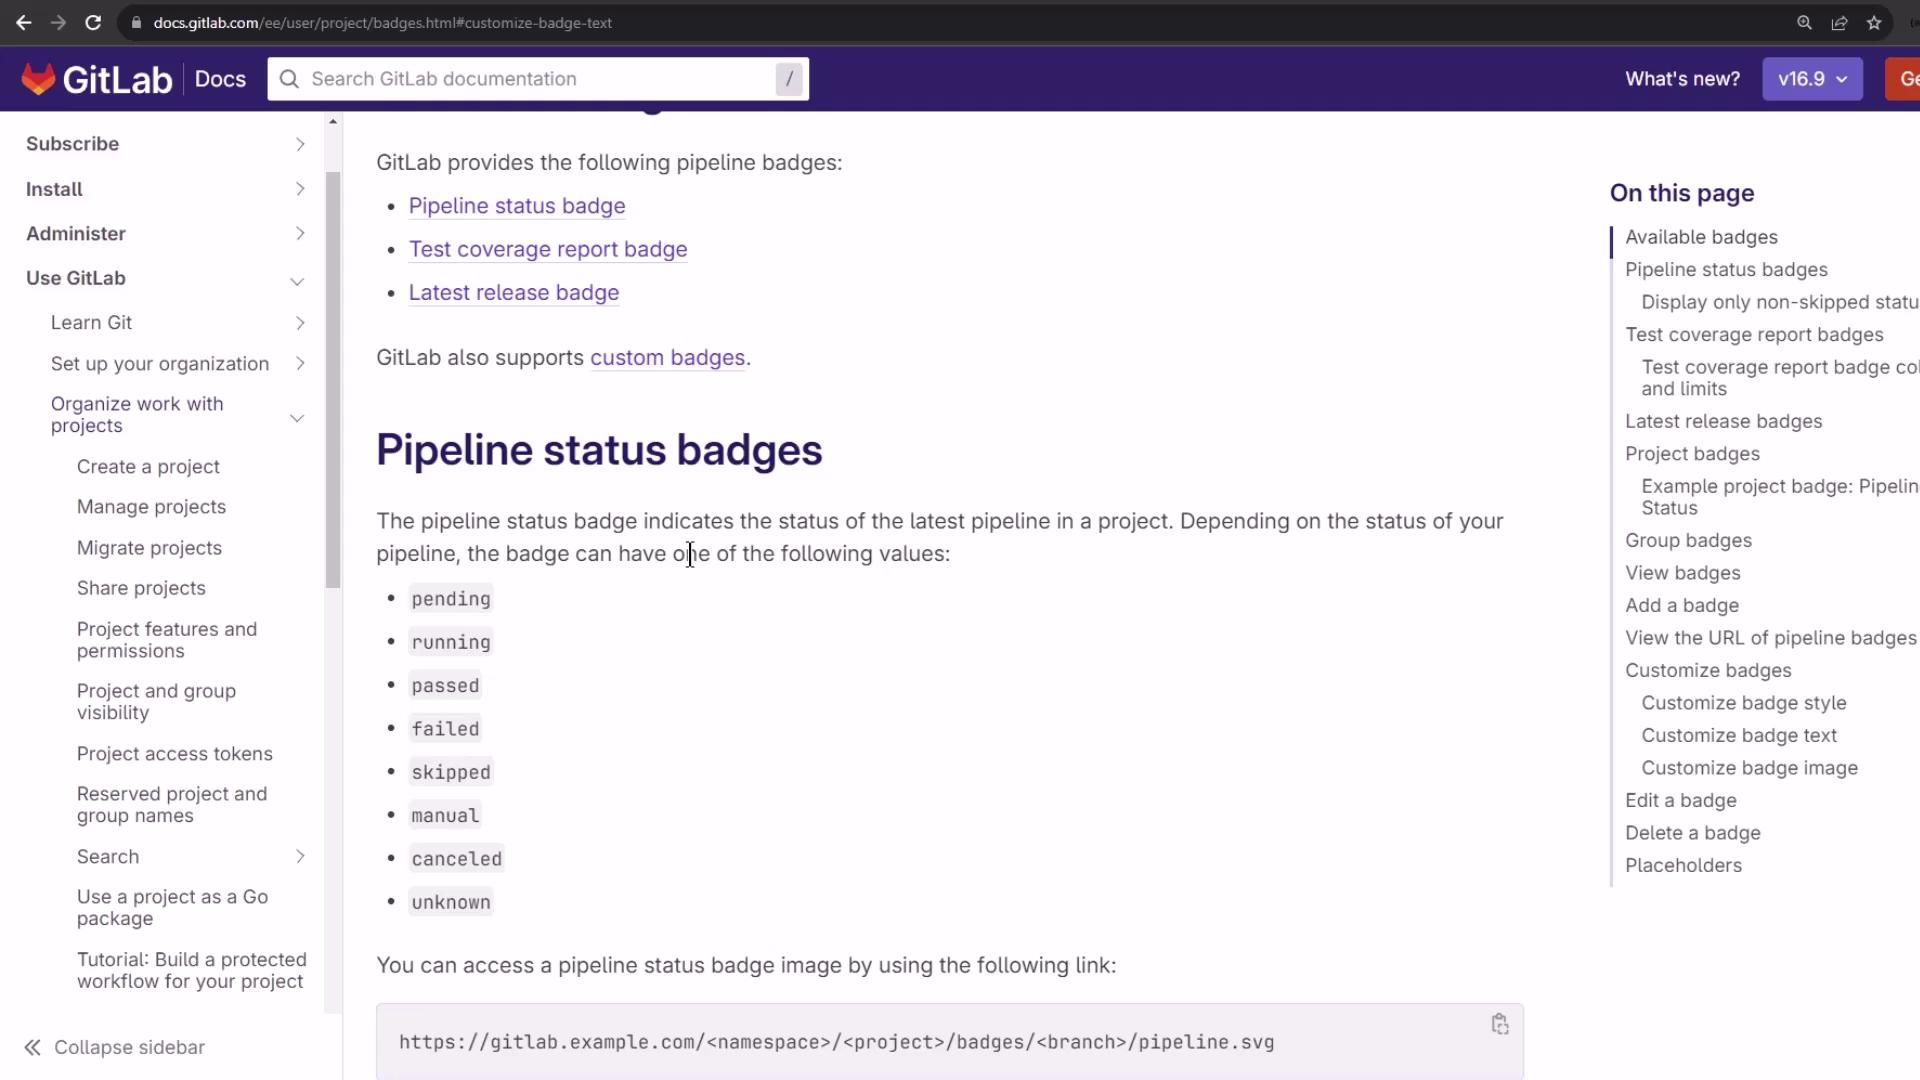
Badge URL Example
If you prefer hosting your own SVG badges in the repository, reference them with a raw file URL:
https://gitlab.example.com/<project_path>/-/raw/<default_branch>/my-image.svg
Note
Hosting badges in your repo makes them versioned alongside your code. Just ensure the branch name and file path are correct.
Configuring Pipeline Status & Coverage Badges
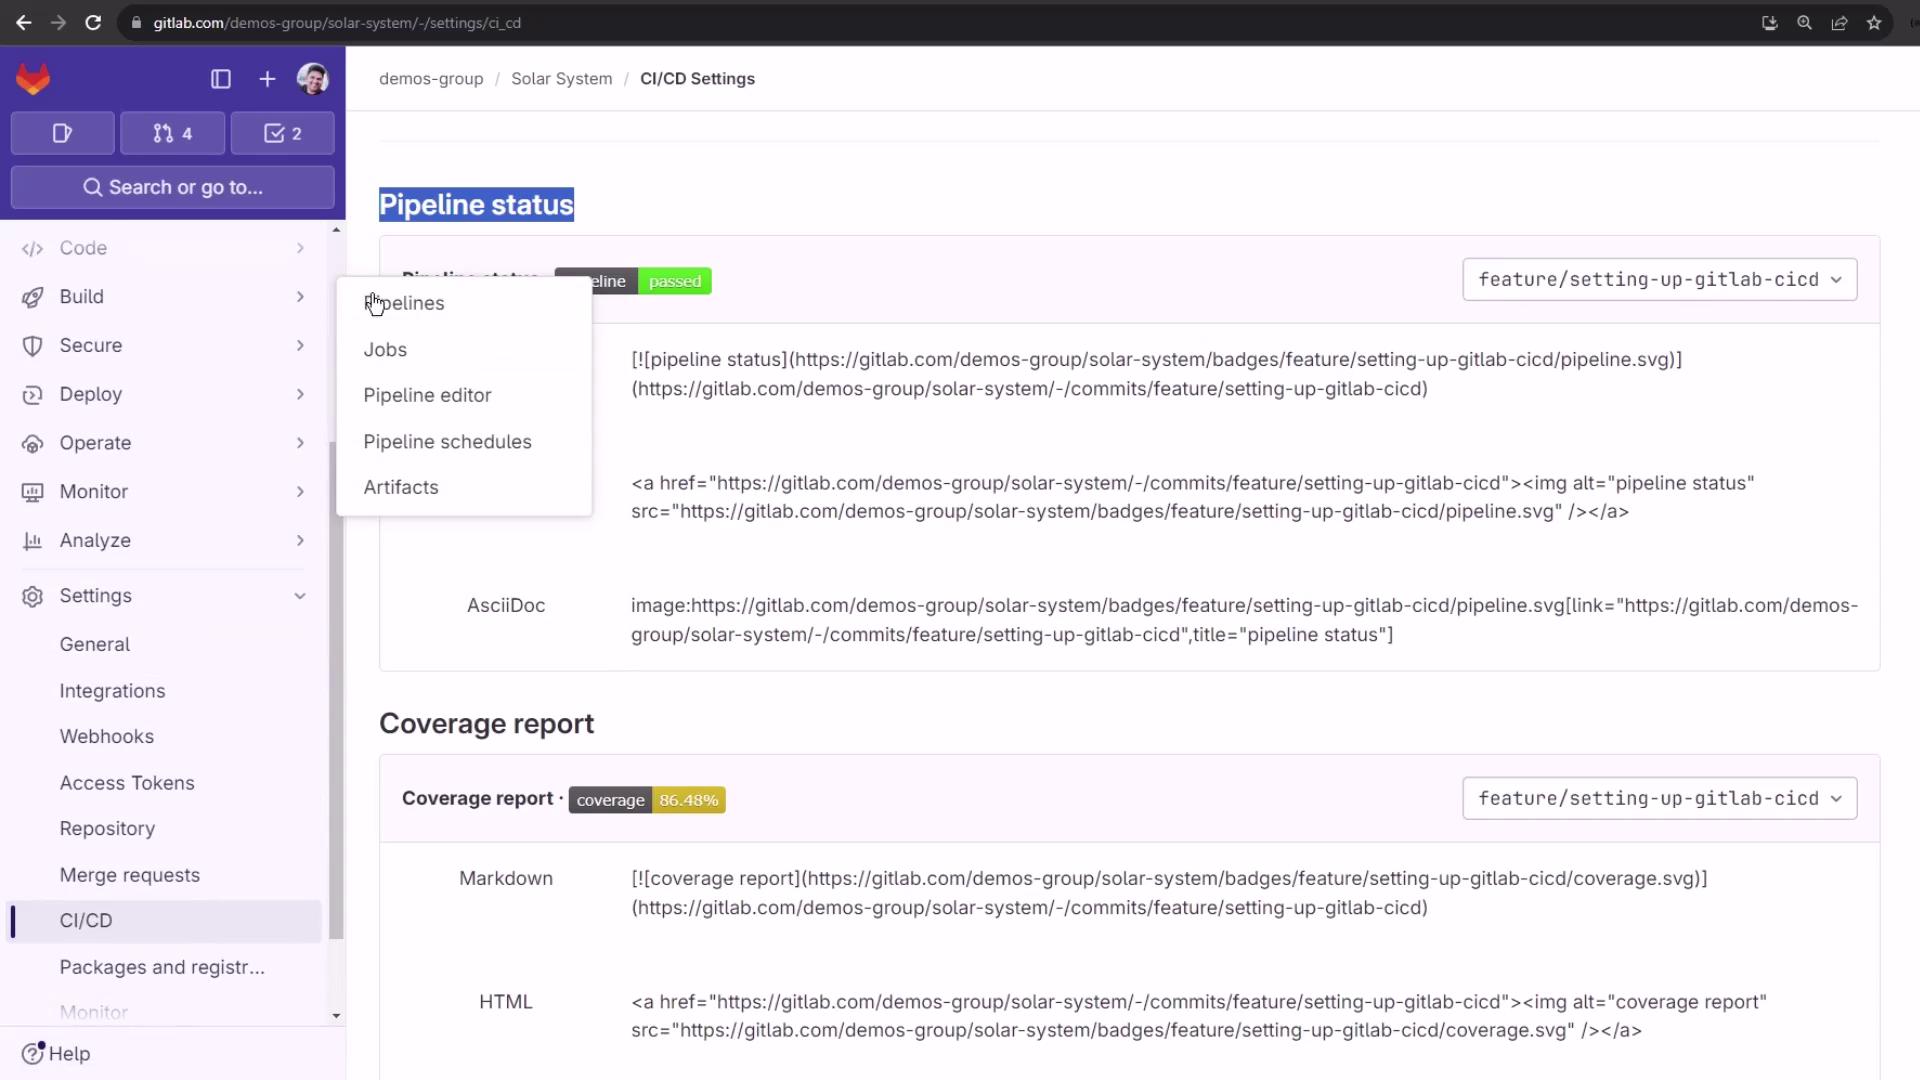
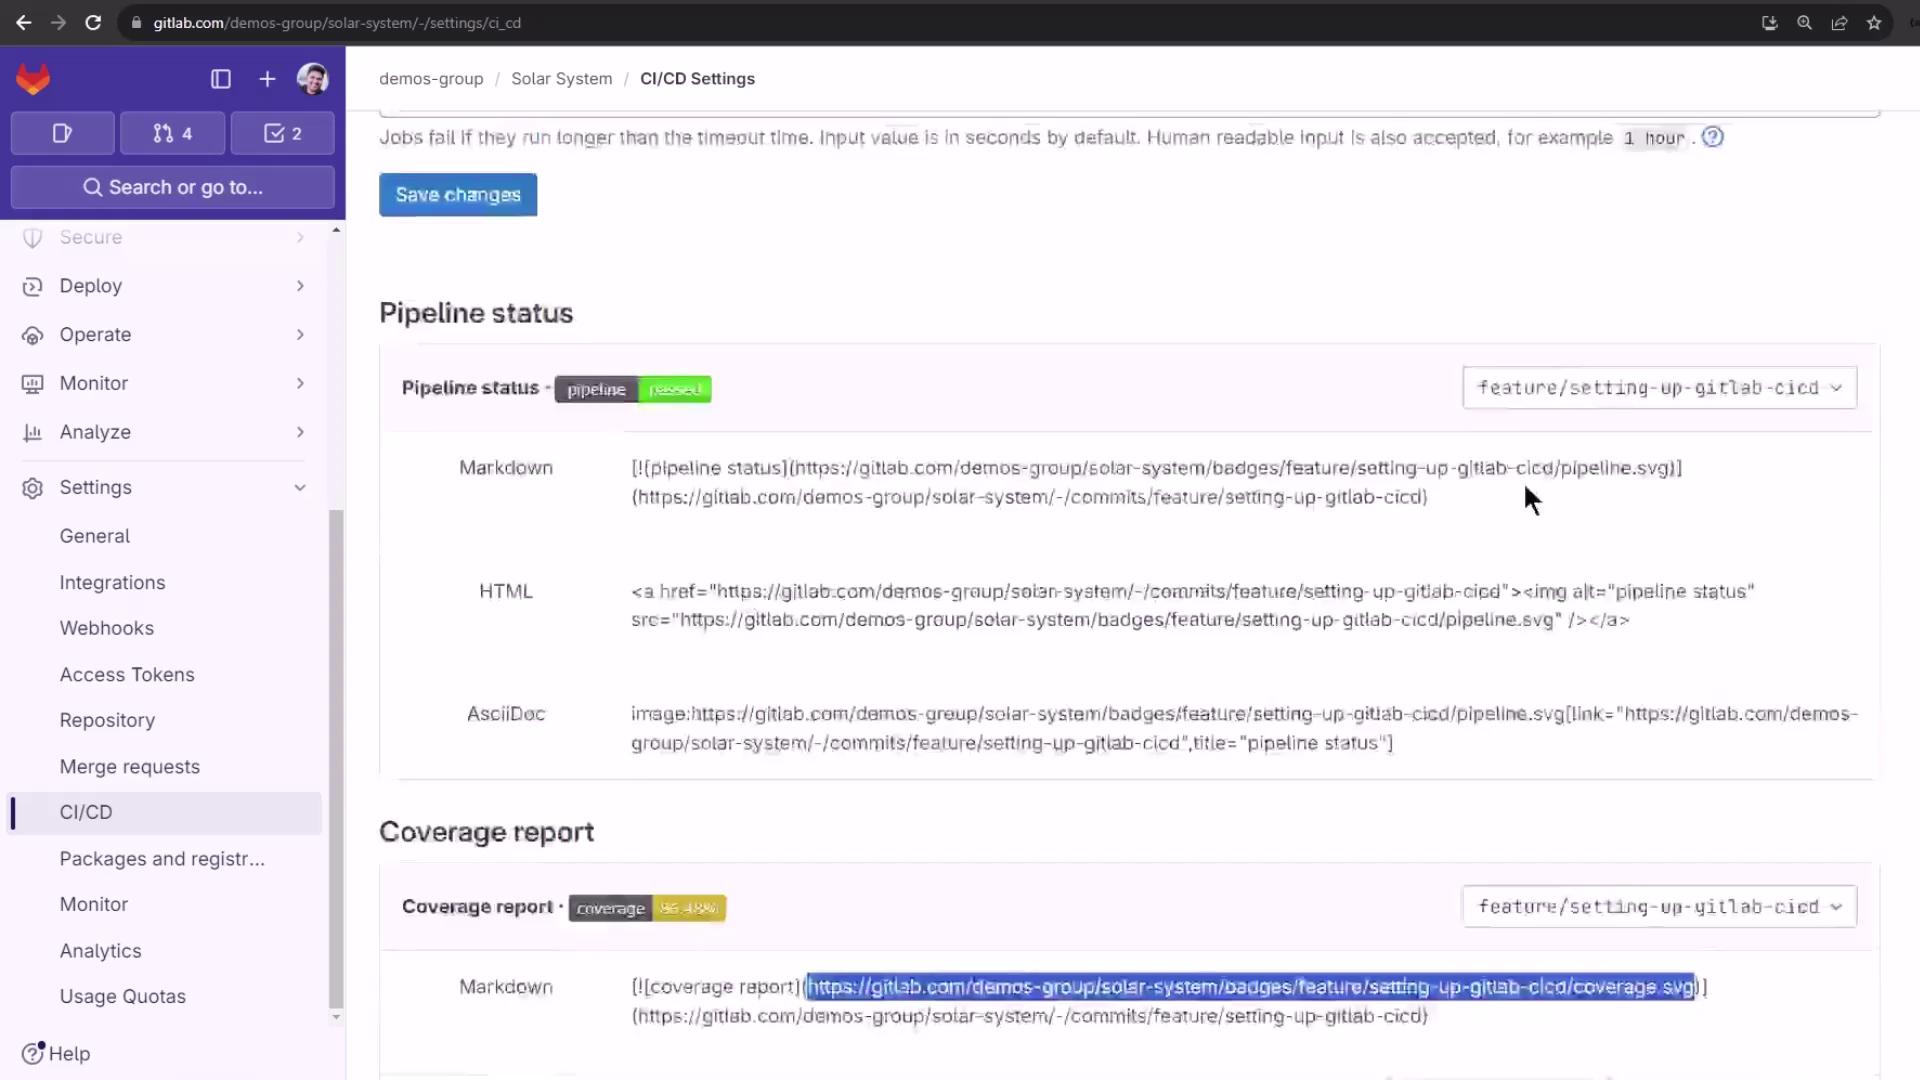
- Navigate to Settings ➔ CI/CD in your project.
- Expand the General pipelines section.
- Scroll down to Pipeline status and Coverage report.
GitLab will automatically generate two badge URLs:
- Pipeline status: Reflects the last pipeline’s outcome.
- Coverage report: Shows the test coverage percentage only if a coverage job exists.
Warning
The coverage badge will appear only when your pipeline includes a job that outputs a coverage metric. Ensure you’ve configured a coverage: /regex/ in your job definition.

Badge Formats & Customization
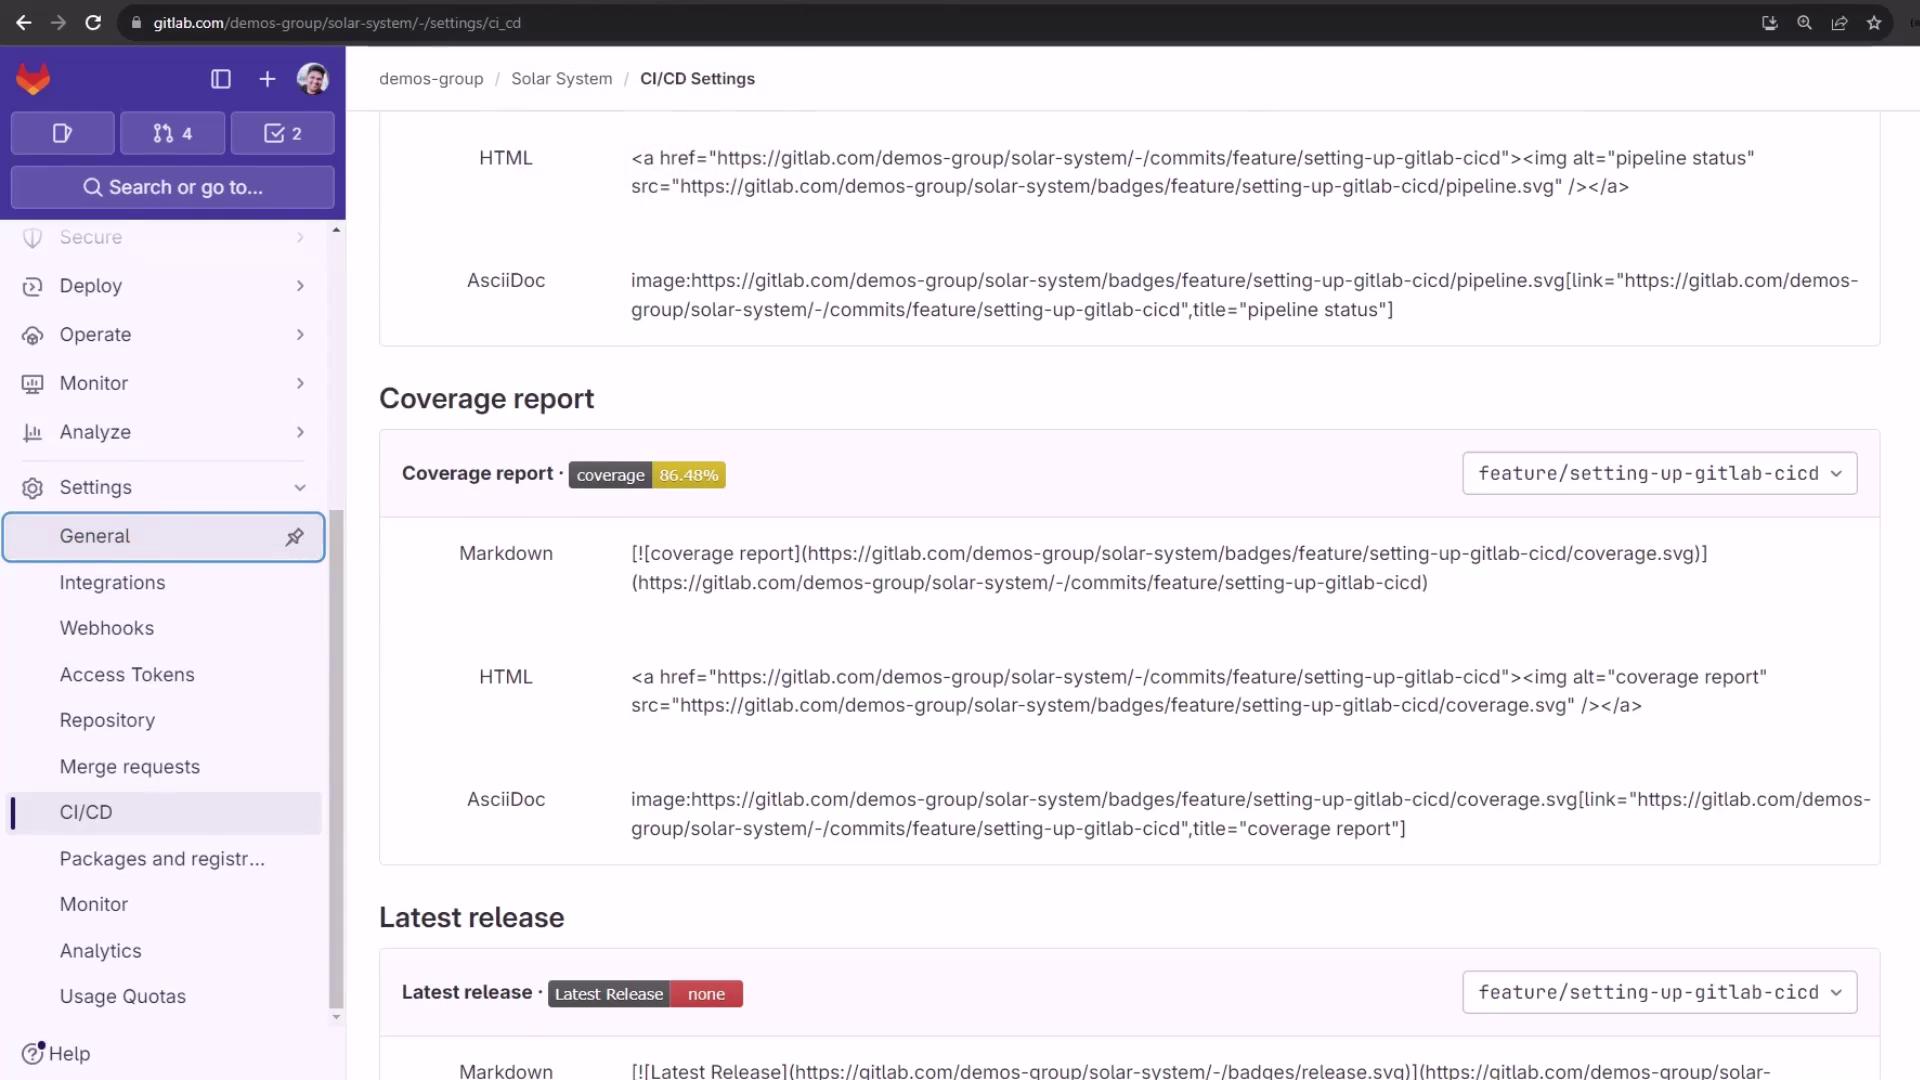
Badges support Markdown, HTML, and AsciiDoc embed formats. You can also target specific branches by appending ?ref=<branch> to the badge URL. Coverage badges change color based on percentage thresholds—up to five levels—which you can customize via URL parameters.
Adding Badges to Your Project
To add badges under your project description:
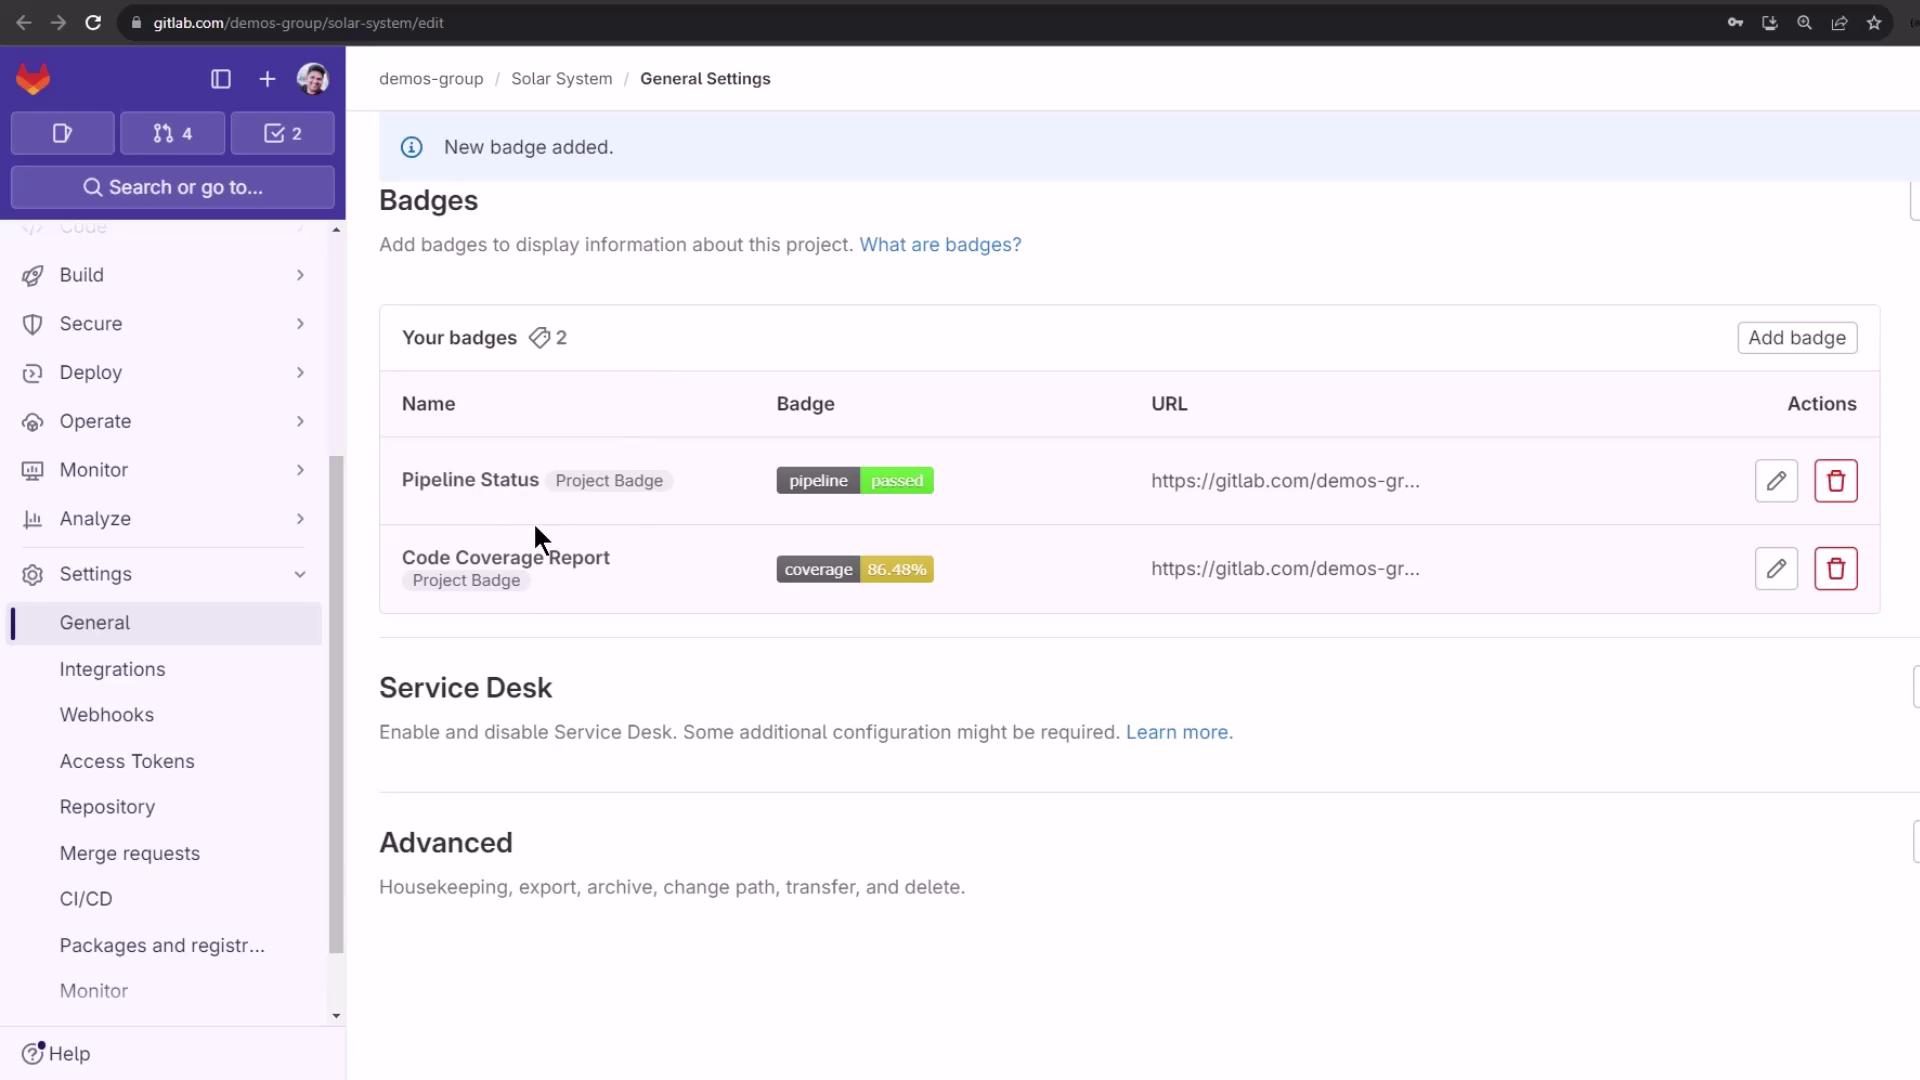
- Go to Settings ➔ General.
- Find the Badges section and click Add badge.
- Complete the fields:
- Name: A descriptive label (e.g.,
Pipeline Status). - Link URL: Destination when the badge is clicked.
- Badge image URL: The SVG endpoint generated by GitLab.
- Name: A descriptive label (e.g.,
- Click Add badge to save and preview.
Example Configuration
Pipeline Status
- Name: Pipeline Status
- Link:
https://gitlab.example.com/<project_path>/pipelines - Image: Paste your pipeline status
.svgURL.
Code Coverage
- Name: Code Coverage
- Link:
https://gitlab.example.com/<project_path>/pipelines - Image: Paste your coverage report
.svgURL.
After saving, you’ll see a live preview. Confirm and you’re done!
Viewing Badges in Your Project
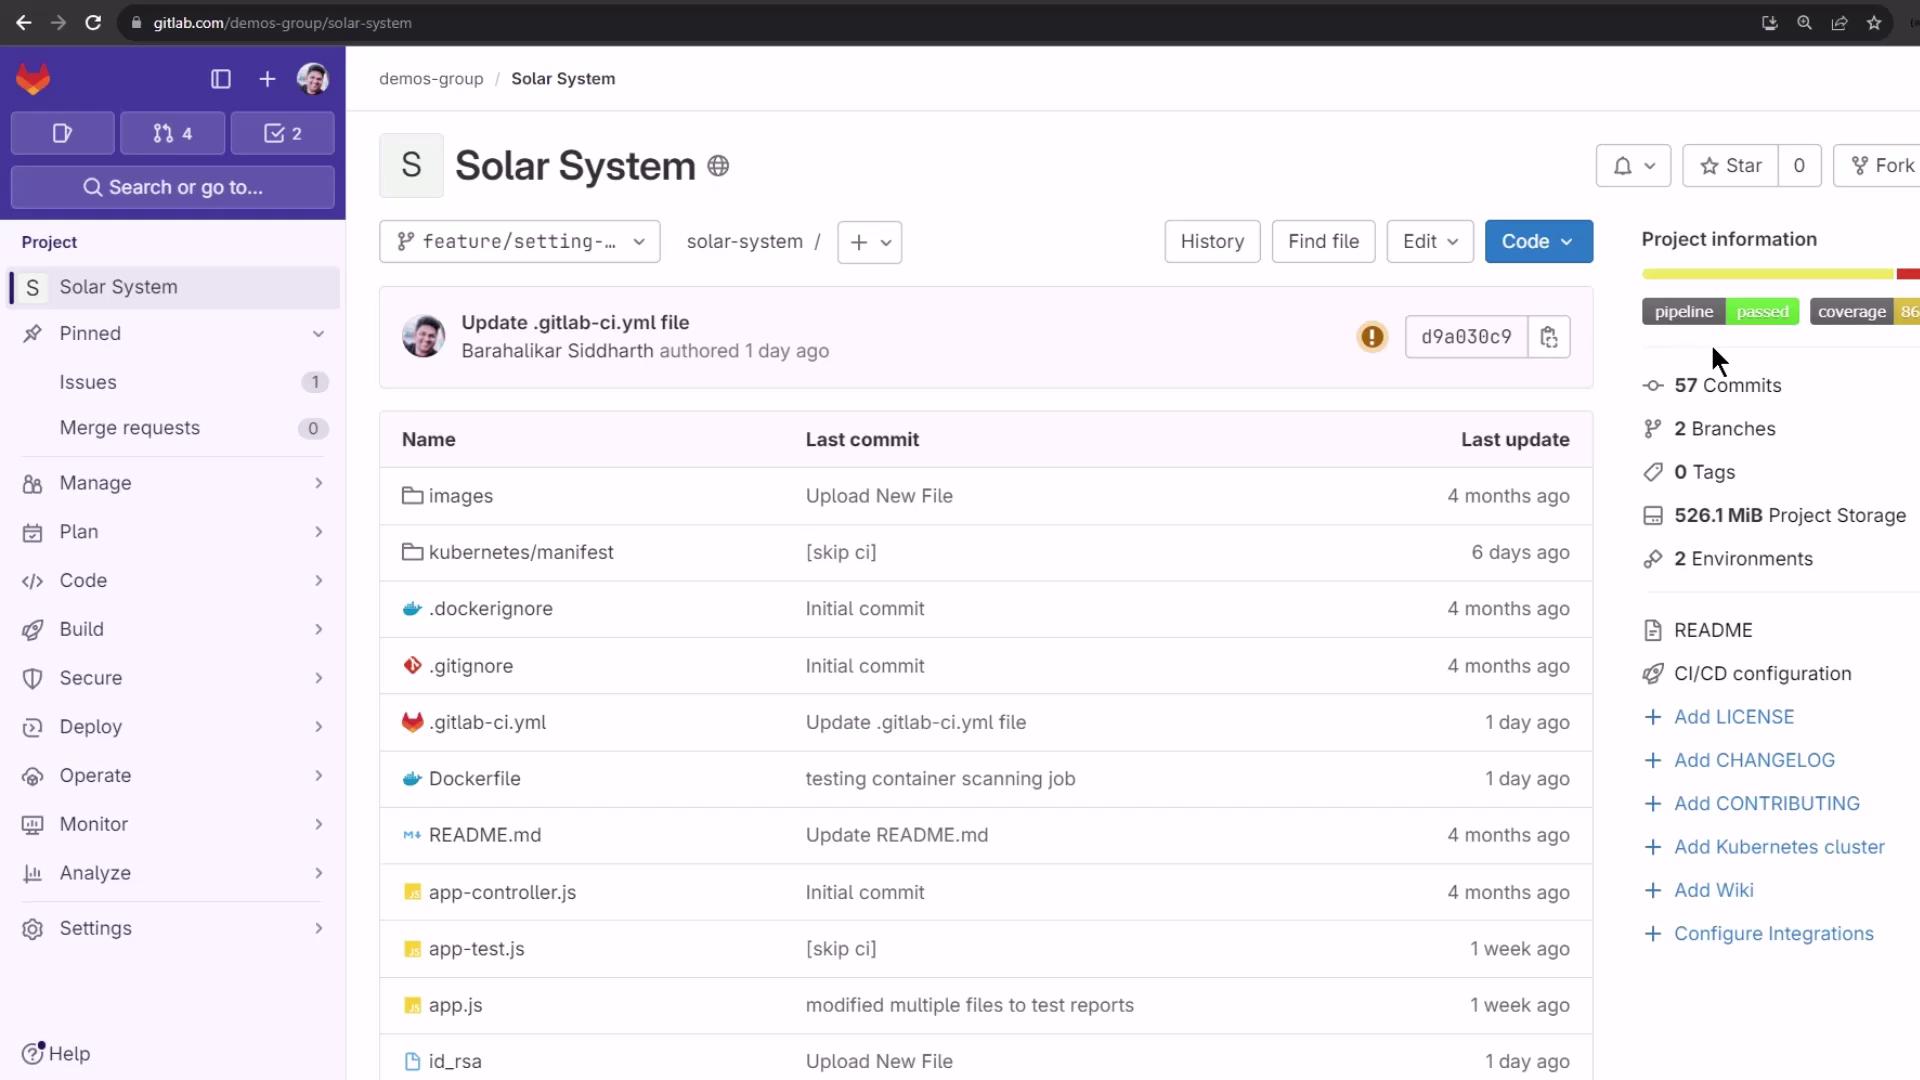
Return to your project’s main page. The badges now appear beneath the project description, instantly communicating your build health and code coverage to every visitor.
Links and References
Watch Video
Watch video content
Practice Lab
Practice lab