GitLab CI/CD: Architecting, Deploying, and Optimizing Pipelines

Self Managed Runners

Install Project Runner on Linux Machine with Shell Executor

In this tutorial, you’ll learn how to set up a self-managed GitLab Runner on a Linux VM using the Shell executor. We’ll use a simple NodeJS application (runner-demo) that runs unit tests against MongoDB.

Table of Contents


1. Import the runner-demo Project

First, create or import a GitLab project named runner-demo in your group. Make the project public to simplify access.

The image shows a GitLab interface for importing a project, with fields for entering a Git repository URL, project name, and other details. The sidebar includes options like Projects, Groups, and Issues.

This project contains a NodeJS app that connects to MongoDB and executes unit tests.

Note

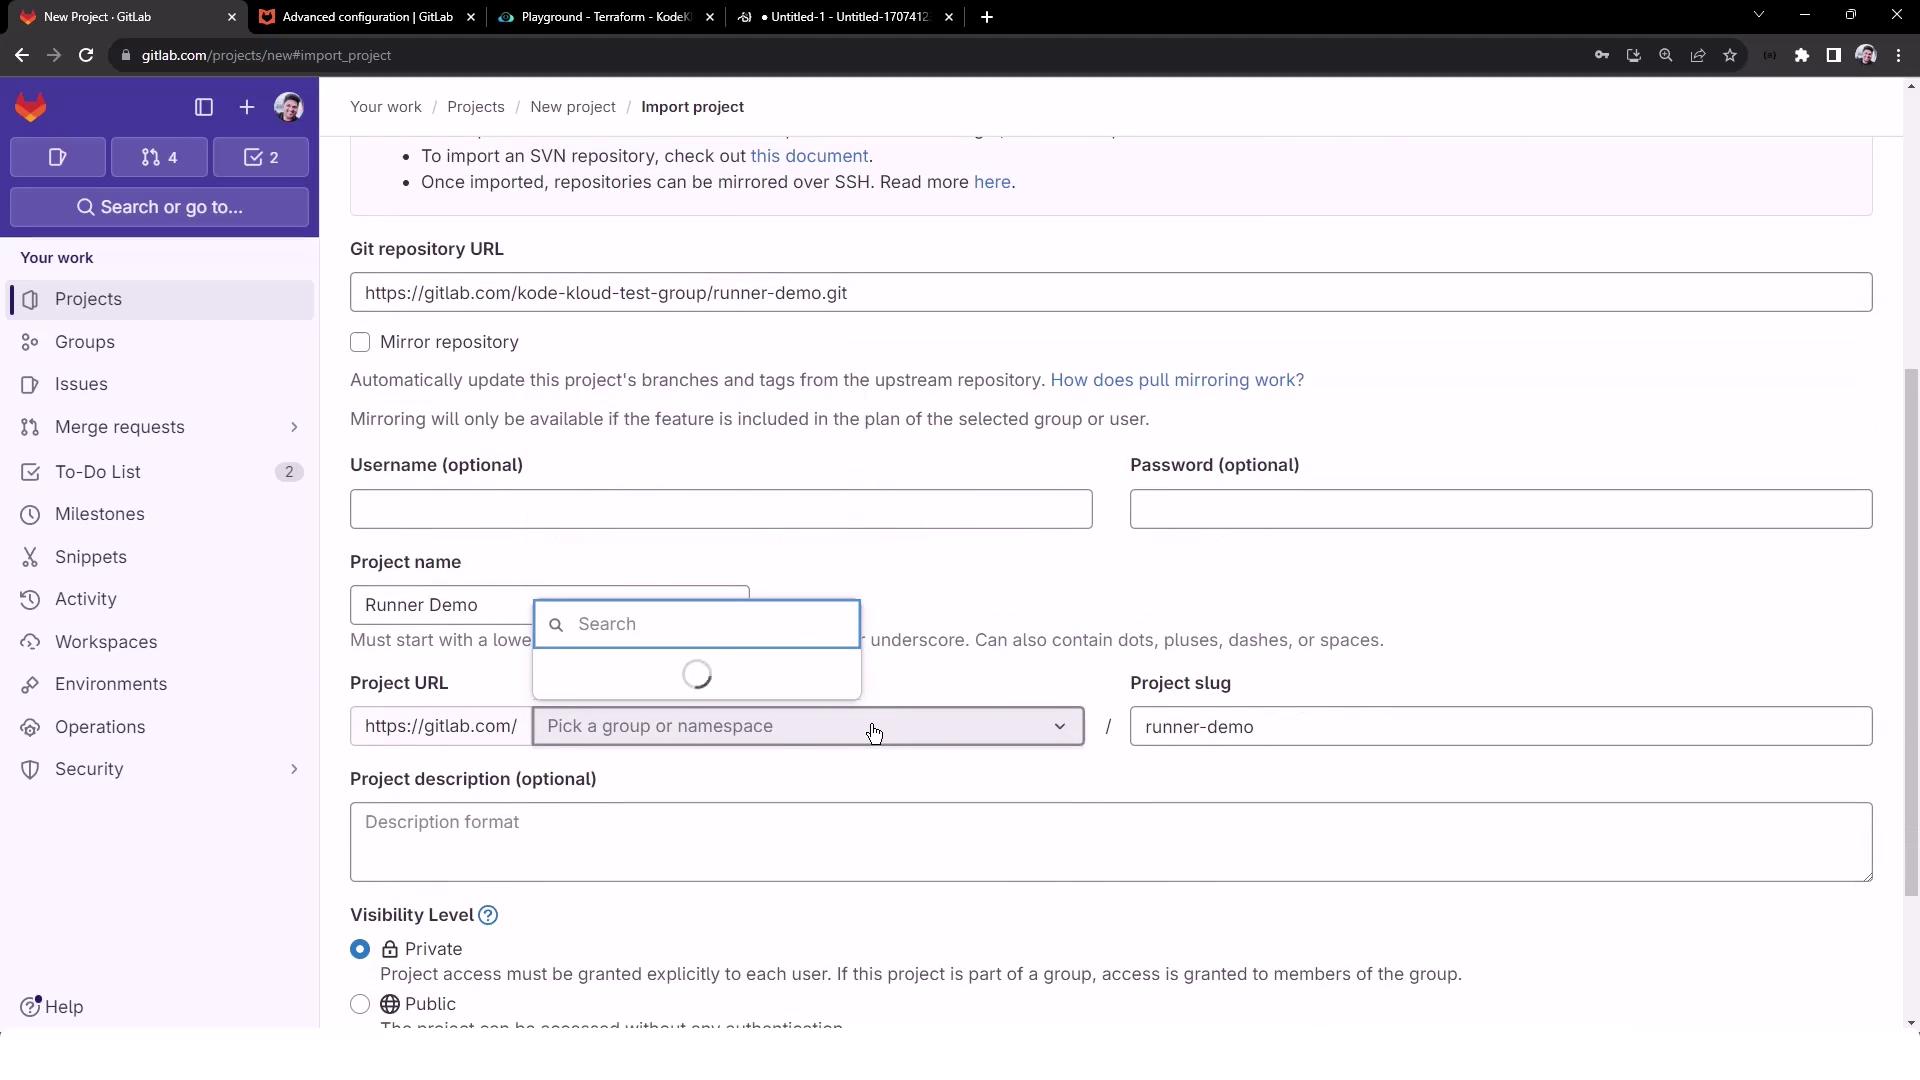
Ensure your MongoDB URI, username, and password are secured via CI/CD variables or a secrets manager—avoid hardcoding sensitive credentials.


2. Define the CI/CD Pipeline

In the root of runner-demo, add a file named .gitlab-ci.yml:

workflow:
  name: Project Level Runner Demo

variables:
  MONGO_URI: 'mongodb+srv://supercluster.d83jj.mongodb.net/superData'
  MONGO_USERNAME: superuser
  MONGO_PASSWORD: SuperPassword

stages:
  - test

unit_testing:
  stage: test
  cache:
    key:
      files:
        - package-lock.json
      prefix: node-modules
    policy: pull-push
    paths:
      - node_modules
  before_script:
    - npm install
  script:
    - npm test

This pipeline defines a single unit_testing job:

StageJob NameActions
testunit_testingInstalls dependencies, runs npm test

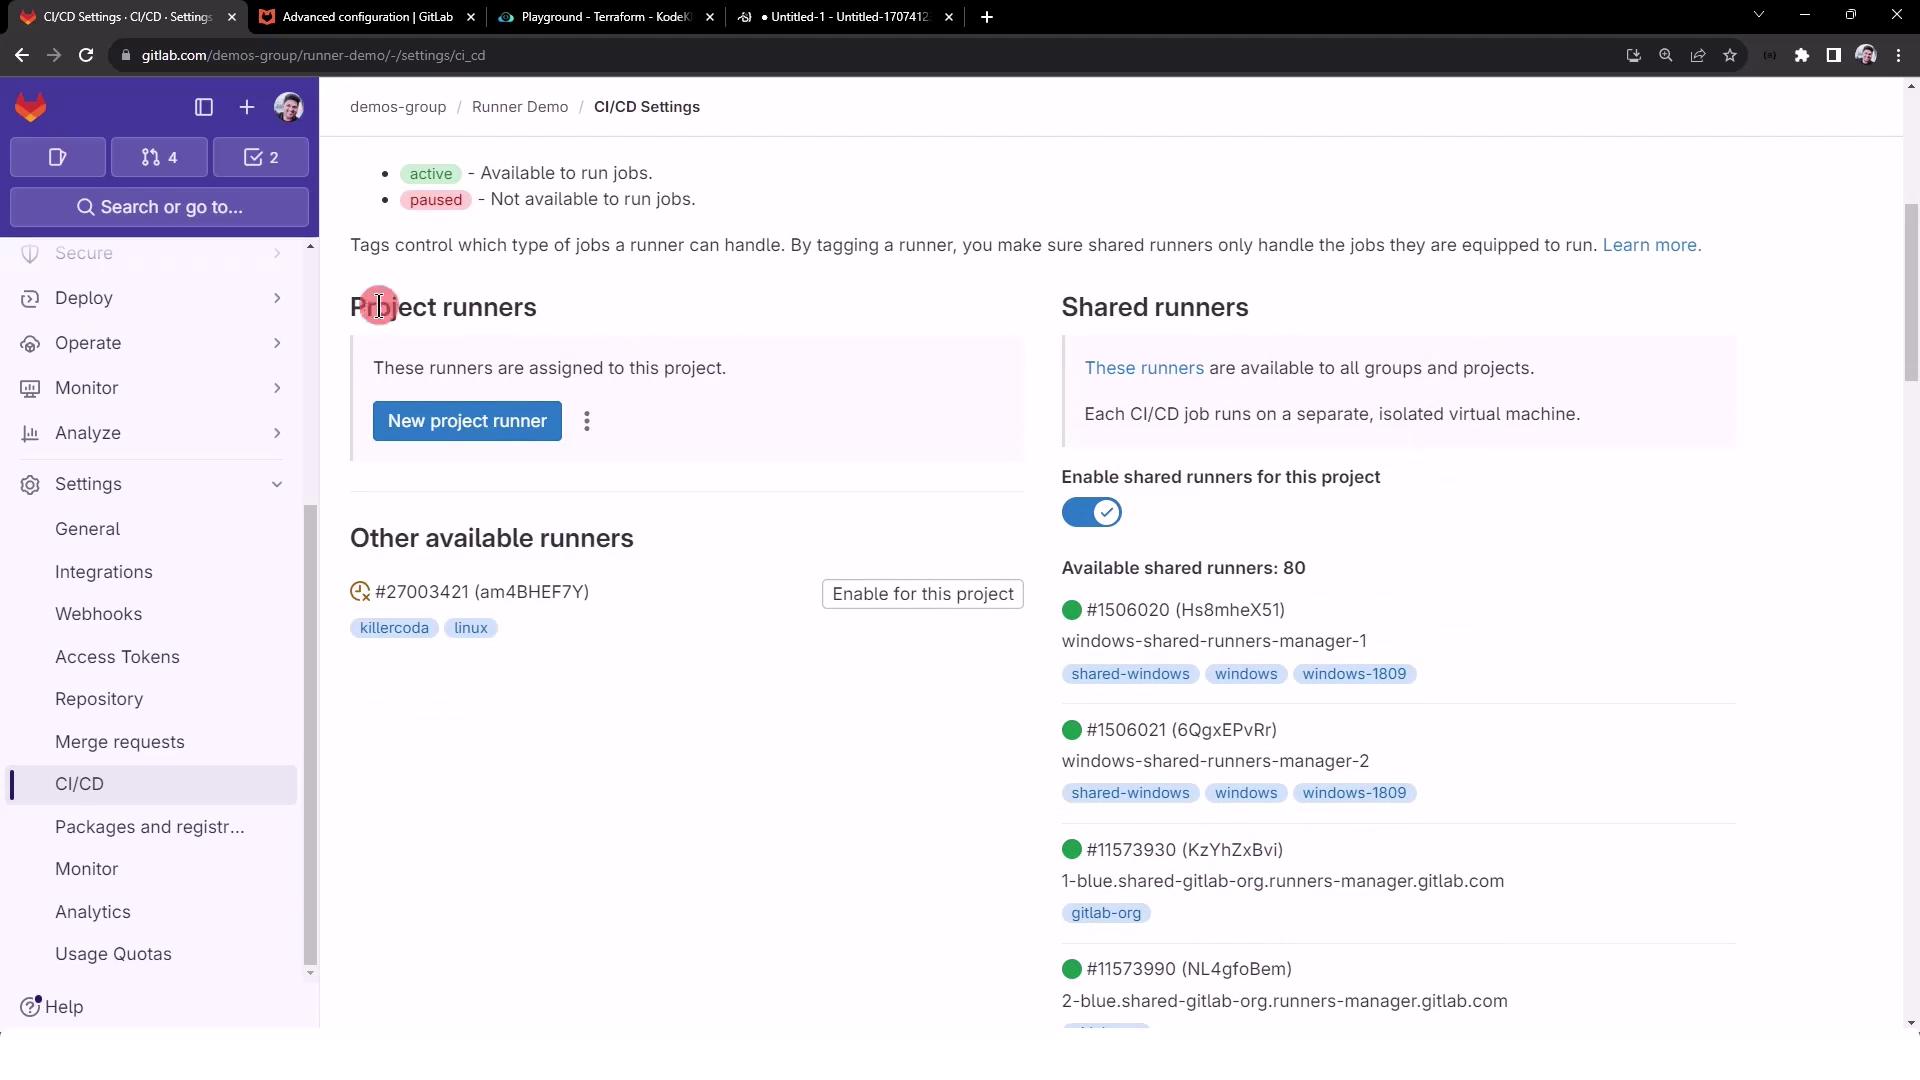
3. Disable Shared Runners and Observe a Stuck Pipeline

GitLab projects default to using shared runners. To demonstrate a self-managed runner, disable them:

  1. Navigate to Settings > CI/CD > Runners.
  2. Toggle Shared runners off.

The image shows the CI/CD settings page in GitLab, displaying options for configuring project and shared runners. It includes a list of available runners and settings for enabling shared runners for a project.

Commit and push your .gitlab-ci.yml to the main branch. The new pipeline will queue but remain stuck:

The image shows a GitLab interface displaying a pipeline with a pending status. The sidebar includes options like "Issues," "Merge requests," and "Pipelines."

The 
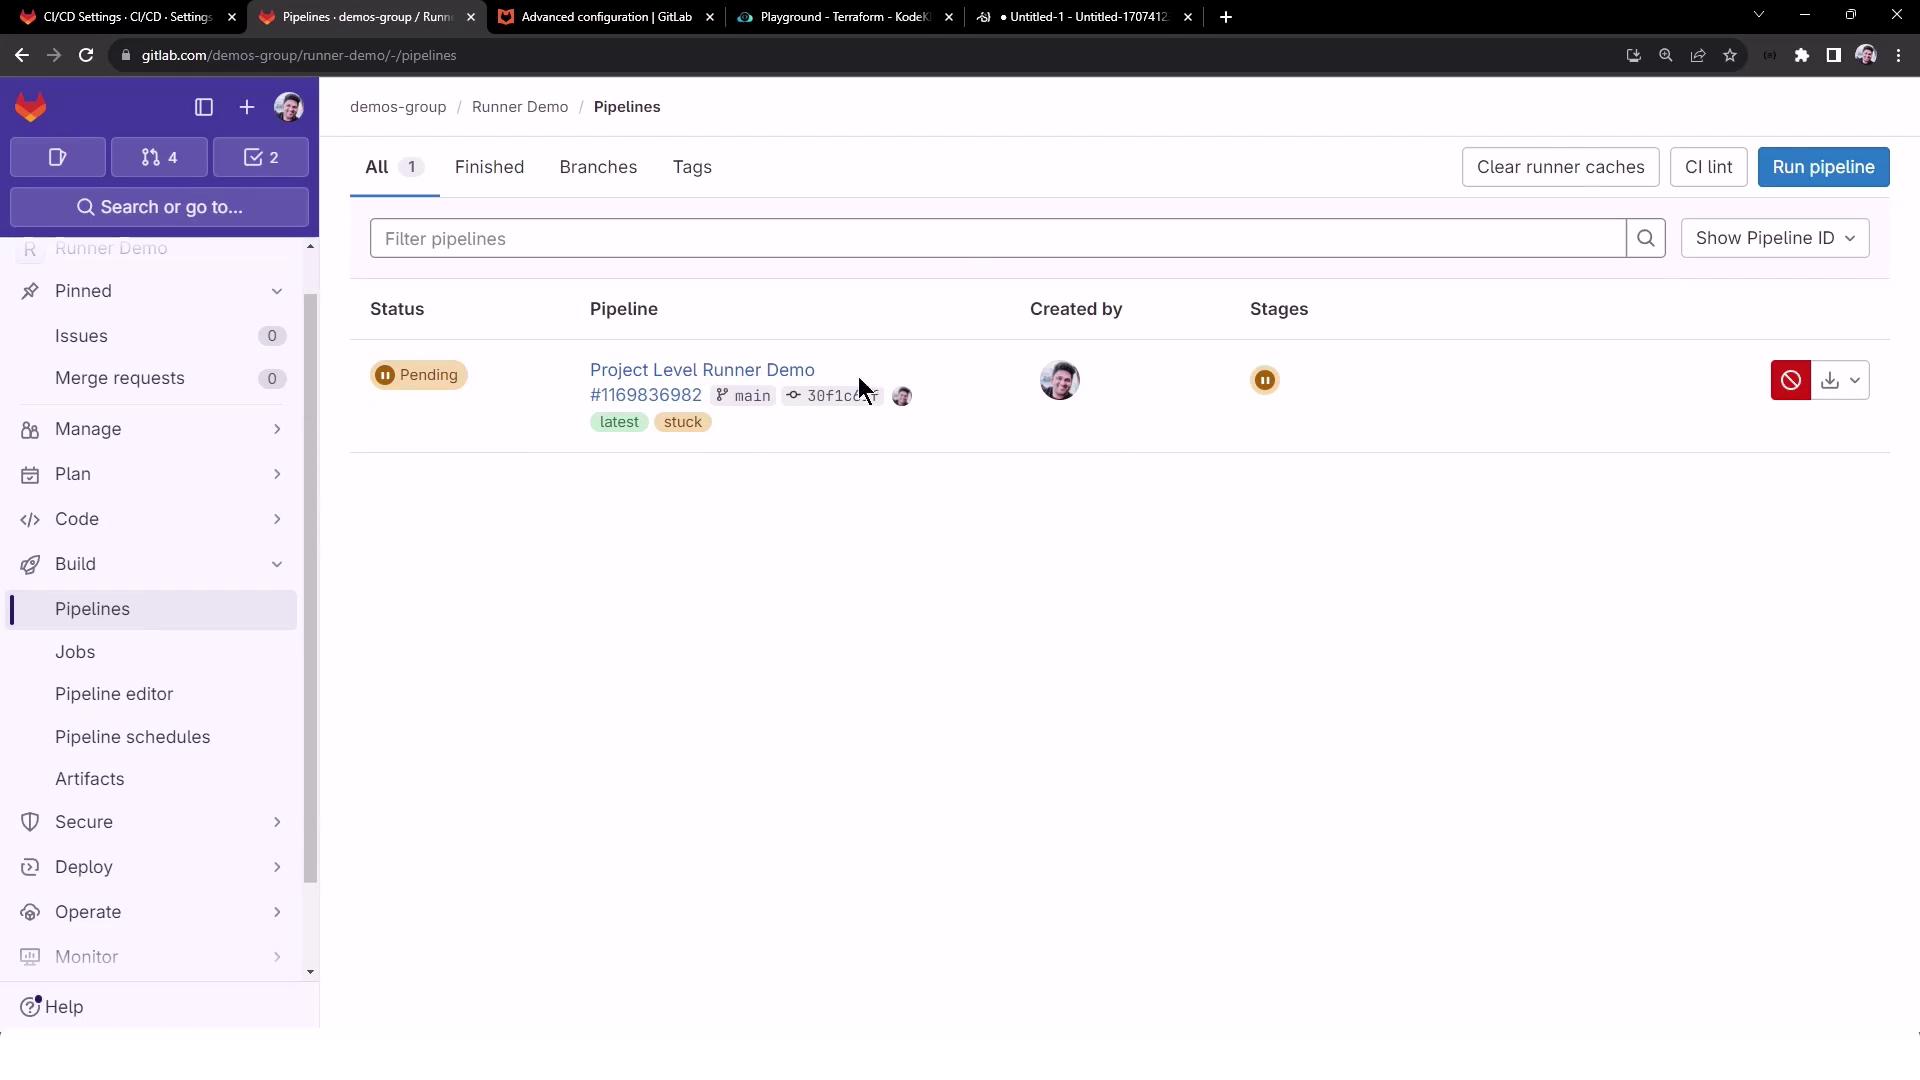
unit_testing job stays pending due to no active runners:

The image shows a GitLab job interface with a message indicating that a job is pending and hasn't started due to a lack of active runners. There's an option to cancel the job.

Warning

Until you register a runner, all CI/CD jobs will remain in a pending state. Make sure to add a project-level runner or re-enable shared runners.


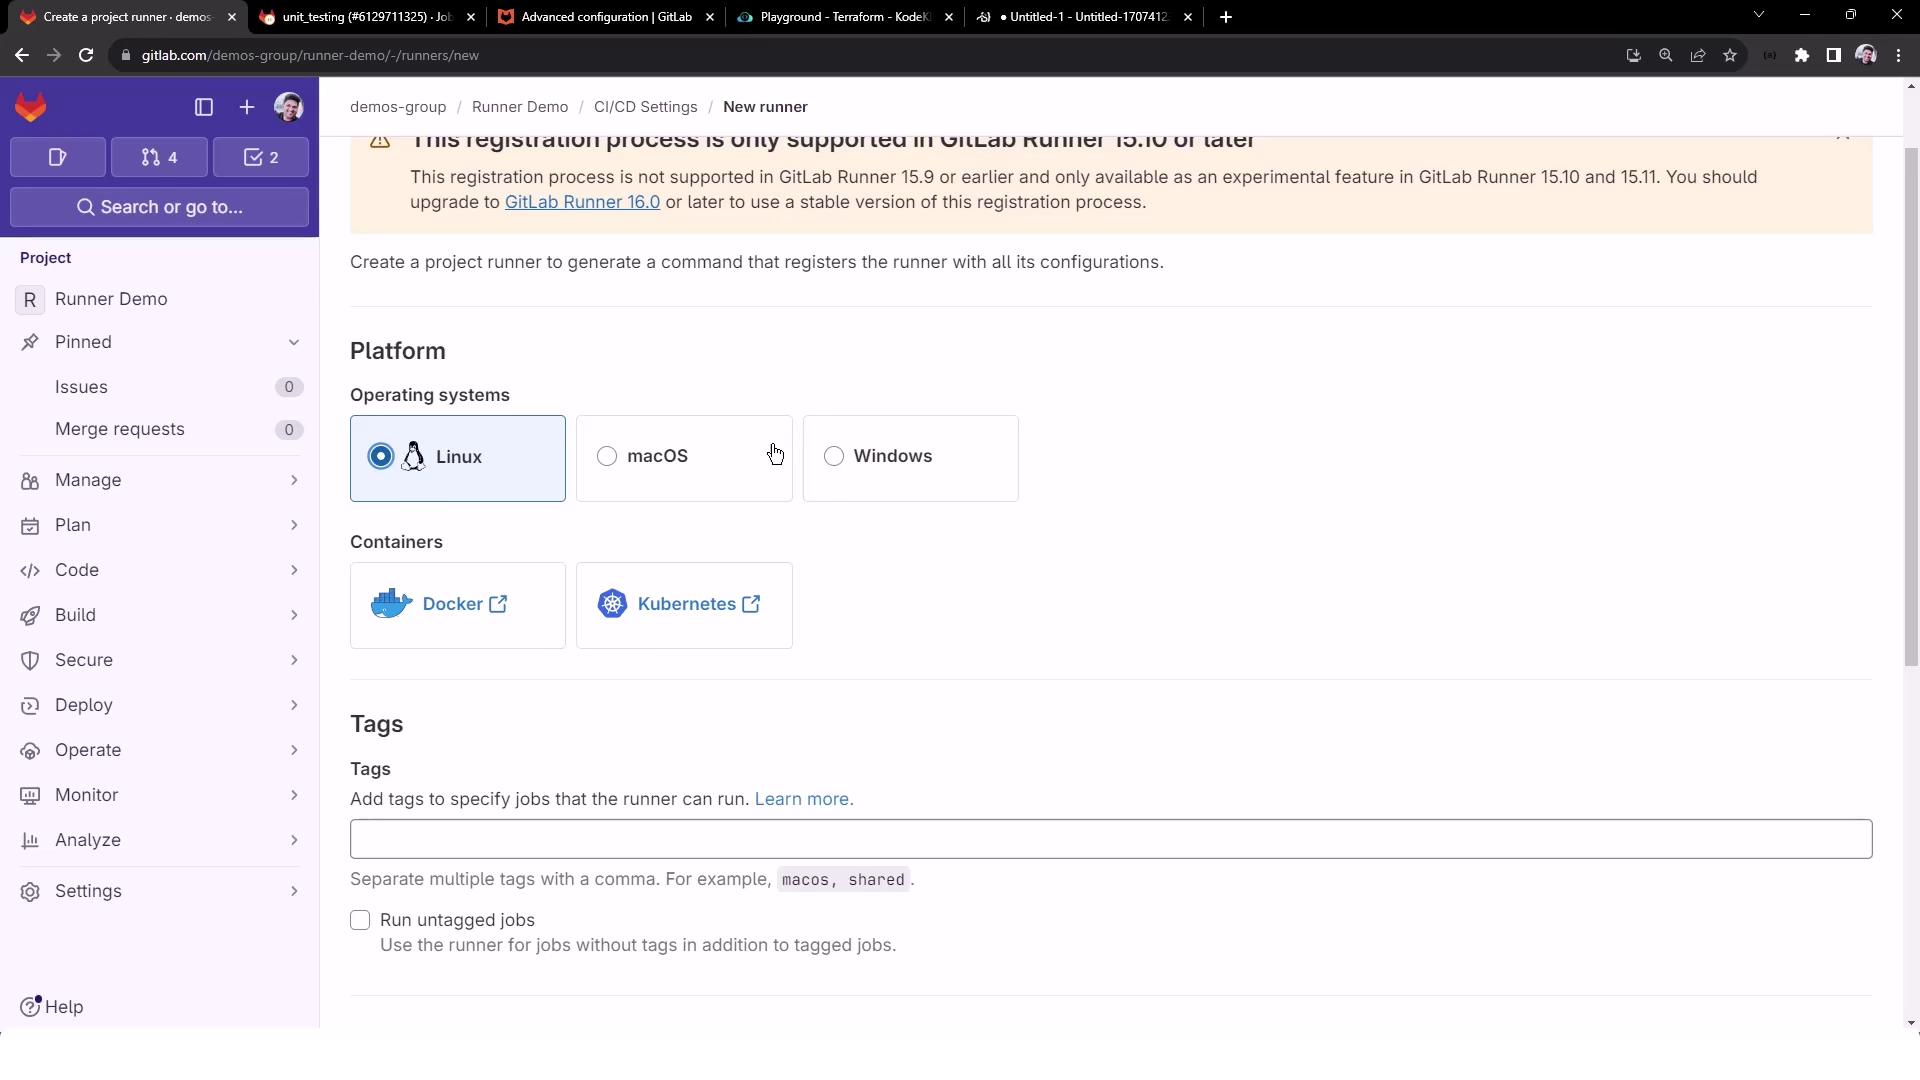
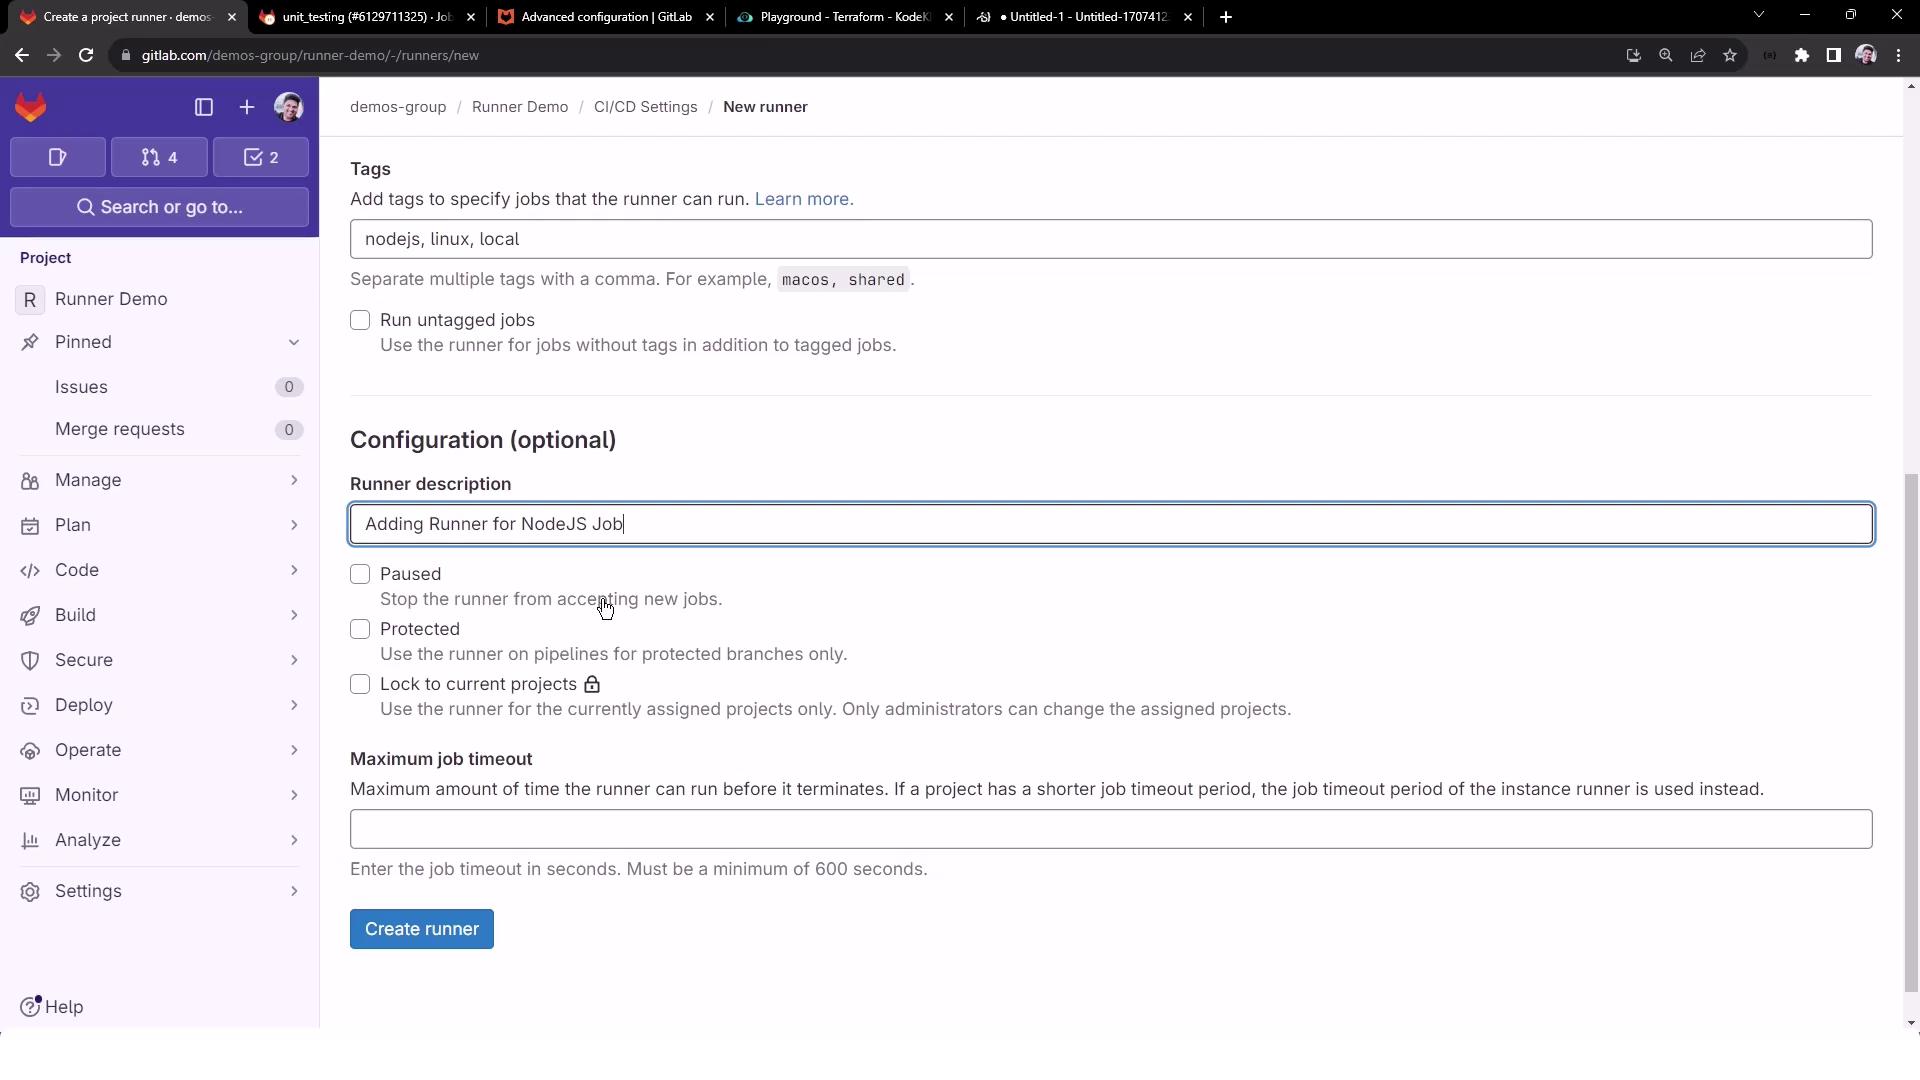
4. Register a New Project Runner

In Settings > CI/CD > Runners > Project Runners, click New runner. Select Linux as the operating system and add a tag to scope job assignment (e.g., NodeJS).

The image shows a GitLab interface for creating a new project runner, with options to select the operating system (Linux, macOS, Windows) and containers (Docker, Kubernetes). There is also a section for adding tags to specify jobs for the runner.

Use the NodeJS tag to target your unit_testing job:

The image shows a GitLab interface for creating a new runner, with options to select the operating system and containers, and a section for adding tags to specify jobs the runner can execute.

Optionally, configure:

  • Runner description
  • Maximum job timeout
  • Protection & pausing settings

The image shows a GitLab interface for configuring a new runner, with options for tags, runner description, and various settings like pausing and protection.

Click Create runner to display the registration token and commands.


5. Install GitLab Runner on Linux VM

On your Linux VM (e.g., Ubuntu), execute the following steps:

# 1. Download the GitLab Runner binary
sudo curl -L --output /usr/local/bin/gitlab-runner \
  https://gitlab-runner-downloads.s3.amazonaws.com/latest/binaries/gitlab-runner-linux-amd64

# 2. Make it executable
sudo chmod +x /usr/local/bin/gitlab-runner

# 3. Create a runner user
sudo useradd --comment 'GitLab Runner' --create-home gitlab-runner --shell /bin/bash

# 4. Install and start as a service
sudo gitlab-runner install --user=gitlab-runner --working-directory=/home/gitlab-runner
sudo gitlab-runner start

Verify the installation:

gitlab-runner -v
# Expected output:
# Version:      16.8.0
# Git revision: c72a09b6
# Git branch:   16-8-stable
# GO version:   go1.21.5
# Built:        2024-01-18T22:42:25+0000
# OS/Arch:      linux/amd64

6. Register the Runner with GitLab

Use the registration token from the project UI:

sudo gitlab-runner register \
  --url https://gitlab.com/ \
  --token <YOUR_TOKEN>

Interactive prompts:

  1. Confirm the GitLab URL (https://gitlab.com/).
  2. Provide a runner name (e.g., nodejs-runner).
  3. Enter tags (NodeJS).
  4. Select executor: shell.
Enter the GitLab instance URL (for example, https://gitlab.com/):
Verifying runner... is valid
Enter a name for the runner: nodejs-runner
Enter tags for the runner (comma-separated): NodeJS
Enter an executor: shell
Runner registered successfully.

7. Verify Runner in the GitLab UI

Return to Settings > CI/CD > Runners. You should see your new runner listed as active:

The image shows a GitLab runner configuration page with details such as runner ID, status, tags, version, IP address, platform, and description.

You can edit, pause, or protect this runner from the UI.


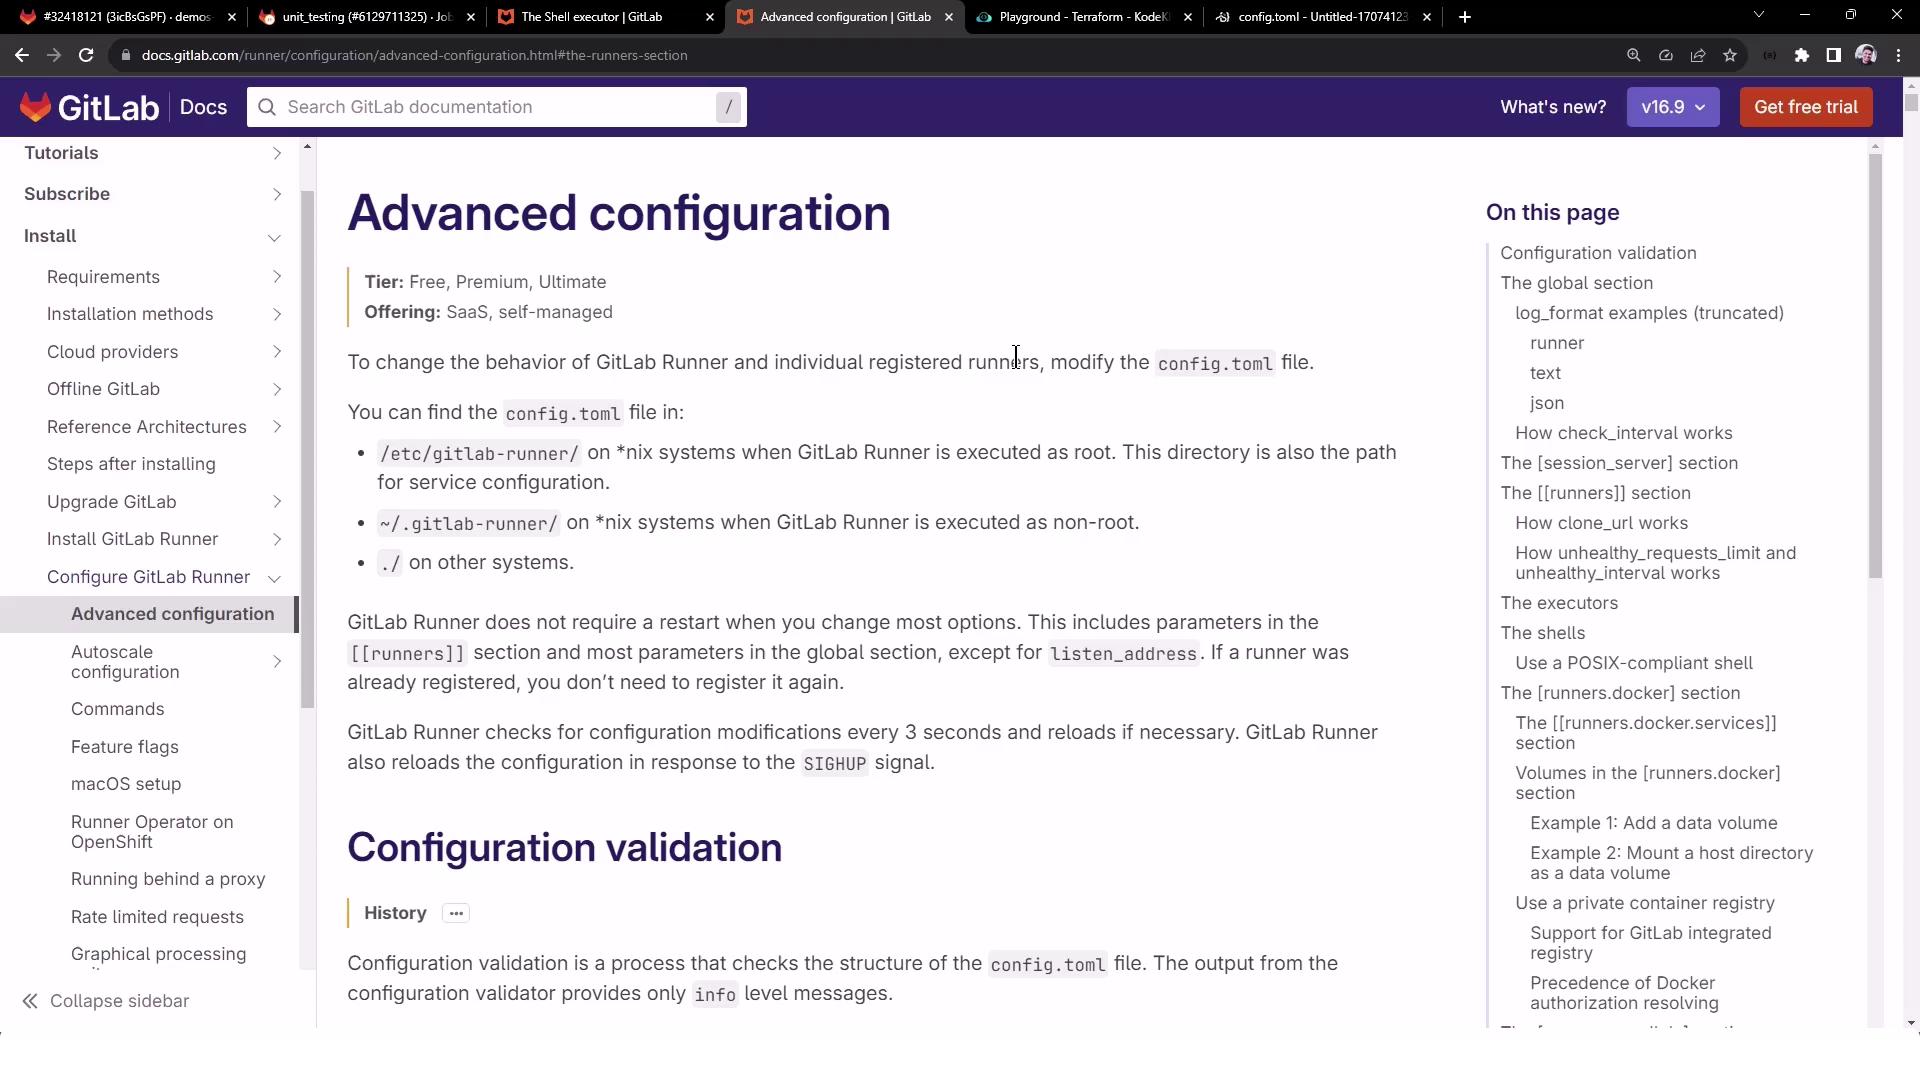
8. Examine config.toml

The runner’s settings live in /etc/gitlab-runner/config.toml:

concurrent = 1
check_interval = 3
shutdown_timeout = 0

[session_server]
  session_timeout = 1800

[[runners]]
  name = "nodejs-runner"
  url = "https://gitlab.com/"
  token = "glrt-..."
  executor = "shell"

[runners.cache]
  MaxUploadedArchiveSize = 0
SettingDescription
concurrentMax parallel jobs (default: 1)
check_intervalPoll interval in seconds (default: 3)
session_server.session_timeoutWeb terminal session timeout (seconds)
[[runners]].executorExecutor type (e.g., shell, docker)

For advanced options, see Advanced Configuration Documentation.

The image shows a GitLab documentation page about advanced configuration for GitLab Runner, detailing how to modify the `config.toml` file and explaining configuration validation.


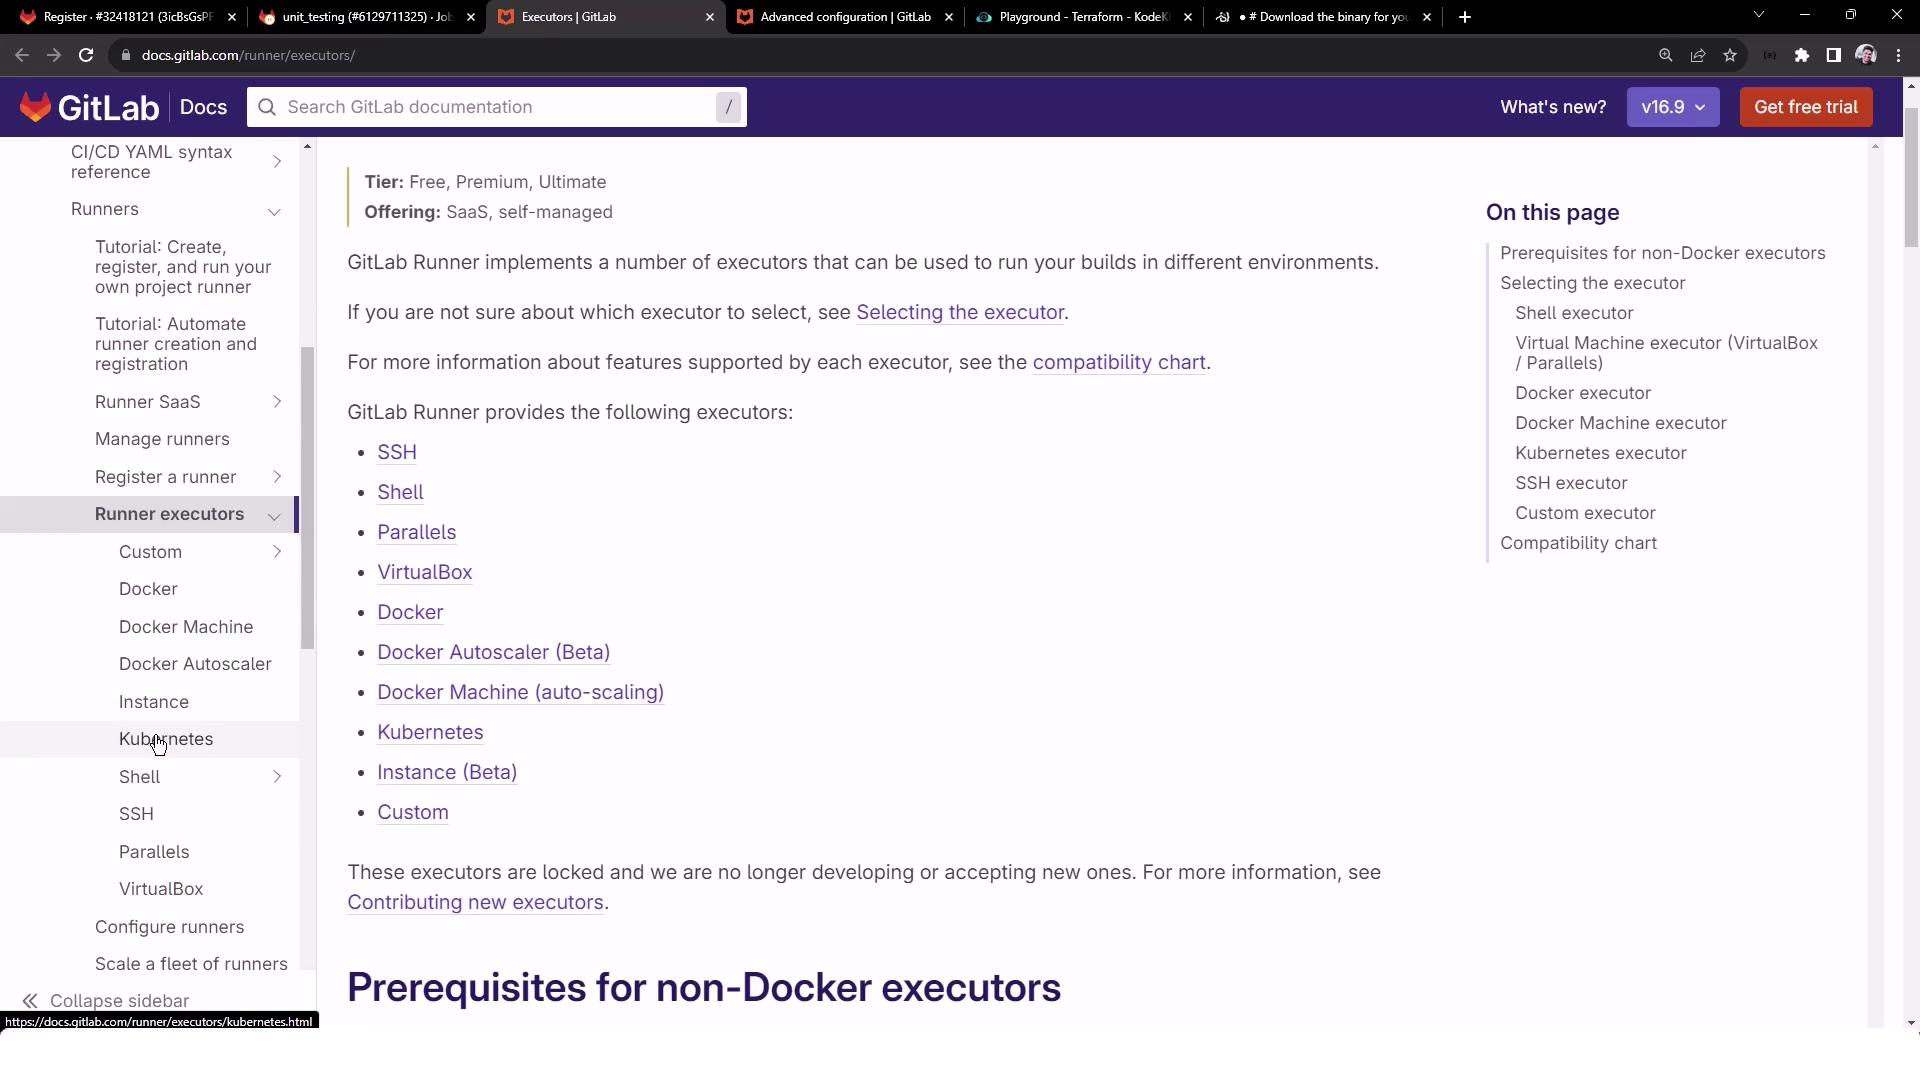
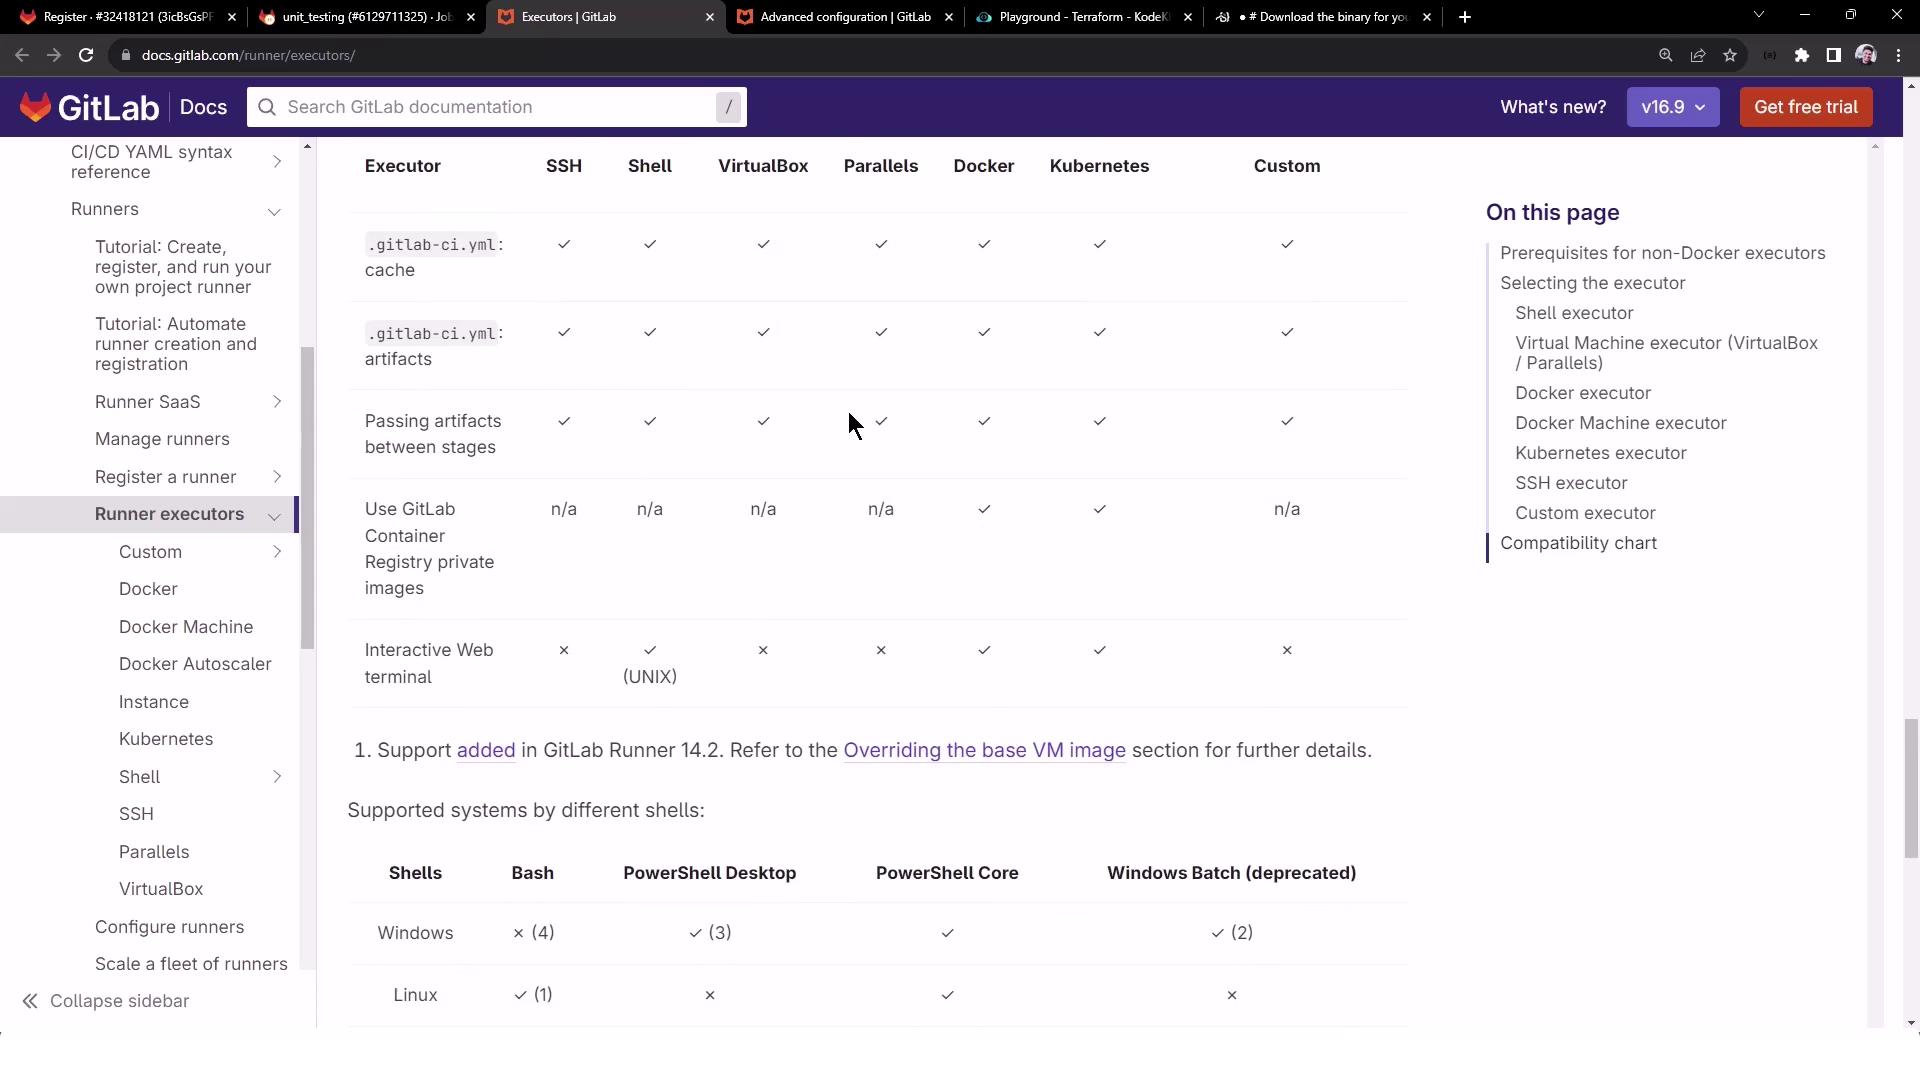
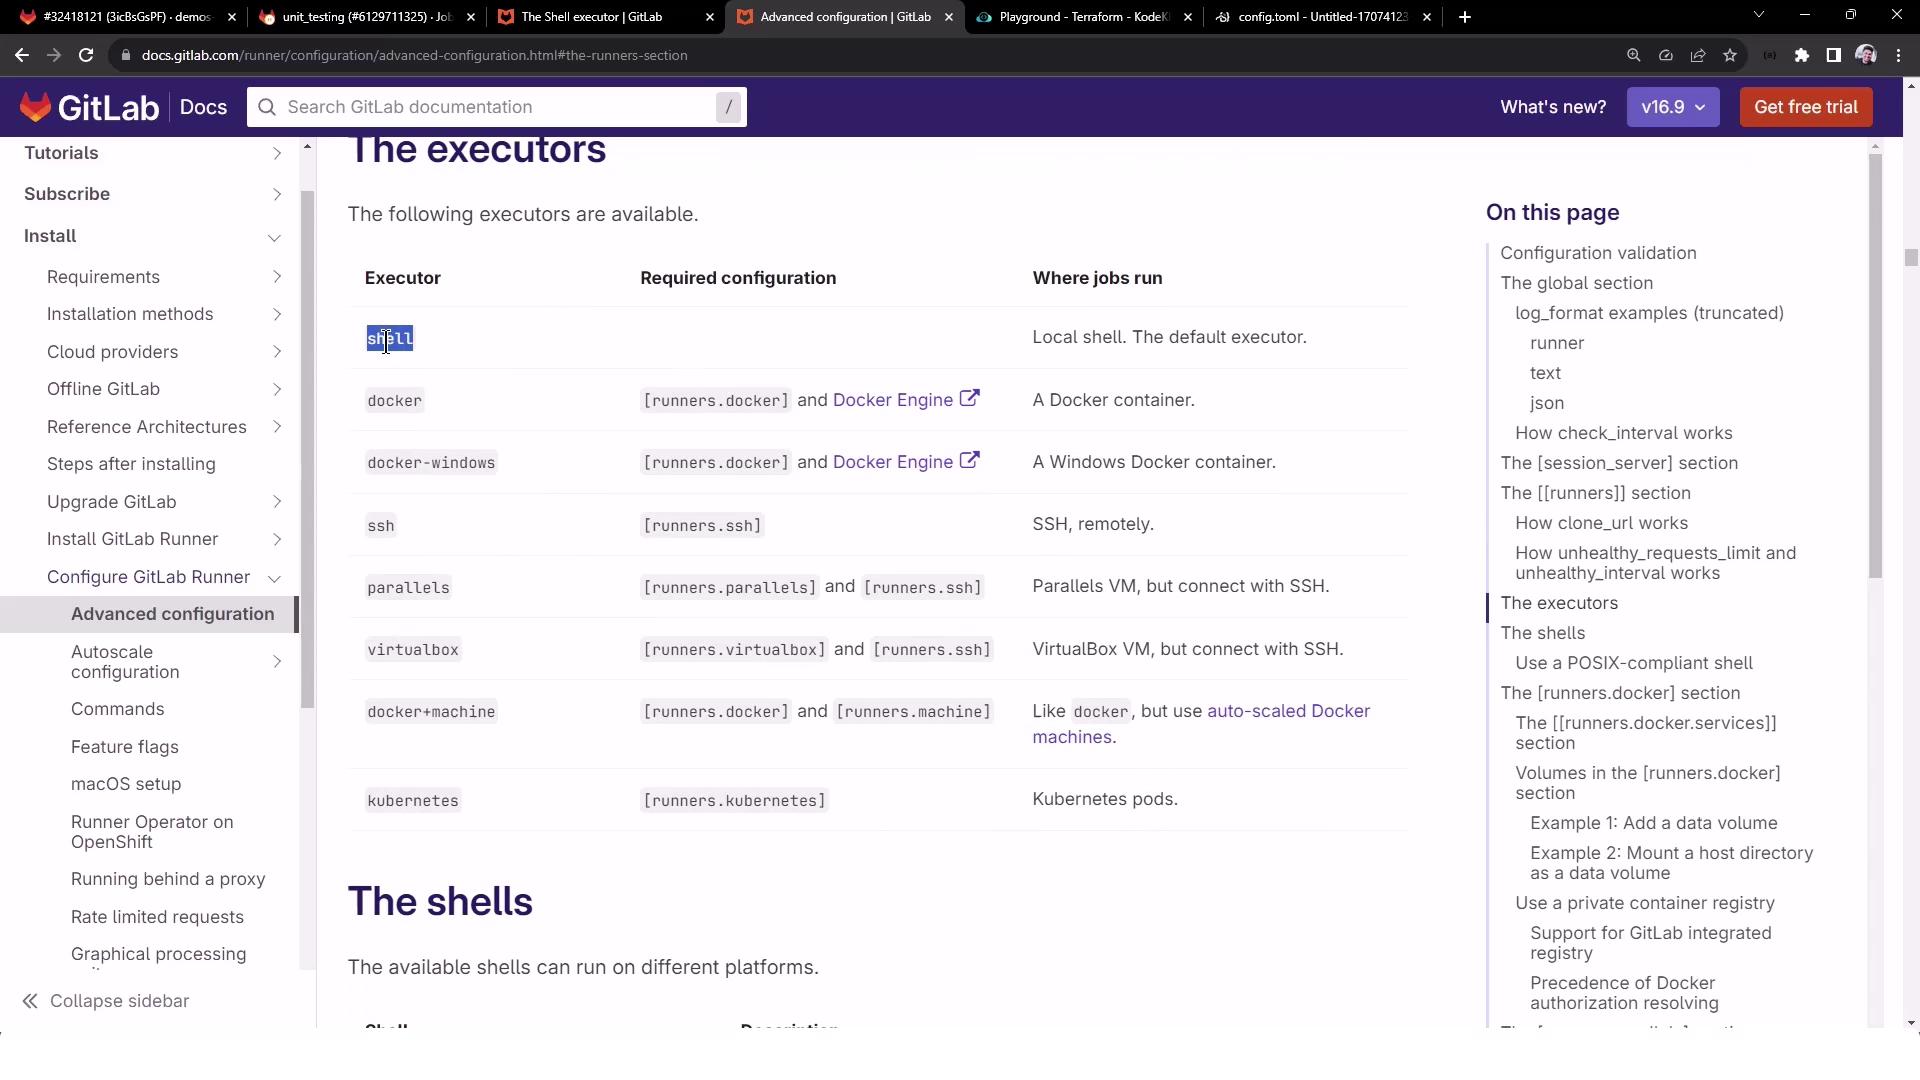
9. Explore Available Executors

GitLab Runner supports multiple executors. Review and choose the one that best fits your environment:

  • Shell
  • Docker
  • Kubernetes
  • SSH
  • VirtualBox
  • Parallels

Executors Documentation

The image shows a GitLab documentation page about runner executors, listing various types such as SSH, Shell, Parallels, and Docker. The sidebar includes navigation links for related topics.

The image shows a GitLab documentation page comparing different executor types, such as SSH, Shell, VirtualBox, and Docker, with various features and conditions.

The image shows a GitLab documentation page detailing runner executors, with a table comparing features across different executor types like SSH, Shell, Docker, and Kubernetes.

The image shows a GitLab documentation page detailing different executors available for GitLab Runner, including their required configurations and where jobs run. The sidebar on the left lists various configuration topics.


10. List Registered Runners Locally

On your runner VM, confirm the registration:

gitlab-runner list
# Example output:
# Runtime platform            arch=amd64 os=linux pid=46330 revision=c72a09b6 version=16.8.0
# ConfigFile=/etc/gitlab-runner/config.toml
# Executor=shell Token=<TRUNCATED> URL=https://gitlab.com/
# nodejs-runner

Your self-managed Shell executor runner is now operational. In the next guide, we’ll cover running pipelines and job debugging.


References and Further Reading

Watch Video

Watch video content

Previous
Self Managed Runners