Nginx For Beginners

Install Config

Demo Firewall Ports Install Config

In this lesson, we’ll move from verifying Nginx via the CLI to ensuring clients can access our services through a browser. Instead of using curl, end users rely on HTTP ports 80 (HTTP) and 443 (HTTPS) for Nginx, and port 5000 for our Flask application. To safely expose only the necessary ports, we’ll configure UFW (Uncomplicated Firewall) on Ubuntu.

Network Architecture

The image is a diagram showing a network flow from users to a network cloud, which connects to NGINX on ports 80 and 443, and Flask on port 5000.

Clients connect over the internet to:

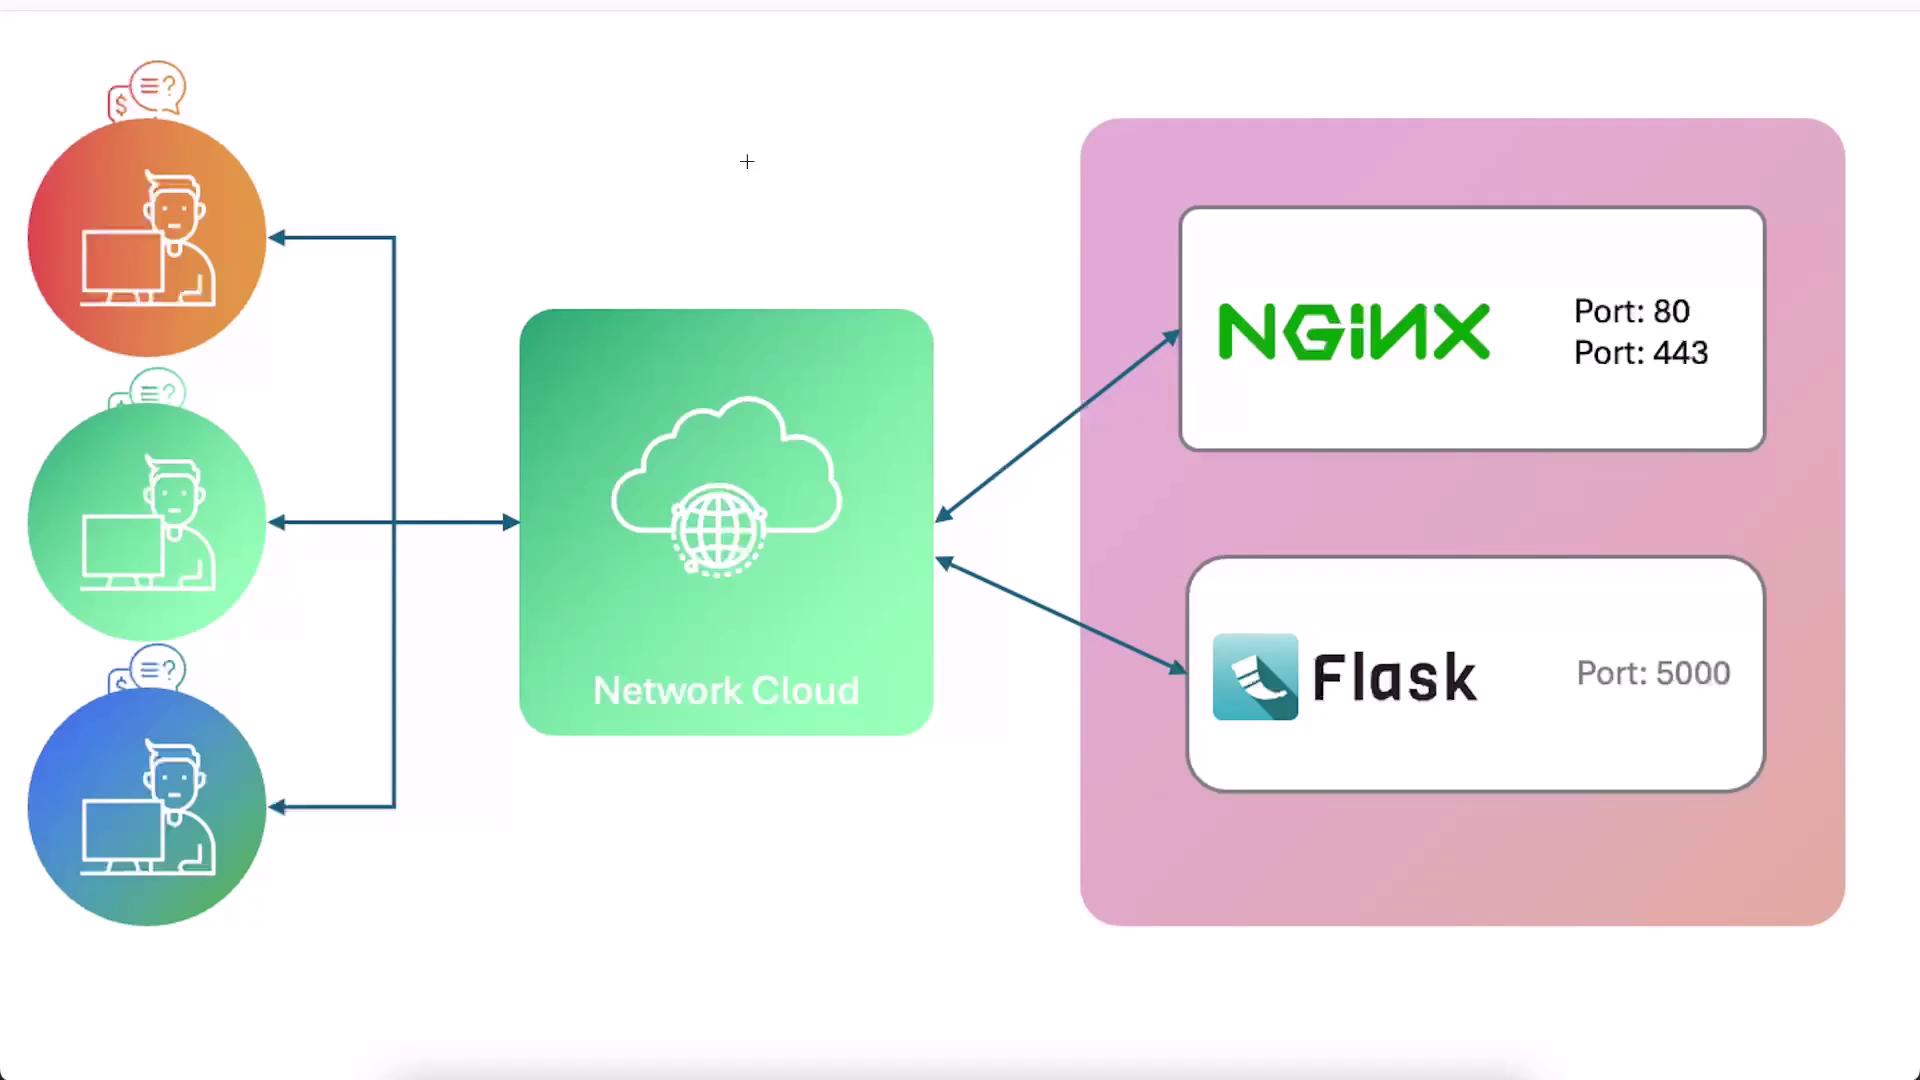
  • Nginx on port 80 (HTTP) or 443 (HTTPS with SSL)
  • Flask on port 5000

With the firewall currently inactive, both endpoints are reachable by default.

1. Testing Locally via CLI

Before changing any firewall rules, confirm both services are running on the host:

# Check Nginx default welcome page on port 80
curl localhost

# Check Flask application on port 5000
curl localhost:5000

Expected output for Nginx:

<!DOCTYPE html>
<html>
<head>
<title>Welcome to nginx!</title>
...
<h1>Welcome to nginx!</h1>
...
</html>

Expected output for Flask:

<h1>Hello, Human!</h1>[Not Authenticated]

2. Viewing and Opening Ports in the Lab UI

In our lab environment, you can also open and view ports using the terminal’s “View Port” option:

The image shows a terminal interface with a pop-up window titled "View Port," prompting the user to enter a port number, with the default set to 80, and options to close or open the port.

Enter 80 and 5000 to open them and test browser connectivity.

The image shows a terminal interface with a pop-up window titled "View Port," prompting the user to enter a port number to view a service, with the number 5000 pre-filled and options to "Close" or "Open Port."

However, it’s best practice to enable the firewall and only allow the ports you need.

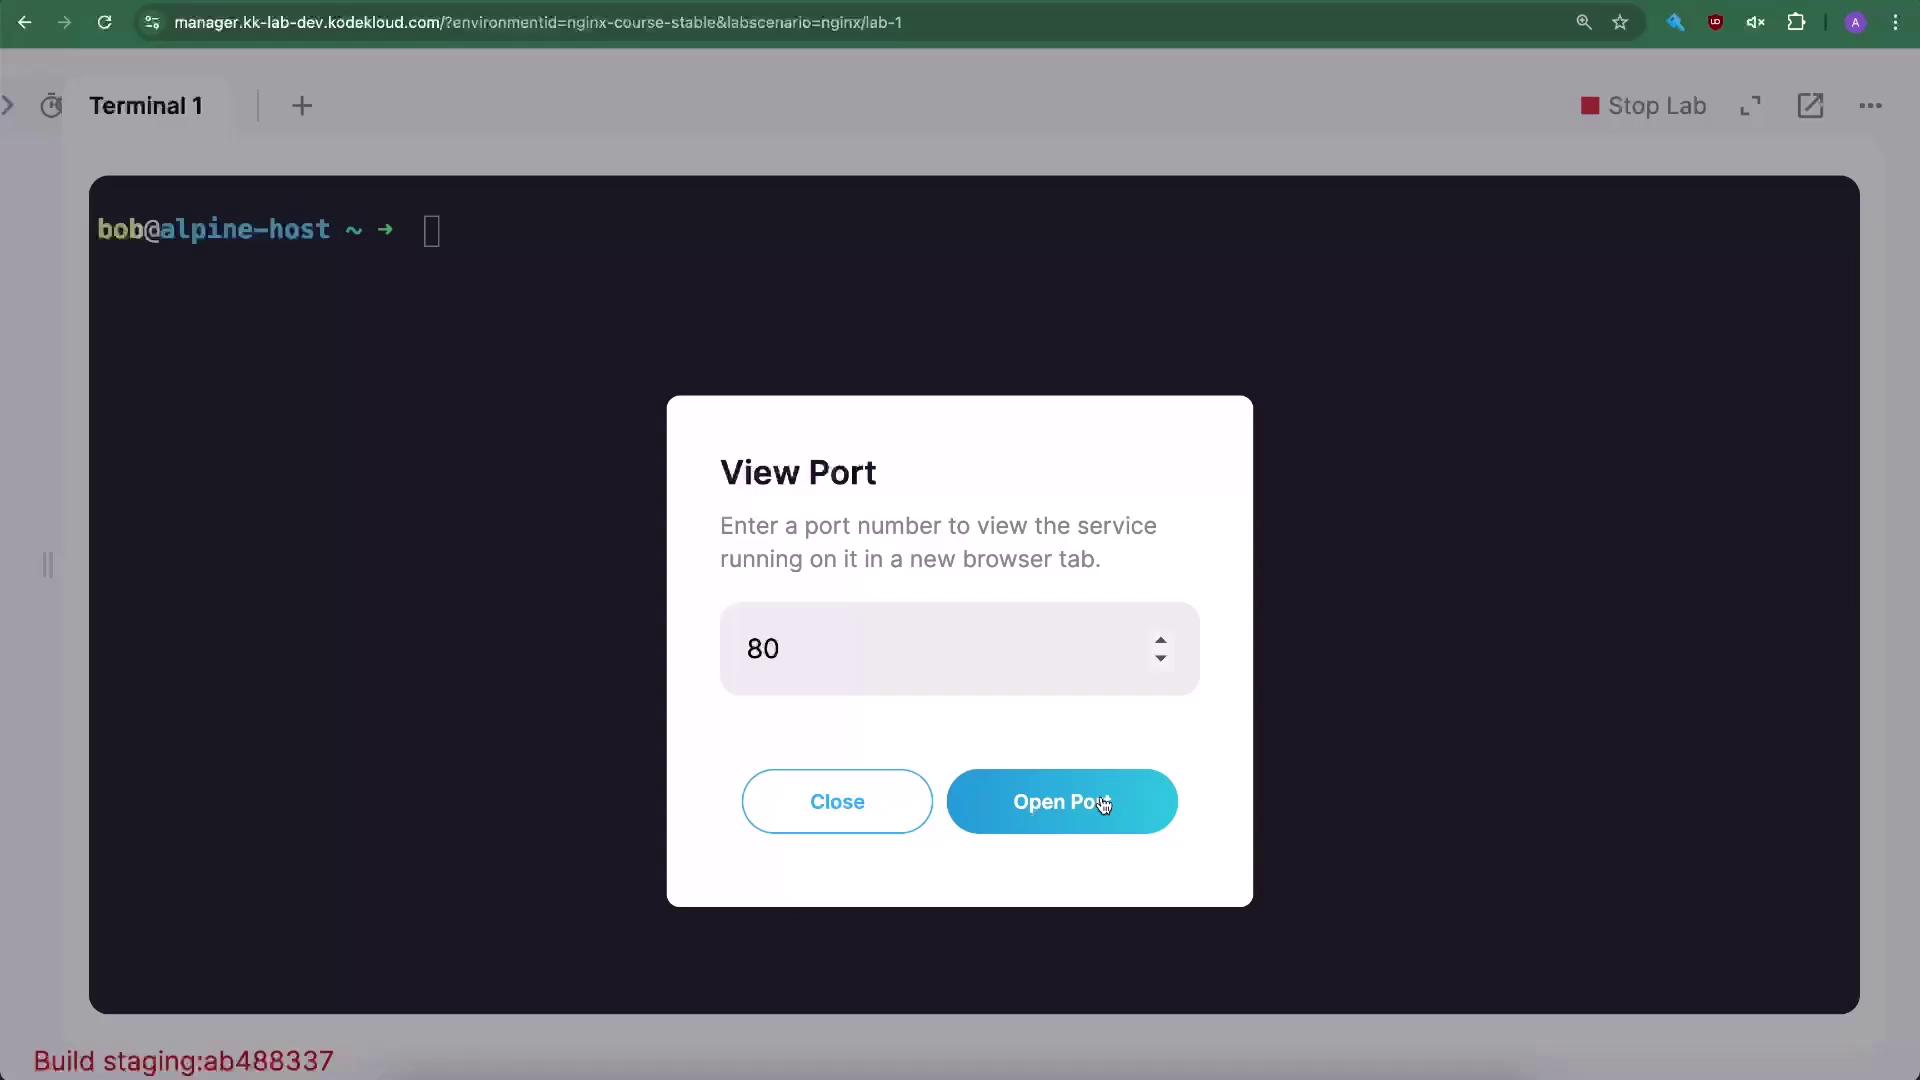
3. Enabling and Configuring UFW

  1. Check the UFW status (should be inactive):

    sudo ufw status
    
  2. Warning

    Always allow SSH (port 22) before enabling UFW to avoid locking yourself out.

    sudo ufw allow 22/tcp
    # Rule added
    # Rule added (v6)
    
  3. Enable UFW and ensure it starts on boot:

    sudo ufw enable
    # Firewall is active and enabled on system startup
    
  4. Allow HTTP (port 80) over TCP:

    sudo ufw allow 80/tcp
    # Rule added
    # Rule added (v6)
    
  5. Verify the active rules:

    sudo ufw status
    

    Expected output:

    Status: active
    
    To      Action   From
    --      ------   ----
    22/tcp  ALLOW    Anywhere
    80/tcp  ALLOW    Anywhere
    22/tcp  ALLOW    Anywhere (v6)
    80/tcp  ALLOW    Anywhere (v6)
    
  6. Test browser access:

    • Port 80 should now load the Nginx welcome page.
    • Port 5000 will be blocked until explicitly allowed.
  7. Allow the Flask application port (5000/tcp):

    sudo ufw allow 5000/tcp
    # Rule added
    # Rule added (v6)
    
  8. Verify again:

    sudo ufw status
    

    Expected output:

    Status: active
    
    To        Action   From
    --        ------   ----
    22/tcp    ALLOW    Anywhere
    80/tcp    ALLOW    Anywhere
    5000/tcp  ALLOW    Anywhere
    22/tcp    ALLOW    Anywhere (v6)
    80/tcp    ALLOW    Anywhere (v6)
    5000/tcp  ALLOW    Anywhere (v6)
    

4. Browser Testing

Now that ports are correctly configured, verify in a browser:

The image shows a web browser with a URL being typed in the address bar, and the page displays the text "Hello, Human!" with a note indicating the user is not authenticated.

Note

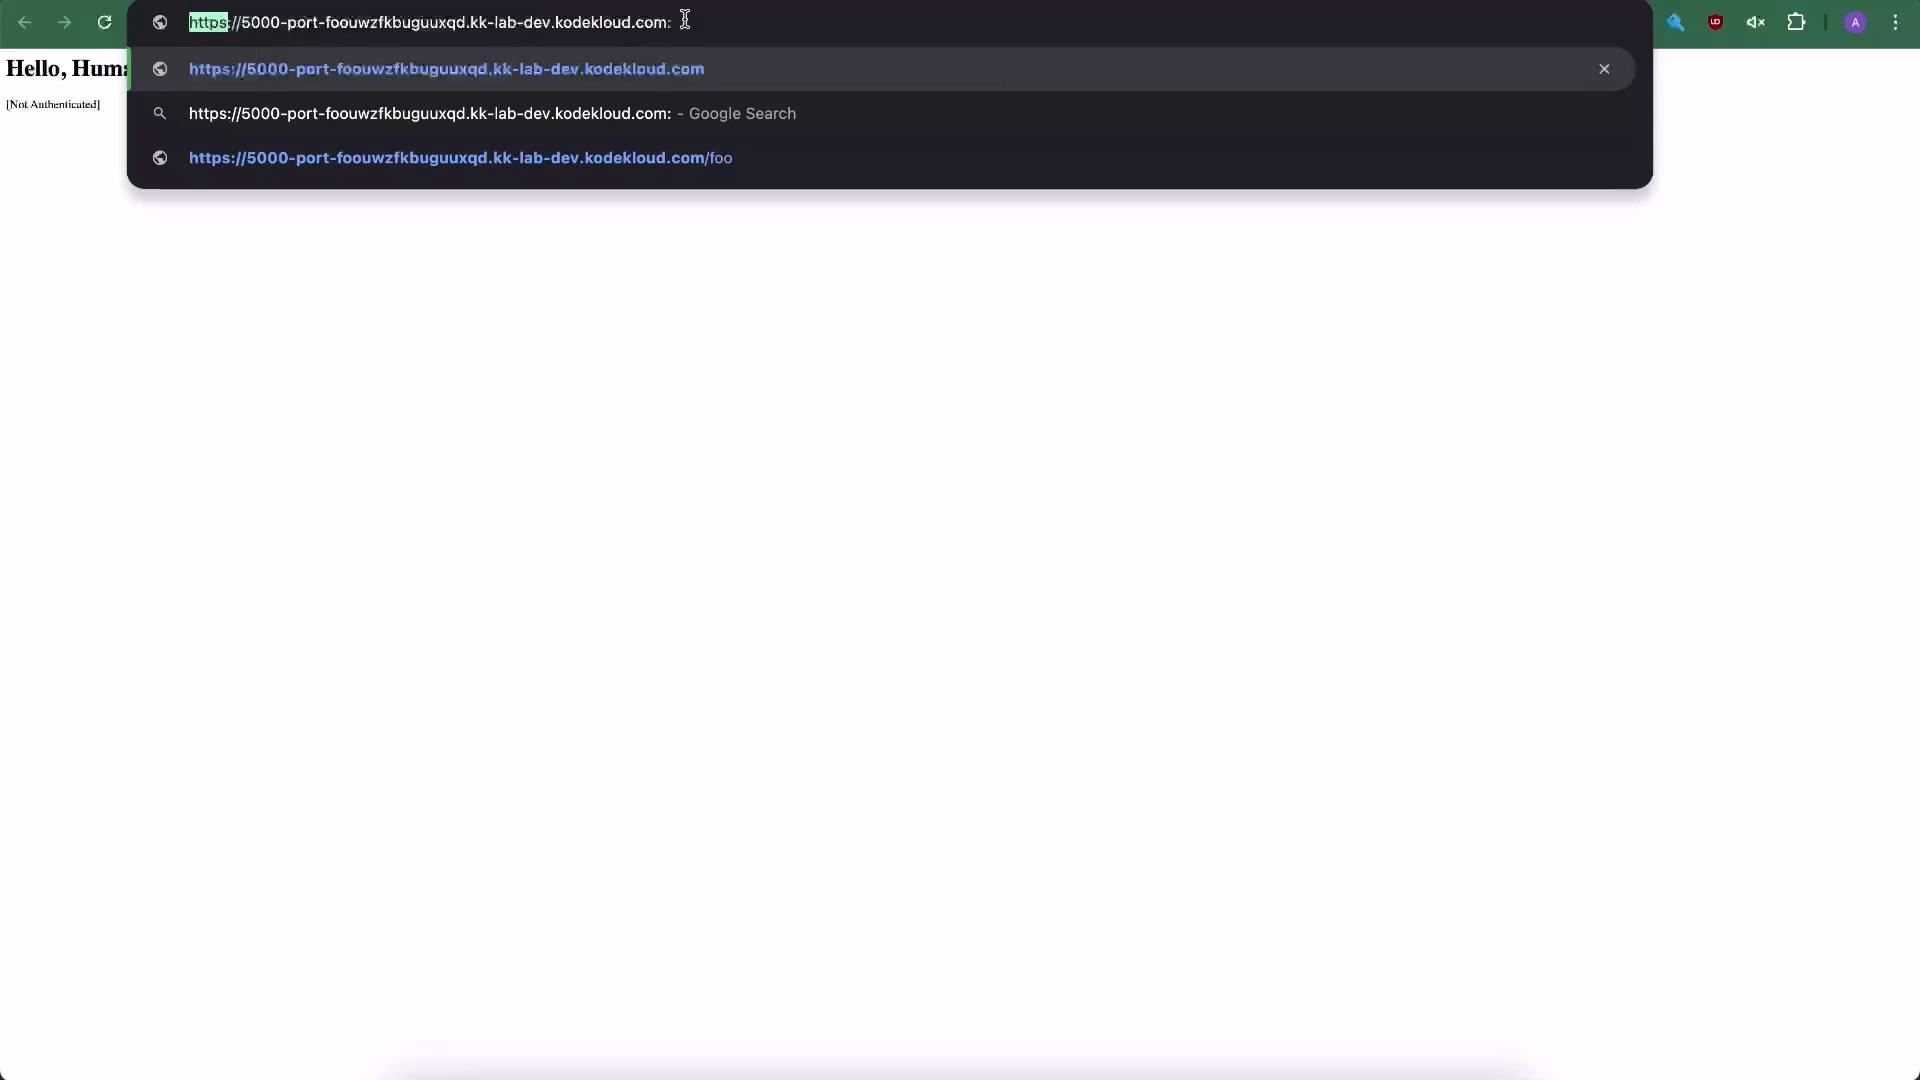
When accessing the Flask app directly, append :5000 to the URL unless you’re using a reverse proxy.

Best Practices

PortProtocolPurpose
22/tcpSSHSecure shell access (restrict IPs)
80/tcpHTTPPublic Nginx traffic
443/tcpHTTPSEncrypted Nginx traffic
5000/tcpTCPInternal Flask application
  • Expose only ports 80 and 443 publicly.
  • Use Nginx or another reverse proxy to forward requests to application servers.
  • Restrict SSH access to trusted IPs or via VPN.
  • Always keep your firewall enabled for maximum security.

Watch Video

Watch video content

Previous
Firewall Ports